Transcripts
1. Introduction: Hi, and welcome. Every wish you could draw some wonderful cats
in different poses. It's time to have a fun and
relaxing drawing journey. One cat at a time. In this seven day challenge, we'll draw a variety of cat
poses from a curled up, sleepy kitty to an energetic,
playful pouncing cat. Each day, you'll get reference
images and a step by step breakdown to help you
capture the unique shapes, gestures, and personality
of our feline friends. Your assignment in class
project is simple. Just follow along and draw cats. What's not love? We'll start simple with the relaxed
curled up cat and gradually explore
more dynamic poses like stretching,
grooming and pouncing. By the end of the challenge, you'll have a full collection
of cat drawings and a better understanding of feline anatomy, movement,
and expression. So grab your sketchbook
or art software, and let's start drawing
some adorable cats.
2. Day 1 - Drawing A Relaxed & Curled Up Cat: Hello, and welcome to the
first day of drawing cats. So for our first day, we're
starting very simple. We're starting with
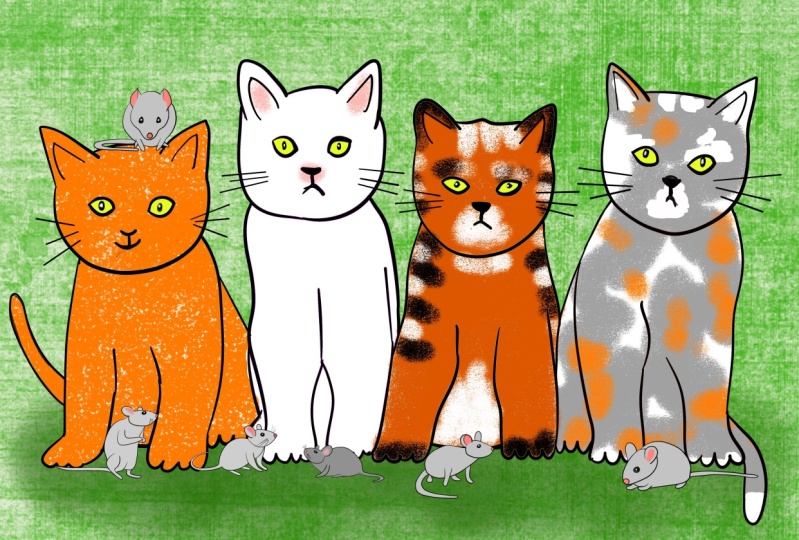
some cats sleeping. And for each day, I will have for you a set of reference images for
you to draw from. So we have here four images of four different
curled up cats. You'll be able to download
this reference board, and that's what we'll be using to draw
our cats this time. But for your
assignment each day, all you have to
do is pick one of these images and draw them. And with that said, let's start. So first thing I do when
learning to draw something new is I pick up some
good references where I can see what's
happening in them, and then I will
open them in clips to the paint or any
other drawing software. I will open those references, then I will lower the
opacity just like this. I will pick my pencil brush, and then I will draw on
top of those references. So what I want to do
here is find shapes. So for example, first cat here, we got first the head, we got here around
circle for the head. And I do like to draw a few guidelines for
where the face should be. Alright, head done, let's go for the second most important
feature of our cats, which is some triangles
for the ears. And now for the body. So when we're drawing
a curled up cat, the shapes we want to focus on are circles and any
kind of round shape. So, for example, here we got almost this kind
of shrimp pulse, so we can go ahead and draw
a very big round shape. For the body, and it ends
here with the back leg. We can't even see the
tail very well here, so this is it for the main body. Now, I also want to not
forget about this arm here. So we got here a triangle, and then a rectangle and
a circle for the paw. So this is it for a first cat. One thing though, these
are the shapes I see, you might see other shapes.
That's totally fine. We all see different
things and we can build up our drawings using
different shapes that make more sense to us. Alright? This is
just an example. Feel free to explore
different kinds of shapes on how you would like to
draw your cat. Alright. Next one, we got here a kitten. Again, start with a circle for the head of face guidelines. To big triangles for the ears, the cat has really big ears, so this is the kind of things that you want to
pay attention to those key features that give more personality to the
cat, to the animal. This can be with any kind of
subject, animals, people. We all have those
distinguishable features, so that's something you you'll
want to pay attention to. Now for the body
this time around, I'm going to go and do kind
of a bin shape like this. Now, I'm being very
loose with these shapes. This is just a sketch. So you don't really need to
be too perfect about it. To triangles for
the front pause, and then I'll divide the
back pause into two shapes. So triangle and then
rectangle like this. And we got another cat
sketched out just the shapes. Next cat, again, circle for the head,
triangle for the year. And now a big round shape
like a spiral here, in this case, for the
rest of the body. Now we got here a triangle and then a kind of a rectangular shape for the
arm and a line for the tail. There we go. Very simple. As you can see, I'm
using very simple shapes just to draw a base
sketch of my cat. We don't need to add
many details here yet. Now for the final cat,
circle for the head, draw those guidelines so
you know where the eyes are going to be two
triangles, for the ears. And now let's see
how we can do this. This is a little bit
of a different pose. But I'm going to say, going
to make something like this. Kind of a spiral again. And now we got our tail right and a circle
for the pow. And this is it. These are the shapes we
have for our cats now, I drew the shapes
for all cats here, but now I'm going to pick my
favorite one and draw it. I'm not going to be drawing
all the cats, just like you, just one cat, so
I'm going to pick my favorite and we will
progress from there. Now, which one is my
favorite? Good question. I really like this kitten here. I really like the shapes on him, so I think I'm
going for this one. So first, I'm going
to go over here, make a selection of it. I'm going to copy
and then paste it. And I also want to select this. So now I have here a new
layer with the shapes. I just duplicated and
now I'm moving here. Now, one thing I do recommend is if you're
not feeling too confident about the shapes yet and about how to draw
a cat yet in general, I would say to practice
these shapes a few times first before
going for the next step. If you're doing this digitally, you can have the
shapes to one side and then practice them
to the other side. So always have it as
a reference for you, the first drawing you made, the first shapes and
then to the side, you can go in and repeat those shapes while seeing them while seeing the
others as a reference. You can do this on your
sketchbook as well, but I do recommend that
you practice them a bit before starting to add more
details to your sketch. And now I'm going to lower
the opacity of these shapes. Create a new layer on top. Now, I like to pick a
darker shade of red, and now I'm going to add a few
more details to my sketch. I'm going to redo this sketch
while adding more details. I also want to keep
my reference to the side so I don't forget anything
important about my cat. So yeah, let's start by going to grab my pencil again
still using a pencil. Now we're going to
go over our cat. As you can see, I'm being
very loose with this, being very messy with my shapes, drawing the face, and now we have here the
rest of our body. I like to be very geometric
with my cat, as you can see, I don't add a whole
lot of detail, but I do add those important
features such as the pause. If you see the bottom of them, let's go for the
back pose like this, straight line, and
then curved line. Now we're just missing
the other Eckbo, so straight line,
and then a curve. It's a good thing to practice these counter
shapes like you have a straight line on one side and then a curve line on the other makes the
shapes more interesting. Don't forget our whiskers and
our sketch is mostly done. This boy is a
little bit too big, so I'm cleaning it up a bit. Let me take a look at it again. Yeah, something more like this, and we do not see a til there. So this is mostly it. Of course, I can go in. If there's something
about a pose that you're not a
fan on, for example, I could go in and tail here, appearing here, for
example, or just going. This way, you can always
add details that you do not see on your references
if you think that could make the drawing more fun. For example, I do think I like the idea of having
a tail appearing. It makes things even
more dynamic here. But yeah, I have here my sketch, my very loose sketch. Don't be afraid of being
messy with your sketches. They don't need to be perfect. And after you're done with your sketches, you
can do more than one. Again, it's time to
finish our drawing. So for that, I'm going to
hide the first shapes, then I'm going to
lower the opacity, create a vector layer on top. I like to use vector layers, mostly because when
you're drawing on a vector layer, you're
creating a vector. And basically, what
that means is that you can change your lines
as much as you want, and you won't lose
any kind of quality. I'm using the GPN
on Clip Studio, but feel free to explore the brushes on your
drawing software. That's very important to find the brushes
you like and enjoy. We're going to go in
and start going over our sketch to draw
our final lines. Another important thing about this step is to take your time. It's always important
to just take your time and repeat your lines as much as you need until you're
happy with them, okay? There's no one rushing you. Just have fun with
these drawings. Sometimes I like to
not draw the mouth. I just draw the
nose and the eyes, sometimes only the eyes
because I think that's fun. So that's always something
you can explore as you draw your cats and start being more confident
in drawing cats. But as you can see, I'm just going over the sketch I have, but with clean and final lines. As you can see, I'm
being very loose with my line art here
and very geometric. Again, this is something
you can explore. Maybe you like to
add more detail, maybe you like to be even more geometric or even more
abstract, for example. These are all things
that you can explore. As you draw your cats, also, you can change the style
you're going for each day. Today, you're drawing
one way and tomorrow, you can be doing it another way. This is all about exploring. We're not doing this for a specific project or
something like that. We're exploring our
style here as well. We're exploring the way we
would like to draw our kits. As you can see, I'll go and repeat my
lines a lot, as well. And now for the
tale that I decided to include the drawing. I'm also trying to be really fast with this
mostly because you don't need to be watching me doing the Line art
for hours and hours. You have to do now
is color chat. Now, you can follow the color
of the reference you used, or you can do something
different and something new. It's totally up to you. I'm
going to try and make a mix. So I'm going to go grab
my paint bucket here. I'm keeping things
very, very simple. And I'm going to
pick here a gray. Oops. Forgot one thing. I want my paint bucket
to refer other layers. So now, instead of filling the whole canvas, I can do this. As you can see, I created
a layer below my lines, my lines are over here,
and my colors over here. So I'm coloring on
a different layer, but the pat bucket is referring to the layer
to other layers. So this way I can
paint inside my lines while being on a different
layer. It's really cool. Most drying software have
this option nowadays, and I really
recommend you to use it to make your
life a bit easier. We don't need to color
everything by hand. Alright, so this part is done, and now we can go with the brush and start
coloring our cat. We have here a bit of
a calico situation, so we here is the
year, not really. I'm going to speed up this part a bit because as you can see, I'm just using my regular brush, going through my drawing and
adding colors to my cat. This is a part
where I like to be. The line art and the
coloring is something that I like to be a bit more
creative sometimes. I don't really need to
strictly follow my reference, but I do like to have
a few ideas for it. All right, so here we go. We have here our first cat, a curled up cat sleeping, taking a bit of a nap. I will also leave you the
shapes I drew for each cat. I'm leaving this for you as a reference and
for you to study, but try to first find
your own shapes, right? This is just an example. You might find others that might be a bit more comfortable
for you to draw. So I really, really recommend you to explore that
phase of your drawings. Don't forget to download the reference images
that I gave you. You can draw only one kit
or more totally up to you, and then don't forget
to post your drawing. And with that said,
I hope you had fun, and I will see you
in the next video in another day where we're going to draw another pose.
So I will see you.
3. Day 2 - Drawing A Sitting & Alert Cat: Hello, and welcome back. So here we are day two
of drawing our cats. This time we're drawing a cat
sitting sitting and alert, just, you know, going
through their lives. Again, I have here
a few references. Don't forget to download these references for
your own drawings. But if you want, you can find
some for yourself as well. And once again, we're going
to start by finding shapes. So I'm picking my
pencil, my red, and now we're starting
with our first pose. So here we have our cat, a circle for the head, two triangular ears, and now
for the rest of the body. I really like drawing cats in a sitting position because I think they have really
great shapes for that. So I'll start by dividing
the body into parts. So we have this weird
shape right here, and then we have kind of
a how do I call this? Well, they don't really
have names right. This is just an irregular shape, but these are the
shapes I like to use for a sitting position. Now we have the tail going here, and now all we are
missing is half of a circle for one of the paws
and now for the front pause, rectangle and half a circle
once again for the pause. There we go. So next cat, I'm drawing here the head a bit differently because if you notice the head does have
here like this shape, right? It's not totally round, and I like that feature here. Now once again, one
part of the body, mountain shape for the rest, and then we got
here a appearing. Of course, I can also
draw this curved line here to remember where
the back leg is. Of course, our very
hairy tail, very fast. Let's go for the third one. Be very loose in this phase and don't overthink the shapes
you're going to use. Just go in and draw the first thing you're thinking
that could make sense. Maybe the first shape you're
doing is not the best, but do it anyway, and then you can try
other things later. Now this one has a bit of
a different perspective. But still, same logic, divide the body into
at least two shapes. Here we can even go
something like this because you see here
this difference. We see here two curves, half a circle for one of the
pas here, and then triangle, half a circle, another triangle, and half a circle for the
other paw. And there we go. We've done it. And finally, last cat, also
looking to the side. So the head shape is a
bit different triangle, triangle for the years. Now, once again, we
got here, divide this. I think we can go this way. We can divide this into two, so we know the front
legs are over there. We have here a bit of
a back leg showing, and then the rest of the body, and finally, our tail. So this is it, as you can see, very simple lines,
very simple shapes, but we got a bit of a base of a skeleton
to draw our cats. I'm going to pick one of these, and then we go through the rest of the steps
of drawing our cats. Practice these shapes first. Change any shape that you
feel that needs changing. Maybe something you did
does not really make sense and is making things more difficult
when you draw them. So if that happens, try using another shape. These shapes don't
need to be regular, as you can see there's almost
no regular shaping here. It doesn't strictly
need to be a circle, a rectangle, a triangle. And then once you're happy and once you've
practiced those shapes, it's time to go
for the next step, which is making a
more detailed sketch. So I'm going to
copy here this one, this blacket because I
really like its pose. Going to copy it and paste it, and I'll move it here to
the side and I will go in and draw my cat again, but with more details. First, I'm going to make it
a bit bigger. There we go. Now I'm going to lower
the opacity of it. A new layer on top. I'm
going to pick a darker red. This is all about preferences, but I do recommend
you to explore how we like to go with each
phase of your drawing, changing brushes,
changing colors, whatever feels more
comfortable to you. And now I'm going to
start to draw our kit. So this is what we have. I really like this curve here, so I'm trying to draw it. Yes, there we go. Perfect.
Now, one here here, right, and another one here. Always have the reference nearby so you can look
at it from time to time. Alright, so now here
we have our other arm, the rest of the body, a bit of one of the
back legs showing here. And now we got our
tail. There we go. Now, all we are missing is
our face, and there we go. Now, once again, all we have to do is go through our line art. So I'm going to hide my shapes, lower the opacity of my sketch, and then a new layer on top, bring my drawing brush. Let's try using
another brush this time just to make things
a bit more fun and to perhaps motivate you into trying different things on your drawing
software as well. It's important to try different things until we
find the ones we like. I'm just going to go over my whole sketch, as you can see. I do repeat my lines
a lot as well, so don't be afraid
of doing that. It's okay to repeat
your lines as many times as you need until
you have what you like. I'm taking the opportunity
here to add some details like bits of hair here
and there. There we go. Now, just a few more lines, and we are done. I find that drawing cats in a sitting pose can
be the easiest, mostly because the shapes are really great
and easy to draw. I will choose a lighter
gray there we go. All we have to do is this and then fix those
bits here and there, where the color didn't reach. I can go also here and maybe
add some color to the eye, as well as even some
color to the years, to the inside of the years,
something like this. The other one, we
can't really see the inside, so this is it. This is our cat in
a sitting position. Don't forget to download the
reference board. I give you. I'll also give you the shapes I drew for each of these
poses. Have fun. Take your time, and
I will see you in the next video where we'll
explore yet another cat pose. So I will see you right there.
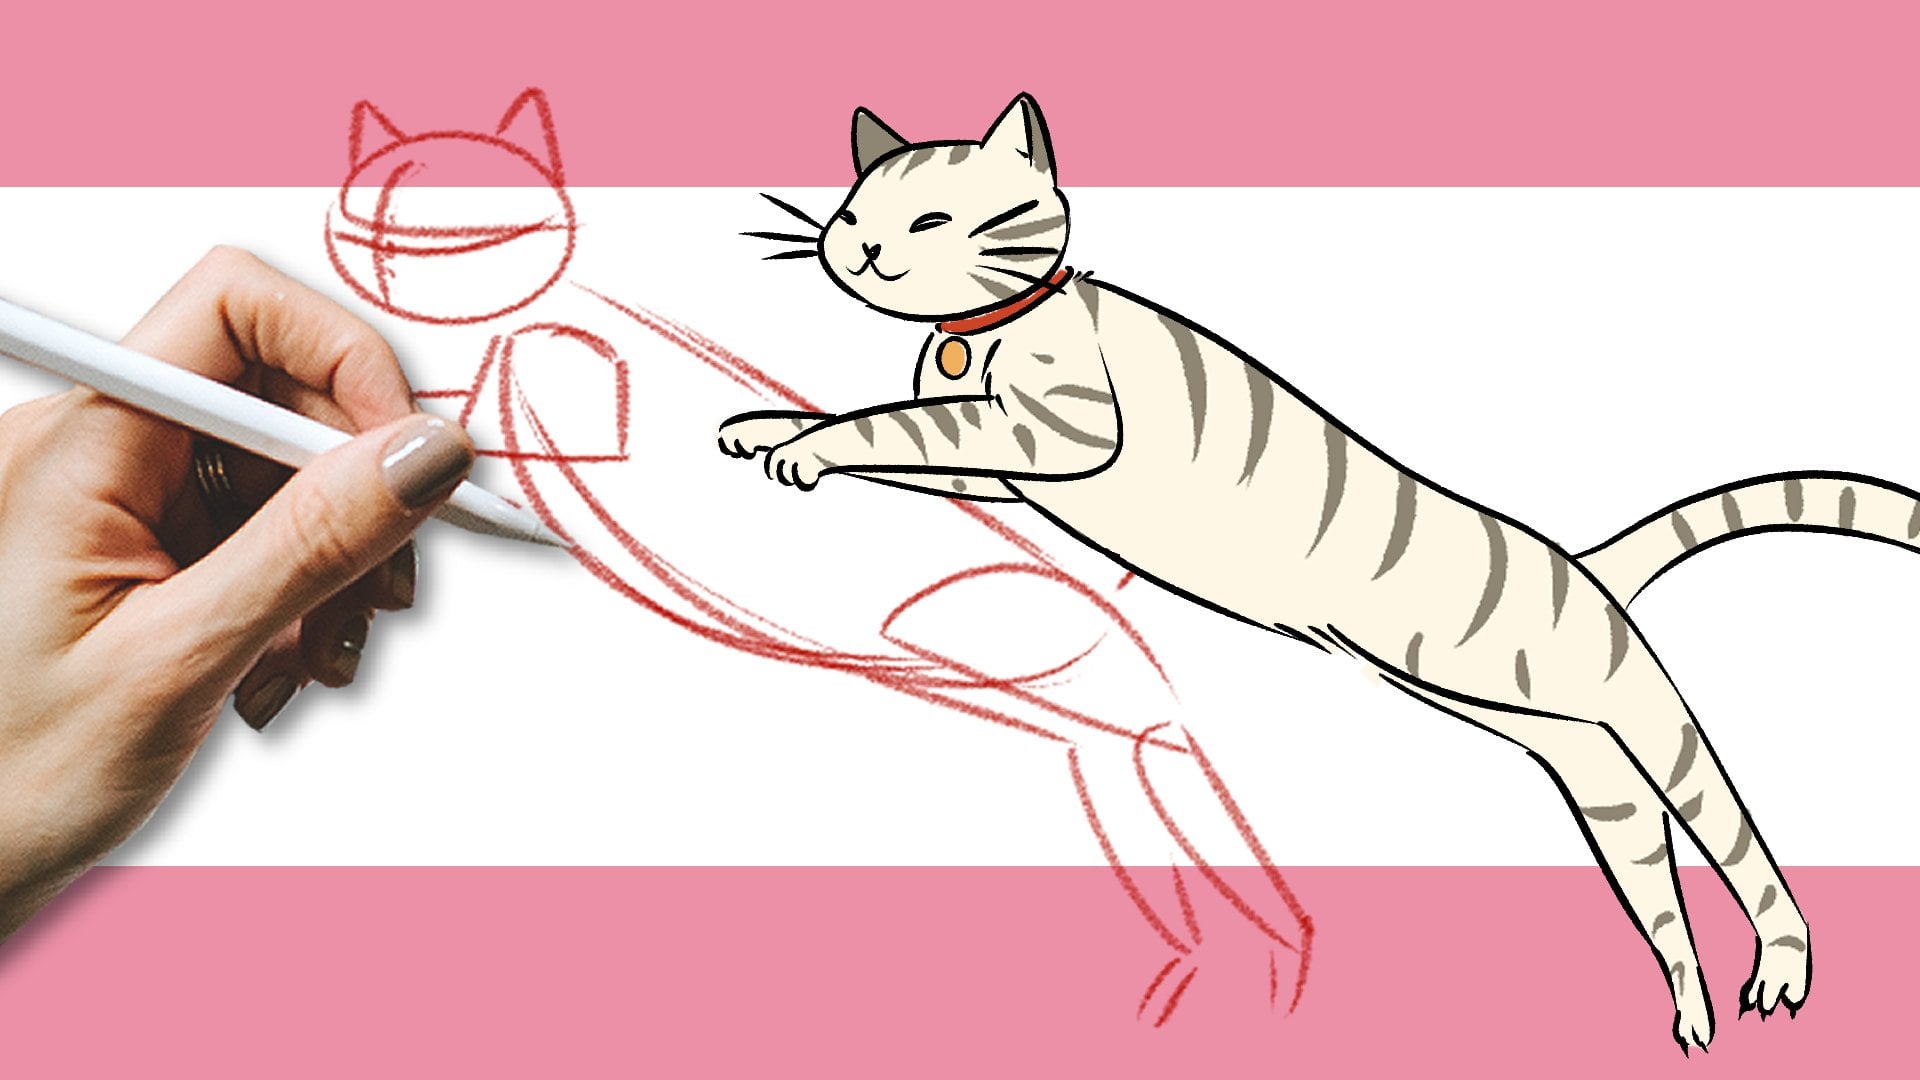
4. Day 3 - Drawing A Stretching Cat: Hello, and welcome back a tree of our challenge class
on drawing Kats. And today, we're going to
draw a at that is stretching. Once again, I have here four images for you
to use as reference, you can download
this reference board or you can find your own images. It's totally up to you. So just like before, the
first thing we're going to do is lower the
opacity of our images, create a new layer on top, and I'm going to grab
my pencil brush. You can use any
brush you prefer, or you can even do
this traditionally, actual paper and pencil. And the first thing we're going
to do is find our shapes. So let's start here
with our first cat. Got something like this. We can draw here
this triangle for the year and a guideline
where the eyes would be. Next, let's see how
can we divide this? I'm going to start with this
shape here. There we go. And now something
more like this, like almost not really trapezium shape,
rectangle, let's say. Now we have here our tail, and we got here one triangle. Two triangles for the pus. Or if you prefer, we could
go with alpha circle. That works as well.
It's all a matter of experimenting. There we go. We have here our first cat. Let's go for this one now. We got our head, something like this
this time around, since we don't see all of
it and our guideline here. Now I would use a
similar shape for one arm and then a
triangle for the other and then another
for the other paw. Now, for the body, so something like this,
the back legs, let's see. We got this shape here, again, a lemon wedge. The lemon wedge shape is really useful for drawing
bodies in general, be animals or even people. Now, we got here a triangle. And rectangle for the other leg, lemon wedge for this leg, a triangle, and half a circle. Now, if you want, we can
draw this guideline here so we know the
direction of the torso. Let's go for the next one. This one, I really
like this pose here. He's very shabby, this cat, a circle for the head. I do not like the circle. Guideline for the face
where the face is, so we don't forget about it and two triangles for the years. This is a very similar
shape as the first one. So we got kind of the same kind of the
same kind of shapes. We just need to
adapt them a bit. So I would say something like
this for the torso part, the torso area,
and then we have, again, this health
circle, let's say, for the lower body, our tail, and now we got here triangles for the boss
or for the legs and bus. And now, same thing here, we got our triangles. There we go. And let's
go for our last cat. I really like this pose. I saw this one and I thought,
we got to do this one. So let's see circle
for the head, right? You know this by
now, our guidelines, so we know where the
pace is going to be and through triangles
for the years. Start with more general shape. So we can do something
like this first, right the body, here, and draw a triangle
for one of the arms. And now we got
here this triangle for this back leg
and the other leg. And then we have
the paws opened. So we could say this is
a triangle, there we go. And finally, our tail. Now let's take a
look at our cats. They're all really fun. So the next step is I'm going to select here this shape
and bring it to the side. All right, don't forget
practice these shapes first. So draw them on top of
your reference first, and then repeat those shapes to the side without having
the reference below it. I'm skipping this step here just so you don't waste time watching me drawing the
same thing over and over. It's not really worth it. I owed the opacity of my shapes here, and now I'm going to
create a new layer on top. I chose a darker color
for this next step, which is drawing a more
detailed cat here, cleaning up our shapes and
make it look more catlie. Okay? Here. The other one, I have my reference nearby, so I can see my cat
at the same time. This really big line
here goes like this. And our belly here, and then another leg
right here a bit more, so it's not confusing. Yeah, we can do this. I
like this, this line. Our other legs and
paws. All right. Now, all we are
missing is our tail. Yeah, that's good. I like it. I like these shapes. All right, so this is
done, my sketch is done. That means my next step is doing the line art and coloring. So hide my shapes layer, then I'm going to lower the opacity of my
detailed sketch. I will add a new layer on top, pick a color, and a brush. Which one should I use? Let's take a look
at this texture. If you're doing this digitally
and even traditionally, take the time to explore the medium you're using,
try different brushes. You might find something
new that you like to use. So have fun with
that part as well. Don't forget the whiskers. There we go. This side as well. The rest of the body, or belly here, or
our shubby belly. This cat has a very shubby
belly and now the other leg, and we are almost finished
with our cat here. There we go. So now I
can hide my sketch, create a new layer
below my line art, and now I'll just
start coloring. So the cat is part gray with black stripes
and some white. So I'm going to start by using
the paint bucket in white, and now with a
gray and my brush, I'm going to add these
areas, something like this. Use the paint bucket to fill the area and now fix
what needs fixing. Also filling here the tail. I really like using the
paint bucket to color, especially when
using this kind of lin art because it makes
things much quicker. Now for the face, we have
something like this. Alright. This year is also gray. And now I missing. Let's add here a
pinkish to this year, and now adding the
spots and stripes. And there we go. Here
it is very quickly, very simple steps,
find a good reference, draw some shapes, draw a detailed sketch
based on those shapes, and then just
finish your drawing with some line art and coloring. Or if you prefer drawing
it in any other way, besides using line art, you can just go in and
paint however you prefer. But this is it. Have fun. Take your time. Don't forget to download this
reference board. I will also leave
my shape drawings if you want to take a look
at them and study them. But feel free to draw
them any other way. There is no wrong way
to go about this. Take your time, have fun, and I will see you
in the next video.
5. Day 4 - Loaf Paws Tucked Under Body: Hello, and welcome back. So here we are day
four of drawing cats, and today we're going to draw a cat that is in
the shape of a loaf. So when the cat is
laying down with the pose tucked in
under the body, that's what we're going
to explore today. And once again, I have
here our four references, each of them a bit in a
different perspective, so we can explore different poses and perspectives and then choose one to draw. So first thing, going to lower the opacity of our image here and create
a new layer on top. Right now, I'm going to pick up my brush pencil
that I really like, and now it's time
to find our shapes. So this pose is also a
lot about round shapes. So we have here a
circle for the face, two triangles, for the years, we can even try to follow
here the shapes of this year so we don't forget that they're going upwards like this
in a bit of an arch. And then we got our cat
bit in a pancake form. I'm going to do like
two ellipses for it. So we have here this shape
for one part of the body, and then we got here this shape, a bit of a mountain shape, let's say, and then we got
this for the back legs. And these are our shapes for
a loaf cat from the front. A lot of circles. Next
one, inside of this box. Let's draw the shapes here of the box very
quickly because I think this one is worth it
to use the box, the prop. Otherwise, we wouldn't have
the folds appearing here, and that makes the pose
even more interesting. So circle for the head, guideline for the eyes, and then we got two
triangles for the ears. Now, we got here something
like this, a weird shape. And then we got kind
of a mountain shape, let's say, going here, and so we don't
forget a curve here for where the back
leg is. Very simple. Again, the shapes are very similar to the first
pose we drew here, but with a few modifications. Next loaf, get
circle for the head, guidelines for the face. Two big triangles for the years. And now let's see. I would say, I would say we have
something like this here, and then we got our pause, a bit of the pause
appearing, so two circles. And now, again, we got here, a round shape for the
rest of the body, and here we got this shape for the back leg.
So we don't forget. Or if you prefer, you can just use one circle,
something like this. It's all about how detailed do you want
your drawing to be. For example, if you want to make things very geometrical
and simple, you can reduce the number
of shapes you have. On the other hand,
if you want to have more detail in your drawing
and even more realism, you can add more
shapes so you don't forget about certain
parts of the body. Last one, circle, guidelines
for the face, two triangles. By now, you know the shapes
you need to draw kat. All a mix of triangles, circles, and some mountain
shapes, let's say. So we got here this shape, which could be like an ellipse, right, something like this. And then we got
something like this. There we go. Very simple. I would say for a loaf cat like this that circles and shapes
that resemble a mountain. So something like this are
the most common to use. Now to choose our cat. I really like this one with the box, but I also
like this one, especially since you can see
part of the little pause. So I'm a bit unsure
which one to use. I'm going with this
one. It's a bit more different, a
bit more complex. And that way, if you
want to draw this one, you can see the process of that. So duplicating my
shapes here, again, I'd recommend you to practice the shapes
first for a while. And I'm not doing it here, so the videos aren't too long. You don't want to see
that. You want to go draw. So o, so shapes here, lower the opacity of the shapes, and you layer on top, going
to pick a darker color, but still use my pencil brush. And now I want to go
over these skates. And add more details. I always like to
start with the head. So that's what we're doing here. Even though I almost never
draw the face first, usually it's actually the
last thing I usually draw. I like to start with the head. So this is also something
you can explore. Where do you prefer
to start with your drawings? Is it the body? Is it the butt, the head? We're all different and
have different preferences. So even if I'm doing
this in one order, it doesn't mean it's
the same for you. So try different things,
sometimes start with the head, other times try to
start with the face. It's totally up there we go. The sketch of cat
is basically done. Let me just check the
reference real quick. I drew this part wrong. That's why you
should always keep the reference nearby so you can check on it as you draw and see if you missed something
or got something wrong. It doesn't need to be an
exact copy of your reference, but some things it's
good to check upon. Let me try to change
the whiskers a bit. Like, more like this, maybe. So yeah, this part is done. So, you know, the
process by now, next step is doing the line art. So I'm going to hide
my first layer, lower the opacity of the
second of my detailed sketch, add a new layer on top. Pick up a color and
then choose a brush. What should we use this time? Why we the real pen again? Because as you can see, it
has a tiny bit of texture. It's very similar to the Pen, but here we got a
bit of texture, which I think is really fun. So now, all you have
to do is go around your sketch lines and
clean everything up. This is also a good
opportunity to change anything that you need
that you feel needs change. Even if you have
your sketch done, it doesn't mean that you can change a few things
here and there. If you think something doesn't make too much
sense, then change. Even if you're doing
this traditionally, there's always a
chance to fix things, and even if you feel
like you can't change things anymore and
you're still not happy with the
results, that's fine. You can redo it. I know
you can feel frustrating because you feel like
you're wasting time. In the drawing and now you
have to do it all over again. But I feel it's actually
quite freeing sometimes. We got too frustrated with a drawing that isn't
going too well, and we're being a bit
stubborn and getting more and more frustrated about
something that can be avoided. Just start over. Usually,
it's the best solution. It's also a good
thing to learn when enough is enough and you realize you're not going anywhere
we took a hand drawing, give up on that and start over. There's nothing wrong with that. I do it lots of times. As you get more experienced, you'll see that you do
that less and less. So get it out of
your system now. Trying is not going well. Redo it. Restart it. You'll see that you'll
feel better about it, and having a new blank page can be more refreshing.
And there we go. Kitty. Well, with that done, all we are missing
is our colors. So a second, I'm
going to do this very quickly. Paint bucket. Don't forget to if you're using clips studio paint to set a paint bucket to
refer other layers, so it will remember
that you have a line there and paint
only inside that line art. Okay? Now let's add some
stripes. There we go. As you can see, I'm being very, very loose with this, going outside of the lines and now fixing what needs fixing. You're raising these areas here. Also, Hendry, you give your drawings right
now. It's totally up to you. Like, for me, this
is not going to be an illustration itself. It's just practice. So I'm not being too
professionist with my drawing. I just want to make these
cute studies of cats. So I keep things very simple. But and there we go. L of cat is finished. Again, don't forget to
first start your shapes. You can draw the shapes
for all these cats. You can even draw all
these cats if you want. Just go one step at a time. Take your time. There's no rush. And once you're done, don't
forget to post your loaf cat, so I can see and give some
feedback if you want. And with that said, I will
see you in the next video.
6. Day 5 - Grooming Pose: Hello, and welcome back. This is day five of our
drawing cats challenge. So we're going to start having puzzles that are
a bit more complex. This time we're going to draw a cat that is
grooming themselves. So here we have our
four references. Don't forget to download
this Heifernbard if you want to use it for
your own drawings, and let's do our shapes. Let's find shapes in here,
lowering the opacity. Layer on top, then
I'm going to pick my red and my pencil
brush, and we can start. So first thing I'm noticing here is that instead
of a circle, we're going to have
a different shape, something a bit more
triangular like this. And then we have our triangles
for the years again. Now for the rest of the body, we have something like this. Now we have here, one
triangle for half of the arm, and then we have
another one here for the other part and a
circle for the paw. Now we have here, one triangle for the arm, half a circle for the paw. Now we can also remind
ourselves that there's some back legs in here and two half circles
for the back paws. We can see a bit of a tail here. Let's add that as well. There, one pose done. Let's go for the next
one circle for the head, guidelines for the face, two triangles for our ears. And now this pose is
a bit weird, right? It can be a bit more difficult, but we can deconstruct this. Let's start here with a triangle for the arm and
half circle for the paw. Then we have here this shape, then a rectangle, and another
half a circle for the paw. Then we got here, once again, the same kind of shapes. Now Area missing is here
this little paw here. So we have here. I know what we'll call this. This is not really a triangle, but a trapezium shape, maybe, and then circle, and we can
even add here the tongue, so we don't forget about it. There you go. This is a bit of a more difficult
perspective here. But if you practice it, if you try different
shapes and you manage to break things down into simple shapes, you'll get it. You'll see that you can do it. This one is also a bit
weird, but we can do this. Let's start here with
kind of half circle, half triangular
shape, and one ear. Let's at this here. So we
know there's a mouth in here. Now we got here our paw. Now for the rest of the body, we have something in here. So we got something weird like this here, like a triangle. Then we have here
another triangle, rectangle and half a
circle for the paw. Triangle, half
circle for the paw. And now almost like a
spiral here, right? Something like this. There
we go. Now for the last one. Again, another shape
that is half circle, half triangle, two triangles for the years, our face guidelines. Now, let's think about this. So I'm going to start here
with the arm with a triangle and now a rectangle and
half circle for a paw. Then we got here another triangle and
circle for another paw. And now for this one, let's do something
that goes like this. Yeah, I think that could work. You can divide it
into more shapes, foram pa could also go like something like this,
something like this. And now here we got
circle for the paw, rectangle, and another
kind of spiral going here. And the tail. There we go. Now, which one should we
draw? I really like this one. It's a bit more difficult, but with the shapes, I
think we can do this. So let's duplicate it dopes. And now move it to the side, going to resize it
a bit. There we go. And now we can go
for our sketch. So lower the opacity,
new layer on top. Darker color, still
using my pencil. And let's do this. I have it. I can see my reference
here to the side. Okay, so I'm going to
divide this into shapes, individual shapes, so it's easier for me to
see and understand. There we go. This
is more likely. Our cat has a color,
so let's keep it. We got this arm here and
our paw. There we go. Then we got the other one here
going something like this. There we go.
Something like this. I forgot here about the rest of this ball.
But there we go. Got some things
here a bit wrong, looking at the heiferns. So let's try and fix that. Okay, that's more likely. There we go. So now
let's hide this one, lower the opacity here, new layer on top, pick
a color, and a brush. And it's time to go over all our lines and
draw new line art. As you can see, the pas have more details
than I'm adding. But that's a choice. I
like to keep things. This is the kind of
shapes I like to use, but you can be a bit more
realistic with it if you want. Let's head here, the whiskers and now the
year one line here. Rest of the face.
And now let's draw the rest of the body
along with the boss. Okay, so far so good. Let's go for the other one. All right. Do not
forget the color here, and there we are.
Do we see the tail? No, but we can add
a tail, maybe. Like appearing on this side, for example, trying to make things a bit more
interesting. There we go. Alright, so with that done, we can hide this and
now color our drawing. Pick my paint bucket, layer below my lin art and
now adding the colors. Let's go pick here a
pink for the thug, and now let's use it
for the color as well. Okay. Do you want to add
the straps once again? Sure. Why not? Right? All right. Now let's add let's erase
what we don't need here, here, and that is done. So yeah, I guess
you can see this is a more complex pose,
but once again, start by breaking everything
down into simple shapes, and you'll see that things
will become much easier. So with that set, we are done with this pose. Take your time, draw
different options of shapes. Choose one of the cats
that you prefer to pose. You can go for something
with the easiest one. If you want a bit more
of the challenge, go with more complex pose. It's totally up to you. Find your own
references if you want. If not, you can download this reference pod that
I will leave for you. Just have fun. Take your time, and I will see you
in the next video.
7. Day 6 - Sunbathing Cat! All Stretched Out: Hello, and welcome
back. This is day six of our drawing
cats challenge class. Today we're going to be
drawing a sun bathing cat, so a cat that is stretched
out enjoying the sun. We drew cats sleeping,
all curled up, cats that look like a loaf of bread with their paws tucked in, and now we're going
to do the opposite. Cats that are stretching
out and enjoying the sun. So I got here a few
reference for you. You can download
this Haferencebard for you to practice with. And if you want, you can also look up references
somewhere else. It's totally up to you. And the first thing we're
going to do is look up for shapes in each
of these photos. So let's do this. Lower
the opacity of my cats. A layer on top. Let's zoom in
so we can see more clearly. And now pick up my
pencil brush and the red so I can see
my drawings clearly. So we have here an ellipse shape for the head and two
triangles for the years. As you can see, we see more
of one year than the other. So this distinction in
sizes is important. Now we have here
something like this, kind of spiral can work maybe. I think I'll divide into proper shape so
it's easier for you to see it and to
have a better base. So kind of a triangle almost, and then we can draw
another one for the paw. And now here we have
another triangle and another one for the rest of the arm and a
circle for the paw. Or we can use another
triangle, something like this. Now for the body, we have a big trapezium
shape like this. And now one of the back
legs with the paw and now the other and
another paw like this. Again, if you want, you
can draw these guidelines, so you know where the torso is or the center
of the torso is, and then we have our tail. There we go. Very simple. Lots of triangular
or maybe I've heard once an artist naming these
shapes the lemon wedge, and it's something
I also like to use sometimes because it's
not really a triangle, right? We have a straight line and
then we have this curve that resembles more lemon
wedge or an orange wedge. Those are the kind
of shapes that are really useful when
drawing anatomy, bit for animals, but
also humans as well. So draw lots of lemon wedges when looking for these shapes. Alright, second pose,
circle for the head, guidelines for the face. Triangle and another
triangle for the years. Now we have here this triangle
and the paw and now we have here another triangle or another lemon wedge
and another one here. For the body, let's
try something else. For the body, we can have
something like this this time, an upside down house,
something like this. We can have this guideline
here once again for the torso and now
for the back legs, we got something like this here. Now this one,
something like this, and now triangle and
another triangle. And here we have
just one triangle. And now, finally, the tail. There we go. Next one. This one is a bit more
simple circle for the head, face guidelines,
triangles for the years. Now, we got here one
part of the arm, the other and the pow. And now we got here. Well, let's do a pin
shape for the body. So something like this,
like we did before, we did a similar shape before. Remember, on the first day, there we go. Perfect. Now we got here another
triangle and the other pow, and now the back legs. As you can see, I don't
always use the same shapes. It really depends on the pose and what I think
makes the most sense. So even sometimes you draw
the body as a pin shape, other times you
can use triangles. You draw what you see or
what feels right for you. Here, let's go start with
our pin shape again. There we go. The torso
goes in this direction. Now, we got here one arm, paw triangle here, and then see here I drew a
triangle for the arm. Now here I'm going more with a rectangular shape
and for the face, going to draw a triangular
shape instead of the circle. There we go. Now, all we
are missing is the legs. We got this shape here. Now here something similar. Paw and another paw, and then we got our
tail, and that's it. We got all our shapes here. Let's pick one of these cats. I'm going to go with this one because I really
like this position. I'm going to select it and then duplicate it and
bring it to the side. Let's make it a bit bigger
so you can see it clearly. All right. And now we can
go for the detailed sketch. New lay on top,
add some opacity, pick a darker tone,
keep my pencil brush, and now it is time. Now the other leg. So as you can see,
I'm just going over my previous lines and adding
more details. There we go. Now, trying the
rest of the body. We have this one going
this way, right? The like this and like this. Now we also got this
little paw here. There we go, and now
the rest of the head. There we go,
something like this. This is a really fun pose. I think we can go
for our line art. So let's lower the opacity here, new layer on top,
pick up a color. And now we just go over our previous lines and
make a cleaner drawing. Or a finalized drawing, T pose is all about drawing very long and floid
shapes just like this. Now we got this
one here as well. The more you exaggerate
those shapes, the more dynamic they can
look sometimes. Other pow. I like to add small hair
details here and there, just to add a bit more detail and texture to the
drawing, mostly. But I think we are done. So now I have to do
is add some color. So this is a gray cat. So layer below my lines. Then use a paint bucket
to fill everything. This is a very simple cat, one color doesn't have any
kind of pattern or anything, so it's a very quick coloring. Just fix the places
that need some fixing and we are done with our cat
that is bating in the sun. Look at this. He
looks uncomfortable. That was really
fun. So once again, take your time,
practice your shapes, try different cat poses. You can draw all of these. You can find more
references and practice different kind of
sunbathing poses. Have fun. Take your time. Don't forget to post your cat once
you're finished with it, and I will see you
the next video.
8. Day 7 - Drawing A Playful Pouncing Cat: Hello again, and welcome back. So this is the last day of our seven day challenge
class on drawing cats. And for this last day, we're going to draw
a very playful pose. So a cat playing. And we have here our
four preferences, and the first thing
we're going to do is, yes, you've guessed
it, look for shapes. So let's lower the opacity of
our images, a layer on top. Pick up a color and
my pencil brush. And now we can start with this first reference
and look up shape. So circle for the head, guidelines for the face, two big triangles for the years. And now let's think about this. So I feel like we can
make something like this, two circles for the body. They go a bit in a
different direction, right? We have something like this. So I think we can
exaggerate this even more. So one this way and another
this way, like this. And then we got our
pass going like this, almost like a rabbit.
It looks like a rabbit. Let's fix this shape
here so we don't forget about that
part of the back leg. And now we have here rectangular shape for
the arms and then paw. And then we got here circle for the pow and then rectangular
shape for the arm. So first one is done. This is probably our most complex pose that we're drawing. I try to start as simple
as possible and then adding some more difficulty with each pose that we
did for each day. So you can start with
something more easy. And then with the knowledge you gather through each video, you can go for more and more
complex poses as you go. So circle and to
triangles for the years. Now for the body, let's see. Should we go Bin shape again? I think so. Yeah,
that could work. So Bin shape. Now we
got here this leg, right, appearing, a paw. We have a bit of a
paw here as well. Let's draw here the
torso guideline and now triangle for one of
the part of the arm. Then we got kind of
a rectangular shape and a circle for the paw. Triangle here, and Wedge lemon
wedge for the other paw, and there we go. It's done. Okay, third one. Let's see here. So we got a ground triangular
shape for the head. We got a trianguus
here for the years. Now we got here. We can do a triangular
shape for this arm here. Or a wedge, lemon white
shape, and then the paw. Now, let's see here. I think we can do a
round shape for a part of the body and
then another circle for the rest,
something like this. And then we got the other paw and the tail appearing here. Oh, we also got here
a bit of a paw. So let's draw it so
we don't forget it, as well as that curve
of the leg right here. I'm just looking
for shapes here, nothing much being very quick, so my lines can be more dynamic, more interesting, more fluid. Sure that if you're doing this
throughout the seven days, you feel more confident
in your shapes right now. I'm pretty sure this is the kind of exercise that really
helps in that confidence. Circle for the head, bit of near here and a triangle
for the other here. Now, let's see. For
the body from it, it's clearly a lemon
wedge like this. And then we got one arm paw and another
arm appearing there. And now for the back legs, we got here another lemon wedge. And another one here and two others for
the pause like this. And these are our
playful cats right now. Not sure which one to draw, so it's really hard to
choose what to draw. I like this one.
It's a bit different from all the rest
that we did so far. So I might go with
this one. Let's see. Let's select here our
shapes, duplicate them. And then move them to the side. It's already a very
good size, I think. We don't need to make it bigger, maybe just a tiny bit, so you can see clearly. That way, I can still see my
reference here to the side. If I need to, I'd
lower the opacity, new layer on top,
a darker color, and our pencil brush. And now we can start, starting with the head. I always like to
start with the head, but you can start
somewhere else. We all have our preferences. So try different things until you find the
things you like. So we have here one of the
paws appearing, right? You can even see the
claws showing up. There we go. Now, try
again this shape. There we go. Now here, got the other paw, clause showing a little. I don't think the image
shows the claws as much, but I want to draw them. I kind of want to draw them and the tail right
here. There we go. We have our shapes our cat here. Our shapes now our detailed sketches it's time to
draw the line art. I'm going to draw here
like a mouse toy, something like this,
just so it shows him playing with something.
There we go. You can add any
elements you want to your drawings if you feel that
would make it even better. You don't need to just draw what you see on your references. You can then add other stuff, so to make your
drawing more fun. Okay. So let's go over our sketch and draw
the final art of our drawing our final cat
drawing. There we go. This, the other side. Forget about the
claws, whiskers here. As you can see, I'm simplifying the face here this time around. I don't want this
face to be the focus. Okay, let's move on
to the next thing, being very loose with
my drawing here. I think depending on the kind
of movement of the pose, I like to be more messy or less. I feel that if I'm very
loose with my lines, it helps seeing that
movement of the pose, that playfulness of the pose. And I think this is mostly it. Need to draw my drawing here, the retito there we go. So let's hide our sketch, and now we can add our colors. So a grayish cat. Let's add a bit of brown
here, paint bucket, refer other layers, a
layer below my lines, and now just use the paint bucket throughout
the whole drawing. Be sure that your
lines are all closed. Otherwise, the paint bucket
will add color to everything. As you can see, I'm not sure. I got it wrong here, so let's take a bit of a
look. Here it is the gap C. Now, I close the gap there. Let's color pick
this color again. And there we go. Now it worked. So if there are any gaps in your drawings,
this might happen. Just look up your innards
and see where the gaps are. The quickest way to add
color to my drawings, it does have this inconvenience. But as you can see, we colored our cat
in very few minutes. Just need to fix things
that need to be fixed. So let's add our stripes here. Very loose with this. Like it. I really like how
our cats turned out. I think they're all very
unique, trying different poses, having fun with it, look up for shapes and then build
our drawings from there. This is, for me,
a really fun way to draw and learn how to
draw any kind of subject. So this was it day
seven of drawing cats. We drew a playful cat
this time around. I hope you had fun. Don't forget to download the reference board. Once you're done, don't forget to post your drawings
so I can see them, give them many
feedback if you want to I can't wait to
see your drawings. I really love to see
what you come up with the poses you draw, the things you chose. I really love to
see your drawings, so don't forget to post them. And just follow me to
the next video for a very quick conclusion,
and I will see you.
9. Conclusion (Before You Go!): Hi, again, artist. Congratulations on completing the seven day cat
drawing challenge. I hope you had a blast sketching all these different
cat poses and gain confidence in capturing
their charm and movement. Thank you for joining me
on this creative journey. It's been amazing guiding
you through relaxed. Playful and dynamic
feline poses, and I can't wait to see the adorable kitties you've drawn. If you enjoy this challenge
and found it helpful, I'd love to hear your
thoughts in the review. Your feedback helps me improve future classes and inspires
other artists to join in, keep sketching, keep exploring, and most importantly,
keep on drawing cats.
 Patricia Caldeira, Illustrator | Digital Artist | Designer