Transcripts
1. Intro: Hello, fellow artists
and welcome to this class on Drawing
a Cat jumping. This is going to be
a very short class, but I will teach you
from start to finish how to draw a cat
that is jumping. We'll start by talking about some resources that I
have for you following by starting to understand the
shapes of our cats that we'll be drawing and then we'll go through some more
detailed sketch. And we'll end with a
final drawing both with Lin art and
colors of Cat jumping. For this class, I'll be
using clips to define, but you can use
whichever drawing software you have or
are more used to. If you want, you can even
just use paper, a pencil, and a pen, or any other
medium you might prefer. It's totally up to you. And with that said, are you
ready to draw some cats? Then follow me to
the next video.
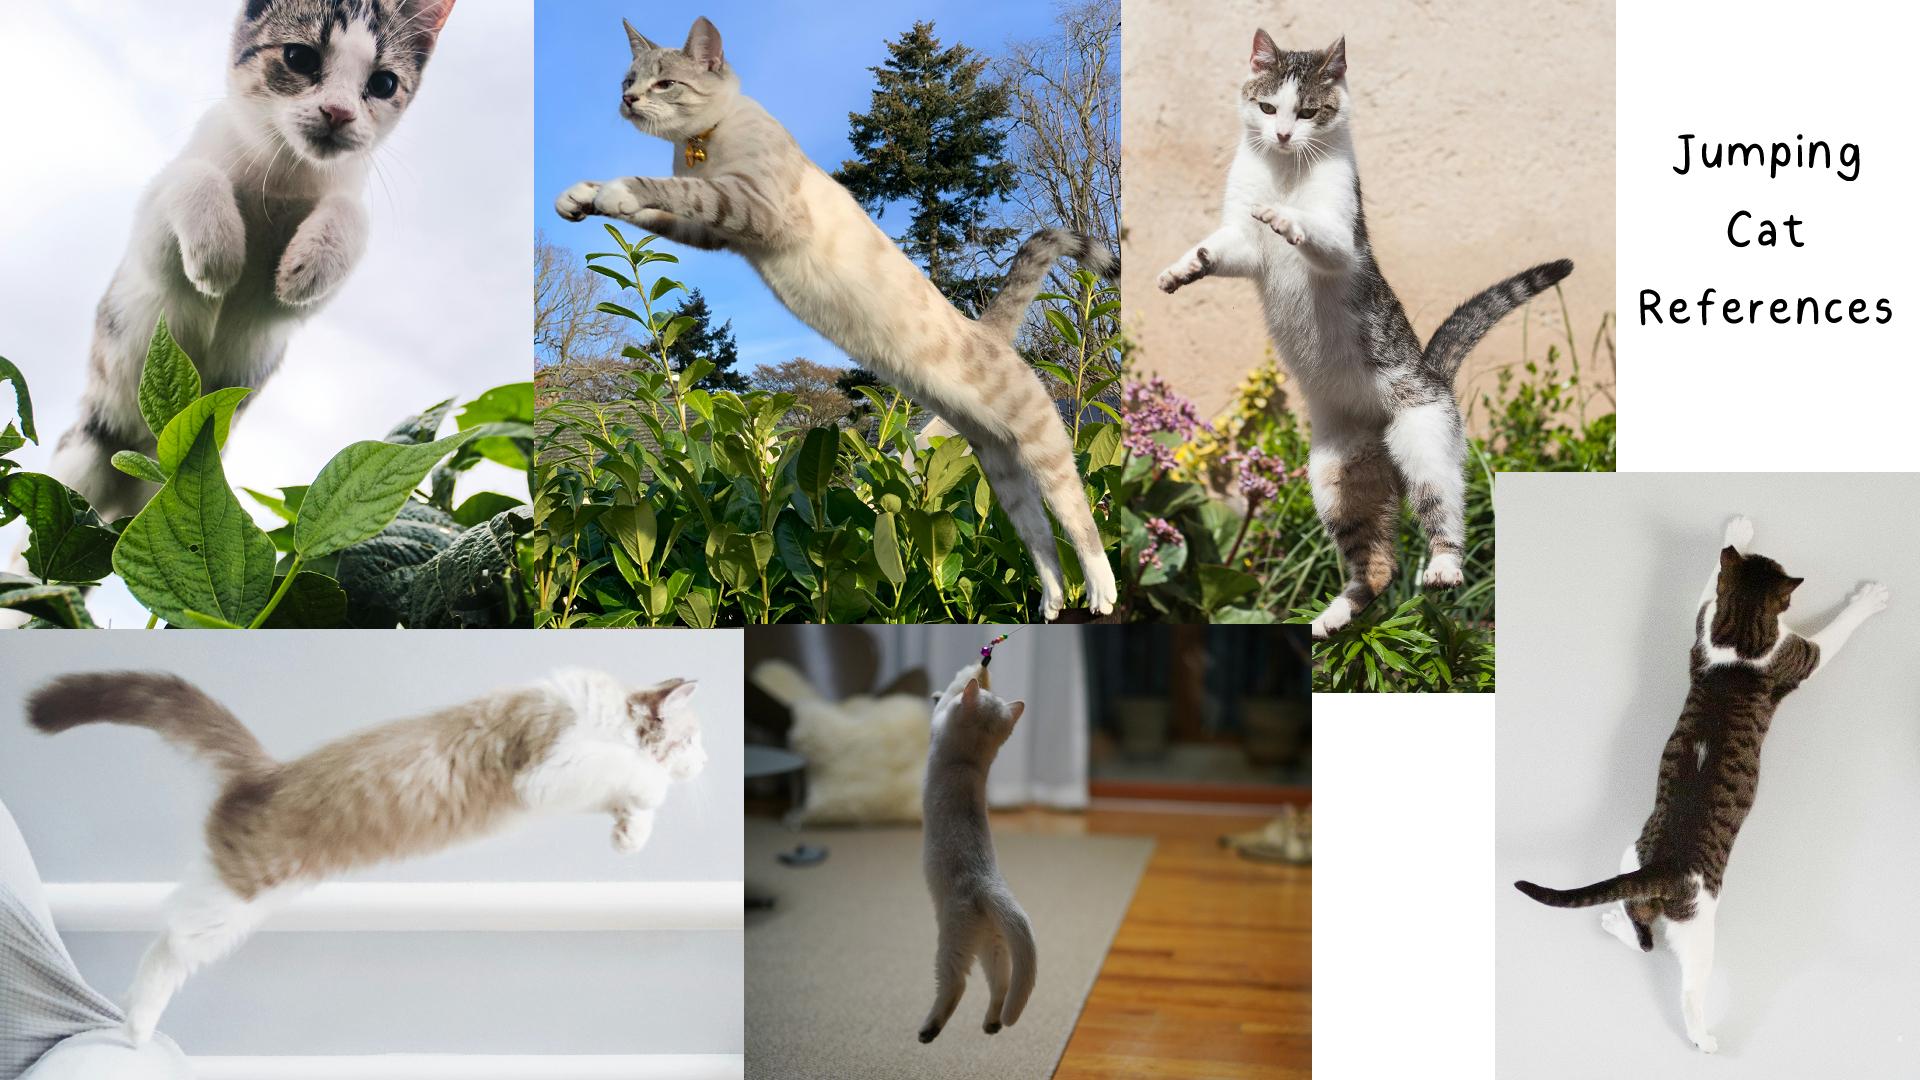
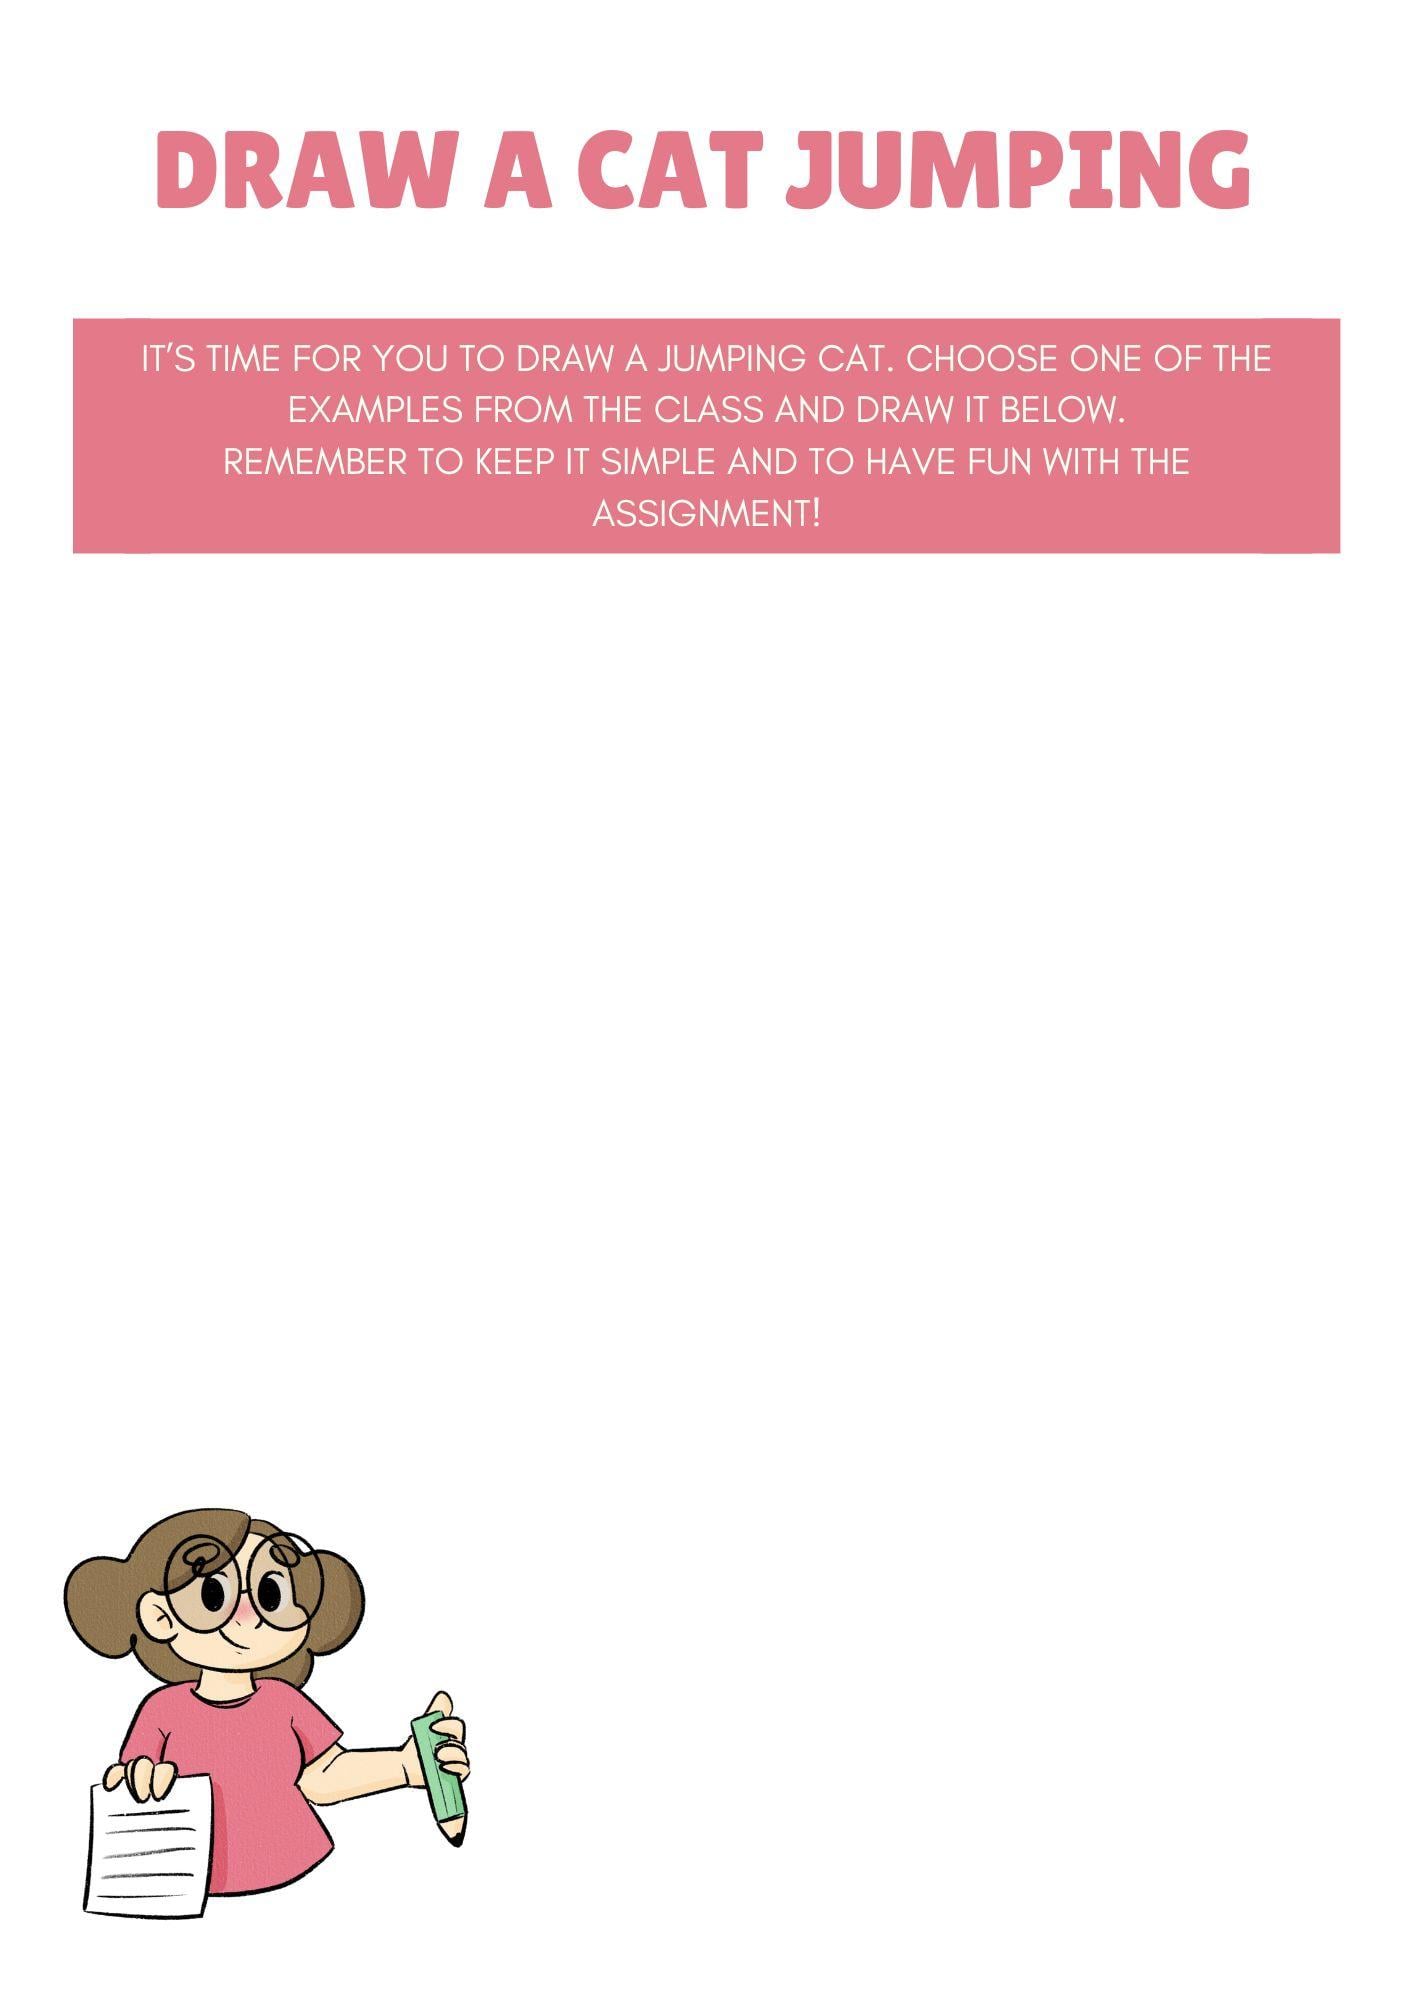
2. Cat Resources!: Hello, and welcome. Now before we start drawing, I just want to talk to you about some resources
that I have for you. First of all, I have this reference board that you can download and
using this class, I'm going to use
this reference board throughout the whole class, and these are the references the cat reference that I'm
going to use while drawing. And other than that, I also
have this template for you so you can use for your assignment at
the end of the class. I will talk more
about it at hand. But basically, what I
want you to do is just to download this and
draw a cat jumping. This is it and then just post
it and share it with me. Yeah, these are
the two resources that I have for you
for this class, don't forget to download them, and I will see you
in the next video.
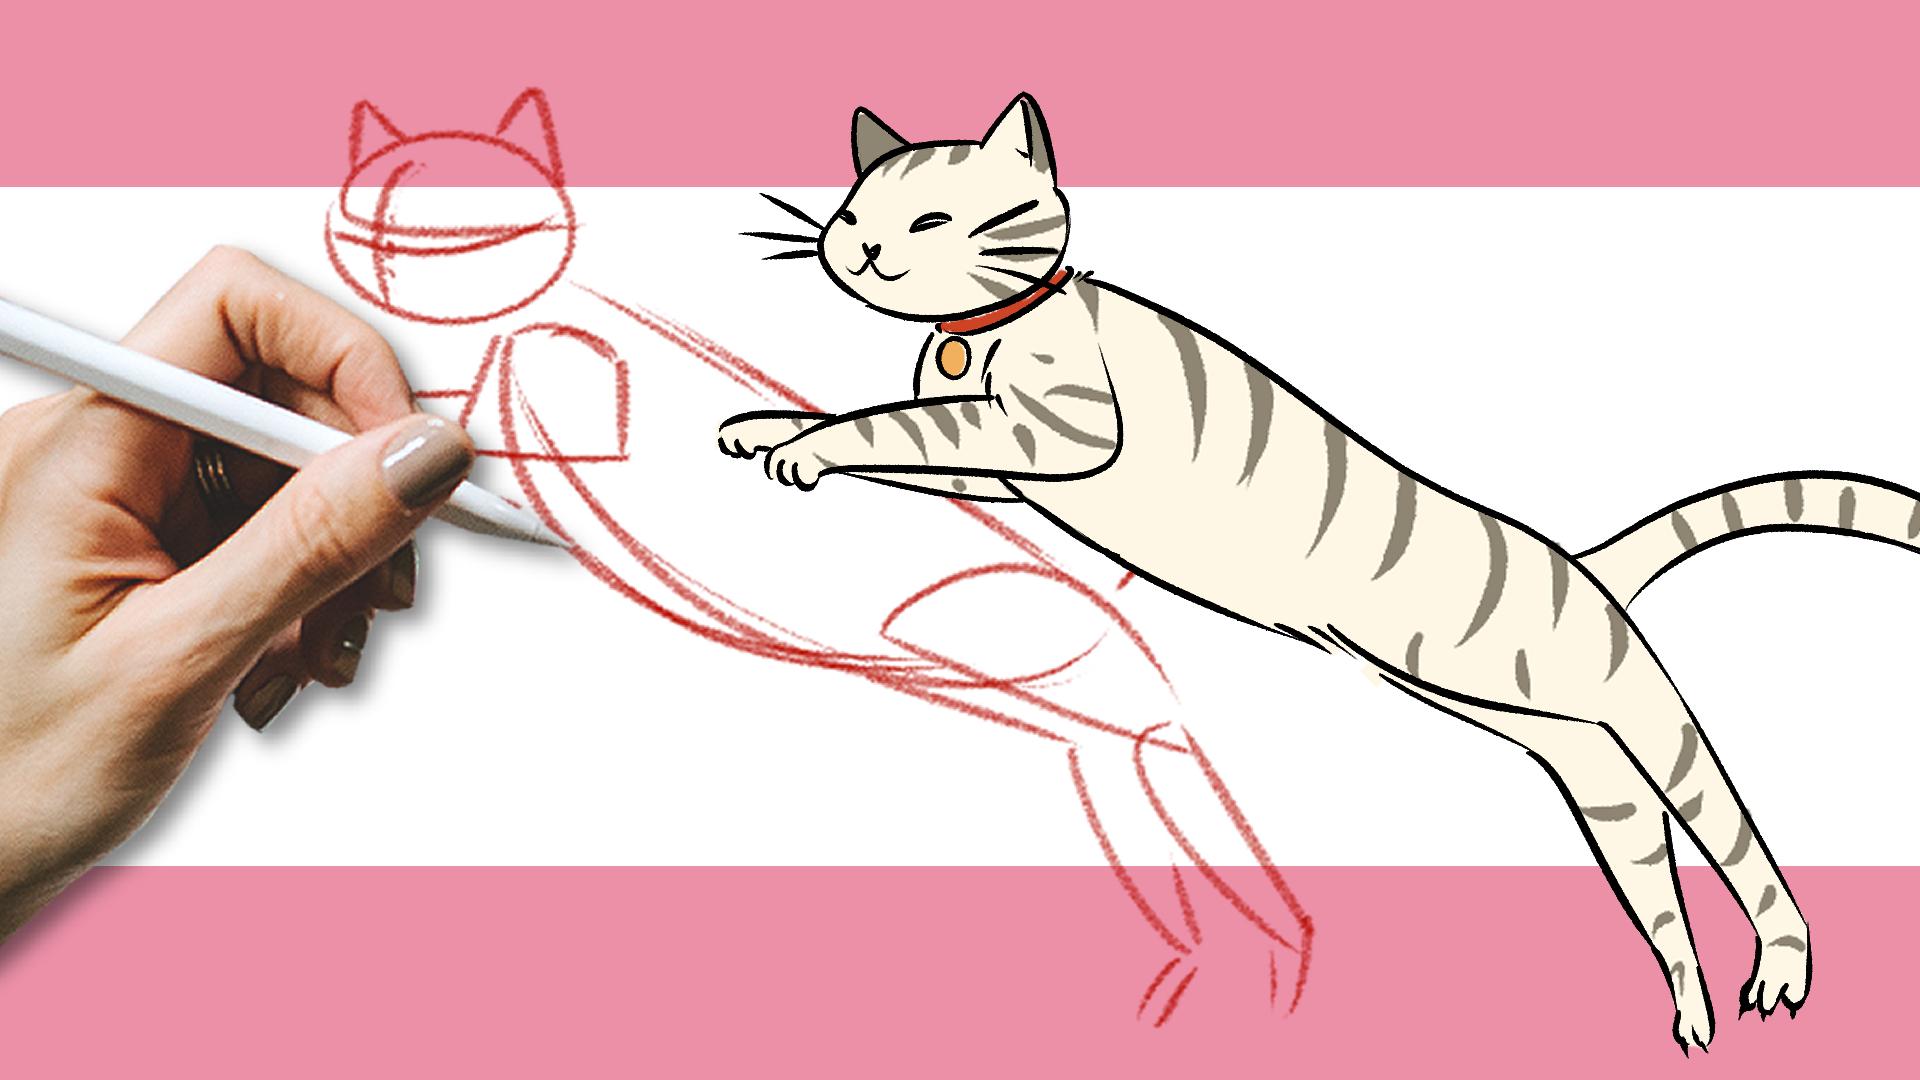
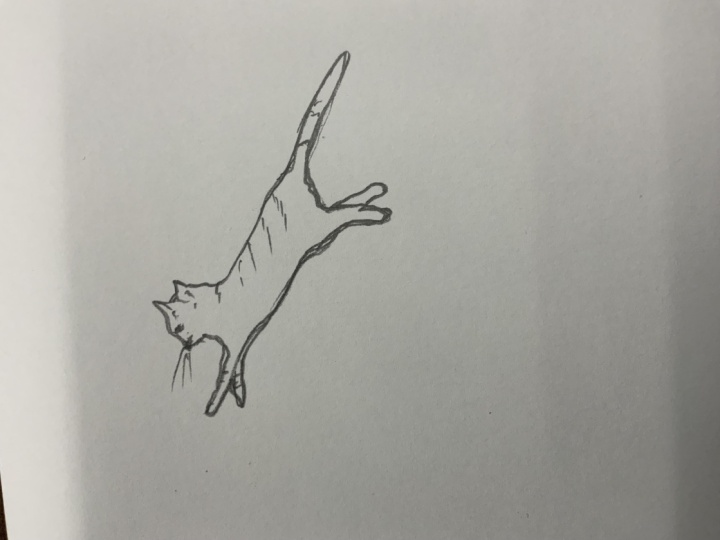
3. Drawing The Basic Jumping Cat Shapes: Hello, everyone, and welcome. We are now going to
start drawing our chats. So I have here my references, and don't forget
that you have these available for you to download,
if you want to use them. If not, you can always look
for your own references. And the first step that we're going to do is look for shapes. So I'm going to go to
my references zoom in. Now I'm going to
bring this layer on top of my references, and I'm going to lower the
opacity of the photos. And now, what I'm
going to do is I'm going to go through
each of these photos, and I'm going to figure
out what kind of shapes can I use
to draw the sket. So I'm going to pick my red
here and my pencil brush. Let me see the size. Bit too big. Yeah, this
is good. All right. And I'm going to I'm going
to just pick one to draw, but I will draw the
shapes for all of them. So it's easier for you to
figure them out as well. And so you can see what shapes I would use for each
of these poses. So this first one, this is not the best reference
that we have here. However, I chose it because I really like
the perspective. Now, since we can't
see all of the cats, it's not a great reference because you can get
somethings wrong, but I still think it was a fun perspective that at
least you can just look at it and have more or less of an idea of yet
another jumping pose. Alright, so I'll start
with not really a circle, but something more like this for the head shape,
in this case. And now we would have something
like this for the body, and we can see here bit
of the leg, the back leg. And now here we have
the front pose. And, of course, we got our ears. So yeah, as you can
see, I'm glad I used this example because
I also want you to I also want to talk
to you about how important it is to have
clear references and good references because
sometimes we think that the pose is kind of
fun to draw like this one. But then we realize the foot
itself is not very clear. So we can see the whole body. Some parts of it are either hidden or they are
cut out of the photo. So they are outside
of our angle here. And that will make things
much more difficult for you. So what I suggest is for
you to look for photos, as we see with all the others that you can clearly
see the cat. There's nothing in front of him. We can see all the limbs
and all the whole body, the tail, and the
ears, everything. Everything is clear.
And this is really important because
we can very easily forget this when drawing or
when looking for references. Sometimes we see that
reference that is really, really nice, but we
forget about this. So yeah, this is something
for you to take into account, and it is very important. Let's see the others. Now, the others
that you can see, we can very clearly
see our cats, and we're going to start
drawing our shapes. So here we have
kind of an ellipse, right, something like this. I always like to draw the
guidelines of the face. So I remember where
everything is two triangles for the years. And now for the body, I always like to go with
kind of a bin shape, or in this case, I would say it's more a lemon
wedge, something like this. And now we got this shape here
for part of the front leg, and then this one for the boss, and then we got
here another one. Now, the tail, we can
just make a simple line. And now for the back legs, I like to use ellipses or a lemon wedge also works,
something like this. And then we can draw
another one like this and tiny circles
for the boss. So there it is simple. And our shapes are always going to be
more or less this one, but we might need to adapt
them depending on the pose. Okay, next one. So once again
using that part circle, but with a pointy end
like this and this, we got here our guidelines, our ears very pointing
this time around. Now we got our lemon
wedge or our ben. In this case, it's a
bit more of a bin. And then we got here our pow and now we got another one
coming right here. There we go, a tail. And now, once
again, we got here. This time, I'm
going for a circle, and for this one, it's a
bit more of a lemon wedge. And now we got here the
lower limbs. There we go. Something like this. This
is very weird right now, but we're going to
fix them as we draw. Let's go for the next one. Alright. So once again, here we have our circle and
two triangles for the ears. Now next we got our
beans lemon wedge. We got here one part of the front leg and
then the pow, right? We got our tail and no circle and the shape
for the back leg. There we go. Next
one from the bay. So we got here our
head, two triangles. So this is a kitten. We can clearly see
this is a kitten, now our lemon wedge or our bean, and then we got
here our front paw. We don't really see the
other paw because it's probably in front of his face and we seeing him from the back. And now we got here
our lemon wedges. And a tail. And the last one. So this is all about
shapes right now. That's all we care
about. All right. So here we got Orchid
here is a bit more. It's a bit of a different shape. So I'm going to
divide this into two. Like this. Now we
got here one leg. Now here we got this one, tail, and back
legs. There we go. Now, I'll just move this
down here so we can see them better and get our
opacity to maximum again. Alright, so there we go. Here we have our shapes from all the poses
that we just seen. Now, what I'm going to
do is I will choose one of these and
repeat the shapes. I want to practice the shapes first before
going to the next step. So for example, I really
like this one in the middle, so I will copy it, so it's easier for me
and bring it here. Alright. And now,
while I have it here, I want to repeat these shapes. And this is a very
important step for when you're
learning the shapes, it's not all about trying
on top of your references. It's good for you to afterwards
practice them as well. Have the reference and
your shapes nearby, and then practice those
shapes so you can learn them and get
some muscle memory. And, of course, this
doesn't need to be perfect, right? All right. We are not trying to make
an exact copy of our cats. We are learning
how to draw cats. Alright, so there we go. Well, as you can
see, this is not an exact copy of the reference, but it's close enough and
the shapes are there. So, yeah, I would say look up for shapes
on your references. Practice them. You don't need to use the same shapes that I use. You can use other ones, but on top of your images, look out for very simple shapes, basic shapes, and then
choose one of the cats. You can choose more if you want, but I like to tackle
one thing at a time, so it's easier,
so I can memorize the shapes for one and
then go for another. So yeah, choose one of these cats and
practice those shapes. You can practice those
shapes more than once. If you're not happy
with the first shape that you've made or the
first drawing that you made, then repeat it and repeat it
as many times as you need. And once you're done, follow
me to the next video.
4. Sketching Our Cat Features!: Alright, so hello
and welcome back. This is our second video. We figured out our shapes, and now we want to start
actually drawing or giving more shape to our cats. So the next step is making a more detailed sketch
and leave the shapes, start to leave the
shapes behind. So what I'm going to do first, I'm going to lower
the opacity of my cat here and I'm going to
add a new layer on top. Now this is still a sketch, so I'm going to pick here my dark red and still
use my pencil brush. And I'm going to go ahead
and start my sketch. So I'm going to draw
on top of my shapes, and I always keep my
reference to the side so I can check it whenever I
have any kind of doubts. Alright, so here we go. I'm going to go over here. And start my sketch. I'm looking at my
reference over there, so I'll keep here the shapes or the
drawing as I sit, right. Still draw this
drawing here a bit off the face of my cat,
some whiskers. So here we start adding more details and more
personality to our drawing. Now, we got here a bell, right. Let's add that as well. And now, let me just move right. Now I can go here and start
drawing the rest of my cat. The chest here. A bit out. So you see I'm always checking
my reference over there. And as you get more comfortable with drawing cats in general, you can add a different
style to them. Like, I don't like to be
too realistic with my cats, so I draw them always
quite cartoony, but that's totally up to you and how you
like to draw cats. All right. This is
still just a sketch. By the way, don't
forget that because I know it's easier
to forget about it. So it's okay to make some
mistakes here and there. This is not a
perfect drawing yet. Be loose with your
lines. All right. I'm going to start adding here my pattern so I
don't forget about it. Now for the front legs, we have something like this. Then we got the other
one appearing here. And here, there we go. I think it looks
very cute already. And this is mostly it. See? Always with my
reference to the side, my shapes below the act as
guidelines in this case, and I just start giving more form to my cat instead
of it being just shapes. Now it's actually a cat, and I start adding a few
details here and there. So I know how I want my cat
to look like at the end. And this is mostly it.
And as you can see, this is not a perfect drawing. These are very loose lines. The lines intersect with
each other. That's fine. This is just a sketch. And this is our second step. This is it for now.
Now, once again, take your time if you need more than one
sketch. Then do so. It's totally fine.
And once you're done, follow me to the next video where we will
finalize our drawing.
5. Drawing Lineart And Adding Colors: Alright, so hello
and welcome back. So we finished our sketch, and as I mentioned before, now it's time to
finalize our drawing. And how do we do that
with two things? Or at least that's
my usual process. So we're going to draw
first some Lenard, and then we're going
to color our cat. If you're not a inart person, you can just color your
cat and paint your cat. But usually, this is
the way I go about it. So first thing I do, I don't need this
shape layer anymore. Now I'm going to lower
the opacity of my cat, and then I'm going to
create a new layer on top. Now, I'm using clip studio
paint for this class, and I'm using here
a vector layer. And what does a vector layer do? Basically, everything you draw inside of it will
become a vector. And that means in
very simple terms, that means that I
can edit this layer, however I want, I can scale
it up and down and do all kinds of things and I
won't lose quality on my line. So that's why it's
so useful to use. I like to use this vector
layer for my inhard. So if I need to change things, I won't lose quality there, but it's totally up to you. You don't need to use
these kind of layers. But I just wanted to give
you this information in case you're using
Clip Studio as well. Now, as for the Linard, I'm going to choose
black as my color. And then we can use the
real G pen, I think. These are all the brushes that come with clips to
the paint already. So you don't need to download anything if you don't want to. And basically, what
I'm going to do here is I'm going to go over
all my previous lines, but give a more clean
look to my get. Just going over my lines,
and as you can see, I repeat them a lot until I
have something I really like. I didn't hear the
nails on my cat, because usually when cats jump and they open up
their paws like this, you can see bits of
nail showing up, and I think that makes my
drawing a bit more fun. As I go, I will also erase
things I don't need. Right. Now, yes, I am
done with my Lenard. And now all I have to do is
add color to my cat, right? So I'm going to hide my sketch. And I'll add a new layer
but below my Leonard. And I just have to
pick some colors. Let me take a look at my cat. So it's kind of creamish
with grays in there. So yeah, I'm going to
draw a cream cat more or less with some stripes. You can either follow what
you have on your reference, or you can just choose
any color you want. I'm going to use my
paint bucket to add the colors more
quickly. There we go. Now, since we have here, here and there are some gaps on the lines I'm going to erase whatever went beyond my
line art. There we go. And now for the stripes, let's make the
brush a bit bigger. We can just draw some I'm going to keep
things very simple here, but you can be more
specific or more detail. It's totally up to you, right? I just want to make things a bit quicker because you
don't need to see me, adding here a whole lot of
details to a cat drawing, but you can draw different
patterns, different colors. You can do so much. You can even search for
references just for that, just for the coloring
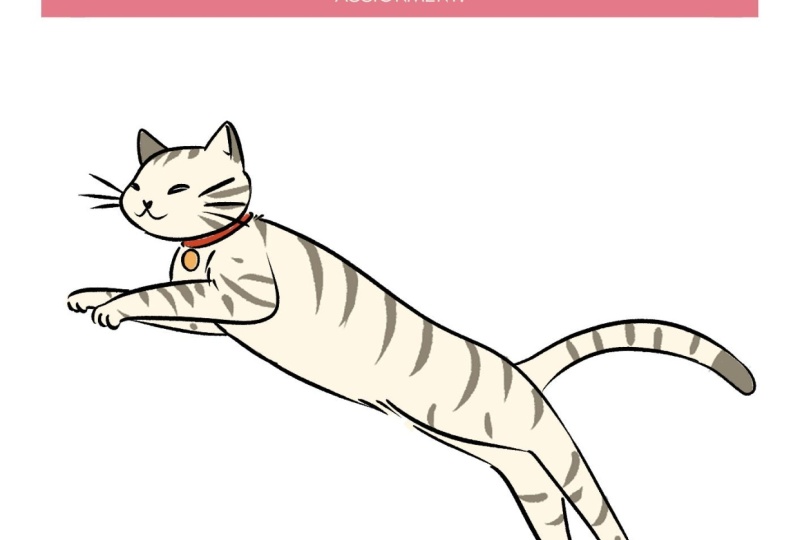
of your cats. Now, all I'm missing
is the color, and there we go. We have here our cat finished with our lineard
with some colors, a pattern. If you want, maybe
even some shadows, I like to keep things simple. But do what's best for you, what you like the
most when drawing. You don't need to follow
everything I do here. You can add more details. You can handle your
drawing even more. So it's totally up to you. What I want you is to
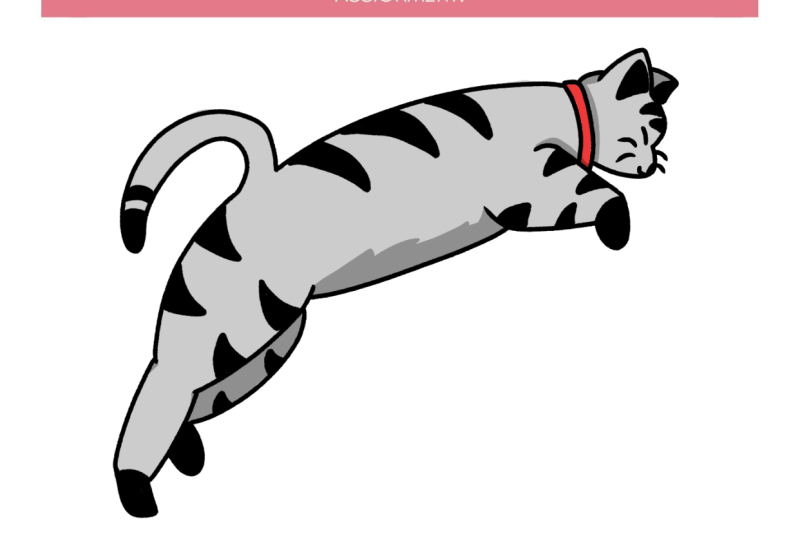
have the most fun. Now, remember the template I mentioned at the
start of the class. Your assignment is to download that and then choose
one of these poses, or if you want any other pose that you find online
or that you have, and draw your own jumping cat. So draw a cat jumping
and then don't forget to post and to share
your drawing with me. I can't wait to see it, and I will give you any
feedback you might need. So take your time, have fun, and I will see you
in the next video.
6. Conclusion - Before You Go!: Hello, once again,
fellow artists. Now, first of all,
congratulations on finishing this
class. You did it. You watched this
class and you drew a cat jumping from
start to finish. Give yourself a pat in
the back. Great job. Before you go, I would really appreciate
if you could leave a review so more people can find this class
and don't forget, check out my other
classes on cats. I have a few more on my
page so check them out. Hopefully I will see you with some other classes and don't
forget, keep on drawing.
 Patricia Caldeira, Illustrator | Digital Artist | Designer