Transcripts
1. Introduction: Hey there, My name is arruniya and welcome to our
drawing class. I'm an artist who specializes
in drawing and painting, and I love experimenting
with different media. In this class will be
breaking down how to draw a realistic eye into
different components, including how to space the
eyes out so they're balanced. Simplifying the eyes
into Basic Shapes. Well, let's Shading and
different drawing techniques. This project is beginner friendly and guided
step-by-step. Our goal is to practice our
drawing fundamentals and use the creative process
and a Drawing Method you can apply into
projects in the future. Over the span of these
bite-sized lessons, you'll learn not only how
to draw a realistic eyes, but how to break down complex
shapes into smaller ones. And techniques for pencil
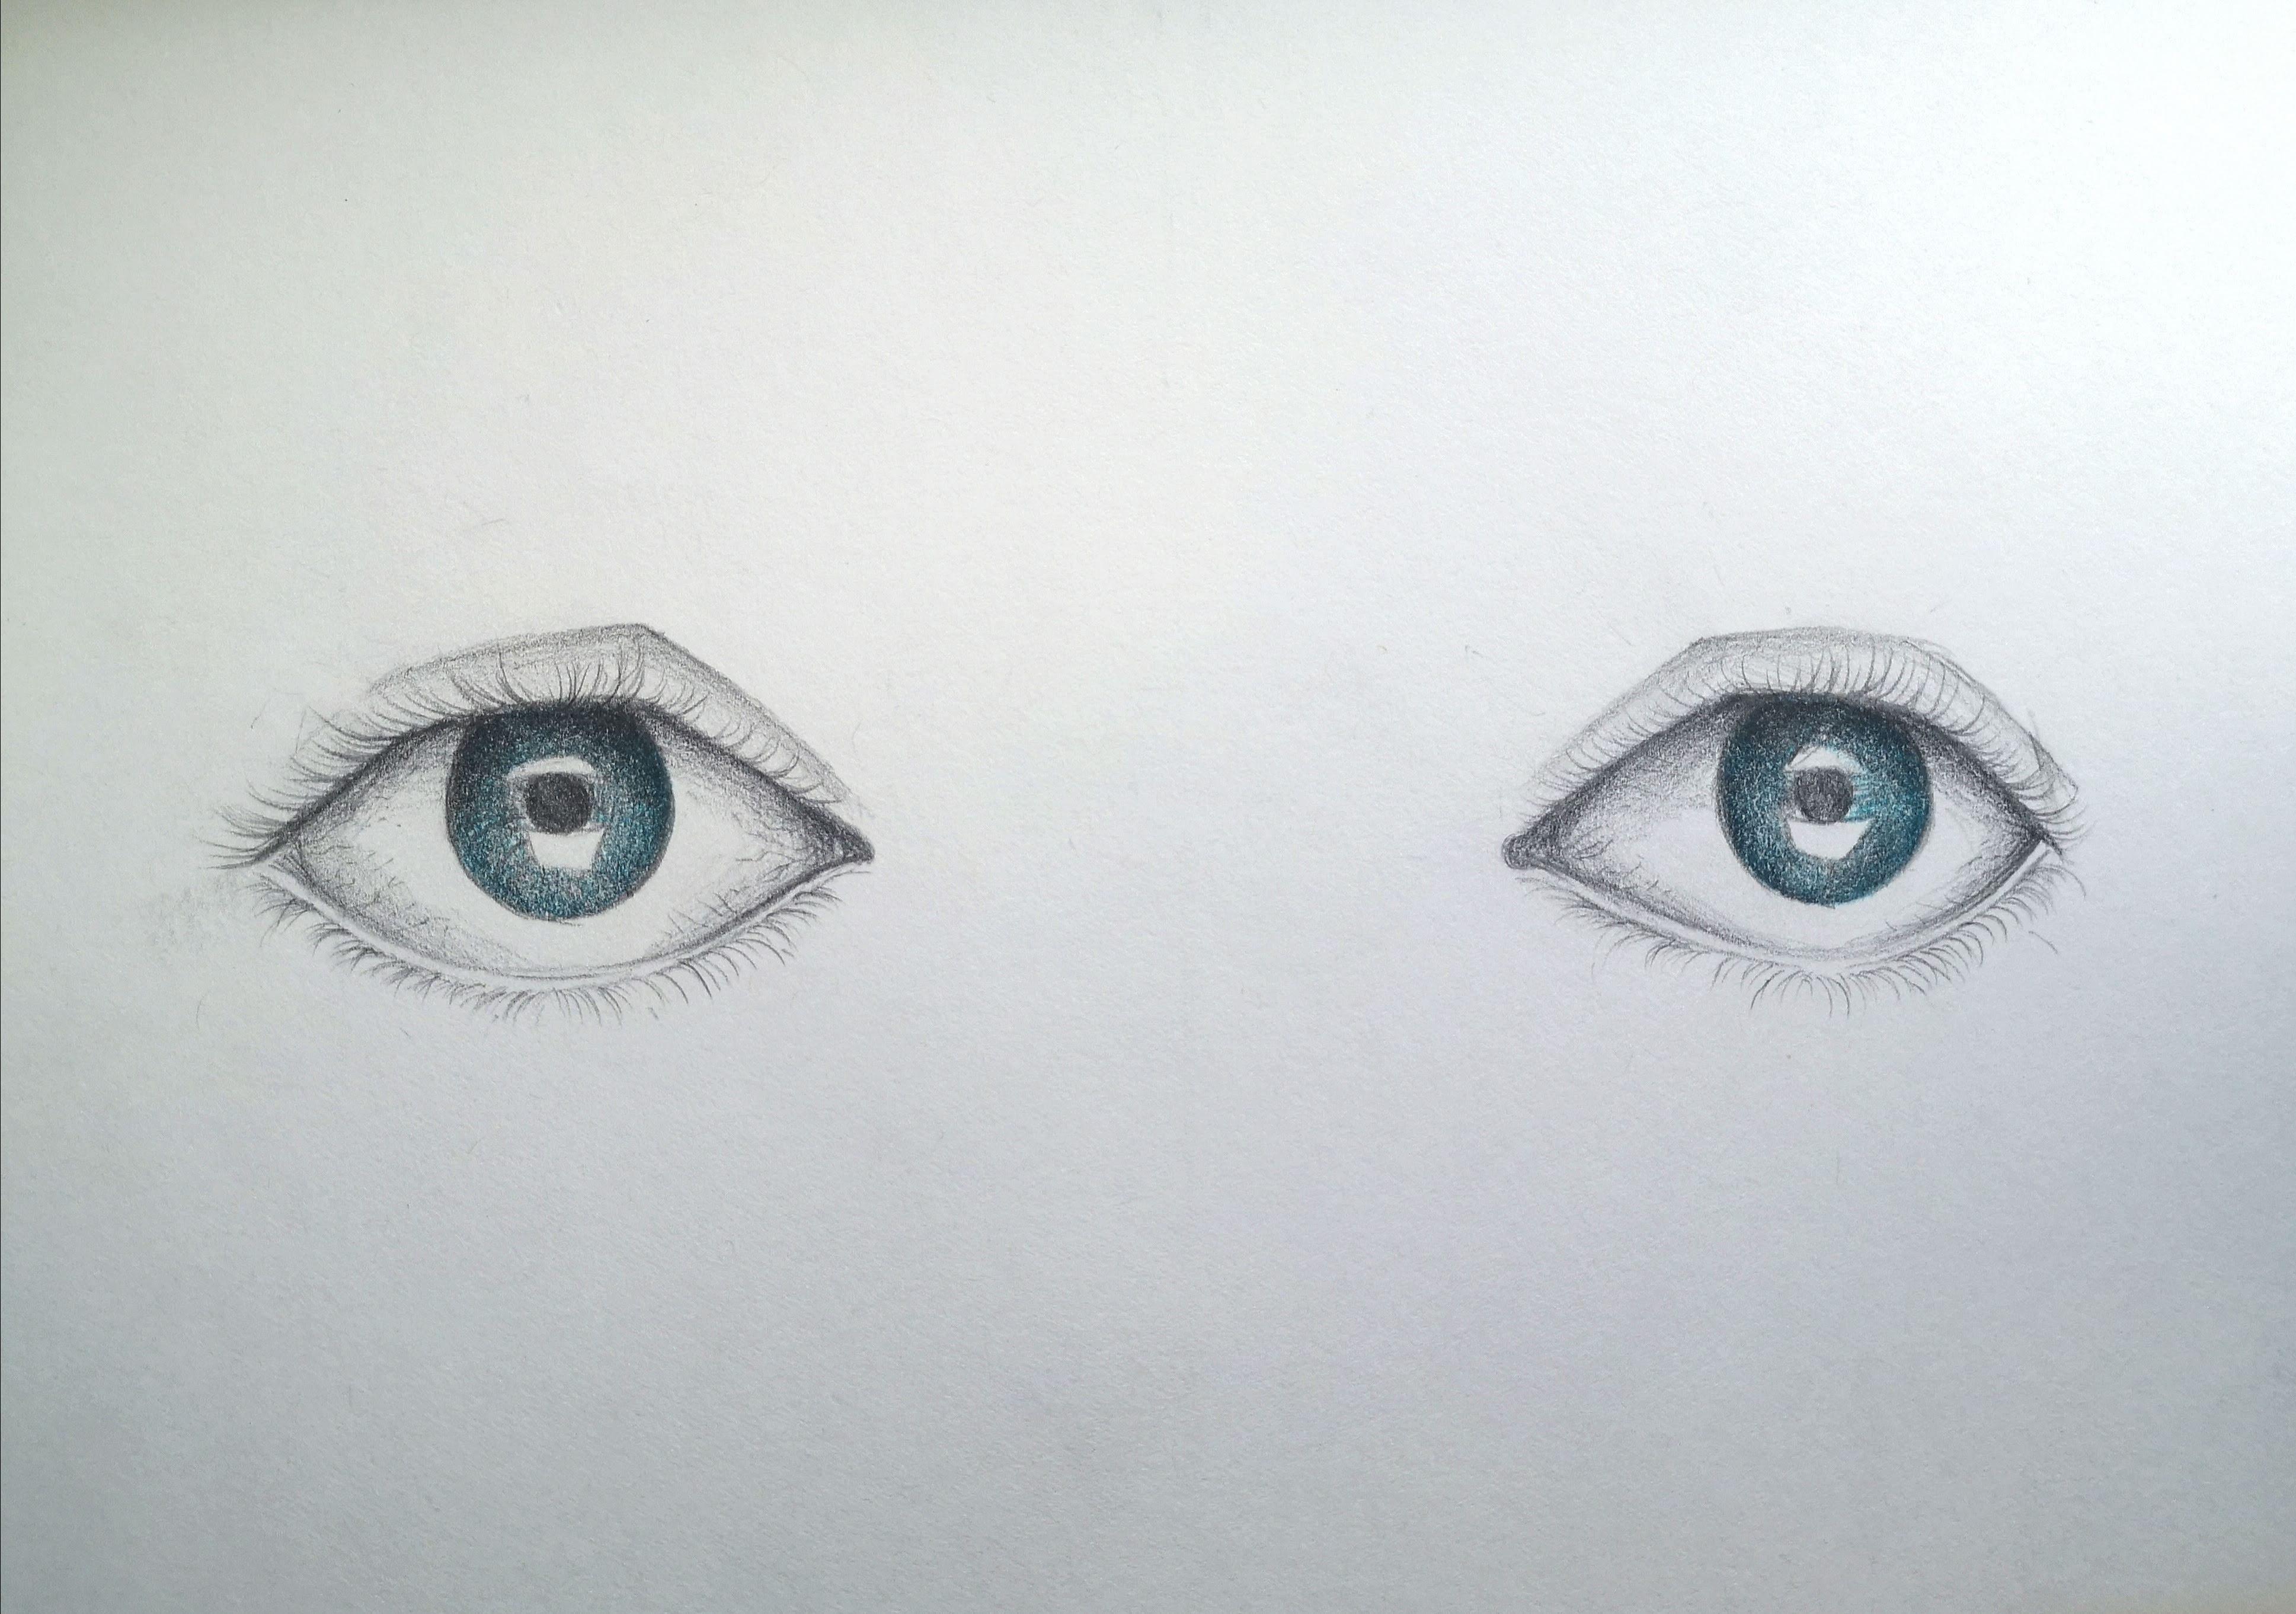
and coloured pencil drawn. By the end of these lessons, I hope you just ask
pumped as I am to have drawn and coloured to eyes. I'd love to see your artwork, so feel free to share
your completed pieces of me for online feedback. Now let's jump in
and get started.
2. Sketching the Basic Shapes: Hi there, My name is
arruniya and today we're going to learn how to
draw a realistic eye. Before we jump in, let's make sure we've got
everything we needed. So you can see
here, I've just got some drawing paper or sketch paper that
I've got ready-to-go. I do have my pencil
nice and sharpened. I've got my sharpener in
case that needs a touch-up. I've got my eraser and I do have some colored pencils
and many years as well. A little later on
in our artwork. With that being said, let's
jump in and get started. You are welcome to make it
a little bit more creative. You're welcome.
Change the inside of the eyes, the colors. You, you're welcome to put
a reflection if you'd like. I'll share some examples of
that before we start drawing. What I would like to do.
Don't worry too much about the technical part because we will be
doing that together. We'll go step-by-step, we'll
break it down nice and easy. Our goal today is to
get at least one. I will do a second one
if you'd like together, I'll do one first though. You can make it Creative
by changing the colors. Changing up what goes
inside your eye, changing up the things that you'd like to
make it more creative. So let me share some examples of what An Eye reflection
might look like. So your reflection can
be anything you want. It could be based on the colors. It could just be An Eye if you just wanted to make
it a colorful eye. But we're really
focusing on shading, pressing really lightly
today and adding teeny-tiny details to make it look a little more realistic. Okay? Alright, so this
is my sheet of paper. Just make sure you were
working side-by-side. So all I'm gonna do for mine
is I'm just going to draw a light line that goes across my page is gonna go up and down. You can use your ruler
if you'd like for this, I'm gonna erase this line later. So you see, that's what
I'm going pretty lightly. Can see it's really light. I'll go over it one
more time, but I'm gonna be erasing this later. So just make sure
that you've got this halfway line
in your artwork. If you guys measure with your
fingers the average space, so it can be a
little bit bigger, a little bit smaller than
what I'm going to tell you is the average base of your
eye you can measure with your fingers is about the width. The space in-between your eyes. If I take my eyes and
I measure the middle, it should be about the same
distance as each other. So there's an eyes space
between both of your eyes. So I'm gonna keep
that in mind today depending on how big you
want to make your eye. That's how much
space we're probably going to leave in the middle. But keeping that in mind, I want to make my
eyes pretty big. I want to make sure
I have a lot of space to work with them. I don't want to have teeny tiny eyes and make it really hard for me
to add details. I just wanted to figure out
how big my eye is gonna be. I'm gonna make it about
three or four spaces wide. So you can see my hand here
and put about four fingers. I'm gonna make them
about four fingers. Space is wide, so that means
one of my eyes is gonna be forefinger spaces wide
when I draw them. Okay. But I'm gonna take about four fingers and
on each side of my hand, I'm just going to put
a very light line. If you want, you can use a
ruler to evenly measure, but I'm just gonna put about forefinger spaces again
on this side of my line. So that's just to tell me
how wide my eye is gonna be. And I'm gonna do the same
thing on the other side. So I have a line, have
forefinger spaces and then align other side of a
line for finger spaces. Then I would recommend if you'd like to follow along
with me to do the second, I won't be adding all the
details to the second Eye. Add some as we go, but not
all of them at the end. So we can add those
together as well. If you are also at the spot, you're welcome to
very gently erase the middle line. If you'd like. You're just going
to draw a really light circle dotted lines. So I'm gonna erase
this line later. This doesn't have
to be very big, but our dotted line
is gonna go right in these two kind
of marker lines. Okay? So you can see here if you want something
to trace, you can trace it. And I'm gonna be erasing
this line later, so please, please press lightly. I will press a little bit
more just so you can see. But when you're drawing, make sure you're
pressing lightly. You can see I just did
like a rainbow shape. It's all within that
dotted line are the two dots that I are two
lines that I made before. But I'm just making
a rough circle. It doesn't have to
be a perfect circle. You can see it kinda
made a circle there. Everyone see that? I'll go over it a little bit
more if you want, but you don't want to fill
in the line entirely. I'd recommend just
doing the dotted line. Okay. It's a bit
wide on this side, so I'm just changing
a little bit and to measure and make sure that the other side is very similar. Well, what happened? I think that's just my eraser go On the other side. So to make sure they're
about the same size, a neat trick that you can
do is if you have a ruler, you can just measure
the top being like, oh, it's about that high. The bottom, oh, it's
about that low. And then you can draw
your little circle and on the other side as well. I'm gonna go to, to do
I'm drawing in Missouri. Go the other side. Alright. Okay. So you can see I've got about two eyes there.
Does everyone see that? Or two circles? They're
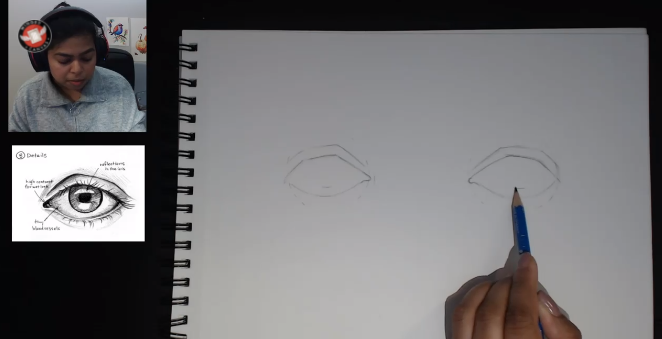
not really eyes yet. So I'm going to start
with the part of the eye, like the lines, the main lines
that we have in our eye. So the lines that outline
our actual eyeball. And then there's always a
little like an eyelid line. Okay, so I'm going to
draw a diagonal line for, I'll get really
close to the camera. For this part of the eye, the eye part that
comes from the middle. So if you've got your
middle line here, you just going to draw a
very light diagonal line. You can see it
doesn't really go to halfway up the mustache, my circle, I'm going to press a little bit
more so you can see, but make sure to
press really lightly. I'm gonna do the same
thing on the other side. Just making sure they're
about the same height. What we're gonna do next
is we're going to draw the little U-shaped part of
your eye that you can see. Does anyone see that below? But this little U-shaped pattern
I'll show you right now. It's like a little C-shaped. So if you want to
draw a little C-shape in your tear duct because that's where
your tears come from. They come from really close
middle part of your Eye. That's what we just
drew in these two little C-shaped see them there. So if you'd see
these to see lines, everyone see these
to see lines here. I'm just gonna
make a little like almost like a little
bump that comes up. I'm going to press a
little bit more so you can see it's not a big bump. Just comes out. I'm gonna make the part that goes
over and back down. Okay? So if you want, you can make this curve for now. I'm just going to
make it come over. It's almost like a curved
line that comes down, but it's kinda
straight at the top. This one's quite a wide eyes. So if you want to make it
a little bit less big, There's lots of different eye
shapes so you can make it any way you'd like to see that this one
comes a little bit. Hello, press a
little bit more, but just pressing really lightly. And once you like
the top of the eye, you're like, Oh, I
like that shape. Then you can keep it. I'm under the same thing on
the other side. So you can see that
there's a short line here. I'm going to draw
that one more time. Break it down a little more here so you can see short line. If it's too, you can see it. This one's going kinda higher. This one came down
really quickly. So I'm gonna change
it just a little bit. So they're going at the
same kind of diagonal. And then it curves back down. And then if I wanted to
make it look more curved, like a curved eye, I would
just go back over the slide. I would curve where there
any points right now? They're just curved it. Same thing here. Now it's pretty close to
the outside of my eye. I'm still going to just do this. I want to make sure they're
on the same height. So if one's higher than the other right now I can change it. So this one is a bit higher. So I can either make
this one higher as well or make one shorter. Just make sure
they're almost about the same size as you work. I'm going to start
where my two duct was. And I'm just gonna
make it very gentle Yulen that comes back to
the other side of my Eye. So not a very big you lie. You don't want it to make
it look like really, really big. So just stay gentle. I go really lightly here. U-shaped are very Smiley
shaped die, right? You can see that there. You want to make it bigger.
You can make it bigger. If you want to make it smaller,
you can make it smaller. I'm gonna do the same
thing on the other side. I'm just going to
measure the bottom. I'm gonna go doo doo doo
doo, doo. The bottom here. That's a neat trick. You can
just elevator and ANOVA. Just going to check that
it's the right spot. Yeah. Pretty close. I'm going
to draw the bottom there. I'm just gonna go in centromere, just get the bottom there. So just as you're working, make sure they're
about the same. I know they can't be exactly
the same and that's okay. Just, just you
investability. Fix it up. If you see there's
a big difference. This part isn't too hard. So remember our tear ducts. I'm just going to
draw a line above my eye and this is
just for the eyelid So sometimes your eyelids
are a little bit bigger, sometimes they're a
little bit smaller. And the picture you can see
there's a line above the eye. So just above the eye, I'm just gonna leave little
bit of space and it's almost like copying the line
that already exists. Alright, let's see, there's
a little bit of space and then it copies the line
that already exists. It just comes up a little bit. Sometimes they're a
little bit closer or sometimes a little bit
further than the eye. And then you can
see on the top of the eye it just copies
it and comes back. I wouldn't draw any details yet. You can just take a look. I'm just drawing a line that almost copies the
top of the eye. And it's a little bit wider on this side and a
little bit closer to the eye on that side. So if you want to try it out,
I'll show you on this side. So it's just almost copies
the eye on the other side. If you want to erase
your dotted line, you can gently start
to erase that. I'm not erasing all of it. I'm just tracing the
top, the bottom, and the to sidelines that helped me measure the length of my I still have some
of my dotted line. You can see that. But I'm starting to erase some of
the lines because they're starting to interfere
with my drawing. I like the dotted line. But right now it looks kinda funny because there's
no eyes in there. So I want to draw the eye in this circle like the pupil part. And you can see in the drawing below the eye that's looking at us as a little bit of
space from the bottom, like the whitespace
at the bottom. I would say if you're thinking about how much
whitespace believe if you were following similar
measurements that I was right at the
bottom of the eye. So if this is the
bottom of my eye, I'm going to leave a
little bit of space. And I'm just going to
draw a little line there. Okay, I'm gonna do
the same thing on the other side to
my best ability, I'm gonna try to
measure them out. But I've left a little bit
of space at the bottom. And I'm going to draw
my eye in there. Okay. The next part,
isn't that hard? It's obviously the pupil. The pupil is a circle
the eye apart. Lots of people have
different colored eyes. So you can definitely make the eyes different colors
once you get there. But they're all circles. The circle does Overlap or desk go underneath
my Eye little bit. So if you want to take a look, I'm just gonna keep
this bottom line. I'm going to start to make
a curve that connects. So this is gonna be
my circle, my pupil. You can say Drew
part of it in there. The reason why it's not
a full circle here, it's because pretend that
goes underneath, right? It's being covered by my eyelid. If you look at my
Eyes on the screen, Just because I think because
you're looking down at me, both of them are
covered by the spaces. I'm just going to finish
up my circle here. You can see that I've got most of it
and I'm trying my best to make it a circle. Don't worry if it's
not a perfect circle, That's not what we're
aiming for here. Doesn't really have to be
if you think about how your eyes kind of
covered a bit anyways, does not be perfect
circle. Okay. I'm gonna do the same
thing on this side now. So I'm just trying to measure out and see how big
my eye is here. And I'm just going to
do the same thing. Just blocking in my
little circle shape. So all I've got right
now or two pupils, it looks really
worried right now. You can kinda see that if your eyes look a
little bit worried, it might just be because of how your top of
your eyes shapes. If you want to comment
down a little bit, it'll get a little bit
better as we shade, but you can make it less
pointy of An Eye if you want, you can just make it a
little bit more curved, a little bit more relaxed. I'm going to draw
the iris and neck. So that's the black
part of your eye, of the part where you
can kinda see through. And that goes right in
the middle of your eye. So it's just an extra circle you can see I'm just
blocking it in. So Fun fact about Eyes is
if there's like a big, bold, bright light, usually your pupil feels like it will look like it got
a little bit smaller. So to just to the light. But if it's like really dark, like if you're in a
really dark room, your pupils adjust and they
get a little bit wider, ***** and kinda see
a little bit better. Sometimes I can pictures. You might see that the pupils
might look a little bigger. I'm just making them like
a pretty regular size. I don't want them to be
pretty big, are pretty small. I just want them to
be like normal size. So that's what you'll see there. And one more thing about the tear duct is I'm just going to draw a little
curved shape there. Because if you look into
your own IOC it to, if you get really close, you'll see where like your skin on the inside of
your head starts, I guess where your eye
ends and your tear duct. Okay. We're gonna start slowly
with the shading process. So if you still have
dotted lines like I do, you can start to
get rid of those. If you want to think
about something creative to put in
your eye as well, you can think about that
while we're doing this. You can think about
what color I, you'd like if we
want to think about that because we
are going to start shading a little later. I want to make sure that
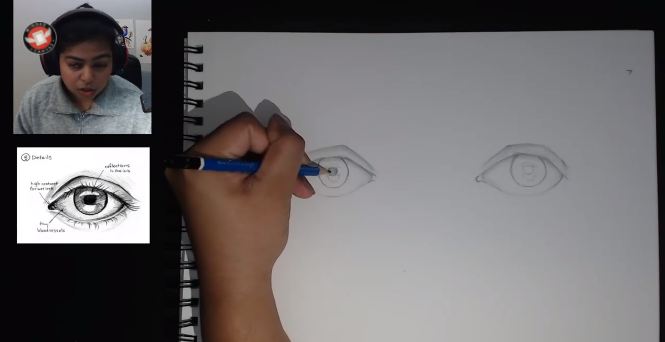
you're on the right track. But I can see it
looks like to eyes. Do it empty eyes?
3. Finishing the Drawing: Okay, I'm gonna get started
with the next step. So I'm just going to
keep it like this. We're gonna be
shading in our eye and you can see the
two corners of the eye below the tear duct and then the opposite side of your eyes
shaded just a little bit. So I'm just going to
find that part of my eye so you can see
the edge of my eye. I'm just going to really
lightly start to shade there. So right at the edge of
my I'm just going to shake gently as I get
closer to my Eye. I'm not going to
shade anything in. So go a little bit
harder because I know that it's harder
to see on camera. But at the edge of my eye, I'm just Shading a little
bit shaded in there. If it's harder to
see, you can outline some stuff but
please don't pass. Press hard because it makes it harder to erase if you need. I'm just going in
on each corner. I'm just gently shading. As I get towards the middle. I'm not going to shade anymore. It's just really gentle, not pressing hard any anywhere. We're also going to shoot
right underneath or eyelet. So automatically
because your eyes are kind of in your face,
they're like inward. You get a little bit of a shadow right underneath your eyes. So I'm just going to
gently shading here, you'll see I did play
shade gently, gently. Even though this part
of your eye might be white like the outside area, you will have a little bit of shadow that happens
automatically. Automatic shadow. It's like when you can't get
rid of your shadow. So is there so you
can see it just shaded the outside
of the eye shadow. So the top of the Aye.
Mr. Outlining my Eye. You can do that as
well if you'd like. I'm just making sure
I like the shape. So I'm gonna do the
same thing on the other side if you want
to take a look at what I'm doing on the
corners of the eye. I'm just shading it
in a little bit. Because remember, even in
the white parts of your eye, you do have a little
bit of shadow. Undo the quantity eye as well. Then I shading the shadow. Working towards the
next couple of parts. It's more shading detail going over lines that you
know, you're keeping. So if you want to gently Overlap any lines that
you know, you like, like the top eyelid, your little lens here. I wouldn't press
hard into any areas. I'm just overlapping and
areas I know I want to keep I'm going to add the
shadow to the top of my eye. There's also a little bit of shading that goes
into your eyelid. So if you want to follow
along with this part, I'm just going to make sure that this is the eyelid that I'm keeping right
underneath the eyelid, I'm just Shading a little bit. So it looks like it's folded, has a little bit of 3D. Depth. Depth is just like how far something looks
like it's going in. Okay. So you can
see I just gently shaded that line there if you're not sure how
to shade a little bit, just gently go side-to-side, go outside the
line a little bit, instead of staying inside
or lines we wanted to shade underneath them. So it's okay if you don't stay exactly in your lines today. Vacancy I'm just gently
shading underneath my eyelid. Don't be afraid to add shadows. Administrate under the eyelid
you can see right now. I'm also going to
gently just shade the whole eyelid so you can
see a little bit of value. I'm just going super lightly, just so it's not white anymore. You can see I'm just going
over the whole thing. You can barely tell it's even
shaded in it, super light. It's like one of my
lightest shaded areas. You see that? Do the same
thing on the other side? Gently shaded in both eyelids. Still see that my eyelids
have shading at the top, making it look like a shadow. You can slowly start to
think about your pupil. You might have some
shine in your eyes. You might want to
block those shapes. And so underneath my
pupil I'm just going to draw a U-shape or it can be
touching my people even. And it's almost gonna
be a little rectangle. But it depends on what's like, what's reflecting
in your eye, right? This just might
be a bright light that's reflecting in my eye. And I'm just going to
gently block it in. It's like little
rectangle and redraw the same thing or a longer
shape above my pupil? So you can see there, I'm going make it a
little bit bigger. It's overlapping my
pupil just a little bit. So if you want to have
anything overlapping, you can you don't have to have the same shine
mark is me either. I'm gonna do the same thing on the other side just
so they match. It's like a mirror. So maybe if it's pointing on one side, this side, then it's gonna be
pointing on the other side. And I'm going to do the same
thing at the top to my eye. Alright. So right now
it looks kinda funny. It's okay. If you're ready to start coloring in the pupil, you can gently color it in. I'm not going to gently fill
it in a bit darker later, but for now I'm just
filling it in so you can see not colouring
in the shine mark. Okay. I'm just gently shading is gonna be quite a bit darker
later as that goes, I'm just going to
gently Overlap always make sure not to
press really hard. Because one, it's going to look really shiny and you might not, it's not the sun that
we're looking for in the eye that's like the shine
of when you press too hard. Looking for different
kind of shine mark today. So ligand to start
to fill that in, we're actually pretty
much almost done. The only things we
have to add in is eyelashes and then all the shaded areas
that we want to go with. So right now it
looks a little bit funny because only certain
areas are colored in. I can tell right now at this eye looks like it's a bit
smaller than that. I am just going to slowly just erase some
areas are mixing the eyes or it's too much
makes them areas look like they match up. So when you feel comfortably can slowly start to
outline your lens. Your is well, not
pressing really hard. You can see him just shading. I'm just outlining it so
it's a little bit bolder. You can see that
same thing here. Just outlining. Just outlined the
eyes a little bit. I can tell that this one just looks like a little bit wider, so I'm just going
to make it a little less wide at the bottom. So as you go, if you notice anything that you need to
change, feel free to change it. We're also going
to start to color in our eye duct very soon. I'm gonna get the pupil in. So sorry, I got
the pupil and I'm gonna get the inner
tear duct in. So if you guys want to shade
that just a little bit, you can start to outline your
eyes as well if you'd like. This is just to make sure you know which areas are
slightly darker. You can see him just
colouring in the little your deck there. I'm not colouring all of it in, but I'm going to start to
kinda outline my Eye of it. Alright, so I'd recommend if
you haven't done this yet, I'm not going to outline
the bottom too much, but every other
outline of my eyes. So the top part of my eye, the bottom part of my
eye, I'm just going to outline a little bit, 60. That one's outlined a
bit. I'm going to leave a little bit of the
bottom of the air. So no matter what gender you
are, everyone has eyelashes. Just depends on how big or
small you want them to be. So that's just
something to remember. You can make them bigger,
you can make them smaller. I'm going to draw them with
you so you can decide. Have I got look. You can see
I just out on the top there. I'm going to outline or
color in my inner tube duct. Feel like there we are. So you can see I'm
just continuing the bold line a little bit. I'm going to continue
on the other side. I've got, you can see
how much the bold line changes, how things look. You're trying to make sure
they match up the best you can then have to
match up perfectly. You also want to
add a little bit of shading at the edge of
your eye if you'd like. You can see just at the edge of my ad shows a little
bit of shadow. I'm just pulled Anning or
and share a little folder. So I'm going to start with
the eye lashes and stuff. Okay? So I'm going to draw a couple of
arrows on my artwork. This is just a reminder
to show you which direction the eyelashes go. Okay, So they follow
the curve of your eyes. So if your eyes like this, so don't draw this in your eyes, kinda like this, right? It curves. Don't draw those in. Your eyes curve. So your
eyelashes follow that For example, if I
drew an eyelash here, it goes up and out. So don't draw these ones in. This one goes the other way,
it goes up and out that way. You see how there it's
almost like fireworks. Biobricks don't go all
the way up, right? They kinda come
out a little bit. That's just like your
eyelashes that come out a little bit and then you
can see that they're curving. Do you see that? I'm going to draw those
lines here so you can see the curved out and out. But when they get
to the middle of your eye, it might be going up. And then they go the other way. Same thing for the bottom right. So if they come out, they go out and
down, out and down. I'm down out and down. If these arrows help you out,
feel free to draw them in. If you don't want to draw
them and you can just draw the eyelashes with me. But I'm going to erase
these arrows later so you can see how they
look at the end. Okay? I'm gonna start with
the bottom of the eye. So the bottom of the
items starting with, because we have to
draw a little bit of the lid at the bottom. I'm just gonna go into
the bottom of my eye, everyone, if you see
the line at the bottom, I'm just gonna give
a quick outline underneath that is
very thin outline. So all I'm gonna do
is take my pencil and you can see I'm just outlining
the Gautam of my eye. So little, little, little you can see here I'm
gonna do on the other side. Right after this, I
add my eyelashes. So do you guys see that little little outline
underneath my eye? I'm under the same thing
on the other side. Alright. So just
make sure you've got the underneath I outline. I'm going to start with
the little eyelashes. Okay. So if you'd like,
you can start with me. I'm just going to add a
little bit more shading to this side of my eye. Here. Shading goes a big way, really helps make your eye look a little bit
more realistic. So if you want to
try that today, I'd definitely recommend it. But your eyelashes. So if you want to start with me, I'm gonna show you how
the eyelashes got out. Okay, so I'm going to
start with the bottom because they are a
little bit smaller. I'm going to start at
the corner of my eye. All right. So if you want to
take a look at your eyelash, if you will even look
at your own eyes, your eyelashes that are closer to the middle of
your eye or a little bit tinier than the
ones at the edges. So keeping that in mind, the ones at the edges
I'm gonna make come out like my lines here
out like a firework. There's gonna be short for now. So they're gonna
come out and over. There's a little bit curved. They don't have to
all be the same. Like same direction
they can come out and like Overlap a little
bit if you'd like. You don't have to have
a lot of them either. Just gonna put a couple in. But they're coming out and over, kind of following those
those lines that I drew. You don't have to
have a lot either. So sometimes people have lots and lots of eyelashes.
That's okay. If you want it. Seem just
drawing a couple there. When I get to the middle, I'm just making sure that my direction
changes a little bit. The ones in the front
of the eye closer to the the tear duct is a little bit easier
because they're short. There's not a lot
of them. So I'm just trying a couple there. If you want to tell
them really long, you can draw them really long. But you don't want to do this. You don't wanna go
leg straight, right? Because that starts
to look like a sun. You want to curve them. So if you want to see
here, they're curved. They're not all the
same length either. Some of them are shorter, some of them are longer. And that's just naturally
how eyelashes are. You might only see
the ones that are really long because
that's the longer ones, that's the thicker
ones that you have. But you do have little
tiny ones as well. So make sure that
you draw a couple of tiny ones as you work. So you can see I've just
got a couple there. I'm gonna make a couple of
them a little bit darker. I'm gonna do my second
eye a little later. I just wanted to make sure
you guys get the first by. If you're doing one,
if you're doing two, then maybe you can do the little the other one later as well. But I'm gonna do the
top eyelashes now. The top eyelashes are
a little bit bigger, no matter which
didn't know you can do bigger eyelashes,
smaller eyelashes, but usually just
like I mentioned, the eyelashes on the
outside or bigger. The eyelashes on the inside
are a little bit shorter. So if I'm starting
on the outside here, I'm just going to make sure
that this line is pretty bold. So I can tell. Then I'm just going
to start with my arrows so they kinda
come outward like this. There are a little bit bigger. So I'm gonna make a
couple that are bigger. They're curved. The big thing
is that they're curved, right? Make sure they're curved. I'm going to add a
couple in from me. I actually don't have
too long of an eyelash. They're kinda short. So I'm just going to make
sure that I have a couple kinda as
they go across. And there's some that come
out obviously in the middle, then some shorter ones
closer to the end. Just make sure they're
not all the same height. Because then we'll look kinda like a Barbie doll where you have there all the same size. Almost like a robot. You know. If you did want to add a
reflection into your eye, you might want to think
about what it is. And if you wanted to draw
a sketch and you can, if you don't want
to do a reflection, what you're gonna see me end up doing is
I'm going to draw a zigzag line that goes to my people and then to
the edge of my lens. So you can see here, I'll finish up my
eyelashes so you can see, but I'm gonna do the
inside of the eye now. Now we're pretty much done
4. Colouring the Drawing: I'm going to start the
inside of the eyes. So if you wanna
do this in color, like he chose a color you undo and color you can
definitely do it in color. You'll just see me
going side-to-side, look at my zigzag line
and it goes to my pupil. And then it goes outward. Overlap my shine mark because remember I want it
to be shiny. Of course. You want to go lightly. Exam just putting the
zigzag line in first. Once I put the zigzag line
and I'm going to shade it. But I haven't shaded yet. If anyone wants to
see how big this is, the zigzag shape
that I'm adding. But just tiny in my eye. I'm trying to really
quick so you can see there In small. Then
I'm going to shade. Okay, so any lines that
you really want to see, sometimes you can
see those eyes. The lines in your eyes
a little bit easier. Sometimes it's a little
bit harder to see. If you're starting to
lose your shine mark. You can outline it like I am. So I don't lose it entirely. That way when I'm shooting, I don't forget that it's there. And now because those
lines are and I'm just going to gently
shading parts of my eye. Usually the top of the high, I'm just gonna make a
little bit darker because there's a bit more shadow there. So the top, a little bit more. Even though I'm Shading
with pencil and my add a little bit of
color at the end. But I haven't decided yet. You can see what a difference it makes when you start
to shoot in the eye. If you're starting to lose those little lines in your eye and you want to draw them back. You can see I'm adding
them it afterwards. We do that to the key to making it look a
little bit more realistic is make sure you shade in this little bit here
and you can see my eyelashes aren't very strong. So I'm gonna go over
them once I know that I'm keeping them and
I like those ones, then you can go over
a little bit more. You can see I'm going
over some of them. You can have bigger
ones, you can have smaller ones if you'd like. But shading is really important here to make
sure it looks a little bit more like a real eye
shading right underneath. Yeah. Your pupils, one of the darkest sparks sparks
spots of your eye. So make sure that you
go and Overlap that as many times as you can without
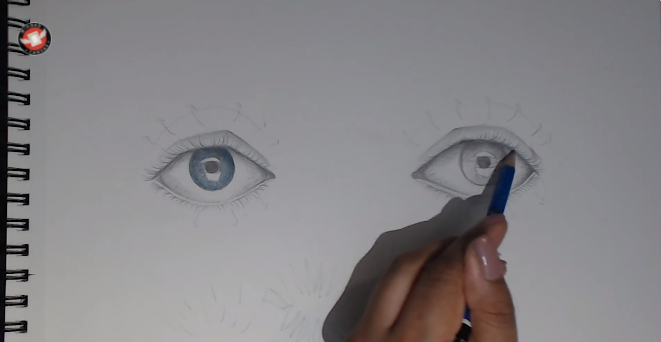
being shiny you don't want. But I'm going to start to add shading to
the bottom of my eye as well because it
looks like there's not a lot gone down
at the bottom. I'll show you the little
veins are the landmarks, the blood vessels in your eye. I'm just gonna make a couple of wiggly lines that go towards the edge of my Eye so that both edges of
my eyes so where the tears are and then
where the end of my eye is. You don't have to
pressing really hard. If you press really hard,
your is going to look like they're really tired. So try not to press
those in really hard. I'm just drawing a couple of
wavy lines, zigzag lines. In my I dropped some
at the bottom here. Want to have too many. You don't want, want to
diode minds as well. You can tell because
the pupil super dark, it does look a bit confusing. It looks like it's
really darken that too. I'm going into the top and adding a little bit more value, making sure that there's
areas that are also similarly dark in my artwork that'll
help balance it out. Um, do the same thing now
so you can see it did what? I do some of the
eyelashes again, I got to the other eyes,
so come back to this. But other than that,
we're pretty much dense. If you want to add
any final touches, if you want to start eye color. If you want to change
the background entirely, if you want to make
it look like it's, have you guys ever seen like illustration aren't
where they like, draw what looks like
a piece of paper. So it looks like you
like Tor piece of paper but you actually
didn't tear it. It's just like drawn in You can kinda make an illusion
that way if you'd like to. But I just make sure that
your eyes are first done. I'm going to hop
onto my other eye. If you want to add
color, I'll show you really quick
how to add color. I'm trying to think about
what I coloured like. I already coloured
in for the majority, so I'm just going to
choose a color that would look well,
it's already dark. So I'm going to use a teal or a blue. So you can
see that here. First of all, I just wanted to make sure it's sharpened so I don't imagine anything that
I don't want to smudge. So I'm just going to
use this blue and I'm just going to outline
my eye just a little. It might be difficult to see because it's already
done in pencil. So if you do want to
go in with color, you might want to erase just
a little bit if you'd like. Let's see what color
does to my scene. I'm just are my eye here. Finishing up one of their eyes. You can follow along here
with me if you'd like to. So I'm going to
slowly start to add eyelashes, this one as well. You can see how much
of a difference color and eyelashes do. I'm gonna start to erase any of the sketch lines
that I made as well. If you have any sketch lines leftover and make sure
you start to erase those. If you want to add
any skin tone. I know I didn't add any of that. You can definitely
add it if you want. Add some shading, maybe started different
drawing if you'd like. You can see I'm just adding my eyelashes and
it didn't realize, but I was adding quite a
bit of eyelashes here. So I just wanted to make
sure they match up on the other side and they're
still pretty curved. I remember closer to the inside of the
middle of your face there's less are not
as many eyelashes. So if you're ever looking to practice your sketching
or drawing skills, eyes are always a good
one to come back to you. Because you get better and better the more
you practice, right? That goes with anything. Anything that you practice enough, you get
better and better. So you can see, as
I'm starting to add more shading
and more eyelashes, it's starting to
look more like an I. And C. I'm just getting
my eyelashes in once I've got enough
are enough that I like, I'm going to start to erase the guidelines to the bottom lines. In the top lines. Make sure
you have shadows as well. So I'm just making sure that
my eyes are outlined enough. Start to erase the
guidelines are to color my island more than yeah. Remission. Start to slowly erase all my guidelines. Since you for the most part, my eyes are done. One of them looks like there's shaded in a little bit more. So I'm just going to go back to the side and see
if I can get it. It's adding any last shading. So just remember the big, the one of the big things that I'll share
with you that you want to make sure you have if
you don't have it already, is just make sure underneath your eyelid there is some
shading because no matter what, that will really add to your artwork and make
it look a little like. It's a little more real, is a little bit of
a realistic guy. You can see I'm just going
back underneath my eyelid. Shooting, shooting away. Thanks for joining
me for this lesson. I hope you had font and
I'll see you next time.
 Winged Canvas, Classes for Art Nerds