Transcripts
1. Introduction: Hey, my name is arruniya and welcome to our
drawing class. I'm an artist that specializes
in drawing and painting, and I really love experimenting
with different media. In this class will be
breaking down how to Draw a Hand Holding Objects
into different components, including the
fundamentals of a hand. Drawing two hands
together, shading details. This project is beginner friendly and guided
step-by-step. Our goal is to practice our
drawing fundamentals and use the creative process and
the Drawing Method you can apply to different Art
projects in the future. Over the span of these
bite-sized lessons, you'll not only learn
how to draw hands, but how to break them
down into simpler shapes, along with Realistic shading techniques for pencil drawing. With these tools, you'll
feel more confident in drawing other types
of hands and imposes. I'd love to see your artwork, so feel free to share
your completed artworks with me for online feedback. Now let's hop in
and get started.
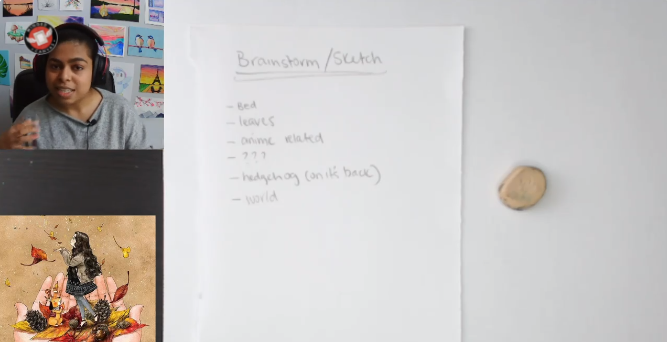
2. Brainstorming the Drawing: Welcome, welcome. If we're
going over materials, I would say scrap paper, paper to work with little later. Make sure you do have an eraser and make sure you
do have a pencil. And then if you have
colored pencils or something to color with
that would be awesome. So on this paper today, I would say that
we're brainstorming, so we're coming up
with some ideas, but we're also sketching. So it's not just a paper that you're gonna get rid of later. Sometimes we keep
brainstorming or sketching papers because they help
build ideas to today, as I mentioned, we're
gonna be looking at some hands before I keep going. And I know hands can be kinda tricky or complicated or
make it a little nervous. They do for me too sometimes. But the big thing to remember today's we're just
learning something basic. So we're just learning
how to hold a hand like this or draw him like this. Then we're gonna be
putting the hands kinda together in a little
hand position like that. It'll do have a couple of
pictures that we can do today. And the big fun part actually is you don't have to draw
the whole hand today. You're only going to
be drawing the outside and you want to put
something on the inside. So for example, if there's
something you really enjoy, like my water bottle, you couldn't put that in
your hands if you want. If there's some other stuff
that you really like, you can put that
in there as well. That's what you
want to brainstorm. What do you want the main
component in your hands to be? To want to pretend old
like a puddle of water. What would you like to
do? Right? So before I do get started, I just wanted to show
you some examples of the hands that I was
talking about before we actually draw that will maybe give you some ideas
for what you want to do. So first, let me show
you this one because this one is not the angle
we're going to be doing, but it is kinda like
what we're doing, where we're going to
have a couple of hands and we're going to
put something inside. So you can go the more
kind of interesting route here and you can hold a book if you'd like, you can hold a bed. This one's kind of interesting
because you can take something that's not
really realistic. Like realistically you can't
really hold a bed, right? You can hold like a toy bed. But think about
things that you like. So what are some
things that you like? This one is a bed, you can keep it a little
simpler if you'd like. Sometimes I really like to go towards things that I enjoy. I really like leaves and stuff. That's something I
enjoy painting a lot. And it may so something
animated related. You can also decide later
if you just want to draw in the hands first and
get started hedgehog, yeah, that one's cool too. You just might
want to figure out what perspective
you're looking at the hedgehog or you're
looking at from like you're holding in the back. I would say the big focus today when you're thinking
about your hands, it's just think about shapes because everything is kind
of built up with shapes. And you're also going to
think about how the shapes relate to each other, right? Because like your
thumb was not gonna be ginormous compared
to everything else. They all work together to create different
shapes and spaces. So just something to
think about there, I'm going to show my second
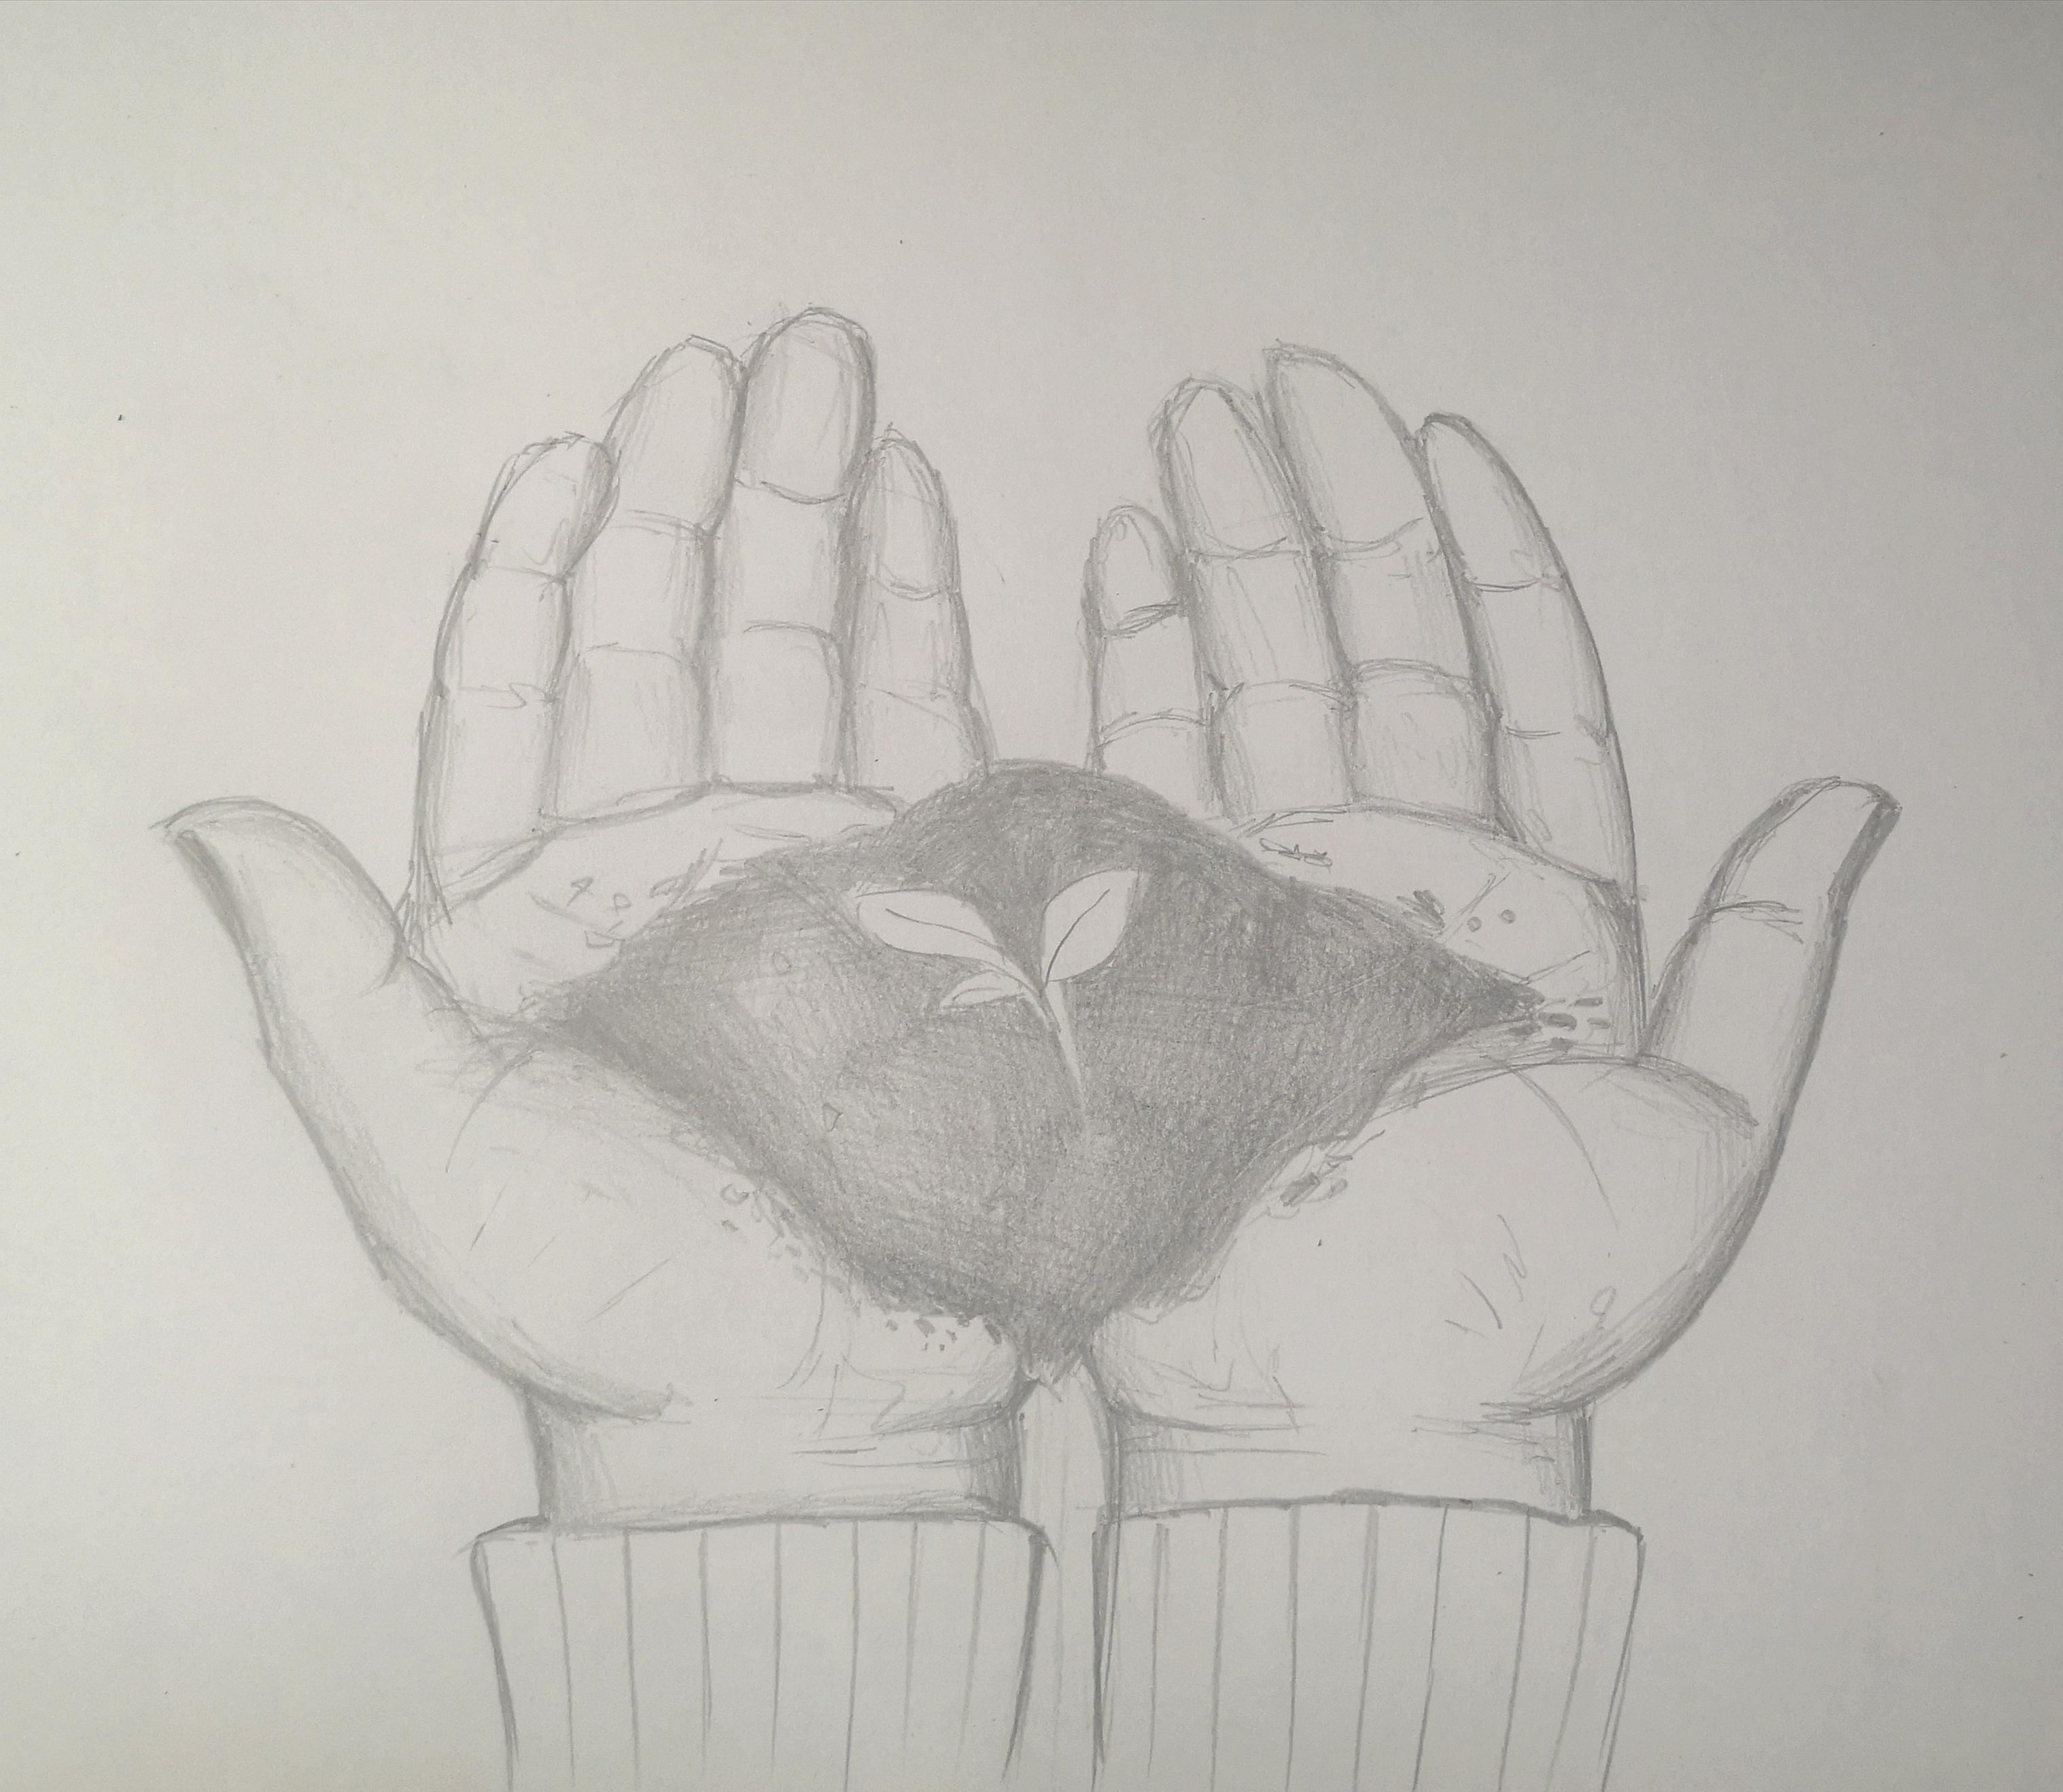
image before we start. This is a little bit closer to our perspective that
we're going to work. I really enjoy about this one is you can kinda see
you at hands, right? You can see the hands
on the outside. You can see them
coming together. But you'll see that they're
also covered by something. So it's not as hard as you
think it's going to be, right? The big goal here is to
build the shapes together. And then you can
always erase and add things on top if you'd like. You can change the tones, you can change the things
that are on the inside. That's okay as
well. If you're not sure what to put on the
inside yet, that's okay. Just keep your brainstorming
paper kinda handy and then we can decide together and what to put on the inside. But the big nice
thing about this, as you can see that most of the space in the hands
are covered, right? You're not going to
lose out to MAC layer. You'll have an opportunity to fill that up if you need. Okay?
3. How to Draw a Hand: I'm not going to start
our good copy just yet. I just want you to
go over some of the base parts of
a hand with me. So that's what I'm gonna do on the bottom of my
Sketch sheet here. Once we have the idea of
what a hand looks like, We're gonna go on
to our big sheets. So let's jump in. I'm
just going to show you the hand that I was
talking about earlier. Drawing lots of different styles of hands is a bit more advanced. That's why we're switching
to just one hand or one perspective
of the hand for now, basically we're going to find the parts of the hand
that we see their tears. A funny kind of note
that's made about hands. If you see the hands,
even if you look at your own handled,
put my hand up here. You can see the top of
your hands kinda have like a mountain shape right
there, not all flat. You'll even see my hands. Your hands might look
slightly different. Everyone's hands are right, so, but there's
three main sections. So you've got the middle
part of your hand, your fingers, your thumb. That's kinda what we're
going to build in. And then there's other
sections within that. What we'll do now is maybe
on your scrap paper. So this is my scrap paper here. We're just going
to draw one hand together justifying
the important parts. And then that's going
to help us build the hand on her on
our final piece. But what I'd like
you to do maybe is we're just going to find a rough kinda hand shape in here for the base of your hand. This big part I want you to just start with maybe
like a rectangular shape. So we're just
learning how to draw just a basic hand to start. So you have an understanding
all the parts we're going to look at on our on
our bigger sheet. I am gonna go a little bit
darker just so you can see, but just a reminder to
keep yours really liked. You'll see here I tried my
best to make a rectangle. You can see it's kinda
curved at the bottom. Can make it a little bit
bigger if you'd like, just start with a basic shape. But I'm just going to find
the fingers here at the top. Even if you look at your
own fingers, everybody, you'll notice your middle
one is usually the longest. So if you're ready for the hands are like the
fingers part here. We're not trying to thumb yet. Don't worry about your
thumb. But you'll see here that usually the middle
one is the longest, right? And then these ones here,
this sometimes depends. It depends on what kind
of like your fingers. Sometimes sometimes people have a longer a second one here. Sometimes they're
about the same, usually just for a rough guess, I would say just keep
them about the same to start minds are
usually like that. And then your pinky is lot
shorter and then your thumb. Okay? So if you're ready, you can kinda take a
guess to this space here. You can almost use
that as a reference. A little bit smaller
than this or about the size of
your rectangle. We're going to just
draw a mountain up top or you can just put
a little guideline here. So if this is my section here, I'm gonna make with my fingers. I'm just gonna make
a little bit taller. Just going to mark
off the top here. So just kinda measured
this part, my hand. And then I just
measured the top. So this is probably the
tallest hand that I have. Are the tallest
finger that I have. Sorry. The one you're
comfortable when you're ready. If you think about it, there's only four
fingers here, right? So this part, this section, if you want to
just draw a couple of a rough lines up here, roughly your hands, your fingers will stay
within this section, right? I would say the pinky
is a little bit wider, but for now it's fine. But from here you
can kinda build a mountain shape if
you'd like going down. So top point, It's enough to be pointing necessarily, but it's
like a mountain. This is just a guide
for your fingers. So they're not all
going to touch there. Maybe they're not all
going to perfectly fit in. That's okay. But roughly your four fingers
are gonna go there. If you're Drawing for fingers, if you think about it, that
splits into three lines. I would say just try to split them into four little
sections. So I'm gonna go 123. If you notice that one is
bigger than the other, you can start to change it up. But really roughly here, I drew three lines to separate
to make four sections. I'm also noticing right now, minds are kinda diagonal. So I'm going to straighten
them out a little bit. So roughly I've got
those lines there. Don't worry if they're
not too perfect yet. If you want to curve up the
top of the fingers, you can. So this is where they might not follow the guideline exactly. You're just kind of bending, are following those fingers
spaces a little bit. Wherever that mountain line is, you fingers might
fall within there. There might look a little
cartoony to start. That's okay. Just make sure the middle one is about the taller
shape that you have, a pinky right now you'll notice that at least
on the reference here, it does get a bit
wider on your hand. So if you want to try
this with me, everybody, you can make your rectangle
little bit bigger, but you can TB edge of my pinky. I'm just making it kinda curved in a little bit of
extra space now. It's just where we are. We've got our kinda like
a rough rectangle shape. We've got our four fingers. We kind of curved up the
side of our pinky here. If you want, you
can think about it. The edges of your, these lines here, they kinda
come down a little bit. So if you wanted to
have some of these kind of curve in there, curved down a little
bit. Have that. So just as a reference,
you can look at your own hands as well. That thumb here you'll see it does depend on which
hand you're doing, but for now I'm just
doing my left hand. It'll just be mirrored
for the other side, but the thumb does come out
of your hands a little bit. So if you think about
it, you can draw it like an extra section here. Usually not for everybody, but you can see how my thumb curves out a little
bit. The curves right? So at the edge of this,
a little bit lower, I'm just going to
have low curved a little rectangle
here if you'd like. But this curves
into your finger. It will start as a
rectangle. I'll show it. I'm going to tell you
how it changes because right now it looks like my hands are really squished, right? It looks like it's
really squished. I'm going to show you how
to change that in a moment. The big thing about
making it not squishes, you've got to make
this bottom bit here, come out a little bit. So you just come out
and then back in. Make start to erase some of the shapes a
little bit as well. A lot of people tens
are different, right? If you look up my pinky to
see how short my pinky is. So your fingers to and kind of a just slightly
if you'd like, you can adjust things. But there's three more sections I just
wanted to show you. And then I would say the
base of your hand is done. All these extra
lines and things, those are details
you can add later. I'm just erasing it so you
can kinda see it lightly, just so we don't forget
where these came from. But the last three,
everybody is not too tough. I want you to think about
your hand or your palm, just like you see it in the
picture in three sections. So the thumb part, you'll see the thumb
part is it's not fatty, but like it's like a muscle. It's a bigger part
of your hand here, this thick part here. So if you want, you can kinda
find this overly shape. It kinda goes into the
middle of your hand here. If you want to
draw it in as like block it in like that you can. But this parts
usually pretty big. This is the thick, thick but roughly draw it in. You'll see that if I'm
looking at my rectangle from before and making sure that I
hit about at least halfway. There is an oval or
section here on the top that's kind of like an oval
if you think about like this, roughly it's not
perfectly like this. I know that much, but roughly
it's like an oval here. So that's like this part. Does it heads up as
to what I just did. I added one big one here. There's like a long oval
section here at the top. And then there's a
third section here. So if you want to
start drawing lines, identifying lines, you can
draw those in if you'd like. These are now just
detailed lines. So at this point
you've got the base of your hand already
in there, right? For your sections of your hands, if you want to draw a couple
of lines and you can usually like thirds roughly, right? But at this point
you've got your hand, you've got the
base of your hand. You want to draw a
little wrist, Go for it. Usually your wrist
isn't that small, so make sure it
matches up to how wide your you'd make your handle
a bit wider if you need. My hands feel like
they're a bit wider. But at this point
we've got the base. So if you think about it
like this, everybody, what we just drew
is just like this. But this time like the
other one's a little bit curved so you might see some of the fingers get a
little bit squished. Or you might see this part
being a little bit shorter, but similar idea, right? I'd say the biggest difference
is just this part looks a lot bigger because of the
way you looking at it. But you can draw them just
like this if you'd like. Okay?
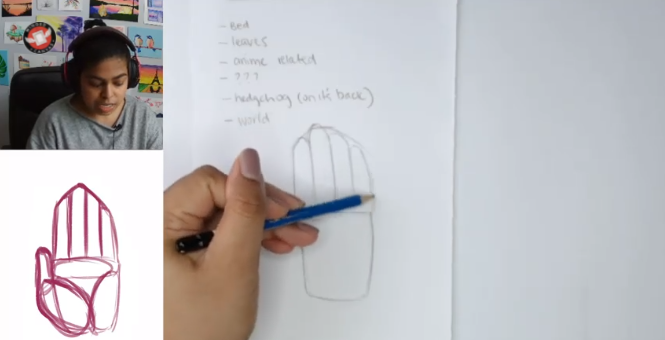
4. Sketching the Drawing: If anyone's curious to what
I'm gonna do right now, I'm just finding the
middle of my sheet. So I'm going to be drawing two hands if you think about it. So if you want to
draw to with me based on the idea of a
hand that we do have. Now, you can start to
split your sheet in half. I'm just looking on
my screen just so I can roughly find the middle. So I'm just Just roughly
drawing a line from myself. This is just so I can
separate the hands that I have roughly. I'm going to be erasing
this a little later. It's draw it in nice and light. So same idea if you're
ready to start your hands, just like we started
with our rough sketch, you're just going to find
those rectangles shapes. This time I'm just going to make them a little bit bigger. Because if you think about it, I want to have to. So I'm gonna make to
kinda rectangle shapes. If I'm finding them about
in the middle of this line. This is the middle, very
roughly on each side. It's almost like I
did a T-shape here. But roughly there's gonna be a rectangle shape on this side. If you want space for the arm, then maybe you'll make
this a little bit smaller, but it's almost
like a trapezoid. That's what it
reminds me of. Right. Constructs. So it's
usually bigger at the top. The bottom. I'm just going to draw to kinda rectangular or trapezoid shapes here you'll see
that they are kinda close if you want them touching, bring them a little closer. I'm gonna get us close
to this line as I can. Maybe I'll have them touch them, having them touch him just
moving the edge slightly. At this point I have two
rectangular type shapes. I don't remember
if you're drawing something big on the inside. You don't really
have to Draw a lot of this stuff on the inside. So it's not a big deal. Just start with your to kinda maybe trapezoid, a
rectangular shapes. If them to your curbing
your hands a little bit. You'll see that all don't like my mountain isn't as
tall as it was before. Gonna see. They are still as tall when
you spread them out. But when I go like this,
they're a little bit curved. So if you want to find that mountains usually for
what I did before us, this is about the same
height as the fingers here. Same thing here. This is about the same
height of fingers here. Remember if you're trying
it with your hands. For this one, the second
fingers to tallest, right? For this one, it is the second finger but
front from the other way. So make sure that
you're mountains. If you're drawing
mountains and just measuring the bottom here, roughly measuring the top. Mark that off for me. Bottom, top, bottom, top. You want them to be more
curved? Maybe they're a little shorter than this,
this time, right? But roughly my mountain shape, it's almost like it's pointing inward to kinda see it. Right? Two little mountain shapes. They don't have to
be perfect guys. Just, just try some
base shapes together. Don't worry too much. Just trying to find these little mountain shapes and then we'll go from there. But from this idea, we build it with this. So you should be okay,
I will keep going. The big difference here is
if you want them to curve a little bit more than maybe their curved a little bit more. What you can do for curves, you can try to draw them almost like little rectangle shapes. So I'll show you how to do that. First. What I would
do is if you want, you can just start
separate them into four. And you'll see this time
they are kinda diagonal. The reason why is because I want them to almost look like they're
curving a little bit. I'm not exactly
like my hand did. That's kind of an awkward pose. But if you think
about it, they're kind of curving a little bit. So if you want them to
curved a little bit, start off with some
diagonal lines. At this point roughly.
Don't worry if you're not 100% about these
lines yet because you'll start to adjust
those as we go. So because right now my
fingers are really wide. What we're eventually going
to do is we're going to find all those little
sections, right? So will find those in a
moment. Don't sweat it yet. What I am going to find
next know everybody is my thumbs because these
are like the wide parts, especially in that angle. Let's see how big this
section looks frame. So I do want to check
in on the next person, but if you were thinking
about your thumb, at least in that pose for me, my thumb is pretty big, so I'm leaving quite
a bit of extra space. Quiet a bit of extra space if you want to practice
it with your own hand. I can even go a little
bit bigger here because I my my thumbs
curving a little bit. So that's kinda why I'm
leaving a bit of extra space. If you want to think
of it like that, you can always adjust it later. But roughly, I've got that
big thumb section going. Okay. So I think the big thing you're gonna
notice for me that I am going to eventually change
is this is very straight, this line is very straight. So eventually it's going
to curve a little bit. So if you wanted to prove anything like that,
you are welcome to This is the part I want
to kinda add in next. I know every hand is different. But for now I'm going to
add this is like a curved, so this is a part of the hand, this part of the hand, the
curvy part of the hand. So if you want to curve
back to your base here, the middle of your
hand, you can. And actually what I noticed
in the picture a lot is do you notice like all thumbs are different, everybody
sounds different. But my phone doesn't curve as much as the one in the
demo. Do you see that? My answer isn't curve as high. So maybe you look at
your thumb, decided it doesn't mind
curved that much, just mine. Dribble a little bit. I would say mine
curves a little bit, so I'm just going to
crave it a little bit. And you'll notice
that the top of the thumb is a
little bit flatter. Flatter here because
it has a nail, right. So this is the only know
that I can partially see. That's why it's
partially flat there. So if you want to figure
out your little curve on each side, kinda flat areas. If you want to have
more flat areas and there's a little
bit of overlap here. So I would say that that's the part I'm starting
to build, right? Because of the angle that this person is kinda
sharing their item with. This part looks really
big personally to me. So if you want to make it a
little bit bigger, you can. But we're going to
start building our item in whatever items you'd like to have
so it can cover up a lot of this stuff
eventually as well. Okay. So just kinda
like before I'm just finding the three parts
of my hand right now. So the muscle, this
oval and this part. So because of the perspective or the angle I'm looking at it, this big oval looks extra bag. So if you want to
draw it like that, you can remember a lot of
it's gonna be covered anyway. So it doesn't really
matter if it looks a bit odd or a bit wonky. You just want to find
those base shapes. So it's a roughly I've got
this part of my hand in. If I'm trying to find it here. This part of my hand and I'm going lightly because
I'm probably going to erase and add some details and then the other
part of my hand, so this is where I'm
gonna make the oval. Does everyone see my pinky
where my pinky would be? Where my pinky would be. I'm just going to
curve it a little bit closer to the inside. If you want them to
touch a little bit, you can have that happen. But the three sections
right now it's dots. That's my three
sections, 123123. And then my fingers. Even
if it looks kind of odd, don't erase the whole thing. You can erase some parts, you can adjust them parts. But if you get rid of all of it, you don't have a like you
can't look back at it, right. If you want to add your wrist,
kind of peeking through. It seemed out of my
risks that rest is definitely getting to
small at the bottom there. So I'm just gonna
make it a bit wider. But at this point we've got the base and they are
curving in a little bit. If you look at my hands, if I'm curving them in, my hands, even space out
a little bit interesting. But they're all like
little curved rectangles. There's like three
sections, 123. You can find those if you don't feel comfortable
with them, you can just draw the lines and then you can start to
decide what goes on the inside. I'm just going to draw in
the outline of the top of my fingers just as a heads
up to what I'm doing. No matter what you end up doing. All just remember though, which
one's the tallest finger. When you're drawing
that, that one looks a little bit
longer if you need. So if you're ready to start
adding anything, everybody, you can start to kinda erase
the play around with that. Add some more finger details. If you don't really
want those to show, you can adjust those as well. Because these lines
are quite intense. You can just look at
your hand, right? You can soften up those
lines a little bit. So I would say like, I have
dislike line going up here. I'm looking at my hand again. I have like a light
line that goes here. And then roughly you're just see me adding
a couple of extra lines. Everybody, if you're ready, start to maybe erase things, add your own personal touch. Don't sweat it too much. We're just giving
these ago today. Just give it a try. If you want to add
a little sweater or something peeking through. I have my my little
splitter sleeve
5. Shading the Drawing: You'll start to
see me, everybody just adding a little
bit of shadow. I'm just going to use pencil today if you'd
like to add color, go for it and you can
definitely add a light shade. I'm just adding a bit
of pencil shading. I will pull out some hand
references, but remember, lots of things just like hands, everything takes a
little to practice. So when you're Practice, don't think of it like this is a really hard drawing and I
don't like to shine it on. Think of it more like
I'm still learning. So this is a great
starting point if you think of it like that. So at this point I'm
just going to put something in here to
look like it's holding. What I'm gonna do
is I'm gonna kinda roughly erase a little
bit of this stuff here. I'm still keeping
most of the lines. You'll see me just
erasing a little bit. And I'm just going to start
a little pile of soil. I'm just going over
the this odd pile of soil in my hands. So if that's what you're
looking at you like, I might add a little
bit of color here just so it doesn't look so odd. I'm also adding little scraps, so it looks like
little bits of soil. You are welcome to keep it
as the pencil sketch I would recommend because we did spend quite a bit of time
just sketching. If you just want to
add a little bit of shaded areas, if
you want, you can. The only areas I'm
adding shading is just around the edges
of my fingers kinda. You can already see it
like almost like if you're hand had an
outline with pen, you can see every kind
of separator section. I'm going to add a
bit of extra shadow or outline it a little bit. So that's the only extra
touches I would do. I would also highly
recommend reading the date on there in the corner. So you kinda remember
when you did this, if you ever wanted to
come back and touch base. But you'll see me just
going around the edges now. I'm just going to
add a couple of leaf shapes or something. Like a little leaf shapes. Just started like a
little tiny plants. Add a couple of those
and then that's pretty much it here for me. If you're not sure
how it's gone, you'll find that even just adding a little
bit of shading. I'm not even adding
it around the middle, I'm just adding it
around the edges will really help find your spaces. If you feel like there's
still kinda rough lines. If you do have any rough lines that you would like to erase, for example, like I
still have some of my mountain lines from before. If you want to erase
any of those, you can. If you want to keep them
because they're kind of like a guideline from before
as well. You can do that. Okay. I am going to take a couple of minutes here
just to shade in some areas, just to make it
look a little more realistic as I did
start the class. Our big focus today is shapes, as well as how they
relate to each other. So proportion, how those shapes work together to look a
little more realistic. So that's what you're thinking about when
you build your shapes. As I mentioned, don't worry
too much about the word Hand. Hand can be really big
and intimidating if you think a bit of shapes coming
together to make something, it does make a little bit
easier to think about. Sometimes, it also makes
it easier to think about when you're thinking about curving the shapes or make them a little
more straight, they don't all come in the
same sizes and shapes. So they can look slightly
different from one another. So don't sweat that. As long as you're keeping
some of the main components, I am just going in with a
little bit of pencil today. We're just making my way
to this little plant area here just to make
it look more soil like I'm just adding a
little sections of soil or little bumps and areas, little bits of soil on the
outside of my hands here. We're on the open parts of my hands where maybe the soil kinda spread apart a little bit. So it does look more natural versus like
a perfect lump of soil. I'm also making sure that
I do have a plant in here. So I'm just going
around the plant. And of course you're
just makes sure to have at least a little
bit of line work or lines sections in your hands. You can shade a little bit
as well if you'd like. Just to bring it to
life a little more, shading a little bit, even though their
soil represents I don't want them to get
confused from each other, but to show that it is
part of the hand or shaded a little bit
will help me out. Also, any guidelines
you'd like to erase. I assume you kinda touching
up or erasing as I go here. But I want to make sure
by the end of it here, do have some shading around
the edges of my finger. Big part of making hands
look kinda realistic. It's figuring out
the proportions vary now how they
relate to each other. I remember what the
mountain usually your second finger or your third, I guess your thumb and then your second fingers to Tallest. So that's kinda
the the guideline that I was keeping in
mind for myself as well. The middle. Also, if your fingers are kinda squished
because they're curving, you'll have a little
bit less space to work with or more
shadows kinda appearing. So if you wanted to have
more those you could. And because this is
possibly usable content, to make sure I can
see all of my lines, I'm gonna do a quick
outline around the edges just so
they are visible. So if you're curious why
things go up a folder or more feasible than
that's probably why in a couple of different
directions to even outside of the areas that stopped
really abruptly. So many areas that are really dark and then
it gets really light in-between I'm trying to shapes so it balances each other out. So shading back side. You can also experiment
with different skin tones. Of course, skin comes in lots of different colors,
different shapes, different sizes or ethnicities, lots of different factors
that go into skin tone, making different values of skin. So feel free to play along
with that if you'd like. Wherever I want some
more defined lines, I'm just going back
around shading as well while it to that so I
can find those areas. My sweater right
now has this almost like the stripes texture lines. So extra shading. I'm just going to add
a couple of stripes outlining a lines that I
really want to pop out, curving some of these
sections of this part here. So if you want to curb Riyadh
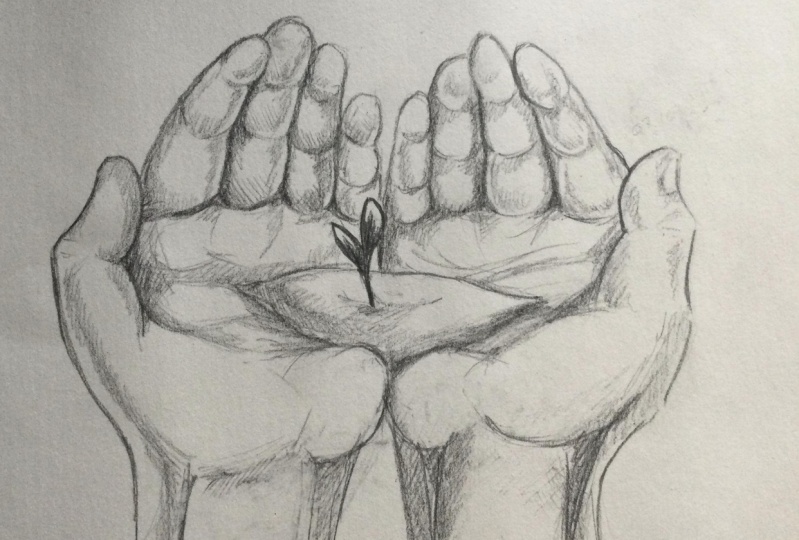
any lines there you can. There you have it. This is our Hand Holding
drawing from today, as we did mentioned before, our biggest focus with
shapes of building up the shapes of our hand,
as well as proportion. Thinking about all the
different elements of your hand and how they relate and
work well with one another. Remember hands and
skin and lots of different things coming in
various shapes and sizes. Thank you so much for
joining us and we look forward to seeing you
next time. Bye. Hey
 Winged Canvas, Classes for Art Nerds