Transcripts
1. Introduction: Bonsai trees are those
little cute trees. I think everyone knows them and probably everyone
the lowest them to. Perhaps you have fun or you've seen one that I
have some friends, have one scene photos online. What are we gonna
do in this class? Welcome to draw a
bunch I3 together. I want to show you
how to draw a bumps I treat starting from scratch
and drawing it all the way. We're going to draw a
bonsai tree together just with the Apple
pencil in appropriate, without using any
special effects, special features or special tools that
appropriate office. We're gonna do it from scratch. The first line to
totally finished, beautiful, cute
little bonsai tree. Yes, you can do that. You can just join
them. I'm going to show you this step-by-step, how to create this,
how to do this, how to actually draw, really draw in Procreate, sounds like a challenge, but it's a lot of fun
gaining the skill just to draw something
from an offering, creating something pretty,
something beautiful. I want to take you
fruit is showing you what to pay attention
to, how to draw, how to sketch in Procreate, how to hatch so that we can add some beautiful light and
shadow effects to it. And how to just create
lovely bonsai tree together. Even if you have no
experience drawing it all or you already
know how to draw, I invite you to join
me in this class, the introduction to
drawing pumps I trees.
2. What do you need?: Welcome to this first lesson. First of all, let me walk
you through what do we need. Then we're going to
set up a Canvas. And in the next lesson we're
going to draw together, you're going to need Procreate, obviously and an iPad then because Procreate doesn't
work on anything else, well, you could use your iPhone. What I would recommend is the Apple pencil
or similar pencil. You could use your finger. If you use your iPhone, you could use your
finger for it. Maybe be tricky for the
pencil is a lot easier. Attached to this
class you will find some photographs of
some bonsai trees. You may use them as a
reference, but most of them, I'm just going to draw them
and explain you what we're doing without really
using the references. But for the project. And if you want to play a
little bit with this yourself, you could use those
references as a guide. All right, well, let us set
up the Canvas together then. I started Procreate already. What I want to show
you first isn't a file with some trees on it. Now you'll see a
number of trees in it. I'm just going to pick
one of these trees. Nice thing about
Procreate or Zoom at him. There's a bonsai tree. I'm pretty sure
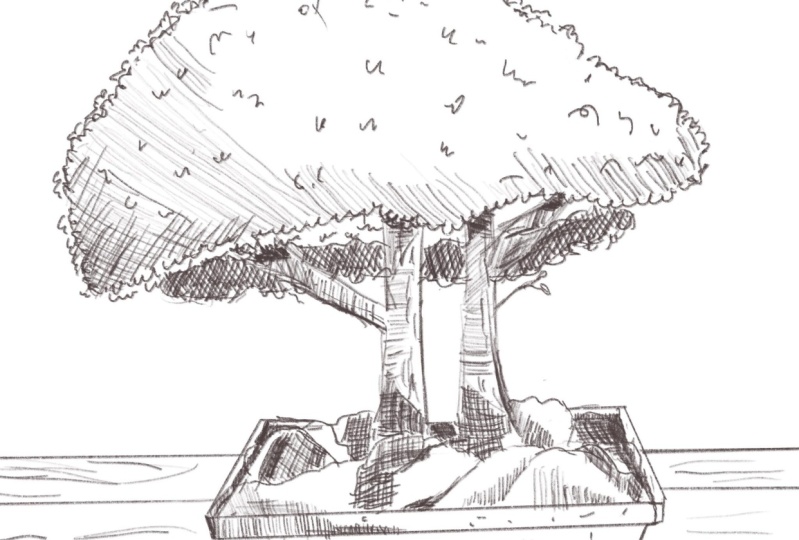
we're all familiar with the elements of a tree. First of all, we
have course have the leaves and together
they make up the foliage. We have branches, that
will be the second part. Then we have a trunk that
will be the third part. Some of them will have a
little bit of routes already, so that will be the fourth part. And the fifth part
is on a bonsai tree, is of course, the plant port. The port which they are in. That part is really important because if
I do the pot away, let's do that like this. Zoom in, we just
simply have a tree. Now, this could be any
tree anywhere by adding the pots and it's like
different trees like this 12. It gives you right
away that idea of dimension that we're
not seeing a huge tree, but we're actually
seeing a small tree. The smaller the port
will be, of course, the larger tree will
be like with this one. The larger your plot will be, the smaller your
tree will look like. Alright, well that's the thing
we're going to make use of that we're going to first do
some very simple sketches. But before we do that, let's set up the Kansas
now to Canvas size, of course depends on the tree. Now, if she would
draw, for example, this tree here, I would
use a square one. I will use a portrait one here. This one also a
bit of ported one. So that will determine
the size of your canvas, will determine the treatment. We're just going to use
the standard screen size. Now if you're going
to draw them from the voltage, you
might change it. I'm sure that later
we change it, But we're gonna start with
the standard screen size. That's it for this lesson, we're ready to draw. So we're gonna do that in
the next lesson together. See you in the next lesson.
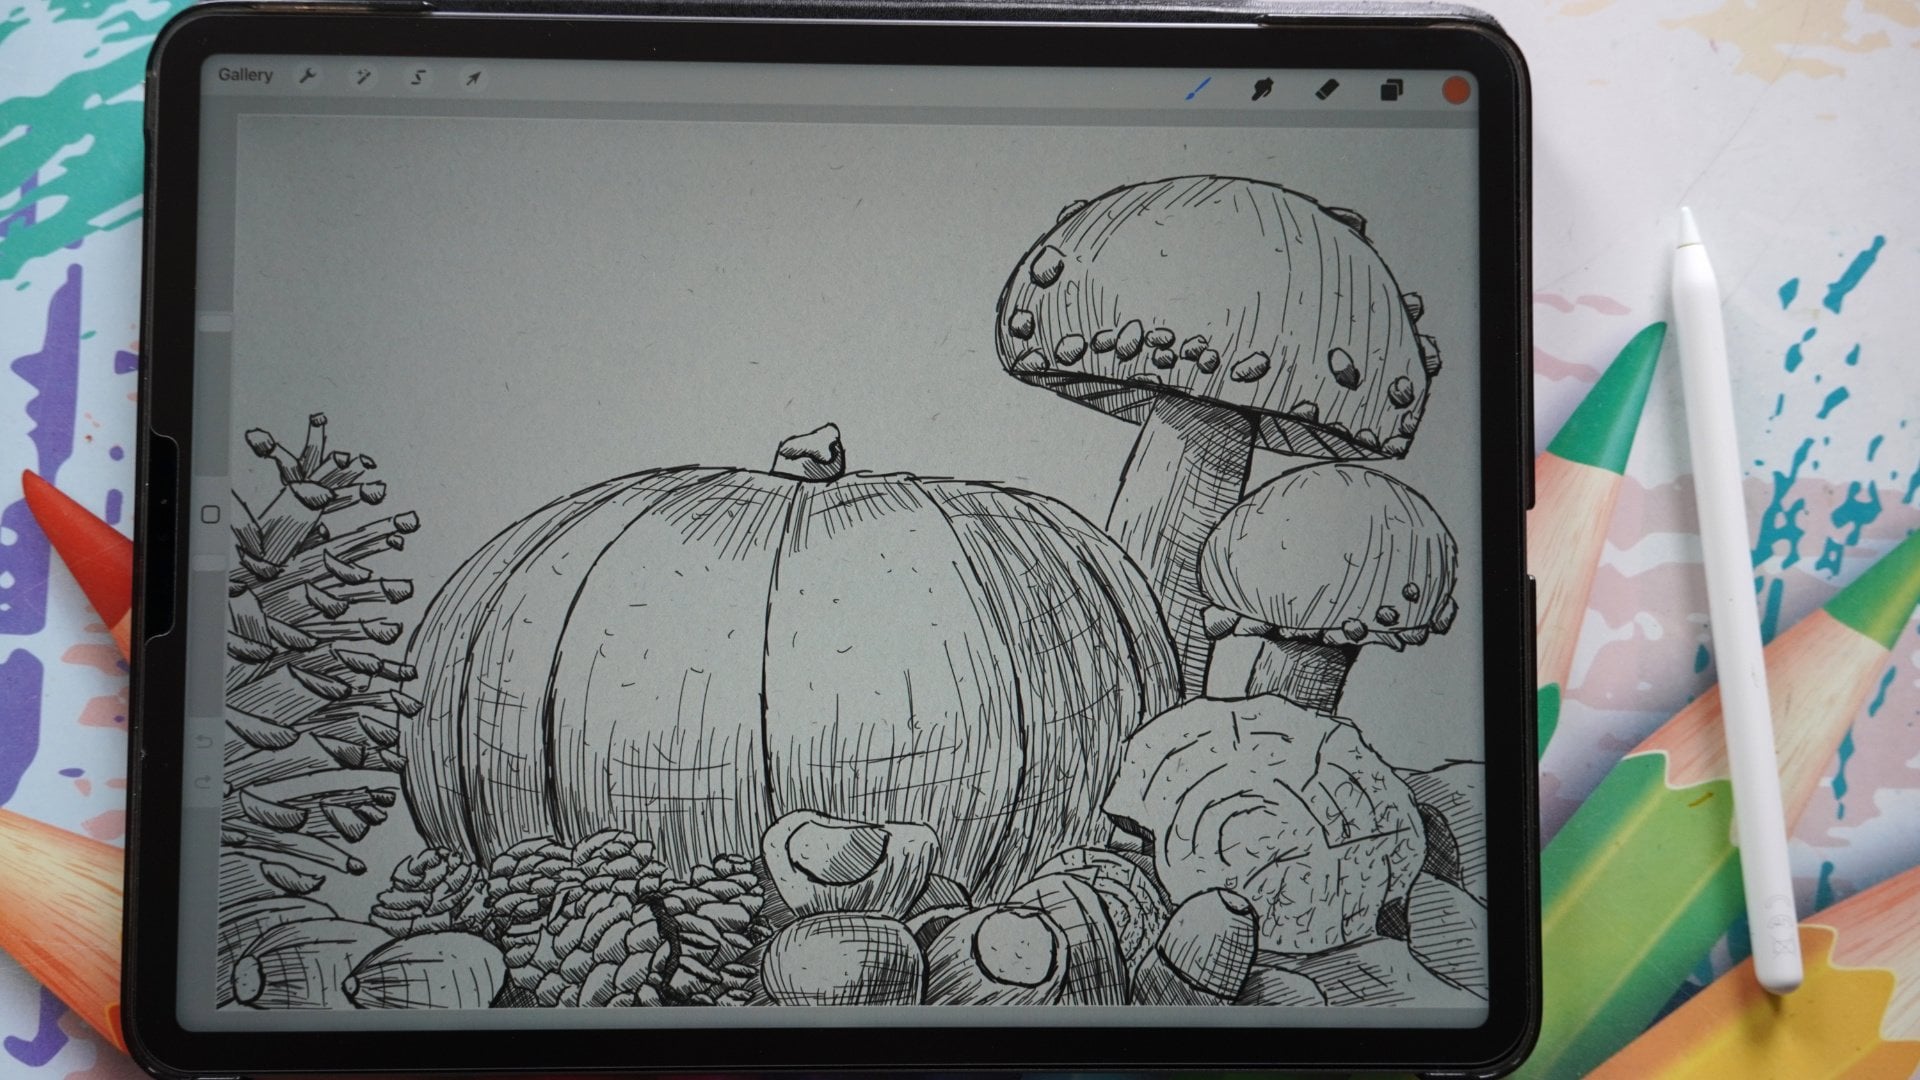
3. Basics of drawing Bonsai Trees: Welcome to this lesson. In this lesson we're
going to start drawing our bonsai trees. We're going to
start really easy. I'm going to just going
to show you how to set up the tree to look at and how we can take some
simple steps to come to it. Really nice tree in
the following lessons. But for this lesson
we're just going to do some very simple
basics in drawing. So let's do that together. I've got my Canvas setup. I know I need a pencil. What I'm gonna do,
you've got to issue. I'm not sure how many brushes
you have on Procreate, but slide all the way down, then you have to
standard brushes. So what we're gonna
do is you're gonna pick sketching like
I've done here. And we're going to pick the
HB pencil that is good, nice to work with. Now we need a color. So I've got a basic palette, but I don't know if you
have the basic pallets. Pallets. So what we're gonna
do is you're going to pick this color picker, the circle. So make sure your
disk here is set on circle and you're going to
just slide it to the red, somewhere in the middle. That's good. Then you take the smaller color picker and you can take it right
there that is black. I don't want to work
all the way in black. I want some grayish
going to go about there. Now I have a nice gray
bit more gray color that makes it nicer later on. So slightly agree. So infrared and go
a bit to the gray, not all the way to the black. Now, if you'd like black, then of course you
can go with black. I'm going with a
little bit of gray. Then we get the
idea of a pencil. That's all we need. We've got one layer and we
can work on that one layer. Now, we had that. I'm gonna take my
photo class with them. I've printed them. We have this anatomy of a tree. We've cut this foliage, We've got the bar
and we have them. So what we're going
to start out with, we're gonna start
out really easy. We're just going to take the pencil and what
we're going to draw, we're going to draw
some foliage like here. It doesn't matter
what the shape is. Let's see, I've cut
this pencil on a 100%. That is a nice size. I don't want it smaller
like that on a per cent. So we've got our canvas, we got a color, we got a pencil. What I want to show you
first of all is how to draw. Now you can draw various way. What you could do
is in procreate, you can actually draw
a couple of ways. The first way would be just
draw a line like this. There you go, That's the line. There will be a continuous line. Then you just draw from
1 to another point. The second thing
which you could do in procreate is draw a line, hold it, and create a
nice smooth, strong line. The third thing what we can do is we could sketch the line. Let's say we want to
go from this point to that point with
the continuous line. We just drew a line
like that from a to b. But if you don't
have steady hand, you might get a line like this. You don't want that. The third way what we can
do is we could sketch it. And sketching is
you're going to do small lines and you
go from 1 to another. The difference between
these and you can see that this will give us, in the end way more
lifelike three then this, and if I draw a tree for, I will draw quickly a tree
with the continuous lines. Let's say this is my canopy. Here is my trunk. Well, let me do some roots
then and let me do parts, then I would get this. No, perfect for
forgive me for that. The next thing if I will do
it with the other lines. So I'm going to draw my shape, I'm going to hold it. What procreate will do is create this polyline edit shape. I could change it to an
ellipse and something else, but I can't get it
to this nice line. So for this, I don't
want to use that. So that one is gone. Bye-bye. If I sketch the same tree. There you go. I'm doing this really
quick. As you can see. There you go. You get this whole
other idea than this. This is gonna be a bit more
lifelike and what we're going to draw really nice trees
later on after practicing, you're going to see a
huge difference if you use these continuous lines. So you draw continuous lines or your sketch
them a little bit. This will give you a
way more lifelike. Three. What we're going to use
this, so we're going to use these sketching lines. So if I want to go to
from point a to B, I'm just imagining where I'm
going and I'm just going to draw these lines like that. And if I miss them a little bit, if I go up or down a little bit, it doesn't really matter.
I can correct it. And that will not
look bad in the ends. Okay, so that's the
first thing we need to know is how to
sketch a little bit. Okay, with that in mind, we're going to draw
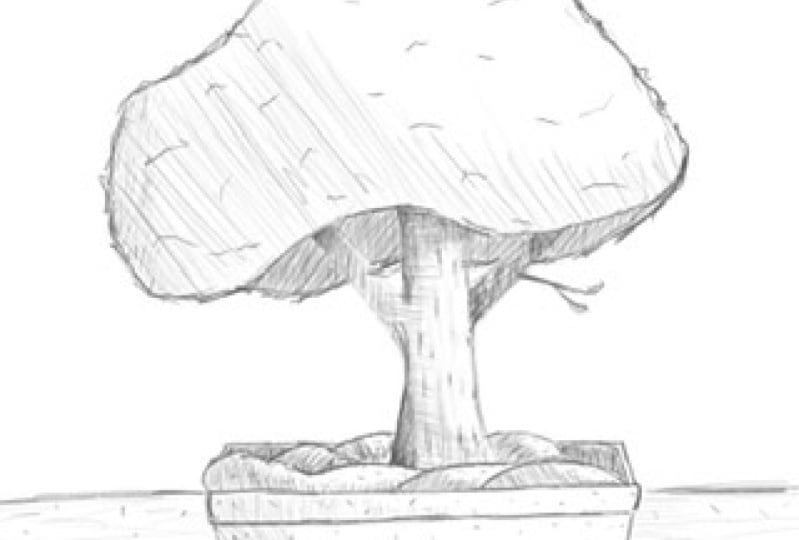
our first tree. Now. We're going to just
draw the anatomy of a tree. We know that the
tree has a canopy. So what I'm gonna do,
I'm just going to draw this canopy of a tree. Now, there is, if
you need the guides, of course, does come with it. So you could just look at it and just copy this a little bit. But since it's a bonsai tree, a bonsai tree can
have any shape. The next thing we
need is a trunk. And I'm gonna do
this really easy. I'm going to draw my trunk. We set next part, second part. The first part then
would be some branches. And what I'm gonna do is
I'm going to just draw in a simple branch like that. I'm not gonna do
anything more than that. The next thing, I want
to have some roots. There you go. And then we have apart. I'm going to just draw
a line under here. Now, I want to give
some dimension to this tree right away. So what are we gonna
do with this part? I'm going to put the pot
under an angle like that. And what I want to have is I got these two angles a bit
the same. That's better. And then I draw my
lines behind it. And I'm gonna do the same here to use this under an angle. And then we have our first
very simple bonsai tree. Alright, trust me, we're
gonna do a lot more of this. Create some very nice treat
as you've seen in the intro. But we got to start somewhere. We got to start to learn
how to draw a little bit. Okay, let's continue. So that would be my first
street, nice and easy. Now we can take this, of
course a step further. What we're gonna
do again is we're going to draw the same foliage. Not the same, but
just some foliage. There you go,
There's my foliage. The next step, what we're
gonna do is we're going to draw again the trunk, but not in the middle like here. I'm gonna go a bit off in
the middle of the middle, and we're going to
draw a second one. There you go. Now we're already
getting a lot more of the idea that we've
got a tree going on. And I'm just gonna
draw this roots in. There you go. Simple and easy. I want a branch. Yes,
please do branch. Also very simple and easy. Nothing complicated. The next thing I'm going
to draw that plot again. And for this one, I'm just starting at the back,
doesn't matter. And there you go. There's my tree. That is a lot further. Now let me show you one
more thing and we're gonna do that nicely
with another layer. I'm going to add another layer. I'm going to hide
this layer if I draw another tree, very simple. And for this one I'm
going really simple. All right? There you go. There's my tree. That is very simple. Let's give it a branch there. Alright, what are we
gonna do with this tree? I'm going to copy the street. I'm just simply gonna do is I'm going to duplicate this layer. I've cut this layer and
I'm going to slide this over to the left and
going to say Duplicate. I've got two trees now, what I'm gonna do
next is I'm going to just hit that little arrow. I'm gonna move this
tree to the side, hit that little arrow again, and then we got to
the same trees. I want to show you
something with this tree. What I'm gonna do is I'm
going to draw a pattern. And the same one we had
before, just simple. There you go. This one I'm gonna do the same. What I'm going to give this
a nice large, huge parts, the pot, I'm keeping the height and the
width and the height. A little bit, depth, a little bit the same. And there you go. Now you already probably see right away what is
happening here. This looks like a small tree, looks like a large tree. And you can play with that term. So if you want to get
some sense of dimension, you can do a large pot. And then you get the idea that this is
quite a small tree. You the other way around, give it a large, a small pot, then the three is
suddenly becomes large, but you don't change anything
about the tree at all. You keep the tree
the same way it is. So that way you determine
the dimension of a tree by putting in an extra
object as reference points. Now she would draw like
Watson, something like that. You often people put in
animals, some bushes, clouds, using some humans
to give a reference of how large
something really is. If bonsai trees,
that is really easy, we're just going to give it apart and make it
the size we want. And that determines right
away the size of the tree. That's it for this lesson. What we're going to start, I'm gonna hide
this or what do we started out with? Really simple. The difference between
the lines you can use. We're going to use for
these lessons sketching lines because it makes
it more lifelike. The second thing
we practice most, just draw some simple trees. Begin with simple tree to get a little bit
of hang-up drawing. Once you've done
that, we can move on to a little bit more
complicated tree. I've shown you the influence of the pot which determines
the size of the tree. That's it for this lesson. I want you to practice this. So draw some trees which
are a bit large part, play little bit
with this foliage, create different sizes,
different shapes, and just look at also a bit of the reference images and
perhaps copy them a little bit. Just try to follow
them a little bit on the contours of the sidelines. I, once you've done that, I'm gonna see you in the next lesson where we're going to take this a whole lot further than
what we have done so far. All right, see you
in the next lesson.
4. Drawing the Bonsai: Welcome to this lesson. We're actually going to
draw a tree together. We've done a little
bit of practice, but now we really want
to draw a nice tree. Take this a few steps
further than what we've W4. Okay, Well, let's do that. We're going to draw a tree
and what are we gonna do? I'm gonna create a new Canvas. And we're going to say
here on new Kansas plus, we're going to create
a custom canvas. We're going to create
a square canvas. Now since we don't need tons
of layers for the streets, we can go decently high. I would say at least 2503
thousand if you want to do, I'm going to go for free
thousand by 3 thousand pixels. And the DPI is there, 300? I'm leaving that on
the color profiles. I don't care about
that at them small because I'm only
going to work in greater the maximum layers
that depends on your iPad, even if there's only ten layers, 20 layers, that's plenty
enough for this demo. We will make it with ten
probably for this one. But I'm sure it does
more than that. Let us say you want to have
at least 15 layers probably, I'm guessing now, let's
say around 1520 layers. So if there's too little there, then load these numbers go
to 2501, I'm pretty sure, but for most of the
Ken most of the iPads, three files by 3 thousand gives you a nice
amount of layers. So I'm going to say Create. I've cut my pencil, I've cut my color. Ready? Next thing is, of course, gotta draw a tree. What I'm gonna do first of all, I'm gonna do the same as before. Draw that very simple tree and then create it
in something nice. So what I'm gonna
do is I'm gonna start with that
simple canopy again. Let's say I'm starting
around the half of it. Starting around half
on half of my page. And I want to draw a canopy, but I don't want the start and the end to be on the same line. I want this to be a little bit higher. I want to add around. They're going to
reference points. I want to start out,
I'm just going to draw up a little bit, create a bit of a
wave line in it. Get the top of my canopy and I wanted around pretty
much in the middle. And then I'm going to just
simply go down. There you go. Now. That's one part. Now I want to connect
these two and what I want, I want them to be a little
bit with little bit of wave going up, down and a bit like that. I'm just gonna do it. I'm
just imagining going up, over down and meet them. There you go. That makes my
canopy of my first tree. The next thing I do want
that trunk in, one, we'll say the trunk is somewhere in not totally in the middle. I wanted not everything
in the middle. If you do everything in
the middle of your page, then just doesn't look nice, but the throwing will pretty
much be in the middle, but not every element
needs to go into middle. So moving the trunk over a
little bit to this side. There you go. The next thing, what I'm gonna
do is draw that pattern. I don't want to have a huge pot. I want to have a cute tree, so I'm going to round the
size. It looks nice to me. And with the pot, what we're gonna do is we're
going to create slightly nicer port right away. We're gonna give it an edge. Then go down on the other
side code down to under here. I'm going to create
another edge. For now, it's just sketching. So I'm just doing a rough
tree and under dead. Going to have some
legs on the plot. There you go. That would be that.
Now, as we said before, we need now to create
some depth finish. So when we will do
is I want to create that pot on the back butt. Remember this is just our setup
set of my tree like this. The next thing we're
gonna do, of course, this doesn't look like a tree. What we'll do is I'm
going to add a new layer. And this layer, what
I'm going to do is I'm going to the original
layer, tap on that end. You see there slide
this to half so that I can actually use this
now as a reference kinds. Good. Now, on the new layer,
the second layer, I'm going to create
that canopy a bit nicer than this rough. And what I'm gonna do
is I'm going to use very small sketching motions, a bit like this to create the idea that we're talking
about some foliage. I'm letting my pencil dance
a little bit on the canvas. I'm not making straight lines, I'm just making some
circular lines. Playing a little bit with going once up and
down a little bit also creating a little
bit of variation, not following that line exactly. By doing this. I'm creating delusion that we have in actually
leaves on this tree. All right. You go. There we go. If I hide my sketch
now, look at that. See, you have a whole
different idea. Now, that sketch gone, what we're gonna do, we're gonna add some
more leaves through it. At least. We want to add the impression of leaves and we're
just going to add some clusters here and
they're very simple. Let him go pen, dance. The pencil, in this
case, Apple pencil. All right, good. Here you go. Now, that looks
interesting, doesn't it? We're going back to
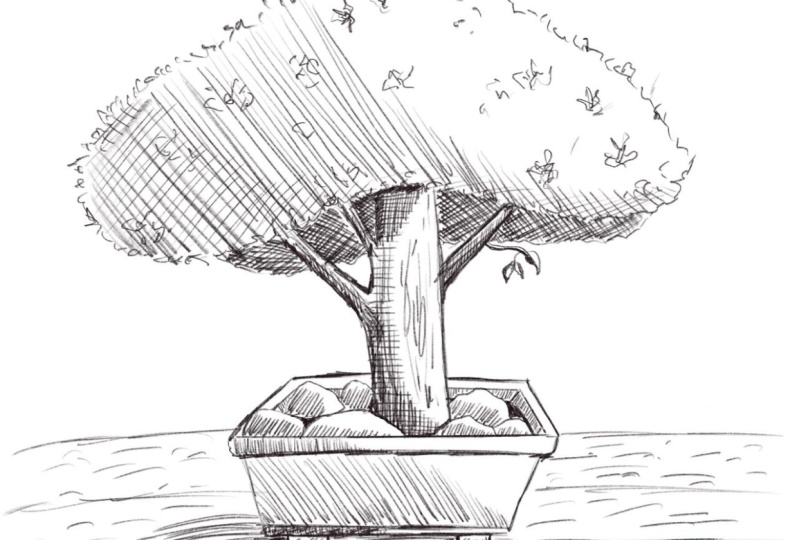
our original one. So now we have our canopy. The next step we're gonna do, we're gonna add the
trunk for that. I'm gonna do new layer, but we could theoretically
welcome the same layer, but I want a new layer for that. I have a new layer. But
what I want to do first, I want to go back to
that original layer. I want some branches. What I'm gonna do is
I'm gonna say I want a branch around,
starting around. They're not want a second
branch going around there. Now. There you go. Now I'm going back
to that layer. And what we're gonna
do is we're going to create our trunk. Now. We're making it
really easy. For now. I want to have a
reasonably thick trunk, so I'm going to
start right here. I'm just disregarding
the branch for now. That will be my trunk. I want to reasonably
be thick one. So I'm going to thicken
it to this side so that I'm not in the middle. Adults EMF the middle, which creates an
interesting one. It's just straight down
and then at the end, creating a little
curve like that. There's my drawing in my branch. The branch I'm starting at 1, I'm making sure I'm putting this a little bit
under an angle. There's a branch ends. The next one I'm
going to do the same. This one I'm keeping
pretty straight. Now these branches are
not nicely connected. What we'll do, let me
hide that sketch first. One I'm going to do,
we're going to take an eraser and erase it. I'm always using airbrushing. You could do a soft,
uh, heartlands. Not a huge size. 2% will be good. With this one. I'm
going to erase this part because I want
that trunk of sorry, that branch to come in. Pretty nice. I want to erase
a little bit more here. I feel erase that
part because I want the branch to connect nicer to the trunk at the
bottom and the top. What I'm gonna do, I'm
going to let it go in like that a little bit
to create some depth. If this were
creating some depth. Now this one I'm going
to leave like it is, I'm actually not gonna
do anything there. All right. Going back
to my original one, now it's already
starts to look like a nice tree. Next thing,
what are we gonna do? I'm gonna add a new
layer with this one. Let's see. I want some little bit
of a hint of that. There is some some muscle or something like
that on the floor. I'm going to create a
little bit of most. And I might do this
first on that practice. Later we done the bottom layer. What I want is, let's say
something like that here. I want that down here, up here to maybe
another one like that. Maybe one like this. Even going outside of that part. Make it interesting. And let's say I want
behind there another one. Large one. That's not
nice, not this one. This one is good like that. Let's go for that. That'd be interesting. But only this one. It's too high. I'm going
to go lower with this one. All right, now let's create
something interesting. Do another one back here too. All right, now I've got that creates little bit
hint of a little bit, something interesting going on. Then only just straightaway some lines just to make it a
little bit more interesting. What I'm gonna do
next is I'm going back to that empty
layer I've created. I'm going to draw in my
pot first. This one. I want to make it a bit
nicer than I have there. I want the edge to be a
little bit rounded like that. And I have this line now I
want to go for the next line, keep it pretty much straight
onto deadline. There you go. There's my plot. Then I'm gonna go down. This one. I've got pretty pretty
reasonable angle, so I'm just trying to get
that same angle there too. The next thing I'm actually
going to draw this in, but I don't want
this bottom rim this bottom edge of the rim
there to be so focused. I have drawn it, so I'm going
to draw it a bit smaller. And there you go. The next thing I'm going to put in the leg. So now I need to extend
the leg and I have drawn it since I've drawn
this under a different angle. I'm getting legs a
bit different site. What I want to do is with that moved in a
little bit from here, but I'm correcting
that while drawing. I want to have these
legs pretty much about the same length
and add that thing. There you go. Now on the
same layer, I could as well. At the most. I'm playing a little bit with
that to go for this one. A go just one goes there
and then we have this one. And then obviously we still
have that line going there, this line going there, a
little bit of the pot, but with the plot,
we need to give it a little bit of dimension. What we'll do, we're going to create a little bit
of an edge like that. No, not like that. Don't do that. Just like that. We're
going to create it like this and here too. The outside. And then
we creating the edge, incites her pots
simply like this. All right, and now
what we're going to do is create it down a little bit to have that
sense of dimension. We're doing it like that. See, now you get
the idea of depth. Let me height. That's good. We have that pot
and the podcasts is an idea of that there is depth. All right, we're getting
a nice three already, but we need a little bit more
of a sense of depth, vivid. So we're going to add
some more elements. Just create that. I want to show you
how to do that. Now, this nice tree, but we can do a lot
more with this. What are we gonna do? The next thing is what I
wanted to do if the canopy, canopy in the back. So that gives me a little bit the idea of a deeper dimension. So I'm going back to the canopy. And what I'm gonna do is
I'm going to show you that first on the practice layer, what we're gonna do if that is the wrong layer,
a hidden layer. What we're gonna do
is we're going to add something in the back like that. Then you get a sense of depth. And the next thing
what we're gonna do is this tree is now floating
in whatever nowhere. So what we're gonna do is
we're going to add some lines. Just create a sense of that it is standing on
some kind of table, something C, and
we're gonna do that. That gives very nice
impression of some depth. And that's this thing is not
just floating in the air. I'm going back to
the foliage here. And I'm going to do
the same as with this. I'm just going to playfully
these parching button. We want to make sure
that I'm not touching, not going over what a tree is. It just needs to
stay in the back. And it's now the next
thing I'm gonna do is I'm going to add these lines. I'm just tracing
them a little bit of sketch them slightly nicer. Making sure they're
on the same level. Day you go. Now we've got our tree
height of the sketch. Now I've got these lines
on the same level, plastic canopy, but it's
not a huge problem. All right, this is the
basic sketch of our tree. We're gonna do a
lot more of this. Yes, because this is
just a nice sketch, but we can make this
really cute, really nice. Play little bit with light and shadow and even add
more the impression of depth and that there's something more going on
than what we're seeing now. But let us for the next lesson. For this lesson, draw the tree. And then once you've
drawn the street, set it up the way
close to what I have, then move to the next lesson and I'll see you in that lesson.
5. Shading the Bonsai: We're ready for the next step. We've got our outline, we've got our basic two ready, but we want to create the
hint of light and shadow in it and add even more depth
and make this pretty okay, but we want to make
something pretty. Let's do that. I've cut my tree. What I'm gonna do is
I'm going to go out of this document and
I'm going to create a new document and I'm
fine with the screen size. Before we're going to actually do something
about the tree. And it shows you something. What I'm gonna do is I'm
going to draw a box. Just simple books
shaded like that. So I've got a box now, let's imagine there's
this one shining. The sun is shining right there. So we've got the sun.
The sun is shining. Or today there's
not much sun here, but in our procreate drawing, There's a nice sunshine. And if the sun is shining from this side, what we will do, it will cast rays of
light on the box. That means with this box, what happens with this
simple box is that this part will be really liked it and this part will
be less sliders. Now to draw that in
what we're going to do, we're going to use a
technique called hedging. Hedging is very simple. Lines under an angle. I'm going to show you that
basically is going like this. You're making all these
lines under an angle. And as you can see with
these even I'm sketching, but I know my light is here. So what we're gonna do is I'm gonna make sure I'm not touching
that part. There you go. That is very simple, so I'm just making
lines under an angle. I want to draw a second box. I'm doing actually
exactly the same. And now if I would swap, use the same light, that means that now
the light goes right there and simply said closer
to the light is lighter, further away from
the light is darker. The great thing about
Procreate is of course you can zoom in
as much as you want. If I'm gonna hatch like this, I need to spend a
lot of distance. I need to do a lot of
sketching if I would have shin alliances will
take me a long time. What I can do instead, I can just zoom in
as far as I want. And now my distance
is very short. So what I can do is now with this one, we're
going to hatch it. I'm going to actually use
lines and we're going to reach across the end right away
and I can erase that. That is the advantage
of Procreate. Now with this light, I want actually this part
here to be darker than that. Then this part, what I can do, I can do a technique called cross hatching and crosshatching simply gone in one
direction with my angle, I'm gonna go in the
opposite direction. I want to go a bit smaller. And I'm going to go like this. Now. Now you have the idea that this is a lot darker than that. One more example, I want
to draw another box. There's my box, but I'm going to actually make a
real box of this. I'm going to go with that angle, but slightly different than what we've done with
the other angle. But I need to give you the idea. This is a box. Now, this is really a box. When you use the
same direction of the light, there's the sun. It will cast these
rays of light. All the sunshine comes in a box. That means the top, most of
the top would be pretty much totally in light except what I want to perhaps on
the back a little bit, attaching, smoke, making
my canvas smaller, again, zooming in a little bit, adding a little bit
of shade right there. The next thing I know that this side at the
back is really dark. So what I'm gonna do is
zoom out a little bit. Zoom out and zoom out. I'm going to watch
one direction. I'm starting at one angle. There you go. I'm gonna
do the opposite angle. And as you can see, I'm
making myself really easy. I could do it like this, but I could also tilt
my canvas little bit. And now I can reach
that part really easy. And there's no
doubt about it now, this is dark, this is less dark. But I've still got
this part here. And I would say, imagine
there's some light going on. Still hear. What I'm gonna do is I'm gonna hatch that too, but making it small again, to make it myself really easy. There you go off
the hedging and the closer you go with hatching, the darker it looks and go. That would be our box. Now, the bottom here I could do just a little bit
of cross hatching. That is simply. Attaching, creating some shadow and light through hedging. Now one thing I
want to add here, since the light is
shining from here, unless again, imagine this
box is standing on the floor. That's really bad. Fluorescent it. Standing on the floor. Here you go. Now
it's more straight. Then this box would cast shadow. So we're going to add a little
bit of shadow and let's imagine light shines them. What we could do is add
some shading right there, some lines maybe at the bottom, a little bit like this, and closer to the edge go for another layer of hatching and even add some thicker lines. There you go. And then you get the idea that there's
light and shadow going on, on this a little bit larger, making a few more by
doing them further apart. As you can see, you get
the idea that way you go, the shadow fades away. With this information. We're going back to
our original tree and we're going
to make something really pretty off the street. Depending, Let's say
a lot on the shading, on this shadow technique on the hedging way more
than we do actually on the drawing because this will add something nice to our tree. Let's go to the three. Alright, so what
I'm gonna do is I'm going to tackle the easy part now what I first
need to determine, my light welcome, does it come
from I can pick any side. I want to pick a corner. It doesn't matter. You
can pick this corner, you can pick that. I'm going to pick this corner. Let's start with
this corner here. Light comes from this
corner on the street. The easy part is, of course, despite the back canopy, that is just really dark and we're going
to start with that. I'm going to add another layer under everything or you
could do it on top. It doesn't really matter. I
still have the same pencil. I'm going to start with
this little bit here and I'm just going to it. I'm keeping them really, really close those lines now. I'm outside a little bit. I'm noticing. Pick the eraser, erase
that and problem solved. Now I'm gonna go in the opposite direction
too with the angle. So I'm gonna do this
part, crosshatch this. And then the fewer
gets the idea. This part is really
somewhere in the back. And I'm going to basically
do the same with the stew. I'm making sure I'm gonna go
a different angle than this, so I'm keeping that
same angle I had there. There you go. Then I'm going to go the
opposite angle again. Zoom out a little
bit, otherwise, I make it myself too hot. What I'm gonna do with this one, do the two opposites. Doing this one. Probably you noticed already
something I did wrong. I did that on purpose because I want to show you
something in a minute. And there we go. Now with their head Xing, what do you want to do is
you want to pretty much keep the distance from your lines the same if you don't do
that as I've done here, I've done this very quickly. This I've paid more
attention to now this looks really strange, that looks out of order. So what we're gonna
do with that, I'm going to actually add just some more hatching
lines in both directions. And now we're getting closer
and darker to the other one. Few more in its diagonal. All right, now,
that already gives you right away a
sense of dimension. We're gonna do that
too on our list. Now we're gonna make it really easy for at least we'll
say light is from here. This part here, close to this part here would
be pretty much than dark. If I will draw an
imaginary line, I can do that on another layer. That's nice, favorite Procreate, I'm creating another layer. I'm gonna say the
light comes from here. I don't want to have a straight
line where it's white. I just want to create
an interesting shape like that a little bit. This part, I'm not
gonna touch this part. I'm going to hatch, gonna go
back to my hedging layer. Might do another
layer, this alike. So I want to keep this, so I'm securing this by going
on another layer. I want to make it really small. The nice thing about this is I'm going to
work really small, but I'm going to zoom in
with my camera so that you can see very well what I'm doing and I'm making it really small because that makes
it really easy. If you go large like this,
you can still do it, but you have to create
hatching lines like that. And don't make them out of
one piece. That works too. But this goes a lot quicker. Iteration those because
now I'm going to change, because I'm going to change. The size and working on, I'm gonna get slightly
different lines. I like it like this. I'm pretty sure I can reach
this without any problem. At one go and set. I'm just going to do one
layer of hedging on this one. I'm going to go there. I got to add a few there. Now I'm gonna hide that layer and I got this look at that. See right away that
sense of light. Light is definitely
coming from here. Now, I see I've gone
outside a little bit. We'll just take our eraser, erase that make it
a little bit nicer. Tree suddenly looking a lot more interesting
than it was before, before it was just
a simple sketch. But now by adding this head Xing and creating this
sense of light and shadow and even some
more depth sign to look a lot more interesting. The next thing we're gonna do, we're gonna do that trunk. I want to make that
trunk a little bit the focal point of
this whole drawing. And so we're going
to pay some nice, some good attention
to this trunk. Let's do that. I'm going to add a new layer. Since I've got plenty
of space to do layers, I'm gonna do the trunk. The trunk, of course, a bit of the same principle. Light comes from here. Shadow is deaf, but what
I'm gonna do first, I'm going to go back to
that line I had here. I'm going to do that the
same with the trunk. Now what I wanted to do
if this strong, now, this branch here, the
light comes from here. Basically, most of it gets
blocked from the sunlight. I'm not going to pay much
attention to this one. The trunk itself though, I want to do something
interesting with it. Let's say I want to create
a shadow on the back here. It's not happening because
I have my eraser still on. My shadow would go there. With this one. I want a shadow,
extra shadow here. And with this tree canopy to cast a little bit of
a shadow right there. Now let's go four right there. That's better. It'll all in
the line going like this. That's good. Then what would
happen around here? I would have some shadow, more shadow around here
with this branch to, well, I'm gonna say most of
this is mostly in shadow. But down here what
I'm going to create, and we're going to
create a line like that. And we're going to create
lots of shadow there, little bit of shadow here. Of course, at these ends here, I want to add some shadow to, but I'm showing you
that this is my guides. I've done it on the same layer. What I'm gonna do, I'm gonna
just merge these two layers with all these lines and I'm
going to add a new layer. The hair. There you
go, that's better. All right, well,
let me start with the simple one that is this one. And we're going to start
with hatching this one. I'm going to just
hatch some nice lines. They're a bit more there. And then I want a bit more extra there and around
the canopy here. I'm going to create some
more lines like that, right? There you go. For this one, I'm gonna do this branch
to branch in a set. I'm pretty much gonna do this
all the way till the end, but I'm going to add
another layer here. And at the end, we're going
to add a little bit darker. You go here to one we're
gonna do with this one. We're going to actually go
straight down like this. I'm gonna go straight
down with this one. I'm going to just
add those lines. There you go. I'm gonna do actually pretty
much the same at the bottom. I'm gonna make this small. And I'm going to go
with these lines. My pencil a bit straighter. There you go. We're gonna do something
about dismantling minutes. Alright, that's it. The
next thing we're gonna do, I'm going to turn my
canvas like this. And we're going to
draw a main shadow in the tree like that. And I want it right that to
needing to move a paper, making them slightly
longer there. And how I got to
connect these two. There you go. That's better. I'm going to hide
that line I have. There you go. Now look at that, see you getting something
really interesting. The next thing I
do want to do is I want to create a sense of bark. So what I'm gonna do here, I'm going to just
add some lines, some random lines here
and there on the street. Short ones, longer ones,
few short together. In the back here, I want to actually add
quite some more lines to create even a sense of
that it is darker there. A bit more here probably ends now the next
thing I need to do, if I go back to my reference, I instill need some shadow here. I'm going to go for nicely
close together there. Alright, let me write
that lining and see, now we're getting something
really interesting. Let me do that under the
branches to adding some lines, just some random lines here too. Now if these I'm going to let
them come out of the trunk. And as you can see,
we're going to create that bit of a funnel like that. That's a wrong line. At the bottom. I'm going to want
some more lines and at the top there to rights. And now we're going to see, we're getting a nice
interesting tree. I want to darken this part, this part one, we'll say
Bach this part a little bit. I do want to do that here
too dark and just slightly. There you go to get
that sense that that is actually where my lines are dark and this part is
50 other ones to go ends. I'm going to do that on
this bottom too little bit, and I'm going to add
some more shadow on here to make it interesting. And now, looking at this, now this looks a lot nicer right away because we've got a nice focal point here right away. We notice this tree, it has some foliage. Got this nice focal point there. We've got these parts
now the next thing, what I wanted to
do a little bit, make this a little
bit more playful. What we're gonna do is I'm going back to where it can appear. That was this layer. I'm going to this layer
and what we're gonna do is just randomly, I'm going to add some
lines and dots here. Here too. At the bottom. There you go. There are two that makes it
more playful here to random. This is really random. I have no system for this. I'm just adding this just
to make it a nice tree. And the next thing we can do is give this a really
a hint of that. It really is a
tree width leaves. And what you could do for that, I'm going to create a new
layer anywhere right here. I'm going to create
a new branch. And I'm letting that
branch go like this. I don't like the
part of this one. Erase that too fake. Right now I'm debt. I like a lot better just
adding a branch here. And what we're gonna
do with this branch, and at the end
we're going to just create a couple of leaves. Vary randomly day you
go and look at that. You could do that on this
side too, if you wanted to. Want to have some more
there, there you go. I want this a bit stronger here to bit more playful here, a bit. That's better, good. Now you're getting the sense
of, hey, look at this. This is a tree
with three leaves, but now I've done this. I need to give this
leash a little bit of a shade away from the Sun. That's enough. Now you could do that with more, you can put here when you
could even do a little one. That's a bit of straight with shading on that to
create that sense of tree. Now I don't want this here. You could do that since this is a bonsai tree and what
people do with bonsai trees, you probably know what
people do bonsai trees. They cut them nicely so they
wanted to have a nice shape. So we're not gonna do that, but that one is nice like that. Okay. All right, We're getting that. Next lesson. We're gonna do the
pot and at most, and the floor a little bit. And that will
basically done with the street starting
to look nice. We need to improve
it a little bit. Work on this part we
haven't worked on, and we do that in
the next lesson. See you in the next lesson.
6. Shading the Plant Pot: We've got that tree ready
to work on the pot and the floor to make it one
complete nice bonsai drawing. Let's do that. Looking good so far we've got some nice focal
attention right there. And we've got this
everything else to support that nice focal point. So that makes it really nice. We've got now a hint of
this is a tree with leaves, not a pine tree, but we
need to work on this. What we're gonna do is I'm
not sure where I am with my layer stack on top
of the shaded tree, I'm fine with another layer. We're gonna work on this. Okay, let's see.
What we're going to tackle first is
probably this part here. This is the easy part. This is just can't
get any light, so I'm just going to straight on hatch this as
close as possible and hedge that down
to there you go. Good. And I'm gonna do that
right here to there we go. That was the easy part. Let's do this too, but
hedge this the other way. Good. Now you have the sense of if you go into a
different direction, you right away noticing that this is going in
a different direction. So this is not the same part, is this part it's
two different parts. Now this answer is pretty
much catching all the lines. I'm not gonna touch
that same here. I'm going to leave
that like this to extend it a little bit. I'm gonna work on the most. This one is too easy most
what would happen with this must most light
would get here. We're going to hatch it in. Simply like that. Proves that piece of
muscle right away. Simple like this. I'm going to do the same
actually on this one. But I'm going to go a
different direction because we want to make sure they're all in the
same direction hatch because then you think
it's all one part. I'm gonna go like this. And there you go, I'm
gonna leave this light. So you get that idea
of light and shadow. I've got this most
now I'm going in the opposite direction
with this one again. There you go. Now I need to add that
line a little bit. All right, and now
with this big one, I'm going actually
opposite of this one. I know that's probably not much light getting
onto this part, but this might be
some more lights. We're gonna do the same thing. Start large and small. And then you get the
distinction between all the parts to now
I'm noticing here, let me see where that is. Got to find a tree. That is a tree. I
got to erase that. This bit should not be there. There you go. That's better. Then with the head
showing here of the tree itself,
I've gone outside. So let me correct that a
little bit here to go. That makes it better. Improves it right away. I'm going back to my
layer, but I'm hedging it. That should be good
question. This layer here. Yeah, that's the good one. All right. I'm going back. I'm noticing that some of
that line is gone there. I'm heading that back in
little bit there too. All right. Hedging now this one, I'm going to do the
opposite direction again. I'm only leaving the top
and this one, same here. There you go. That's good. Leaving the top. Light it again. Alright. That's that. Let's see. You want to add a
little bit of an idea of this is not
just some circles, some lines doing the
same as on the foliage. Little bit of interest
might do that here to edit on the top of this one. Here too, you wouldn't see
that this one you would see some short lines, so that's not good, not going
outside, Don't do that. Might do some on here too. There you go. I didn't prove it.
That's that part. Now we only need this
part and then the floor. This one I'm gonna
do really easy. Let's see, I've shaded
this direction. I'm going to go with
a straight direction for this to make it easy. This would be pretty
much in shadow. And I'm going to
let the light come in decently of these
simply pretty quick. Going shorter and shorter
and shorter and I'm done. I'm gonna leave it like
this, That's good. Now under here, we're
going to create a shadow line that functions as a h. Then you get that really seeing that
this is an edge on it. And there you go. Adding a bit of an edge. We're gonna do that
right here to this one. Just creating a little
bit of sense of an edge. Now I need to hatch this one. I'm, I'm gonna do that under an angle
probably not straight. I will do this one
straight again, this one we're gonna
do under an angle and making it small to
make it myself easy. There we go. I want to touch the
top a little bit. And now I'm going
shorter and shorter. And shorter. There you go. I want
to create a little bit more dark right there. I hope that that's not good. There you go. Might want to
do a little bit more dark. Cut this. Alright? Want to create this
little bit better? There you go. Alright,
now I need to do this, etch what I'm going to
take this way first. There you go. We're gonna do this one. We'll do the same as on the top. I'm looking at the
top where the light would pretty much go less. That's around here. Going less and less and less. There you go. Now I need these parts on the
bottom here, the legs. I'm going to go opposite
direction of this. These are pretty dark. You won't see much
light on this. For this one. You see
some light on it? No, not really.
We're gonna go dark. You won't see much light. On that edge here would block
it all. Now look at that. That looks really nice. Now the next thing
we're gonna do is we're going to
work on the floor. I want to have a new layer. My probably my finally, I want to do some shadow first. Under here, the shadow fiercely. I've turned my canvas, I'm going to add some shadow
on the floor. Let's see. I'm just come like
comes from here. I would get definitely
under here some shadow. I'm just going to
sketch in my shadow. Go and I'm gonna make
this darker under here. I'm going to add a shadow to
make this inline, the ego. Now I'm going to just
add some shadow. At the end. I would say around here is good. Some extra lines. A little bit more. Here. Good. There you go. Either this good, only once, probably at this bottom here. Now I want to zoom in. I'm going to keep seeing
these edges well, dark and closer to it. A little bit good. And do that up there
to around there too. Good. Leaving that bit lights close to that good. That looks nice. Now the next thing I'm
gonna do is create a sense of that this is
not just some plain, so what we're gonna do
is on the same layer, I would say some lines, little bit as we've
done on the bark, but where the edges are going to thicken
that a little bit. I'm gonna do the same here too. And add some random
lines here and there. And of course down here
we need to do the same. Make it one whole drawing. All right, good. This one is touching
that, right. There we go. Let's zoom in. All right, Good. Taking
a final look at it, I would say this is pretty good. What do we have some shadow from the tree right here on this. I don't think I've
gotten no distri here. Doc and just a little
bit with probably catch some shadow on the back part but I'm not gonna lift,
I'm not gonna do that. We're going to
leave it like this. We're not going to
worry about that. It's good like this. Alright, let's look at it. The only thing
which I want to do, this is quite dark
compared to this one. I want to go back to the
layer of the tree here and just making sure
adding some lines. But I'm now going
shorter at the bottom. There you go. Now it's more in line with
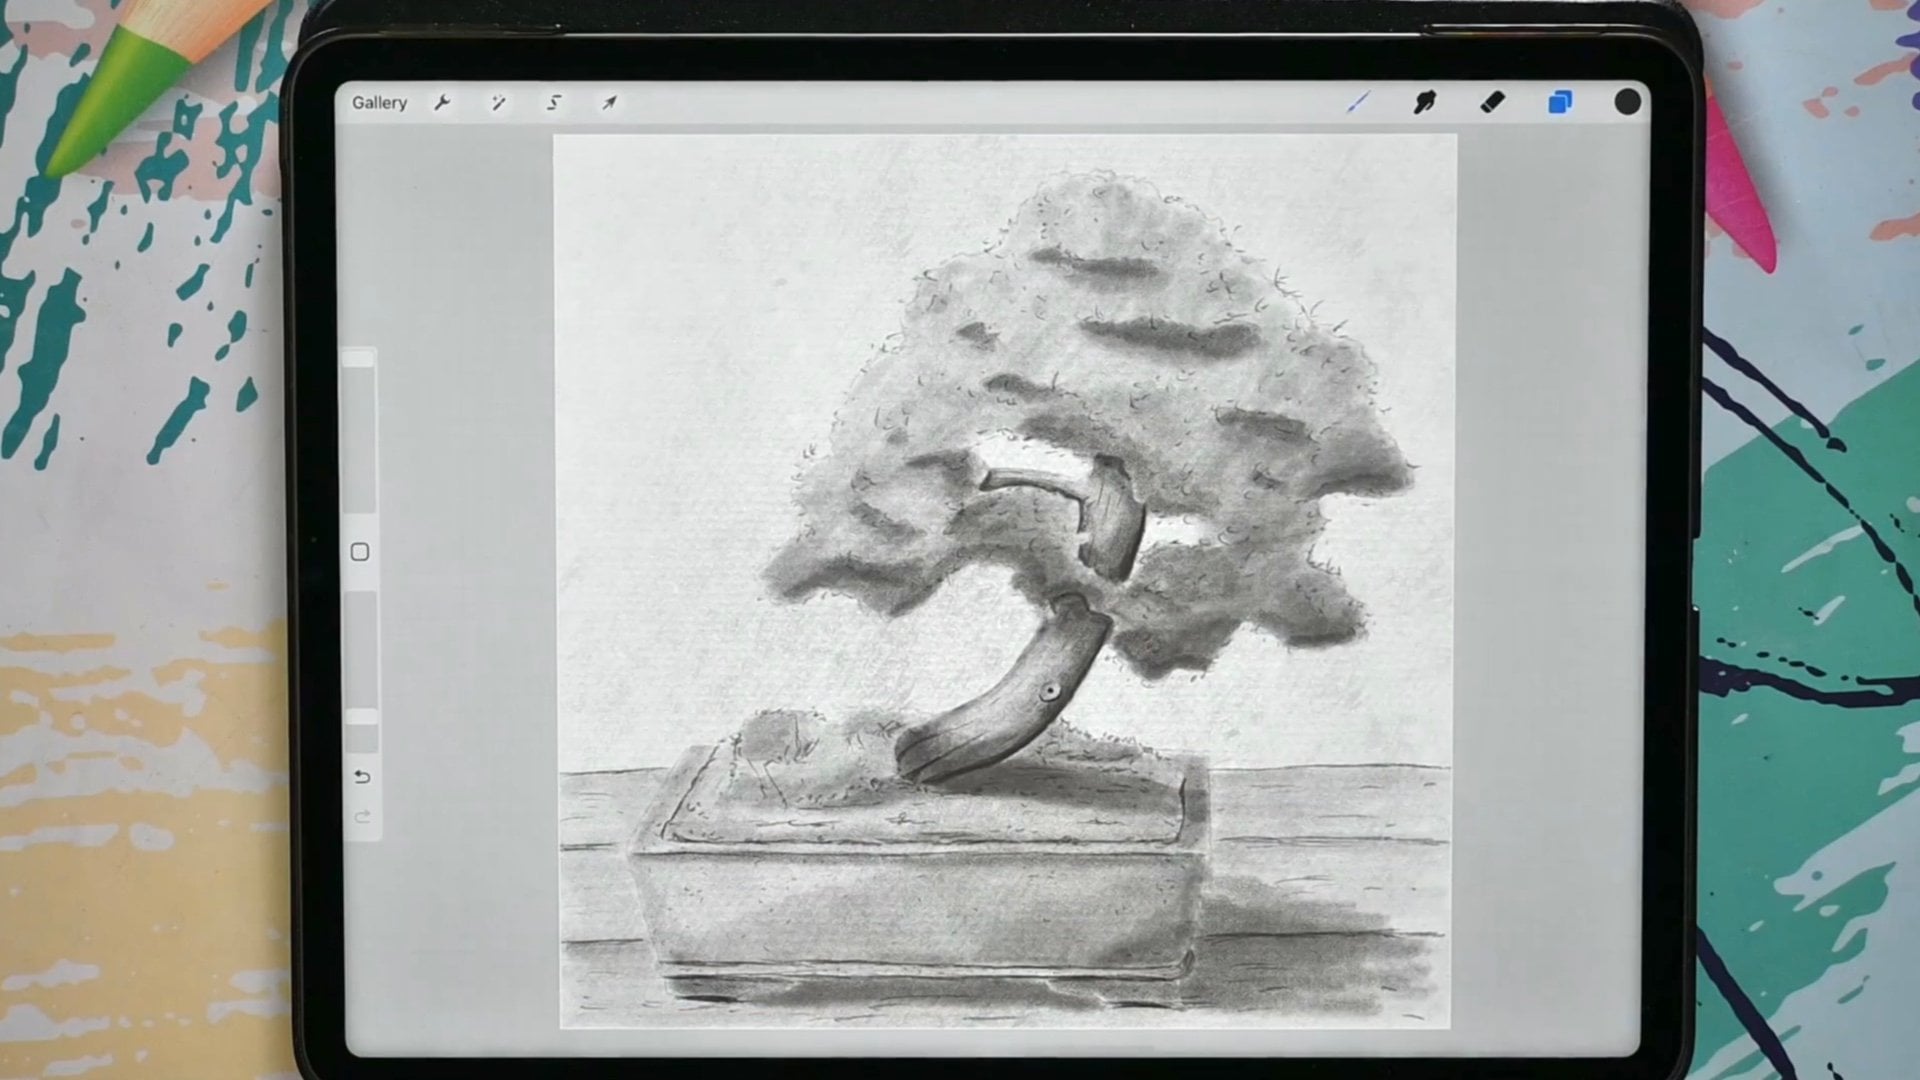
this one. A bit of balance. We have a bit more balanced. We're almost done with this. Now, when I look
at this drawing, I'm happy with it, but there's
a few minor things I see. I would really like to change to just improve the bit more. Let me show you what I mean. I'm looking at this, okay, now this is quite empty. Let's put it that way. What are we gonna do with this? I'm gonna go to the layer
where I've hedged on this one. And I'm keeping, keeping this pen but straight
and we're going to add some dots on it to give
a little bit D idea. Appropriate is making
them disappear again. To add a bit of a hint of
texture here to the width. And the bottom rim. Course. This lex
to look at that, that improves that nicely. And, um, I want to do that
upon this a little bit. Just make it a little
bit more interesting. Now looking at the tree, what I do think is the
light comes from here. This part here in the back
would be a lot darker. So I need to find my tree
where I hedged my tree. That is this part, yes. It is some gonna go
reasonably like this. What we'll do is I'm going
to hedge this part in. And I'm going short here and then with longer here
and then ending there. Longer strokes. And simply ending
there. There you go. Now that unlike a lot better, just a little bit
small improvement. And we've got some
texture on the PO2. And it makes it nice. And I think I'm done with this. I'm looking let me look
at it one more time. Yes, we're gonna stop here. That is our first bonsai tree. We're going to stop here too. We've created a
lovely bonsai tree. Now in the next class, what I want to do is
create a pine bonsai tree we've done now one with
leaves, my foliage. In the next class, I want to create
a nice pine tree. But for now, we're going to end this class because we create something really pretty
acute bonsai tree. The next step is the project. I tell you what you can do more. But before we go to the project, would say draw this tree if
you haven't done so already. Then once you've done that, check out the project, I'll see you in that video.
7. The Project & a little Extra: Welcome to this project. Now in the previous lessons, I've shown you how to draw
really cute, nice bonsai tree. Now, supplied with this class, There's a number of
photographs with other shapes or
forms, audit trees. I would say pick one of
those trees and create a new bonsai tree of it in the same way we've done
following the same guidelines, setting it up, really simply
then expanding on it, and then eventually
shading it into a nice tree with using that
hatching and crosshatching. My challenge, I'm
going to do the same. I want to pick one
of those trees. And I'm just going
to create a nice, lovely tree in the same
way what we've done. Now, I'm not going to talk
you through all of that. Of course that's what
the lessons were four, but I'm gonna show you that now. Just speed it up. And then you can
just look at it. Probably get some
inspiration from it and enjoy watching that. And perhaps even recreate
the one that's fine too, if you want to do the
same one as I'm gonna do now, that's fine too. Thank you for being
with me in this class. Next class will
be the pine tree. We're gonna work on a
pine tree tube because now we've done this
tree of leaves, but of course we need
one with needles too, but that is for the next class. Thank you for being
with me in this class. I hope to see you
in the next one. But in the meantime, what you can do, of course,
what's your other class? I've got plenty of
Procreate classes here on Skillshare
for you to enjoy. I would say pick another
class while waiting for the pine tree
that is still coming. While enjoying
doing the project. Don't forget to post
all the treaty-making. We would love to see them. I would love to see them and I'm sure others
would love to see it to what you are creating and really looking
forward to that.
 Benjamin A, Art Teacher, illustrator Art by Benjamin