Transcripts
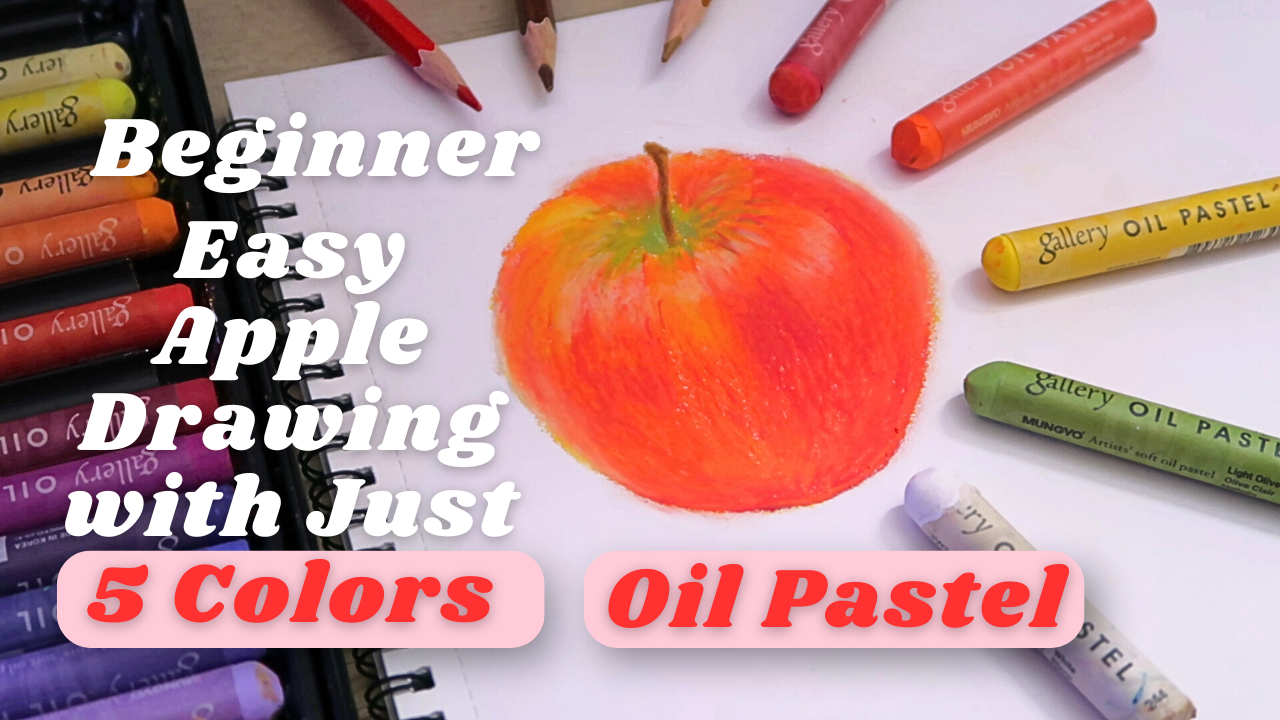
1. Intro: Hi, I'm Michelle and welcome to this class oil
pastel for beginner. Easy Apple drawing
with just five colors. If you always wanted
to try oil pastel, but felt a little overwhelmed, or if you're looking for a relaxing and creative
project to ease into this medium, you're
in the right place. In this class, we'll be drawing a simple Apple using just
five basic oil pastel colors. This project is
designed especially for beginner, no fancy tours, no complicated techniques, just a soft introduction to the joy of drawing
with oil pastel. You will learn how to choose
and prepare your toast, how to sketch your apple
with simple shape, how to build up color
layer by layer, how to blend with your
finger for soft rand result, and how to add highlights
and textures to make your apple look
juicy and full of life. Along the way, I also be
sharing useful tips and tricks I learn like why direction
of your shots matter, how to control smuching and how to add that without
too much pressure. This class is more than
just learning a technique. It's also about slowing down
and enjoying the process. Whether you're a total
beginner or just someone looking for a calm
and creative moment, this is a gentle place to start. By the end of the class, you'll walk away with your
very own beautiful oil pastel, apple drawing, and
more importantly, the confidence to keep
exploring this colorful medium. All you need is a few oil
pastel, a piece of paper, a pencil, an eraser, some color pencil, and
your fingers for blending. So grab your supplies, get cozy, and let's
draw together.
2. Tools & Supplies: Hi, and welcome to this
class. I'm Michelle. I'm so happy you're here. In this short lesson, we're going to go over all
the tours and supplies. You'll need to draw a
beautiful Apple using oil pastel and just five
simple color. Don't worry. You don't need anything
fancy to get start. Let's go through
them one by one. First, oil pastel. I'll be using Muno oil
pastel, 36 color set. You can use any brand you have. Even student grade ones
are perfectly fine. The five colors I
using are yellow, red, orange, green, and white. I will be list out
the color names and number of go
on the screen too. If you don't have the
exact same color, feel free to use whatever
you have that's closed. For paper, I recommend using thick paper that
can handle layering, like mixed media paper
or pastel paper. I'll be using this A four size, 135 grams paper is a
no brand sketchbook. We'll be using some color
pencil for cleanup. The color we'll be using
our red, dark brown, and light brown and
beige as optional. Lastly, an eraser and a pencil. That's it. Very simple
and accessible. Once you got your toes ready, let's move on to the next lesson and start sketching our apple.
3. Sketching: Alright. Now that we
got our supplies ready, let's start by sketching
the outline of our apple. This sketch will act
as a light guide for where we place our
oil pastel color later. So don't worry about
making it perfect. First, make sure you're
using a regular pencil or a beige color pencil
and keep your hand light. We don't want any
dark lines that will show through
the pastel later. I normally like to use
beige color pencil, so I no need to erase
the sketch later, but for you can see
more clearly on camera, so I use pencil on this one. Let's begin by lightly
drawing a circle. This will be the general
shape of the apple. Apples aren't perfectly round, so it's totally fine if
it's a little uneven. In fact, make it
look more natural. Next, we'll draw a small
dip at the top center. That's where the
steam will come up. It doesn't need to be deep, just a little curve inward. Now let's slightly sketch a short steam coming
out of the top. You can make it curve slightly
to give it some character. Then we move to sketch the shape of the apple
more accurately. Here's the key. Apple
orange perfectly round. Look closely at real apple. Their shape is a little wider at the top and slightly narrow
or more tap at the bottom. So instead of drawing
a perfect circle, try to make the upper part of the apple slightly fuller or rounder and let it gently
slope in as it goes down. Think of it as a
hard like shape, but without the pointy bottom. After done sketching,
use eraser to erase the extra line
so it look more clean. And there you go, a simple apple sketch with a more
realistic shape. Don't stress too much
about making it perfect, slightly uneven
adds personality. In the next lesson,
we'll begin layering our base color with oil
pastel. I see you there.
4. Base color: Before we start adding color, take a moment to lightly
erase your pencil sketch. Don't erase it completely just enough so you can
still see the line. We do this because if the
pencil lines are too dark, they can smudge and make your
final artwork look dirty, especially when
blending oil pastel. Now, let's move to
the base colors. These are the five colors
we're going to use, which are yellow, orange, red, green, and white. I'm starting with yellow to draw the outline first and
also at the base. You might wonder, why
not red straight away? Well, I like using yellow
underneath because it adds a vibrant
glowing undertone. It helps the apple looks
more alive and less flood. So I begin by gently applying yellow over the main
body of the apple. Here's something
important to note. When using oil pastel, the direction of your
strokes really matters. If you just scramble randomly, the apple can look
flat or messy. But if you follow
the natural shape and curve of the apple, your drawing will look more three dimensional and realistic. Think of it like
sculpting with color. Your strokes should curve
along the apple form, especially around
the top and bottom.
5. Layering and Build up the intensity: Then on top of that, I layer orange following
the same form. As I apply orange, I make sure to leave
some gap for highlight, especially around the middle
and top part of the apple, where the lights
would naturally at And then I use yellow
to gently blend out the orange from the lower part to the upper part of the apple. Remember to keep your strokes
curve along the apple from Then use red colour to gradually building
up the intensity. Slowly draw from the
top part of the body, then slowly move
to the lower part, then move to the upper
part of the body again. Remember to leave some
areas for the highlight. After layering the colors, I'm using my finger to
gently blend it out. And just like colouring, blending works best when you
follow the same direction. It keeps everything
smooth and natural. Here, you can see the
difference between the area without blending
and with blending. Isn't it the blending side
look more soft and smoother? I'll blend until the
transition between yellow, orange and red feels
soft and glowing. But I'm still
careful to preserve the highlight areas
I left earlier. They help the apple
pops and look juicy. Take your time and
enjoy this part. This is where your apple
really start to shine.
6. Adding textures: Now that we block
in the base color, let's add more depth and texture to make the apple
look more realistic. First, I'm using green around the top where
the steam will go. Pay close attention to the
direction of your strokes. Instead of coloring
in random direction, try drawing from inward to outward like you're pulling the green out from the center. This help give the illusion
that the top part of the apple is sunking in
just like in real life. Remember to leave a little
empty space for the steam. We'll add that litter
with cal pencil, but not in this chapter. Once the green is in place, I take my yellow oil
pastel to gently blend out the green
just a little, but be careful not to blend into the inward part near the steam. We want to keep that part
darker and more defined. I'm also using yellow in some parts of the
apple's body to lighten or soften area that look more orange or pale
in the reference photo. Its give a beautiful warm tone and helps balance the
color transition. Next, I pick up the red
colour again to add subtle texture to the apple.
Don't press too hard. Instead, just slightly draw soft curve strokes that follow
the shape of the apple. This give a realistic
skin light texture without overpowering
the color underneath. And finally, I use my
finger to blend lightly, but with care. Be gently. We don't want to overblend
the g texture we just added. Let them stay visible. That slight texture really
brings the apple to life. In the next chapter, we'll
focus on adding highlights, which will make the apple look even more treedy and juicy.
7. Highlights: Before we begin this
part, take a moment to clean your yellow oil
pastel using a tissue. Sometimes the pastel can pick up other colors while blending, and we don't want those
leftover colors to smudge the area were
about to work on. Now, I'm using the
yellow oil pastel to fill in the highlighted
areas we left earlier. You can refer to the
reference photo and notice where the apple looks
brighter and more yellow. After that, it's
time to bring in the white or pastel to add
those stronger highlights. Since the colour underneath
are quite vibrant and thick, make sure to press a bit harder
when applying the white. This help the highlight
show up more clearly. Once the white is in, use your finger to
gently blend in, but don't blend it too much. We want it to look
smooth and natural. But still keep that
nice pop of brightness. You might notice
that some part of the apple outline
catch the light, especially on the top or side. So I'm adding more
white highlight along those area and
blending slightly. This is a great way to make
your apple look more treedy, dreamy, and well shaped. As I'm walking, I
noticed that some of the red texture strokes we added earlier become less
visible after blending, so I'm likely adding some
red strokes again to bring back that texture to keep
the apple looking lively. Now I keep adding
the highlights. Also, don't forget to keep cleaning your white
pastel as you go. Since it pick up colour easily, we want to make sure we are not unintentionally dragging red or orange into our highlights. I'm using it eye pastel
here to clean up the edge a little and cover
up some small mistakes. It's also great for
softening or fixing part of the outline
that I want to adjust. Lastly, I'm tweaking the
area around the steam, adding some small details to improve the shape and make
it feel more complete. Your apple is almost done. In the next chapter, we'll add the steam and finer details
to finish it beautifully.
8. Final touches: Alright, in this final step, we're going to draw
the steam and add some finishing touches to
complete our apple drawing. We'll be using color
pencil for the steam. I'm using a dark brown
and a light brown pencil. I choose color pencil instead of oil pastel for this
part because it's much easier to draw thin
detail object like the steam. If you prefer to use
oil pastel, you can. But since this is a
beginner friendly class, I want to keep things
simple and appreciable. First, take your light
brown pencil and gently sketch the shape of the steam in the space
we left earlier. Next, we'll fill in the area around the
steam using green, yellow, and a bit
of red oil pastel, just to blend it
smoothly into the apple. Be careful not to
cover the steam area. Now it's time to add
some depth to the steam. Use your dark brown pencil
to shake in one side, about half of the steam, then use the light brown
to fill in the other half. This will give the steam
a nice treaty look. Once that done, use your finger to lightly blende around
the base of the steam. If you accidentally smudge the apple like I
did, don't worry. You can use a white oil
pastel to clean out the edges or gently erase more smudges with an eraser if they are like. Mm. And for the final touch, take a red color pencil
and lightly outline the bottom part of the apple and just a little
bit along the side. Don't outline the whole thing. We want it to look
natural and soft. This step helps to clean out the edge and make the whole
apple look more polished. And there you go.
Your apple is done. You just complete your
first oil pastel work using only five colours. I hope you proud of
what you create today, and I can't wait to see your result in the
project gallery.
 Michelle Gooi, Traditional Artist