Transcripts
1. Introduction: um, wait rocks doesn't sound very interesting. No rocks school when you take a closer look. Rocks are beautiful. They're interesting. There, varied. They're literally the foundation on which everything around us is built and grows. In this tutorial, you will learn how to draw in pain several types of rocks, including pebbles, boulders, coastal scenes, mountains and rocks with plants. I'll show you how to break down a complicated reference in a more logical and approachable way. In addition to drawing, we'll talk about all the different ways I like to paint rocks, including digital techniques, watercolor wash so that no matter what medium you prefer, you can come away from this tutorial, confident that you can create your own unique scenes. Everything is filmed in real time so that you get to watch the pain, react and flow. We'll do a crash course in color theory, and you'll also get access to all the show notes and reference photos. You'll come away from this tutorial with the tools that you need to succeed on your own, and so much of what you'll learn can be applied to several different subjects. Hello, my name is Sarah, and I'm a freelance illustrator and artists living in Scotland. Painting nature is my greatest passion, and I love being able to share my knowledge with others. I'm here today with my perfectly normal size sketchbook to talk about rocks. I promise this tutorial will not be full of horrible rock funds, although it is tempting. But anyway, you're here for the art, so let's get rocking.
2. Start Small and Simple: Pebbles: Let's start. Small pebbles and small rocks are usually found in a variety of scenes, anything from scattered across the ground on a forest floor next to rivers and streams. So in this chapter will talk about how to incorporate those elements into different scenes and how to draw them. How do you know it's a pebble, or how do you know it's a small rock scale is one of the most important things. And if you take a look below me, I have a few reference photos going through the slide show just to give you an idea of, um, a few different types of situations where you might find pebbles and small rocks. Uh, in terms of landscape design, they usually aren't the centerpiece. They're not the focus because they're so small. Usually they're just like teeny, tiny little supporting elements in a larger landscape. So to start off, let's just talk about general shapes. Ah, and how you can draw them simply and more realistically say this is our ground. If you're looking at it from the side, this is something you want to avoid. Perfect circles, ovals and gravity defying objects like that that would be pretty impressive if if a pebble was standing up like that, Uh, so it just looks so unnatural when things are too perfect. Um, and if you have too much repetition of the exact same shape So what a better approach would be is just kind of lump if I it there's probably a better term for it. But I like lump. If I, um so, you know, say we want to make a sort of circular pebble, Maybe just flatten one or two of the edges. Think about that. This whole mass being squished and poked and flat and in some ways like it. Like Plato Almost. You can still have flat pebbles, but maybe just give one edge a little bit more flat surface, and you can still have tall ones, but they have to sit properly on the ground. So they have to have, like, a decent sized base like that. Um, otherwise they will tip over. So you know you can still play with those types of shapes, but just try to think about it realistically, and probably one of the best ways you can do that is to go out and observe go paint from life draw from life. It is so incredibly valuable. How do you know that these are tiny. How do you know that they're pebbles or small rocks. If you don't give us any clue as to scale, the viewer will make their own decisions. And they could They could get it really wrong. So, you know, say they they don't have an idea of scale. What if it's a boulder? What if they but if they really they think it's massive. So one thing that is, like, just the easiest way you could possibly show skill. No, I probably didn't need to copy my house, did I, Uh, is little blades of grass or in this case, they might be kind of large because we want them to be bigger than our. Our stones are rocks. So really simple scratchy blades of grass. Maybe some of them are overlapping the rocks, starting at the edges and going out, and already just by showing grass next to the rocks, they seem tiny. Um, our brains are very good at noticing these things. And if you, you know, included something like this in a larger landscape, you don't even have to think about it for a split second. You just know those rocks are tiny, so it's It's so much about scale. Usually you aren't going to be drawing individual pebbles in a landscape. I mean, sometimes you will be, uh, but small rocks are small and they're usually just tucked away on the side, or they're just like there as a supporting character. So, um, clusters are important, and there's a few simple ways you can draw clusters. You can start with just really quick little circles, burying sizes, varying shapes. Um, depending on how this is incorporated into your landscape, you only really need a few. You don't have to sit there and draw every single pebble. Um, and if you throw in some grass, it'll automatically give it that sense of scale. These are just, you know, little little visual elements to give us a clue. So if we zoom in on that a little bit, you know, say you do want it to be a little bit more detailed. Um, one thing that I find helps is don't draw the entire rock or the entire pebble. Leave one of the edges, usually the bottom edge, where it would hit the ground. Um, leave that open and visually are I fills in the rest, but it just gives it a little bit more realistic because when you're looking at a landscape , it's not like nothing is outlined. So if you're drilling it, you do have to make those marks and make it kind of obvious that you know what things are, but you can. You don't have to give the viewer every single detail. We're more than capable of doing doing a lot of that with her mind. So yeah, just a little bit here and there. And you can even add some variety to those stones. Um, and then if you want to go even more, do you tell another quick way. We just add a little shading. So if the sun is coming from this side, are right side of those rocks is going to be shaded. And you can do that by just little quick lines. You can use the edge of your pencil and get some soft shading, maybe a couple shadows. If the rocks are a little bit tall, so really quick that took what, like, five seconds, you can do so much with very little and giving the viewer very little information. So one of the last things I want to mention about pebbles and small rocks are if you do want to draw them next to a river or a stream or something like that, like below, you can see from far away they all kind of blend together. Um, so if you are going to draw something like that, you have the edge of your river and you won't want to drop in Just a few hints in the foreground next to the water maybe vary in size a couple larger ones and a couple little dots. Um, but honestly, and then you know a beyond your pebbles you'll have some bushes or trees. I apologize that Veeder is me yelling a lot in the background. I hope it's not too distracting. So you know, we have some some organic stuff beyond the pebbles. But in the foreground, Really quick, fast, loose lines Um, and of course, we have the river in the foreground. If you want to zoom in on that, uh, what I suggest is avoid making the water's edge smooth like this. In reality, like a few of your pebbles kind of sitting along the edge, but this line is there. It's kind of defining a more that's more of a That's an unrealistic water's edge. So as you can see, we have our rocks. We have regresses and stuff. Um, just like a little bit here and there. No, to fix that, it's very easy. We'll just copy that coming and will move this water's edge to hug the rocks a little bit closer. So I'm drawing the water's edge almost like connecting the dots, and you'll start to notice, especially once we get some of the water. The flow of the water in there will give the water a little shadow just to kind of emphasize that it's not the same. But basically, if you do something like this, where the rocks are kind of dipping their toes into the water overall, it will look a little bit less cartoony. It will kind of give the viewer just a slight hint of realism, Whereas this is a very simplified approach, it's still totally works like don't get me wrong. If I saw that, I'd be like pebbles on the end of water, it would work, but just a tiny little thing you can do is add, um, a little variation in the edge of your water. And it's especially works well with larger stones that are kind of sitting in the water. Um, and we'll get we'll get into that when we talk about boulders.
3. Find the underlying structure: Boulders: boulders. Boulders are basically very large rocks, something that a normal person couldn't move on their own. I really enjoyed drawing boulders because they can add a really fun graphic element to a landscape. Boulders could even be the focus of a landscape. Sometimes they could have very interesting shapes, but when we're just starting off, it's best to simplify it. I have three examples for you off very simplified forms that you might find out in nature. The cube is honestly one of the least likely that you'll find, but it's a very simple shape to start with. So it's good as an exercise. You could consider this like a wire frame, X ray view of a stone or a boulder, and I challenge you to come up with your own really fun designs for these internal structures, on top of which we're gonna add detail and actually defined the stone to find the boulder draw a simple wire frame design. It just helps you kind of see things a little bit more. Three D, if that seems a little bit too complicated at first we can think about what these look like two d like directly from the side. You know, this one is obviously a square. So again you won't often see a shape like that in nature. It's a little bit unnatural. This shape from the side might look like this have kind of some bumpy edges. This shape up here is a little bit odd, but occasionally you see odd shapes out there. So it's OK. I shouldn't say occasionally, I should say almost all the time. Rocks are strange, but that's why we love them. But once we have identified our internal structure, given ourselves a little bit of a blueprint toe work with, we're going to take that and we're going to copy it down here, and we're going to lay in it a lot, so, like, almost where you can't see it. Okay, a little brain it a little so you guys can see it and add a layer on top of that. And this is where it gets a little bit more tricky. But let's start simple. So we're gonna outline our shape, giving it a little bit more volume. So we're not gonna follow the lines. Exactly. Just give it a little bit of ah, lumpy. More interesting outline. If you're not a digital artist, you can do the same thing with traditional mediums. You can start with a really light sketch using either light lines or a colored pencil, and then come back in with a darker pencil and do the same outline like that. And now we have a very simple way to start. So because I remember what that internal structure looks like, this is these air, like the general sides to this bolder. But we don't want it to be too perfect, right? So we want to maybe lower one of the corners or around one of the corners, and this shape again was a little bit funky. And we can just try to have fun with this, and nothing you do at this stage has to stick. You can just use it as a jumping off point, but once we start shading things it will become will really start to see where our different facets of our rocks are, Um, and where we want things to be more rounded. I'm not covering every single aspect of drawing in this tutorial, but knowing the basics of shading is really helpful. So say we have a spear very try drawing a perfect circle. It's really hard. Um, if the light is coming from this side in general, this part of this fear is going to remain light, and this part is going to be in shadow, so we can just very loosely give ourselves a She did a sphere, and the same goes for a cube. Wow, this is rough. If the let's say the lighting is coming from this side this time. So this side, this side is going to remain pretty bright as well as the top over there. But this is hidden from the sun. So it's in shadow. And of course, we would have later shadow coming off of that. You might even get a little shade on top, depending on how bright it is. So when we think about these rocks, obviously we need to know where our light source is coming from. So let's just say for all of the rocks, the sun is kind of coming from the left or the top left, so we know that all of our right sides of the stones are going to be shaded, So we're starting very simple. Um, and if you don't like this type of shading. One thing that you can do so I'll go back. This is another really fun way of shading. Stones is, um, parallel lines so you can actually use the line orient the line direction to define this up the form. So if it's if it's angled, the lines will be angled. If it's vertical, lines will be vertical. If it's rounded, the lines will be rounded like that. So that is a really fun way to do it. And that's something that I love doing. When im sketching, I recommend filling a page of your sketchbook with little exercises like this. It's a really good way to warm up and loosen your hand. Don't worry if you accidentally shade outside the lines or if it looks really messy. Just use this as an opportunity to start thinking about in visualizing the form in three D . We can cross hatch. That'll add even more depth to it. This pencil is a little unpredictable. Sometimes I get those big, shaded lines, Um, but this is a really casual way of sketching it. Just I think it makes it fun, and it's visually interesting if we zoom back out you can start to see, like how the form is defined and our lines air helping with that. So same thing over here this edges a little bit angled. So we'll do some vertical today. I'm gonna lines like that. And then maybe here it's going more vertical. And then over here it's a little bit more round. So, yeah, have fun with it. And down here we probably have some shading underneath. So, well, you know, give it a little bit of variety down there and you can continually crosshatch and add a little bit more depth and just continue going. Maybe this is Con Cave that goes inwards, and then this is going out. But the whole point don't get too fussy with it. You have plenty of time to get more detail later for this beginning exercise. Let's just a simple So that was a crash course in designing your own boulder and adding a little shading and thinking about the lighting. And I hope that helped just get you into the right mindset. But as you can see from the photos that have been cycling below me, there's there so much variety in types of boulders. You don't just have thes standalone boulders. Um, well, even will have lots of different shapes will have flat ones. I'll show you guys how to identify different patterns and shapes of boulders out in nature from our reference photos, and hopefully that will get you started. It's really fun to try to come up with your own designs. So just to really quick examples, tall and skinny versus flat and smooth and these air really good elements to practice, especially when you're getting more into bigger, more complex landscapes. If you're drawing a mountain, you sometimes want something like this at the edge of it or, um, at the base of it. So practicing boulders first, I think, is very helpful. Okay, I hope you don't mind. I went back and I cleaned things up a little bit just to give you guys a nice reference sheet just moving forward. So that's everything we talked about, um, and more so you can use this as a visual key in the future. But now let's talk about maybe a more realistic way of drawing boulders, which is not this standalone style appear but more about clusters or scattered across the landscape. What I did here is I started off with a wire frame drawing just like we did up here. Although I didn't include the background dotted lines because that was just a little bit too much. But basically, this is all you need to start off with, and you can see how rough this is. This is nothing fancy. You can you can just draw lots of overlapping circles. And as long as you can see what it is, that's all that matters. So really simple line drawing. We're gonna take this and copy it, copy paste just over here and start erasing anything that any of the lines that are overlapped. So start with the foreground, these air, the foreground stones erase anything that goes through these rocks and then work our way towards the back. And that's pretty much it. So you raise your overlapping lines and you can see just between one step one and two. It's very simple. It's the easiest thing. Even just adding something like this on the right to your landscape would be enough information for them to know the viewer to know that you're looking at a bunch of boulders Um, but again, you might not realize how big they are unless you add something to give it scale. So we'll talk about what? We'll do that in a minute. But first, let's figure out how to maybe make this cluster a little bit more realistic and just like we did up here, where we poked and prodded and flat end and scratched our rocks to make them a little bit more realistic. We're going to do that down here. We'll copy this again and bring it down here and let's take our eraser and just take away some of those edges and flatten them and maybe add a little bit more angle just to make it more fun, more interesting. And you can do it as much as you want or as little as you want. So go ahead and do that. You can see I went through and I did a lot. We're also gonna add some different facets to our rocks again. If we remember what we did up here with the wire frame, how their obvious flat facets on our boulders, you know you want to make them a little bit rounder and a little bit more organic looking, but you still will have some sharp edges and some obvious facets. So let's take a step back and I'll show you what I did. So we have our long, flat top. Um, in my mind, I'm thinking I would like to sit on that rock so I need a flat surface up there. So I would I might start with something like that. And then I will start adding in more straight lines because I A badge in a some point, the rocks split and the little cracks happened. And here and there we had all of this going on. So obviously I would like to do a better version of that. So I will erase that and come back in and start thinking about how I can make that look a little bit more realistic. And then soon, once we adder start adding our shading, it's going to be even more obvious. But go ahead and just start dividing up your boulders in different ways and adding cracks and lines and contours and things like that, and you'll quickly get a knack for it. And from there we are going to copy that, and then we're gonna work on our shading. This is the really fun part. So as you can see, we're just building up slowly to our realism. And this is exactly what I talked about earlier. You can either do the parallel lines or cross hatching or shading army in the loo sheeting . So I like doing the lines, so I'm gonna do the lines. So basically, as I'm looking at this, I'm thinking about the angle of each facet. So this one is definitely angled like that. And then maybe right here, it's a little bit more vertical, and then it kind of scoops down here. So go ahead and start adding that to yours. Um, if if you want to really define the roundness, you can wrap things like and very intensely like this. And then when you zoom out, it's gonna read as shadow. And once you get all of your lines filled in, we can start adding little grasses. So if we make the grass really tiny, it'll make the rocks appear bigger. Just like we did with pebbles. We add a giant grass and it made the rocks drink really quick so we'll do the same thing here. We don't want any tall blades of grass that go up this way because then the rocks automatically start looking smaller. Um, well, unless that's your intention, so you just take just keep that in mind. It's all about contexts when it comes to scale. Four steps later, we have our boulders. The's show notes are references will be available for you in the download pack in case you wanna quickly reference it in the future. But in order for you to get to this point, you do need to practice. So check out the exercises. I'm giving you guys as a way to start getting used to doing this.
4. Build up the complexity: Coastal: coastal rocks. A lot of times, coastal rocks have really interesting patterns and coloring, but that's also what can make these types of rock so difficult to paint and draw. But no matter how complicated our references are, we can always break it down into more simplified shapes. When it comes to coastal scenes, we're obviously dealing with bodies of water or water and the rock meeting so we can't just draw the coastal rock. We have to draw the water as well. But this isn't a water drawing tutorial. This is a rock tutorial, so I'm gonna focus on that aspect. I find that it's still really helpful to imagine the entire rock or the overall form, even though it goes down into the water or up out of the water, depending on how you want to say it, Um, so there is going to be that level of water at some point, but in our heads we can try to imagine it as a complete form, like if it's a little if it's a big boulder sticking up out of the water, we want to think about it like a glacier obviously has a bottom to it, so does Iraq. Um, so in a way, we can start thinking about, like, rocks there. Go down. This is the sea floor. Iraq comes back up like that, and the water level is about here. Right? So if we zoom in, this is going to be our main rock form that we're gonna focus on. And so is this over here in this over here. So, yes, that's what we're focusing on. But there is a lot going on underneath the water, and that's a whole other funding to deal with. So this is cleaned up a little bit. Um, we're looking at this directly from the side, which may or may not be how he would normally want to draw this in a landscape, but for learning purposes will just keep going with us. It keeps it simple. So what we want to do is duplicate that drag it down here, and we're going to erase everything that we don't mean. So we don't need the text. We don't need this. And I don't need anything that's below the water. So anything that goes down there getting rid off and this is the most simple way I can think about doing this. But we'll add another layer underneath and I'll get a bigger brush that's easier to shade with. Just that brush is fine, and I'm going to fill in all of my rocks. It's kind of like a light gray color. Okay, so now let's get, like, a hard edge brush as our eraser. I love this dry ink brush, and we're going to figure out where our light sources and start erasing away some of that shadows. So far, light sources over here, we have a happy little son. Um, we want Teoh. Imagine the light is coming down from that side. So on the right side of our rocks, I'm just going to start slowly racing. And in some spots, I'm gonna have a hard edge. And in other spots, I'm gonna have a soft edge so you can start slow so you don't go overboard. But basically, some of my lines are getting really long, and that kind of indicates that it's one of those long, jagged surfaces that comes up out of the water. You have long edges like that, and then we have ones that cross them occasionally here and there. Keep having the Chase Vader. We actually so loud, so we I can just do a little bit here and there to start off, and then we'll kind of take a look at what we have. Um, if you're having trouble with this part of it Ah, that's totally understandable. But it does get a little bit easier the more you observe riel life rocks or at least reference photos. So, honestly, I urge you to do that as much as possible. If you want to make it a little bit easier on yourself, you can define which direction those long striations air going straight away. So, for instance, in these ones, most of my most of my longer edges are going that way, and this way, you know what I mean. So that way, I know straight away where the majority of my cracks will be. We do want a couple coming this way, though, just to add that variety actually go back in and define the shadow more. We can add a couple really dark lines. So in a second I will show you how we can take our our reference and break it down into simple forms and then We'll just pre keep practicing, drawing those forms. And the more you do that, the more you will be able to just kind of invent to your rocks on your own. Let's take a look at this reference at first. There's so much going on that it can be overwhelming to even know where to begin. You can begin by identifying some of the major shapes that you see. For instance, I can look at this upper area with the mountains and the grass as one large mass. The next thing that stands out to me are these really noticeable cracks and patterns in the surface of the rock. Then I start to notice the highlights in the shadows. Let's do a quick drawing of what we see here. I'll start by laying in the top line that identifies the mountains in the distance and then drawing the grass that's overhanging the cliffs rate above at this stage, keeping it really loose and quick in gestural and not getting into any detail. Yet then I need something to anchor it. So we'll add in some of these foreground rocks and quite often all exaggerate them a little bit more or change things up a bit, just using some artistic license here. And then I'm going to continue to build up that depth by adding some mid ground rocks and rocks that kind of reach up to the grass that I drew before and just like we talked about with the boulders. I am trying to identify that internal structure, and it's important to stay very loose and gestural at this point so you can get the overall shapes first, and we can always come back in and add detail later. Something that helps me is that occasionally along the way, I'll throw in a shadow tone just to remind myself which edges I'm looking at because we can easily get lost in all the details. A good exercise you can do to start helping you see these more geometric edges on the rocks is to start off with a basic plane. So it's a flat plane that we're looking at and then draw awesome shapes in front of it. You could start off simple like this and then start to imagine how it would come out of that plane so it might look like this, and from there you might even imagine how another rock comes out of that. But if you start to think about rocks in this way, it becomes a lot easier to see how they're building forward or they're all attached to each other. And, of course, there's plenty of organic shapes to rounded and smooth curves. But this is just a really basic way to start getting your mind thinking about the structure of rocks. And once we start imagining our forms as thes three D masses stacked one in front of the other, it becomes a little easier to break them down into individual rocks and addle the details on top of that. So let's take a copy of this over here. We can zoom in on that and start thinking about how we might make this look more like a rock. So what I usually will just think about first is how I can make them have a bit more organic form, something like this. Perhaps you can even start cutting into the rock and taking away little pieces. Maybe they have lots of cracks like that. Make sure you don't leave too many perfectly vertical straight blinds or even horizontal ins. You know you want to make it look a little more organic, and the one in front of it could be even more dramatic. Well, maybe something like, but you don't. You want to be careful not to repeat yourself too much, So always try to have a bit of a randomized edge here and there. Rocks are unpredictable, yet they're predictable. So you can just keep playing with the the outline. You could even have the bottom of it. Brown did more. And in our background we might start picturing some of these vertical lines where horizontal as they go up the cliff face. And in a moment I'll show you how this can translate into a more realistic scene. But if you start very basic, give yourself a chance to understand the scene and then we can copy paste. So how might this turn into a cliff face? Let's see, we might erase the edge. This is maybe got some cracks here, but the same way we did in the foreground will have some of these rounded edges. Um, and maybe there's maybe there's a cut out or a this one, like, is back in the distance right here. but it's not fully flat. Or just keep playing with this. See what you can come up with, and the more the more often you do this, the more you won't even really need to draw these guides underneath. You'll just see it and jump straight into drawing your rocks. If you wanna draw one that's like a little bit set further back, Um, think about shading it and it'll automatically appear like it's further away because these front rocks air much brighter. So you get an idea of that part outline wouldn't really be like that. What, it Maybe it's like this very jagged top. Maybe there's an overhang, but you really have toe. Do this quite a few times until you can do it without a wall. A lot of help like this in the beginning, but I think it's one of the most fun exercises. Let's look at these smaller coastal rocks that are on the shore. First thing I notice is that they're definitely coming out of the water at a quite extreme angle. So that's something that I'm going to hone in on when I draw them. First things first. Just starting off with a very simplified version of what I see. So in this case, it's almost like a triangle. And if you need to, you can draw a actual triangle and then try to break this down or create into created as a three d form. And it's okay if you have to sketch it out like this a couple times before you jump into a natural, detailed drawing in order to understand it. Often times when I'm thinking about a bigger seen, I'll draw out a couple of the rocks just to get a feel for the overall design that I'm going for, and then I'll jump into the bigger seen or the more detailed scene. But when in doubt, there's always an opportunity to stop. Just take a pause, think about your form in a very, very simplified way, and then go back to the detailed drawing. Rocks are one of those subjects that are very complex. They can be extremely simplified, too, but a lot of times scenes that I'm drawing involved so many different fast. It's different cracks and crevices and different forms overlapping, so this is like just a really quick way. You can jump into it and get a little bit more confident
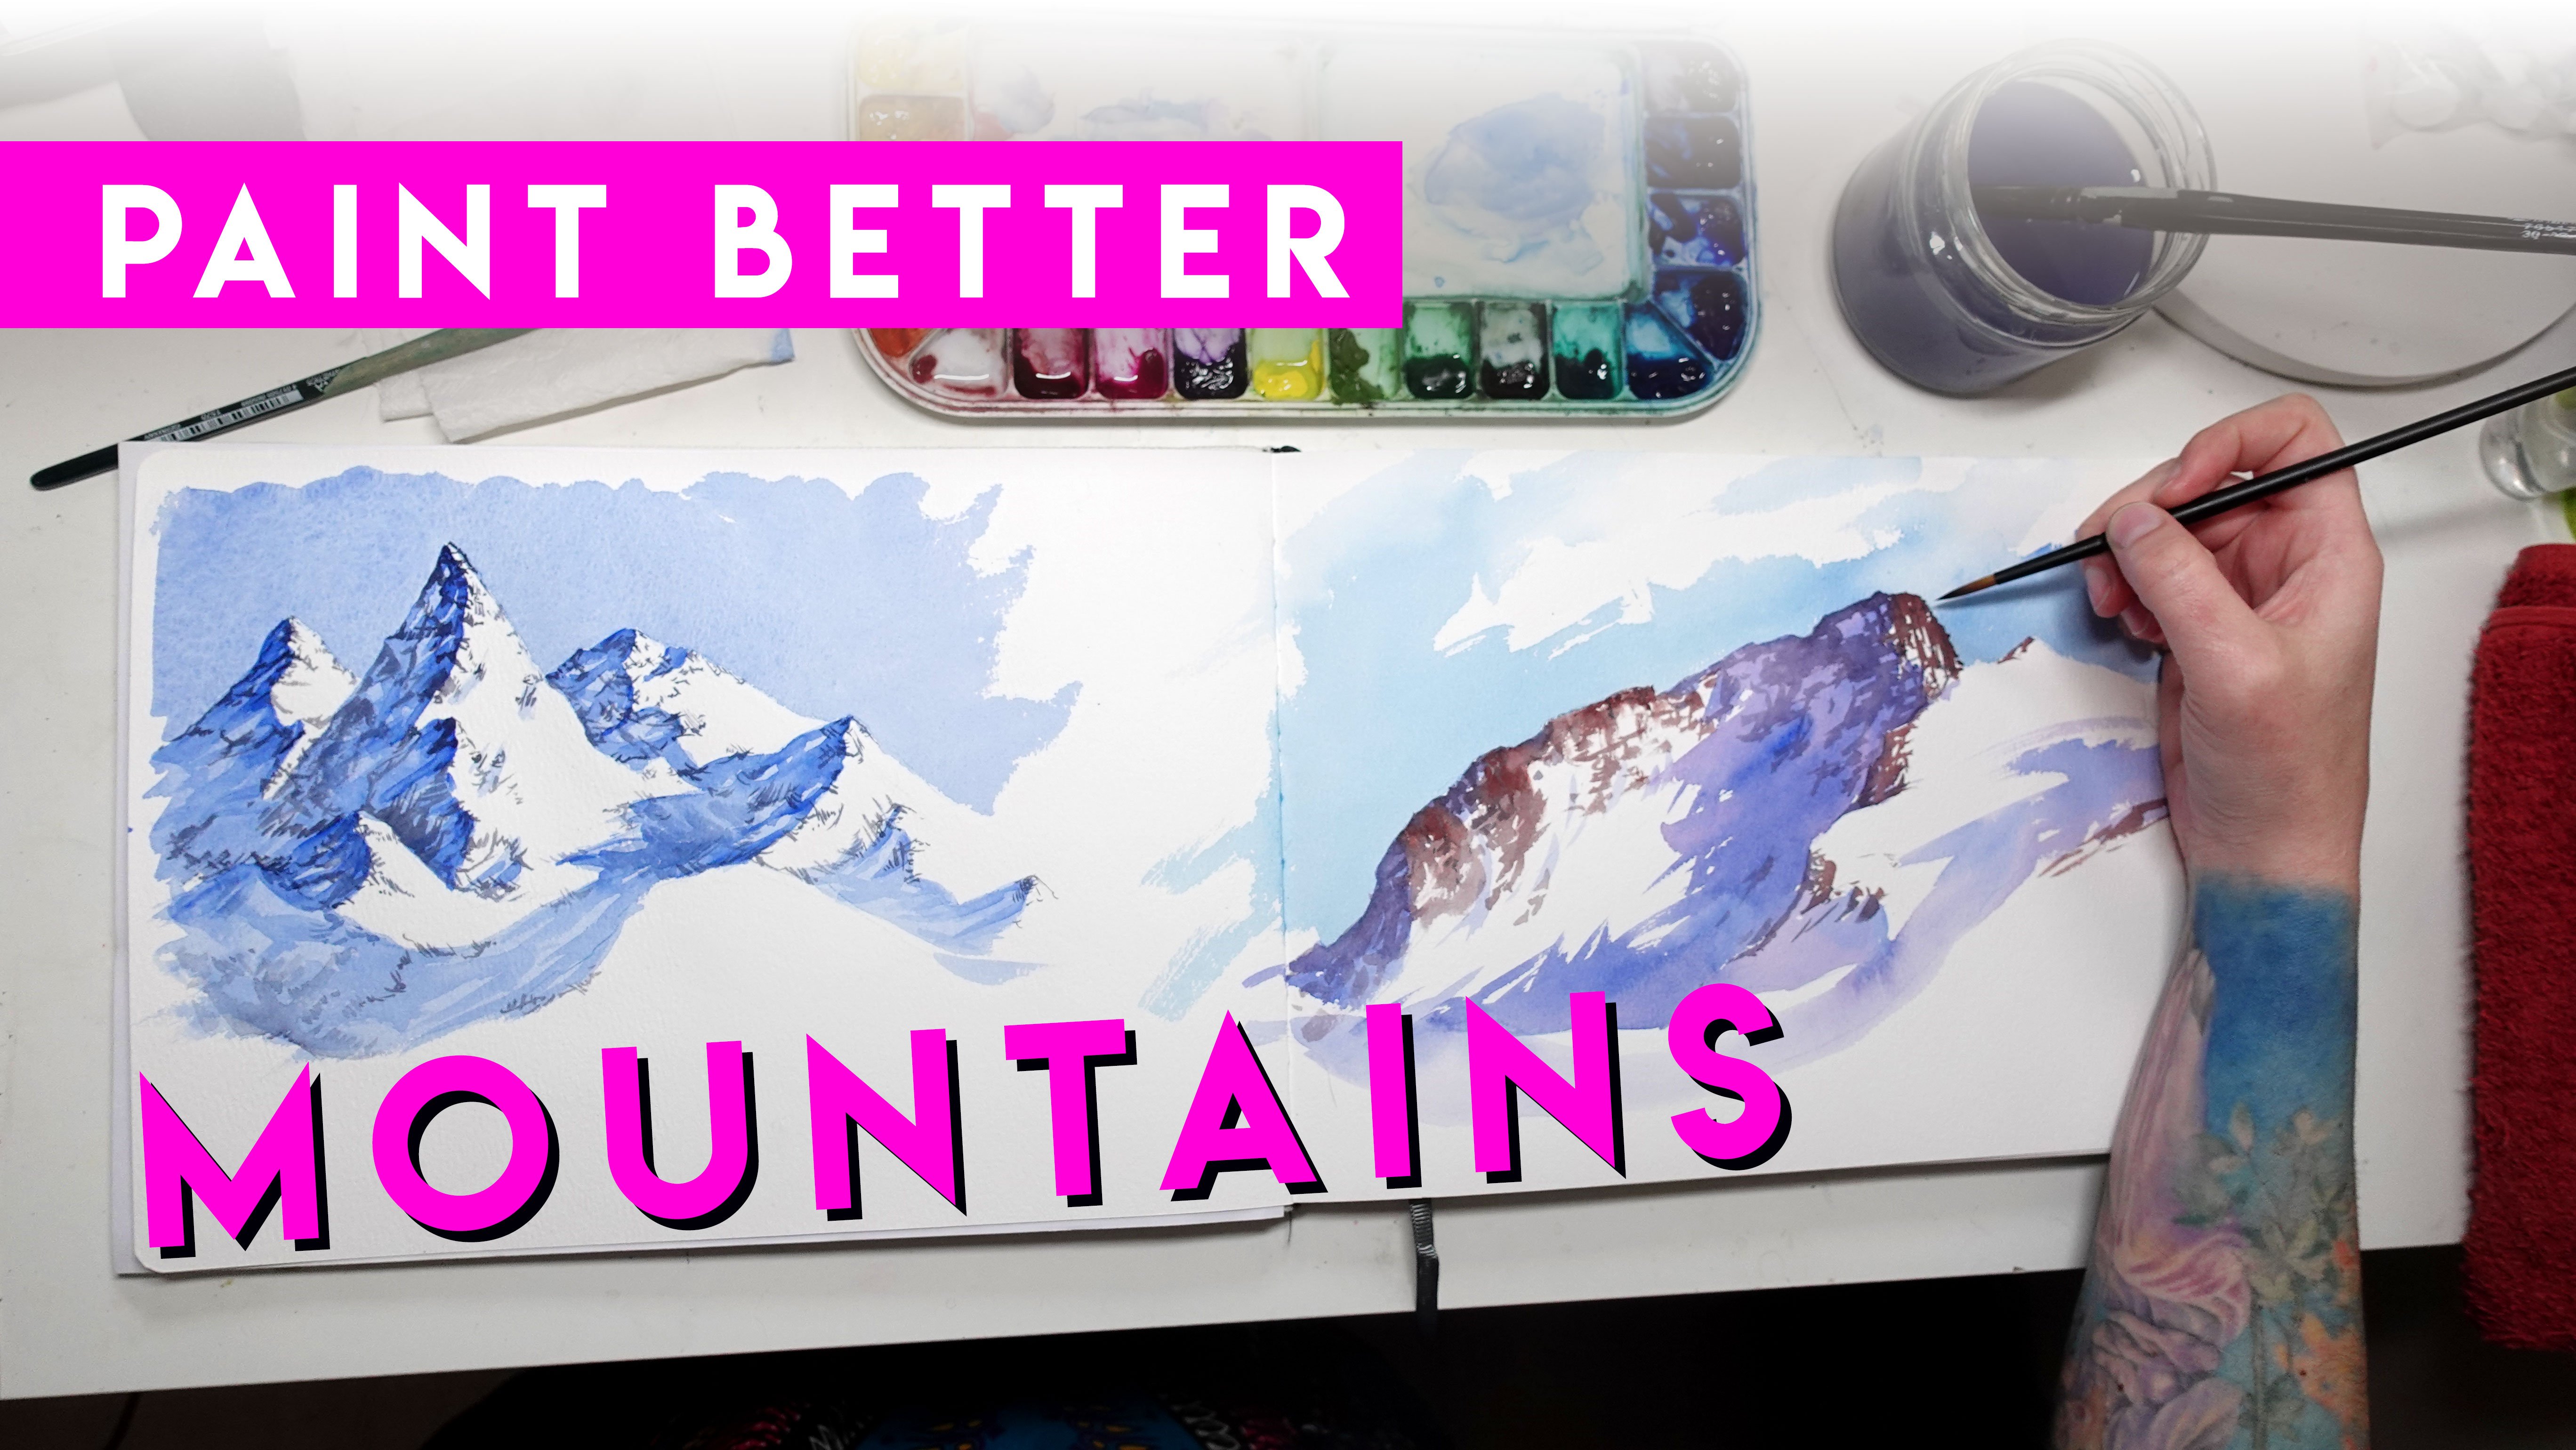
5. Go Big! Mountains: I want to see mountains again. Mountains, Gandalf. Now we're getting into the good stuff. Mountains can be incredibly simplistic and overly complex, so let's start simple and work our way up. Let's talk about a really simple way to make mountains, and that is triangles. Triangles are your best friends. Over the years, the winds, the elements have eroded away the large masses of rock and the earth, and we're left with these really cool peaks. So very simple, Easy way to have to have mountains are just a bunch of triangles. Obviously, that's not as realistic is what you'll find in nature. Just starting off with something as simple as this is what we need to get us going. So on your paper draw a bunch of overlapping triangles. They don't even need to have bottoms again. It's that wire frame idea. It lets you just start off with something very simple, and then we're going to slowly build up. On top of that, let's copy that over, and now we're going to erase the overlapping lines very similarly to how we did the boulders, and we'll start adding, making the edges a little bit more jagged so we'll start in the foreground. Just figure out for yourself where you want your foreground mountains to be and just erase the rest. So this is more like a mountain peak, a mountain range where we have foreground and background mountains. Um, and let's make this, Ah, a little bit later, so we'll just reduce the opacity and add another layer. And on top of that will just start adding more jagged edges. So how fun with it, you can go really exaggerated and do lots and lots of, uh, peaks jutting up and down. You can be very dramatic, Uh, in terms of shape here. That's the fun. That's the fun part of mountains. Um, I said, oops there because I drew instead of drawing, making my edges a little bit jagged like that, I accidentally did this, and that would obviously be a very large overhang, which is extremely rare, I would say so try to avoid that, have them ascending up like that and then back down. So we'll continue this. You can even flattened parts of it out. Okay, and that's all we need to start off. So let's duplicate that and bring it down here. we're gonna go forward with more detail. Okay? Now we need to figure out where our light sources because usually we have a light side and a shadow side to a mountain, and that's what makes it more interesting. So let's say our son is over here bright and happy. On the right side of the mountain, we have our highlight. And on the left side we have our shadow. So in order to just get us started with that, we're going to draw very simplified shapes to start off. You can do it very simply by circling the areas you want to be highlighted and then slowly build are slowly go into more realistic shapes from there. But once you've done it a couple times, you'll be doing something more like this where you add some jagged edges on the right and these can go any which way up and down, side to side, as long as it kind of ends up looking something like that. And we are halfway there, guys. So let's copy this again. Could be paste, move that over maybe a little bit more. And now we're gonna very quickly define our shadows filling our shadows. So we remember where we're where we are with that. Now, this is a very easy way to do shading on your mountains. So if you think about your peak, it goes up like this. All of your lines for your shading should follow those contours. Follow that direction. In that case, we will do our parallel lines like this going up against that highlight area, and if you spread your lines apart, it will be a little bit later. If you put them closer together, it will look a little bit darker so you can have fun with that and get it as dark or light if you want to. But this is just a quick exercise to show how easy it is to get an idea of shading and lighting and Heil shadow and highlight in your painting. From here, we're going to draw a little bit more of a realistic mountain range. So have this in mind as we go forward, Really simple line drawing that is slightly more complex than what we just did. But it kind of follows the same rules so you don't have to go overboard. Let's just take baby steps. You can copy paste this line, drawing onto your paper or wherever you're working and go from there first of all, our background mountains, anything that's in the distance is going to be lighter and less detailed. So these mountains back here, um, actually, let's use a lighter brush. I'm going to fill in the shadow side the very light. I don't have to stay within the lines. It doesn't have to be perfect, but this is going to be lighter than the foreground shading. So that's the whole goal. And I'm so following the rules that I said earlier, and now on the foreground mountains, we will increase our darkness again and start shading in. Let's go in the direction, as I discussed earlier. So we're going up towards the highlight side. We don't want to have it. We don't want it to be black here because we still need to add in some of the cracks and crevices. And those are what are going to be the darkest. So let's leave a little room for play within our values. So just and again you can come back in and erase anything that he kind of overlapped, takes a little more time to observe nature or your reference photos to get an idea of how to do this quickly. But basically, when you look at your mountain, you should know that the sun is coming from the side. Therefore, anything that is Hayden from the Sun is going to be in shadow, and that includes any of these really tight areas. And we can fill that in with a very dark dark. And we can also add in some perpendicular lines. And that's gonna appear as like big cuts or, um, areas where the stone has broken off and fallen down the mountain. So any time you have a direction change in your your highlight side. So here is going down here. It's going this way. Here. It's going down next to that in your shadow side, you can start adding some darkness. So here and then this this shadow side comes all the way down here. There might be a big chunk missing there, Um, and this is just I think it's very fun to do this, and I you know, maybe it takes a little getting used to, but once you start getting the hang of it, it's so much fun to add in all these little details. But we also have shadow in our highlight side. It's not gonna be perfectly white, Right? So here is what I like to dio, um, any time again with thinking about how the mountain has formed over time and how things are breaking off here and there. It's not gonna be perfectly flat, so we might have some lines. Let's make her pen a little bit later. We might have some lines coming in like this and changing direction. If you start off with just a couple of random scratches on the surface, it will get you started. Don't be afraid to just try things out and see what happens. So much of out of how I learned this from experimentation. And the more we add, the more varied it's gonna be. So I'm just scratching and playing with direction. Um, and if you want, you can keep zooming out, seeing if it kind of feels realistic to you and then zoom back in. I would suggest not staying zoomed in for too long because you differently definitely lose sight of the overall feel that's happening, and the overall effect you're getting so again, learn from life if you can, or at least reference photos. But experimentation is gonna help you so much. The's show notes will be available to you guys in the download pack if you want to quickly reference it.
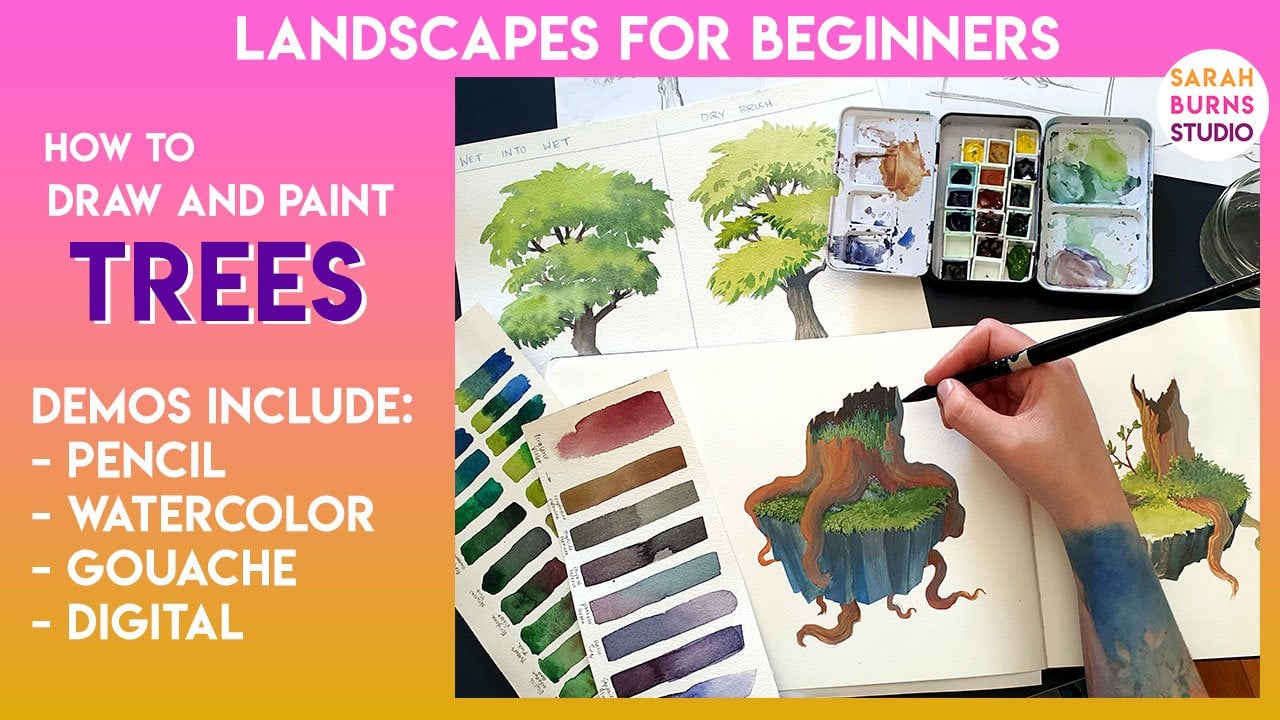
6. Adding Texture and Plants: It's like it has a little hat, something I love to draw and paint our little grow ease on top of rocks and boulders. And it's a very common element in a lot of my landscapes. Can I help you? No. Don't do that. Grow ease, meaning anything that might grow on or around rocks like moss, grass, ferns, even flowering plants like there's so many things out there. But basically, I think you guys are gonna find this to be one of the most fun and easy things to do with your rocks, and it just adds a lot of life to them. So it's my preferred way of drawing rocks, and I heard the ever just have a naked rock. It's always got something on it or next to it, things we don't want to do. Our well, I call the Bart Simpson grass. You know, how is the top of his head? His hair is just like a bunch of spikes that isn't really going to give us a very realistic feel. It's gonna feel very I don't know kind of cartoony, Um, and we also want to avoid just perfectly parallel lines like this, or especially when they're almost all the same length. Instead, we want to have a little variety. We want them to bend, and we want them to overlap. And what I find is that doing quick, uh, kind of like twitchy hand movements like this gets me more realistic than like sitting here and calculating every single brushstroke. So that's a really quick way. It's simple. It's actually a lot faster, I think eso this would be a simple groups, a simple version. And if we wanted to go a little bit more detailed or more complex, or maybe do, um, like, have a couple focus pieces of grass? Um, this is kind of the basic idea of how a blade of grass looks right like it's got a wider base where it comes out of the routes out of the ground and it has a tapered and it gets kind of pointy. And if it's bent over, it might look like this. We have some overlap there, so that shows the viewer that there's, um it's either going towards us or away from us, depending how you shade it, and I wouldn't want to sit there and draw each blade of grass like that. But you know, if you do happen to have a close up of something, that's a really simple way of doing it. So when it comes to adding the grow ease to our rocks or next to our rocks, we can still do the wire frame. So if this is our boulder or rock coming up out of the ground, we have the ground behind it. We can think about how a lot of times the grass will the grass or the plants are the mosque . Whatever it is, we'll sit on top of the rock but kind of fall down the side slightly or even be growing up out of the ground and covering the rock. So we're not really gonna want something that's like just sitting on top of the rock that might look a little goofy. We wanna have something that's a little more organic looking, so perhaps if we draw our wire frame rock in there, we can think about how the grass starts down here and it's going to kind of grow up over the rock, and our grass is going to change directions as well. So perhaps up on top, it's kind of going upwards towards the sun, and then it gets a little heavy and it starts falling down the rock. So once you start drawing in those top pieces, you can erase the top of the rock and then have the rest of the grass kind of falling off the side. And that'll be a much more natural, organic feel you can see already. It's looking a little bit more realistic, so in the most basic sense, you almost can look at it like a blink. It blink it of moss, a blink it of grass. And even from there you can have, you know, ferns growing out or something, and you can just keep on adding detail. But just as a quick little representation that would be, this would be more than enough, especially once you start shading it in our coloring it in. It'll be plenty of information for the viewer to know that this is a nice organic forest floor or, you know, wherever you are wherever you're drawing. So let's insert a photo that we can use as a reference, um, and get an idea of how this could work in a real situation so We have grass and moss on these rocks and in this one on the left, it's very It's like hugging the rock very tightly. And over here is you see the mosque. It's a lot thicker, and there's big Tufts of grass coming up, and it adds a ton of volume to the top of the rock. So just breaking this down into the basic rock forms first will really help us. Um, so if you want, you can go ahead and trace it. But I'm gonna try to just vision view it from below and then recreate it. So, you know, one over there, we have one kind of coming up here, So just start off with very simple lines. I think these kind of overlap a little bit, and then we can erase anything that does overlap. Um, and then on top of that, we can create another layer, and then we can start thinking about how the moss, the blankets of moss and grass sit on top of that. So in this case, we might have it looks like we have a little bold patch up on top, so I would maybe do something like that if you just do like a very simple opening. This is probably not gonna look very, um, realistic for the viewer. They're gonna think that's strange. What is that? Sitting on top of the rock Instead, we can very our lines, the edge of our moss just by adding these, like, jagged motions. And we want the the actual moss to sit on top of the rock, right. So it's gonna come up above that and fall down there and the same thing over here and just add a lot of variety to your line. Don't go. Don't make it too straight. You also don't want to go like this because that's not gonna look very good. So just a little bit here and there and practice, you know, pressing hard on your pencil versus soft and you'll get lots of line with variety. Um, and then we can come back in and oops, I need to be on my Rockler. Ah, we can erase our where for him underneath there. And already we're having We're getting and nice fluffy blanket of moss on top. And then, of course, you can come back in and add because there is grass on this one as well, and it kind of goes in all different directions. Um, And then in terms of shading, if you're just doing lying and not so line shading like that versus soft shading like this , um, we want to differentiate these textures, right, So the rock might be super smooth, and so we have a lot of, like parallel lines with for our shading kind of like this. But in order to make the moss look different, we probably want to change it up a little bit. So either you can go in a different direction. Um, or you can have cross hatching, which is what I prefer. So this just adds, like, kind of some chaos to it and automatically makes it look a little bit different. So all I'm doing are quick little zigzags, little lines, little almost like clusters of cross hatching. I'm not filling in the whole thing like this, which I guess you could do if you're in a pinch for time. But just by doing little bits here and there, it gives it a little bit more of a, um maybe the softer look or more organic look compared to the street lines that we used for the rock. So that's just like one simple technique. I'll show you guys how I would approach the subject if I were outside drawing and just for fun, I gave myself a five minute time limit. I love sketching with this blue pencil. It gives me a really light under drawing that I can use as a guide, and it can be easily covered by almost any other material. So I might start off with just a very simple shape, like this rock. And then I'll come back in with a darker pencil and I'll start drawing in all of the little moss and grasses that are kind of growing up over the rock. And I'm trying to use those quick, twitchy hand movements that I mentioned before. When I start shading, I'm usually going to use directional lines. So in this case, my lines air slightly rounded, just to give the sense that the rock is also rounded, and if I want a dark in it in any areas, I would go in the opposite direction, which of course, is called cross hatching. And at this stage I'm still staying pretty loose and keeping things light so that later if I change my mind about something, it won't be so hard to change. We'll start adding little cracks and crevices here and there and shading in those areas a little bit darker so that they feel like they recede into the rock a little bit more. Then I'll start really coming back in with bigger, bolder movements to indicate the bigger grasses that are growing up and around the rock. In order to bring this rock forward, I will start adding a little bit of some background detail, and I can just start off with a hint of it, and then leader come back in and really make it dark. And even adding a shadow with quick directional lines like this will help ground the rock no pun intended. And the darker I go behind the rock, the more this rock is going to come forward. At this point, I want to start differentiating this material that's growing on the rock, so we'll come back in with very different marks instead of the big, scratchy marks that I'm using for the grasses. I'll use little, um, kind of like cloud shapes almost and use those to make it feel a little bit fluffy. They're almost like W's, but lots of W's put together, I might indicate some bushes growing behind the rock, but using very simplified forms and adding this little bit of shadow back here and stopping it before I hit the actual rock is gonna make that moss that's growing on it. Look a little bit later and fluffy er, and that's pretty much it.
7. Color - Digital, Watercolor and Gouache: Let's talk about color. There's so many different ways to add visual texture to your rocks. Color is a really fun way to do that. Okay, let's do a little mini crash course in color theory. There's so much more that goes into this than what I'm about to talk about. But this will get us started. So let's fill in our rock with our local color. So this is the actual color of our rock will just go with a basic brown tone. For now. Since the sun is coming from the left side, we need to make sure the shadows appear on the any facets where we don't think the sun is gonna hit it. So I'm gonna dark in this local color, and I'm gonna fill in these areas over here, so there's less late hitting it and maybe done here. It's even darker, but it's all the same color, just a little darker. Okay, so on our light ciders are side that's facing the light source, which is the sun. We will have some highlights and will probably be warmer because it's ah, sunny day. So we'll warm that color up and just add a little bit of some texture anywhere. We think the light is coming down and reflecting are hitting our rock. However, we're also going to have some cast light from the sky looks sky color on our rock so appear since the surface is facing upwards. Any areas that face upwards will have a little bit of that sky color, so we can fill that in a little bit. And if the rock was really wet, it would be shiny, and we would see a lot more of that color on it. We also have a little bit of that color, however, of more dark version of it in our shadow. So that's reflecting. It's still reflecting some light in the shadow, whatever is around it, and there's gonna be light bouncing off the grass. So in the shadows in the shadow area, the late is coming down and bouncing off that grass, and we're gonna have a little bit of some green in there, too, so you can start to see how incredibly colorful rocks can be. But it's so bunch about reflected and bounce light. So if we look at this compared to this, you can kind of get an idea of how to add a little bit of realism to your rocks just by thinking about light in and color in our shadows in our highlights. So let's look at a real world example that we think back to all that internal structure and how we can define the form of our rocks. We can just take a minute to start drawing these in based on what we just talked about. Let's see if we can figure out the basics of these rocks. So we have our son's words on the top left. It's probably a bright, sunny day with a little bit of cloud cover, because we have such strong highlights and shadows visible. But we can definitely see the direction of our light. And we can tell, because if we look at this shadow here, it's being cast down in that direction. Same with this rock here, the shadows being cast down like that just to start off. We can do a quick color pick of some of the highlight areas of our rock, which quite varied. Actually, you can see so many different colors, and now let's look at the shadows so but there's a big difference between this shadow over here and this shadow over here, and we'll talk about that in a second. But on this side, her shadow colors very from dark gray to dark green, too navy blue and even black down there in the cracks. But photos do lie or photos on Lee have Theobald City to give us so much information. Their computers make decisions about what colors they see and how to represent them. So we need Teoh. If we can study from life, it's better. You see a lot more data in the highlights and shadows take some colors from these shadows over here, and I'm just trying to get a variety. So I know what I'm working with and also to give you an example. If we take that first white layer and we make a layer above it and then make it into a clipping mask now, anything I do is only going to stay within that area. And this is a really good way to practice, and we can just quickly paint things and not worry too much about you know how messy it is . So I'll take a big textured brush because I really like using textured brushes for rocks. And we'll just start with filling in any song any area that we think the sun is hitting. So in this case, it's the left side or the facets that are facing towards the sun and, well, just look at form right now. So don't worry about shadows yet. Just look, any surface that we think is hitting the sun is going to be hitting. And I mean, of course, it would be very it would be a lot more varied. The color is gonna be what kind of all over the place. But this is just gonna be a quick example when we want to start thinking about the shadows , Remember, over here, how these ones this is a lot lighter than this. Part of the reason is because this area is facing the sun a little bit more than the one over on the right side. We have lots of darks down here, and the cracks come up here. And of course, you could keep going with all the different details. One thing I want to point out is that this area of the rock is reflecting light that way, which is why this area is a little bit brighter, and this side is also casting a shadow down this direction towards the bottom, right? So we'll go ahead and fill in a couple of the other areas of shadow and this over here. You can really see how much darker this area is because it this late is reflecting up to this area. But this is so deep down it's not really getting any light, and it's not really getting reflectively either. So that's gonna be a lot darker, so we can take our dark dark and put it down here in that shadow, the shadow area, and start varying the color a little bit cause we don't want it to be too uniform, and we can use thes dark cracks as ways to define the shape of the rock. You're constantly looking at your reference and kind of going back and forth between making your decisions and using the reference as your model. This area appears the cast shadows, so this is sending a shadow down on the right side, and again it's gonna be a little bit darker. And already look how much it received. It sends that rock backwards that were sent recedes into the distance a little bit. Decide toe light enough one of your areas of your shadow. It's going to make it look like it's reflecting, like these rocks are reflecting more light towards the left. So it's up to you to decide how much you want that. And I think part of it is just, um, it depends on your own. Seen like I can't really sit here and tell you exactly what to do. I can just give you little tips like this that hope will hopefully help you along on your journey. So let's start off with two very simple rock shapes, a really round rock and one that has a little bit more of, Ah, noticeable facets and hard edges were going to use watercolor first. And then we will do an example with wash and instead of Gua, Shi could also use acrylic or even oil as long as it's an opaque medium. To keep it really simple, we're going to use the primary colors only so a red, a yellow in a blue, and you can mix any of the colors on the color wheel with these three colors if you need more help with color mixing, I suggest doing a quick Google search or YouTube search on how to mix colors with primaries . But for now, you can just watch how I do this, and I'll explain as I go. So we have a reference photo up here on the left to show you how much variety of color there is within each rock. And oftentimes we think rocks are only gray or they're only brown. But if you look really closely, you see so many different colors within them, and the reflected color is different. We're going to start off with a technique called wet into wet. So first we need to get our rock completely wet. Clearwater, make sure it's not tinted at first. Then we're gonna mix whatever color we want. The base of art rock to be, which, in my case, is going to be a very transparent, orangish tone. And while the paper is still wet, we drop some of that color into it, and it's gonna start bleeding and flowing, depending on how much water you use versus how much pigment you use. I'm not going to dark in this first layer this is more just an undertone to the rock. And if you want to, you can vary how bunch pigment is on your brush within different parts of the rock. So there might be less on the top right where the sun is hitting it and more pigment on the bottom left where some of the shadows will be with watercolor. We have to remember that the paper color, the white that you see there is the highlight of our rock or are subject, so we cannot add white later. We have to keep that highlight preserved from the very beginning of the painting. While that's drying, let's start mixing a great tone for the right side rock. And since we don't have a black watercolor toe work with, we're gonna make our own gray, and you can do that by mixing all of the primaries together. So if you take a little drop of color of each of those piles and mix it together, he'll start to see that it becomes this beautiful natural grey tone and you contend thio, more blue or more red, depending on what you want. But I'm gonna stick with more of ah, neutral gray, so you don't have to get a wet First, we're gonna do a different technique this time. Drop in the gray, fill in the whole shape of the rock. And then as that starts drying, we're gonna lift some of the highlights out. So clean off your brush, start scraping wherever you want to highlight to appear. And if you d to, you can keep tapping your brush on your paper towel in between brushstrokes just to keep it a little bit more clean. But that'll lift up some of the pigment and reveal a highlight. And then as it continues to drive, we're gonna drop in some shadow tones. So I am still using a great tent, but I will tend to maybe a little bit more blue or a little bit more red for the shadows, and I'll start dropping in the shadow tone anywhere that I think the sun isn't hitting the rock as much. So in this case, that's the left side and in the bottom of the rock, And since it's still wet, it will bleed and flow and still become a little bit soft, which is okay. We're gonna add a little more variety to the texture by tapping in some pigment while it's still wet. So if you just fill your brush with some pigment and then start tapping your brush against baby, another brush handle or something hard, it'll release speckles of color into the paint, and you'll start to see how it starts bleeding in those few areas and adds a lot of texture to it. And then we can come back in and add even more variety. So I'll get maybe a warm tone this time and start dropping in a couple spots of color here and there and just let it sit, Let it let it do its thing and bleed and flow until it dries. And while that's drawing, we can go back to the left side rock. So this time I'm gonna mix a little bit of a more saturated tone, and it's gonna be kind of a warmish gray, and I'm gonna start using a dry brush technique, which means I didn't get the paper. What first, it's it's still dry, and I'm gonna start dropping my pigment on there. The bristles are going to kind of dance across the surface of the paper and because it's a very textured paper. It's cold press. They have a lot of ridges, and the bristles will sort of very lightly caressed them, and you'll end up with a really interesting texture. So if you use a very, very light touch, you'll notice that it becomes even more varied. If you press harder, you'll get a bigger area of color released onto the paper. And I'm just gonna keep doing this back and forth until I get closer to the top right of the rock, which is where my highlight is. And then, while that's still drawing, I will get a shadow color that's maybe more blue and start dropping it into the wet pigment I just put down, mostly sticking to the bottom and the left side, and it will continue to flow and become a little bit less dark as it dries. So don't go too overboard with this one. You can always add more layers if you want to, but the whole point is to get a variety of tones and textures within the paint, and you can do that in so many different ways. We'll do something similar to the rock on the right so we'll start with a shadow tone and just lay in a bigger section of darkness on the left side. Facets wherever you think, the sun really won't hit the rock and you can use streaks or splatters or whatever technique you want for this. But the whole point is to just emphasize the fact that the rock is a little bit brighter on the right side. You can use a variety of colors if you want to. It just depends on how realistic you want to be or how subtle you want to be. And lastly, we can do the final little details, such as cracks and scratches, using a very, very fine script brush. So it has a teeny tiny tip, and we'll just load it up with some darker pigment and just play with different areas of trying to add variety and maybe go against the pattern that you already laid down so that you can see that it stands out a lot more. These types of things become the focus of the rock and just add a lot of depth and visual texture. The darker you go with your pigment, the Mauritz gonna look like a deep crack or scratch in the rock. So I suggest doing a bunch of examples like this try to paint different types of rocks and different colors and use thes tips and techniques that I just gave you as well has come up with your own. Next up, we're gonna use an opaque medium I'm gonna be using wash. So grab your supplies and let's get ready. Once again, we're going to start with the primary colors, Although with a no peak medium, I always add white in black to my palette you can used wash both water down like water color and fully opaque and thick like you would with acrylic. Since I'm painting on cold press paper, which is very absorb in, I much prefer to start off with just a base wash or base of color. And then I'm gonna build up on top of that with everything else. I just find that it gives the wash something to grip on to, better than if I was just going straight into the thick painting on dry paper. So I want this rock to be a little bit warmer, and I'm I'm starting with the warm tones. But I'm going to slowly start adding in cooler tones as I get towards the shadow side, which again is on the left and the bottom. So this can almost be like a practice run for you. If you are so sure about what colors you want to do, So start off with, like this really water down translucent layer, and then we're gonna We can build up our opacity on top of that. So now that we have that base color in, we can start laying in our thicker, opaque paint. So I'm mixing up a really warm gray tone, pretty much using all the colors on my palette except the blue. And I'm going to start touching in on my shadow side while it's still wet, and you'll notice that the color is gonna kind of bleed like the watercolor did, but not quite so much. It doesn't spread quite as far. It's sort of stays right where we put it, but it does give us a softer edge, and then into that warm shadow, I'm going to drop a cooler shadow, but mostly keeping that containing that to the very left and bottom. Ah, and I will point out that one tricky thing about washes that there is a color shift that happens from when it's dry versus wet. So as you're laying in your colors, really pay attention to how dark it looks on your palate versus how it looks when it dries on your painting. We can also add a splash, just like we did with Watercolor, Um, but this time I'll use a little bit heavier pigment, and once I splash it, you'll start to see that it spreads a little bit, but not too much. And once it dries, it's actually going to give us a really beautiful surface texture. I'll speed up the drying so you can see how cool it is and how dramatic that color shift is . Let's do another one. And this time we're gonna just start laying in the color onto the dry paper so you can get a new idea of how different it feels. Painting on dry paper versus laying in heavy gua sh onto a pre existing wet layer. Let's speed that up again so you can see how intense the color shift is. I'm going to use a bluish tone as my shadow, and it's going to give a really soft texture to the shadows because I'm using a dry brush so the edges of the shadow are, um, sort of hard in some areas and a little bit soft and others. And the beauty of wash is that it blends into itself really easily. So if I keep touch again and keep moving my brush across that first layer, it's going to continually blend into it. So now we can lay in some of our highlights, and I'm gonna be using a much warmer tone and a lot brighter. So it's got a little bit of white in it, and I'm just using a dry brush again and letting it dance across the texture of the paper. So it has a very rough texture to it. And this will just make the rock surface look a little bit rougher than, say, the top. The watercolor examples where we left it looking a little bit smooth, but not all of our highlights are in the light side. We also have highlights in the shadow side, especially if the rock is reflecting sky color or watercolor. So what I like to do is take a light and version of the shadow tone and lay that in over my shadow. And again, with the color shift, you might feel like it's a bit to break at first, and it may or may not be, but do give it a chance to dry, so you can really see what color it is. Sometimes it changes quite drastically, and when you give it a chance to dry and see what color it is, you can come back in and blend any of the edges that maybe are a little bit too harsh into that first chattel layer. I love how this technique adds so bunch depth to the the rock or honestly, they could do this with any any subject. But because rocks sometimes reflect pretty bright colors, depending on where they are, you can have a lot of fun with the color in this, especially when you have that temperature change of a warm rock with a cool color being reflected. So now it's time to add in our final details, such as Thekla axe and scratches. So I mixed a really dark tone using black and red, and I'm using a script brush again, and I'm just dragging little teeny cracks throughout the rock, really just anywhere that I feel like doing it. I'm not following a specific reference here. Just having fun with that, and you can do as much or as little as the one I like to keep it more subtle, you can use the direction of your lines to add depth to the form. So if you want one area toe look very flat, you can use the straight line versus rounded edge, which would have a smooth round line. So how would we apply this to a more practical scenario? So let's take a look at this new reference photo, which has lots of moss and it's in a little riverbed, and I just drew in a couple basic rock shapes, and now I'm gonna fill all of the rocks in with a nice, dark, greyish tone. I varied the texture and the color of my great tone as I went, because they're not gonna be completely smooth one color, and this just allows us to speed up the process of adding that all that visual variety, that texture that we want if you squint your eyes and look at that reference photo. You can see that the shadows are a little cooler, and the highlights, which aren't super bright, are warmer. So what I'm doing is just mixing kind of, ah warm, chocolatey color and dragging it over the rock that I just painted. But letting my brush with a very light touch just very lightly grazed that watercolor paper so you can see some of the texture show through. And if you want to add some lost to yours, you can use the blue and yellow to make green and what I usually do with washes, I start off with my shadow tone. So basically, we're gonna pain all of the moss in this darker green first, and the way I make it darker is to use more blue. If we wanted to be lighter green, we would add more yellow, and all I'm doing here is just very loosely dabbing the paint onto the rock of not scrubbing it into it or anything. It's just sitting on top of it, so of course you'd have to use very thick pain. You couldn't use anything to water down here, which is why we want to mix a big enough pile for ourselves because it is quite hard to color match with wash for the rocks that are further away. I'm adding a little bit of white to the green because I wanted to be slightly more faded and not necessarily the focus. And one thing that we can do if we want our background elements to appear further away, to be less of a focus is dull them down a little bit and nothing dulls something down like white. So we'll add that in, and as we get closer to the foreground, we'll start adding more saturation and more contrast. And as that's drying weaken, start thinking about our shadow tones. So what I like to do is touch in a really dark color, such as my green mixed with a little bit of red or a little black, and I'll lay in the shadow just on the bottom edge of all of that moss. So I'm not surrounding the entire thing. I'm not outlining it or anything. It's just underneath where I think the moss would fall on top of the rock and then leader will come back in and smooth it out and blend it and make it look nice now. We want to start adding in some of our mossy highlights, and so we'll add a lot more yellow to the green this time and just let it sit on top of that dark green. And as we touch it into the dark green, we're gonna notice that it's going to start blending so you can let a thicker area sit on top of the green. Or you can, like, use it a little thinner and automatically blended into that existing green. Just depends on how much for 80 you want to get. And now we can start to see the full spectrum of values in our painting. So we have our dark shadows, and we have our break our bart break of hearts of our moss. Um, and now we can start working on those in between tones. So what I like to do is come back in with maybe a more colorful shadow tones. I'm adding a little bit more blue and start blending in those deep shadows into the rock. Ah, and I also will add a little bit more warmth to the highlight areas of the rock, with some like light chocolate color again. So it's a constant back and forth, like assessing how bright or how dark things are and just going from there. So lots of little decisions piled up off on top of each other. But once again, the beauty of washes how blend herbal it is. So you can always come back in even to an area that is already dry and touch in a little color, or even just use a clean brush and kind of blend or smooth and edge out. It's a really versatile medium, and one of the last little details we would want to do is some of the bigger grasses that air kind of popping up off of the moss, which may or may not be in whatever reference photo you're using. But I just love adding these kinds of details and just think back to the little lesson I gave you with the grow ease. How not all the grass is gonna be sticking straight up. Some of it will be tilted or, um, drooping down towards the ground. As I was finishing this, I kind of thought it might be fun to throw in a little bit of water just to make it look like they're sitting in the stream. So I just got a clean, wet brush and through some water on the paper and then came back in with a very diluted grayish blue color, dropped it in and let it flow and bleed down the paper. Then I took a darker version of that color and dropped it in underneath the rocks just to add a little bit of a hint of shadow. And lastly, just a hint of green to reflect the grass and finally a little bit of a reflection on the edge of the rocks. So I'm mixing a really light blue and just letting it barely graze the surface of the rock , letting a lot of that texture show through. And this just adds that slight hint of reflection of the water. It could also be this guy, but in this case, it's the water. So little tiny additions like that can really make a big difference in the end. Next up, we can do a coastal scene so I can show you guys some techniques for creating really jagged rocks. I'll give you guys a peek into my sketchbook so you can see some of the ways that I paint rocks. I think the most common scenario where I would have rocks are is a Seascape, so that could be this kind of thing, where it's like the beaches edge. Or it could be cliffs that plunge down into the ocean, and the other most common scenario would be waterfalls. Something like this, where there's lots of little rocks and boulders scattered next to a waterfall in stream. And the strategy for doing this is very similar to what I'm about to show you with coastal rocks so you can apply this to all sorts of different scenes. I have two main approaches to thes types of rocks. One is where I layer things, so I do like a lighter tone and then a darker tone for the shadows and the cracks. And then the other strategy is to do one big color that goes across the whole thing. And then I scrape paint away, so I'll show you guys both of those methods. Hopefully, now it's more obvious why I started us off with drawing, because we have to have a good understanding of the structure of the rock before we paint it. I don't often draw my rocks in this much detail when I'm going to paint them, but I wanted to do that for this demonstration. So if you want to follow along, you can use one of the references I posted or just find your own reference and try to do a very basic, not necessarily an outline of the whole thing, but a basic representation of that rock. You can even include shading like I'm doing here, because it's pretty much all going to be covered up since our rocks air coming up out of the water. We want to make the bottom edge very soft, so all we need to do is lay in some clear water for that. And while that's still what will start laying in our rock color, so I'm gonna fill in this whole area with a mid toad, and in this case it's a mixture of indigo and neutral tint. Oh, and I will treat this rock separately from this rock on the right because I want to show you guys two different styles that I like to do. This one is a wet into wet and the one on the right will be a little bit different. And while that's still what I will start laying in my darker shadow tone. So this is gonna be a darker version of that first color, which is due Chilton and into Go, and I'll just start from the right and work down to the left. So I'm totally imagining where I want my brighter areas in my darker areas to be here of not following a reference photo. Exactly. So this is where you can really have fun and play with that negative space, and it definitely helps to visualize where your shadows air gonna be first. But if not, just start with one or two marks and go from there. And so much of what I do and how I paint is about those quick in the moment decisions. And in fact, I think that's why I love it so much because it's kind of spontaneous. While that is drying, we can work on the right side. So will lay in another Mentone. This time I'm going a little warmer, and I'll just fill in the whole area of the rock again. It's okay if little white areas show through, because in the end. It's just going to kind of appear as a little highlight on the rocks as that's drying. I'm going to throw in a little splatter, so this is gonna be the same color just used and then also add some blue. And once that dries, we can come back in with our shadow tone. So this one is going to be a mixture of the first color with a little neutral tint, just a dark in a tiny bit. And I am doing the same thing I did before. Only this time there's no soft bleed happening, so it's all hard edges. I think this way it ends up looking a little more dramatic. Um, but I like both versions, so I recommend that you bake a bunch of thumbnails like this in your sketchbook just to try it out and see which version you like better. Here and there. You can come back in with some darker tones and try to push those shadows further into the distance. Um, but I think eventually you'd probably want to switch to a small brush so you can get some really fine cracks and details if you come back in with a really dark color. It'll make those bum deep crevices really recede into the rock. So have fun playing with that have do a lot of combinations and just take it slow at first because again, it's a lot of experimenting and putting a mark down and then making your next decision based on that. And I didn't follow the schedule little bit, but I kind of veered away from it by this point, and I was just playing with it, having fun, making whatever marks I felt like in the moment. If you like the softness of this First rock, you can come back in and add these little details just the same way. So both of these strategies will give you different types of. It'll give you a different look in the end, but I think they both have their own benefits in terms of design. Overall, I am sticking with that original concept I talked about in the drawing portion of this tutorial, where I keep the lines really long and almost horizontal or diagonal, almost like the rock is at an angle coming up out of the water. So finally we're gonna use the scrape technique, and this one is really fun. So all we need to do is lay in a mass of color without any riel definition in it. I usually like to use a couple mounds or jagged eggs edges on top, but you can just play with your own shapes, weaken, splatter. We can drop pigment in. We can just let it bleed, inflow and get really creative marks here. And the whole point is to get a nice variety of that texture and color in this first layer . And, as that's trying, will come back in with a palette knife and will start scraping away one of the edges of the rocks. So once again, you still have to visualize where you want each rock edge. But it's it becomes pretty clear once you start doing this. So I'll I imagine each rock is kind of overlapping each other, so I'll come back in and scrape away just the right side of each one of those. Then you can come back in and add scratches with the power palette knife, and the pigment will start settling into those deep grooves that you're making in the paper . So obviously this is Ah, much more loose and free form and expressive version of doing the rocks, but in a larger landscape. If you imagine like doing a whole Seascape, these could just be really nice. Soft elements on the edge. Do you know if you just feel like having fun one a day in your sketchbook? This is a nice subject to practice, so that first layer was a lot. That was a lot of stuff happening at once, and you have to work quickly because the pain needs to be wet. Um, but once you get that done, you can come back in and start playing with adding other values or other colors, or even splashing it with more color and even switch brushes to something more fine pointed and add really little cracks and details. But it's up to you to play with it at this point. No one can tell you how to do it. You just have to experiment until you find a nice strategy that works for you. Hopefully, these tips will get you guys started
8. Bonus: Digital Painting Advice: Even though digital painting isn't my preferred way of painting, I do find it incredibly useful for doing studies. So I wanted to show you guys my strategy for doing a color study. I like to work with a limited palette, so a lot of times I'll just color pick some of the major colors that I see in the photo. The really nice thing about digital is that everything is temporary. You can always undo something, and you can change your layers around, and it just gives you a lot of flexibility and freedom within the process. So we can start with a really basic wire frame drawing and then come back in with a much more detailed drawing on top. I like to start off my color by filling in the bigger areas of solid color and then later coming back in and adding all the textures and the varieties of colors that I see. And the reason for this is just to simplify what I see at the very beginning, so I'm not bogged down by all the little details at first. At this stage, I'm also setting the tone for the rest of the painting by choosing what colors I want to focus on. So it may or may not wrap match my reference photo exactly, but it's an artistic choice. We'll use two different color palettes here, in my example, just to show you that you can get a variety from one reference, I'll use the shadow tone to start laying in some of the cracks and crevices details. Since this is a waterfall scene, I'll throw in some textural water. But I'm trying not to make that the focus because this is a rock tutorial. In this case, I'll just use a very fluffy light brush and get some of the directional lines to indicate moving water. Then it's time to add texture to mind painting. So what we'll do is take a big textured brush and will create a layer on top of my existing rock layer. And I'll set that layer to multiply and reduce the opacity. In that way, whatever I paint on top is kind of being embedded into the color below, and it really reveals some of the texture but not making it completely overwhelming or covering the rock. Then it can come back in with my highlights and start adding some little details here and there, and you probably noticed that I like to work zoomed out. And that's mostly because I don't want to get so obsessed with every single tiny detail. I want to keep my eye on the bigger picture. And I think one of the problems with Digital is that it is so tempting to zoom way in much further than you ever would in like a real traditional painting. So when you're doing your quick studies, I urge you to say zoomed out as often as you can.
9. Class Project: so I think that's everything. Time for homework. Take a look at the reference photos. I provide you guys and choose your favorite from that photo, I want you to go through all the basic steps we talked about. So start off by identifying the internal structure and use that wire frame idea. Then draw a more realistic version, either on top of it or next to it. If you're using pencil, you can just take a photo of each phase. Then create a version of that drawing with shading, and you can use any type of shading you prefer. Feel free to add grass or other textural elements as well. Next, you'll do a color version, and you can use whichever painting mediums you prefer. And ideally, you'll do this more than once. So, if possible, include 2 to 3 examples. As a bonus, you could take photos of all of the painting along the way to show the different steps that she used. Repetition is key here, as it will help build your muscle memory and internalize all the things we talked about today. But most importantly, police have fun. If you guys have questions, please reach out to me. If you make any cool stuff that you want to show me, just tag me on social media and I'll find you. Thank you again for your support and happy painting.
 Sarah Burns, Painter / Photographer / Youtuber