Transcripts
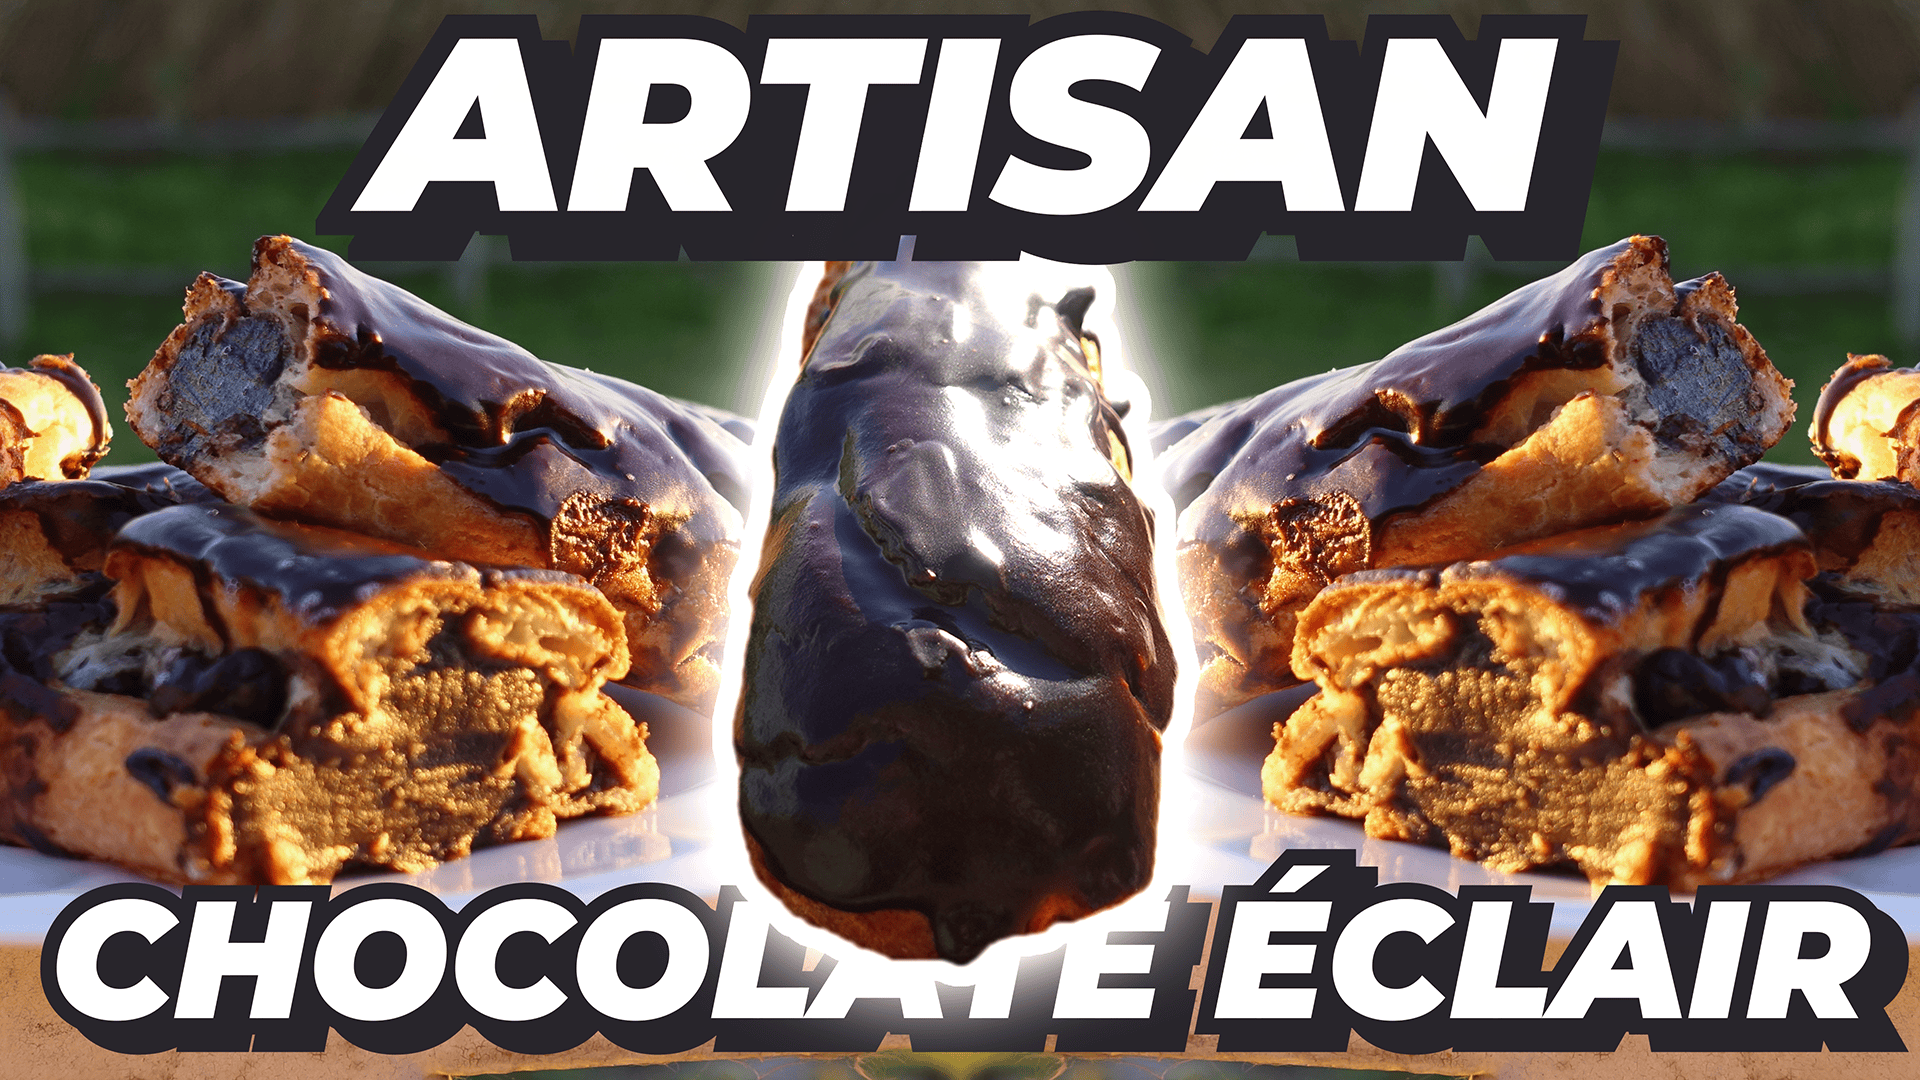
1. Welcome!: Chocolate eclair
has been found in French pastry shops
since the 19th century. But I think it's about time this delicious classic made its way out of your
very own oven. Hi there. My name is
Mako and in this class, you'll be learning how to master the three components to
making an excellent eclair. From the essential shou
pastry to the cream filling, and, of course, the
final chocolate glaze. Eclairs have a reputation for being difficult
to get right, especially on the first attempt. That's why the upcoming
lessons will be guiding you on every
step of the process. With detailed but easy
to digest instructions, they'll make this recipe
a breeze to go through. Help you even further,
you will also have access to these
lessons measurements and instructions in a
written PDF guide to accompany you along
all of your baking. With that said, however,
this recipe is aimed at more intermediate
bakers who already have a bit of experience
working with pastries. If you want to hone your skills before jumping into this recipe, be sure to check out my teacher profile where you can find the other classes in the six
part series and many more. Do feel free to hit
the follow button while you're there
to not miss out on the final upcoming recipe on how to make amazing
chocolate lava cakes. With that out of
the way, however, let's dump straight into
the following lesson.
2. Chocolate Éclair Introduction: To make six delicious
chocolate declares, we first need to break them down into their four components. First let's take a look
at the shou pastry, which is also known
as the Ptahu. For this recipe, we
are going to use white bread flour as it helps produce a thicker
and stronger crust, which is essential
to hold the filling. The shou pastry doesn't
require a raising agent, but for some additional flavor, I'd highly recommend
using sudo starter. It is, however,
completely optional. If you do choose to use it, just be sure to prepare it at least 8 hours in advance with an additional 10 grams so that you may refresh
it at a later date. Moving on to the
pastry cream filling, these are the ingredients
you will need. For the chocolate,
I highly recommend a quality 70% dark chocolate, especially for such a
high effort recipe. Then for the glaze, all you need are these two ingredients. Take note that for the cream, heavy or double thick cream should be used for best results. And finally, as an
additional note, be sure to have one more egg and just a bit of
milk available for an egg wash. Now that all of your ingredients
are hopefully ready, we can begin making our clays.
3. Prepare The Choux Pastry: To begin making
the shout pastry, take out a small
stove pot and in it add 88 grams of whole
or full cream milk, as well as 88 grams of water. Add in 77 grams of cubed unsalted butter
with 4 grams of salt, as well as 6 grams of sugar. Then in a separate bowl, measure out 110 grams of
white bread flour and add in the optional 40 grams of mature sourdo starter if you
had it prepared in advance. Move your pot of liquids over to the stove on medium heat
and bring it to a simmer, making sure to give
it frequent stirs to prevent any burning. Once you start seeing
some bubbling, add your flour and sour dough
to the pot and continue mixing for one to
2 minutes until it becomes incorporated
into a dough. When that is done,
switch off the heat and move your newly formed
dough into a large bowl. You can now begin adding
three large eggs, one at a time and mixing each one in fully
before adding the next. It will start off
looking quite lumpy, but as the emulsion forms
between the egg and the dough, it will begin taking on a nice glossy sheen
and a smooth texture. Once your shout pastry has
finished being prepared, cover the bowl with a
wet cloth and take out a baking tray to line it side to side with
parchment paper. We are now going to be piping
out the shoot pastry for which you will need a piping bag and a wide opening nozzle. If you don't have one available, I can also show you
a more DIY approach using an empty water bottle. Just ensure the opening is wide enough at roughly 2
centimeters in width. Cut open the top section, leaving enough space below the bottle cap to get a
nice seal in the bag. You should be left with
something like this. You can then use a
plastic freezer bag as an alternative
for a piping bag. Just nip a small hole into the corner and carefully
push in the bottle head. Just ensure it
doesn't tear to get a strong seal around
the lip of the bottle. And there you have an improvised
piping bag and nozzle. Add your dough to the bag
and then begin piping the show pastry into
three parallel strips, roughly 30 centimeters
in length. When that is done, prepare
an egg wash consisting of one whole egg mixed
with 5 grams of milk. Apply it lightly
to the surface of your show pastry and then move your tray into the
freezer for 2 hours. While you're waiting
for that to cool down, you'll have time to
prepare your pastry cream, so we'll be exploring how to
do that in the next lesson.
4. Make The Pastry Cream: For the pastry cream, we are going to need three egg yolks. And to do that, first crack
your eggs into a small bowl, taking care not to
break the yolk. Then using a clean hand, scoop out each
individual yolk and place them in a large bowl
to remove the egg white. To that add 45 grams of sugar, as well as 14 grams
of cornstarch, which will help thicken
the pastry cream later on. Give that a quick whisk
until incorporated, and then measure out 83 grams of 70% dark chocolate and break it into cubes so that it
is easier to melt. Once everything
has been measured, add 188 grams of full
cream or whole milk to a small pot and place it on your stove at
low to medium heat. When the milk begins to simmer, switch the heat off and begin adding the heated milk
to the egg mixture, one tablespoon at a time. This will allow us
to slowly bring up the temperature of
the egg mixture without cooking the eggs. Just be sure to whisk
until the milk is incorporated into the
mixture before adding more. Once you've slowly added
in half of your milk, pour in the remainder and whisk for an
additional 30 seconds. Pour all the contents of
your bowl back into the pot and place it on your stove at low to medium heat once again. This time, add in all of your
cube chocolate and begin stirring continuously with
a large spoon or spatula. Just make sure to scrape the
bottom of your pot while stirring as it can very
easily burn at this point. The pastry cream will
begin to rapidly thicken, and when that
happens, take it off the heat completely
and continue stirring. When you are done, you
should be left with a rich and smooth pasture
cream such as this. Move the cream over
to a cool bowl and cover the top using a lid or plastic wrap before placing it into your
freezer for 5 minutes. When those 5 minutes are done, move it over to the fridge
for at least 30 minutes so that it can continue cooling
down without freezing solid.
5. Bake The Choux Pastry: Once the shout
pastry has finished, it's 2 hours in the freezer, you can preheat your
oven to 220 degrees Celsius or 428 degrees
Fahrenheit for 20 minutes. In order to prevent the bottom of your shoot pastry
from burning, you'll also need to
add a baking tray with approximately two cups of water or just enough to fully
cover the surface. Move that baking tray
to the bottom of your preheating oven so that I can come up
to temperature. While your oven is warming up, you may take your frozen
shoot pastry out of the freezer and
using a sharp knife, cut each strip in half. Place each piece in
diagonal rows like this, replacing the parchment
paper if torn or damaged. If your oven hasn't
yet fully preheated, cover the pastry with
another baking tray to prevent it from drying out. Once the oven is ready, place your baking tray into a middle rack in
your oven to bake at 220 degrees Celsius or 428 degrees Fahrenheit
for 15 minutes. Just be careful when
opening your oven, not to get your face
blasted with hot steam. When those 50 minutes are up, remove the tray of water from
your oven and then rotate your pastry tray around so that they bake evenly on both sides. Drop the temperature
to 190 degrees Celsius or 374
degrees Fahrenheit and continue baking for 20 to 25 minutes or until
a beautiful golden brown.
6. Prepare the Chocolate Glaze: Once your shout pastries
have finished baking, let them cool off at
room temperature on a metal rack for
about 10 minutes. While you are waiting for that, you may also take out
your pastry cream from the fridge and allow it to
come up to room temperature. While your shut pastry
is busy cooling down, it's time to prepare the
final and easiest component of our clase, the
chocolate glaze. Into a small pot,
add 105 grams of heavy or double thick cream and place that on your stove
at low to medium heat. As soon as the cream
begins to simmer, switch the heat off and add in 100 grams of cubed
70% dark chocolate. Stir until the
chocolate is fully incorporated into the cream,
and there you have it. Your chocolate
glaze is complete, and it's now time to finally assemble your clays
in the next lesson.
7. Assemble your Chocolate Eclairs: Depending on your fridge or the ambient temperature
where you live, you may need to warm
the pastry cream back up so that it is easy to
pipe into your clairs. If the texture
feels too viscous, give it about 20 seconds in the microwave to soften it out. For the piping, you can use
the same trick as before, but you will need a
more narrow nozzle, something closer to half
a centimeter in width. If you don't have
one, then you can also substitute it with a straw, cut to 5 centimeters in length and a rubber band
to create the seal. Once your piping bag is ready, add in your smooth
pastry cream filling, and then also move your
chocolate glaze into a sufficiently white container to make it easy to
apply to your eclair. When all the
components are ready, begin cutting three 1
centimeter wide holes into the bottom of
your show pastry, making sure not to cut too deep. All that's left for you to
do now is to generously pipe the pastry cream
into the base of the eclair at each perforation. Once you're happy, the
clay has been filled up as much as possible without
breaking the pastry, keep it topside down to evenly
apply the chocolate glaze. From there, simply repeat this process with
all remaining clays.
8. Chocolate Eclair Conclusion: Feel free to add any
remaining glaze to the top of your completed éclairs
and let it rest for 3 minutes until set
if you're patient enough. In French, éclair
means lightning, and they call it that because
you can eat it in a flash. While I'm not entirely sure that's the true meaning
behind the name, in practice, there is
a lot of truth to it. These chocolate éclairs are such a delicious treat pulled
straight from childhood, and I truly hope you enjoyed making them as much as I have. Can be a bit tricky at times, but the end result is always
so incredibly worth it. There is still one
more amazing recipe to try out in this series, so I do hope you will
join me one more time so that we can make this
delicious chocolate lava cake. If you have enjoyed this class, please do feel free to leave
a review with your thoughts. And before you leave, don't
forget to share pictures of your own chocolate creations in the project section below.
 Marceau Dauboin, Artisan Baker/Owner at The Yeastie Bois