Transcripts
1. Class Introduction: Hi, everybody. Welcome to
this class on how to create a seamless Chevron pattern in Procreate. My name is Srihari. I'm a digital illustrator and an artist with over three
years of experience. In this class, you learn
step by step how to create a chevron pattern and can
create variations like this. You will see you
will learn multiple variations of chevron pattern. Like actually what you need is just an apple iPad and an
Apple pencil for that. This class is designed
for beginners in mind, so we'll go at it step by step, starting with creating a
basic understanding of what a chevron pattern is and how a seamless
pattern functions, following it up with creating a basic template so that you can always replicate your designs and then creating
a color palette. Then combining
both these things, we'll create our final
pattern tile in Procreate. Then the exciting bonus
lessons of repurposing your content or
repurposing your pattern in multiple ways using
different sizes, colors, textures, and gradients. And then as a second bonus, you will learn how to create a seamless Chevron pattern
brush in Procreate, using the pattern which
you have designed. I'm so excited to share everything I know about
creating a chevron pattern. After taking this entire class, as part of class project, you'll be creating two or either three
different variations of seamless chevron
pattern using Procreate. What you just need,
as I mentioned, is an iPad, a Procreate
installed on it, Apple pencil, and
just some time with a dedicated focus to create
your amazing patterns. I'm so excited to
share everything I know about creating
chevron seamless patterns. I'll meet you in the
class section below.
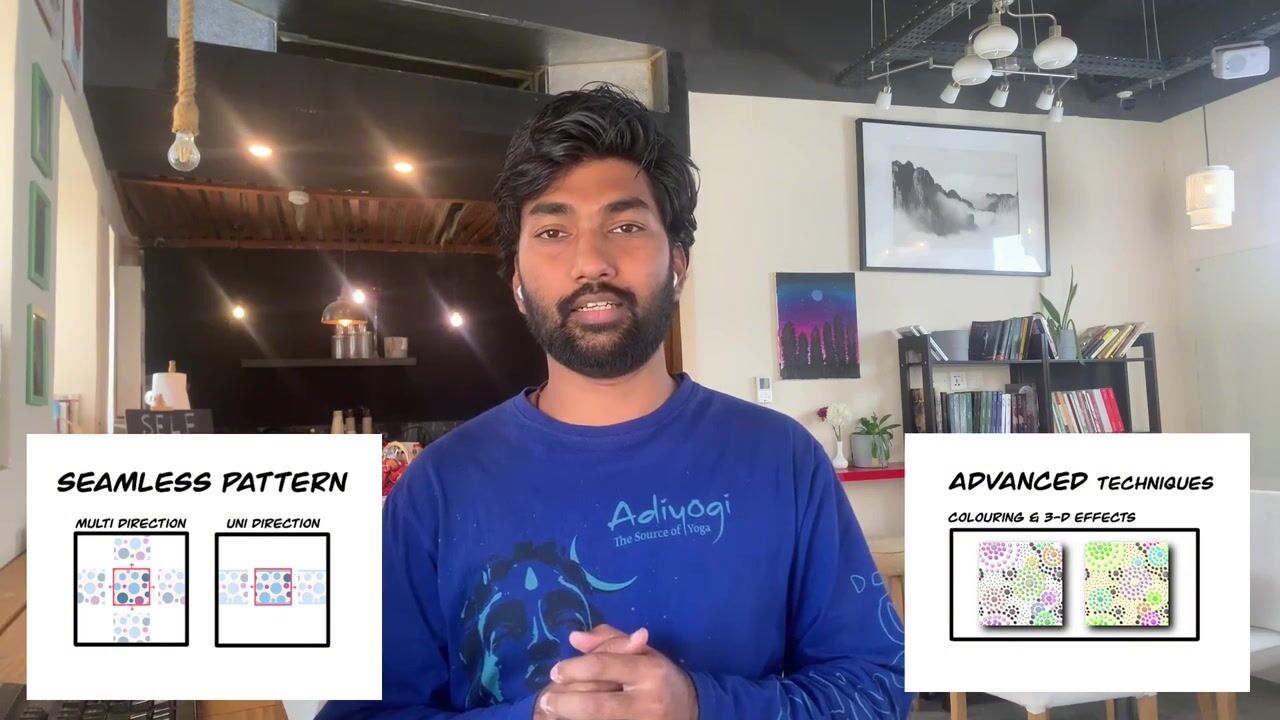
2. Understanding Seamless Chevron Patterns: Welcome to the first lesson of creating your seamless
chevron pattern. Now in this lesson,
we'll talk about what chevron pattern is in the overall sense and how a seamless pattern functions when we create
Itrocreate, right? So, firstly, about the
chevron pattern introduction. It's a pattern which can be
used in multiple variations. You would mostly see
it in the backdrops, sometimes in fashion design and mostly in the
surface pattern designs, which can be printed as a
seamless version, right? So one core identity of this particular chevron pattern is you will see a
pattern like this. When they are kind of like
slight angular lines, mostly horizontal with
the vertical breaks, which will continue
again on its own. Like this, mostly horizontally. It'll go seamless in all the
directions all the time. But in this case, you
will see that the prominent or the dominant
aspect is the horizontal, kind of rookid or
angular lines, right? That is one thing. Yes,
we can do variations. We'll look at the kind
of coming lessons, how to create multiple
variations of chevron pattern. And do some slight alterations, might be increase
the depth of it or increase the height
of the overall pattern. Something like
that, we'll try out different variations
using colors, textures, and so
on and so forth. But the overall idea of what a chevron pattern is
is clearly that it has angular lines horizontally going parallel like concentric
kind of circles, right? That's the overall idea
of the chevron pattern. Now, uh, there are a few types which we can always
kind of vary. You will see that actually in this particular chevron pattern
design or pattern tile, you will see the pattern,
the main pattern isn't the white color. Okay? You can change either this white color to
different color, okay? You can play
around with that. Or you can play around
with things which are in the center or
the filling colors. These are the two major
variations which we always see when it comes
to chevron pattern. Or you can play
around with textures like actually on actually using which brush you're
creating that particular, let's say, lines in
the overall pattern. That also determines the
different variations you can do in the
chevron pattern. E. So so now that you know basic introduction of what
a chevron pattern is, we don't go into deep onto history and multiple use cases, we'll implement them and see where we can use them, right? We'll look at how basically, uh, seamless pattern functions. Okay, this is very important
because when we are creating a chevron
seamless pattern, first, we'll start
off with creating a template and creating
one basic tile. Okay? And then we will see
how to make it seamless. So the concept or
the idea of creating a seamless pattern if we know or understand the basics of it, it'll be easy for
us to, let's say, multiply the basic template tile which you have created
in the coming lessons. Okay? So so firstly, let's say there is a
particular canvas. Usually seamless pattern,
we go with a square canvas. That's not a mandatory thing. You can use multiple
canvas sizes. But square is far
more beneficial to make it seamless.
That's one idea. We always go behind
the square canvas. But in this lesson
again, we'll work with different shapes also, especially in the bonus section, where once we have
created a pattern tile, we'll create multiple
sizes of our pattern tile to create a
seamless version, which can always be done. But when you're brainstorming and finalizing
your pattern tile, I would always recommend that you go with the square size. In terms of the
size of the canvas, we'll actually look into
it in the coming lesson. So if you have a square canvas, the things which are on the top should resemble the ones
which are in the bottom. Okay? In a similar fashion. The things which are
in the left should resemble the things
which are on the right. So if you do this, naturally, there'll be no edge lines when you are copying and pasting the pattern tile on a horizontal or vertical
aspect, right? It'll become seamless because
the half shape will become a full shape by adding
into the next pattern. That's the overall idea.
So now we'll create a basic seamless pattern to
see how a pattern works, right? Add a new layer. Again, I'll actually
skim through it. You just have to observe and see how a patentile functions, especially a seamless pattern. Then in the coming
lessons, we'll go step by step slowly so that you understand how to
do it in action, right? Perfect. So on the
drawing guides. Okay, we can assume this is
one pattern tile. Right? Now, how is it seamless pattern? Since we have used
the drawing assist, which copies everything on
the corns, it's easy for us. So I'll copy this
particular pattern tile and try to show you how
it is seamless in nature. Don't worry, since
I'm skimming through, we'll go into this
deep step by step, so you can clearly
understand how to do this. But as of now, you just
have to absorb how a single pattern tile can
become a seamless pattern. You see, you can't see
any division lines whatsoever because our actual pattern if you see the
pattern tile we have, which we have made
in the first part, this is the pattern tile. Okay? This one square thing is a pattern tile,
actual pattern tile, which is copied and
pasted multiple times, so you won't see where it's ending and
where it's starting. So that's the overall idea of creating a pattern tile, right? So in the next lesson, we'll start with creating
a basic template to start off our let's say kind of chevron
seamless pattern design, and then we'll go
through it step by step. I'll meet you in
the next lesson.
3. Setting Up Your Base Template: So welcome to Lesson two,
where we'll be creating a base template for a
Chevron seamless pattern. So for this open Procreate, tap the plus icon on the top right hand corner
and go for custom Canvas. So in this case, as I mentioned
in the previous lesson, we'll start off with a
square canvas to start off with because that's
easier to understand how a seamless pattern functions
in the overall aspect. So we'll go with
thousand by 1,000. That's good enough
size. You can even go with 2000 or 3,000,
that's totally fine. And in terms of the
number of layers, it depends on your
iPads RAM capability. So at least 50 layers
is more than enough. So you can size your
canvas accordingly. But to kind of start
off with a brainstorm, I'm going with
thousand by 1,000. Okay? Always ensure
the DPI is 300. Okay? The reason so is because initially when
you're designing, you might not be planning
to print it out on, let's say, a merchandise
or something like that. But eventually, if you have two, you need the 300 DPA
for clarity of print. So always choose
that. And layers, it depends on your
iPad, as I mentioned. And about the color profile, uh, we'll start off with RGB because it's easy to do
it on the screen. But when you're printing it out, it's better to do it in CM k. So if in case you're
using your pattern to, let's on a print on demand website where you
want to print it out. So at that point of time, you can change your
artwork to CMC, that's totally possible, right? So we'll start off with this. Once you have checked
all these aspects, tap the tick mark on the
top right hand corner. Now you have your square canvas. Now, firstly, as I mentioned, the orall pattern will
look like this, right? So we'll do only this part. Only let's kind
of mountain arch. We'll do it exactly perfectly. Then we'll try to copy it
in multiple ways. Perfect. Yeah. So first, we'll go for actions and
choose drawing guide. Go for edit drawing
guide, go for symmetry. And then you can press
the top right tick mark. Okay, so you see that
it's symmetrical. Perfect. Now go for black. I would choose black because it's easy for us
to start off with. Then eventually we can change the colors based on
our design, right? So draw from a particular mark and once it becomes a
straight line using the other finger
tap on the screen. You will see it becomes
approximately 30 degree angle, which is the angle which is most preferred for
a Chevron pattern. You will see that
there's a small overlap. You can zoom in well and then erase it.
That's totally fine. Perfect. Now again,
we'll duplicate it. Now move it down. This approximate, you don't have to move it in
a specific way. Depends on how thick you
want your pattern to be. You'll see there'll be
a difference when we scale it down, so
that's totally fine. And then combine both the layers and fill it up with
the black color. So this is one single unit
of our Chevron pattern. Now we'll copy it and
paste it in multiple ways, right? So duplicate it. Select both actions,
reduce the size by half, ensure the snapping is
on, so it's easy for you. Then select kind of then sell one of the layers and
then move it to the side. Enjoy it snaps that
is very important. There is no gap. It is just
for cross checking. Okay. And since this particular shape, you have not completely
decided on how to do this. Make one copy and keep
it at the bottom. Okay. So make one copy, rename it as original. So that you always have the base or main
copy and hide it. And then you'll be working
on the other layer. Duplicate once
again, select both, reduce the size by half, then select one and
move it to the right. Perfect. We can
continue like this or we can kind of stop
with this itself. Combine both, duplicate
it once again, bring it down and see how
thick the pattern would be. It seems like in this case, the pattern is a bit thicker and that's what I wanted compared to the example pattern
which I've showed in the kind of introduction
or the first lesson. I want a pattern to
be a bit thicker, so that's the reason I opt for this particular thickness,
right? That's good. Now, on the guide again, go for canvas, drawing
guide, edit drawing guide. This time you'll
go for two degred. And remember the overall size of a grid was thousand by 1,000
pixels, the canvas size. So we'll be dividing it by
five parts or ten parts. Okay. So either it's 200 and
see how big the grid is. If it's too big for
you, it feels like, okay, it'll become
a very big thing. Then you can change it to 100 and ensure you
bring the corner mark, you bring the blue colored dot, which will be in the
center usually to a corner so that the exact grids are
clear for you, right? Once it's done, you can
press the tick mark. Perfect. Now move
one of those uh, Chevron horizontal strips to the top and then
reduce the size, go to free form, switch off the magnetics and
reduce the size. Perfect. So now you will see
that this particular strip is within that one single,
let's say, grid line. And then you will
copy this particular strip into ten times. Right? Duplicate it. Move. In this case, I
would recommend you to switch on the snap and magnetic so that it comes
exactly, vertically down. And it snaps exactly
the right place. Perfect. We'll
continue this again. Actually, you can
actually merge both, duplicate it once again, and then move it again. Always enjoy it
snapping on the place. Duplicate it once again,
move it to the bott. You will see that overall
pattern it's coming out of the grid because of few pixels
which might be different. So you can always alter
that. That's totally fine. You can combine
both these things. Now move, how it's free form, and then move it a little bit. So you will see that
every single layer is already set now, right? Again, a similar fashion, duplicate it, move
it to the bottom. Perfect. You will see it
exactly fixed in the corner. The reason so is because we have chosen the grid under
which it'll function. Right? Perfect. Now we will
create two vertical lines, entire black vertical lines, and we'll erase
certain aspects of it and copy and paste it across different verticals so that we complete our
seamless pat, right? So for that, combine all
the horizontal layers, then tap a new layer, sure your brush is black in color,
calligraphy and monoline. Then your mark should be exactly the same thickness of the horizontal strips that
you have to be aware of. I have made this
line, then move it. Yes, perfect. Again, we are doing it manually
and organic fashion, not going to the dot of pixels because the
factors you will see, especially online, if you see any pattern, it
looks too perfect. It doesn't seem like
you've done it with hand. It seems like you've done
it with mouse and keyboard and it's too perfect
to pixel perfect. That is something
which you're trying to avoid consciously, right? That's the overall
idea. Now zoom in to see how the
overall pattern is. If it looks good. You'll see
there's a slight difference, so we can try to move and see
and come to or, you know, we can add a new layer, go to white, reduce the size, hide the black line, then make a line
exactly in the center here so that you know exactly
where the center point is. Right? Now again, switch on the line vertical line and
see if it's in the center. If it does not, you
can slightly move it. Perfect. All right. So we'll continue the same
thing for the other line also, which is here, the next
vertical, duplicated once again. First, move the
white color line so that it's easy for you
when you're marking it. Now then move the
black color line. Perfect. We have got both
these lines right now. You can remove the white colour highlighter
which we have used. Now, we'll start off
with the first vertical. Okay. So if you see
Chevron pattern, there'll be alternatives
of the verticals. Okay? So that's what
we're trying to do here. So use the array as a tool. Okay. This is one here.
There'll be a line. Yeah, there won't
be. Yeah, there will be here, they won't be. We'll just do it in
alternative fashion. Okay, you must ensure that the top and bottom
always resembles, right? So in this case,
if you see there's a line here and there's a
continuation line here also. So that's the overall idea. Right? Perfect. Now we'll
go to the second line. In a similar fashion,
we'll continue there also. We'll remove it here.
I'll remove it here. It's a very simple pattern if
you just follow the steps. It's not at all complicated. Perfect. Now we got
our line, right? Ensure you don't merge
both these lines. It's very important in this
particular point of time because you have to even move the lines to
different locations. At the same time, even
create the corners, right? So this is a second line, right? So we'll try to copy the second
line in multiple places. Let's say, here, here, and at the corner, right? We'll do that now, duplicate it. We'll rename the first line with line one, so we
don't confuse it. Now move the second line. Wait, I made a mistake here. In the second line, we need to even arrase this part, right? Because this won't be there.
Perfect. Now it's correct. Now duplicate this layer,
move it horizontally. Always, it'll kind of snap to the place
you need so you need not worry onto if it'll
be in the exact position. Right? Now, this
part is important. Now we have to move it to
the corner with a copy. Now one thing is you
have to zoom in. Okay, and ensure it's half. Okay. Why half specifically,
I'll let you know. Now, the other half, we had
to paste it on the left side. So it's continuous, right? So the half line duplicated once again and move it all
the way to the right. Perfect. Now, the second
line is taken care of. We'll copy the first line now. Okay, we'll copy the first line which we've already
created, duplicated. Now move it sure the snap is on. If in case you don't
see if it's center, you can always zoom in and
look at the central point. Duplicate once again and move
it to the next vertical. Now, again, finally, you'll have one more
vertical on the last. So this is a overall pattern
which you'll create. So always ensure you're kind of testing the pattern, right? So once this is created, combine all the layers, all the verticals and
horizontals. Okay, duplicate it. Rename the base layer as original template
or original tile. Now, we'll be working
on the working layer, duplicate it once again, reduce the size,
enjoy its uniform, reduce the size by half. Enjoy it snaps on the place when you reduce the size, then
move it to the side. Again combine both,
duplicate it, and move it to the
bottom, right? And switch off the
drawing guide. Now, once you zoom in,
you should not see any vertical strips anywhere,
vertical or horizontal. Right? So in this case, there is no vertical
horizontal strips. So our basic template
is exactly right. There is no problem about it, and you can continue using
this particular template. Okay? So in the next class, we will start working on the color scheme or
the color palette, how to create a
color palette for your design, and then
we'll go about it.
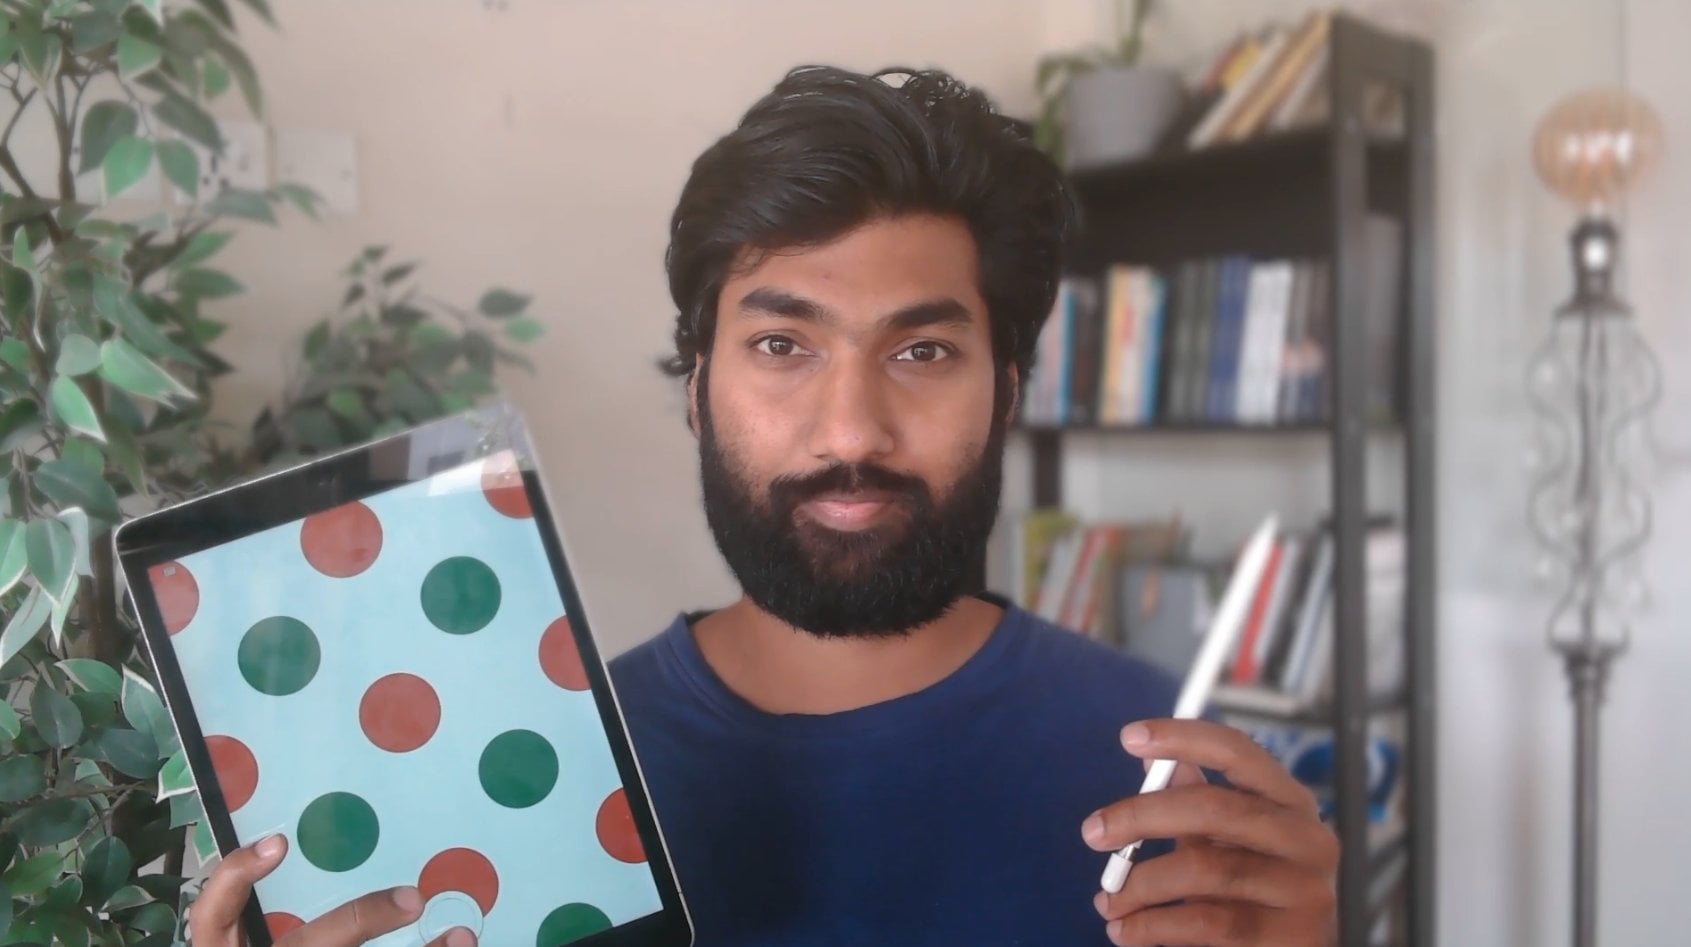
4. Creating a Clean & Cohesive Color Palette: So welcome to Lesson three. So in this lesson, we'll be
talking about how to create a color palette for your
overall pattern design. So first, tap the plasticon the top right hand corner
and go for customs canvas. So in this case, for
the color palette, it's better to have a canvas
which is vertical in nature. Okay? So you can
keep the size of, let's say 1,000 in terms of
height and width can be, um, let's say, 600 or even 500. We'll go for 500. Y
vertical specifically, I'll tell you in the next
lesson where we'll be implementing this color palette sheet into our design, right? And once it's done, you
can press the checkmark. Once you have Ensure the
brush is monoline brush, and then you create circles. Okay? Create one.
Ensure it's circles. So by using your finger
tap on the screen, so it becomes a perfect circle. You can reduce the size
if in case you need it. Right? In this case, I'll reduce the size a bit because
since it's kind of chevron pattern and you need multiple color schemes
in one particular sheet. Okay, fill it up
with black again. And then once it's done,
duplicate it multiple times. And then you'll be
moving them across. In a similar fashion, you
can do multiples of these. So entire thing is one set of colors which
we are looking at, right? So in this case, they
are eight colors, right? In a similar fashion,
you can create multiple color palette sheets. So in this case, we'll stick with one color
palette sheet. So what is a color
palette sheet? So when you're designing first, you're brainstorming a
particular design and then creating a final artwork or
surface pattern out of it. At that point of time,
you must not have a confusion onto which color
I have to put in, right? So for that reason,
you'll already have color palette sheets
ready so that you can import that sheet as
a reference and then copy and paste those colors.
That's the oral idea. So we'll start off with
we can either go with monochrome or we can even grow with let's say
complimentary colors. So there are any number
of options for that. So we'll start with a
light orange shade. So before that, you combine all the layers and then
you drag and drop them. It's basically wil colors,
it's a bit brighter, so we'll have it a
bit lighter shade. It's totally up to you. It's completely organic process where you choose the colors, based on your need and
based on your designs feel, what kind of feeling
it should give. Let's say if it has to
give very bright feeling, then you'll choose all the bright colours like neon colors. Let's a light green,
light yellow, or light blue. Okay? If you want a very monochrome or subtle or very bland design, then you'll choose
darker colors like dark green or dark violet
or something like that, right? That's totally up to you. In this case, I want
to kind of keep it a bit minimalistic and flat. So I'm kind of choosing the colors which are in
the same tone range. Again, go to color palette. We'll choose one green color. That is too bright. We'll tone it down in terms of darkness. Yeah. Perfect. We'll go for a blue
light blue tint. Perfect. We have
violet, we have green. We don't have yellow, so
we'll have a yellow option. And so yellow is not
too bright or else the entire visual identity
of the design will change. So that's very important.
We don't have a dark blue, so we'll go for a
dark blue shade. You'll see a difference,
the difference between light blue
and dark blue, that is very
important, sure you're not continuing the same pattern. We'll have a red also, but in a darker shade, so it doesn't be very
flashy or on your face. I feel this orange
is a bit darker or brighter will make it
a bit more darker. Perfect. Now, we'll have one
more color to be added to. So we have yellow shade. We have RGB, R, G, B, we have, we have CMYK also in a what colors we can choose
more. We chose violet. Yes. Yeah, Violet
tint is not there. So we'll start off
with the violet tint. Perfect. So we have
eight colors with us, and this is called a kind
of a custom, let's say, color palette sheet,
which you can always use when you're designing your final pattern, right? So what we would do with this is we'll export it as
an image, right? Ensure all the colors
are in one single layer. You can create one
more color palette also based on your liking,
that's totally fine. So we'll create one
more color palette with just four
colors in it, right? So again, duplicate
the entire thing. Move it to the bottom. Or we'll
have five colors in this. We'll remove the bottom layer, and these five colors will be just a gradient
colors, right? So it'll start off with the
darkest shade of green, and then slowly it'll
kind of dumb down. In this example,
we'll go for violet, darker shade of violet, and then slowly they
become lighter. Ensure the gradual
change is very evident. Perfect. So this is one more, uh, let's say sheet
which we have done. So this particular
palette sheet has two color schemes
or color sets which we can use separately for your designs. So
we'll export it. So tap the Actions menu on
the top left hand corner. Go to share and export
this image as JP. Right? And once you have this
tab the save image icon. So when you tab that, this
particular image will be directly saved into your
Apple photos, right? And then we can import
it to the next lesson. So in this lesson,
you have seen how to create your own color sheet. The next lesson, we will design a Chevron pattern
tile with colors and modifications and export
it as a seamless style.
5. Designing Your First Chevron Pattern Tile: Okay, so welcome to this
lesson where we'll be designing our Chevron
seamless pattern tile, using the template which we have learned how to create
in the Lesson two, and the color scheme sheet which we have done
in the Lesson three. Okay? So we'll get it started. Open the template file
which you have created. Remember in the second lesson, ensure combine all the layers, ensure the original tile is off, and then open the original tile, duplicate it and rename the duplicate tile
as working layer. Perfect. So we have a template ready on which we can
create our pattern, right? So we can drag and drop
colors straight away. So as I mentioned in the
second lesson itself, either you can
change the color of this main pattern or you can change the color
of the interiors, right? So in this case, we'll start off with filling of the
interior layers first, and then we can play around
with the pattern color. Okay. So how do you do this? Always, as I mentioned, ensure you're on
the working layer, not on the original tile. Then to import the
particular reference, go to Actions menu. Okay? Go to Canvas. There's an action option
called reference, tap ensure it's switched on. Then once you have
this reference window, go to Image, Import file. It will open up your Canvas
or the camera photos app. Then you can import
that particular image. Now I hope you
understand why we have, um, let's say, use
the rectangle, right, for our canvas or the color
sheet because it'll it'll exactly fit on the left corner
of our let's say canvas. So it's easy for us
to work on, right? Perfect. We'll zoom in
as per it's needed. Now, since we are in the
working layer, that's good. We'll just tap on the color and then we'll
drag and drop it, right? Drag and drop it in
different places. It's completely Hapazer. You need not worry
about how the rhythm is because you're using
almost eight colors, so you won't see a difference onto what the pattern
is following, right? But always since we
have eight colors, keep it maximum to four
spots each, right? Now perfect. Now
we'll go for another so as I mentioned, if it's in the corner, then it'll be in all
the four corners. Okay. Good. Now we'll go for orange color,
the second color. If it's in the top, it'll
be even in the bottom. So it continues, right? If it's in the right, it'll be also in
the left hand side. Perfect. We have
enough of orange. We'll go with yellow now. An Then we'll go with violet. So if it's down, it'll be continuing at the
top part of the canvas. If it's on the right,
it'll be even on the left. These things are very crucial. Only then you'll be able
to see a seamless pattern continuously without the
horizontal and vertical lines. Right. Now we'll
go for red shade. Perfect. Now we
have eight spots, so we have to compensate
with two colors. So we'll finish the
blue color first. We have four blues already. Now, we have four
more spots, right. So in this particular case, based on your vision, which color do you think is less prominent in
this overall picture? We have sufficient yellow, we have sufficient green, right? We can add one more green. Because green is a
very subtle color. Blue, we have sufficient
orange is also fine. Light blue, yes, we have five light blues,
that's good enough. So in this area, if you see, which color is not
available or prominent? There is green, there is
yellow, there is red, there is orange,
there's purple, right? There's no pink or
pink as there, right? There's no dark blue, so we can add one more dark blue here. Okay? And what
about this region? This region, we have
red, we have orange, we have pink, we have yellow, we have green, we have blue. We don't have violet here, so we'll add in violet here. Right? And this
particular region, we can add yellow
here, since it's surrounded with
dark colors, right? So now we have a complete, let's say we have
dropped in colors using the color scheme sheet or color palette sheet which we have created in the
previous lesson. Now we have completed
a pattern tile, or at least the interior colors. Now we can play around
with the exterior colors, the exterior pattern colors. So for this, you can remove the reference by
tapping the cross icon. Then duplicate the
original layer, original tile, move it to
the top, switch it on. Alpha lock it by swiping with the two fingers
from left to right. Then choose the white color
in the color palette. Go to the layers and
fill color. All right. This is the overall
pattern which we have right now. It's good. I kind of has its own charm
to its overall picture. Now what we have to do
is we have to combine both and see how it works
in the seamless pattern. So before confirming
the pattern, it's always best to duplicate
it as I always mentioned. So duplicate both the
layers and combine one set and remove both the others or
hide both the others, duplicate the
working layer which you have duplicated,
which you have copied, reduce the size by half, ensure the uniform is on,
and the snapping is on. Right? Perfect. So you can't see any horizontal or vertical
lines in the overall design. So we have a seamless
pattern tile, based on the color schema, which we have done in
the previous lesson and the pattern template, which we have done in
the third lesson, right? So as an export, what you could do
is you can hide the final kind of test or kind
of delete the final test. Now export this particular
image as your final tile. So go to actions, share and export it as HP. And so exported, you can
save it as an image. It'll be saved in
your Apple photos. So in the next lesson,
we'll talk about bonuses, where since you already have your seamless pattern
tile right now, how to use variations in terms of size,
in terms of color, in terms of gradients, and in terms of position to create multiple variations
of your design. I'll meet you in
the next lesson.
6. Bonus: Creating Chevron Pattern Variations: Kiper it. Welcome to the bonus
lesson where we'll be talking about how to create multiple variations
of your pattern tile, which you've already created in the previous lesson, right? So we have your pattern
tile right now here. So in what all variations
we can achieve, right? First thing is size. Okay? In terms of size, if
you reduce the size by half, so that the entire
let's say the shape of the single unit of a chevron pattern will
change that you can do, or you can change
in terms of scale. But since it's a
seamless pattern, it won't make much of
a difference, right? Can make in terms
of color, okay? Colors, you can add
multiple colors. You can have monochrome colors, or you can even have
textured colors or right, a similar fashion,
you can do that. So we'll start off, right? So this is your pattern which you had in the
previous lesson. Now we'll create one
variation based on size. And as always mentioned, duplicate the original layer, don't work on the
original layer, right? So duplicate the working layer and duplicate the original
tile also and combine both. This is your working layer right now and we'll reduce the size. Go to free form, reduce
the size by half. It looks a bit skewed if
you reduce it by half. So what we will do is instead
of reducing it by half, we'll reduce it
by three quarter. Okay. No. Uh, 500 will change the bith by 750 and we'll move it on the corner. Yes. Now, you will see a
slight difference here, actually, okay, compared
to the previous pattern. This pattern is more like
a squarish thing, okay, that you could do or
even you can move the way you like to in terms
of the overall pattern. Yes, you can change it
into half like this, so it becomes almost like a vertical pattern rather
than a horizontal strip. So is it seamless? It
is always seamless. Even the single tile which
you have graded is seamless. It's just that
seamlessly function in a vertical and horizontal way with the canvas which is
vertically stretched. Okay, so test to kind of
test its seamlessness, duplicate it, select both, choose uniform and reduce
the size by half and copy and paste one pattern on the side and do the
same process again. The same process once again. Perfect. So can you see
the same pattern as this? It's just that now it's a bit skewed and you won't feel it as skewed if you're
seeing it for the first time. It's just that you created something horizontally
stretched out, and then you have altered
it. You might feel it. But if you paste it
or if you place it on a merchandise or
any digital product, it'll feel like it's a new
pattern altogether. Okay? That's one variation you
can try based on size. Now the second variation we'll look at is based on the color. Okay? Now hide this
particular layer. Rename it as size variation. Perfect. Now again,
take it to the bottom, duplicate the working layer, duplicate the original tile. Okay, and combine hide both and keep it as
a working layer. Now here, we'll change
the color skin, okay? Go to adjustments, which is the second icon
from the top left. Then go to hue saturation
and brightness. Okay? Keep an eye
on your canvas. The moment you change hue, will see the entire color
changes in the pattern. Right? Can you see a difference? It's been blinking just
because I'm moving it quickly so that you
can easily see it. Can change the
saturation also, right? So in this case, if you
see because of the hue, even the red colors appear
to be pink. All right. So you can add any
one of your choice. I'm good with this. You can change the brightness
also overall brightness. I usually don't change
it because it will just impact the entire design
rather than just a few part. Okay. Now once you're done, you can change adjustments. Now you will see that we have
two different patterns now. Right? So this is
one pattern which we have created right
now by changing the hue, saturation, and the brightness. And this is a pattern which you originally created, right? So within a fraction of moment, we have two different patterns with different color schemes. So that's the overall idea onto how to create multiple
variations of your pattern by creating multiple styles, multiple
color variations. Now, as a next variation, we'll create a pattern with a single monotone color with
different gradients, right? Remember in the color palette sheet which
we have created, we created a different
color set where the colors are all the shades
of violet, right? We'll do the same thing now. Right? We'll duplicate
the working layer. We'll rename the one
which we have done as we'll rename it as variation. Color. Same size variation and hide it and go back
to the working layer. Now import the color scheme
sheet which you had, Canvas, reference, and you
have a reference ready. Now we'll go with
this color scheme which we have in the bottom. Fine. Ensure the right layer
is on the working layer, and then we'll start dragging
and dropping it, right? Right? So since we have
five different colors here, and approximately if you
count number of rows we have, we have approximately ten. Okay? So what idea I have is, we can have a horizontal
gradation, right? So the darkest color
will be in the center, and as it goes on the top, it becomes lighter, right? So when you create a seamless
pattern on top and bottom, you will see a slight gradient of your colors going
from dark to light. Right? So I'll show
you how it is done. We're selected with
the darkest color. Now we'll find the
middlemost layer. So one, two, three,
four, five, six, seven, eight, nine, ten, two, three, four, five. So the blue is the
darkest layer. We'll fill it up with
our darkest color. And then we'll go for
the next lightest color. Fill this up in the next
top and bottom layer. It's a bit tedious process, but you will see the
result far more beautiful, you'll feel very happy about it. Then the next lightest color. Now, the second lightest color. And then the lightest color. We might be short of one more
color just for one line. For that, you can add
one more shade of the same lightest color and reduce the intensity
of it, right? So we'll go to the
layers or the colors. We'll almost make it
white or gray in tint. Now it's almost gray, right? We need to have a tint
of the same color. I'm sure you're following
through the entire process. Perfect. So this is our
overall pattern, right? So we can switch
off the reference, and then we'll duplicate it
to test our seamless nature. Reduce the size by half, ensure all the other
layers are switched off. Select one of those layers, move it to the right,
combine them both, duplicate it once again and
bring it to the bottom. Right. So can you see a
beautiful thing now, right? You will see that there is
a slide gradient of colors also when it comes to
bottom to top, right? That's the overall idea for
this particular pattern. So we'll delete it. So this is a working layer. We can rename it as
color variation gradient or we can say
gradient variation. All right. So this is a
gradient variation pattern tile which we have as
the final product. Now, we'll add one more
variation, which is texture. Okay, we'll add texture brush
into the overall picture. First, we'll add it only
to the outer frame, okay? So hide the gradient variation, move it to the bottom,
open the original tile. Sure the alpha lock
is on, you can remove the background
layer if you want. Alpha lock on, go to the kind of brushes and see if they're
in texture brushes, which resembles what you
really want in terms of, let's say artistic
brushes or elements or charcoal or whichever
you're comfortable with. I'll go with the brunt tree. I will try how the pattern is. Perfect. This is
good. This is good. I'll choose the lightest
color. That's also good. And then, I'll just
add a few textures. And we can switch off
the drawing assist, so it's easy to sketch on. Okay. You're seeing I'm just
doing a patchwork here, so it's easy. It's like you doing something on an actual real canvas
rather than digitally. But this is what it helps
also in the overall picture. Right now you have
a texture for this. Now if you switch on
the bottom layer, you will see a slight difference
in the overall pattern. You can do the same thing
for the colors also, right? You can do the same
thing for colors also, and the overall style of
the pattern tile itself will change because
of the slight texture which you have created, which will add on in depth to the overall pictures, right? So in this lesson,
you'll have created multiple variations with colors, with position or size, and even with the texture. In the next lesson, we
will create a seamless, let's say, Chevron
brush in Procreate. I'll meet you in
the next lesson.
7. Bonus: Turning Your Design into a Seamless Pattern Brush: So welcome to this bonus
lesson where we'll be creating a seamless Chevron pattern brush in Procreate. So
how do we do this? You open the original
pattern tile which you have created
in blacks, right? We'd have named it
as original tile. So you open that, duplicate it. Okay, and ensure no other
layer is switched on. Using the three
fingers, swipe down. And actually tap, copy all. Once the canvas is copied, switch off the layer, open a new layer, go to the brushes, go for the calligraphy
and then choose monoline, then duplicate the
monoline brush and tap the duplicated version. Now go to grain, choose the grain source,
import, and paste. Okay. So this is one
variation of it. Now what is the impact? Like mark, ensure you
choose texturized, increase the scale of it. Perfect. Now we try drawing
it, see how patterns. Right. If you want you can
increase scale a bit more. If you go to Apple
pencil settings, You can increase
the stroke pacing. You can increase the
stroke stabilization. It's a stream line or
however you want to. Yes. And then once you're done, you can tap the tick on
the top right hand corner. Increase the size of your brush, ensure ensure that it's a new brush which
you have created. Then once you start drawing, you will see the pattern here. It's black because we have
chosen the black color. If it use a different color, let's say orange, then
it'll turn up in orange. If we choose a color,
let's say green, then it will get a
green color pattern. If it use a color, let's
say blue or violet, then we'll get a
blue color pattern. It's a seamless pattern, right? Now, what you see in
this particular case is it's actually a
negative pattern. It's creating the
color on the places where it's opposite of
the paxtal pattern. So how do we do that? This
is actually one brush. We'll create one more
brush like that. So again, type a new layer. Go to brushes, duplicate the
original monoline brush, and then go to the
duplicate brush. Ensure you are in the
grain, not in the shape. Choose the grain source, import and paste. Okay. So once you have the grain
on the grain source, using two fingers,
tap on the canvas, so it inverts. That's
very important. Once you're done, tap on the top right hand corner
and choose texturized. And then you can
tap the tick mark on the top right hand corner. Now, hide the previous
design which you have done. Now, ensure it's a new pencil which you have chosen,
increase the size. It's very small, so we can
increase the scale of it, go back to the brush,
increase the grain scale. Okay, that's very important.
So it's kind of visually visible. Create a new layer. Once you start it's very big. Ensure the scale is
around let's say 15, so you can see the
actual grain, right? Perfect. Right now you see that you have a
seamless pattern, seamless Chevron pattern in the color which you really want. Okay, you can change the
color to let's say red, increase the size
if you want to. Can go to let's say blue
colour, light blue colour. You can choose green, a bit of darker shade and might be yellow at
the bottom corner, right? So this is our overall seamless
pattern brush which we have created and used it
with different colors. If you want to add on, then you can add on a cohesion
blur and increase the cosionblur so it'll mix well. Everything
will blend well. That's overall idea, right? So in this lesson, we have learned how to create
this pattern brush. If in case you want to
export, it's very easy. Go to the brush section. Swipe it, and there's
an option called share, right? You can share the brush. You can save it to your files or you can mail it to somebody else or even you can pack it as a digital product,
and you sell it. So you have multiple
options on that front. Okay. Perfect. So in this lesson, you
have learned how to create your seamless Chevron
Pattern brush in Procreate. In the next lesson,
we'll talk about the class project and
our final thoughts.
8. Class Project: Create Your Own Chevron Pattern Variations: So welcome to the final lesson onto recap and class project
and final thoughts on it. So we'll recap what we have learned already, right
from the first lesson. So we have learned how a chevron pattern works and how a seamless pattern
functions in a pattern tile. And then followed by that,
we create a base template. Okay, for our Chevron
pattern tile, then we created a color palette, which we can use while we are creating entire seamless panel. Then combining all these things, we have created our final, let's say, seamless
pattern tile, with the kind of chevron
style in Procreate. Then we went on to the bonus
lessons where we created multiple variations using
color, size, and texture. And then finally, we
created one more bonus where we use the
Chevron pattern tile to create a seamless brush with a positive actually negative
brush in Procreate, and how to export and share. So after you have
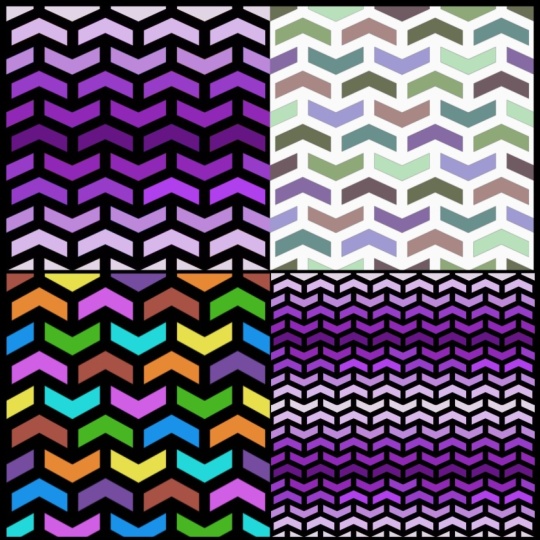
learned all these things as part of class project, so I want you to
do at least three or four different variations of seamless chevron pattern. As you see on the screen, where the first one has dealt
with the size variation. The next one has dealt
with the color variation. The one in the bottom
left hand corner is with the exterior color. You have changes to black. A similar fashion in the
bottom right hand corner, we have worked with
the monochrome and the gradient aspect. So in a similar fashion, you try to create multiple
variations of your seamless chevron pattern and you can post it in
the project section. I'll be so happy to look at your designs and with
your colleagues also, it'll be a nice
experience, right? I'm so happy that you
have taken this class, and I'm sure that you have learned a thing or
two from this class. I'm so happy if you want to, and if you really like the class and based on your opinion, you can post it on
the review section. I'm so happy to learn
from you also onto how I can improve sharing
my knowledge with you.
 Srihari Muralidhar