Transcripts
1. Seamless Dot Patterns : Class Introduction: Have you ever tried to
make a pattern which actually look good
when you did it on paper or on an iPad and then kind look off when
you try to repeat it. The most important mistake everybody does is
they first create the pattern and
then try to create a seamless kind of
nature out of it. That's the biggest mistake. Who am I to say this?
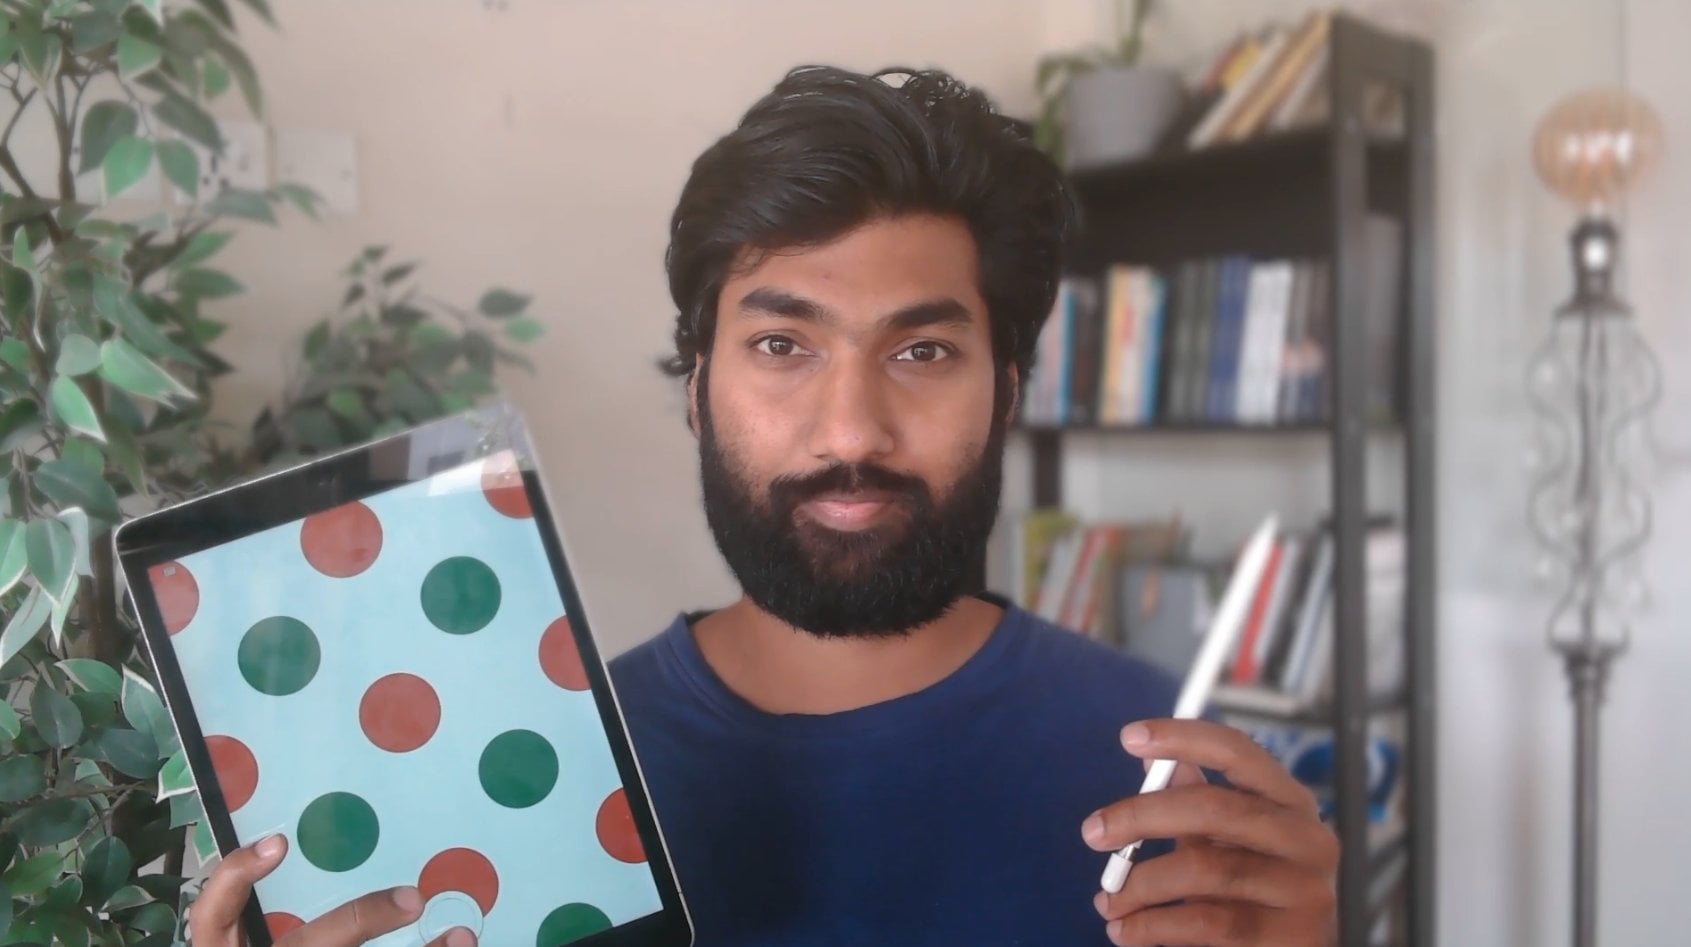
Hi, my name is Tri Hari. I've been actually
a digital artist for almost four years now. I've been creating seamless
patterns like Mandalas or dot art patterns and
multiple number of patterns, and I've sold all these patterns for multiple design agencies. So I'm so excited to share
everything I know about this art of creating a seamless pattern using
the dot art techniques, which is usually done in
the traditional patterns. So what you learn in this
class is the fundamentals of dot art in terms of
the visual spacing, visual density,
the flow patterns which we'll be going through, and the seamless nature of it. And then we'll even
learn the technique to create a single tile
into a seamless pattern, which can be replicated
on all the direction, which is called as a multi
directional seamless pattern or a unidirectional, which was either
horizontal or vertical. And as a bonus, we'll be even
learning to apply colors in our design work using the
color theory and gradients. And we'll even add three D aspect for our design using the
shadows and highlights. At the end, I'll
teach you how to export the file which
you already do, which is a seamless
pattern tile. So as a class outcome, actually the end of this class, we'll be having a single tile
design work which can be seamlessly replicated either in all the directions
or unidirectional. And this particular file
will be ready to be exported as a wallpaper to be used as a pattern
for print on demand websites and even
for your personal use. So I'm so excited to share everything I know
about this process and let's turn the simple
dots into seamless patterns. I'll meet you in the
class section below.
2. What is Dot Art?: Welcome to Lesson
one, where we'll be seeing the introduction
to designs. Firstly, in this
lesson, we'll see dot art as a design element. What is the significance
of dots in a design? They can be used
as space fillers. They can be used as visual contrast or visual
attention grabbers. But all these use cases
are for the designs when the dots are
as a sub element. But when it comes to
dot art patterns, everything we have is dots. So we'll be playing around with different thickness of dots
like you have seen here, where we will start
off with kind of the bigger dots and then
eventually dumb down the size. And we can even play
with the opacity of dots and even colors, which
we'll be playing around. And at last, we'll be
adding few effects like three D effects like
shadows and highlights. Now, what are Dt art styles? There are any number of styles. In fact, in this day and age, we can include different
art styles into dart art and kind of have a remix of all the
art styles, right? But to start off with, you can have black
and white style where either the dots are a negative space
where it's white, or the dots are black, and the rest of the
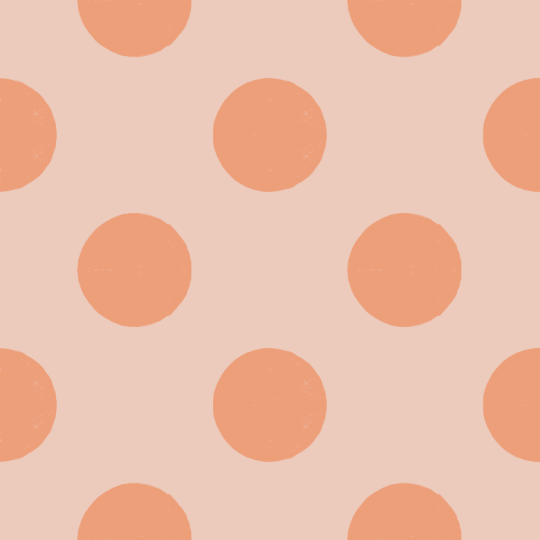
entire canvas is white. You can do that. Or they can be multi colored and
happizat patterns. And patterns like these very simple in nature, but
they are structured. Mostly these are used
in textile designs. And at last, you would have seen something like this
in the artistic, uh, ways where people do
dot art paintings, right? And these things
can even be used as floor tiles or seamless
patterns for digital products, or even for physical products or merchandise like clothing
and phone cases. So there are number of use
cases at the same time, the N number of styles.
3. What is a Seamless Pattern?: In this lesson, we'll
be talking about seamless pattern,
what it is all about, and what are the different types of seamless patterns available, and what is the real
world use cases. Firstly, if you divide seamless patterns
into two categories, one is the multidirectional
seamless pattern, other one is unidirection. The main idea is, let's say there is a pattern,
a single pattern. If we can multiply this
in all the direction, then we term it as multidirectional
seamless pattern, right? If you see in this case, this is the pattern
tile, which we say. And if you copy and paste
this in all the direction, you won't see this line at all. You won't see where
the tile ends and the next tile starts, right? So it becomes seamless. So this is multidimensional
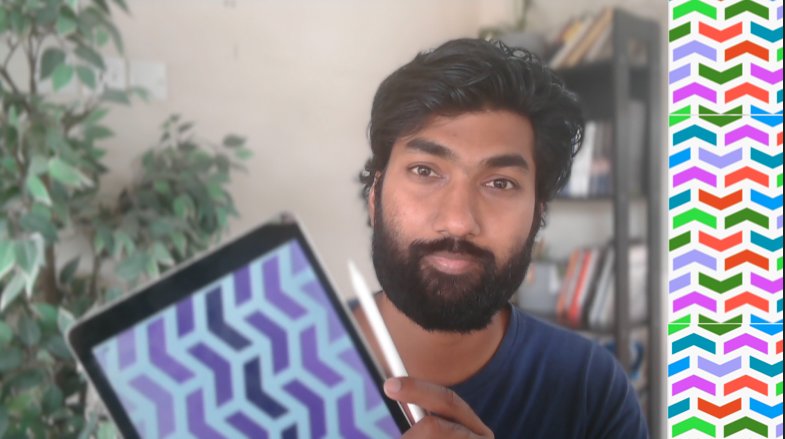
seamless pattern. But if you see in this case, this is actually unidirectional,
which goes horizontal. Right? You will see there is a blue colour border
on top and bottom. So if you copy and paste
this on top or bottom, you won't see that
seamless effect, right? So this particular pattern only goes in a seamless way
on either directions. Okay? So what are the use cases? There are different use cases for different kinds of pattern. For multidirectional,
they use it mainly for fabric or kind of
wrapping paper or, the kind of places
where the kind of corner edges are not,
clearly visible. In that cases, we will
design them multi direction, so it can go in all
directions with full freedom. When it comes to uni directions, there are specific use cases. Uh, let's say there's
a product where the bottom hand of that particular product have to be printed with
seamless pattern. Then we will use the
unidirectional or if you wear you see costumes of Asian background
like Indian Caris, which actually women wear. For that, the bottom background
is always like this. That's the main difference
between a multi directional and a unidirectional
seamless pattern.
4. Brainstorming & Rough Sketch Layout: Now in Lesson three,
we'll start off creating a rough sketch layout for our kind of dot on
patterns, right? So you will see here as a kind
of brainstorming session, we'll first draw our
lines so that we will know in which pattern
the dots go off. This is for the kind of organic way of
structured, dot arts. But if you're going to go with complete chaos style patterns, then you can go completely
without any guidelines, right? So before going
to actually start brainstorming our rough sketch, we'll go with the visual
density or spacing of the dots, which is very, very
important when it comes to dot art pattern, right? You'll see a difference here. We have used almost kind of
similar kind of size of dots, but just because there
are multiple dots in this and the density is higher compared to the one which
is on the right side, you will see that
the visual identity completely changes, right? Even the first design, you will see from
the bottom right hand corner, it's very dense. And as it goes towards
the top left hand cre, it becomes lesser in
terms of density. Here it's completely chaotic
and completely empty. So you use different dot art patterns styles,
different use cases. Let's say the overall design
language is minimalistic. Then we'll go for a pattern,
something like this. If the overall language is, let's say, gradient
kind of style, then we'll go with
something like this. That is very important, especially while
you're brainstorming, you have to think about
this aspect also. I'll start with the
brainstorming session. You can open a new canvas. Preferably, you always work with this square canvas, okay? But since it's a
brainstorming session, we'll make a square so that
we can work inside that. You can make a rough square like this and actually do
not lift your stylus, please your finger, you get an exact square
like this, right? Once you're comfort
with the size, you can leave both at once. And complete the square. Again, this is
just a rough skit, so it's totally
fine if your square is not completely exactly right, and that's 100% fine. You can take a gray
colored pencil because it's easier
instead of black. Black we can use for
the dots, right? But test how your lines
are that's perfect. Now in this class, we'll actually initally
final project, or the final design
we should be doing is a multi dimensional seamless
pattern using tons, right? So in this case, we'll do
it for all the directions. So there are multiple variations
which you can go for. First one is, either you can go with kind of the
whole density style. Where you kind of cluster
in different groups, right? For example, all the dots are in all the dots are in
semicircular pattern, right? Or all the dots are in
the triangular pattern, triangle semicircle
sem triangle, right? There are multiple
ways like this, or you can actually arrange
all the dots in one line and all the other dots in the
parallel lines like this. So you will see a tiled pattern, which you can always make it into a seamless
pattern, right? Or something like
completely hapost curves based on your
subconscious thought. Right? I can place the
dots on the intersection. The major dots, at least. Okay. And we can bring in the
clusters which you're talking about around those uh, you know, the
center main points. You get it? It's like that. You can
explore multiple options. So in this clase, we will do the one which we have
done the last moment, right, where you'll go
with the flowy pattern, then make the main points
at the intersection of the lines and then create clusters around
those main points, right? So we'll
start off with this. Imagine we So we have multiple
intersection points. Now we'll actually
take a new layer. We'll switch to black,
increase the size. You can have one more
line here, right? Because it seems like there is kind of an
empty space here. Sorry. Since the curve
is already like this, we can do an offset
curve, right? Yeah, good enough. Okay. Right? Yes, it doesn't seem like an organic doesn't seem
like a structured pattern, but that's what
we're looking for. We need a sense of organ nature and then we'll add
structure into it, right? We'll go back to the guideline, and we'll create concentric
circles as a guideline, so that it's easy
for us to make dots, reduce the pen size. Thing is, if you make
a circle and hold it, you will see that the
lines will get smoother. If you place your
finger on the screen, it'll become an exact circle. This we can do the same for
all the other circles also. In fact, you can even
play around with the concentric circle sizes, and it's kind of off
centered nature also. Right? You can continue the
same for the other circles. As I mentioned, this is just
a brainstorming session so you can completely flow
with the patterns, right? Okay, initially, we'll try
to not work on the corners. We'll just try to do it at the center wherever it's
available right now for us. You can make small
intersections of the consenting circles also
how I'm doing right now. This seems good enough. In our pattern, you see that
there is a few major points. The one, the circle which we are kind of like encircling now, this one is a major point. It seems like all
these things are focused around it. And
that's a good thing. There will be a point of
interest in our design. Even if it's seamless, they
need to be some point of interest or else it'll become too vague for us to
design something on it. Perfect. It seems good now. So this is a
brainstorming session. Now, after this,
what we'll do is, we'll have a basic
thought process on how we're going to
go with it, right? So let's say you'll have
dots around it here. We'll continue going around. The one which I'm drawing
will be actually a dot. So this is just a rough sketch. So we're just envisioning
how it would be there. Right? It seems good. Yeah, it seems good. Right? So the next lesson,
we'll complete the entire pattern first,
at least in the center. Then we will learn how to do the seamless aspect of
this pattern design.
5. Building the Dot Structure: Welcome to this lesson where
we'll be finishing off our drawing or the main
pattern from the brainstorm, which we already had in the
previous lesson, right? So in this case, ensure, it's better if you combine all the layers you have
here and export it. Share, chap it. The reason I'm saying
this, we're going to take this to a new file, right? Now, open a new file, ensure its square sheet. Okay? So the size
would be 2048 by 2048. DPA would be 300. The reason for the
DPR is that initially we using our pattern for kind of print products
like conditional products. But if in case you're
going for printing on offset or even
kind of merchandise, we need that 300
DPA for clarity. Okay, that's very important. And the size of 248 to 2048, the reason is the
seamless patterns really work well,
mostly in circles. So, you know, it's
actually a square canvas, then you will know where the seamless pattern is working or where the problem is
and it's not working. So we'll go over this
size 248 by 2048. We'll import the file which
we've already exported, which is a brainstorm
insert a photo. Perfect. We got it now.
We'll scale it up. That's very important
now. We'll scale it according to our canvas. Yes, good enough. Okay,
there's a mark on the bottom. Yeah, not good enough. So on our wall dos, we will reduce the opacity so that we can work
on top of that layer. Well first mark the main dots which we have created already. Again, in this, it feels like you have
to do a perfect circle, but the thing is, it's
better if you don't do it. You will see a slight
organic nature to it if you do it
like this by hand. Yes, we're combining
the digital artwork. But since we're doing it with hand instead of a
mouse and a keyboard, it's better if
there's some form of inorganic patterns
which you're creating or small imperfections, right? It's one way of doing the
circle or some people prefer doing the outer edge
first and then filling it up. Totally fine. It's up to you. Whichever style you
would want to choose, you can go with it or
whichever way of drawing this, you can go with
it, but try to do it with hand as
much as possible. Older then you will see
a small imperfection or organic nature
to your pattern. You can reduce the opacity of
the background layer more. Our main pattern is
clearly visible. This is a organic
flow which we have. You see that there is a flow in this area and there's
one point of contact, sorry point of center, and
there are few filaments of it. I believe we can
do one here also, so it will balance out this
one particular dot here. We'll do a small dot here. Yeah, perfect. Now we can have
concentric circles around that also, right? As of now, don't worry
about the seamless pattern. We will look into it
in the next lesson. We'll fill up the
concentric circles also. Concenting circles,
you can go with actually a dot which
is already there. Or else it'll get
very slow process. Choose the right size of the brush. Yeah,
that's good enough. Again, as I mentioned, you need not follow any particular structure
here because of the idea that you're creating something organic, not
extremely structured. If your circles are
not aligned with the one which is the adjacent
row, that's totally fine. All right. Perfect. A
similar one for this circle. One circle is enough. As
I mentioned, remember, don't try to cross the canvas thigh because that will create a process
of seamless more difficult. That's the idea. So do it in the center so that when we cover the seamless
pattern aspect, then we will see how to
complete the outer layer. Then here also we'll do only one semicircle or concentric circle. Oops. I made a mistake here
about the smudge, that's totally fine.
We can solve it later. Preferences see if there
is gesture control. Yes, so remove the
smudge, so it's clear. See now it won't
happen. It'll just as. Miss. That's perfect.
Now, we have okay, we can have one more
concentric circle here. Yeah. So this is our
final pattern now. Now we will see how to seamless
it in the next lesson.
6. Building the Seamless Tile: This lesson we'll learn how
to do the seamless style. Now, since we have
the artwork or the fine line drawing clear after the brainstorming session, a seamless pattern, ensure
you combine all the layers, remove the whole
brainstorming grid. In this layer, mark the
four corners like this. Just a small mark,
once you have it done, for actions for canvas, or a drawing guide, it drawing. Of a symmetry options quadrant. We won't be doing anything
with using symmetry, but it'll be easy for us to guide our artwork,
the first space. Now, select the layer where we have the
drawing and then go further move tool and scale
it down 25% time this. But ensure there's
a snap on how do snapping settings and magnetic
and snapping should be on. Now we again scale it down. We'll see that there's a
point it snaps off, right? This is how you start
off doing this. Now in the first
case, what we do is for seamless first duplicate it. Choose one layer, move to the left hand corner until
it snaps in the middle. In a similar fashion,
choose the other layer. Now move this to the
right hand corner, again until it snaps
to the middle. Perfect. Now combine both these layers,
again duplicate it. Choose first layer and take it to the top until
it snaps in the middle. A similar fashion, go
to the bottom one, move it to the bottom until
it snaps in the middle. Now, combine both these layers, remove the one which
is in the middle. Now, you will see that
this whole thing doesn't look like the pattern which we have created in
the first place. But the difference is, this is actually a
seamless pattern now. You can seamlessly integrate it across any single file
in all directions. Now we will complete
the marks which are in between so that it feels
like complete pattern, right, you choose pencil
to start off with, you can do it and then
a separate layer, then we can club it off. Since there's an
empty space here, we'll create one more cluster. Okay. Okay. The remaining pass, you can do it with a small
extremely small dots. Again, remember, the idea is to not fill up the entire page. The reason is the
seamless pattern should feel like a rhythm, and the rhythm is
complete only when there is music and silence
in a similar fashion. When it comes to digital art, there needs to be space, there needs to be empty space, there needs to be design space. Only then it won't feel like
clustered or claustrophobic. Ensure there is empty space always when you're
designing certain things. So it doesn't feel like you just dump every single art
style into one artwork. Okay? Keep it minimal, sure people ensure
you would want people to see where
you want to see the artwork in, right? Yeah, it's simple now. It's not very complicated. We have filled up the remaining
spaces with small dots. That's good enough, right? Now
combine both these layers. This is the main final
pattern which we have. Now to test it. What we need to do is
duplicate this layer. And kind of like mark one layer as original so
that you don't touch it. And it'll be saved up.
Choose the other layer and scale it down to 25%. Again, look for the snap, duplicate the same layer,
move it to the right. Wait for the snap.
Again, duplicate the layer, move
it to the bottom. Wait for the snap.
The duplicate it. We complete the remaining one. Now hide the guidelines so
you can see the pattern. Now you see that you won't see
exactly where the line is, can you see somewhere?
It's supposed to be here. But you can't see it because
it's just seamless now. Okay? Actually, one tile is only one quarter of
this entire artwork. But since it has become
a seamless pattern now, you can't see the tile where it exactly starts or exactly stops.
7. Coloring Techniques & Adding Depth: Now in this lesson,
we'll talk about the color grading aspects and adding shadows and highlights
for three D effects, we'll be working on the
main original layer. I want you to delete all the seamless test which
we have done, go for the original
layer, again, duplicate it, hide the
main original layer, and actually rename the layer which we are working
as working layer. Always remember to
have a original layer separate so that if in case you need to get back
to the oginal layer, you always have a copy, right? Now in this working layer, remove the assistance and on
the Alpha lock. Alpha lock. Now, select a new layer. You'll be drawing on
that layer, not this. Eventually we can combine it. Or you can work on the
working layer itself, go to the working layer
on the Alpha lock and type select 1 second. So you can test it. Yeah. So since you have
selected the Alpha lock, we can only draw on the circles,
not on the empty space. That's one advantage
we have, right? So we'll start off
with coloring aspect. So we'll start with
this central aspect. We'll go with the green
in this case, right? A bit of kind of darker shade. And eventually, once it
comes to the outer circles, we will reduce kind of gradient, but we'll follow the same color. Increase the brush
size, so it's quick for you. Now you see that is done. No change the gradient to
a lighter shade and do it for the next concentric circle and then induce it a bit more, do it for the next
concentric circle. Be aware of it,
ensure you're not spilling out to the next layer. You see a slight difference on how this whole
process is going on. Now we move for a
bit more lighter. Right? Now, you see that
it kind of starts off with a darker shade and eventually gradually
becomes lighter, right? We'll do something similar for the other kind of clusters also. We'll go for red in this
cluster in darker shade for the central then becomes
lighter as it goes away. So we'll do here. We'll go for blue
color gradient. Again, it's completely random, but if you want to
choose something or a very specific shade also, like complimentary colors or something like that, you
can always go with it. Again, keep it as
organic as possible. Don't kind of kind of
structure everything. And if in place, there are black colored, clusters
here and there, that's totally fine
because that will add some visual interest
to your overall artwork. Now we'll go for purple
or pinkish color, and we'll go for this
concentric circle. All right. So if
you're doing it here, better do it in the bottom also here so that we can
just same tone, right? Always remember that
bit more lighter. I hope you understand why
we are doing on the top and the bottom because that
will be continuing here. Same with the right
and left side, also, we have to do that. And a bit more lighter shade. Since we have done it here, we need to do it for
one piece here. All right. Again, since we
have done it here, this will continue
on this side also. Okay? I believe we can do some outer circle
which we have. Perfect. So we have few black, I'm sorry, we made
a mistake here, so we had to rectify it. Perfect. So we'll add we'll
add some colour here and here and we'll keep the rest as
black color, right? We'll add an orange shed, right? An orange shead we'll add. Firstly central with
a darker orange. Then as you mentioned, it
becomes lighter and lighter. We add a yellow here. It seems like there's
a lot of black here, so we had to add two
more colors here, and then we can
wrap it up, right? So we'll add some color here. We have purple or
lavender color. I really love the
lavender colour. Again, as it goes, get lighter. Perfect. And just one
more circle here, right? What color we can add more? Red is done, blue is done. Orange shades are done,
green shade is done. Might be light blue or you can add kind
of one more green. As the green is in center,
we still be in the corner. It's actually a different shade of green this, so that's fine. Again, since we're
doing it here, you have to do it
here also, right? So the dighter shade
will be on top. O Let's get Yes. Perfect. This is a
pattern with color. Now, how do we bring in the three D effect which
I was talking about? We have to bring a
shadow and a highlight. That's two aspects of
a three D element. So what we'll do is we'll
remove the Alpha lock, which is two finger swipe to the right for that
particular layer, and then duplicate that layer. Again, Alpha lock, create
the entire ring to black, fill it become black. Now again, again duplicate it. Again, fill it with white. So now we have two layers. One is black and one is
white of the same artwork. Now take the white sorry, take the black layer under
the working layer and take the white layer on top of
the working layer, right? So we have the highlight
and the shadow layer. Now we will work well first
work with the shadow layer, go for the shadow
layer first here, and then go for adjustments, gaussian blur and slightly
turn towards right hand side. You will see if on
6% is good enough. I go to move it towards
the bottom right. The reason is if you have to
show lighting and shadow, it needs to be from a
particular angle, right? So light falls from the
top left hand corner. That's a norm we use artwork, and then the shadow falls in the bottom right hand corner. Similar fashion, do the same
for the highlight also. Move the highlight towards the top left hand
corner a bit slightly. Sure you can remove the snapping,
so it's easier for you. If it's difficult for you
can slightly tap on the top, left hand corner, and things
will move on that side. Ensure you don't move so much, so it feels like it's
out of the artwork. Perfect. Again,
good adjustments, cause blur and increase the
percentage for the white. Yeah, perfect. So 20% is more than
enough. All right? We'll see a slight pump on each and every dot which
you've done, right? And then now we'll combine all the three layers
of highlight and shadow and we'll kind of test it for the
seamlessness again. So duplicated. Right? There's no snapping, so enjoy adding the snap. Duplicate it and take
it towards her, right? Again, combine it. Date it
and take it to the bottom. So perfect. This is
a seamless pattern. You see that the colors
are already met. You will see a slight
kind of template. You are seeing a green colour, invisible form here, again here, there's a point of focus, especially with
the red and pink. This is a seamless pattern
which we have created using the three D effects
of shadow and highlights.
8. Exporting for Different Uses: Once we have checked
our seamless pattern also, you can remove. Or you can keep one layer
as a main working layer. This is a seamless final
pattern which we have. Now, the real world use
cases of let's say you're printing it out or using a
print on demand website, then you need to export it
in the right way, right? How do you export it ensure all the layers are switched off? Only the working layer is on with the color patterns
and the three D effects, which are clustered
into the same layer. Now, go to the wedge icon, actions icon, go to share. In this, you will
see multiple things. You will see share image, you will see a share layers. If you're creating a
print on demand product, it's better you choose share image instead of share layers because if
you do share layers, all the other layers
also will be exported, which is unnecessary
for a print on demand. In this case, preferably, you want the best
quality possible, so you can go for PNG. If you go to PNG,
what will happen is you might get empty background. So to solve that problem, you can add one more layer, and fill it up with white color. Okay. And then you combine these both working layer and the
white color background, right? So once you have this and
once you export it into PNG, you'll get the best
quality image, especially for Penton demand. At the same time, you won't get the transparent background
since you already added white. But if in case you
choose to have a transparent background
in your products, then you can omit the white background layer check
which I mentioned. Again, export it as PNG. Especially when
I'm doing my iPad, save it to your files
rather than your gallery. You can change the naming
as seamless pattern. Sless dot pattern,
it is on my iPad. You can add a new folder on name patterns and save it here. Once we go and check
it if it's saved in a right location,
go for patterns. There you go. We have
the seamless pattern. It's important to procreate
just because we have set it as a default to
open all the PNG files. But if you have four kind
of photoshop installed on your computer or you want to export it to the
front on demand side, then you can directly do so. This will be the final image. Ensure before
exporting the image, you're testing the seamless pattern with all
the information. To find the information
of the particular canvas, you can go to Canvas. We go to Canvas information. You can check everything
in terms of dimensions, in terms of DPI, which is one of the most
important things, especially when you're
printing for print on demand, layers and color profile,
which is very important. In this case, it's RGB. But if in case you're printing it out and you want
to convert it, it's a very simple process. You can import it
into a Photoshop or any professional photo
drin tool and you can kind of resave it as a CM BC. That's
totally possible.
9. Class Project: Welcome to the final
lesson of this class. So we'll actually review everything we have
learned in this class. First, we went with
what is a dot art. We went with different
kinds of f dot arts and we talked about visual
density and Lexi spacing. And then we went on to
what a seamless pattern is and what are different kinds of seamless pattern which is, which is a multi dimensional
and unidimensional patterns. And then we started off
with creating the pattern. First, we went with the
brainstorming session, and then we created
a basic dot patterns on top of it and finalized
it in the next lesson. And then we created a
seamless style of it, then added colors and three D effects like
shadows and highlights. Then we saw about
exporting options to be exported for print
on demand products. So I hope you enjoyed this class and learned
a thing or two. Now as a part of class project, what I want you to do is you create at least three
patterns like this. One could be a black
and white pattern, which you can try all the
different compositions. One is a colored pattern
which we have done, which could be a multi
directional seamless pattern. The third one is on your own. You can try a
unidirectional pattern, it can be horizontal
or vertical, it depends on you, but you can try out a different
pattern altogether. Yes. So and I want you to post your beautiful patterns
on the project section so that I can see and give me my honest opinion and
appreciation for your work. Thank you so much for
taking this class and learning the art of creating a seamless
pattern from dot art.
 Srihari Muralidhar