Transcripts
1. Introduction: Hi, Welcome to my class. Today, I will teach you
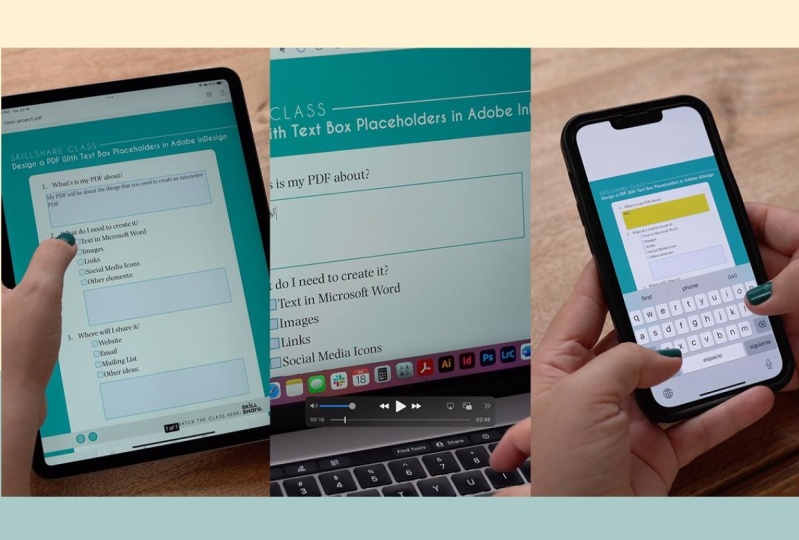
to design a PDF with textbox placeholders for you or anyone you send a PDF too, can type directly into it. From a computer to convenience of a tablet or
even a smartphone. You can share this PDF
through your website, maybe list or email to
anyone in the world. My name is neither.
For the past 14 years, I have worked as a
freelancer employee and now with my
own design studio. I specialize in
editorial design. I have to sign more than 20 commercial and
educational magazines and over 30 mammals. All of these, while
using Adobe InDesign, the PDF that it will create
in this class can be edited and save as many
times as you need. Ideal for these times for remote work is
becoming the norm. I use this kind of PDF to create educational content for
my website classes, and to send to my clients. It is convenience is
people don't need to print it to fill it up and then
scan it to send it back. This class is great
for teachers who create freebies or
documents for an audience. Professionals who work remotely and send documents constantly and even to create
your own document to help you keep
digitally organized. For this class, you
will need access to the Internet and
to Adobe InDesign. Because in InDesign free trial in the class description
below this video, even though I will teach
you everything you need to know to create your
PDF in this class. Some basic knowledge in InDesign will speed you up in
the class project. But if you have never used this program and we'd
like to learn more, I will be recommending
specific lessons from my Adobe InDesign
digital portfolio class, where I teach it
from the ground up. So you can benefit from it and get more familiar with InDesign. For this class project, you'll create your own PDF
with Flexbox placeholders. You can design the
same one as me. Just go to the Resources
section to download the sample text or you
can create your own. Then follow along the skills that you will learn
in each lesson. Adobe InDesign is one of my
favorite design programs. I love teaching
about it because it has so many options
for you as a creator. You can create from a sample
to a complicated documents. From print to digital. You can create documents for clients or to help you
in your day-to-day. That is why it has been
told that I have used the most throughout my
professional career as a designer. So let's dive into it. See you in the first lesson.
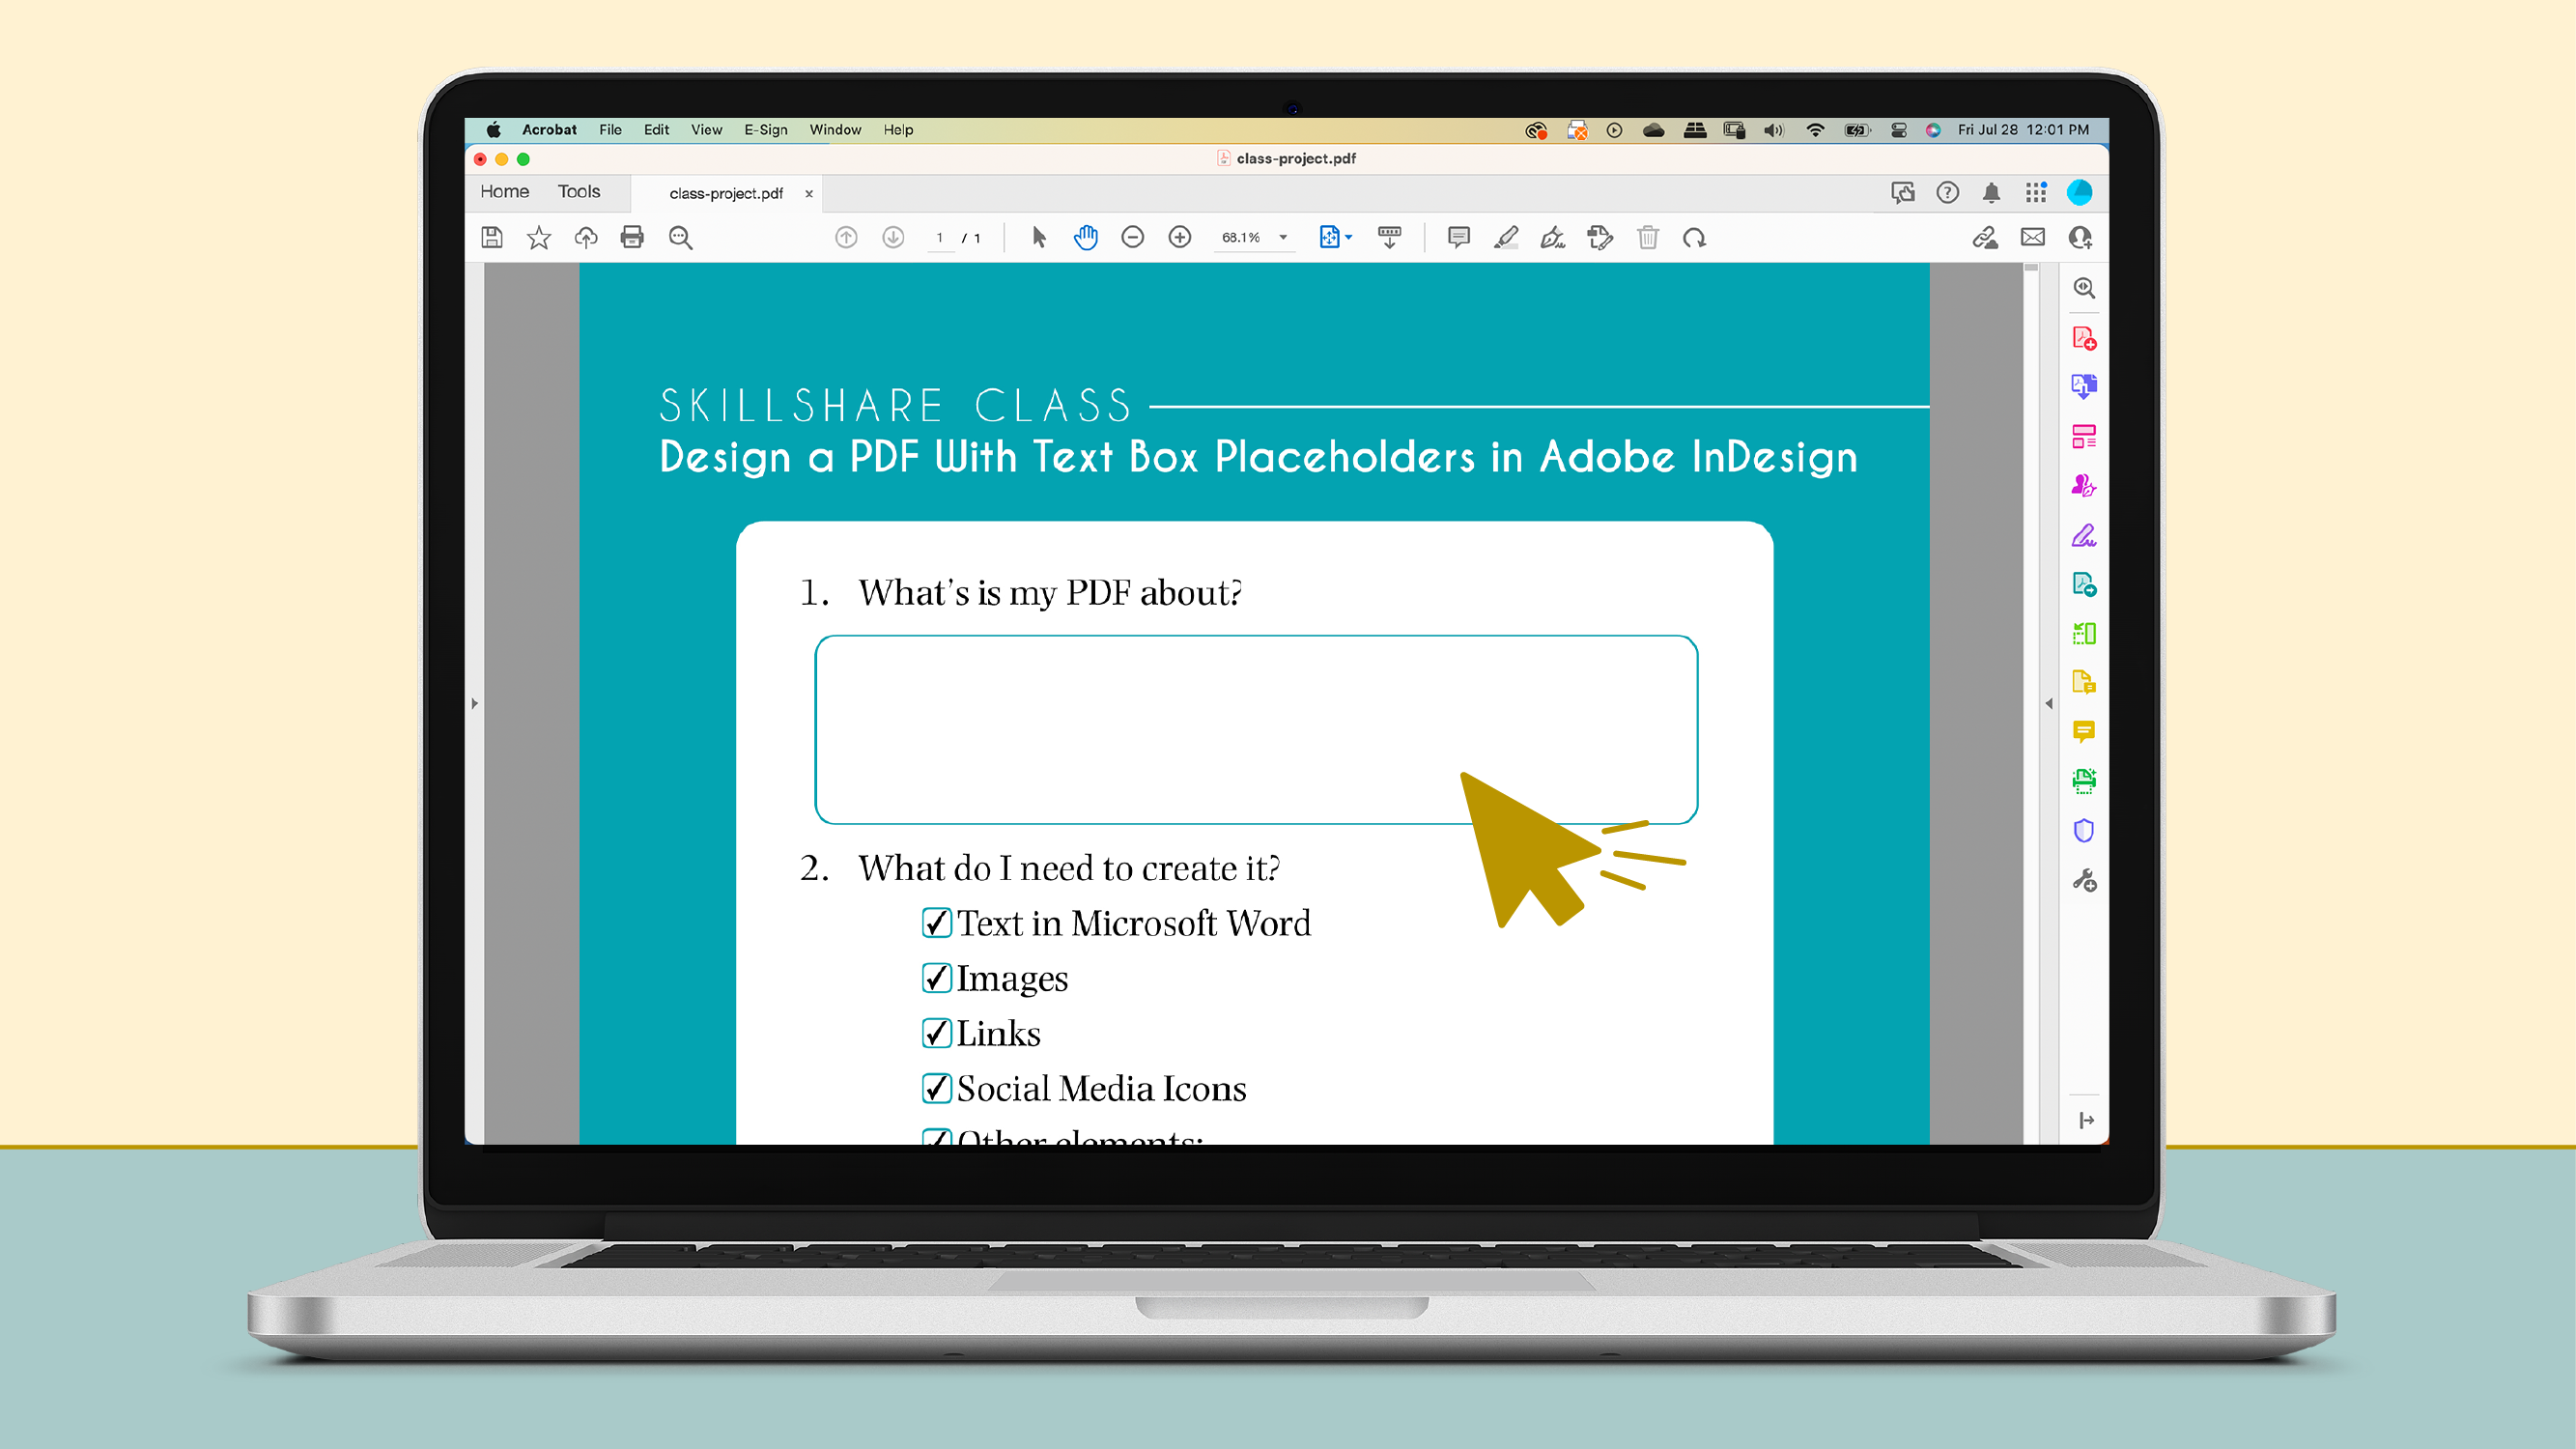
2. Class Project: Let's talk about
this class project. You will create a PDF with textbox placeholders where you or anyone you send a PDF too, can type directly into
it from their computer, tablet or smartphone
and save it. We felt the need to print it out and scan it later
to send it back. You can follow along
every lesson with the actionable steps I will share at the end of each lesson. Or you can watch it and then come back to it
whenever you need to. You will first open and prepare your Adobe InDesign document. Then you will select
a sample texts from the resources section of this class or write
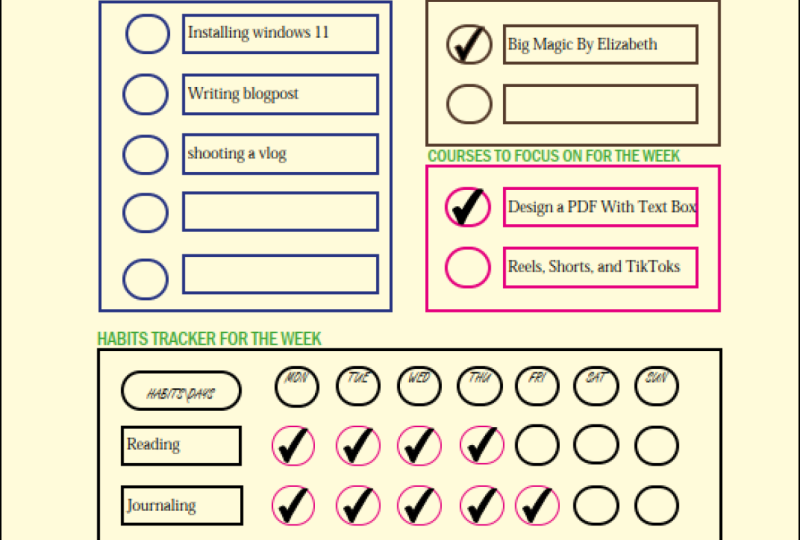
down your own. It can be for a
freebie, a sheet, sheet, a personal document,
or whatever you need. Then you will place that
tax in Adobe InDesign, design it at the
textbox placeholders and export the document. Finally, you will share
it through your website, mailing list, or email
to anyone in the world. Keep in mind that Skillshare classes are
designed to get your results. The best way to achieve
this is by completing the class project and sharing it with the
student community. So please do so in
the project section, you can post the link
to where you shared your PDF or simply
sharing screenshots. You can also go to the
discussion section and asked me direct questions
about this class. I will be more than
happy to support you. Let's go to the next
lesson to begin our class
3. Prepare Your Document in Adobe InDesign: In this lesson, you
will learn about how to prepare your documents
in Adobe InDesign. I want to remind you that
you can find a free trial of Adobe InDesign in this class description
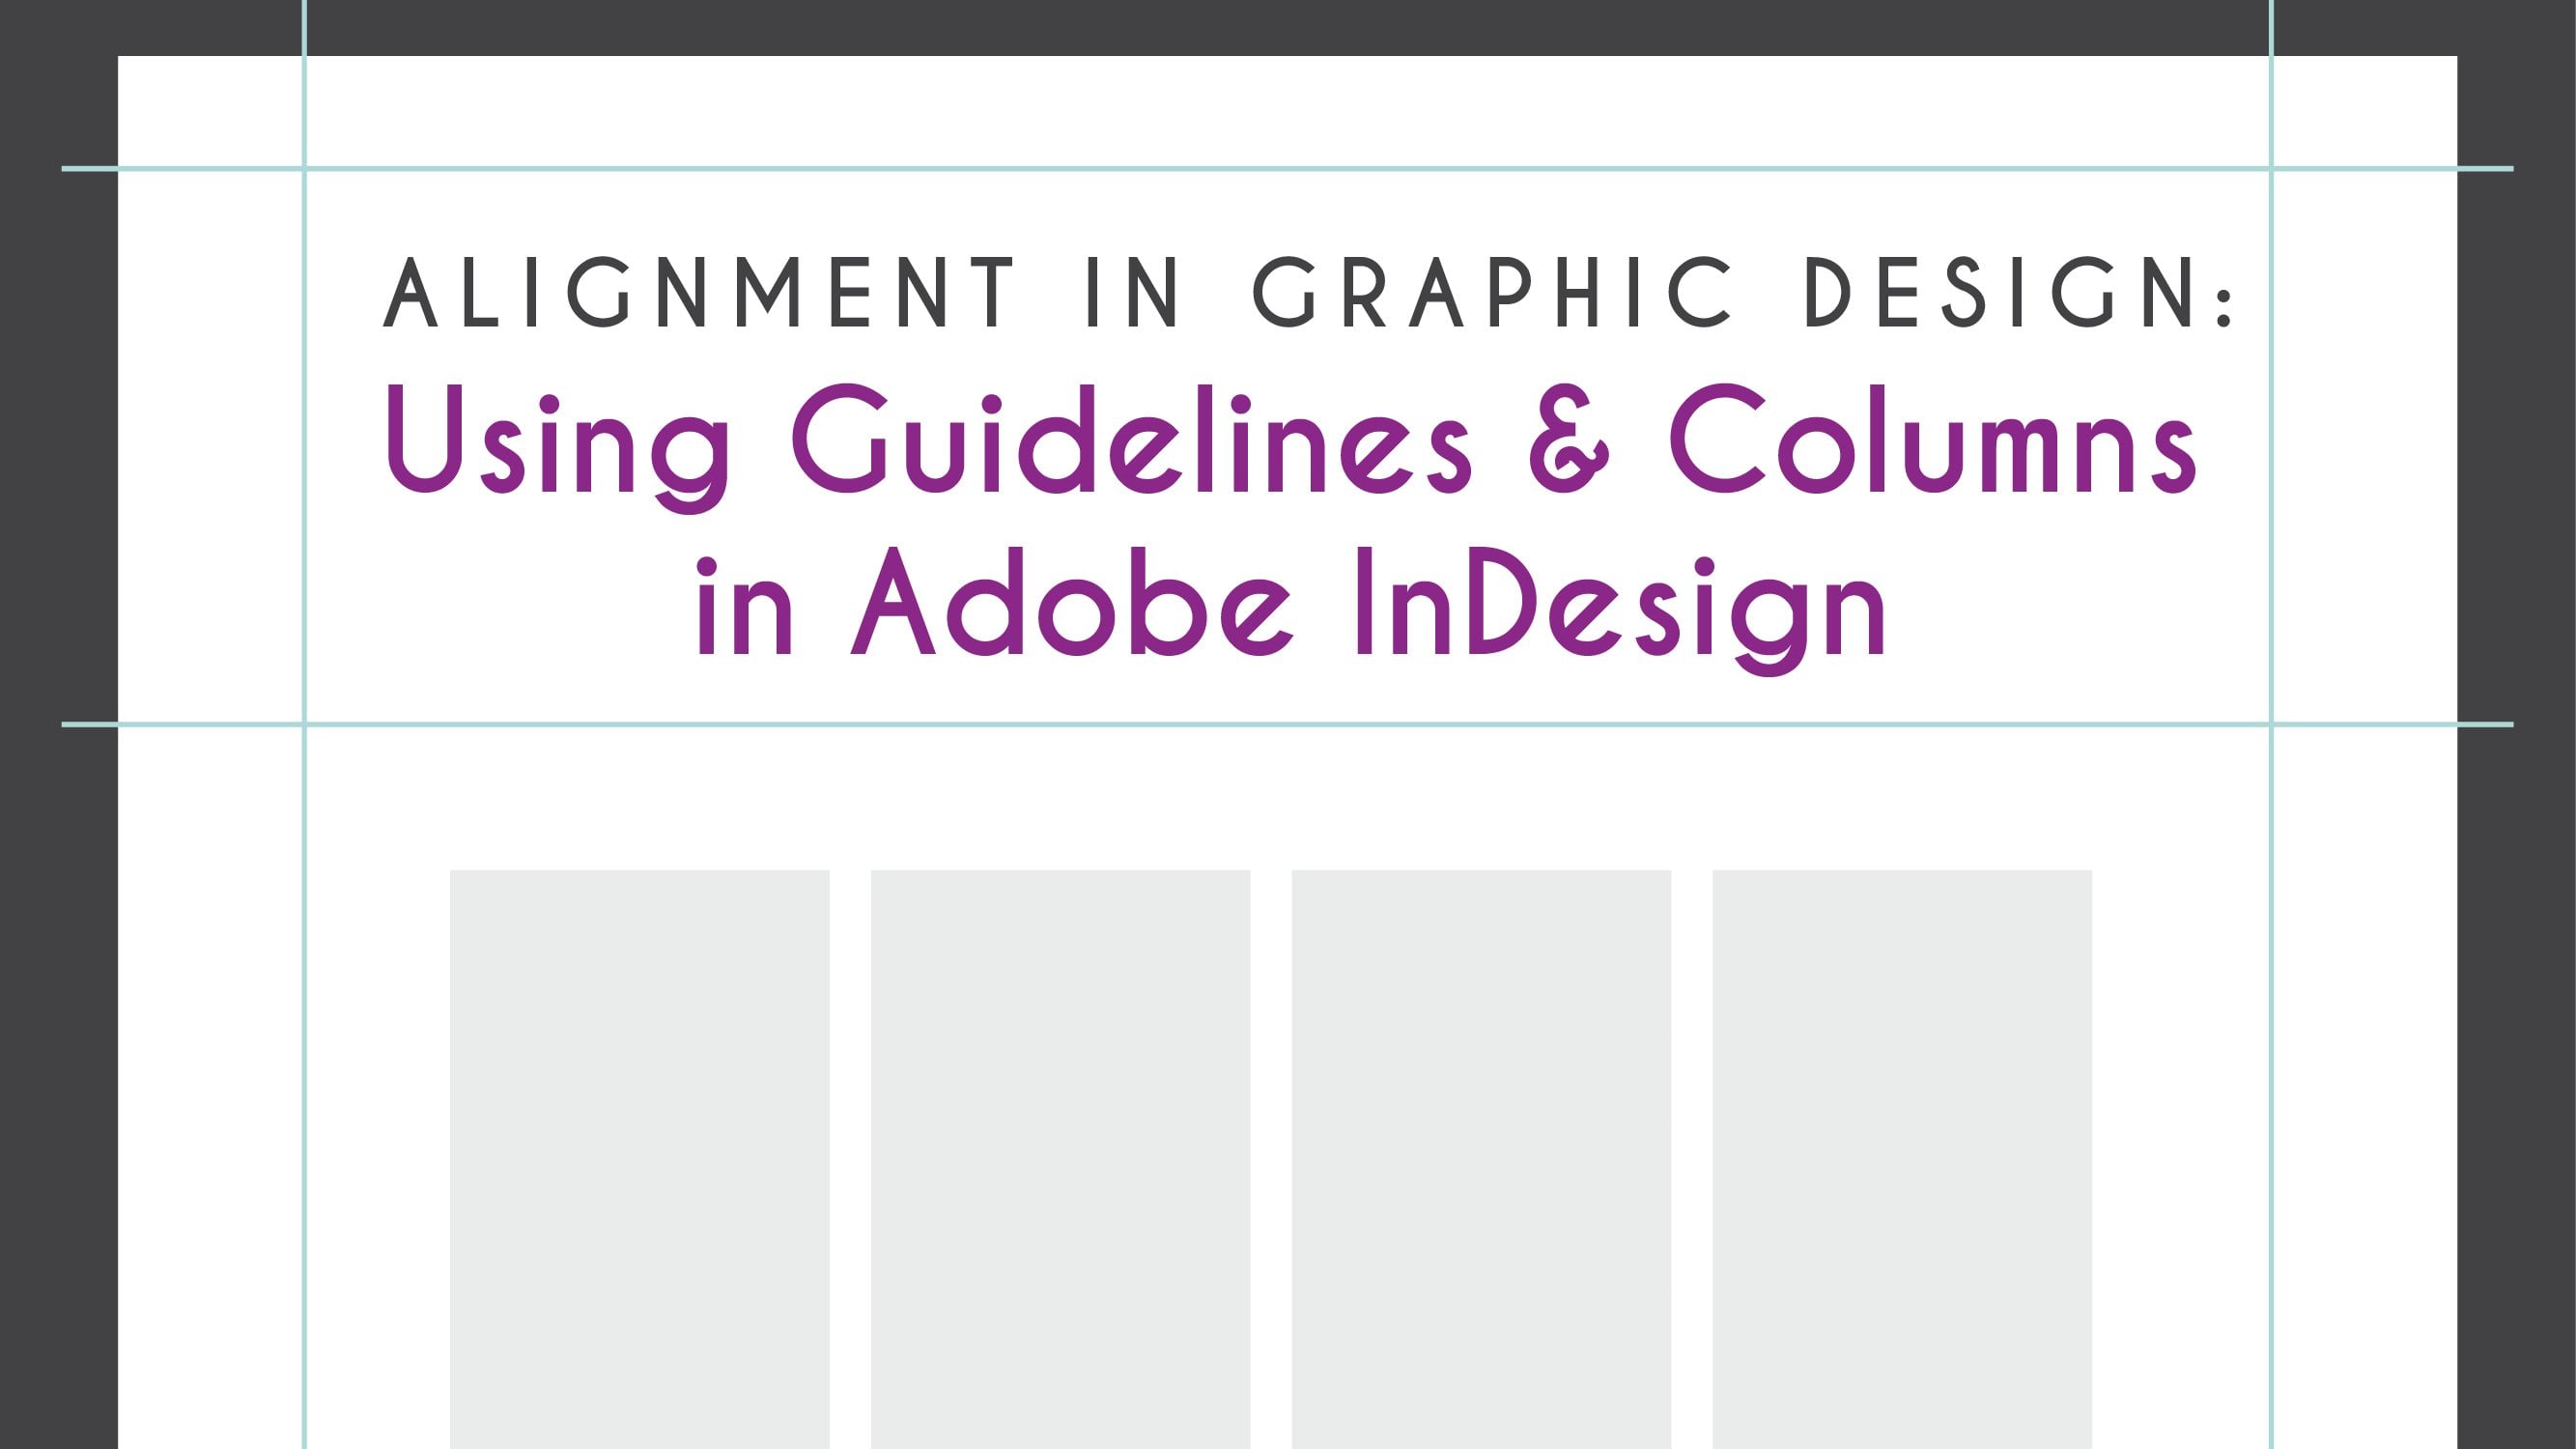
below this video. Also, I will be recommending to use specific lessons
from my class, plan, design, and Publish Online your portfolio
with Adobe InDesign. There I teach specific aspect of InDesign related to this class
that you can benefit from. So now let's go to
Adobe InDesign. Now we are inside
Adobe InDesign. Let's go to new file at
the left click there, and then going to select Web. Since we're doing a
digital document, I'm going to choose
letter over here. And then in the preset
details at the right, I'm going to change
the units to inches because it's the
measurement unit that I'm most familiar with. And here I am making sure
that I have a letter size. You can change to any
size that you need to. I'm going to use only one page for this example
of this document. I won't be choosing facing
pages because this is not a magazine than it is to be a spread or
anything like that. I will leave start at
one columns, just one. I don't think I don't
need more than that. Margins. I'm going to leave it at 0.5. Bleed. I don t need bleed and slug zero this everything looks good. If you want a deep dive into
this new document window, I recommend that you
watch Lesson eight of my portfolio class to get a ten minute detail introduction
to every aspect of it. Now let's click Create. Here we have our document. Now we are in the Adobe
InDesign workspace, if you will like to learn all the tips and
tricks about it, you can watch Lesson Nine
of my portfolio class where I explain it in detail. It is very important that every time you create something, the first thing that you're
going to do is to save it. We are going to go to File
Save As I'm going to name it, p, d, f class. And I'm going to save
it in my desktop, in my textbox PDF for folder. I'm going to click Save
and there is, There it is. Here in this step you can see
the name of the document. That means that it is
saved is very important to save these
documents in a place where it will remain until
you finish your project. In my case, I have the folder on my desktop called
Tech textbox PDF. In the same folder
as my texts and images that I will be
using in my document. When you're working
with InDesign, you should keep
all of your assets together until you finish it. If you move your images
to another folder, the next time you
open the document, the program will notify you that there are errors
in the document. If this happens to you, you can watch less than 15 of my portfolio class to
learn how to solve it. So now, before going
into the next lesson, make sure that you create your
new document and save it. I suggest that you watch Lesson 89.15 of my Adobe InDesign
data were for your class. In these lessons, I teach InDesign aspects
related to this class that you can benefit
from if you have never worked with
Adobe InDesign before. Now, let's go into
the next lesson to learn how to place
your text and design it
4. Place Your Text and Design It: In the past lesson, you'll learn how to create the document that we
will be working with. In this lesson, I
will teach you how to place and design the text in it. First, know that you can go
to the Resources section of this class and download the same sample texts
I will be using. So you can follow along. You can also create your own. For example, you can use this
PDF to collect information, brief for clients to create your own cheat sheet
or for a class. You can write tax according
to your specific needs. Once you have your texts ready, save it in the same folder that we save our InDesign document. It is important that
you have it saved in Microsoft Word or any other
program will not work. Now, let's go to our
InDesign document. The first thing
that we're going to do is to place our texts. For that. You're going to
go to File Place, or you can use the shortcut
Command or Control D. There. I am going to
look for my text. Here. It is called sample text. We're going to open it. And here you can see that I
have something in my mouse. If I move my mouse, that is a text,
I'm going to click here in these margin Glick. And this is my text. As you can see, it's
in a very basic font. It came right from
Microsoft Word. To edit this text, I'm going to open my
characters panel. Over here at the right. You have panels that you can use to create and design
stuff in InDesign. If you don't see this palette, just go to window and look for it on the Type
and Tables character. Now I'm going to double-click
and select all of my text. And I'm going to choose a font that I like
a lot that I use. I'm going to design these texts. I'm going to use the
traditional copy and paste this text to
have different sections. And this text, I'm going to
have it in another font. I'm going to select
Skillshare class and go to this hamburger menu
and select all caps. Then I am going to select all the text again and
increase the size. Let's see 218. Okay, I'm going to
select only the title, title of this class
and go to bold. I'm going to select against
Skillshare class and go to this section that is
called the tracking. I'm going to create
more space between each letter just to give
some emphasis there. And now I'm going
to click outside of this box to select
the other one. Actually, I'm going to
select this box and go to this menu over here where it
says fit frame to content. And you see how the
box fit this text. If you'd still don't
see this icon, you can go to the gear here to customize your
control group control panel. And there makes
sure that you have fading frame, frame feeding, Text Frame Options,
frame feeding, selected and click. Okay. Now I am going to
do the same thing, thing with the links over here. I'm going to cut them and paste them again
because this is the folder, my design. Anytime you need to move
something without going out of the selection tool, you can just press your space
bar and you will change the hand tool and
you can click and drag, and it will move. You release your space bar and you're again with
your selection tool. I'm going to leave
this over here. I'm going to change this
text size maybe to 14. Remember this is a
digital document. You don't need to maybe follow the traditional
12th letter size. You can do something bigger. And this next to the letter, the text size, it's the leading. Leading is the space
between each line. Usually we call
that double-space. Single-space. In programs like Microsoft Word, the leading
traditionally should be at least four points
more your text size. So in this case,
I'm going to write here a leading of 18 points. You can increase that or not. You can do whichever you like. What I'm going to do
here is enter 2345, at least five enters 12345. So I have space for my textbox. And as you can see here, there is a red dot. That means that I have texts
here that is not showing. You can click again here
the icon that fit, frame, fit frame to content icon and all of your texts will
be visible again. That looks good. And this text over here, I'm going to do some changes. And I'm going to
place an icon of a, I'm going to open
Adobe Illustrator, select this icon of a website. And Instagram load, also
going to copy these and paste them inside InDesign because in design
support vectors. So I'm going to press Shift and drag to make them smaller. So make them the
size that I want. And they are grouped. I'm going to go to
object ungroup. And now I have them separate. I'm going to zoom in. And now I'm going to select
each one of them and go to Object group because I ungroup them and every part
of the logo is separate now, so I have to group thing
again, Object, Group. And now they are separate
from each other, but every element within
the icon is together. So now what I am going to
do is to go to my website, copy my link, select the icon of the
website, right-click. Hyperlinks, New Hyperlink. And in this window
in the U or L, I'm going to paste my e-mail, my website and click Okay. Now you can see dashes
around this icon. That means that now this
is an interactive element. I'm going to do the same
thing with my Instagram. Handle. Actually is not the handle
is the web address. New, new hyperlink in
the hybrid URL section going to paste my
web address, okay? And now that is there. I am also going to place
the Skillshare Lu, I'm going to go to, I'm going to press Command D. In my folder. On my desktop, I have my links folder. I'm going to select
the Skillshare. This is a PNG. I'm going to click and drag. Click and drag. And this
is a Skillshare logo. I'm going to select
a web address for my Skillshare profile. I'm going to right-click again
Hyperlinks, New Hyperlink, and paste in the URL, my Skillshare
profile web address. Click Okay, and
there you have it. Now I am going to
select this text. I'm going to cut it. This box. I don't need it anymore. I'm going to delete it. And I'm going to paste my text, click the fit to frame content, and then I have my my text. I'm going to arrange this. So now I am going to design
this a little bit more. And for that I will use
the Rectangle tool. I'm going to click
create a rectangle here, and I am going to change the
color of this rectangle. I'm going to open
my swatches panel. If you don't see it, go to
Window, color swatches. And here you can select from the basic colors that
we have available. And also we have colors because I brought in my icons
with this color. It is also available
now in the swatches. You can see that this
is like a weird name. You can double-click
and select this box named with color
value and click Okay, and there you can see that it's a better arrangement
that you can. It looks nicer. This word color. I'm going to delete it because
we won't be using that. I'm going to delete, click on the trash can
and select here you can choose that color to this substitute
with any other color. We're not going to need
it that so black is OK. Click OK. So now I'm going to
select the blue color. I'm going to click on this
plus icon from the new swatch. And it's going to make a copy. I'm going to double-click to
change this to some kind of gray color. That's okay. I'm going to click Okay. And as you can see, I have my rectangle on top of my text. I'm going to press Command
Shift opening bracket. I'm going to send
it to the back. Now I'm going to create
another rectangle, the size of the page. And this one is going to
be my turquoise color. And when to send it back
command Shift open bracket. I am going to create
another rectangle. This one is going to be white. Now I'm going to press Shift, select my turquoise rectangle, send it back again. And you get the idea using the rectangles are
colors attacks. You can design this
however you like. You can double, I'm going to double-click here,
so like white. And you can keep
going and design, designing your, your PDF the way that
you would like it to be. When you're happy
with your results. Remember to always go to
File, save your document. Before going into
the next lesson, make sure that you
write down your text, save it in the project folder, and then place it in your
documents and design it. In the next lesson, you will learn about how to
create a textbox placeholders
5. Create the Text Box Placeholder: In the past lesson, you'll learn to place
the text and design it. In this lesson, I will
teach you about how to create a textbox placeholders. Let's go back into
Adobe InDesign. So now we're back
inside Adobe InDesign, and as you can see, I
finished my design. Now we're going to
add the rectangles for my textbox placeholders. I'm going to zoom a little
bit in so you can see better. Select my rectangle tool, place it in the right that I
want my box click and drag. I'm going to open my
swatches panel again, and I'm going to select bring to the front over here the stroke. I'm going to click on top of it. And now whatever
color that I choose, it will apply it to the border because
it is in the front. If it's the other way
that I click on top of the field color and then
change it to any other. It will do the same thing. But for now, let's focus on the border because I want
my interior to be white. And then I am going to
select my turquoise color. I want my corner to be rounded
like this one over here. So I am going to go to Object corner options
and choose Rounded. And I'm going to click
this chain here to make sure that all of my
corners are the same. And here you can
click and go up and down with your arrows
and change the shape. I'm happy with this one, so
I'm going to click Okay. Now I am going to select
my selection tool. And I'm going to
press Option Shift. And you can see how
my cursor change. I'm going to click and drag
to copy this rectangle. And I'm going to make it smaller
by dragging up the left. Now I'm going to do the
same thing and pressing my spacebar to use the
handle to release it, I am back in my selection
tool option shift and copy it again over here. Now I have my textbox
placeholders. What I'm going to do
now is to click on top of the box, right-click. And I'm going to go to interactive
convert to text field. You can also go to Window, interactive buttons and form. And that will open the
buttons and form panel. And in type, you can
select text field. Now, I am going to name it. Question one. It is very important that you name every text-box different. Because if you name the, name them the same way, when you type in the PDF, it will type the same
thing in the same box. If it has the same name, I'm going to show you
that in a little bit. Now I am going to select on the event that it happens on release or tab and
release of my mouse, if I am in a computer on untap, if I am on touchscreen. And down here, I
am going to select printable, multi-line
and scrollable. So now I have this PDF
to show you an example of why we will make the selections that
we made in our panel. First the same name,
these two squares. I have them with the
same name in InDesign. So if I write right here the word text and they released the box click,
clicking outside. You can see that the
same word that I wrote in this square, even though I didn't write
anything in this one, it applied the same tax because they are
named the same way. So the program is assuming
that they are the same thing. That's why it's important that
you name them differently. In this case, we
select multiple line because we won more
than one line. In this rectangle. I didn't select multiplying. And I'm going to paste this word again and
again and again. And as you can see, I keep
trying to write something, but it's not writing
because I didn't select multi-line or scrollable. So I can't really
use this space. Now. If you choose multi-line
and squabble, this is what happens. You can creep writing
with mainly lines. And if you go outside, you write more than this
base that you have. You quit. The program gives you this bar that you can go up and
down and that is usable. So here you can see a plus
sign, you click there. And you know that there
is more texts over there. So that's the importance of selecting principal
multiline scrollable. Then I want to leave this
font to the standard one because it's computer
have his own fonts, maybe I choose one here. And the person openings in
a computer that doesn't have this font is going to be substituted
with another one, so that doesn't really matter. And on font, I'm going to choose 14 just to make it a
little bit bigger. And now you can click outside of your rectangle and
everything is ready there. If you click W, you can see if you go over
with your mouse, the dashed lines
around the rectangle. That means that it has
an interaction just like happened when we
add the address, the web addresses to our logo. Now I went to do the same
thing with this other box. I'm going to name it. I'm going to select TextField, name it Question two. And choose all of my make
all of my selections. I'm going to do the same
thing with this one. Now we're going to create something a little
bit different. I'm going to select
my rectangle tool. I'm going to zoom in and
I'm going to select, create a small square over here. You see my shift. Is it created a perfect square. Want to change the
border color and open my button and forms panel. Instead of choosing to
create a text field, I'm going to select checkbox. Then going to do the
same thing here. I'm going to name it box one and make sure that
printable is selected. And that is all that
you need to do. I'm going to select
my selection tool. And now I have it a checkbox
here that people can click, Create checkmarks on it. Now I'm going to keep creating. I can copy this box using Option Shift
and make more copies. Just make sure that you
change the name to box two and you keep doing that to great until you create
all of your boxes. Always make sure that you have your printable selected both in the chatbox and
in your text field. That means that the final PDF, if you're going to print
it, it will be printed. Now, always remember
to save your document. Before going into
the next lesson. Use the rectangle tool
to create your shapes. Use the bottled and
forms panel to create a text fields and make the selections save
your documents. In the next lesson,
you will learn about how to export and
share your document
6. Export and Share: In the past lesson, you'll learn how to create a textbox placeholders
in your documents. In this lesson, I will
teach you about how to export and share
your final PDF. Let's go back to our
Adobe InDesign document. So now we have our
document ready with all of our TextField and
our checkboxes, the design, the links,
everything is done. We're going to go
to File export. And in the format, choose Adobe PDF interactive. You can rename your
document if you need to. Click Save. And the export to
interactive PDF will prompt. Usually you can
leave this as it is, but you can go around it and read everything
that is there. And it's pretty
self-explanatory. I'm going to choose
to export all of my pages in this
case is just one. But you can also choose, if you have more than one page, you can choose specifically
which page to export. And you can make any
changes that you want. I'm going to leave it as it is. Click Export. Now
here is my PDF. As you can see, the first thing that we're going to say is that the actual level areas are in this blue
slash purple color. That is just to let you know that you can
do something there. If you print this, that
color won't be printed. If I print this right now, it will have the
turquoise border, but not the purple color. I'm going to zoom in and
practice something here. Tax, it's working and it's
not writing anywhere else. I can select. My box says right here. Always check everything. Actually, I'm going
to make sure that I have multi-line scrollable. Yes, I have it. Went to paste this text
here and over here. I'm going to test my links. Everything is looking good. It's very important
that every time you create a digital document, you test your links. You have no idea how many
documents I have received. And some links don't work. And every time someone posts a project in any of my classes, I always make sure that
the links are working. If not, I will let you
know that is a good reason to post and share your
project because I will make sure to give you any feedback that may
be important for you. Everything is good. If you close your document
is going to ask you, if you want to save
this document, you can click Save and
it will save and close. Or you can go to make sure
you just go to File Save. And now it's saved. Close your document. I'm going to open it again. And here it is.
Everything that I made, the changes that
I made are there. So that's the magic of this PDF. What can you do with this PDF? You can upload it to your
website as a freebie. You can share it via e-mail
to anyone in the world. You can upload it to a class portal or you
can use it yourself. Think of ways that
you can benefit from these PDF and redesign
it to serve your needs. Before going into
our final lesson, export your document as
Adobe PDF interactive. Then share it in your
selected platform. Now, let's go to
the final lesson to share some final thoughts
7. Conclusion: Congrats, You have reached
the end of this class. You can now design a PDF in
a digital and efficient way. It can be typed directly
from a computer, tablet or smartphone
and saved without the need to print it out or scan it later to send it back. Then you can share it
through your website, mailing list, or email
to anyone in the world. This PDF makes working
digitally accessible and easy. If you enjoy and learn anything
valuable from this class, please do leave a review. It will be very helpful
for me to reach more students who can
benefit from this class. Take care. See you
in the next one.
 Nayda Cruz, Editorial Designer