Transcripts
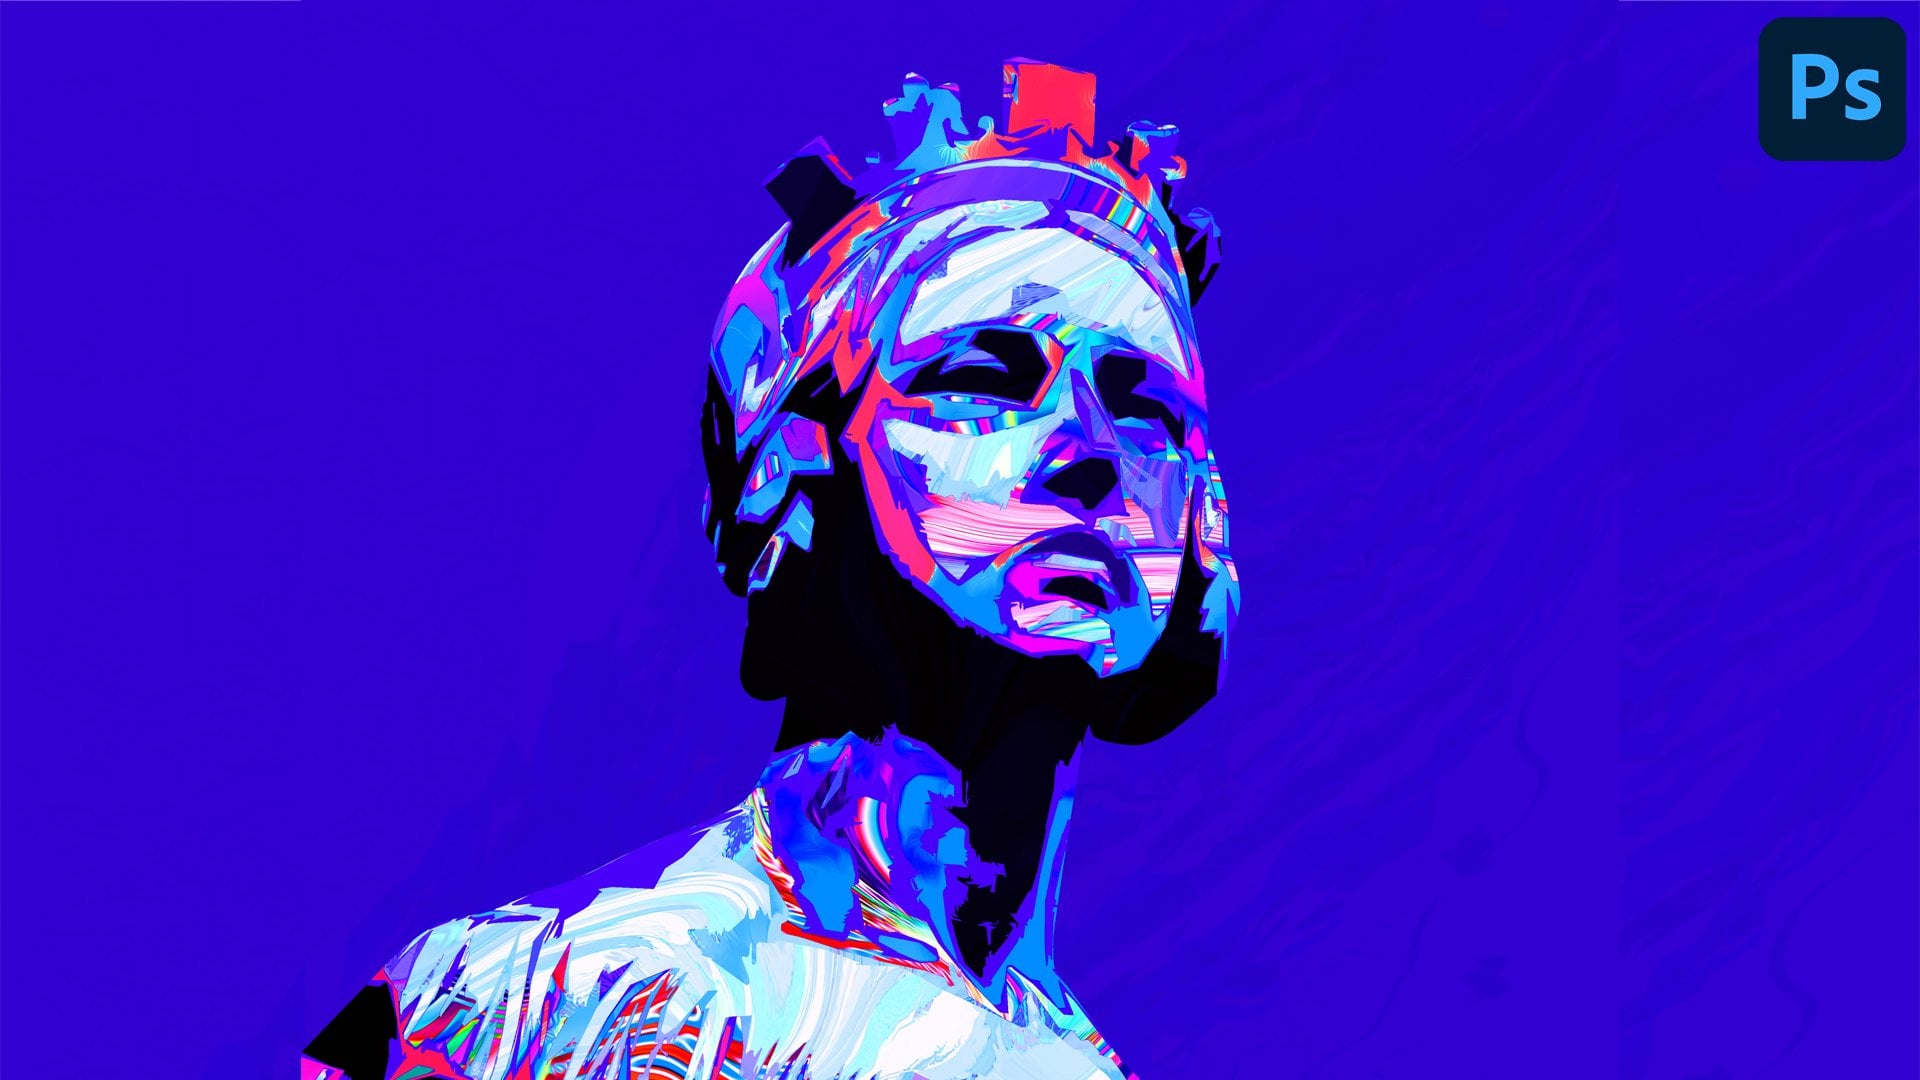
1. Intro: Hi, everyone. My name is Clarence on this glass, you're going to learn how to create this exact foster. You will learn the tools and techniques to create abstract shapes and make a modern poster with same techniques. You will be able to create similar posters like this one. You will start by creating patterns and great aunts on follow shop, then make some abstract, colorful shapes. Also, you will learn to use color adjustments to add some contrasts and highlights to their picture. This is an experimental poster where you can play around with all the tools and techniques that you will learn and create something unique. You will need only father shop, so make sure to enroll and see the whole class.
2. Sources: Hey, guys, Welcome back. So I've created this posture so we can have it as a reference while we work on it So we can understand better. What is the next step? And also we're going to need toe download. Some kind of resource is for example Ah, we need a picture like this statue and I will show you where you can get some like, Ah, I usually search on Pinteresque like just statue. And ah, you get all these results and you can see what fits. Ah, better with the with the poster like this. This one is a great example off what you can get on Pinterest and use it for your poster. But you have all the this Ah, other pictures do that you can use also you have Ah, once players that come again just search statue and you will have all these results that that you can choose from. Ah, if you want this exact statue, just send me a message. I was sent it to you because I don't remember when I downloaded it. Ah, Anyway, also, we have these kind of leaves and these stars has details again. Just go on. Ah, Google search and I type leaves PNG. And you have Ah, these results. And this is where I got it. So this is the picture I used? I guess so. Just download these as ah, PNG and ah, because we will use them them later. Also about the stars detail just type stars black and white on DA A picture like this Ah would fit the our poster say I just ah surged thes and download so we can start working on the person we don't need. Toe open Google again. Toe download. Ah, resource. So now we're going to start to work with a background 10. So? So see you in the next video.
3. Create a Background: Okay, so now let's start by creating a new document on further shops on fire. New. And now let's change the size, the wits. I'm going with 22 thousands and ah, high 2500. Ah, the resolution 72. Because this will be only for Web, not for bringing color mode rgb. And now quick create. Okay, so the first thing that we need to do is to create those stripes like this one. So to do that, we're going to need toe create a kind of ah pattern. So click here to create a new layer. And now go Torrey Congo, our market tool and ah create Ah rectangular with the half of the shape off our document. Somewhere here goto pain back it tool and apply a black color. Now let's ah de select on. Let's go up in this layer by holding old key and dragging up command control. Tito resize this and we're going to place that right here. And ah, we need to invert the colors, image adjustment, invert or command control. Why now? Let's ah select them both by holding chief. So click on the bubble air called ship. Quick on the below layer Command Control T Let's ah reposition them So they are half of the art board and quick, enter. Now we need to create the pattern. So to do that Goto added and click defined pattern. Now click OK on da to create the pattern. You just need to goto Ah, layer Newfield layer and goto pattern click. Ok, and now we just need toe change the scale like 50%. Ah would give this Ah, this Ah pattern. I think we need to go with, like 2% so quick. Okay? And ah, Now let's copy this pattern. So Goto added Copy Merge. Stand up. Is this okay? Let's ah decide. Like the below layers. Let's make a copy of the is just in case we needed by holding old key and dragging up. And now we need to reposition this so command control T and that's ah scale this Or maybe we can just cut it because the lines get really thinner when we do that. So somewhere here, I think. Yeah, just select it and click. Delete now is dis Elect. And now we're going toe create this kind off, strangle shapes and then apply that radiant and also apply pasteurized effect to create those kind off lines. So let's create a new layer and place it Ah, below the stripes. Maybe we can rename this stripes and to create the street triangles. I use panto so it just create a triangle shape and makes election. So right click makes election click, OK? And we just need to apply Grady ingredient, Go on paint bucket tool directly can go on Grady in tool. Let's choose another Grady Int. So to create a Grady int, I will show you how to do that. You can goto this default, Grady. And right here, click on this Ah, part right here. And you will get this Grady and Editor And to change the Grady into just go need to go step by step to these collars like on red color. Click on color red right here and just change it. Or if you have a photo reference Ah, you can just pick a color from the picture like this. So I have only black. So it selects black and then click. OK, then you go to all the other colors and to save you. Just click new this way. I've saved all this greediness that I use on my artworks. So I'm using this one. Maybe you can screenshot this and get the colors from from here as a father reference. OK, now click OK on. Just apply a greedy int. Now let's ah de select by going here right quick to select. And now we are on the same layer again. We will do triangle Shape s O. This is the process of it. We're going to create some triangles on this part right here. Then we're going to make copies of it so he can feel the whole ah background. So I'm speeding this up because I'm just repeating shapes. Okay, so after I created this kind of shapes, I can group them so I can feel this other space. So click on the above lier and click on the below layer off the leers where you have created the the triangle shapes by holding shift clear company cycle right here on this group. Now let's make a copy of these groups or hold old key and drag it up. No, that's Ah, Check the below earlier and we can merge this layer. So merge groups right click I can click on Merge Group so we can have it as Ah only I know we can make copies off this by holding old key and dragging down. So now click command control D on Let's reposition this So we just need toe feel this Ah, other spaces so we can make other copies. Come on, control T Maybe we can reposition this so it looks more random. Okay, so after we feel the old background, we can emerge again. This layers so merch layers on Let's go These triangles now we can make the stripes darker is to go to image adjustments and you situation or you can click command control you as a short cup on Just decreased the lightness. Yeah, like that click OK, and the next step that we're going to do, it's ah toe at some kind of stripes toe this greedy INTs like we did on this warm and that then we're going toe work with other details. So see you in the next video
4. Abstract Shapes: Hey, welcome back. So now we're going toe. Apply that effect on the triangles, so make sure you are on the triangles. Layers on da goto image adjustments and goto pasta rise. Now you have these levels that you can play around with Ah, outs and just ah, eight as the level because it looks okay, I think. Anyway, you can see what looks better to you. Now click. OK, And now let's create Ah new earlier above these layers. And now we're going toe at this kind off three d lines, Let's say and to do that we need to use a smudge tool right here. So goes much tool and make sure the strength is 100%. Also make sure the sample all layers, is checked on on the brush toe. Amusing this around shape with hardness 100% and the size Ah depends on your buster. I will see how this Ah, With this size, it looks No, I think the sizes too big. So we need toe. We need toe decrease the size maybe like Ah, yeah, let's see how this is. So just click on a point and drag. Let's make another one right here. You can make other ones if you want. Also, let's make one on these black and white part. So let's undo. We need toe check somewhere. I t I think so. I just some details to make this poster more abstract. I think now the next step is to work with the statue and ah, the adjustments on it. So see on the next video.
5. Add a Statue: Okay, So before we move on with a statue, we can work a little bit with consideration. So go to image adjustments and to separation for these much to let fact that we created Yeah, I like this. This one. Okay, now we can, ah decrease the lightness on this black and white stripes. So one way to do that is to create a new layer and go toe brush tool, change the size and just ah, apply black color on it. Now you go to layer great clipping mass. So it applies only on the below Lear, which are the which is this much tool. And now we can just ah, decrease the A positive Yes. So it creates a good contrast Ah, between this much tool under strikes below. Okay, so now let's get the statue. I'm coping this on. Let's face it somewhere in the middle, let's rename this, uh, statue. And now we're going to remove the background. You can use these quick selection tool, but I would suggest to use mental to cut pictures or to remove the background because it is more accurate. So the way to do that is make sure you are on the statue earlier and click on a point and then ah, click on another point. You can hold to create curves like that on their release and go to another point so we can ah, create the shape of the of the statue and remove the background. Okay, so now we're going toe kills the path. Megane Thunder now, right click makes election click OK on. Just command control C Command Control V. Now that's uncheck the below layer. Let's make a copy of these just in case we need it. So hold old key and drag this up. Let's ah, rename this statue and now we're going toe work with the adjustments on it to make it like , ah, like on this ah example right here. So first, let's start with brightness and contrast. Oh, go on this cycle right here and go on Brightness and contrast. Let's increase the contrast. As you can see, it increases the contracts on all the poster we needed to increase it only on our statues. So go to layer create ah clipping mask and it will apply the adjustments only on the below earlier which in this case is the is a statue? No, let's Ah great. Another adjustment there we can create curves. Ah, no anchors. We have rgb red, green and blue on. We have this line right here which Ah, if we change it, it creates like highlights or contrast on our image. We can ah change the position of this point, create other points. So basically we will kind of be Ah well, we will create, like, extreme curves to get some highlights from the picture. So just play around with all these to create some some highlights. Yes. So basically, I just played around with all these curves. And as you can see, it creates a lot these scholars from from the statue. Ah, if you want, you can get the same or similar curves toe lease. You can check this out. Now let's great another adjustment layer like consideration. Let's increase the saturation. And now we're going to make this black and white. So we just needed these, uh, highlights, not the colors. So goto adjustments and go toe black and white. And how this works is you have all these colors red, yellow and all the other colors and each of them has Ah level, like 40 right here. And if you change that, the on the picture it changes the the part of the picture with which has, ah, red collar, toe to gray scale. So just ah, I'm just going to play around with these just to create some some contrast. Maybe you can get the same levels as mine. But ah, I would say Just see what looks better with your picture, because you may have, ah, different highlights. So you, maybe you maybe are not going together the same results as mine. Now I'm going to make a copy off this statue, So hold key and drag it. Make sure it applies that clipping mask, and I'm going to apply the posterized effects and go to image adjustments. Posterized on. Let's make this like seven. Maybe. Let's see what looks better. I think I'm going with eight click OK, maybe we can, ah, decrease the the lightness soldiers creating you. Earlier you adjustment layer hue, saturation and decrease the lightness. Don't worry if it looks too dark, because we're going to apply some some Grady INTs on the highlights, So let's go and do that. So creating new earlier on and we need to select the highlights of these statues to go to select call. Arrange on. Let's ah, select this great collar right here. So make sure on the select you have this sampled colors and now you can play around with the fuzziness Click OK, and ah, let's go to Grady in tool. Let's apply the Grady int. Okay, Now let's ah de select. You can play around with ah mode, maybe make it overly. Yeah, overlay looks good, I think. Now let's see our example toe understand better what we're going to do next. Okay, so after we applied some highlights, we can at these kind off lights on the eyes of the statue. So let's zoom in tow to see the the high part. Maybe we can check Ah, this for a while just to see better the highlights. You know, let's create the new earlier, and I'm not going to be precise. Ah, by using Cantel, I'm just going to use brush tool. Let's ah, decrease the size and just paint on the ID part. Let's amount and we need to select this layer. So click command control on Quicken by holding Greek common control do you click on the layer? As you can see, that selection icon appears, So just click on it and it's like the layer. Now go to great and tool and we're going to apply great into it. Okay, Now let's ah de select. Let's ah, change the mold to maybe like a lighter color, something like color Dodge. You know, let's ah, check again. The the adjustment layers. Maybe I can increase a little bit the lightness on this one. Let's make a copy off this I, ah layer by holding gold key and dragging has changed the motor lighter color. And let's change the A positive e. Yeah, I think it looks OK now. The next step is to work with some geometric shapes or at some text to it and the other elements. So see in the next video
6. Text and Triangles: Okay, so I just made a small change to this. Ah, radiant highlight. I duplicate the layer, which was an overlay mode. It gives more colors to it. Ah, anyway, now, let's Ah, group these parts that includes the statue. Okay, just to be more organized. Statue. Now, that's at some tax to it. So creating new earlier goto text. And I'm using the food tour a found Andi. I'm just typing stoicism. So change the tax settings. You just go to the cycle right here. You have the size right here. Maybe like, uh, 64. Ah, here. You can change the space between ah, Rose like, frankly, cantor and type again. You can select this and change the space between like, uh, 82. Okay, now we're just going toe. Make some copies of this. Okay, So nice time to add those triangle shapes like this one. Basically, we will create these five triangles by using mental, and we're going than toe apply the Grady int on this and some ah stripes. Ah, to the other triangles by using the the clipping mask case. So let's create a new layer. And now we're going toe create that triangles by using the the mantle on. Let's just apply some great Dent's tow it because then we can change it by using the clipping mask. Okay, so after we created the shapes, now we need to get that stripes layer, which was right here. So let's make a copy of these and place it above the shapes. Now go toe the year. Great clipping mask. So as you can see it Ah, apply it on our shapes. But we need toe kind of change Position off of this ah pattern just to make it more random . Let's make another copy and place it below toe. Have again that clipping mask effect and let's ah, reposition it. Okay, so for the one with Grady int, I'm going to apply the posterized effect. So a major adjustments and goto pasta rise. Let's change the level toe, maybe six click, OK. And yes. So this is how you will create this Ah, geometric shapes with the stripes pattern all the next step. As we can see from our references to what some details like this leaves and the the stars Also, this kind off highlights on the edge of the off the statue and some color adjustments. So see in the next video
7. Small Elements: Okay, So first, let's at that kind of highlights on our statue. So to do that, let's goto our statue image and right quick and go toe blending options. Now check this a bevel and members on DA. Now you have, ah, oldest, ah, settings that you can change like size, for example, which changes. Ah, the ad right here, the size of the edges. Also, you have this highlights, Moz on shadow mode. Make sure on shadow mode Uh, the Airbus t 0% if it is 100% to get this. Ah, black Lawrence right here. Which I don't like personally. Ah, on the highlight mold, make sure the modus color dodge. And, uh, I'm choosing another color, maybe Like a something new Dwight on click. OK, here. You have the angle where the light is position. Ah, I'm position it somewhere right here, since the the ingredient is from this left part. Also, the light is supposed to to come from this angle, so it makes sense. Toe toe. Put the angle on this On this degree, that's a okay. You can play around with taps, but ah, it doesn't make any big change. So that's it for this. I like part click. OK, now let's get Ah are leaves file and I'm using Laser told Just toe. Select only this part. Let's cooperate. Common control, See? And let's ah, position it above all the other layers. So great a new layer and command control veto. Taste it now to change the color. Just go to image adjustments and to separation and just ah, increase the lightness toe 100. And now we're just going to reposition them in different parts of the poster toe to create a better composition and to at some details, toe to our Buster case. After I made some copies off these leaves toe place them on the poster. We can group this. I made some of them black. You can do that by just clicking invert color by clicking command control. Why are just going to image adjustments and decrease the lightness to a minus 100? And now I'm just going toe place. Ah, star picture and ah, change the mode case. I'm just getting the stars from this picture. So command control see on let's base it on our image. We need to pace it. Ah, somewhere below the statue. So let's create a new layer below the statue. Unless based it. Notice the mold from normal. Tow something like, Ah, screen. Now we're just going toe work with adjustment layers toe. Finalize this poster so soon in the next video.
8. Finalizing: Okay. So before we start with the adjustments, I just wanted to say that if you enjoyed this tutorial till now, I would appreciate Ah, good review. Also, please share your project so I can review them. Give a comment and share them on my instagram page. Okay, so now let's Ah, start with the adjustments. So just go on the cycle right here, and we're going to work with the brightness and contrast to saturation and color balance. So just increase a little bit. The brightness stand a little bit contrast. Now let's go Toe color mode to color balance. I'm just going to make, like, really small changes here. Now let's stay around with his adoration. It's always hard to choose from Houston oration because I think they all look great. But let's make a decision on your let's leave it like that, I think. Okay, so that seat for the adjustment, just some small changes. I hope you enjoy this class and learn some new stuff that you can use for the creation of your poster. I'm tryingto create like toe tutorials amounts so you can just send me a d m off what you want toe to learn. Next on my instagram page, I shared my work, their daily. So I would appreciate your suggestions for the new tutorial. Okay, so see, in the next tutorial by
 Klarens Malluta, Visual Artist