Transcripts
1. Intro: guys. My name is Tillerson. Aspirin. I am coming to you from Sunny Manitoba, Canada. Yes, finally, it's Sunny here, middle of May. I have been an artist and educator for over 40 years, and I'm coming to you with another class on pattern design. I've been working on a collection, and in this collection I needed a couple of more coordinates, so I decided to develop a kind of a scalloped pattern. So what you're going to see in this class is the development of that scale, a pattern we are going to be using transformations to make. Our pattern design had a repeat kind of ah, alive kind of a process so you can see the whole pattern develop as you add icons to the one single scallop. All right, I know it seems a little confusing, but believe me, you want to get into it. You'll understand. It is just a really fantastic way. Teoh really speed up your creation process. The transformation is something really valuable that you can use as a template for further designs. So it's really worth the extra time to do this. And we really do it quickly, though as part of the process of creating the transformation. You'll learn a little bit about the appearance panel, and we're gonna work on some different colors and color combinations with this pattern. So there's a lot to be learned. I've tried to compress it as much as possible to make this class as short as I can. I promise you that you will learn a lot of tips and tricks along the way. This class is ideal if you've already been doubling and pattern design, and you just want to learn a new process, and you can use the concepts you learn in any draw program that you use so even if you don't use it will be illustrator. The concepts are really valuable for you as a pattern designer. The very last step that we're going to do is use this pattern and produce a few mockups with some variety. All right, My ultimate goal with his powder design collection is to include in a look book. So that's why we're gonna do some mock ups and we're gonna be leading into that next class that I'm going to do on creating the look book. Are you ready to get started? All right, let's get right into it.
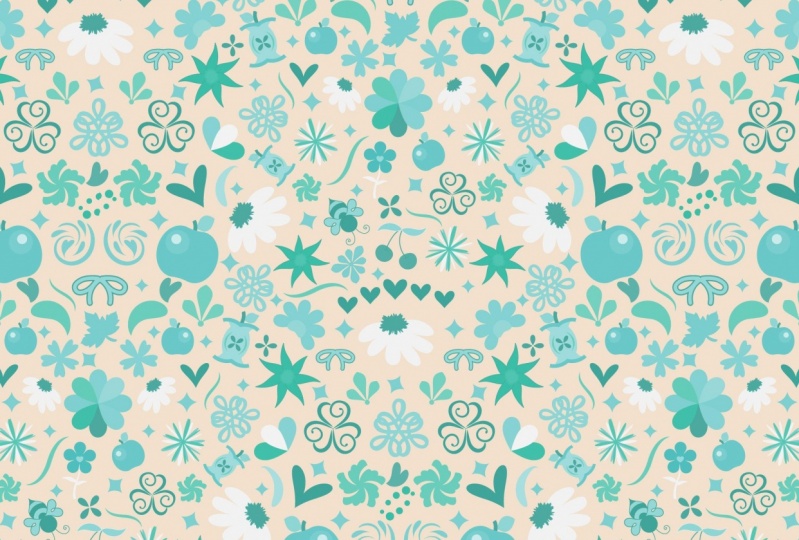
2. Template and Document Set up: Hi, guys. Welcome to lesson one. In this lesson, we're gonna set up our document. I'm gonna set up our scallop shaped that will become our initial template for the transformation. All right, let's get started. The first thing we're gonna do is create the actual template for our scale up. This will make positioning the icons a lot easier. So what I do is I start with a document that's exactly 10 by 10. You know, that's my preference when I'm doing my pattern repeat stuff. It's just such an easy figure to work with so easily divided. And I use it both in Illustrator and four shop. As you probably know, if you've taken a few classes for me, the first thing to do is grab the Ellipse tool Option click Doesn't matter exactly where a position it here on my 10 by 10 documents. I want to make a full 10 by tan ellipse. I'm going to click, OK, and I'm going to use my allying tools here. Actually, let's pull these up here because I think we're going to use these a lot train going by. My two year old grandson was here e having a seizure right now. The drain that trade running to the window to take a look. Anyhow, I've got my circle. I want a position it perfectly aligned to the art board. So I make sure that I got a line toe art board selected here. You don't see it here. You can. She was up here lined our board. If you don't have this panel open, sometimes you don't. You produce thes up here. I know. I just Old habits die hard. I guess I'm going to use the one over here. And now I've got that perfectly centered. And what I need to do is create my scallop out of this. So I'm going to move a duplicate of this circle one on the left and one on the right and lower by five inches. Personally, I have some actions set up to do this, but I won't complicate things right now. I explaining how to record the actual maybe do that in a later less Or now what I'm gonna do is I'm going to as long as I'm on one of the move tools. So here select either V or eight. And as long to hit the return key. With one of those tools selected, you'll get the move panel. So I'm going to move this five inches over and five inches down. Make sure I've set this eth copy and you'll see that I have the bottom corner Autumn right corner of my scallop. You're done. And again, I'm still in my move tool. I could get moved by hitting the return key. And this time I'm gonna move horizontally minus 10 inches. Not going to move vertically at all. You know that you could hit the preview key here and you'll see your transformation or your move before you actually commit to it. We know that's what we want. We're gonna hit copy, cause we want that original. Want to stay there and you can see here. Now we've got the scallop that we want. So this is the shape we're going to be working with. And what I like to do here is I like to select it all. Check out my layers and you see, I've got those on one layer. I am going to call this layer template I have duplicated by dragging onto the little page icon at the bottom. So you could see that's an exact duplicate has all the same content in the layer. I'm going to temporarily hide and lock this template layer This one I'm going to name Guide Layer. And what we're gonna do is manned five. And you see, that creates a guide. So this will be what will use to help us Position. Actually, don't let's do something else here. Let's just select it all and used the divide option here so that we can get rid of actually all of this extra stuff that we don't want here. So I'm going to get rid of this. This, this all of that. So we really are strictly left with the scallop case. So we're going to elect all of that and we're going to hit command five. And then we've got just a lovely template to work with, and that is going to be there in our background whenever we want it, we can go under view two guides and law or release the guides here because they were made into guides there currently locked. And that's exactly what we want a so named guy layer and again, that's another one that we can just hit the lock on here. So what about the template layer was about the guy layer, both of them locked. And then but to create a new layer. Now call this one design layer. I find that it's easiest Teoh separate all of my different options here into years because we're going to do a lot of copying and repositioning thes layers to create our overall pattern. So having it separate just helps me stay a lot more organized. The next thing I'm gonna do now is I'm going to grab the icons that I'm going to use for making my pattern in here my scalloped pattern. And I'm gonna grab those from another document that I created. I've just copied from that other document and paste it here. And I'm just gonna move these guys over to the side here because it's easier for me to work with when it's not right over my template. So I'm gonna close this align palette for now. That way, we've got a nice, clear view of everything on the screen. I'm going to reduce the size of this just so that we've got smaller icons toe work with end . You can see here that I've got a combination of icons that I've created with brushes or as field shapes. I do the view mode here. You can see which ones airbrush is so any of the ones that airlines or just dots are brushes, and the rest of them are filled shapes. I've created this one in another collection that I will show you right now. This is a collection that I've done, and I'm actually gonna use the scalloped pattern that I create as one of the coordinates for this pattern over working on this collection here for about a week. And this is the different coordinates that I've created for it. And you can see those icons are this set here. In this coordinate pattern that I created, it could have more of a close up on that one. And like I said, those were all created with brushes and shapes that I created. And a lot of these shapes were created really quickly. And as we go through the lesson, I'll try to explain some of those to you. This is thesis of coordinates that I've done so far. So I thought looking at these, I've got a lot of grid patterns. I've gotta toss or two. But what I want now is a nice scalloped pattern as my last pattern for my collection. And I know that I haven't taught a class on that before, so I thought, Well, this is perfect opportunity to record and create that last coordinate for this set. So in the next lesson, what we're gonna do is we're going to start positioning our icons to create this scallop patterns. I'm going to save this and I'll meet you in the next lesson. We're going to start doing that. See there.
3. Transformation Settings for Auto Repeat: Hi, guys. Welcome to lessen, too. So in this lesson, what we're gonna do is do those initial transformations that will set up our pattern. Repeat, this will be our first step in setting up our automation. Let's get started. Our next step that we're going to do is just talk a little bit about and set up a file that helps us Teoh reflect the second half of our scallop automatically as we are positioning the icons that we've got. So it doesn't take too much of a look here. I'm just on Pinterest of the moment to see that all of the scallop patterns are characterized by the reflection of the pattern on that center line. So a scallop is like a seashell, I guess you'd say. And it's very symmetrical. So let's take a look at this one. For example. You can see that the left side and the right side are identical. So what we're gonna do is set up a way for that to happen automatically in our document. Face it, we're gonna be basically just drawing half of the scallop and the other half as we're drawing, they'll be reflected. All right, so that's our next step. So let's go back to our illustrator documents. And the first thing we'll do is set up that reflection based on that original scallop that we drill will go back into the layers palette here. Remember, we had both a guide layer and a template layer, and I'm gonna do is I'm going to unlock the template layer and I'm going Teoh, duplicate it. We're gonna turn it on, will turn the other two off temporarily. And what we'll do is we'll be creating the reflection of this half of the scallop. All right, that's gonna be completely automatic. And therefore, as we are placing and drawing and laying out the left half of our scallop, it will be reflected alive kind of a way. So if you took my class on the life transformation mandalas, you will have had a little bit of experience with this, basically going to be doing the exact same thing. So I want to quickly explain about the scallop again. Let's go back to some of these examples that we have. If you take a really close look at something like this, what we've got is a pattern that's reflected, but it's also moved. Let's just take a screenshot of this so that I can explain it more easily and open up this screenshot in preview so that it can quickly just give you a rundown of how this works. Technically, what you've got here is both a reflection, you see, from scientist side, the left side and the right side are reflections of each other. But then you see that they also have 1/2 drop. In other words, what happens is that reflection. So let's say the top corner here. Just take a look at Onley the top corner. You'll see that that is actually repeated by moving it over half of the width and moving it down. So what we're gonna be doing with the Transform is not Onley impeding it from side to side . By reflecting it, we also need to view a transformation that moves the pattern over by half and down by half . So let's go back to my illustrator document and we'll get to work setting that up. So what we need to do, really is divide this in half, so right across from here to here and we need to get rid of these extra parts on the circle . So I'm going. Teoh, just hit. Delete. I've only selected that segment of the circle it hit. Delete. Here, Here. Sure. I've got this point gone and I'm going. Teoh, get rid of this part of the bigger circle. Okay, so you can see here that I've got what I need for my scallop. But I also want to be able to divide this in half both ways. Okay, so I'm going to draw a five inch by five inch rectangle. I guess it's a square in the corner here, so I'm going to It doesn't matter where a draught. Somebody used the line tools to align it up to the corner. So, yes, I should be square five by five. And he used the allying tools. And remember, I've got this aligned to art board, and I'm going to line is the left side and to the top, I'll put no feel on it so that you can see what's happening here is even need to have any sort of a stroke on it, and then I'm gonna move a copy of it. I want a copy of it on this side as well, us. Its weight is to make another five by five rectangle. The Summum been a line at the left side and the top and those two I'm going to duplicate to put at the bottom. So I'm on my move tool so I can use my return key. And I'm gonna go zero horizontal and five vertically. You can hit copy. And then you see, you've perfectly divided your space there. So let's actually to use the divide function on our Pathfinder palette here. I'm gonna use this one here, and I'm going to just don't just ignore that one line. That was extra line that was formed here because we're just going to be removing it anyway . So we're taking out all of these corners here, and we've got four parts that we need. So, user directs electoral. You can see that these are for completely separate sections, and that's exactly what we need for our template. All right, so we've got that set up in the next lesson. What we're gonna do is we're gonna set up that actual transformation that we need to have happening. All right. So I will see their
4. Transformation Finalizing and Testing: Hi, guys. Welcome to less than three. So we're gonna finalize the set up of our transformation, and I'm gonna show you some tricks with the appearance panel and you'll find that this is a really great way to keep things straight in your head. So let's get started. All right? So I want to do now is to set up that transformation, and there's a couple steps I need to do in order to have that work. So if you look over here in your template layer in your template copy, let's actually rename this, cause we're gonna dio this as the reflection. So let's call this the reflection for transformation later. I think so. A couple things I want you to do is take a look over here on your transformation layer and you'll see that right now. Everything is group, so we're gonna go and select everything here and go under object to ungroomed. Okay, so you see here in your layers palette. Now, all of these paths and everything are completely separate. So that is the first step that we want to dio. The next time we want to do is create an extra large rectangle and this one we want to have way bigger than our actual layers. Let's do this 20 by 20. And again, we can use our align tools to align it and have it perfectly centered to our layer. Just gonna ignore that one for now. And we're gonna go back. Teoh were information layer, and I could do all of this set up without something visible. But I think it would be easier for you if we do have actually something on that layer. So let's go back and grab that little icon that we were working with. No, I'm gonna apologize because I can hear that one of my neighbours has just packed up his long more and you're gonna probably be hearing that in the background. So I'm gonna copy that icon. I could hide this layer, paste it. Let's go back to the transformation layer, gonna pace it into that transformation layer. Okay, so we're going to put that over here in this corner. Think I'm going to rotate it, make it a little bit smaller. Not that that was necessary. But I know that something I'll probably do when I'm doing my actual design. Okay, so totally unnecessary. But there you go. It's in the corner, and this will help you just to visualize what I'm doing with these reflections and the transformations that were setting up on this document case. So the first thing you want to do is have access to your appearance past, not mine. Over here, it looks like our circle with the dog line around the outside. If it's not there, it's not visible. Go to window and go to appearance, and it will mop. And what I want to do is pull it out here because I want that easily accessible with my layers open. When you're moving these around, you probably know this, but I will remind you you can line them up to the outside and see that dark blue line appear, and you know you would be adding it to the outside, or you can add it to any of the panels you already have open. I'm gonna outta here cause I don't think I'll be using the brush is too much at the moment or this watches. When I opened up this panel, I could have both it and the layers palette visible for you to see, I'm constantly moving around my little Hal. It's here. So no, that from different classes you've taken from me. Anyhow, we are ready to start doing a little bit of this transformation stuff. We're going to create the transformation on this layer, so we aren't going to be actually selecting the object in transforming it. We are going to be making sure that we've targeted the layer that we are transforming. This is how you do it. You click right on the layer itself. That single circle that you see there, you know, it's just a single circle. Once you click on it, you'll see that it looks like a target, which means that it's targeted. It's got two circles, and that's what we want to do because we want to make sure that we're reflecting based on the entire layer. So you've got the whole square selected here. What we want to do now is hit the effects button down here on the appearance panel. So we're gonna go down here. We're going to go to distort and transform here at the top, so make sure you're using the top half here, not this distort at the bottom and you go to distort, transform and you go to transform. You want to make sure that you've got scale, strokes and effects on you don't want transform patterns. Make sure that you've got the center, not one of the size. Here. He want the center selected. You want one copy of it? You can preview it. It's at this point. And you want to make sure that you're doing the reflect X. Do you see that when you hit the preview button, you'll see that your icon has popped over to this side and we want to make sure that we would in one copy here. All right, so hit. Okay, here. So in a way, it looks like nothing has happened because our icon is still sitting over here and it hasn't currently got it reflecting here. But if you look here in the appearance panel, you can see that transform has been added for this particular layer that were on. Okay, so now we're gonna Duthie move that we need in order to have for the transformation of this object now appearing in this corner. Right? So this does that drop Repeat that I was talking to U boat. But the example The next thing we're gonna do is actually add another transform. But this time we're going to be using the move. So again, I want to make sure that my layers targeted gonna go back down here again to the distort and transform and back to transform again. And yes, I do want to apply a new effect. So I hit apply new effect. And now I'm not going to be using the reflection here. I'm going to be using the move in the upper part of this panel. So I'm going to be moving it. Half the width of the art board, which we knew was five inches. I'm moving over by five inches and I'm moving down by five inches. So now you'll see preview. My icon will be repeated right here where I need it, which is 1/2 drop to the right. Right. So you could hit. Okay, there again, you see, another transform has been added. Now we're going Teoh, go again. We're gonna use transform. Yes, I want to apply a new effect this time. I want to move it minus 10 inches because I want to move it over to the lower left, and we're going to keep this zero because we're not moving it down anymore. We're just moving it straight, because you so we could see that. That's going to be okay. It all right here, OK? And you see, another transform has been added here and this time what I'm going to dio is the transform that will give me the repeat across the top here. One of the cool things about this using the transform panel is that you can actually go in and edit any of these transformation. And one of the things I realize here is that I did not set this as a copy. So I'm gonna go and double click on these and I'm gonna make sure that they're all set with one copy. The 1st 1 was correct. The 2nd 1 I didn't put one in there, so I'm gonna put that in there now. And the 3rd 1 I didn't put one in there, So now you can see that I've got the actual duplicates of the copies that I needed, and I see that my icon is not completely copied here, But that's okay, cause I'm gonna eliminate that. Anyways, all we're doing right now is setting up the transformation. So we're gonna do one more transformation, and that is to repeat the scallops up at the top. So let's do that now. Starting transform. We're gonna go back to the transform. This time we're gonna apply new effect again. This time I'm gonna make sure that I am making the one copy and that I am movie up on my documents. So I'm going to be using minus measurement here for vertical and five inches over to the preview here and see what that looks like and hit, OK, And we've got all of our transformations working. Great. So I am going to leach this icon here so that we can see what would happen if I now draw in this quadrant and I can see that I've got the repeat happening perfectly. I just don't have a reflection happening here. In the next lesson, we're gonna go back and take a look at why that did not work
5. Using the Template to Arrange Motifs: So in this lesson, what we're gonna do is start actually setting up our design. I'm going to paste inside motifs that I have from my initial coordinates set that I've created in the other document. And then we're gonna use those motives. It just kind of start getting our pattern set up. All right, let's get started. Hi there. Welcome back. So, yes, sometimes it takes a little bit of trouble shooting if something doesn't appear to work. And first thing I checked was the my first transformation here, And I could see I do have it. Correct. I have the reflection, and I have the copy, So it should all be working. And my first clue was that I could see that there is a white feel here on my scallop. I forgot to check that when I was originally baking it. So I'm gonna select all here. I'm gonna make sure that there's no Phil and that Ah, hair is my other half. So what was happening is that the white feel that was on this part of the scale I was just blocking it off here. Even though it was here, the transformation is all correct. Now I'm ready, actually, to get started. So over here, I just want to also point out that if you don't have this targeted, let's see, you've got another layer. We've got no layers targeted at all. You will not see your transformations here on the appearance panel. So that could throw you off if you ever wanted to make it on adjustment on your information and suddenly can access your transformations here, make sure that you re target that layer, and then you'll see them all show up. So we know we've got everything correct here as far as our transformations go technically now, at this point, we don't need the template lines to be showing. So I think I'm gonna group all of those. I'm gonna go over here to my layers palette and select all of these. So you see, I've got them highlighted here. Group them, and then I'm gonna temporarily hide them. I shall. Let's go back and take that. It's quickly lying out of there. And what I'm gonna do with this group is I'm going to for I hide it, make a duplicate of it. And this one here, this group I'm going to make into a guide layer that I can either hide or how showing. And I want to change it. Teoh A guide. It's all selected here because I'm target against you. See that my whole scallop is selected and I'm going to go to hides. I know my shortcut has spent five, but I want to show you. Here you go interview two guides and make. So now I've got this guide that I can hide or show. And I know that I can work in this quadrant here, and whatever I do will be repeated everywhere in my template. Undo that. Okay, so let's work with some of these icons that I have my original document and let's just start placing them over here in this corner. Like I said, you could you could have this not showing. And it's still going to work as long as whatever you want to move and work with is copied over into this transformation layer. So if I was to either cut, so I'm gonna do Command X and I go to my transformation layer and paste. You can see that even though I don't have my scallops showing my transformation is working perfectly fine now, Really, it's all about positioning your icons into a pleasing kind of an arrangement. Teoh. Have it work in your scallop design so often at this stage, I go back to my inspiration and I check out some of the things that I've got sort of as a guy, so to speak. And sometimes what I will even dio is I will copy and have that guide right in my documents so that I can use it as I'm working. Let's just say, for example, I want to use this particular graphic as an example What I would do down here, there's a whole bunch of cool ones. So what I would do is I would take a screenshot and we're not copying just so that you know , you're not actually stealing this person's design. All you're doing it is just kind of having it. There is a mental guide for yourself, so I would do a screenshot. So I do command shift for get thes crosshairs. I select a section depending on what version of the system you're currently on. This is obviously on a Mac, and it comes up in the right hand lower right hand corner here. And all I have to do is open up that screenshot get copy, go back to my illustrator document can actually just close that off and hit paste. And my example is here now, right now, I've just pasted it into my pull it out of transformation layer that should make nuclear and put into that new layer. And we can call this one. Inspiration would help if I smelt it right moving out of the way, I could be using this as a guide for laying out my my actual Skela. I'm not abusing this particular one. I'm going to go from scratch. But this is a way that you could do it if you did want to have a bit of an inspiration document to go and delete that for now. And I am going Teoh, just delete this layer because I don't want to use it. That's just the way that you could do it if you had an inspiration that you wanted to draw from. But for now, we're just gonna work with my icons here and my scallop, and I'm going to start playing with my icons and positioning and re sizing them as I see fit to do a bit of that off camera. When I come back, I'm going to show you and give you a few tips on how Teoh go about working with that sort of a layout. So here I've decided. I want Teoh import the brushes from my other sets Over here, I've got school set of brushes that I can use. So I think it would be really useful for me to have those in this document. So what I'm gonna do here is go, Teoh, open my brush library, put in my user defined. And I know that that brush that is the one that I created called Succulents six. So here is that entire set when I'm gonna dio to this one here into the bottom here. And add this to my actual regular brushes here. And then I can just close off this brush set and about all these brushes that I can also add to my scallop. All of these brushes airbrush is that created in another class. I can't remember the name of the one that I did it in, but it is the one where it did create a nice, succulent repeat pattern. And this one here, this main pattern that I created for this particular collection that I'm doing Those were all icons or motifs that I created using strictly this brush set as I'm working along here with this scallop kind of a sheet I want to show you or explain to you a little bit about what I'm doing with Positioning and General. Lay off my pattern because I want to kind of emphasize or make sure that this scallop shaped is going to be white visible in my final pattern. Repeat, I am kind of, you know, if you can tell here, but I'm kind of trying to follow the curve at the top of the scallop and then also the curve at the bottom of the scallop. So everything I've positioning kind of looking at that line, these dear motifs that go along the edge here. If I was to hide everything else, you would see that they're kind of following along the curve and I'm kind of avoiding the actual line here. The dividing line. If I'm not sure, I may end up wanting to have a kind of a solid color background. I'm gonna leave that toe last. But in time, as you watch and see that I'm positioning my Moti just kind of Cuba. General, I on how this is emphasizing my overall Gallup shape. One of things I do when I'm working on this and it's kind of hard to demonstrate as I am doing it. But I'm squinting my eye now and again to just kind of see if that general shape is happening. If you squint your eyes here, looking at my pattern, you can almost see now that there's kind of no, it's almost like a diamond shape being produced when you squint your eye. So I'm doing that and I'm obviously avoiding this central area here. And that's because this is one spot where I'm not going to actually be reflecting my pattern. That part of my shape is going to be static, and that's something that we're gonna kind of look at in the next lesson. Meantime, I'm gonna position a few more of my motifs, and when I come back, we're gonna talk about that central area. The other thing that I'm avoiding doing at this point, you really won't see anywhere in my design is any perfectly vertical or perfectly horizontal items. This cactus is probably the only one that somewhat looks like it's vertical. I'm actually going to rotate it slightly. So it emphasizes Mike er on the bottom of my scallop a little bit more that's gonna give me a little bit more room in this central area, which, like I said, we'll address in the next lesson. So I've cleared out this center area here, and I'm ready to stir church kind of feeling around with the motifs that I'm gonna put here . So you're going to see me do a little bit of this and it's basically mental work for me at this point. So I'm just going Teoh, fast forward it. And then I'm gonna come back and explain a little bit more of what I've done, So I will see you in the next lesson.
6. Layout Finessing: Hi, guys. Welcome to less than five. So we're going to continue with working on our design. We're gonna do some finessing that will help improve our overall design. Let's get started. All right. So I have he said some elements that I'm going to use for this central part of my scallop. But I don't want those to be included in the reflection so you could see here I've got at separate layer. And on this I've got the items that I'm going to use for that central part of my motif. So keeping them out of the transformation prevents them from actually being reflected. Because in this case, I want the asymmetrical elements to be the central part of my motif. So you can see that if I were to put thes, let's just grab them and put them into this transformation layer that this is gonna happen and we don't want that to happen, So I'm gonna undo that. So there, on that separate layer, And then I also added this element which, of course you could see is problem because it is not in the right position. So I will a position that way. I want it and resize it. And this is where you know, there's gonna be a lot of little adjustments that I'm going to mate. So I'm going to do those in a fast forward time lapse for you. You can just watch as I'm working and perfecting my layout. Just take note that whenever I am working on the central elements here, I will be working on this other layer. I've been actually call the central elements so that you can see when I flip from one layer to the other and doing that work. All right, fast forward this for us so that you don't have Teoh watch every painstaking move I make and one last thing, you'll notice that this cactus here is the central heart of the cactus that I originally drew here. These are all drawn with brushes, by the way, show you the brush that I'm using for that. It's this brush here, and that was part of my brush set. And I think that's one of the advantages of having the brushes is that you could do really quick motifs or added elements just by using the brushes. Okay, so now you're gonna see me as I worked my way through the final positioning of all of these elements. If you're ever looking for a little bit more inspiration on this sort of a layout, I have a Pinterest board that I have created. Let's go take a look at that. Go to my boards. So my interest site is the lower start battlers, ask print. And if you go to my surface pattern design board, that's this board here and go to the Tomi inspired or did you're gonna see a lot of this sort of a reflected layout and you can see here for sure on quite a few of these that this central motif is definitely not reflected. And that's kind of what I'm going for is that non reflected central element. So this is probably the best example here, this one here. So while all of these little animals and motifs around the outside are deflected, not central element is not. Mine is not going to be perfectly symmetrical front office, any that are quite like that. But I personally like it when that element is not necessarily perfectly reflected. It's completely up to you, so that's just a personal choice on my part. I really want mine to be not reflected. Not the very central element anyhow. - So at this point, I feel like I'm getting closer to what I want for my finished scallop. And I think I'm gonna take a little bit of time off camera to do a little bit of this finessing of my general scallop motif. And I'll come back to you in the next lesson where we're gonna talk about a few of the other things I do to finalize my pattern. Right. So I will see you in the next lesson.
7. Finalizing the Scallop: guys, welcome to lesson six. So we're really close to getting this Leo complete, and we're gonna do some adjustments. I'm gonna use some warp effects. We're gonna work on color and a lot more. This lesson is filled with all kinds of tips and tricks on improving your overall design. Let's get started. We're gonna talk a little bit more about color schemes and how I kind of ended up with this particular layout. So as you can see, there have been some changes made, and amongst the things that I've done is changed colors. I found that reducing the amount of colors actually made it work a little bit better, so you'll see a kind of narrowed it down. Teoh, just take a look here. I'm going to select all of the unused and make sure that they're gone. Yes, So I've narrowed it down to these colors here that are in use is my color palette. And I may end up actually even experimenting with some that have even less colors. Because when I went back and took a look at these, I did notice that a lot of them are in one color and some of them are just in two colors. Very few that Aaron More colors. But I like I don't like this as well. So I definitely am gonna try color scheme that is just a single color. And then you can see also that I did put this solid scallop shaped in the background. We just cited for a second so you can see my design. So you'll probably notice when I showed this way that I have increased the spacing around the outside to make that work a little bit better. Those were a couple of things that I've done. I added a couple of extra pedals to my succulent here in the upper center. What else have I done? I moved this grouping here. I think this is a flower didn't originally have in there. And I added, And then I've also moved this lower and added some additional leaves to it. The other thing that I went through and worked a bit on offscreen waas, the implied line that you see kind of going around the outside of my scallop. You can actually have shape defined by using a solid color in the background. But if you lay out your motifs really thoughtfully. You could have them give you the suggestion of the shape by just following the curve really carefully. So I've done that as well. What I'm gonna do next is do a couple of other iterations of this, and I'll probably do a bit of a time lapse so that you can see it. I'm going to keep this one. I'm going to duplicate the file and then I'm going Teoh, just I a couple of different ideas for the coloration. So you may see me also still moving around some of my icons and what not us to perfect it cause you find I know you'll find if you do this as well that sometimes once you change the color of something, a change has to be made in the Liotta's well, one of things that I still dio and it's always a test is too unfocused. My eyes a little bit or I reduce in size quite a bit, and I see what that tells me. He's just doing that, just reducing the size. I am immediately seeing this straight line that has been created by these PCI colored flowers, so that's probably something that I will address. So you'll see me do much of this stuff in my time lapse. And if there's anything really interesting that I want explain to you, I will stop and do that already. So first things first, I'm going to save other copy of this. I'm just gonna call this one scallop to so that I could make my changes and not worry vote that original file being compromised. One of things I'm gonna do here is I'm gonna convert my color settings so that I am not having an RGB preview here. So think it's causing a little bit of a conflict with the colors. I don't know if you can tell here, but these two, even though they're supposed to be the same color, are not. Once I realized that this was happening, the colors weren't exactly right. I looked up here and sure enough, I had an RGB preview said here and I guess that's at one point when I duplicated the file, I just didn't pay attention when I was setting it up. It's very easy to change. I've got to do it before. So what we want to do is go into the document color mowed down here and just change it to see him like a Now I can make sure that Okay, so this this is the color that I want to use, So this feel here has to change to be this one here. So what I've done is I've just eliminated that extra light greens watch that I had here, and I've made this one global. So this matches perfectly now, OK, so a little bit more finessing here. - So here's a kind of an interesting technique that you could try if you wanted Teoh change the general shape of something. And I'm liking the way I've got kind of curves coming in towards the center from a couple of these motifs and I'm thinking I want a curve. These two and I could go and move a bunch of anchor points around which could be time consuming. I'm going to opt for using this envelope to storage, not gonna make it with work and hit preview, and obviously that's way too much. But if I bring this down to just a few percent, I can for a little bit more. The cool thing about it is that once I say, OK, I've got this war up here, but I can use to help me make some other fine tune adjustments so I could bring this corner down in this corner, down this one up, and so you can see that that's giving me a nice curve without having to go and mess with a bunch of individual points. So I like that's gonna commit by switching to a different tool. Now, I'm gonna do the same things with this one here. Selected it, object envelope, distort, meet with work. And, you know, the percentage that I just had everything that I just set like it's just fine. Maybe a little tiny bit more. What do you think? And okay, here again, I can go and make a little bit of fine tuning on that one. And the mesh stays there. So you know, you Congar back and change things afterwards. If you want eso, I've successfully added a bit of a curve to this one. Thin it out a little bit in the middle of and I like that. So that kind of mimics the curve that I've got going on here is Well, okay, so I'm almost at the point where I can make my patterns watch. What I want to do also at this point, is show you how to duplicate this center, he said. I have going on there and I will meet you back in the next lesson where we're going. Teoh, talk about how it handled this central set of elements and then how to change to a one color or white layout. All right, so I will see you in the next lesson where we'll do that.
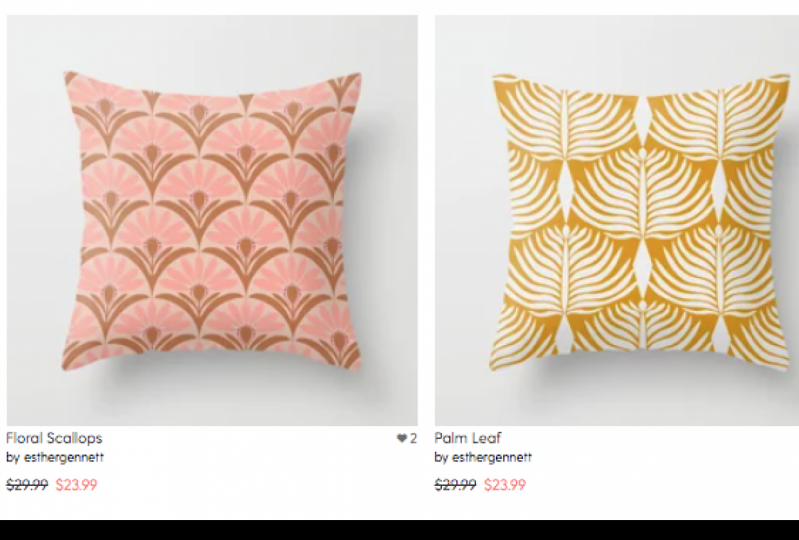
8. Testing Different Color Combos: Hi, guys. Welcome to lessen Seven. In this lesson, we're going to work on the repeat of are central elements. So we're gonna be using things like the actions, and then we're going to start doing a little bit more work on the color. Let's get started. So now what I want to do is repeat these elements. Remember this layer that I made called central elements. I need to repeat that on these reflected and transformed duplicates of my scallop. I have personally recorded actions to move them into those positions. But what I'm gonna do is show you how to record one. So if you go to your actions, you can see here. I've got five inches upper left, five inches upper right, five inches lower left, and I will show you how to record one to position it in the lower right. We're gonna add a new action down here at the bottom of the actions palette. You click on this little page icon, which gives us a new action, and we're going to call this 15 inch lower, right? And the moment we hit this record button, it's gonna record every action that we do so just make sure you kind of have it clear in your head what you're going to do. This one is still simple. I'm sure you're not gonna have a problem, literally. We just move it. So I'm gonna hit record because I'm on the selection tool. I could just hit Return Teoh to the move dialog box here. We're gonna move it five inches horizontally, so that's gonna move it across and we're gonna move it five inches down. If you want to hit the preview button, you'll see it go into the right position. You know that that's correct. And if you add copy here, it's going to give you duplicate so the original will stay in the middle and you'll get a duplicate here. So we're gonna hit, OK, and then we're going to stop recording and you've now made an action that you can use time after time. I think what I'll do is actually drag my actions and just put them here temporarily on. Let's just take a look at them as buttons. So I find sometimes just having the button here is faster. And so I've got my central elements selected here, and I just have to click on this button and you see, I've repeated it here. Let me reduce in size here so you can see everything as it happens. Let's go back and select this set. I think what I'll do is all group thes as I create them. Let me go back. I'll do this as a group. So you can see here that this is the central group. So I'm gonna call this original group. This will just help us keep it straight. I'll name this upper left and go back to my original group from the next action. This one is now operate again, back to the original group Run the next action And finally, the last one here. So we've got all four of the central elements now repeated within our pattern. 10 by 10 bones And you could see why I really loved actions. They totally sped up that process. We don't need to worry about any of the other ones here that air on the outside in the art board area, because all we need is this 10 by 10 area here. So now I could park those actions back over here because I'm not gonna need them for a bit . Okay, so we're ready to actually make the swatch here. So what I'm gonna do now is create a 10 by 10 rectangle or square, obviously, and we'll use that to create our bounding box. So I am going to just taken the measurements. I just clicked in the upper corner. It doesn't actually really matter, because I am going to use my alignment. Teoh, make sure that it's a line to the art board, centrally. So you can see here that I've got aligned Art board selected. You see, I've got the rectangle as the top most layer here, and I've got a few other things to do to prepare the file before I make this watch into temporarily hide it. And we're gonna do the other things that we need to to prepare for making this into a swatch. Okay, so you remember originally we had created this design layer. This is where we're going to actually make use of that layer. I don't want to do anything to affect my transformation because I want to be able to use This is a template, and I'm gonna show you how to create the template in one of the lessons coming up. But for now, what I want to do is just take this transformation. And remember, the transformation is what makes all of the pattern duplicates of the scale. I'm going to duplicate the transformation layer. And I'm doing that by Let me just get this a line out of the way. I'm going to drag it onto the create new earlier icon at the bottom here. So you can see here we now have a duplicate. I'm going to lock and hide. My original is we don't need it anymore. We're gonna now take this and create our design. When it take us someone open the science. Let's get rectangle. Hold up into this layer. If you get rid of that group, would take and duplicate my central elements. I dragging it down onto this page icon and then I'm gonna take thes and dragged them into my design layer your it of that one. And then we're going Teoh a duplicate of this transformation and also drag it into the design layer. And let's lock this and hide it. And like I said, I'm gonna keep that I don't need to throw that away and I'm gonna lock this and hide it a swell and actually this inspirational er I don't need any more, so I'm going to delete it, and we've now got all of the items that we need in our design layer. So the key to this is actually making a clipping mask out of this square that we put on the top so less located here, I'm gonna teach us not that would matter, but I'm going to take and have it free of both Feel an outline I am going to select. The layers are good, the entire thing selected, including the rectangle or the square. I'm going to go dio the mask here and make you can see here everything that's in the board area has now been hidden. I mean, basically, it's still there. If you do preview here and why, you can see that it's all still there. But this is what we need to create our patterns so we can do a couple of different things here. You can just simply go to our pattern may for tool, which is probably the fastest way I have shortcut for that which is command apostrophe. But if not, you show your pattern right here. Your pattern options. You can actually open that. I want to. At this point, it's over here now, in my l it's just click on. It is going to be a grid pattern. You'll see all that in a second. So let me just get rid of the one that we did create and we'll select all. Like I said, command apostrophes. My short catch. It tells me a swatch has been at it. You could see it up here Right now. The grid repeat is humongous. I wanted to be our 10 by 10 that we had originally done for our document. And you can see now that my pattern repeat is here. If I click out of this by either hitting new pattern are just hitting any other tools. You can see my swatches over here. It has been added. Let's test it out by creating zwei where and will fill it with our pattern that ah, you could see that has worked perfectly. One of things I do is I test the scale so we'll do command option shifty, which is my shortcut to get to transform each with a preview button here, I lighted. Let's see here. We're gonna change this to transform patterns. You can see that the repeat is working just fine. And it does form a beautiful Scala's. You see it in a reduced scale. Okay, we've completed that test. Now, let's go on. Do the exact same thing. Create the one color version from this one here. So it's going to save as one color document. And you know why I'm doing that is to save the time that it would take to that whole clipping mask and stuff. So I'm gonna say OK here. Now this one is called one color only. Let's get rid of this test Watch that I created. And let's go back here and do just a few with changes that we need. You can just leave those things locked air, and I think it would go in here and I'm going to work with these elements. Why not? I mean, they're all set up in the clipping mask. It's already they're gonna select all of the's so you can see all of my motifs and icons are selected, and I'm going to fill those with white. So in a minute it's gonna look like there's absolutely nothing on my page. Let's do that with he's as well with White. Okay, so it looks like absolutely nothing on my page. But remember, we back down here somewhere, I'm just gonna drag that scallop back up here. My design layer here. And I know I don't have it to duplicate it here, but I can just use those actions that we created and let me just lock this stuff back up again. Turn that extra stuff often. Let's use my actions. Teoh duplicate this there is the upper left and all. Select it and her right, lower left and lower rate. And so that's all set up. A Mittal's off this palette here, and you can see that I've got my four corners here. I know that to myself. I can already see things that I will adjust eventually, which I can do it in the time lab. But we've got it all set up here so that we've got a colored background like we wanted just to make us a little bit easier to see. Let's change it to a Kareen that we haven't used that we used this one like that Dark green . It looks great. It So I'm gonna show you a different method this time. We're not going to use the clipping mask, but I've still got that rectangle or square as my top most layer. I'm just going to select all and I'm going to go to my pattern maker Tool, put my measurements and again for my grid and by 10. And I'm going Teoh escape out of here. You'll see that my swatch is up here now and let's make a an extra large tests to take a look at this. And you know how like that I am going. Teoh obviously do this in the one color to show you, and I'm gonna even try one without any scallop whatsoever. But I just want to point out one thing here. I know if you can see that on your screen, but right now it looks like there's a slight hairline right here in this area. But I just want you not to worry. It actually is not there, You see, As you enlarge, it disappears. So it's just a screen glitch. All right, so let's do those other two quick examples. I'm going, Teoh, Maybe time lapse side a little bit to speed up the process so that you can see what it looks like in the one color. I'm going to keep that swatch. So I've got that here. Got that original one and then I've got this dark green colored scallop And now I'm going to go in and I'm going Teoh, change my design. So I'm gonna select all of the design layers here without selecting the actual scallop itself. And I'm going to Let's give it a try and yellow We looked like in the pink, kind of like the yellow. And let's make a swatch with that. That's kind of nice. Oh, Cardy. It kind of reminds me of those examples that we were looking at here. Somebody has a pattern maker tool so that I can add that to my swatches as well and hit escape from that. And let's take a look at that in our big swatch. Yeah, that's kinda cool. Make a nice wallpaper and let's try that one more time, this time with no scallop, it all We're gonna hide all the scallops. We're going to re color this again. Let's try this. Maybe deep peachy color. Really? Quite like that. So let's take a look at that in our big swatch. Yeah, that one is actually really sweet. It could look at it really close to make sure we got none of those little hairlines. You could see that there's none there. And yeah, I really like that. That really to me looks a lot more like those examples we were looking at. And I'm gonna make some adjustments. I'm gonna do some stuff off screen just to save some time, but I think for this one color one, I'd like to have less white space in between the scallops, So I'm gonna do a few little experiments off camera, and then I'll come back and show you the results.
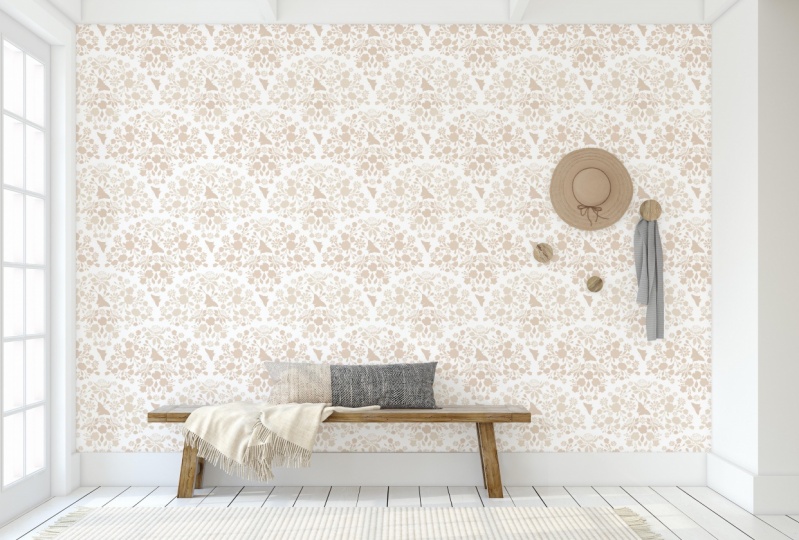
9. Final Swatches and Mockups: Hi, guys. Welcome to lessen eight. So we're finally at the stage where we can create our swatch and do some testing. This is one of my favorite parts where we get to actually use the swatch and tested out with mock ups. Let's get started. I'm going to be showing you two different methods, first of all, which is going to create large copies of a repeating pattern by copying a large swatch that we've created just with a rectangle. And then the second method is gonna involve us actually exporting each separate pattern tile on its own art for what I want to do is actually create large swatch with each of our different colors. Here is I'm not sure which one we're gonna end up using. I'm going Teoh drag and duplicate that 1st 1 Let's fill that one with the first combination and you'll notice that the scale is kept the sand and let's select both of these Should slept in their entirety by holding down my option and shift key. And now I'm going to drag the two of them down and this one will be miss color combination . This one will be this color combination. So we've got our force watches here, and you notice Over here. I've got my asset export panel open. You can export a number of ways You could do it with art boards. I'm just gonna use thes the square is that we've created selecting them all. So I'm pulling down my option command and shift keys, as I select all four of them are for sure. Select is gonna drag them down here into the top part of my asset export panel. And you can see here the four assets are added on in the quarter here. You want to go to resolution? We're gonna change this to 300. I've already adjusted the scale by doing it here with the original. Remember that option Command ship D, which is Thedc transform each. So I've actually already got the scale the way I want it. And these files should be more than adequate for the mall cops and stuff we're doing. So now I'm just gonna hit this export button, and I'm going to make a new folder and I'm gonna call it I know swatches. You can add whatever. I'm gonna put four color here it create folders created. Once I have created it, I can hit us. See this choose button on The four will be exported. So it's really important that you have chosen this 300 peopIe I because that's what's going to give it a really good quality for what we're doing in the next step. So those are all exported. We're gonna go over into a photo shop. This was the first mock up that I set up. I had bought this mock up from Julia Mall cops on Creative Market. It was OK, it was one of those small cups where I'll open it up and give you a look at it. Um, not my favorite kind of mock up, because rather than having the smart object to double click on and replace what Julia has got here is a high thes two and show you she's got a layer where you have to select based on the color using your magic wand. So if I was on that layer, I would hit W a magic wand. I could go up here to select similar all of this Ark Pink is selected. Then what I did is a group actual. Let's put that out here and make a mask on the group by clicking on this mask here cause I had that area selected, the mask was created. Let's use that mask group Teoh place Our pattern, though I'm going to open those Final Four watches. Doesn't matter which one. If you have something in mind for maybe ah, sell sheet or a look book. Of course, you're going to be pretty specific with what you choose. So I'm opening up one of the big swatches that I created Gonna select all and copy. Go back to that group and paste. Let's just hide this mask in here and there. You see, the wallpaper has been added. In this case, the scale is really large for this particular mock up. So I could just go back into Illustrator and create a largest swatch with a smaller scale. In this case, what I would do is just reduce it down. Seems like it'll be faster. I'm going Teoh drag duplicate this layer. You could drag it onto this plus icon. The other method would be Command J, which makes a duplicate. You see, over here in the layers palette, it's drag that over. We didn't actually export this watch. You're going to see that we have to do a little bit of overlapping here. I'm going to collapse those two layers together by doing Command E, which is merged. And there I've added my first swatch in this case what I would dio Because I want to still have some of those shadows and stuff that she has in her interiors. Here. I would change the blending mode here, multiply maybe. And then you can see some of the shadows coming through around the bed. So that's the one method the other method would be. Go back into illustrator. And instead of exporting these watches the way they are, these actual large samples of the pattern that we did the other way would be to take your swatch, drag it out of your swatches palette and centered on to your artwork. Make sure you've got a line to art board selected here, and then you could export the individual art boards. So what I get off camera was I created individual art boards for each of the different color swatches. So I've got the four here. 1234 1st one was the demo one. Now, when I go to file export and I go to export as and what I want to dio is use art boards here down at the bottom. I've made a folder called Final 10 by 10 swatches you could see here. I've already got them in here and go through the process. Anyways, let's go back to assets colder. I'm gonna make a new boulder. I'm gonna call this final swatches to so that we can check those out when we get into photo shop. So that felt ready. There it create hit export. What we're gonna do is we're gonna export them as high resolution and art optimized. You want to make sure you change that from type optimized to art optimized, you could have the white background, or you can have a transparent and just hit OK and go through its process of writing each of the PNG files. Now I've opened the ball up in photo shop and I'll select all go under edit to define pattern, close that one electoral pattern buying patterns because he here I've made the shortcut command option shift p Make it faster. Let go! Mandelson shift PG, And now I've got to my force watches. So if I were to let's create a different walk up here, open up on original mockup that I got from my class by cat Coca. Let I love this one. This is a create see walk up and I've used it before. And as you can see, I've already tested it with this pattern I like about the create Seawall cops is that you can just double click on the smart object. It opens up into a separate file. I'm going to do a you feel layer based on the pattern, and the patterns that I have imported are now here. I could scale them down to try this one at 15% like, Okay, save it. And when I go back to my wallpaper, you'll see it pop in there. So that's pretty neat to So those are the two methods by which you could make your walk ups with patterns from illustrator. The nice thing about doing it this way is that now you've got your patterns, watches for use in any file there now saved with your patterns. Let's go back to that. SB file is time we'll make a new field layer based on pattern, and we'll select. Maybe this one here. Now you can see over here on the layers palette. You could see that this is a special kind of a layer double click. Here. We get the controls for the pattern, Phil. And here I'm gonna try this one at 10%. Okay, Save. And when I go to my documents that wallpaper is now in position there. I am going to actually adjust the levels on this. So command l brought up the levels hellish. And no, we convey we're changing our colors in this way. Depends on the purposes for your mockups. How accurate you want this to be to the true colors of the pattern. I'm just finding here that this has really deep shadows that I want Teoh reduce or lightens . So I'm here on the shadow layer. I could double click on this levels which will actually control the shadows. So I am going to lighten those up considerably. So this is pretty subtle pattern. Here he is just a little bit too small of a scale. Go back to that PSB layer. Try 18%. Save it then go back to the wallpaper here and you'll see your scale like that. So let's two methods for you, Teoh your patterns into your mock ups. Gonna save that one. How far, very last step. Want to make sure that you save your original file from illustrator as a template? So this is my original. Remember, I had my design, Lee or my guide layer might central elements layer the inspiration later that I could get rid off. I've got my transformation layer. And remember that you can check to see if it is your transformation layer by selecting it targeting aunt than seeing that all the transformations are here. So I know that this is my master template that I want to use, and I can test it out real quick by just drawing something if you see it repeating the way it's supposed to remember. We're always drawing on this half over here the left side and we know that's working. I'm gonna undo that. And I think I'm actually gonna get rid of the design layer here. So in that into the trash is well, I've got everything that I need here for a master template So I'm going to go Teoh file and save the file and save as template. No, it's gonna put it by default into this blank templates folder, but I actually want to keep it in a different location. Here. Let's put it in the assets folder for now from this class. Put it wherever you do. Your pattern design is where I would suggest I'm gonna do another copy of it just to be on the safe side. And I'm gonna put it in my pattern design boulder into my vector patterns, which is where I would keep that. Maybe even in a folder called Templates and Hit Save. And I've got a copy of this as a template that I could open. So if you ever want to use it, you would just open. Go to where you saved it. Open it up, and you would have that template to then work with down. So that was the last step. We're ready to wrap up this class, so I will see you in the next lesson. You will have a little fun first. Gotta love these templates. I love the fact that you could see the whole thing live as we're doing it. Hey, how I will see you in the final lesson where we're gonna do some wrap up. See you there.
10. Outro: Hi, guys. Thanks so much for hanging out this hour and learning how to create these scallops so you could include thes as one of the things in one of your pattern. Collections are really hope that you've gotten a lot out of it and that you'll be able to use this template over and over. One of things about pattern design that I find is that there is always something more learn . I really hope that you create a really great pattern and that you shared here post it and let other people take a look at it and get some comments and feedback. That's the fun part about this course is being able to share what you've done. I love seeing your work, So please do that if you happen to post it in social media or what not? Could you please hashtag me at the Lord's NASCAR and slash skill share? I appreciate all of your comments and all of your suggestions, and I really hope you'll take the time Teoh Click Fall and I really hope you have the time to leave me a little bit of feedback. That would be awesome. Please check me out on Pinterest. I've got a lot of resource Is there for artists? Check me out on society six and red bubble. If you ever get the chance, Take care and good luck. And I hope everything goes well with your pattern design.
 Delores Naskrent, Creative Explorer