Transcripts
1. Intro: Hello everyone. My
name is Clarence, and I've been creating
something new every day for around
seven years now. I always try to explore
different styles. And whenever I come up with
something that I like, I want to teach it
to you as well. This time I want to
show you how I created these series of animations in cinema for D and octane render. I will show you where you can find all the resources
that you need, like three D models
pictures and some free pre made animated textures that
you can use for your project. You will learn how to create some nice colorful
animations in after effects, and also animate
your text so you can use it for your
scene in cinema for D. Here you will be able to
create an ice cube and set up the lights and textures to
come up with a cinematic look. I will show you
different tricks that I used to make the
renders look more professional and then do the final color adjustments
in after effects. As a bonus, I will also
include a pre made scene, so you can easily customize and edit it for
your own projects. For this tutorial, you
will need Cinema for D, octane render and after effects.
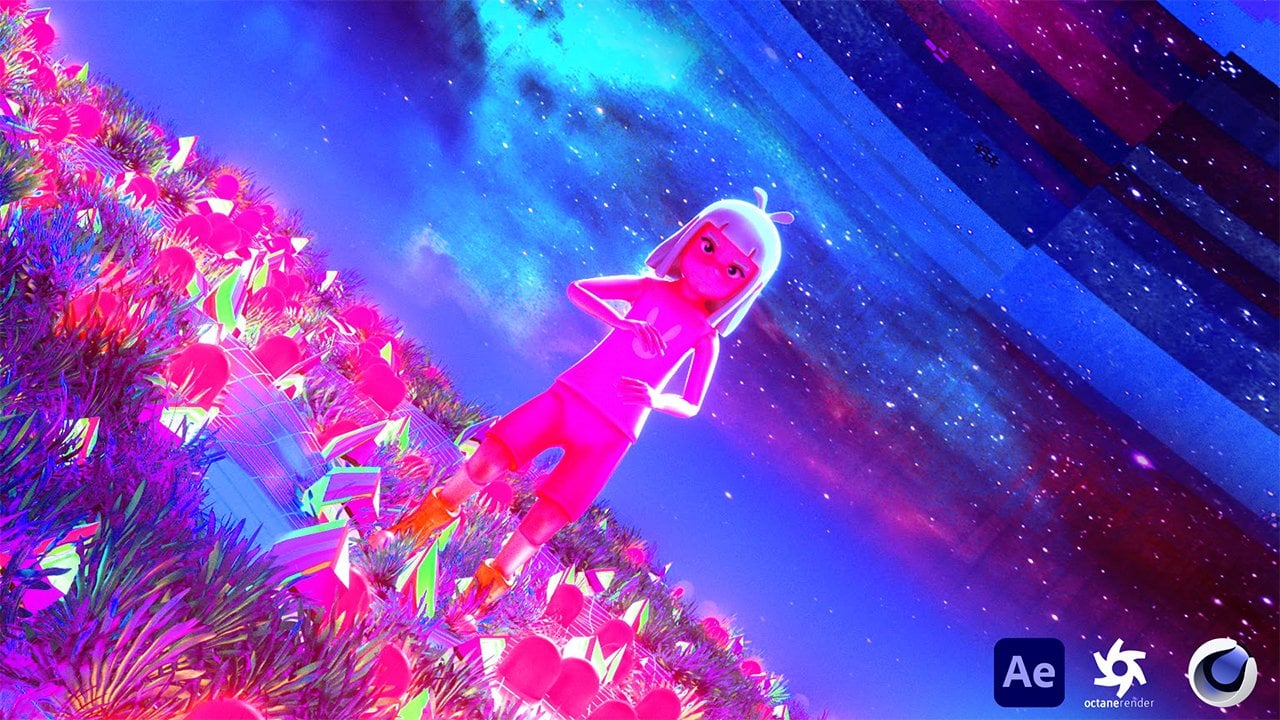
2. 01 Finding Resources: First let's see some
examples where we can see the techniques that I use
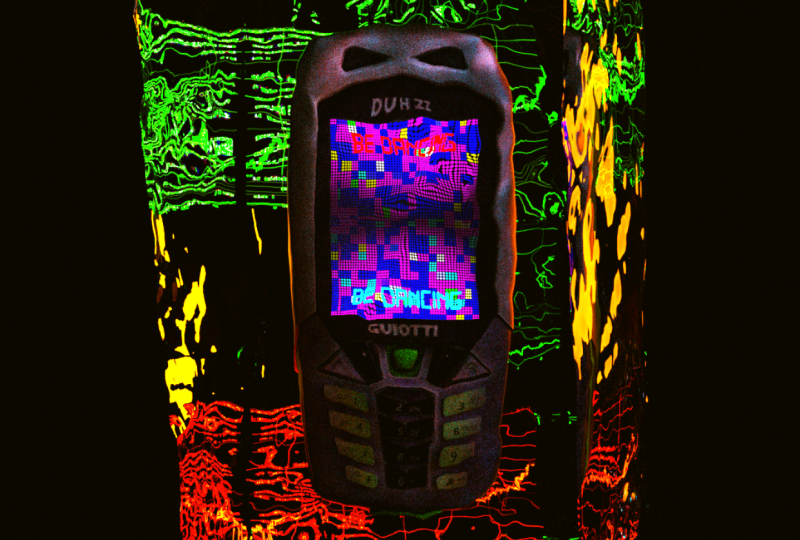
that we will learn today. This is a nice example of
what we're going to create. Basically, as you can see, I want you to bring a vintage element and put it in a nice sci fi
futuristic environment, which is this ice with these tech elements behind
and the light flickering. To break this down,
what we have here is this Nokia phone with this
animation on the screen. Then we have this ice cube that I created in
cinema for D octane. Then we have this
animation behind this hacker type and then the lightning to
create something like this. First we need a model,
a three D model. For that, I use the
Kind resources, Turbo Quid, Sketch Ab and CD. Trader. But basically I just search on
Google, for example, classic cell phone
three D models, and see what results I get here. I searched for free models. I was looking through
these all and I think I'll go with this one because it has also
the screen where I can replace it and create
a nice animation. I also have this
one, but this one, I bought it and I thought I'll show you some
free versions. But of course you can go ahead
and use your own models. I make sure that it
has the FBX version. I can open it in Cinema for
D also, it has the textures. Here is the user
that created it. I just download this
and then I will open it in cinema for D. You can also search here
for other models, also in CD Trader, you can buy this
one if you like. But yeah, I thought I'll show
you a free version and then you can do as you like now
for this flickering light, you can use this
free pack with a, with this textures that I have, you can download this for free. Also for the type behind. I will upload it in gum. You can download
as a PNG sequence, but I can also show
you something. You can go to this
hacker typer and you can type anything from
the keyboard and it will create these
random coding elements. You can screen record
this and use it for your animation as you like. But in any case,
I'll upload this. Now. The next thing that
you need to download are some textures for that, I'll go to unsplash and pexels. I'm just searching texture
and I'll download a few. Okay, now that we have all
the resources that we need, we can put them
all in one folder and continue in cinema for D.
3. 02 Cinema4D Project: Okay, now we are
in cinema for D. And let's open the three D
file that I download it. Okay, I'm going to delete this. And sometimes you may have
this problem that you cannot see the object in the scene. It may be because it is
too large or too small. So I'm going to copy this, create a new project, and I'm going to create a cube so I can have it as a
reference about the size. I'm going to paste this. Yeah, you can see that it is too big compared to the cube, so I'm just going
to scale this down. Okay, so now we can
start to see the object. Okay, let's delete this. I'm going to position
it in the center. Now I'm going to
use octane render to create the textures
and the light. So here we have the textures. I'm going to retarget these elements so you can
see the file name here. Okay, let's do the same
thing for the other one. Now we can convert this.
So we can go to Materials. Convert materials as
delete the other ones. Now as you can see, we have
one file and two textures. One that is for the screen and the other
for the rest of the phone. We can do adjustments to the. For example, we can
convert this to universal. It is more metallic. I'm going to create an octane daylight so you
can understand better. As you can see now
it is more metallic. You can change this here, but we can do adjustments later. Here we have the screen. We can copy the shader here from the diffuse
and we can go to the emission and paste it to the texture emission
and increase the power. The screen has more light. In case in your model, this is not separated, the materials are not separated. What you can do is just go to the polygons from model mode to polygons mode and you can just select the area that you
want to do changes to. Yeah, you can create
a new material. I can just drag this here. As you can see we have a new material applied only
to the part that we selected. Okay, I'm going to
undo this also. You can do changes to the
texture as well, for example. Yeah, I can open this
one in Photoshop, now we are in
Photoshop for example. You can do, for example, you remove this using the
spot healing brush tool. You can remove the text and you can type
something on top of it. I don't know, for
example, lost on. You can also do changes to the texture of the phone and you can
save it as a new texture. Yeah, let's call
this version two. Okay, as you can see this is changed now you can see that it's lost phone, the
changes that we did. But also you can do the
changes directly here in octane by going
to color correction. Here you have all the
settings that you can change. Brightness, saturation,
gama and so on. You can play around
with these and see what you like more. I'm just trying to give
you some options of how you can customize the model
that you already have. Now, before we continue
in cinema for D, we're going to move
to after effects just to create a nice animation
for the screen of the phone.
4. 03 After Effects Screen Animation: Okay, now we are
in after effects. And I'm going to create
a composition with a four or five ratio
like it is right here. I can make it maybe 7 seconds. What I'm thinking to do
here is first of all, create a nice animated
texture in retro style, with colors and also
an animated text. You can choose whatever
you like for your screen. I'm going to create
something really simple. I'm just going to go
with a solid here. Let's go with fractal Noise. I'm going to convert
this into a Lego style. I'm going to put the
complexity to one here. On the fractal type, I'm going to make this rocky
and make this block here. I can play around with a
contrast and brightness. Now, of course, this depends
on whatever you like. I'm just trying to create
vibrant animation here. Now, this is not animated. To do that, we just need
to animate the evolution. We go to the first frame, create a key frame here, go to the last frame and
just make this five. And let's see how it reacts. You can see that we have
this animation now. Okay, now this is
black and white. What I would like to do
is to make this colorful. For that, I'm going
to use Colorrama. Let's just double click on it. If we click play, we can see
the animation that we have. And this comes because
of the output cycle. Here you can see that there is this rainbow color palette. You have also this
cycle repetition. If you change, you can see how it reacts on the animation. You can also do
changes on the colors. For example, let's make
some of them darker. Yeah, you can change
these as you like. You can also animate the
cycle repetition here. Maybe I can go to two. Yeah, see how this reacts? Or I can just keep
it dark and yeah, just have these squares
be animated now. You can keep it like
this and you can export this as a PNG sequence. Or I can add another
effect, CC star burst. Here's another effect that
you can use like this. Again, you can just export
this as a PNG sequence. And it's a really nice
background for the screen. But I'm going to
do something else. I'm going to put
the speed to zero. And you can see that
it just moves around without this zooming effect. Now, I'm going to also
decrease the scatter to zero. You can see that it
is exactly as it was, but with these pixels, like a lead wall, this is the effect that I
wanted to achieve. And now you can
increase the size here or the grid
spacing so you can get bigger circles or spheres, I think. Yeah, I think I'm going
to keep it like this now. I can create a new text. I'm just going to
write something like good things take time. I'm going to put
this in the center. I'm using this
color, of course you can change this to
whatever color you like. We can go to the alignment tool and this way I' make sure
that this is in the center. Now I'm going to apply an
effect to this text typewriter. I'm just going to
double click on it now. If I click play,
you can see that, yeah, we have this
animation of the text. If you want to make
this stay longer, you can just go to this text
animator range selector. And you can just drag
the key frame here, for example, and you
can see how it works. If you want to make it faster, just bring it closer.
It's up to you. Yeah. These are the two effects that I wanted to show you, the typewriter, and also this
background that I created. Now it's up to you how
you want to combine them. I want to keep them both. I want to create a shadow behind the text. It is more visible. For that, I'm going
to create a new, so let's put it in the middle of the
text and the background. And I'm going to use
a gradient ramp. I'm going to put this to radio, let's put the center here now. I'm just going to make
it a little bit bigger. I'm going to put it from
normal mode to darken. Also, I need to create a
new solid to put below everything I think now
it is more visible. I can scale this up
a little bit more. Okay, now that I have this, I can just click control M
or go to file export Ad. To render Q on the output module, put the format to PNG sequence. Click okay, here
everything is okay. Yeah, Now I'm just
going to render this. I'm going to use it as a PNG sequence on the
screen of the phone.
5. 04 Creating a 3D Ice Cube: Okay, now we are back
in cinema for D. And before we do the
screen replacement, first we need to create
the cube. The ice cube. So for that, let's
just go to the cube and I'm going to just, yeah, create a cube that matches the size of
the phone overall. First of all, I'm
also going to change the size of the scene. I always go with this ratio. I can change this to HD now. This way I can also
create an octane camera. I'll put the focal length to 80 to make this
more cinematic. And now I can also adjust the size of the cube based on the scene that I have so I can create a
nice composition. Okay, now that I have this, I'm going to create
an octane material. To create the ice, we need
to go to the material type, from diffused to specular. I'm going to make
this really easy. Let's just apply this
here and make sure that this is set to path tracing because if you
put it to direct lighting, we will not have
enough specular depth. As you can see, the phone
will not be visible. When we put it to path tracing, we can see that we have
the specular depth to 16. When we decrease it, you can see the results
that we have. This is why it is important to have this two path tracing. Now the next thing
that we can do is, first of all that's just increase the
segments to the cube. I'm going to use a displacer. I'm going to hold shift
here on the displacer. I'm going to go to the
shader and put it to Noise. Yeah, we have this texture
applied to the cube. We can change this,
first of all, let's change the global scale. Yeah, we can see that we get this watery material of you can change this to other textures as well and
see what you like more. But I want to keep this simple overall because I want also the text on the
screen to be more visible. I don't want to
overcomplicate this because, yeah, I can go
with this texture, but we will not be able to
see the screen for that. I want to keep it
simple to Noise. Yeah. You can also change the brightness and contrast and see how it reflects
on the object. You can also change the seed here to get different options. Yeah, now the next
thing that I'm going to do is just add the bump texture, let's go to Image texture, and I'm going to apply one of the textures
that we download it. I can go with this one. As you can see, it
creates this, Yeah, ice material, but we see that
the phone is not visible. Let's try this one. Okay,
I think that's better. But again, we can do
adjustments to this one. Yeah, we can go to
color correction here. We can decrease the brightness. As you can see, the
more we decrease, the more visible the phone gets. If we decrease the gamma, we can see that it
gets more blurry. This also depends on the
texture that you have, but basically you need to
play around with the contrast and brightness until you get the results that
you like, okay? Okay, for now I'm going
to leave it like this. I'm not going to
change anything else. For example, if you
want to put an object that you don't want to
keep it very visible, of course you can
increase the roughness more or again on the bump. You can increase the brightness
here of the texture, and the object inside
will be less visible. It depends on what you're
trying to achieve. For me, I want to keep the, the screen more visible. This is why I'm going
to leave it like this. One last thing that I
can do is animate this. I can go to animation
speed loop period. I can put these to one. Let's just click play, and you can see that this gets animated. I can also change the speed. If you'd like to get this
animated, you can do it. But in my case, I'm just going to
keep it static. I can just animate the position
of the cube a little bit. Yeah, now let's move
on to the next step, to the set up of the lights.
6. 05 Octane Light Setup: Now first of all, I'm
going to put this in one group when I
want to move them. I can move them both
at the same time. And I can also go inside
the group and for example, I can decrease the size of the phone a little
bit like this. I can also change the
size of the cube. Yeah, now let's go
to the texture here. I'm going to go to the
emission image texture. And I'm going to target the
texture that we created. I'm just going to click
on the first frame. Click open here
on the animation. I'm going to calculate, let's make the frame rate 30. You can make this
a loop as well. This way it calculates
all the frames. Yeah, you can see that
now this is animated. Let's change this to 180 frames, which means 6 seconds. Okay, first of all,
let's uncheck the cube. We can see that we need to make some adjustments
on the position. For that, we go to the shader, to the UV transform. Here you have rotation
scale and transform. Now I'm going to
go to transform. Adjust this a little bit. We can also scale this down. Okay. Yeah, just do all the necessary
adjustments. Okay. Now I can increase Yeah. The power. I can also
copy this to the diffuse. Okay. We can play around
with this later as well. I'm checking this surface
brightness as well. I'm going to uncheck
this octane daylight. I'm going to create an environment
and keep it all black, so this way I can set
up my own lightning. I'll go to octane area light. Now let's just position them. I'm going to put one
light in front of it, one light here on the side, and one light behind the cube. Let's see how this goes and
then I can do adjustments. But just showing you
what I have in mind, also checking the cube. Now when we create the light, we can also see more
highlights of the texture. Okay, I'm going to
create a gradient here. Yeah, we can see the light here. Now, of course, we can
make more adjustments. For example, I can make the
light smaller depending on how it reflects on
the object as well. I can decrease the power here. This is a matter of
checking and then deciding. Now I'm going to
make a copy of this. Okay, just changing
the size and I'm going to position it here on the side. As I said here, I'm going to apply the flickering texture that you can download for
free K animation. Calculate. Yeah, you can
see the reflection here. Of course, again, I can make adjustments to
the power of it. I think maybe I
can also position this in the back like this, but I need to make this
unvisible as a light. Okay, I think I'm going
to make one more copy just to position
it somewhere here. I'm going to check
this so we have a clear light and just play around with the
temperature to see how it reflects on the ice cube. Okay, now this looks very messy, but we're going to
make adjustments. Let's go on the bump texture, and here I'm going to
decrease the brightness. Okay, I made a few
adjustments and I think now it is looking better. What I will do next is just, first of all, create a fog here. For that, you need to
go to the octane sky, go to add fog. Yeah, as you can
see, this creates a more cinematic environment. And of course, you can
change the medium rates. The more you increase it,
the more fog it creates based on the lights
that you have. I think I'm going
to keep it at ten. I'm going to make the
lights invisible here. I'm also going to decrease the height of the shader because I don't really
like these shapes here. Now I'm going to create two other planes for the
hacker type elements, I'm going to create
a new material. And on the emission, I'm
going to apply the textures. I'm going to put this to Loop. Calculate, Copy the same shader also on the diffuse,
and paste it. Now let's just apply it on the plane and see what we have. Yeah, as you can see, we have this animation. Now what I will do is just put this behind everything
somewhere right here. When we go back, we
can see how it creates this really nice effect
behind the ice cube. Going to put it somewhere here. I'm going to make a copy. And also another one here maybe make it a
little bit smaller. I'm going to make a
copy of this so I can reapply to the texture. To the plane, sorry. And just
decrease the temperature. Yeah, this way we have two variations
of the same texture. Now, I think I can
make some adjustments on the texture of the phone. For example, I can go to this
thin film layer and yeah, make the texture
more iridescent. You can also uncheck this, but I think we need
the overall texture. What I can do next is maybe
decrease the roughness. Okay. Okay, so overall, I
think we have the scene. I'm just going to show
you a few more things that we can do to
make this better.
7. 06 Final Render: Okay, now what I'm
going to do is just change the
position of this. So I'm going to make this a little bit more in a floating state
out, say like this. I think I can put the phone
a little more in the center. Now I'm going to apply
vibrate tag here. This way it will be
animated automatically. I'm going to change the amply two frequency to
one and see what we get. Yeah, we can see that we
get this little animation. We can also animate this
automatically or manually. We can also do a little
bit of animation. We can go on the first frame, set a key frame, go
on the last frame, do the same, and go
somewhere in the middle. Just put it a little bit up. We have this floating. Yeah, I think it has
a really nice look. Before I render everything also, we need to do some
post processing. I can enable here on
the octane camera. I'm going to increase
the bloom power this way I can see if I need to increase the power of the emission here
on the texture. I think right now it's good. Okay, we can see that
the text is visible, so that's good to go now. I can just do some final
adjustments here on the lights and yeah,
then render it. I think the light
in front is okay. Now let's go to the other
one here on the side, maybe I can increase
this a little bit more. Okay, now we go on the last one. Okay, overall, I
think this is good. Now, I just need to make some
final adjustments here on enable camera imager and here
I can apply a custom data. I'll always this
one I really like the look that it
gives to the image. Yeah, I can do overall
adjustments to the exposure
saturation and so on. But usually I just
apply a custom lot and then change this
saturate to white. Sometimes it gives a
nice look, for example, it makes the red textures
more to a pink color. These are the changes
that I'm making now. Yeah, I think now this
is ready to render. I also need to the samples. Right now there are 1,000
and once I see this loading, I can see if the
quality is good enough, you can change the samples here. I think I'm going to
test it with 1,000 And if I see that it doesn't
look good, I can change it. Put the render to octane render. Make sure to check all frames. I'm going to leave
the size like this, put it to PNG. Let's save the project. And now I'm just going to click Render. I'll wait for the first
frame to be rendered. Okay, the first frame is rendered and I think
it is good enough. Yeah, I'm just going to wait
for this to be finalized. One frame is 2 minutes. This is 180 frames, so it means that this
will take around 6 hours. For me, I say once
this is finalized, we'll move to after
effects just to make minor changes and
export this as an more.
8. 07 Final Color adjustments in AE: Okay, now that the
render is finished, we can move to After Effects. To finalize everything on the project sections,
just double click. And let's open the PNG sequence. Okay, we just need to
click on the first one. Make sure to check
this PNG sequence. Click Import, and let's
just drag this to create a new
composition based on the length and the size of the render that we have
on the composition settings. Yeah, we can see
that the duration is 6 seconds and
here is the size. Now basically what I
do here is just create an adjustment layer and put
it on top of what we have. Just do some color adjustments. I go with this lumetric color and work with this
basic correction. I play around with
exposure and contrast. I think I want to make this
a little bit brighter. Yeah, I can increase
the highlights more. This also depends on the layer on the
artwork that you have. But basically, you can just try to make some final
adjustments here. I think I'm going to
leave it like this. And lastly, I can
add grain as well. So go to add grain, I'm going to go to final output to see better how
this looks like. Here, I can increase
the size. Okay. You can see the difference, especially here on
the black colors. And what I did is just
decrease the size a little bit and also
the intensity. Yeah, you can see
the difference. Also, something else
that you can do is also animate the hue. If you don't like the
colors that you have. Yeah, I think this
would be nice. I can be on the first
frame, check this. So we can create a key frame. Go to the last frame
and just click one so we can have a full cycle. Okay, now, yeah, you
can see the difference. I think it's ready to
render as an Mp force, so I can share it
in social media. For that we can go to export and add to Adobe
Media encoder Q. Let's do some adjustments here. Make sure the format is on 264. Let's select a folder
where to save it. I'm going to leave
the rest as it is. Besides the target bit rate, I'm going to go with ten because I think that's enough
for social media. Check this quick. Okay. And
also make sure that, yeah, the estimated file size
for social media is better to be less than 20 megabytes
for these short videos. In this case, we
are. Okay. I'm just going to render overall, this is how it works. I hope this was helpful. And of course, if you have any questions about
anything just let me know. You can write me
in any platform. I hope you found this helpful. Yeah, we'll see you in
the next courses. Bye.
 Klarens Malluta, Visual Artist