Transcripts
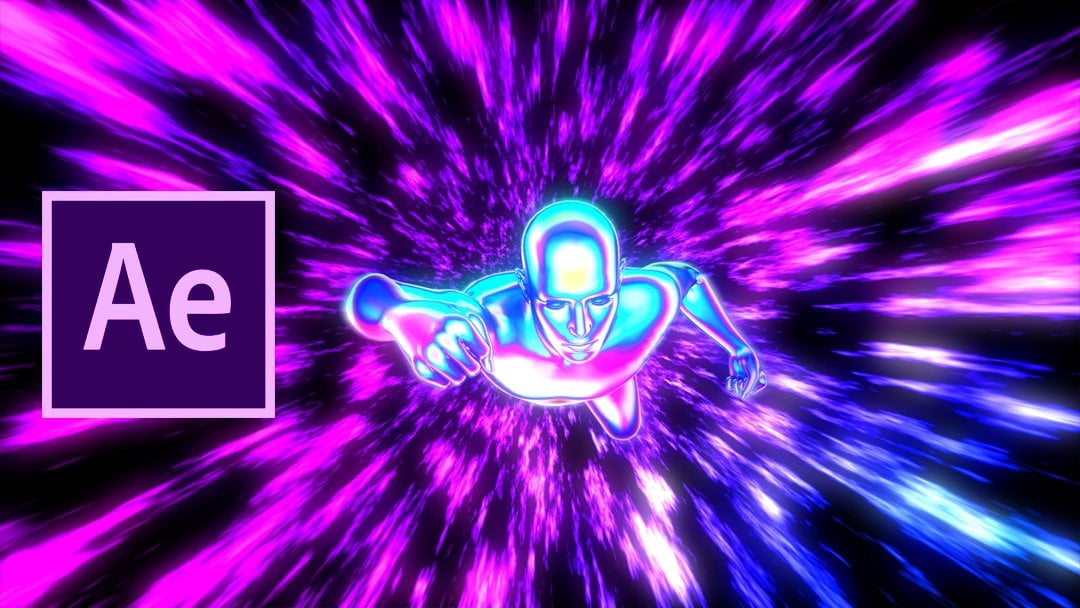
1. Intro: Hello, everyone. My name is parents. On this class, I will explain how to create some beautiful iridescent animations in a simple way. You will start by learning how to create a liquid animation and then learn to create a material using octane render. We will do some variations of the material and learn to improve your three D seen by adding area lights. Then you will learn a simple way to create crystal shapes. In cinema 40 he will be able to create a reflective, colorful material and play around with the settings so you can get the results you want. If you like colorful upstart three D shapes. This is the right glass for you. I will explain everything in details. So this will be a fun project for you to experiment with three D and your distant materials For this class. You will need cinema for detail. Do the animations on octane render toe, apply the materials, so make sure to enroll and see the whole class
2. Liquid Animation: you guys don't know. I'm on cinema for D and ah, we will use octane Orender Ah, another professional at cinema four D or obtain render. But I got some requests after I shared some readers that I did using octane Orender just to explain how I did them. So yeah, that's why I decided toe try to do on a tutorial using octane render I will just do a simple animation on DA Just explained the the materials that you can create using ah octane render so and now we'll just do the animation and then we will play around with the ah materials on octane render. So the first thing that I'm going to do is just go to this cube right here and, uh, get a plane. You can change the weeds, segments and the height, the segments. It helps it to get like a more smooth Ah, like more segments if you see on the yeah, right here. So I change the segments. Basically, when you get more segments, it helps on getting a better displacement animation because you have more segments toe displace. So yeah, now we need toe. Add that kind off half axle display service. You're displaced around. You just need toe place it build Ah plane. Like when this arrow that is pointing down appears. You just, uh it's like the clipping mask on on Photoshopped on da Now, As you can see, nothing changes because we need toe add ah shading here. So on the shader, we can have the noise. Um de as you can see it Ah, does this kind of displacement? So the segments 20? Yeah. Now you can see what I what I meant with the segments, so OK, now we can go to this to this noise. Quick on it. And here you have all the options for the noise. I think we can change the global scale. So basically, this is the the noise and ah, it projects on three D on the plane so we can change the global skilled like 300 on. We get something better if we change the contrast. Yeah, you get something like this, So yeah, it changes. You have only black and white. No gray shades. But I think it's better to have it. Zero say now if we play this, nothing happens. So to make the animation we can do the animations Be like three and loop period three So and now we have on animation Onda it loops he as you can see, this continues So you know, uh, something else that we can do If we zoom in, you can see that we have some kind off And just so it's not like very small soul tow Avoid that. You can go on Ah, subdivision surface on da just like the plane and make it part of this subdivision. And now you have much smoother Ah, surface also something else we can do with the animation is go to the objects and make sure you are clicking on this placer Goto object on We can animate the strength and the height So that's just ah taken it on And make sure you are on the zero on the first frame and ah, now we can go to this frame unjust. Ah changed the height, for example. Yeah, OK, now we click again. So let's go toe his frame like just trying to make random friend them Ah, values for the item The strength. Yeah, and on the and frame I'll just ah do the same thing as the first frame. So I get a loop, so I'll just make sure to creek again on DA Yeah, let's played. Yeah. Okay. So also something else I can do for the animation is we can go to this strength Goto animation show track Onda, Where there is this curve this blind. If we leave it like least with these kind of curve, you can see that it starts. Ah, slowly. And then it goes faster Onda on the and it's ah, it starts slow, slowing again. So if we do this leaner Ah, Speed, I think it's more like a fast so you don't have to stop at the end. Yeah, I hope you get the point, Onda. Um yeah, I think that's it for the animation. We can set a camera later. Now we're going toe work with the materials using octane render soc on the next video
3. Iridescent Material: case. And now it will just ah, set a camera really fast. So you can use these options here to change the angle of the camera. Like so mean. Move laughter Right on DA rotate sale. Just set an angle here some first. You need Tosa like this camera object and then move. Okay, so now we can select this and ah, we can see in different position. And when we want to make, like the preview, we can just click on these cycle right here. And, uh, you will get the same angle. Okay, so now we go toe, create Shader obtain on da kine material. So I will open the live viewer. Okay, so the first thing that I'm going to try first let's duplicate on the layer I'm going to try Ah, descent material. So on the material type you goto Pelosi on da toe Get that kind off medicine material you need toe go to diffuse And first let's make this I like that color goto film with and ah, we can change that But something really important is you Goto Film index And you make this one on da Yeah, let's apply so you can see the difference while I make the changes. So as you can see, we have these kind off black material with these reticent colors shades and ah, something else you can do is go to index and make the like. You could change the index and gets like, more. Read the sound If you make it one, it's all like reticent colors. So first, I would just leave it. Ah, at uh who won also, we can change the roughness, so it's like more small so we don't get this kind off. Ah, black edges. So zoom so me insurgency better what? I mean, yes, so but change the roughness. Yeah, it's much better. Also, it's affected by the subdivision surface. I find Check that. Yeah, it doesn't look really good, So yeah, I would suggest toe increase the roughness. So this is the first material toe animated. We can ah use the bill with We can click on this float on DA You just do the same thing as we did with Shader. So let's go to another frame and ah, I'll just change the value of these and then click again on this point. Goto because school this frame? Yep. And out. Ah, on the next frame, I'll do the same thing as the first frame, which I don't remember soul just and on the first frame. Let's copy this. And, uh, let's go to the just frame on that would taste it. And just like this, a round shape right here on now. I think we have a loop. So I was just blazes some seat. So it takes sometimes to loadem on ah, octane Because I'm also during the school record, but yeah, I hope you get I think you get the idea. Yeah, Okay. So I'll just ah, copies. So copy and paste. Just so I will show you some variations that you can do with this material. So, yes, you in the next video.
4. Material Variations & Lights: Okay, so now I will just duplicate the material. So command control Sika Montengro V. So I can do some variations and, uh, something you can do is that just used, like a blue color? But, uh, I will apply it on the on the surface so you can see if there is any difference. As you can see, there's no difference because we have the index color, which is at one. So here you can play around and see what ah like. How do you like it? Ah, what kind of value is better for your purpose? So the point here is that you can change the color. You can get different shades, not just Syria. Descend callers, for example. We can get something purple. Are they? Ah, green. I don't know. It depends on what do you want to. And you can just play around with the index. Yeah, something like that. If you I think 1.3 is the least reticent color. And if you increases, you get most ah of the readers and colors. And if you get one Ah, you don't see any of the of the colors I said that's just to show you how it works. Also, another thing that you can do is just Ah, at some source slides. So what I'll show you and Ah, yeah, that's a mountain Goto objects octane area light on. Now you can use these tools, for example Rotate, move or scale. So here's the obtain light on that will rotate it. Yeah, you can add lights in different ah positions. You can copy this and rotated so you can place it somewhere like depending on the kind of flight that you want. If I want the light light power to be decreased like here's you just need to click on this Michael right here. And you have the power. You can decrease it Here you can uncheck the octane light. Ah, the 2nd 1 If you don't want it, you can check it again and just see what like what version do we like more said this is just to show you that you can use the ah, the octane lights Ah, to so I wouldn't check them them for a moment also, I will reapply this other material on. I will try to at another materials that I'm going to explain. It was right on this kind of surface. But then I will explain it on another object because I think it looks better. I'm on another object, But first I'll just show you so material type, it's Ah, speculator Onda. Uh, that I would just apply it so you can see what I can do. So since this is speculum material actually need toe duplicate the plane So on da, I would just move it a little bit. All he was a move to. So I have two planes now and ah, if I apply the speculator on DA just move it a little bit so you can see the difference. And now to get like some colorful are reflections We need to go to disperse in on DA I would just increase this Kwan So yeah, if you can, you can zoom in You can see some kind of three different colors, but it doesn't work really well in these kind off surfaces. So on the next video we'll show you what kind of objects you can create for these kind off material. So see in the next video
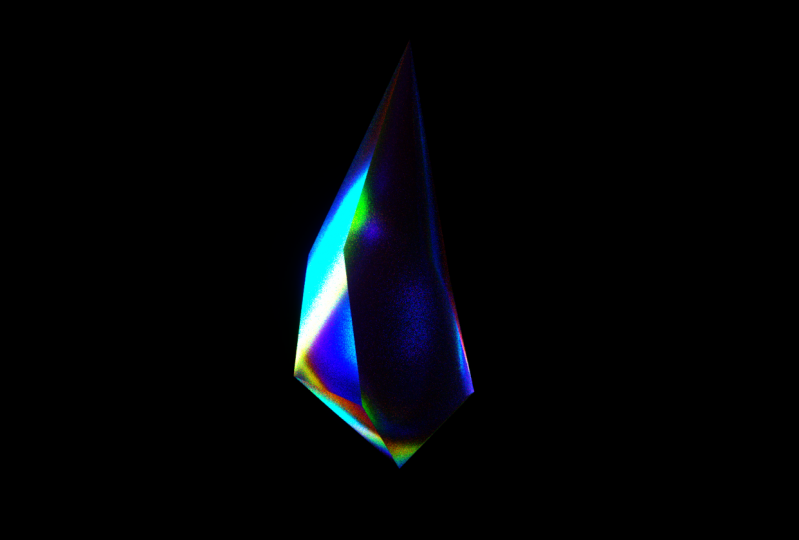
5. Crystal Object: Okay, so now I will create a new document so we don't get really messy here. So I was a file in New Onda. Now we would create the crystal because I think the that kind of material that we're going to try works better on kind off crystal or geometric shapes. So I will go to Cuban goto this platonic shape. I think there are two ways toe to create a crystal or that I know off. Ah, the first way would do would be like like we did the plane. So we go to this place her again when the arrow is pointing down soul again Let's go to shaving Shader That's used the noise go to noise. And, uh, now we can just change the global scale. Like for 100 on DA we can increase the contrast so you can change the seed. But I think another thing that is important is to goto object and change the strength. Yeah, just see what looks better. So now that we change the strengthened the height, we can just go toe shading on da Just change the seed until you get something that, uh that you like. Yeah, This one is nice, I think. No, we need to click a Tony. You can change the seed and see what you like with another way that you can create. Ah, crystal. It's more manual but you still start with the platonic on DA click on this perspective because basically, we need to use polygons but we can't use them if we don't like this perspective. So it makes it creditable on da So it converts a parametric object into a polygon polygonal object as you married. So yeah, let's use polygons. And now these publicans are edible. You can just click and drag. So that's what I'm going to do. Well, just click and dragon great, like a crystal shape. So I know that I created the shape. I would just apply the material to it and ah, I will see what changes we can make. Solar material looks better. So see in the next video
6. Specular Material: case of before I at the material. I was thinking tour, do a rotation. So I just need to goto this rotate tool and make sure you click on this a model mode. So, like, uh, here's the rotation tool, and if you rotated, you can see that the value changes right here. So that's why we can change the like. We can do the first frame toe zero onda click on this key right here on go to the end frame on make it like, 360 degrees so we can get, like, a full rotation. So if we played, we get a full rotation on the loo. But as you can see, there still this Ah, problem that it starts toe slow down in the and so to fix that. So we go to these coordinates and we go to the rotation goto animation. So right, click animation show track And make sure you So you change the this this plein you change it to a linear. So we have a winner move our animation on da If you play again Yeah, you can see that it doesn't slow down its ah, linear. Ah, animation. Okay, So now we need toe had the material So let's open the obtain live You were Onda I'll goto creates either octane material So change the material type to a speculator on just increased the dispersion toe one Let's just apply these to the material on Does you can see with We get these kind off reflections Colorful reflections So to make it look better we can great a black background So I would just create the plane on da Make it big enough so I can place it as a background Yeah, okay. I was just ah, Gaita black material for you. Just change the colors. Click on Just place it right here so you can see better. Yes. And now, as you can see, you have this kind of reflections so we'll make this bigger on if we play. It looks much better because you can see the reflections like on the preview. It doesn't look high quality, but you can see on the render it Ah, video case and I will try to add some ah octane area lights and just do some small changes to the material. So it looks better and it protects the lights better. So see in the next video
7. Specular Material Variations: case and now we will just, uh, at the octane area light Onda just tried to reposition it. I can make it like, bigger on DA as you can see, like you get this kind off edges soul when you apply the light. I think it's better toe make some changes on the material. So I will duplicate this material on DA I will increase the roughness and that will apply the the new material to the object. So, yeah, now is going to see it some. The light is affecting the the whole, uh, object. You can also play around with some with the power of the light. So let's go to this right. Setting some just, uh, decrease a little bit the power and also to add more colors to it. I can do the film with on film index so I would decrease the film index store one on DA increase the film with like I did with the other material. And ah, I can also do some animations to this, so you would do the same thing as I did with the with a floating plane. So I just click on these points and ah, just goto somewhere in the middle. Just increase it on DA. The next frame will be like the 1st 1 So I'll just copy this. Go to the unframed Onda will paste. Now if I click plate Yeah, I'll just upload the rendered videos that the tutorials Because I can see them now really good. But yeah, that's ah, main idea or the the settings that you can play around with. So and now we'll just teach you how to export the videos and, like, remove the bare ground and stuff like that. So see you in the next video.
8. Export Video: case It seems we're working with this crystal first ologists Oyo How you can do the rendering Get this video and ah for example, if you want a toe, remove this plane from the ah background The you can just click on this. Ah, take right here. If you want a transparent background, you need to goto obtain settings and you just click Alpha Channel on DA If you don't want that octane life like you want the effect of it but you just want don't want to show on the render you just go to render settings Gotta visibility and just click camera visibility so on Check it so you won't be able to see it. Also another thing that if we want the the effect of the plane off the black plane But you don't want the black background you want a transparent background You can do something like goto plane, right click cinema for the octane tax and go to this obtain object tag Roto visibility and ah, just something the camera visibility. So now you still have the ah, the black background effect on the crystal but you don't have the whole ah background Now you can set the Oakton camera on DA Just so mean. So basically, with the often ah, camera, you can goto post processing on DA You can play around with all these bloom power glare, power and all the other ah settings. Basically, we just need a quick enable and, for example, increase the bloom power declare powers. Just surrender these so you can see what it does. You need to check the check, these camera object so you can see I think what it does safe here. And check these you can see that the difference. But yeah, I want to. Any changes? Because usually I just goto after effect and stuff like that, and I do the post processing there. Ah, so you know we can Export is but first to go to settings. This maximum samples like decides the quality off the final render soul. The more you increase it, the more time it will take to render. But the quality will be ah better. So these depends on your computer, but ID badges Dulic five founded because I don't want to wait too much. If I don't like it, that will re Orender it, but yeah, just to have it have in mind that on now we go toe understandings. I'll just, uh, go to output and make this Ah, in HD resolution now goto frame rain. So go from zero to 90 frames on No, on the render you need toe. Make it octane, Oakton Orender. First I go to save and, uh, to the PNG Alpha Channel because this will be a PNG's sequence and just create the folder. I'll just create a folder crystal file name just to see. And now I go toe octane render go to render pass, enable former PNG and just go, Andi, just do the same file name on. Yeah. Now just make sure you have the right camera position. You can get some out more on you just ah, quick render and ah, wait for it to finish. You may get like, these kind off background, but don't worry, because it will be transparent. So now we can export the next Ah, seen that we create
9. Export 2 & Finalize: another tip is that you can see the first frame of the video. And if you don't like the quality, for example, the first frame is finished and I see that it is kind of grainy. So I'll just stop this and ah, go again to render walked in settings and make like thousands on. That would do the rendering again. But I'll do it later because now we can go toe the next scene on DA Let's see the live your By the way, if you have enjoyed this tutorial till now, I appreciate a good review on DA I would love to see your projects to and just on the project description. Just leave your instagram account page Seiken, Shayt and ah, tag you. So now that c live your I will check the camera. Actually, I did the default. Ah, camera Don t often camera Onda Um yeah, let's see how it looks If the tail lights Yeah, I think with this one I will do some different versions so I can show them in the intro. But for now, we'll just show you the the render settings for one of the videos. So basically, the video is some this where this black line starts right here within the black lines. Say, I think this ah kind of fungal looks good. So, yeah, it's the same thing, because now we don't have to worry about any, like, Alpha Channel stuff like that. I can just do the maximum samples. 500 and ah, goto under settings co two output and just make the same way as you did with Crystal. Uh, yeah, just make zero from Syria's hold 90. Um, yeah, just do the same thing as the crystal one. I was still do the Alfa Channel Channel form a PNG just ah, create Ah, in your folder. So, like the octane render on, just go to enable from a PNG on file. It should be the same name as the on the safe. Say, an owl just quick surrender and wait for it to finish. And I will just surrender the other ones too. So, yeah, that's it for this tutorial. As I said, I'm not like a cinema for the expert octane expert, but, uh, I just thought I'm explaining this stuff that I know, and I hope you'll find them helpful for your projects. so, Yeah, I thank you for watching and Ah, let me know what kind off tutorials do you want next? So, yes, you on the next tutorials by
 Klarens Malluta, Visual Artist