Transcripts
1. Intro: Hello everyone. My
name is Karens. I'm a freelance digital artist. And in this tutorial I will show you how to create
these animations. We will start with the
basic technique of doing the scenes set up and
then animate a character. To create the composition, you will learn how to use
Forester Animate the flowers, and create a nice environment by adjusting the lights and
the octane materials. In the end, you will do the
final color adjustments in after effects and
render the animation. For this tutorial,
you will need cinema for the octane render
and after effects.
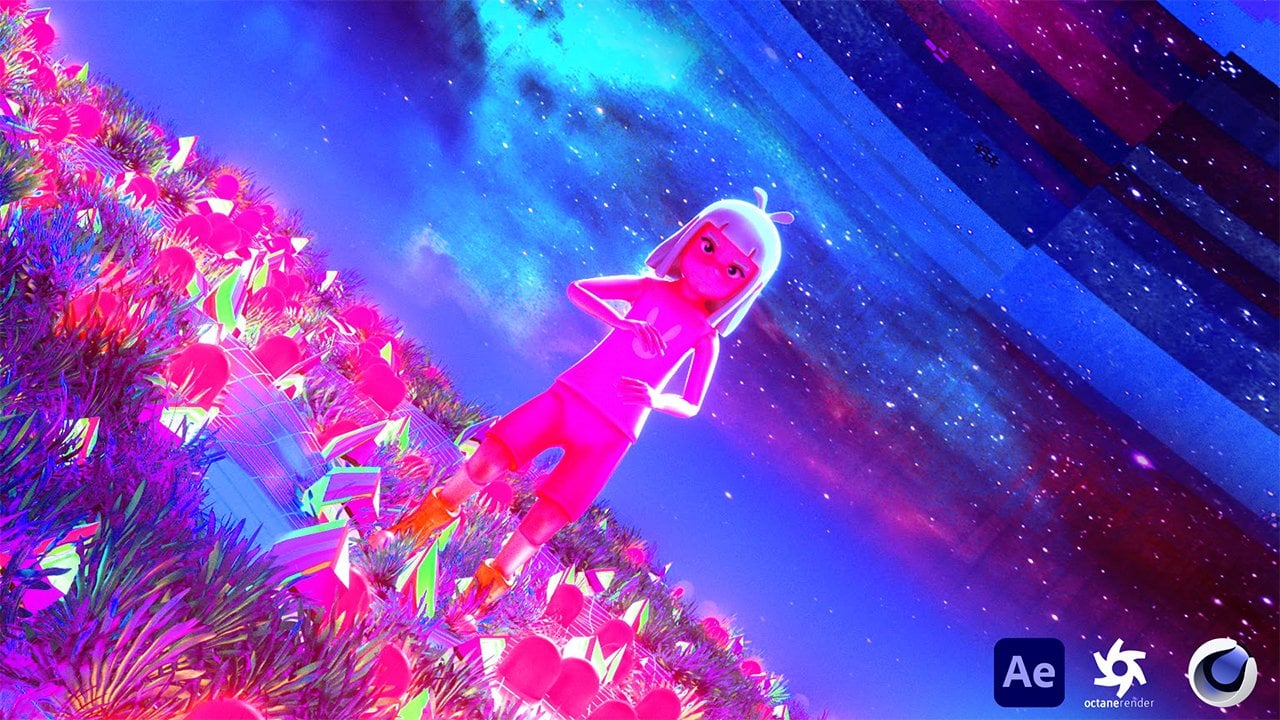
2. Showing Some Examples: Okay, so here I'm showing
just a few examples of what I've created using the techniques that I'll teach. Basically, right
here, you can see the flowers that has been
created around this person. In the middle, we
have this free space that is also animated,
getting bigger. That's the main logic here. Right here, it's just
applying the flowers on the plane and doing the
animation, making them random. While right here, it's
about animating this path, or animating these plans
to follow a certain path. I've tried to synchronize the movement of the flowers with the movement of the person. Yeah, these are
just some ways of using the techniques
that I'll teach you. While in our case I'll make it the person that walks has
no flowers around him, while everywhere else there
are flowers similar like this but also animated like
this one in inverse way. But yeah, I just wanted
to show you how used these techniques
in a creative way and maybe it's
sparked some ideas. Now let's move on
to the technique.
3. Explaining the Basic Technique in Cinema4D Octane: Now we are in cinema for D, I'm going to open octane render, because we're going to use
the scatter as a beginning. We just need to create a plane. We can increase
the segments here. Also we can make this bigger. I'm creating this just to show
the basic way of doing it. And of course then we
can do adjustments. First of all, you go to
object octane scatter. Here on the octane scatter, you need to put the
elements that will be distributed on the surface
that you'll decide. In this case, we go to
distribution, make it surface. On the surface, we apply the plane because
this is where you want to distribute the elements. As you can see, the green
lines that orientate you towards the position
of the elements, we can use a sphere for now. Just get a basic idea
of how this works. I can increase the
segments of the sphere. We just need to apply
it below, like this. As you can see, it
is already applied. We will go through
these elements later through these settings. But for now, just
see the basics. Now we need to go
to go to plane. Yeah, it's right
here. This plane is an effector that we need to
apply to the octane scatter. If we go to effects, we just need to drag this here. Right now, we just see
this strange movement because of the position
that is changed right here. What we need to do now is
go to this fall off and make sure to add spherical
field. It's right here. As you can see here is
the spherical field that will affect
the octane scatter. Now to make the changes, we need to uncheck the position and just change the scale. I'll go with uniform scale
and make this minus one. Because what I'm trying
to achieve is to make the small spheres on this
spherical field invisible, and the rest to make
them visible and bigger. This way we can animate it. After we make this minus one, we go to spherical field here. We need to play
around with the size, with the strength here.
Here is the strength. You can also do it by
dragging it like this. As you can see, the
bigger you make, the more effect it
has on the spheres. Right here, you can
see that the spheres disappear because we put
the scale minus one here. This is the parameter
that is changing. Of course, we can change this inner offset depending on the form that
you want to create, and of course, the
size or the position. Of course, you can
also animate this. You can go from here, let's select the key frame. Go to the other key frame, and let's make the
movement linear. Basically you click on the
first one, hold shift, click on the last
one just to select all the animated parameters and go to she trek this linear, you'll see that
this is animated. Yeah, as you can see, you can also do the
inversion of this one. If we go to the spherical field, just go to invert. And as you can see
that the spheres appear only where the
spherical field is. Basically, I've done something similar for the animation that I showed you before where the flowers appear after
the person is walking, but I'll go through that later. Okay, let's make this as it was. Let's uncheck the invert
now to make this random, you can go again to the
effector and go to random. Here. You can animate or just change the position,
scale and rotation. Just make like random numbers. To see the changes you need to make sure that it's
under the effector. We apply this, okay? Yeah. You can see how it reacts. Yeah, that's up to you.
If you want to change it. If you don't want to
change it, you can just uncheck this same thing for the scale to make this
even more random. You can add also another
effector, the shader. Let's apply it here. Let's
uncheck the random for now. Just so we understand
better here on the shader, what I'd like to do usually
is just go to shading. Of course, you have also
this scale selected. Yeah, as you can see, it scales up the elements on the shader. I go to Noise, just use the random noise can
apply some contrast. If I increase the brightness, you'll see that the
elements grow up more. If I decrease it, we can see them to get smaller
because it follows this path. The black ones represents the
elements getting smaller, and the white ones the opposite. You can also increase the
global scale based on the size of your scene. Yeah, in this case this makes it even more random as
you can see right here. Also make the scale one
to see more the changes. I hope this wasn't
too much to process, but basically it is the octane scatter effect from octane you apply below the element that you want to be distributed
in this plane. Then to make it more random, you can apply the random
effect, the shader effect. And then to follow a certain path to have
more control over it, you apply the plane
and spherical field.
4. Animating a Character in Mixamo: Okay, now that we learn
the basic technique, we want to get creative. The next thing that
I'll do is just create an animated character for that. You can use my free pack with these three D humans OBJ file. You also have these glitchy
textures that you can use. What you need to
do is go to Mixamo and then go to Upload Character. And you can pick any of these. I'll go next. Just a just these here. Now let's click here. We can a certain animation walk. Of course you also have
characters from mix itself if you'd like
to pick any of these. But in this case I'd like to use my own search for walk here. You can see all
the animations of, You can also choose other ones, but I'll see, I'll pick one. Yeah, I think I'll
go with this one. Walk backward, right here. You have also some settings
that you can change. For example, on this over drive, you can decrease this
and make the animation slower on the character arm space. Yeah, you can make it
a little bit bigger. I think that's okay. So we don't have any interactions here. We can make this
longer on the trim. Yeah, that's nice. Also, you can check this in place right here. It
just stays in place. And you can animate it in Cinema Ford from one point to another. I think
I'll do this. I'll keep this in place
and just download. Now that we have this, we
can move again to cinema.
5. Creating the Scene: Now I'm opening the file that we just download it
and I'm going to copy and base it
on our main scene. We can group this by
selecting everything right click and go to group
a group object, okay. Now to scale this down, make sure to go to this object, hold and go to object, go to scale, and we
can scale this down. Because otherwise if
you don't do this, you may get some glitchy. Yeah, this distortion
always make sure to be object mode when you scale down or up
these characters. Now the next thing that I'll
do is make sure to make the timeline twice as
long as the animation. Because I'm going to
duplicate the animation itself because right
now it stops at 121. Let's check these for now. As you can see, it stops here. For that, I'm going to go to Select Children to make sure
to select the animation. Now go to show tracks. Let's see the
timeline better here. I can just go to edit, copy. Go to this frame right here. Let's make sure it right
after the animation ends. I'm just going to
duplicate this edit. Paste. Now, as you can see, it should be 242
double the length. If I click Play, you'll
see that it will continue to animate as a loop. Now the next thing
that I'll do is to animate the position of this. Because right now
as you can see, it moves in place. I'll make sure to rotate. You can hold shift to
make it 90 degrees. I'll start with the
first position. Okay? Actually, this
moves backwards, so I guess I'll
have to start here, Go to the last frame
and just go back. Now, depending on the
length of the movement, you may need to do some
adjustments to put it, put it further away. Because when you click
Play, you will see that, first of all, we need
to make this linear. Because when you click play, you may see that the
movement of the legs, yeah, it's slower compared to the movement of
the human itself. As you can see, it doesn't
really make sense. But first of all,
let's make sure that the animation is linear. Now, we need to make
the adjustments. For example, I try to
put it here, okay. I think this fits very well. I'll leave it like
this. And of course, if you want to make
the timeline longer, you may need to duplicate the frames of the
animation again. And of course change the,
the position of this. The speed of the walking matches the speed of the
path that the human follows. Okay. Now the next
thing that I'll do is to adjust the camera. Because based on that I'll do all the other
adjustments like increasing the size of the plane itself or the flowers
that I'll add. I'll add the camera just so I can have a certain orientation. I'll go to object and
make the focal length 90 because it gives a
more cinematic look. First of all, I will also adjust the width and
the height so we can have this other ratio
that I use for Instagram. Okay, So now that I have this fixed position of the camera, I know where to do all the positioning of the
other elements. For example, right now I will
adjust the plane Is yeah, so it is inside. I'll make it bigger. Okay.
Now that I have this, the next thing that I will do is animate the spherical field so it matches the
movement of the human. I'm going to lead the
animation that I did before. Okay, now what I will
do is just try to match the position of
the human character. I'll make sure to put
it in the middle of it. Now let's set a key frame. I'll go to the last
frame, and of course, adjust it again like this, making sure it is
linear animation. Now let's see if this works. As you can see, it follows
the path of the human. And overall it's okay. But of course, we can
make adjustments. For example, we can
the circle smaller, we can decrease the size
to make it even smaller. But just wanted to show
you the overall idea. Yeah, I think I'll make
it smaller for now. Okay, now I'm going to
save the project and the next thing that I will
do is work with the flowers.
6. Adding the Fflowers: Now when it comes to the
flowers that we will add, you have different options. Personally, I will use
the Forester plug in. I just go to Forester
and just go to this multiflora on the library. I have a lot of options
where I can choose from, but I wanted to show you also some other options
that you can use. One of them is this
Quicksell Bridge, where you have a lot of things
that you can find here. One of them is also
the flowers that you can use for this project. You can download them as
FBX files with textures. Another way to
find flowers is of course on these websites
like CG Trader, just search for flowers and you'll find a lot
of them also free. I have this pack that
I've basically using some for plants
and I've converted them in OBJ files for anyone
who doesn't have Forester. How I've also created
these strange plants. You can find it for
free on my patron. But of course if
you want this one, just send me a message
and I'll make sure to give you a code so you
can download it for free. Yeah, these are the
options where you can download some flowers and of course you can also
use other elements, whatever works best for you. But for now I'll
use this one I'm using for Ester because
the advantage that it has is that you can
also animate the plants, For example, this random one, you can just go to this global. And besides changing the seed, animate the growth,
change the size. You can control the grass. How many to add to remove? Of course, again, even
animated basically, you have a lot of control over
the plan that you create. You can change the shape of
it and animate the growth. What I will do, what? I will create a new
project just so I can pick some flowers and then come back to apply them
to the octane scatter. Okay, now that I've created
this collection of flowers, I created each of them
in a new project because sometimes there is this
glitch that the new flower that I create gets the materials of the previous flower to avoid the solution that I
found is just to create a new project for each
flower right now, I'm going to also convert
materials so we can have them to octane materials and
remove unused materials. Now to make this
look even better, what you can do is also play
around with the materials. For example, you can copy
the shader from the diffuse and make sure to apply
it on the transmission. This makes the light of the environment to reflect
better on the flower. You can do that with all the parts of the flower
that you want to change of. To make it even more simple, you can remove
duplicated materials because I see that
some of them are the same as you can see. If I uncheck the transmission, you can see that it gets darker. But in this case,
I'm not going to do this because I have in
mind something else. I want to animate the colors. I don't want to overcomplicate
it with the materials, but just wanted to show
you that this technique really help for the flowers
to look more natural. Okay, let's copy
these. Paste it. And I'm going to put them all
under the octane scatter, so I'm going to move
them from the scenes. Yeah. Now, as you can see, everything is a little bit messy because of the
size of each flower. Now, what you can do right here is play around with
the octane scatter. If you go to distribution, you have the, if you want to make more flowers,
you can increase them. Here. Also, you have the
seed to get random ones. Also you have this
position scale and rotate now to scale the flowers, you can go to each
of them and go to this multiflora size
or grow global. Yeah, I can make them smaller. Or you can just go to
the scale right here. And you can change this too. I don't know, maybe 0.5 You can scale them down
all at the same time. Something else
that you can do on this position, scale and rotate is also apply a shader the same way that
you did here with the shader. So we can apply the
noise this way. We don't have them
all in the same size, but some of them are bigger,
some of them are smaller. As you can see
right here. You can also change the global scale. Now we can reapply the
random right here. I will play around again with these parameters just to
see what looks better. Again, I can also
apply the shader. As you can see, these
ones make it more random. Again, I want to
make these smaller. I'll go to scale
and maybe make this 0.2 Now something that I don't like here is that we see the flowers distributed
in a certain line. And I think that is
because of the segments of the plane As you can see
here are the segments. Let's undo this. And
I'm going to make it, I'm going to make it bigger, I think maybe. Okay. Yeah, I think that helps
to distribute them. To make them more
random, I'm going to adjust the spherical
field as well. Now, at this point, it is
about changing the size of each flower to create a
nice random distribution. Because right now I see that the orange flowers
are dominating. So I'll go to each of these and play around
with the size. Now something else
that I can do is go to each color of the
flowers and change them. For example, let's go to
this red one on the diffuse. I can go to color
correction here. I can change the hue. The hue saturation, and so on. I'll make sure to adjust
any of these to create some nice pastal colors and
then move on with the rest. Okay, now that I
change the color, the last thing that I'll
do is add some winds. I'll make this wind on. I don't know if we can
see on the preview, but yeah, the flowers get
animated, but this is too much. The wind speed,
0.35 is too much. From my experiments, I've
noticed that 0.04 it's enough. I'll make sure to apply the same thing on
all the flowers. Yeah, we can see
the preview now. A little bit. Yeah. Okay. Now I think we have
the basic animation. So the next thing
that we will do is work with the lightning
and the materials to finalize the whole thing.
7. Lights and Materials: Now my idea about the
lightning is just to add a nice octane daylight sky and see what angle of
the sun works better. But I wanted to show you also
this other technique where you can apply an
HDRI environment, an octane sky, and make
this thing all dark. Of course, you can apply an octane sky here
if you have one, but I want you to try something
by making everything dark and just adding on
octane spotlight. Yeah, here is the spotlight. We can rotate 90 degrees. I'm going to adjust it so we can see the human right here. Yeah, what you can do
is also animate this. So here is the first frame. Let's go to the
last frame again, put the position here,
set a key frame, and let's make sure that this
is also linear animation. Okay, Yeah, I just wanted
to show you this way of doing the lightning in case you have
these kind of scenes. Light itself follows the person of course here on the power, you can increase it
to get more light. You can also go to this camera
visibility and we don't see this fog, change this more. You can change the color
here on the light medium. You can also just apply a color. Yeah, that's one way of doing these animations
with the light. But in this case, I wanted to make something
more natural because this is for a more
dramatic animation. I'll just go with an octane daylight and let's rotate so I can see
what angle looks better. Okay, I think this
angle is nice. If you like, you can also
add an octane area light. If you want to add more
lights, for example, you can try to add it somewhere on the angle just to get a nice tone of light way. I'm
going to adjust it. If you want to add extra light, you can put it
somewhere on the side. And of course, you can
also adjust the color. You can see that the
whole thing gets the tone of the
color of the light. You can decrease the power here. But I'm not going to add this because I want to keep
everything natural. Right now, I'm thinking about the color of the ground and
the color of the person. I'm thinking to go very simple, I can copy this
color right here and just applied on the surface
below just to keep it simple. And I'm going to create
a new material for the character and just apply it. Okay? I need to make sure
to apply on each element. Now I can decide if I want
to make it in another color, but I'm thinking if I should
keep it white or black. Okay, what I will
actually do is animate the color of this front
texture. I'll go to color. Make sure to just leave it
as it is on the first frame. And I'm going to
animate the brightness. If I go on the last frame, I'll just decrease the
brightness and this will convert to black again. Let's make this linear. I'm thinking to do the same thing also for
the colors of the flower. For example, I can go on
this one here to animate it. To make everything white, I just need to make the diffuse
color white right here. And animate the mix. Because this mix right here
mixes the texture and color. The color is white, the texture, you can see that right here
that it goes to white. This is what I'll do
on the first frame. I'll make the mix to one, We have only the texture. On the last frame, I'll
make the mix zero, so we have the white color. I'll do the same thing for all of the colors just so we
can have a full animation. Okay, animated all the elements. All the colors. As you can see, it starts in a colorful way. As we go forward, everything
turns to black and white. I need to also animate the
character itself right here. I need to make it, to
make the color white. Now the final thing before
I render the scene is go to octane camera and play around with a camera imager
and post processing. If I enable this, I can
increase the Bloom power Power. Chi, we don't have any. Yeah, it's just
the main character that we can add glare to, but I think it's too much. So yeah, when it turns to white,
it will be too much. So I will disable this and just go to camera
image enable this. And here I can play
around with exposure. Basically it is just
a color correction. Right here I have
this custom lot that I use almost in all
my three D artworks. It gives this really nice look. But of course, you can
also test all of them. This one is nice as well. Okay, just some
minor changes here. Just changing the exposure, the gamma and adding
this custom lot. Now the final thing
that I need to do is just render this. I've put this to path tracing because with
direct lighting, yeah, you can see more shadows. Path tracing, we can see
a more natural look. I think I'll go with
maybe around 800 samples. I'll lock ratio and turn this, yeah, make it a
little bit bigger. Animate all frames,
go to octane render, change the format to PNG
and just pick a folder where you can save this after
the render is finished. I'll move to After effects.
8. Finalize in After Effects: Okay, so now that the render
is finally finalized, we just need to open
the PNG sequence. Yeah, we just need to
click on the first frame, make sure the PNG
sequence is checked. Click Import Now,
we just drag it, and the timeline is created. Now in after effects, what I usually do is just
do some color adjustments. So first of all, y,
let's see the animation. I think it looks nice.
I'll just right click, create a new
adjustment layer and go to this lumetri
color double click. Here you have the basic
color adjustments. You can change the exposure, contrast, highlight
shadow, and so on. And you can also go to
this creative to the tint, the shadow, tint
the highlight tint, the curves, the color
wheels, and so on. But personally, I just work with this first
one, the basic correction. Okay, so this is the difference. I can also add color
balance again, just play around with these to see if you like a certain
color combination more. Again, in this case
there is no formula. I just change this from left to right and see
how I like the colors more. The purpose of this is just
to blend everything together. Okay? You can also change the hue here, but I think I'll
leave it as it is. Yeah, not going to change it. Yeah, at this point I'm just
going to export this as MP four using the
Adobe Media encoder. The format should be 264. I'm a select the folder here, here is the size. Now I'm just going to
change the target bitrate. I'm going to change it to 15, just so this estimated
file size is less than 20 megabytes. Because I'm going to
share this on Instagram. And if I increase this a lot, the estimated file size will get bigger and then Instagram
will compress it. It's better to
compress it yourself on Adobe Media encoder. Let's click. Okay. Yeah. Now I will render
this. Yeah, this is the final animation. I hope you found this helpful. And of course, for any
questions just let me know. Yeah, thank you for
watching and we'll see you on the
next tutorials by.
 Klarens Malluta, Visual Artist