Transcripts
1. Welcome and Introduction : Welcome to my new class
cute watercolor chicks, 12 easy and fun paintings. In this class, we
will be painting 12 adorable watercolor
projects featuring cute little chicks and hatchlings in different
styles and mood. Some will be simple and quick, whilst others will have
some more details. So there's something
for everyone. You will find a variety
of checks in here, some tiny and fluffy, others full of character
and personality. A few projects feature
groups of checks and others focus
on a single one. For some paintings, we will even add soft background with grass, sky and warm sunlight to
make the scene come alive. So these were all
the 12 projects that we'll be doing
for this class. Apart from this, we have two additional projects that I'll be showing you one in the beginning and one at
the end of the class. Hi, my name is Vishal, and I'm an artist from India. I teach watercolor, oy, pastel and ink beast art
classes here on skilsia. These are some of my classes. You can also find more of my work on my
Instagram and YouTube. We will start the class with a very simple and basic
sketching for our chicks. Then I'll be showing
you some detailed one. Then we will move on to the colors that
we'll be using and some watercolor basics that
I'll be using in our project. After that, we have
the 12 projects. Almost all the projects
are in meal time, so you can always
follow along with me. This is one of the
easiest chick or hatchlings that I'll be showing you in the beginning
of the class. And then we will proceed on
to the 12 main projects. So I'm showing you
all the project, starting from the last ones. The paintings in this class or the project sticks around
ten to 20 minutes, and most of them are recorded in real time, as I mentioned. So if you want, you
can follow along with me or you can do it
at your own piece. This class is beg N friendly. So even if you are never painted before, you can jump Triton. By the end of the
class, you will have a whole collection of cute watercolor checks
that are bright, cheerful, and full
of personality. So grab your brasses and let's
start painting together. It's going to be so much fun. I'll see you in the next video.
2. Class Project : For your class project, you'll be creating your own set of watercolor checks and hatchlings inspired by the 12 adorable
projects from this class, you can choose to paint one, a few or all 12 of the projects. It's completely up to you. Each painting sticks
around ten to 20 minutes, making them quick, fun, and perfect for daily practices. Throughout this whole class, we will be exploring how to
skate simple and cute checks, basic watercolor techniques
like layering, blending, and wet and wet technique, adding small background
details such as grass, clouds and sunlights
and bringing your chicks to life
with expressive eyes and bright cheerful colors. Once you are done,
upload your artwork in the project gallery so that we can see your
amazing chicks. Don't worry about perfection. Skillshare classes are all about practice, progress
and creativity. I'd love to see how
your chicks turn out, whether it's a single chick in the sunshine or a whole
flock in the garden setting. See your favorite ones and tell me a bit about
your process. Apart from this,
you can also create bookmarks like this
that I have created. I have not included this
in the class project. But if you want me to paint this kind of cute
little bookmarks, let me know in the
discussion section, and I will include this in the extra videos for this class. Apart from this, you can also
upload your project scenes, sketches, colour sketches
or even partial painting. It's always inspiring to see
everyone's learning journey.
3. Supplies : Um, this class, you will very basic supplies,
pencil, eraser, watercolor. Here I'll be using
Camelins watercolor. You can use any watercolor that you have, Watercolor blushes. Any small to medium watercolor
brush will do their work. I'll be using this
larger watercolor brush to do the wet on wet techniqu. Then we have got
this fine liner. I'll be using to
do the outlining and a little bit of detailing, masking tape to secure the Picker watercolor
or mixed medium paper. Here I'm using 300 GSM paper. You can use any other
paper and see that it's more than 200 GSM and
a little bit textured. I'll see you in the next video.
4. Easy sketches : Welcome to the first
time on Strian venue. In here, I'll be sewing in here, I'll be sewing the easiest
kind of chicks that I'll be using for
most of our projects. These are the simple heads. So these are the simple sips for the heads that I'll be using circles and for the rest of
the body, semicircular seeps. You can consider this to be the Sep of a
watermelon slice too. This second check is
facing towards the left. This tick is facing towards the center and the remaining two, let's
do the remaining two. The saps of the sticks
and the hatchlings are quite simple circle and a combination circle and a
combination of semicircles. To make it a little
bit more curvier, you can bend the
circles a little bit more for the
rest of its body. As for the wings, too, I'll be adding another
smaller semicircle. The foots, the beaks and the eyes will be
quite simple, too. These are the basic
simple postures that I'll be using for
most of our project. Now for the second rows, the checks will be facing
towards the ground. For the first row, we
have the chicks facing towards the center or
towards the right or left. But basically, they are looking above or at eye
level, but in here, the chicks will be facing
towards the ground, picking some food
from the ground. So these are the two
chicks facing towards each other and picking some
food on the ground. Now let's create two more. Here we have got a horizontal
chick and the final one. Now let's make it a
little bit more defined. For this one, I'll be
creating the two wings. That is all the two wings of
this check will be visible. So these are the basic
outlining shapes that I'll be using
in our project, and then I'll be going
in with the color. Then I'll be going with the watercolor to
add the coloring. But for now, but in here to show you how I'll
be creating it, I'm using this fine liner to go over the outlines and
adding the details, the beaks, the leg, and the tiny little eyes. I have increased their speed. If you want to follow
along with me, you can pause the video or
you can reduce the speed. As you can see in
here, I'm not treating any detailed eyes,
beaks, or fin. If you prefer, you can make them a little bit more detailed. To create a little bit of fluffier texture for the wings and the rest
of the chicks body, you can create a little
bit of broken lines. So these are the kind of broken line that I am talking about, a little bit of small
hatching to create this kind of fluffier texture
for our chicks. Let's do the remaining four. In here, I have created very simple and basic
posture for our chicks. If you want, you can
experiment on your own and create some detailed and defined
postures for the chicks. For the next video, I'll be showing you a
little bit more detail and defined versions of the
chicks and the hatchlings. I'll be adding a little
bit more detail eyes, beaks and the legs. As well as I'll be
making the wings and the rest of the body a
little bit more fluffier. I'll be adding a little bit
more details to the head. Now let's do the outlining
for the last one. In here, I decided to create. In here, I decided to
sew both the wings. Both the wings are visible. And with this, we are done with the basic sketches
for these easy birds. Now let's remove
the pencil lines. And with this, we are
done with this section. I'll see you in
the next one. And
5. Detailed sketches : Welcome to the second section. In here, we'll we
continue where we laptop. I'll be showing you
more examples of different lineup chicks that
we'll be using our projects. Here, the chicks
will be a little bit more detailed, more defined. So let's start with
this first one. So here we have got a fluffier
version of the chick. The proportions of the head
in the body will be a little bit different from the one
that I showed you earlier. Primarily, I'll be making
the heads a little bit more larger for some of the chicks
and the hatchelins in here. And for some of them, I'll
be making the heads a little bit more smaller as
compared to the earlier one. This is the outline
for our first chick. I'll be adding the
details later on using the fine liner. Let's
do the second one. This is a little bit similar to the first demonstration video. So in here, I'm
dividing in here, I'm dividing the portions
of the chicks into different sections so that
you can easily draw it. So we have got a circle,
triangle, semicircles, and a little bit and a
little bit of courtesy for the back of this chick.
Let's do the third one. In here, the proportion of
the body is a little bit larger as compared to the
first chick that we created. Now, let's create
the wings for it. For our projects too, I'll only be creating
these kinds of outlines, and then I'll be erasing
it and then using the watercolor to do the
outlining and adding the color. But in here, I'll be showing you how are we creating it
using the fine liner. Moving on to our fourth chick. So this is a little bit different
from all the other one. Here we have got somewhat here we have got somewhat
of triangular see for it, a curved triangular sieve or mushroom head like se
for this fourth chick. For this fifth and
the sixth chick, these are somewhat similar
to the first video. In here, I'll be making them
a little bit more details. I'll be adding a little
bit more definition to their wings and as well as
a little bit defined legs. So here's a small chick. Now let's make it a
little bit larger. And as you can see,
the proportion of the head and the
rest of the body is somewhat different from the one that we practice in
the first video. I'm using the same
kind of basic seeps that I used in our
earlier video. I'm adding a little bit
more details in the form of back tails and a little bit more definition
to the wings and the foot. And with these we are done with the fifth and
the sixth one. Let's do the seventh
and the final one. This will be somewhat
similar to the fourth one, but in here, I'll be changing the proportions of the head
and the body a little bit. For the fourth one,
we have somewhat of seam proportion for both
the head and the body. In here, the proportion will
be a little bit different, somewhat of triangular sep or
mushroom head for the top, and a little bit of enlarged circular sap for the
rest of the body. Now let's add the
tiny wings for it. If you want to make the wings
a little bit more detail or if you want to create hands like projection,
you can do that. Let's add the cowlx on
the top of this chick. Yeah, we are done with all the simpler demonstration
of the chicks. Let's do the outlining for
the additional sieves. You have got crowns
and this magical cap. We simple and basic
sieves for it. Now, I'll be showing you how
I'll be creating the legs, the beaks, and
different positions or poses for the
head simple heads. So these are the
very simple feeds or the legs that I'll be
creating for the chicks. If you want, you can add a little bit more detailing to it. Here's another one. So
this is a little bit bend. For most of the projects, I'll be using simple
and straight legs. If you want, you can
create this kind of a little bit curvy or bend legs. And here's a very simple
and basic see for the beak. For most of the beaks that are facing towards the
right or the left, we'll have triangular s. But
for the front facing one, we'll have this kind of rhomboid C. Now let me show you what I mean by
triangular C for the beaks. This is facing up, and in here, we have got open wick and here I made a mistake.
Let's correct this. So it would be a combination of two triangular C like this. So we have got openw in here. Let's create one more
example of that openw. And here we have got
another front facing weak. This is a little
bit simpler version as compared to the first one. You can add two small
dots to represent noses, and with these we add with
the six pencil sketches. Let's do the outlining
with a fine liner. In here, once again, I've
increased the speed. If you want to
follow along with, you can reduce the speed
or you can pause the venu. So these are the
kind of broken lines that I'll be using to create the fluffy texture for our chicks and the hatchlings. I'm using somewhat
of broken lines to create this kind of texture. So feel free to
experiment on your own. You can do a little
bit of hatching and cross hatching too
if you want to make them a little bit more detailed.
Let's do the second one. Here, too, I'm
using a little bit of broken lines to create this kind of weary texture
and a pattern for the wings. If you want, you can
also create if you want, you can create a
straight uniform lines. Oh and with this, we are done with
the outlining for the second one. Let's
do the third one. For this one, we have got
coalex at the top of its head. For the remaining
three larger one, for the remaining
three large chicks, I'll be adding the
coaolx on top of it, three or four coalex
on top abnm and I'll be making the eyes a little bit more detailed, a bit bigger. And yeah, I'll be
creating fluffy taxi for them. Let's do this one. Fluffy taxi for its stomach, tiny little ice
less kind of big. Now let's do the
two smaller ones, a little bit more
detailing to the beaks. Let's move to this one.
For the colorings, I'll be using two or three
sets of the yellows or cher. If you want to add more details to the
wings and the tails, you can use a little bit of more colors to it and
do multiple layerings. But mostly I'll be using two or three layers
of the colors. Let's do the final
one, the biggest one. Let's create this kind of broken lines to create
the fluffy texture for this In here, I decided to create
a bit larger eyes. Let's create a little bit
detail beak for this one, a little bit of texture for the remaining
section of its pony. Let's create its feet, a little bit of band feed. And yeah, we are done
with all the chicks. Let's do the outlining for the extra details and
the remaining section. So we have got crown in
here, this magical care. To create somewhat
of fluffy texture, All mostly using this kind of broken lines to create
this kind of texture. If you want, you can proceed
with the straight lines too. I'll be using the fine liner for some of the project,
not for the all. If you want, you can use the fine liner for
all the printers, but I'll be creating
the texture, the fluffy, but I'll be
creating the fluffy texture, the outlines mostly
with the watercolors. A bit darker sets of the gallows or the orchard
to do the outlines. But yeah, I'll be sticking
with the watercolor. Let's do the outlining for the chick heads and With this, we are done with
this demonstration. Let's use the pencil marks. If you want to add more
details to the wings, the tails, you can do that. But since I'm creating
simple and easy chicks, I won't be doing that. And yeah, with this, we are
done with this section. I'll see you in the next one. Where we We will be
using the colors.
6. Colors and basic blending : Welcome to the third
section in here. I'll be showing you
the colors and some of the basic
watercolor techniques. For most of the projects, I'll be using combinations of lighter and darker seeds of the yellows and a little bit and a little bit of ocher
and a little bit of red and the orange for
the beaks and the legs. So these are the five
colors that I'll be using mostly Camo, yellow ochre, lemon yellow, orange, and raw siana. Now let me show you
the color swatches. So here we have the light
yellow or the lemon yellow. This is Camus u. Now we have got this orange. And lastly, we have got asiana. These are the four
or the five colors that I'll be using for most of the easier versions
of the chicks and the hatchling and for the defined and a little
bit more detailed ones, I'll be using other colours too. Now let me show you a little bit of blending of the colors. I'll be starting with the
lighter sets of the yellow. In here, I'm using
this lemon yellow. Here you can see I'm keeping the consistency of the color
a little bit concentrated. The color is a little bit diluted so that we
can easily blend it. And on top of it, here
I have added Cambo. It will blend on its own. You'll have to spread
it a little bit, and these both
colors will blend. So I'll be using this
color combinations for the lighter sons or the
lighter types of the chicks. To make it a little
bit more darker, you can add a little
bit more darker seed on the side that you
want to make it darker. Let's do another
example in here. Instead of using the lemon, low as the primary layering. I am using this Camboz. Let's do a circular.
If you're not comfortable with directly
creating the circular seed, you can use the pencil
to draw the guidelines. Now, let's completely fill
it with this Cambio zu. And in here, I'm
using this ocher. So adding this ocher
on the one side. And as I mentioned, I'm keeping the consistency of
the color a bit concentrated and the
colours are a bit diluted so that they can
easily blend with each other. Et's do another example. In here I mixed a little bit of white with the lemon yellow. So here we have got pale yellow, and I have kept the consistency somewhat seen now going
in with this Cambou. We have got a bit lighter seed. So here we have got a bit more lighter seed than
the lemon yellow. And now let's do the blending, spreading this camo
u a little bit more. These are the kinds
of the blendings that we'll be doing for our chicks. I'll be filling the insides of the chicks with
the lighter sets, and then I'll be going in
with the darker seats, do the outlining and a
little bit of blending. Here's another example. So here we have got a concentrated light yellow
or the lemon yellow. For the upper parts, let's add a little bit more
concentrated camziu so this blending or layering is somewhat similar to the
wit on bit technique. I'm not I'm just
spreading the colors. It's blending on its own. And in the same manner,
I'll be creating the grass. So I'll be going with the lighter tone of the green
with a diluted consistency, and on top of it, I'll be adding a bit darker tone or
darker side of the green. Here I'm using a lighter tone of the green, and
as you can see, I have kept the
consistency a bit lower by adding
more water to it. And I will wait for it
to dry a little bit. And then on top of
it, I'll be going in with this darker
side of the green. Start with the lighter
side of the green, add a little bit of more water
to make it a bit diluted, and do the first layering, then wait for it to
dry a little bit. And then on top of it, go
in with a bit darker side of the green to add another
layer on top of it. Don't cover the entire section, and this is how I'll be creating the grasses and the
grounds with the greens. If you want, you can
add a little bit of yellow or red dots to
represent flowers. For one of the projects,
I'll be doing that. Now let's do a proper
wet on wet blending. So here I'm using clean water. So here I'm using clean water
as the primary layering. And now going with the
slighter tone of the yellow, here I'm using a bit
diluted consistency of it. And I only added it
for the half side. For the other side, here I'm
going with this cams you. And yeah, let's add it for the entire section and do a little bit of
blending in the middle. Both the colors are
blending on its own. I'll be using this to
create the backgrounds, the sky or a little
bit for the grounds. Now, let me so how
I'll be creating a fluffier texture
for our chicks. In here, I'm using a diluted consistency of the yellow ocher, and I added a little
bit of white, and I added a little
bit of white with it. I'll be creating this kind of rough texture for the outlines, and I'll be doing two
or three layerings of the colors on top of it. For the primary
layering, I'll be using a bit lighter
tone of the color. And when it dries and when
it dries a little bit, I'll be going with a second
layering of the colors. Let's wait for it to
dry a little bit, and then I'll be adding another
layering of the colors. Here I'm showing you
how I'll be using weight and weight
technique for one of our project for the background. I'll be starting with the
water as the primary layer, and on top of it, I'll be going with a bit
darker tone of the columns. For our project,
I'll be using blue, but in here, I'll be
using red or orange. I'll be adding it near
the outline region, and it will spread on its own. It will spread on its own, but to get a little bit more uniform and
consistent spreading, I'll be using my brass to
spread it a little bit more. As you can see, it's
spreading on its own, but to get a little bit
more uniform consistency, I'm using my breast to
spread it a little bit more. For the inside, I'll be
using a bit lighter tone. In here, I'm using this ocher and it will blend on its we, the two colors, the
red, and this ochre. And when it dries,
we get somewhat of smooth gradient in
between these two colors. And to make the middle region
a little bit more lighter, I'm adding a little bit of
concntriy dhite in here. And as you can see, it's
spreading beautifully, and it will help the
blending of the two colors, the yellow, and the red. This primary layer has
dried a little bit, and in here, I'm going
with this organ. As you can see, it's a
bit more concentrated. And since the primary layer
has not dried up completely, it will blend a little bit
with the primary layer. Let's create this kind of
texture for the lower region. I won't be covering the
entire regions with it. The regions that I
make the regions that I want to make
it a bit darker, I'll be primarily adding I'll be primarily adding
the lines on that region, as well as for the entire
sections of the outlines. And as I move away from the
outline or the lower regions, I'll be decreasing the
intensity of the color, and we will wait for it
to dry a little bit more. Until it writes, let's
make the outline of it a bit more clear
and more crisper. Once again, I'm using this
red to do the outlining. Here, too, the color has
not dried up properly, so this darker tone
of the red will blend a little bit more
with the entire section. And we will wait for more white to dries to
add more detailing. Till it dries, let's practice a little bit
of more blending. In here, I'm using this. In here, I'm using the
lighter sad of the blue. I added a little bit of
white to the blue to get this consistency or
this sad of the blue. Now I'm going to blend it with a bit darker
tone of the blue. Adding this darker
tone of the blue. Here the consistency
matters a lot. As you can see, I have diluted the color a little bit
more with the water. Instead of this, if I have used bit darker tone or
concentrated blue, then the blending would become a little bit challenging
and difficult. And here I blended the colors by overlaying it on top of the
lighter side of the blue. As you can see, we have
created a somewhat of gradient in between the lighter and the darker side of the blue. Let's do the same in here. So here I've started
with the graystone. Here, too, it's diluted and
we are using a lot of water. Now I'm going in with the white. And it's blending
beautifully with the gray. So this is the second color
that I'm using for this. Once again, I'll be using the grey bit darker tone
of the gray in here. This time, I'm only using the
water to blend the color, spreading this gray, to
blend it with the white. And finally, let's go in with more darker
tone of the gray to blend to blend it with a lighter tone of the grey
to create a bit of gradient. Once again, I'm using
water to spread the colors to get
somewhat of blending. And lastly, to finish this gradient scale
that I'm creating, I'm using this black. Once again, it's diluted. I added a bit of
I added a lot of water to get this kind of black. And because of this water, it will act as wet
on wet technique. And with this, we are done with this gradient of black,
white, and green. Let's do one more example. So here I'm going
with this cher. I'll be using this to create ground for some of the project. Start with a bit
concentrated form of the color and then spread it. The upper section
will be a bit darker and the lower section
will be a bit lighter. You can do the opposite to
start with a lighter set and then increase the tone to
make it a bit more darker. To do a little bit
more blending, I added a little bit
more ocher and now let's spread the color and
blend it with a lighter tone. Moving back to create
the fluffy texture, this has dried somewhat. So this is the third
layering of the color. In here, I'm creating
more smaller strokes and overlaying on top of the other two layerings
of the colors. Small strokes to create this
fluffy or fur like texture. Since it has not
dried up properly, it will blend with the remaining two and create a little bit of subtle gradient as well as a bit of fluffier texture for
the entire section. As I move up, the intensity of the color is
decreasing on its own. So this is how I'll be creating for our
fluffy texture for it. You can add more
layers to make it a little bit more detailed
and more defined, a bit darker tone of the ocher. And with this, we are
the demonstration or the tutorial section
for this class. I'll see you in the next
video where we'll be creating the easiest sticks and
the hatchlings. Oh
7. Easiest chicks single color: Welcome to the first
watercolor illustration. In here, we'll be painting
the easiest chicks. So I'll be mostly using
only three colors, no layering, just
simple plain colour. I'll be using Ochre, camoziu
and light tone of yellow, lemon yellow or light yellow. As you can see, very simple
seats for our chicks, I won't be making any detail
eyes, beaks, or feeds. They will be very simple. The side is very simple, too. It is more simpler than
the easiest sketches that we did in our
first section. For each color, I'll be
creating three or four chicks. You can increase or decrease
the numbers of the chicks. You can also make it a
little bit more detail. You can make it big or small. So whatever you feel comfortable,
feel free to do that. I'll be changing the seats
of the chicks a little bit, and this is the fourth one that I am creating
using this ocher. As you can see, I
have diluted this occur a little bit
with a lot of water. It has dried up. Now let's do the Now let's go in
with the second color. It's advisable for you to
wait for the colours to dry, otherwise you will get smudging. So when you are done with using one colour to create the chicks, wait for it to dry a little bit, and then go in with
the other color. Then here I'm using this
lighter tone of the yellow. Here too, I diluted it, but not that much as
compared to the ocher. So it's a bit more concentrated compared to the ocher chicks. Now, let's create few more. You can also use the same color and create two variations, one with the diluted
consistency one with a diluted consistency, and other with the
concentrated one. Also, if you want to create a paler version of the chicks, you can add a little bit
of white to the color. And yeah we are done with this lighter tone of the
yellow, four chicks with it. Now let's go in
with another side. So this time, I'm using this This time I'm using
this Camus you. I added a lot of water to it. And yeah, let's create three
or four chicks with it. So I'll be adding the
sticks in the empty spaces in between this ocher
and the yellowt chicks. I won't be creating any
backgrounds or grasses. If you want, you can do that. But since this is our
first illustration and this is going to
be the simplest one, I won't be doing
anything like that. Let's create one more so
we can add it in here. We have got a little
bit more spies on the top right side and
on this left side. If you want, you can
add more chicks. Also, if you want, you can use a little bit
of darker side of the color to do the outlining for some of the
chicks like in here. I won't be doing it
for all the chicks, but I'm just showing
you as an example. You can do that using this Camus and going over the outlines of this lighter side of the chicks. Since it has not
dried up properly, it will blend smoothly
with the light yellow. And now it has dried up. We'll be adding
very simple weeks in the form of triangles, very small triangular see. Here I'm using a bit
concentrated consistency of the orange to
create the beaks. Okay. For smaller areas, mostly, I'll be using the
concentrated color since it will provide me
with more accuracy in precesonF bigger areas, mostly I'll be using a bit
diluted color consistency so that it will spread
and blend easily. I'll be adding this small triangular beaks for all
the remaining chicks. If you want, you can use
two colour combinations. For some of the chicks,
you can use orange and for other a combination of the
orange or the red or red. So for the eyes, I'll be creating two small dots. And as for the feet or the leg, very simple tiny straight
or curved lines. Now let's create two more weeks for the remaining two checks. Adding the B for the
last remaining check. Now let's create tiny little
feet for these chicks. So very simple lines
for the chicks. If you want to create a
little bit more defined legs, you can do as we practice
in the earlier section. But in here, I'll be creating this very simpler
versions for the leg. Some legs will be some legs or feet will be a bit straight, others will be a
little bit curvier. Here I'm using the same color, the orange that I
use for the beak, it has become a little
bit more diluted. You want to use a bit
concentrated color. You can do that, but here I'll be using the same
that I have on my bras. Let's add the legs for
the remaining chicks, and then we will
proceed to adding the eyes, small black dots. For some of the chicks,
I decided to create a little bit more
detail and bold legs. So in here, I'm using a bit darker consistency of the orange to create the feed. So yeah, let's
create the feed for the remaining five or six
chicks that we have in here. You can also create
the resemblance of feathers in the wings. You can use a bit concentrated
orbit diluted color, a darker side to create somewhat of semicircular
see for the wings. Carefully creating
the smaller lines to create the feet for
the remaining ones. If you're not comfortable with creating this kind of
smaller lines with abs, you can also use
breastbin if you have. Apart from that,
you can also use colored pencil to green
the legs and the beaks. And with these, we
are done with adding the feet for all the chicks
that we have in here. And now I'll be
creating the tiny little eyes where small dots. In here, I'm using
the fine liner to add or create the eyes. For smaller ice, I would advise you to use
the fine liner, since it will provide you with much more accuracy
and precision. You can do the same thing
with buttercolur breath, but with that, you will have to be super accurate
and super precise. Otherwise, the ice will turn
out a little bit more ger. A Let's add the ice for the remaining four
chicks we have in here. To make it a little
bit more interesting, you can use colored
watercolor paper, or you can create
a little bit of background or pattern
or doodles for it. And with this, we are done with our easiest illustration
of the chicks. Let's unmask our painting, and I'll see you
in the next video, our first class project. And
8. Warm afternoon gathering : Welcome to our first project
warm afternoon gathering. In here, we'll be creating
the same kind some of the chicks that we practice
in our first section. The easiest chick
sketching that we did. So let's start with creating the basic outlines
with the pencil, and then we will use the colors. In here, I'll be
using the yellows and the Cambooy a little bit
of green for the grass, and I'll also be
creating the background, the sky with the yellows. We simple seeps for the head
and the rest of the body, we have this circular see for the head and this
kind of somewhat of semi circular seep
or the seep of a watermelon slice for
the rest of its body. In here, I'll be
creating four chicks. If you want, you can add more or you can also
decrease the number. This two will be facing towards each other, and
the remaining two, one will be picking
something on the ground, and the last one will
be looking straight. Let's do the third one. So as I mentioned, this will be picking something
on the ground. So we have this
somewhat of watermelon see for its body and this
circular C for its head. If you're comfortable, you can
directly create the scene, or you don't have to start with the basic pencil outlines. You can directly start with
the watercolor brushes. For some of the
initial projects, I'll be starting with the
basic pencilla sketch. And as we progress, I won't be creating the pencilla
outline since you will become familiarized
with how you can easily create the easy chicks, since you will become
familiarized with easily creating chicks directly
with the water colaborss. These are the basic outlines
for our four chicks. If you want to add a little bit more detailing, you can do that. You can also create a
little bit of background like mountains or
some kind of pattern. I won't be doing that, but if you want, you can
proceed with that. Now let's lightly erase
this pencil marks. And, yeah, now let's
do the coloring. In here, I'm using
the light yellow or lemon yellow or any lighter
seed of the yellow Bili do. Instead of this, you can also use other sads of the yellows. This is our primary layer
with the slighted tone. In here, I have kept the consistency a
little bit saturated. But if you want, you
can dilute it more. For all the four chicks, I'll be using the same color as the primary layering and then
I'll be going in with a bit darker set to do the
outlining and a little bit of blending to create the
resemblance for the wings. Bring the color
for our third one. Instead of using the same
color for all four chicks, you can use different color
for the different chicks. Let's do the other one. As you can see, I
have sweets, dabs, Ab any small chic of
bras will do the work. So whatever you are
comfortable with, you can create this kind
of easy chicks with that. Now let's do a little bit of outlining and more detailing
with this cambziu. As you can see, I'm
going over the outlines, and since the color has
not dried up properly, it will blend a little bit with the lighter
side of the yellow. In here, I'm creating
this kind of small hatching lines or you can say broken lines to create a little bit
of fluffy texture. Also use this color to create the first layering for
our beaks on top of that. I'll on top of it, we'll be going in with
darker sad orange to make the beaks a
little bit more detailed. Going over the outlines
and a little bit of broken lines to create a
little bit of fluffy texture. In here, too, you can change
the color for one or two. You can use the Cambos
for the others. For the remaining one, you can use Ochre creating the
beak for this one. And also, let's create
the legs for this too. The whole portion of the fit
won't be visible in here. But if you want, you can
create that for the ground. I'll be covering it with
a greens, small grasses. Let's do the last chick. A little bit of hatching
for the lower side. And now let's create the wings. Adding the tiny little
legs for our chicks. Adding a little bit more details for the feet of the chicks. Mostly, I'll be covering the
feeds with the grass using this Camboo to create
small dots for the eyes. And we are done with this,
let's wait for it to dry, and then we will
add the details. Let's create the
background by sky in here. So here I started with the Camboo as the
primary layering. Now I'm going with only wed
to spread it a little bit. This is optional.
If you want to keep the project simpler, you
don't have to create that. Also, instead of using this
yellow to create the sky, you can use blues too, so lighter sats of the blue. I decided to use the yellows because of the same
color of the chicks. Adding more water to spread
it a little bit more. Instead of directly
starting with this, you can do wet on wet technique. Now here I'm going
with the orange. A bit of concentrated
orange on top of this Cambo and since
it's not dried properly, it will blend on its own, but to make it a little
bit more smoother, I'm adding a little bit more
water and spreading it. On top of this, I'll be
adding another layer to make it a little
bit more darker. Let's wait for it to dry a little bit until it's
dry leads to the grass, using this thinner
consistency of this yellow as the primary
layering for our grass. And once again, I'm
using this orange color, laying a little bit on top of the two layers of the yellows. In here, I'm overlaying this
lighter tone of the green on top of the yellow that we added as the primary
layer in here. So we can create a subtle
gradient in between the greens, as well as a little bit of
lighter tones for the ground. On top of this,
I'll be going with a bit darker side of the green when it dries a little bit. This is also optimal.
If you don't want, you don't have to create
the ground on the grasses. Now let's make the outlines a little bit more crisper
and more details. The colors have dried up. So in here, I'm using a
little bit darker tone, the orange color to
redo the outlining, as well as add it a little bit
for the beaks and the fad. Here, once again, I'm creating a little bit of broken
lines or you can see a little bit of hatching to create more fluffy texture, overlaying this on top of the
Cambo that we used earlier. Adding it on top of the fi, too. So we'll be doing the same thing for
the remaining chicks. As I mentioned
earlier, you can use other colors to make things a little bit more interesting. Instead of this range,
you can also use a bit of darker consistency
of the aqua color. Adding it for the fee. Now let's move on to the third
and the fourth one. If you want to
make the wings and the feathers a little
bit more details, you can add more fluffy lines. Let's do the outlining
for its head. Now, let's add
this for the beak. Going back to the wings. And yeah, let's create
the hatching lines, adding this for the feed,
adding this for the fee. And now let's do the last
chick that we have in here, going over the outlines. Adding a little bit of fluffy texture with the hatching lines, and then we will do
the remaining section, a little bit of coloring
for our background, our grass, and we will move
on to the next project. This is one of the
easiest project, and this is a 12 minute. After this, we'll be creating
same kind of chicks. But instead of four chicks, we'll be creating multiple ones. Creating a little bit
larger beak for this one. I decided to add a little
bit more orange for the upper section to make the upper section of the beaks
a little bit more darker. And here, we are done with
the orange for the outlining, creating a little bit of fluffy texture and for the beaks. Once again, in here, I'm going
with a bit more darker and concentrated form of the orange and laying it on top of this. Now let's spread it so that it will blend with
the remaining sections. The color has not dried
up properly in here, so it will blend smoky. Using water to spread it evenly so that it will blend with
the remaining section. And here, we are done with the clouds with the background. Let's do the remaining part. The grass in here, I'm using a bit darker tone of the green. I won't be covering the entire section and I'll be creating this kind of broken lines
in here with the grass. And I'm also covering
a small portion of the feed with
this darker green. You can use a bit of yellow
and orange or pink to create a small resemblance of the flower on top of
the green grasses. Let's add a little
bit more green for the bottom section
to make it a bit more uniform and a
bit more darker. And with this, we are
done with our grass. Insure that the color has
dried and then add the eyes. So once again, I'm using fine lining to create
the eyes because of it, because it allows me
more preciason and more accuracy and I can create
smaller ice with it. For the first chick,
I made a mistake. Instead of adding
the ice on top of the Cambugio yellow dot, I added it a little bit Going back once again with the orange to make the feet a little
bit more darker. And at least we are done
with our first project. I'll see you in the next one.
9. Golden flocks in the field : A Welcome to the second project, Golden Fox in the field. So this is somewhat
similar to the first one. Instead of creating
four single one, instead of creating
four chicks in here, I'll be creating ten chicks. The sins will be comparatively smaller as compared
to the first project, and in here, we'll be
creating multiple poses of the chicks that we practice
in the first section. If you want to
decrease or increase the number of the chicks,
feel free to do that. In here, I'll be creating ten chicks in different poses
and different positions. Since we have lots of chicks
for this second project, I'll be keeping it a little bit simpler as compared to
the first project we did. Instead of doing two or three
layerings of the color, I'll mostly be doing
only two layerings, one with a lighter tone, and
one with a bit darker tone. I'll be using the
lighter tone as the primary layer and then
go in with a darker tone, er or orange color
to do the outlining and to create a little bit of fluffier texture for
the body of the chicks. Continuing on with creating the outlines for the chicks
throughout this entire page. Instead of creating a single row of grass for the bottom section, I'll be creating multiple ones. So I'll be using a little bit
of wet one bit technique. The grass that I'll be
creating will be a little bit different from the one we
did in the first project, where we started
with a lighter side of the yellow as the
primary layering. But in here, I'll
be starting with a bit lighter and diluted
side of the green, then add a little bit of yellowy stone with the
yellow and then go in with the darker sides of the green to create the
resemblance for the grasses. You don't have to
create the chicks in the same manner and in the
same number as I am creating, feel free to experiment. Here I'm making
some of the chicks a little bit rounder as compared to the one we
practice in the first section. Since this is our
second project, I am not using lots of color, but if you want, you can create. But if you want, you
can turn this project into a multi colored project and use varieties of
yellows and orchard to create multiple
colourful chicks. Let's continue with creating more chicks throughout the
entire section of the speech. One more thing you can do to make it a little
bit more detail. You can use the fine liner
to do the outlining. So after releasing
the pencil outlines, you can go in with
the fine liner to do the outlining and create more fluffier texture with a broken hatching
or broken lines. In that way, you can use that fine liner as the
outlining and then add the lighter sets
of the yellow and the ocher to do the remaining coloring for
the second project. And this is going to be my last chick that I'm
adding in here. Let me know how many chicks you have created for
your second project. I have not created the outline
for the beaks and fits, as they are quite easy. I'll be directly using the
watercolor to do them. If you want to make adjustment,
feel free to do that. Now, let's lightly
erase the pencil marks. The pencil outlines
that we created should be a little
visible so that we can overlay so that we can overlay the
watercolor on top of it. If you have large
brush or tissue paper, use that to remove
the eraser dust so as to avoid smudging
of the pencil marks. And now here I'm
using this wet to do a little bit of wet-on-wet
technique for the background. Here, I'm just dropping a
few droplets of the water. And on this, when it
spreads a little bit, I'll be adding a little
bit of the greens, a lighter tone of the greens, small dots to represent a little bit of green
regions for the background. Them spread it a little bit. And now in here, I'm using a very lighter tone
of this green. Adding this lighter
tone of the green on the water droplets
that we added earlier. You can use varieties
of the grease. In here, I use two
seeds of the greens. And we will wait for it
to dry a little bit. I'm spreading it a little bit. Be careful not to
overlay it on top of the pencil sketch of the
chicks that we add earlier. On top of this, we'll
be adding more colours, a little bit of a little bit of diluted form of the
yellows and then greens. Use water to spread it. And now we will wait for
it to dry a little bit. You can add a little bit
more greens if you prefer. Or instead of this green, you can also use Ochre or any
other seeds of the colors. Let's spread it a
little bit more. It has dried up a little bit, and in here, I'm starting
with the yellow. So lighter tone of the yellow. So I'll be filling the entire
section with this yellow. In here, I'm using a little bit concentrated
form of the yellow. If you want, you can
make it a little bit diluted by adding
a bit of water, or if you want to make it a
little bit more lighter or if you want to turn
this into pale yellow, you can add a little bit
of white colour to it. Now let's go over the
remaining eight chicks that we have in here
with this yellow. You'll have to emit couses as the greens that we used earlier has not dried up properly, and we want to avoid mixing
of these two colours. Okay. So to be causes, you can wait for the
greens to dry properly and then move on
with the yellows. Also, the intensity
of the yellows and the greens will decrease a
little bit when it dries up, since we use a bit of lighter
consistency of the green, so it will lose its
intensity when it dries up. Same goes for the
yellow. It won't lose that much of its intensity, but yeah, it will lose
some of its vibrancy. We have got four or five more
chicks to add colour to, and then we will move on
with the orange color. We will wait for
the yellow to dry a little bit and then add the orange to do the
outlining and create a little bit of fluffy
texture for our small chicks. Let's do the outlining for
the remaining two chicks. For our other projects, apart from this
yellow and the ocher, I'll be using other colors
to create the chicks, like pale, yellow, blue, pink, And with this, we are done with all the chicks. Add a little bit of more yellow wherever you
think it's required. Feel free to make some
changes and adjustment, make the seeps a little bit
more larger or smaller. So I'm adding more yellow
wherever I think it's required. And now with a little bit
diluted form of this yellow, I'll be overlaying it on top of the greens that
we used to create a little bit of lighted tone for the grass that we'll
be adding later on. A bit of diluted yellowish
color on top of the greens. I'm also adding a little bit of yellow for the empty
spaces in between them. If you want, you can also create a different kind of background. You can create a little bit
of pattern background too. For one of the project,
I'll be doing that. I'll be using a little bit of wine to create a bit of pattern, as well as I will add small
leaves and flowers to it. If you want to do the flowers
in here, you can do that. On top of the grasses, you can use yellows
reds and the blues to create very small
resemblance of the flowers. In here, the yellow was
not all that dried up, and on top of it, I
added the orange, and it got merged with a yellow. So to cover this mistake, I am lending this
orange with the yellow, and I will wait for
the yellow to dry and then later on lm adding it. For now, let's use this
lighter consistency of the orange to create
the feeds for our chicks. On top of the slighter tones
of the orange for the feeds, I'll be adding a
bit of darker tone later on to make it a little
bit more interesting. Let's add the feed for
this last one in here. I used a bit concentrated one. Until the rest of the
sticks body drive, I'll be creating the
small beaks with this bit concentrated
form of the orange, small triangular
saves for the beaks. In here too, you'll
have to ait causes. As you can see, one of
the beaks got merged with the yellow that we used
earlier for the background, ensure that the paper has dried and then
proceed cautiously. If you have blow dryer, you can use that to
fasten this process. And let's continue with adding the beaks for the
remaining chicks in here. On top of the stone
of the orange, I'll be using a bit
more concentrated form of the orange to make the beaks a little bit more to make the beaks a little
bit more interesting. The watercolor for the chicks
has dried up somewhat, so let's do the outlining
with this orange color. For the wings and for some of the lower section
of its body, I'll be creating this kind
of hatching lines to create a little bit of fluffier
texture for our chicks. This is a little bit different. For our first project, we used a little bit of blending of the colors with the yellow. But in here, I'm just
doing the outlining. If you want, you can
proceed with that, too. Carefully and cautiously, do the outlining for the remaining chicks that we have in here. This is going to
take a little bit of time since we have lots
of chicks in here. So be patient and let's do the outlining for the
remaining chicks. If you want, you can add
a little bit of mood and characteristic to
each individual ticks. You can add accessories
in the form of caps, hats or sunglasses. You can also add small sticks behind the wings
of the ticks and other accessories as you see fit that will make this project a little bit more interesting. For the feats of the chicks, you can add small boots. And for the wings,
you could create some kind of
patterns and design. Apart from that, as
I mentioned earlier, you can use other
color combinations. Instead of using orange to do the outlining for
all the chicks, you can use a bit of you can use a little bit
of aqua color or brown or red that will make
the chicks more interesting. As you can see, I'm wearing the thickness of the
lines a little bit. For some of the
reasons, I'm making the lines bit thinner and
for some of the reasons, I'm making it a bit thicker. So it to make this a little bit more organic,
that's why I'm doing it. If you want, you can
create the uniform lines, but I'll be wearing the
thickness of the lines. To make this process
a little bit more quicker and easier, if
you have breast pain, you can use that to
do the outlining, or you can also use the colored pencil to do the outlining. Go over the lighter
side of the orange with this darker one for the feeds. We have got four more
chicks to do the outlining, and then we will move
to add more details in the form of ice and the
background, the grass. And as I was mentioning
for the background, for the grass, you can create the resemblance
of small flowers. And in the same way,
you can also create the resemblance of small
butterflies flying around. Creating this kind of
broken hatching lines for the wing of
this chick in here. And we are done with this one. We have got two more chicks
to do the outlining for. Now going over the outline
of the second last chick. And finally, it's to the outlining for our last
chick that we have in here. The first and the second
project were quite easier. For the third one, we'll
be creating a bit more fluffier and a bit more
detail angry chick. That is going to be interesting. We'll be doing multiple day to create fluffier
look for our chick. And now let's carefully
do the grasses here. I'm using a bit darker
tone of the greens. This is a little bit
concentrated form. If you want to make it a
little bit more detail, if you want to make it a
little bit more different, you can use a bit lighter
tone of the green first and then on top of
it, a bit darker tone. Create this kind
of organic lines to create the resemblance
for the grass. And in here, I am not overlaying
it on top of the feet. But if you want, you can
cover some section of the feet like we did
for our first project. Now, I'll be creating the
grass for the remaining birds. So carefully, adding it
in between the feeds. I'll also be adding
these grasses for some of the middle section, and the intensity
of these grasses will decrease a little bit since I use a little bit
more water for this color. So when the water dries, it will lose a little
bit of its intensity. In the ground, you
can use a little bit of aqua or other colour to create resemblance of small food that is lying on the ground. You can create resemblance
of bread crumbs. Moving on to this one, carefully adding the grass in between
the feeds and around it. And now, we have got three
more. Apart from this. I'll be adding a little bit of more greens for the yellow
sexons that we have. Adding the greens
for the last one. In here, I kept the sides of
the grass a little genufon. But if you want you can
increase the sizes. For some of them, you can create a bit larger grasses for others, a bit smaller ones. And with this we
added with the grass near the feet of all the chicks. Now I'll be adding the greens
for some other section. Small grasses on top of the greens and the yellow
layers that we have in whiten. Since I did not use more greens, the consistency has
decreased a little bit. So adding a little bit of more greens on the brush to
make it a bit more darker. And yeah, let's add a few more grass
streaks here and there. As I was mentioning earlier, you can create a resemblance
of food or bread crumbs. And in the same manner, you can also create
resemblance of earthworm or small worms that will
be interesting too. And we are almost
done with the greens, adding in a little bit
more green streaks here and there randomly. Now, either you can
wait for it to dry, but in here, I'm just using the fine liner to do the eyes. You'll have to bit causes if you are not waiting
for it to dry. Small black dots for
the small tiny eyes. For some of the six that
are facing forward, I'll be adding two eyes and for the remaining
ones, a single eyes. Let's add the eyes for the remaining two chicks
that we have in here. And with these, we add
with our second project. I hope you had fun
painting this, and I'll see you in
the next project.
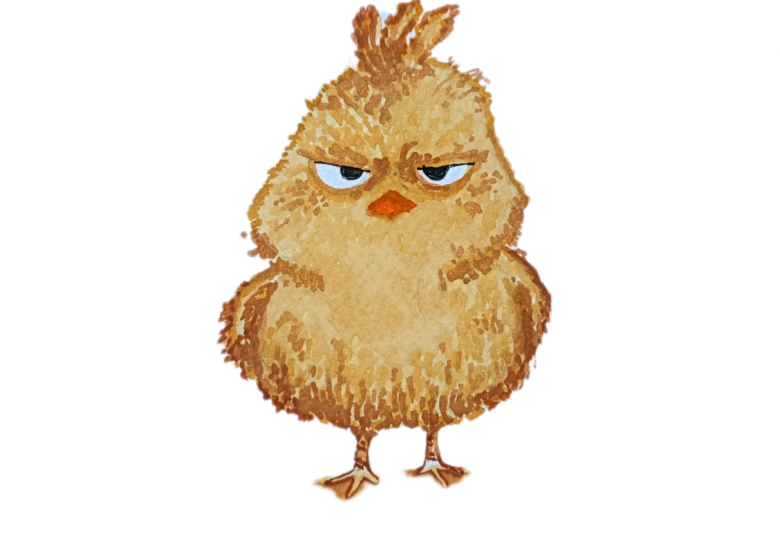
10. Little boss: Welcome to the third
project, the Little box. This is going to be
fun and exciting. So I'll be creating the
same kind of sketches that I did in our second
section of the tutorial video. In here, we have got
a grumpy little chi. This will be a simple one. Let's create this kind of s for the top somewhat of triangular s. The rest of its body will be somewhat proportionally
smaller to the head. Let's create its feet. The feet will be a
little bit more detail. The calx at the top. In here, in here, I'll be creating a little
bit more defined eyes, and let's create the
guidelines for our eyes. For this project, we'll be doing multiple
layerings of the color. I'll be starting
with a bit diluted in the lighter
sets of the color. Mainly, I'll be
using ocher in here, and for the first layer, I'll be using ocher along
with a little bit of white to get somewhat of
paler set of the ochre. Feel free to make changes to the seep in the side
of the check in here. In here, I decided to make the stomach a little
bit more rounder. So let's redo its wing. A small feet for this
small grumpy little chick. In here, I'll be
creating simple ground. If you want, you can
do the same thing like create the grass for the background
or for the ground. In the background,
too, you can create the clouds or some kind
of pattern or texture. I won't be doing it. Simple plain normal
ground with the auger. Mostly, I'll be
using only ocher, a little bit of orange for
the beak and the laying. And here, we are done with
the basic pencil sketch. Let's lightly erase
the pencil marks. For this project and
the next project, I'll be creating this kind of
little chick, fluffier one. And here I'm using ocher. For the next one, I'll be
using blue and grayish color. Remove the erasers dust, and now let's paint. So as I mentioned, in here, I'm using a combination of
ocher along with the wine. And here, the consistency of the color is not
that much diluted. It's somewhat a
little bit thicker. So I'll be completely
covering the entire section, leaving the beaks and the eyes. You can cover the beaks, too, since we'll be using
darker consistency of the orange to
create it later on. But for the eyes, I want to preserve the
whiteness of the paper, so I'm doing the outlining
with this color. If you want to make it a little bit diluted, you can do that. And on top of this,
we'll be doing three or four more
layers of the cher. I'll be increasing
the intensities of the cer a little bit. I'll be making it a little bit. That is I'll be making it a
little bit more concentrated. Now, let's feel the
remaining section with this. You don't have to
use the same color that I'm using in here. If you want, you can
proceed with the yellow or the Camb to get yellow chin. In here too, if you want to make changes, you can do that. You can make the stomach
a little bit more bigger, broader or more rounder. Let's add the color
for its wing. I'm leaving a little bit of a space in between the wing and the rest of its body
and for the ground. For the ground two, I'll be
using two or three layers. This is our primary layer
or the first layering. On top of this, I'll be
adding a little bit of ocher. It darker side of
the ocher in here. And since it's not
completely wry, it will blend on its own. Here, too, I'm using
a bit darker side of this ocher for the wings to
make it a bit more darker. O you don't have to wait for it to
dry since we use a little bit concentrated
form of the coloring in here. So it's dried up a little bit. And in here, I'm using a bit
darker side of the ocher, as you can see, and creating
this kind of broken lines, or you can see a little
bit of hatching with this watercolor for
the upper section to create this kind
of fury texture. I'll be doing the same for
the remaining section, the entire outline
for this chick. And since the primary layer, the one with the ocher and
the white has not dried up, it will blend on its
own to create a bit of subtle gradient for the outlines and the
remaining section of this let's do the outlining for the
eyes and the beaks to make it a little bit
more darker and bolder. If you want, you can
create a little bit of smaller eyebrows. Moving onto the other
side, doing the scene, small, very tiny strokes
with the breast. And in here, the white
piece that we left, I'll be covering it with a
bit darker side of the ocher. I'll be adding the colors
in multiple layers. This is our first layer. And primarily, I'll be
doing the outlining with this and add a little
bit for its body tune. You'll have to bit causes to create this kind of
smaller strokes. And now let's create its neck
line, small pining strokes. And for the lower
section to make it a bit more flaffi
and more texture, let's create this
kind of broken line. I'm wearing the sizes of
the lines a little bit. For the middle section
and for the sides, I'll be making a
little bit larger, and for the remaining section, a bit smaller lines. For the upper section
two, primarily, I'll be adding more lines on the left side to make
it a bit more darker. Small lines throughout
the entire top section, not the entire top section, but over the eyes and a
little bit for its checks. Let's add a little bit of more small lines in here
for its middle section. And as you can see the
intensity of this, and as you can see
the intensity of this occur has
decreased a little bit, and it's blending quite and it's blending a little bit
with the primary layer. Let's do its sling. Here I just outlined its
sling and later on, I'll be going with darker set to make it a bit more distinct. Add few more strokes to make
it a little bit more denser. And since the intensity
has decreased quite a bit, it will completely blend with the remaining colors
of the first layer. Now, this is our third layering. So here, I will in here, I'll be creating more
smaller strokes. The intensity of this
occur a little bit more concentrated as
compared to the second one. Create more smaller strokes and do the outlining
with it once again. I'm not covering the
entire outline that we created with the
second layering, so I'm only overlaying it on top of some of the
sections to make it more distinct and to create a subtle gradient in between the three layers
of the colorings. For the wings, I added a
little bit more orchid to make it more clear and more distinct from the
rest of its body. For the lower section to,
let's add more smaller lines. Let's add a little
bit of smaller lines for its neck line to
make it more distinct. Let's redefine the
ice a little bit more and make it a bit more bolder. I'll be adding more tiny
lines for the upper section, the calix and a
little bit below it. If you want to make the ice a little bit more
grumpy looking, you can add two or
three curvy lines below it to so dark circles. And, we are done
with this layering. If you want, you can
add a little bit more. If you want, you can add
a little bit more texture like this to create
more furry appearance. If you want to make
it more fluffier, you can go in with the pencil colour to add more finer drills
and finer lines. I decided to add a
little bit more lines in here, small tiny lines, small strokes with the brush Once again, the intensity of the colors has decreased as it has dried up. Let's make the legs
a bit more defined. And this is going to
be our final layering. So before adding it for the remaining
section of its body, let's create the webbed
feet for this chick. So in here, I'll be creating
three digits finger for it. If you want, you can add a little bit of orange
with this cher. Add a few more
lines for our feet. Below its feet, I'll be adding a little bit more
orchard to blend it. We now let's create more tiny strokes throughout the outlined section
of the stick. Create a bit more clear
distinction in between the wings and the remaining
section of its body. Making the eyes a little
bit more pronounced. Later on, I'll be going with the fine liner to make the
upper section of the eyes a bit more clear and distinct and add the eyeballs
with a black fine liner. More lines for the
top of its head. And now let's wait for
it to dry a little bit. For now, let's do the remaining
section for the ground. A bit concentrated
form of ocher. I'm not covering the
webbed feet with it. Now I'm using water to blend it with the remaining section
for the foreground. Spread it a little bit for the entire section
for this foreground. Insure that the paper
has dried up and then proceed with adding a
detailings for the eyes. In here, I'm using
the fine liners. So as I mentioned, making the upper legion
a little bit more distinct and completely filling the entire section of the
eyes with this black. You can add accessories for
this fluffy little chick. You're going to add cap, sunglasses, earrings,
bow tie or normal tie. Now finally, let's
color the beak. So in here, I'm using a bit
diluted form of orange. In here, I'm using a
bit concentrated one. So a little bit of blending, the upper section of this
beak will be a bit more darker and the remaining
section a bit lighter in tone. And with this, we are done with this little boss chick and I'll see you in the next
project with royal chicks.
11. Royal chicks: Welcome to the fourth project. Here and we have got
the royal checks. So these are somewhat similar to the last project that we did. Here, I'll be making
a little bit changes in the proportion of their body. Apart from that, we'll have additional accessories
slide crown on top of these
two little chicks. Here, the main chin will be
in the seep of the head. I have made the head a
little bit more conical, so to fit the crown
on top of it. And as for the legs in here, you can see I added a little
bit more padding to it. So I'll be making
the lower part of this leg a little bit
more full of here. Let's create the outline
for our second chick. Apart from this, you can also
see the side of its body, a little bit more conical. So we have somewhat of triangular
see for the lower half and bit and bit of strawberry
like see for the head. But otherwise, we'll be using
the same kind of technique, layering, using two or
three different layers to create fluffier texture. And for the feet,
we'll be making it a bit more detailed like
the last project. The additional
element, the crown, I'll be keeping
it a bit simpler. I'll be creating the
same kind of crown that we practice in the
demonstrations. So with these, we are with
the basic pencil sketch. Now let's add the eyes. Here, the eyes are a little bit different from
the one we did in the last video,
circular round eyes. Let's add the beaks for
the two royal chicks. And with these, we are done
with the sic pencil skit. If you want to make
adjustment changes, feel free to do that. Let's slightly erase it, and then we will move
on to coloring it. I'll be using combinations of light blue for the first
one and for the second one, a bit of black and gray stone. Now let's color it. In here, I mix a little bit of white and a small bit
of gray for this. I'll be covering
the entire section, leaving the eyes and the beak. As you can see, I'm using a bit diluted consistency
of the color. Carefully surrounding the
eyes and the beaks with this. If by mistake, you
cover the eyes, you can add accessories like sunglasses on top of it
to cover your mistake. Let's do the outlining
for the wings. I'm leaving a little bit of space in between the
body and the wings. Now second layer.
Mostly, I'll be using weight one weight technique for the first two or three layers, and then I'll be using the broken lines to create
a bit of fluffier texture. The blue that I'm using will
spread on its own because of the wet one weight technique and create some kind of
beautiful gradient. The left side will be a bit darker and the right side
will be a bit lighter. Adding a little bit of blue for the lower
section of the ling. Let's make the wings a
little bit more darker. Going over the outlines a little bit to make
it a bit more darker. Very tiny strokes of this blue for the outlining some
sections, not the entire one. Now, here I'm using
a little bit of water to spread the
color a little bit more. Till it dts a little bit, let's proceed to the second one. I'm using this consistency of the green and I
added a little bit of white on top of it to get
this kind of paler gray. Here, too, as you can see, it's a bit of diluted consistency, and I'll be spreading it
for the entire region, leaving the weak and the eyes. Let's go over the
outline and then feel the remaining
section with this. Carefully outlining the
beaks and the eyes. Instead of this, you can use any other color combinations. You can use blues, oranges, pinks, yellows, and even green. So feel free to do
experimentation and come up with your
own colour scheme. Here I added a little bit
of green for the beak. But I'll be covering
that mistake with a darker consistency
of the orange. Let's create the
outlines for the wings. A little bit of gray for the
lower section of its leg. Yeah, we are done with
the primary coloring. Let's try to create a little
bit of textured outline. You don't have to do
this, as we'll be using a darker consistency of the colors to read the
fluffier texture later on. Now let's go in with darker set. Here I'm directly
using the black. And since we are using
wet-on-wet technique, it will spread on
its own and create a subtle gradient using water to spread it a little
bit circling the ice with it. I used a bit more black. You should use a
lighter consistency of the black or the gray. Spreading it on the left side to make this region
a little bit darker. And now we will
wait for it to dry. Let's do the crown
for this first chick. I'm using Cambooj completely covering the entire
section with this. And a little bit of this Cambo you got mixed with the blues. If you want, you can use tissue
paper to soak the color, but I'll be leaving it as it is, since it will create a
little bit of reflection, the reflection from the crown. In here, too, for this one, I decided to make the
crown a bit larger. So we have two crown
princes in here. The black one is
the bigger brother. We have a small brother
too. So two brothers. In here, I use the seam
Camo hue for the feet. I'll be using orange later on, adding the Cambo
hue for the beak. Decreasing the
intensity of the yellow a little bit by spreading
it with the water. To fasten the drying,
I use the blue dryer, and now let's do our third
and the fourth layering. I'm using a bit darker
consistency of the blue, and it's a bit more
concentrated as the earlier sons as
the earlier layering. And the paper has not
dried up completely. It's a little bit wet, so the colours will blend a little bit with the first
and the second layers. Creating this kind
of broken lines, a little bit of
hatching to create this fluffier appearance
for the chick. I'll be creating the
same kind of lines and in the same manner that we
did in the last project. So I'll be creating this kind of broken lines for the
entire outlines, a little bit more for
the wings to create a clear distinction in between the wings and the
rest of its body. I'll be adding a little bit for the neck line of
the royal chicks, a little bit of lines that
will encircle its eyes and the beak and a little
bit for its checks. Continuing on adding continue on with adding the lines
for its neck line. If you want, you can
cover the yellow with a lot of tiny
streaks of the blue, but I won't be doing that as the reflection seems
pretty good to me. Tiny strokes for both of
its check and for one side, I'll be adding a little bit
more lines on the left side. Tiny little strokes
throughout the entire region. Since the consistency of
the blue has decreased, it's not covering the yellows. Since the consistency of
the blue has decreased, it's not subduing the
yellow that much, adding a little bit to encircle the eye Moving on to the
second one, the big brother. So here I'm using bit
darker tone of the gray, and we'll be doing the
same thing small strokes. Here I have already started. Here I have started
with the wings. Create a distinction in between the wings and the
rest of its body? For the lower region,
beside its leg, add a little bit more lines
to make it a bit more flafier Moving onto the other
side for the wing. And now let's do the
lines for it stomach. Broken lines throughout the entire lower
region of its stomach. Apart from the grease
and the black, you can use a little
bit of white. That will create an
interesting contrast between the colors for
this big brother chick. Now let's create its snick
line with tiny little strokes. A little bit of more
for the center part. And now let's do the remaining
outline for its head. For the eyes, let's
make it a little bit more clear and
distinct using this black or gray to do outlining for the eyes
and for the beak too. Since it is still a
little bit intense color, I'm not creating that
many strokes in here. Adding a little bit more
strokes for its wings. Add more strokes wherever
you think it's required. I think we are done
with this one. Let's make the outline a
little bit more clear. Here I decided to do the
outlining for its weak. It was not that clear. Let's do the outlining
for its eyes, creating oval saves
for its eyes. Now let's add another
circular C for the inside. Let's do the same for the
second one, the big brother. Adding the pupils
inside the eyes. So the big brother is looking
towards the small brother, adding orange stone
for its beak. Now let's do the feet, a little bit more detailed feet, a little bit more detailed feet. I'm using this orange
to do the outlining of the Cambo that we used
for the feet earlier. If you want, you can
add another layer of the blues and the blacks, but it turned out pretty
well, so I'm not adding it. But if you want, you
can proceed with adding one more layer to make
it more fluffier. Doing the same thing
for the second chick, outlining the Camboj
for this feed. And let's do the remaining
part of the feed with this With this, we are
done with the feeds. Let's add the color
for the crowns. In here, I'm creating
this kind of rhomoid C, three rhomoid sees for the
first crown and I'll be adding circular and I'll be
adding circles on top of it, circles on top of the
peak of this crown. For the second one, you can use the same
color combination, oranges and yellow, but I
decided to use bit darker tone. So here I'm using the blue. Instead of creating
the square sieves, I'll be creating these circular sieves and for the upper part, I'll be creating the rhomboid
seep or the square seep. The seeps are a little
bit larger since the crown is a bit bigger as
compared to the first one. Let's add the blues
for the upper part. Let's make it a
bit squares seep. And with these, we are done with our fourth project,
the oil chicks. I'll see you in the next one.
12. Sunshine in the sky: Welcome to the fifth project. Here we have got
sunshine in the sky. Here we'll be combining a
little bit of doodling, a little bit of background, and a different kind of check This is a little bit similar to the third
and the fourth one, but here the proportions
are quite different. The head will be quite smaller. The remaining section of its
body will be quite large. And yeah, this is going
to be fun painting. Here I have already started with the wet on
weight technique. I'll be creating the same
kind of I'll be creating the same kind of bubble that I showed you in the
demonstration video. Here I'm using the blue color in the demonstration video in the demonstration
video, you used to it. So if you want, you can
use any other color. So going over the outline of
this wet on wet technique, and then we'll be spreading it, and then we'll be
spreading it to get somewhat of cool
gradient in here. Instead of this blue color, you can use any other
color of your choice. And if you don't want, you
don't have to create this. For now, let's do
the outlining and here a little bit of color has accumulated. So let's spread. I used a bit concentrated blue. If you want, you can use a bit less concentrated
form of the color. Using the brass to
spread the color. I'm spreading the colour
towards the center. Let's make the outline a
little bit more defined. Since some of the water
has sprayed unevenly, so I'll be covering
the mystic litter on. For now, let's continue
with spreading the colors. And as I was mentioning,
let's try to make the outlines a little bit more
clearer and more crisper. Instead of one color, instead of using one color to do this, you can use multiple colors so that you can create
a rainbow like effect. I was going to use a little
bit of white for the inside, but I don't think it's
required, and it has dried up. I weighted it for to dry. I use the blow dried to make the process a little
bit more faster, and now I'll be encircling
the outside with the broken lines to
create a kind of cool pattern for
the entire region. If you don't want, you
don't have to do this, or if you want to create
any other designs or pattern on your own,
feel free to do that. This is going to take
a little bit of time, so let's increase that speed. For the inside, I'll be creating the chick in somewhat
of egg like say. And with this we are done
with the outer section. Let's do the outlining
for the chick. I'll be using yellows or
a little bit of white. A bit more curvier triangular
C for the top and at larger a bit larger and circular C for
the rest of its body. Let's do the outlining
for its wings. Adding the two tiny feats, here I decided to make
the feeds a little bit curvier small B and
small Is on top of it, I'll creating colic with orange. Start with the coloring. Here
I'm using the light yellow. So I'm using a bit
concentrated light yellow, and I thought that it will and I believe that it will
cover the pencil outlines, but it's not doing it, so
let's erase the pencil marks, and then we will continue
with adding that color. I was certain that
it will cover it, but this consistency of the
yellow is not covering it, but if I am used any other
darker color like ocher, brown or red, it would have
covered the pencil outlines. Going back with the light yellow to feel the primary layering, here too, I'm trying to
create a bit of texture, fluffier texture
for the outline. You don't have to worry if
you cover the entire section, the eyes and the beaks, since we'll be using the darker tones to create it later on, black for the eyes and
orange for the beaks. Try to create a bit
of small strokes for the outlines to create a
bit of fluffier texture, going over the outline for
the remaining section, and let's feel the
insides with the yellow. For the empty spits beside this chick, you can create smaller chicks
that will be interesting. And now here I'm going
with the Camboo hue. I'll be doing a little bit of
blending of the two colors. Since the light yellow that we use has not dried up entirely, so it will blend on its own. But to create a little bit of lighter igen I'll be
using a bit of white. For now, let's add this Camboo hue for
most of the section, primarily on this left side. The contrast between these
two colors is quite high. So that's why I'll
be using a bit of white. For now, let's add. Now, let's create tiny strokes with the brush to
create a bit of fluffier texture
for the upper side and the remaining
outlines portion of this. Going over the
outline of the wings. Yeah, we are done with this. Now using this as the primary
layering for this feet. On top of this, we'll be going
with the orange metfona. Let's add it for the two feeds. Adding a little bit more, and now let's use the water to spread the colors a
little bit and to blend it a little bit
with light yellow. Also, I'm making this regional
a little bit more wet, since I'll be adding white in to blend it with
the remaining colors. Using the water to
spread the color a little bit more for
the outlined sections. Adding a little bit more
camo ju for this wing, it was a bit lighter
in the scene. Let's make the outline of this wing a bit more clear, too. And yeah, we are done with the light yellow
and the camo Ju. Now, let's add a little
bit of lighted seed. So here, I'm going
with the white, a bit diluted form of the white so that it
can easily spread. And since we added a
bit more water earlier, so it will spread on
its own and blend and blend with the
camo j and the yellow. And to make this process
a bit more smoother, I'm adding a little bit
more water to blend this. And now let's wait
for it to dry. It has dried up, and let's add a little bit
of blast for this one, a bit of orange for both
sides of its chicks. Now let's blend it to subdue it. And now let's do the final
outlining using the orange. I'm creating this kind
of tiny strokes with the brass to create a
bit of furry texture. Here, I'm not trying to create
the kind of texture and fluffy patterns that we use
for the earlier to project. But if you want to do
that, you can do that. You can start with the cambujio a bit of strokes with the
cambujo and then on top of it, you can add ochre
or this orange. Let's make the meek a little
bit more oranges and using this concentrated orange to do the outlining for the feet. I'll be making the outlines
of the entire section of the cheeks a little bit more
darker with this orange. For now, we are
done with the feet. Now let's make the outlines a little bit more clear and more crisp with this darker
consistency of the orange. As you can see, I'm not
covering the entire section. Adding a little bit of orange for the sides of the wing to create a clear distinction
between the body and the wing. Creating the coalex
on top of the stick, three or four alk. We are done with the orange. If you want, you can add a
little bit more orange for certain regions to make it
more bolder and more crispier. Going with a fine
liner to create the ice Oval saves for the eyes. I'll be creating a little bit
of highlight for the eyes, so I'm leaving a
little bit of white, so I'm leaving a
little bit of space. This will act as the highlights. If you want, you can add
a little bit of white to make the highlights
a bit more distinct. And with these, we are done
with our fifth project, and I'll see you in the next
project, the sixth one.
13. Best feathered friends : Welcome to the sixth project,
Best Feather Frances. So this is a little bit longer, and in here, we'll be creating
a bit more detailed words. We'll be adding a
bit more details in the form of feathers and wings. Let's continue with
the basic pencil outlines for the chicks. I'll be creating two chicks. One will be a grumpy one, and other will be a quite
happy and smiley one. So this is a sketch for
the quite grumpy one. We have got somewhat of curviar triangular sea for the top, another small curvier
seat for the wing, and I'll be adding the
tail feather later on. For now, let's do the
remaining section of its body. In here the proportion of both the head and the
body, it's somewhat same. Let's add the outline for the second wing that
is on the other side. I'll be creating the
same kind of wet that we did for the last project,
a bit detailed one. On top of this, I'll also be adding the four or five colds. And in here, I'll mostly using the lighter
seeds of the color, light yellow, camozu and a
little bit of orange or ochre. Let's add the tail either
four or five of them. If you want to make them a
bit larger, you can do that. In here, I decided to
keep it a bit smaller. For the upper
section of its head, I'll be adding the
eyes and the beak, a bit larger weak in here, and I'll be creating
the same kind of slanted eyes that we did
for our third project. If you want to add
any other kind of ice, feel free to do that. You can create small dots for the eyes or you can
create large oval saves. Let's do the outlining for the Cawlex on the
top of its head. Here, I won't be
creating any background. I'll only be creating
the foreground. I'll be using a bit
of gray to do that. I want to create if you
want to create background, add patterns or do more
designing, you can do that. And with this, we
are done with the basic pencil outline
for the first one. Let's do the same
for the second one. So this will be quite happy one. Its head is a little bit
slanted since it's smiling, and let's do the remaining
section of its body, a combination of
circle and triangles. Let's do the outlining
for the legs. If you want, you can
make the legs or the feet a little bit
larger and more detail, but I'll be doing the same that we did for
the last project. We are done with
the feet. Let's do the remaining
section, the wings. And finally, let's add
the tail feathers. One more different
thing that we'll be doing for the six
projectors that I'll be using the fine liner to do the final outlining and to create a little bit
of fluffier texture. So I'll be doing a
little bit of hatching and use broken lines to
create the outlines, add a bit more detailings to the wings and
the tail either. Let's create its eyes. So its eyes are closed and the mouth will be a
little bit larger. I'm not satisfied how
it's feet turned out, so I'll be making adjustment while I'll be adding the color. If you want to make changes in adjustment, feel
free to do that. We'll be creating
this kind of pattern using the fine iron later on. So let's make a little bit of changes to the feet
that I was mentioning. Oh creating the same kind
of it as the first chick. So this is how our basic
outlines turned out. Now let's do the outlining
with the fine liner. Earlier, I mentioned
that I'll be doing the fine lining after
adding the colors. You can do that you can or you can join along with me and
do the outlining right now and then add the coloring using this kind of broken
lines to create a bit of fluffier texture for the
outlines for the wings, we'll be adding a little bit
of more texture patterns. These kind of small lines to resemble small little feathers. Let's do the lower
section of its body here to add more fine lines to
create a bit of texture. If you don't want to
use the fine liner, you can stick with
the darker seats of the color to
do the outlining. Let's do the outlining
for the other wing. And as you can see, I'm not sticking with the
outlines that I created, so feel free to make changes and adjustment to your
pencil outlines. Here I made the piece a
little bit more broader. Now, let's do the cow legs. Here too, I'll be
creating a little bit of shaky and curvy lines
for the cow legs. Finally, let's do
the tail feeders. A bit of saky lines with a fine to create
organic fill for the tail fether and then I'll be dividing
into two sections and add few more lines to it. So straight lines to divide
the steel feather into two different portions and few lines to make it
a bit more detailed. If you want to
make it a bit more detailed and more darker, you can do a little bit of
hatching and cross hatching. But I think it's looking good. So let's do the second one. I'll be adding the I'll be adding the outlining
for the feeds, eyes and the beak later on. So for now, continuing
on with the second one. Go over the outline
for the colics, same kind of outlining a bit of sicky lines and broken
lines to create a bit of organic en for the colic on top of
this second chick. If you are not doing the
outlining with this fine liner, then this project will
be under two 15 minutes. And since we are
doing this outlining, it's around 17 or 18 minutes. Going to the lower
portion of its body, adding the outlining
for its father, small textured line
with small strokes. Let's do the outlining
for its tail feather. For the first one, we
had five tail feeders. For this one, I'll
be creating four, but they will be quite larger as compared to the first one. Adding the small dividing
lines and few more lines to make it more detailed
and more textured. Now, let's do the
beaks and eyes. Creating small lines
for the eyebrows. If you want, you can make
them a bit more detailed. Tiny dots for the nose on the beak. Let's do
the second one. Et's go over the outline
for the closed eyes. I'll be completely feeling the
closed eye with the black. Instead of this closed eye, you can create any
other kind of eye. You don't have to use
the same kind of eye. You don't have to
do the same kind of thing that I'm doing in here. Feel free to make adjustment and the changes to your project. Let's do the outlining
for the other wing. Adding few more lines to add
more details for the wings. And finally, let's do the
outlining for the feet. For the feet and the beak, I'll be using orange, also
a little bit of orange to create a blushing effect for
the cheeks of these checks. Doing the outlining
for the second one and the final outlining for the last link of
this second check. And yeah, with this, we are
done with the outlining. If you want to add
few more detailing, you can do that, but I'm satisfied with how
it turned out. Adding the pupils for the eye. In here, you can do
this kind of eyes, but I'll but I'll be completely covering
it with the black, lightly erase the pencil marks, and then we will add the color. And then we will
add the coloring. Just doing the outlining took
around four to 5 minutes. If you are using brass pain
or waterproof black ink, then you can make this
process a bit more faster. Instead of five to 6 minutes, you can do it within
two or 3 minutes. Here I made a little
bit of mistake, and I'll try to cover it with the darker
seeds of the yellow. Let's add the coloring
for its eyes, making it a bit more darker. I see that the pain that you
are using is waterproof. Otherwise, if you are
using gel pain or any other paint that
is not waterproof, then the colors will
merge with watercolor, making the eyes a
little bit more bolder. Now, moving on to
the second one, completely filling the
entire section with this. And with these, we are
done with a fine lining. Now, let's add the color. In here, I use in here, I'm using a combination of light yellow along with
a bit of white. And I have not
diluted it that much, so it's a bit thicker
in consistency. You can use any other color, but here I was aiming to get somewhat of
pale yellow color. Adding it carefully
beside the eyes and the beak of this first
grumpy little chick. And as I mentioned, its
consistency is quite thick. So the lines that we
created with the fine and it's not that
much visible in here. But when it dries up, the lines will become visible once again. Adding a little bit
more for the first one. Moving back to the second one and yeah, carefully adding it. You don't have to worry if you covered the ice that
you created with the fine liner in here
since when it dries up, you can clearly see
the fine lining that you ended with
the fine liner. Carefully adding it near the beak, we don't
want to cover it. Yeah, we are done with
the primary layering with the pale yellow. Now, let's create
the blushing effect for the chicks of this chicks. A bit of orange color. Here I used a bit of
saturated orange tone. Now, let's blend
it a little bit. Since the pale yellow
has not dried up, it will mix smoothly with it. Yeah, we are done with creating the blushing effect
with this orange. And in here, I'm going
with bit darker seeds. So here I'm using
Cambooj primarily, I'll be adding this
cambio ju on one side for the feathers and the wings and the caolics as you can see, for the feathers, and as
you can see for the wings, I added it primarily
on the regions where I added more lines
with the fine liners. And now let's add it
for the lower regions. It will blend smoothly with the pale yellow that
we used earlier. Since the color, the pale yellow has not dried up properly. Now, let's add it a little
bit for the fees so below and above the eyes and a little bit beside the beings. Now making the sides and the outlines a
little bit darker. So adding this cambio jeu
near the outline section. And with these we are done
with the cambio Ju for now. In here I'm going in with the
water to blend it properly. Using this water to spread
this Camboju that we just added and also blending it a little bit
with a pale yellow. I'm using this water to wait
the earlier color as well as spreading the cambio
ju so that we can get a kind of smooth
and subtle blending. If you want, you can add a
little bit of darker seats of the orange to the
outlining once again. I won't be doing that in here, but if you want, you
can proceed with that. I'll be using this
darker side of the orange to add the coloring for our beaks to add the coloring for the
beaks of the chicks, and a little bit for the
feats of the chicks. With these, we are
done with the beaks. Now let's add this
orange for the feed. If you want to make it
a bit more detailed, you can use Camuji as
the primary layering and then go in with this
orange to do the outlining. In that way you can create the same kind of feed that
we did for the last project. And with these, we get done
with the orange for the feet. Adding a little
bit of this orange stone for the lower section of the tail feathers on the wings to make it a bit
more interesting. Adding it for the wings
on the other side. Blending it a little bit. Now go in with the
water to blend it a little bit with
the remaining color. You can also add a
little bit of orange for the lower section
just above the leg. And finally, let's create the foreground in here,
I'm using this gray. I'll be creating the same con of foreground that we did
for the third project, the grumpy little bass. So using this gray and I'll be spreading it
with the water for now, let's use this darker tone of the green to create
the fore down. Instead of this, you can
use any other color, or you can also
create the grasses like we did for the first
and the second project. Adding it a little
bit in between the waved feet of the chicks. And with this, we are done
with our hex project. I'll see you in the next one.
14. Under the Blue sky: Welcome to the Eats Project
under the blue sky. This is going to larger project. And here we have got
two large chicks and five small
chicks below them. This will be similar to the first and the second
project that we did, and the sketching is
somewhat similar. And the sketching is
completely similar to the first section in which we sketched out the
easiest chicks. Here I've already started
with sketching out the guidelines for
the first one. So this is the
first larger chick. And just beside it, I'll be
creating another large chick. Below them, I'll be adding
five smaller chicks. If you want to
increase or decrease the number of the chicks,
feel free to do that. You don't have to even add the smaller chicks at the base. Creating a triangular C
for the rest of its body. For the wings of
the larger chicks, we'll be creating and
adding a little bit more detailing when we'll
be adding the colors. In here, I decided to create the feeds a little bit larger. Instead of this larger fit, if I would have stuck
with the smaller ones, then it would have
been much difficult for me to create the
smaller chicks below them. So a total of five
chicks in here. Instead of creating this
kind of smaller chicks, you can create other kinds. Finally, let's add
the beaks for it. And with this we are done with a very rough pencil sketching. Let's slightly erase it, and then we will
do the coloring. For this month, we'll be
creating the background. I'll be using blues
to create the skies, and for the foreground, we'll have greens for the grasses. Let's remove the resistor. And now let's start
doing the coloring. In here, I'm starting
with the light yellow. Here I'm using a bit. Here I'm using the wet
concentrated color, so less water. And let's do our primary
layering with this yellow. I'll be using the
same colored scheme of the yellows and the occurs. Let's do the colouring for
the smaller chicks in here. Let's do one bigger one so
that it will get a little bit drier that we can do a little bit of wet
and wet coloring. You don't have to stick with the outlines that you have created. Feel free to make changes and
adjustment as you see fit. And the kinds of the beaks that I created in the sketching, I won't be doing that. Instead of that, I'll be using the triangular shape
to create closed beak. If you want, you can do the open makes too, but I
won't be doing that. And with these, we are done with the coloring for our
two large chicks. Let's continue with the
remaining ones, smaller chicks. As you can see, I'm creating a bit larger separation
in between the wings and the rest of its body to sew a clear distinction
in between both. If you don't want, you
can just keep it simple. Doing the out turning
for this one, the third little chick,
and we have got two more. You'll have to be a
bit coarser since we'll have to add
the legs later on. So try not to cover the entire section of the
legs with the smaller chicks. Circular C for the head and let's do the
coloring for its wing, and we can add a smaller
one right beside it. For that, I'll have
to make it a bit slanted that it's peaking
something from the ground. If I want, I can add two more, one in the right and
one at the middle. But I won't be doing
that since we'll be adding the legs of
the larger chicks. And yeah, with this, we add with the primary layering
of the coloring. Now here, I'm going
with a Cambo trying to create this kind
of pattern throughout the entire outline
sexion for the chicks. It will blend a
little bit on its own since the light yellow
has not dried up completely. In here, I'm aiming for a
little bit of blending. If you want to do a
bit more blending, you can add a little
bit of water to blend these two colours to get
somewhat of better gradient. Using the water to blend it, I decided to make the wings a little bit more darker to keep the clear distinction between its wings and the
rest of its body. Anya, we are done with the
cambie now for this one, let's do the same thing
for the second one, starting with the head. For this bird to, I'll
be adding a little bit of more camo zu for the
upper section of its head, a little bit more for its wings, and then using a little bit of water to do the
partsile blending. Texan below the wings, try to keep it a bit
in lighter shade. Adding small dark circles. On this, I'll be adding the black later on to
create the tiny eyes. Let's do the same for the
remaining chicks in here. Going over the outlines. A little bit of small hatching
for the wings to create a clear distinction between the wings and the
rest of its spotting. And here I won't be doing the
blending using the water. If you want, you can do
that, but I am relying on the wet on wet technique that the watercolor we used earlier, the light yellow will do a little bit of
blending on its own. And we are done with
the second one. Let's do the same thing
for the remaining one, going over the outlines, making a little bit of feathery
appearance for the wings. A little bit of blending
of these two colors, the light yellow and the Cambohu finally moving on
to the last one, a little bit of small
strokes for the wings. And, we are done with this. I'm adding a little bit more camo je for the upper sections. I decided why not
let's blend it. So a little bit of water to do a bit more blending
of the two colors, the cam Jew and
the light yellow. I decided to make this one
a little bit more broader. And now using the same color, the cameo Jew to create the
outlines for the feeds. On top of this, I'll be
adding the orange later on. For now, let's use this to create the feats of the sticks. And now, finally, let's do the legs for this
second large chick. Some portion of its leg slice
behind this smaller chick. Adding the webbed feet for this, I will be curving some
of the section of the feet with the
grass later on. Let's create the
outlines for the beaks. As I mentioned, I
am not following the outlines that I created. If you want, you can
create the open mix. In here, too, I'm using
the same cami ju later on. I'll be adding the
orange on top of it. I decided to add a
little bit more camojo for the wings and the
outlining section to make it a bit more distinct
and to create a bit of more feathery appearance for the fluffy texture
for the chicks, small strokes with a us to create this kind
of broken lines. Let's make the feet a
little bit more darker. So adding another layer of this camoug on top of the feet. I waited a little bit
for it to dry somewhat, and now here I'm starting with this lighter tone of the greens. So this will be our first
layering for the grass. On top of this, I'll be going
with bit darker side or a bit darker color to
do the second layering. Adding it a little bit
for the best to make it a bit more darker
and more uniform. Tiny brush strokes to create the grasses in here
for the foreground. Let's do the background. So for background, I'll
be using the wet on wet technique and I'll be
using the blue colour. Making the paper wet
by using the water. And now let's do the coloring. Let's add a little
bit more water to make it a bit more wetter. I'll be doing two or
three layerings of the color like we did
in our first project. For the first project, we
use the yellows in here, I'm using the blue, but the
process will be the same. With building a lighter tone, and then we'll be going with bit darker tones to make
it a bit more interesting. So this is our primary layering. Now, let's go in with
a bit darker tone. I'm not using the darker tone. I'm just using the same color, but I'm using a
bit concentrated. For the first one, I diluted a little bit more
with the water. In here, I'm diluting
it a bit less, and for the final layering, I'll be using more concentrated
form of this blue color. Spreading the colour
throughout the entire section. I'll be using a little
bit more water to spread this colour to blend it with the
rest of the people so as not to create a kind of rougher texture or rougher
outlines for these clowns. Let's wait for it to
dry a little bit, and then we will
be blending it a little bit more if required. But if it's blend
on its own with the rest of the background,
I won't be doing that. For now, let's do the big, feeds and the legs
for the chicks. So here I'm using the orange. Overlaying it on
top of the camo u. And as you can clearly see, I'm not completely covering the camo Jiu that we
use for the foot. If you want, if you want, you can do the outlining for the feeds like we did
for our earlier project, but I won't be doing that. I'll just be creating
simple straight lines for the feeds and the legs. And adding triangular
seeds for the beaks. If you want to create open
weeks, you can do that, too, but I'll be just sticking with
this simple closed beaks. Now let's do the outlining
for the last chicken here. I'll be adding one more layer
of the orange if required, since some of the legs are
not that much clearer. So before before doing that, let's make the outlines a little bit more
clear and crisper. Over the outlines
that we did with the Camuju using this orange. I'm not covering
the entire section, but most of the section of the emuju outline
with this orange. For the wings and
the lower section, I'm doing a little bit of smaller bras strokes to create this kind
of rough texture. Put the fluffy nature of the wings and the
remaining portion, the lower part of
the chick's body. For the upper part, the
head and the wings, I'm creating uniform and straight line for
the lower part, small brass strokes to
create fluffy texture. I'll be doing the same
for the two large birds, but for them, but for them, I'll be gritting a bit
larger brusso strokes to create the feather appearance
for the fluffy wings. And, we are done with this. If you want to make it a
little bit more bolder, you can use a bit more
concentrated orange. Let's do the two large ones. Creating thin lines
to do the outlining. Here I'm using a bit
concentrated form of the orange. Going over the outlines
for the wings with this. It will blend a
little bit on its own because the
color has not dried up properly the
allele color that we use the camo hue
for the outlining. And for the upper
section, as you can see, the color was not dried
up for the background, the sky and a little
bit of this and a little bit of the orange has merged with the remaining
section of the sky. I'll try to rectify it
later on but for now. Let's create this
kind of texture using small brass strokes for the wings and the remaining
section of its body. Now, going with
the darker tone of the blue to do the last layering for our background No, let's spread it with the water. A little bit of more water
to spread the color. And here, we are done
with the background, the sky with the blue. If you want, you can
create small stars in the background with white. Using the black to
create the round eyes. Small dots with a breast. If you want, you
can proceed with the fine liner to
create the dots. Adding the eyes
for the last one. With the brush, you have to be a little bit more
cautious and careful. If you make mistakes, the eyes will become
a bit more larger. So if you're not that confident, you can use the fine
liner to do the eyes. And with these, we are done with most of the
section for the chicks. Now, final thing, go
in with the green, a bit darker tone of the green, to overlay on top of the lighter tone of the green
to complete our painting, creating small and
large bruss strokes to overlay on top of the
lighter side of the green. I'm covering some
section of the feet with this darker
side of the green, a little bit not
the entire portion. And with this, we are
done with the green. I was not satisfied
with the beaks, so I'm using a bit more
concentrated form of this orange. So for the upper
section of the beaks, I am adding it, and for the lower section, we
have the lighter tone. Doing the same thing for
the feats of the chicks, adding another layer of dark concentrated orange
for the feeds. And with these, we are done
with our eight project. I'll see you in the next one.
15. Sunny Day stroll : Welcome to the ninth project. Here we have sunny days draw. This ninth and the tenth
project will be quite simpler since we have two back to back but
harder projects, so I decided why not let's include two smaller
and easier project. Let's start with sketching out the guidelines for our
four chicks in here, circular C for the
heads of the chicks. In here, the proportion of the body to the head
will be somewhat same, and this is a little
bit different kind of chicks that we are creating. We practiced it a little bit in our second section
of the video. And a little bit of slanted circular
see for the body. Here, we won't be adding
many details to it. But if you want,
you can do that. I'll be keeping it
very simple and easy, small, and simplified version
of the wings like this. Try to make the
seeps a little bit curvier I won't be adding the foreground
or the beds in here. If you want, you can
add the shadows, you can treat the green grasses. I will only be creating
the background using the same colour
that we'll be using for the birds, yellow color. So for this tick, this
is facing towards the center and both of
its wings are visible. Let's do this third one
and the fourth one, too. So this is also facing
towards the center, and its two wings
will be visible. I'll be sketching them out
later on. Let's add the beaks. Simple seams for the beaks. Adding the beak
for the third one. Let's do the final
one. Tiny little eyes. If you want, you can create
any other kinds of eye. And as I was mentioning, if you have bras pin, you can make the
outlining process a bit much more faster. So in here, I'm using the Zikkurataki bras pin to do the outlining for
it. This is optional. If you don't want, you
can leave it as it is and use the watercolor
to do the outlining, or you can also use the fine liner to create
a bit thinner outline. I'll be doing the outlining
for all the I'll be doing the outlining for all the chicks in here with this breast pain. You can also use the
watercolor brush to do it, but ensure that the ink that
you are using is waterproof. Otherwise, it will merge with
the remaining watercolor. Let's do the third one. Put this I'll be using very
simple seeds of the yellows and a
bit of Camboou. Here I'm creating a bit of organic or you can
say dynamic lines, the lines lines with
varying thickness. So some section of the lines are bit thinner and
others are thicker. Let's do the final
one, the fourth one. You don't have to
strictly follow the pencil outlines
that you have created. Feel free to make changes
and adjustment to it. Adding the two wings
that are visible for this chick that is facing
towards the center. Now let's create the mix
simple shapes for the mix. Finally, creating going over the
outlines for the feeds. You'll have to be a bit
cautious since we have created a bit smaller
versions for the feet. If you're not that confident, you can use the fine der to do the outlining for the
smaller sections. Moving on to the third
one. Here, if you want, you can add accessories
in the form of different kind of hats, caps. You can add sunglasses, goggles. You can add chain around
the necks of the sticks. You can make them wear
some kind of clothing. You can add sticks
behind their wings. If you have more ideas, let me know in the
discussion section. Adding the feet
for the final one. And lastly, let's add the eyes. You can create
different kinds of y. Here, I created a
bit of slanted eyes. For the remaining ones, I'll be creating circular oval
seeps for the eyes. You can create close eye
open eyes, larger eyes, smaller eyes,
grumpy little eyes, and whatever you feed. So feel free to experiment
with different kinds of eyes. Adding the eyes
for the last one. And with this, we are
done with the outlining. If you want to add a little bit of sading or hatching,
you can do that. Ensure that the ink has
dried and then erase it. Now, let's remove
the research dust, and let's get to coloring. Here I'm starting
with the camo u. So this will be our
primary coloring. So this is our primary
layering. It's a bit diluted. It's concentrated,
but it's a bit diluted and carefully
filling the entire section, the outlined section with this, and I'll be doing the same for the remaining three chicks. IEC, my plan was to use a
bit of yellow and Camboohu, but then I thought the
last project was also. Then I thought that the
last project that I did was also a combination of
both these two colors, the light yellow and the Camboo ue, so I decided, why not? Let's start with
this Cambooh for this project. Moving
on to the third one. You don't have to
be that much coss even if you cover
the eyes or the B, since we'll be using
darker tone of the orange to go over
the weeks and the eyes. When the colors will dry, you can easily see the eyes. Here I used a bit darker to
the cambe for this third one. As you can see, it's clearly a bit more darker as
compared to the first one. Finally, let's add the
colored for this fourth one. This fourth one did not
trown out the way I hope, so it's looking a
little bit thinner. And with these, we are done with the coloring for the bodies. Now let's do the
coloring for the food. Apart from this cambusu, I'll also be using
the orange later on for the feeds of the
four little chicks. With these, we are
done with a primary layer for our four chicks. Now, let's do the background. In here, I'm using
the same cameo Jo. I diluted this a lot more, and now let's spread it. In here, I'm using
water to spread. I'll covering the entire
section with this color. So in here, I'm using
water to spread it. But if you want, you can use the bit darker or bit
lighter consistency of the Camusu to create yellowish background for
this four little chicks. Let's go with second
layer, a bit concentrated, a bit more concentrated Camusio spreading a little bit more
for the lower sections. A little bit more of this
Camusi for this section. And here I diluted
it a little bit. Let's spread it a little bit
for the lower section too. In here, I'm using
the same consistency of the Camus that I use
for the middle section. Let's make it a little bit
more darker and bolder. So in here, I'll be
using this orange, a bit diluted form of the
orange as the third layer. And here, we'll be doing
a little bit of blending. The wet on wet technique will
do the rest of the work. It is not that much
visible in here. If you want, you can add a bit more orange for the upper part. Going back to the chicks
here, once again, here, I am using the same orange that we use for
the upper section, a bit diluted form
of this orange. I'll only be adding it
for the outline section, near the outline section. This will blend on its own since I am using diluted color. Carefully doing the outlining
with this orange color. This is somewhat
similar to what we did for the but day chicks, mostly adding the colors
around the outlining section, wearing the thickness of
the lines for some section, adding a bit thinner
line and for others, a bit thicker lines. Let's go about the
outline section. I'll also be adding it below
the eyes and the beaks. Moving on to the third chick. As I was mentioning, I'll be
leaving the ground as it is, but if you want, you can
add the greens grasses. And with this, we are done
with the third check. Let's add a little bit of more orange color
wherever you think it's required to increase
its intensity a little bit. Here I'm using a bit
concentrated orange, and I'll be adding this for
the feeds and the wigs. As you can see, I
am not completely covering the entire section
of the feeds fitted, but only a small single lines
for one side of the feet. Adding this orange color
for the last chick. Let's do a herd
layering with this. Once again, I'm doing
the same thing, adding this orange color just
beside the outline section. The lines are a bit more thinner as compared to what
we did earlier. Here, the concentration has
decreased a little bit. If you want, you can use a
bit more concentrated orange to do to redo it, but I think it's staned
out pretty well. Now I'm using water to blend
a little bit to subdue this orange a little bit since the other threes are
not that much darker, since the other threes
are a bit lighter, so that's why I'm
using this water to spread the orange
color a little bit. Let's do the final
layering for our ground. In here, I'm using a
bit of orange color. It's a bit more concentrated
compared to the earlier one. I'm using this darker seat to create a bit more
pronounced shadow. With this, we are done
with our ninth project. If you want, you can use
a little bit of white to add tiny highlights
for the checks. In here, I'm using
this white ink. In here, I'm using
this white ink from Zickuratake and creating tiny little dots to create a little bit of
highlights for the eyes. You can also use concentrated
white watercolor to do the highlights. I decided, if I'm using white, let's make some of the section
a little bit more lighter. So adding a little bit
of white for some of the sections to make
it a bit more lighter, adding it beside the orange that we used earlier for
the outlining areas. And with these, we are done
with our ninth project. I'll see you in the next one. H.
16. Young trio: Welcome to the tenth project. Here we have got the Young Trio. These are also quite
simple and easy. Let's start with doing
the pencil sketch, starting with a circular C
for the head of the checks. Here the proportion
of both the head and the rest of the bodies
will be quite seam. So same size for the head
and the rest of its body. Let's do the outlining
for the third and the final circular
C for the head. Let's do the remaining
section for its body. The body will be a little bit fluffier because of the wings. If you want, you can increase or decrease the number
of the chicks in here. Let's do the outlining for
the body of the second one. And finally, moving
on to the third one. In here, I'll be using the fine liner to do the outlining. I'll be creating the cavalc on top of the heads of
the three chicks, and I'll be using
a little bit of broken lines and a bit of
hatching to create a bit of tark to create a little
bit of seeding for the lower sections of
the three little chicks. Very simple and small very
simple sets for the beak. Let's add the tiny eyes. And yeah, let's do the same thing for the
other two chicks. To avoid confusing the one on
the left, is our first one. The middle one is the second one and the one at the
right is our third one. We have got the three chick,
the first, second and third, and with this, we add with the eyes and the beaks
for the third chick. Adding the colex in here, adding it for the third one, Calex for this third one. I'll be creating this kind of hatching lines to
create a little bit of seeding for all the chicks
using the fine liner. Let's make it a little
bit more Carvin. I'll also be adding
the wings later on. And with these, we are done with the basic pencil sketching. Let's do the outlining
with a fine liner, starting with the cow lick and creating this
kind of jig jag or a bit of broken lines to create the outlining
for the chicks. If you want, you can create the uniform and straight
lines to do the outlining. You can also use the breastban
to do the outlining. Here, for this one, I decided to create a bit thinner lines. That's why I'm using the fine
liner to do the outlining. Let's go over the
outline for the week. I created some small lines
using a little bit of hatching to create a bit darker seed for the lower regions. I'll be doing the same
for the other three. Let's add a little
bit of more lines to make this region a
little bit more darker. Instead of this, you can also do a little bit of
cross hatching to make it bit more darker and
to create a bit more sados. Let's do the same for the remaining two, starting
with the eyes. I'll be leaving a little bit of white piece for the inside. If you want, you can entirely cover the eyes with the black. And now let's do the
outlining Clic at the top. Here for the ground, I'll
be creating the grass. If you want you can
create shadows or you can use aqua or gory to
create normal ground. I won't be creating
the background. If you want you can proceed with creating skies or
you can also create different kind of
pattern or design or do a little bit of
doodling for the background. Now let's add hatching lines
for the lower section. I'm adding more lines
primarily on the right side. Instead of adding it
on the right side, you can set it towards the left. Here I'm considering
that the light is falling from the left side, so that's why the right
side is a bit more darker. So I'm adding more lines
to create a bit of shading in that region,
the right side. Going over the outline
for the weeks and the I. Now, let's do the
remaining section, starting with the cow lex. This is our teen project, and this is the
last easiest one. After this, we have
two more project they are more than 20 minutes, and we have to create a lots of small little chicks
for that project. I'll be creating two
different kind of chicks. This will be somewhat similar to the second project that we
did with the ten chicks. But in the next project, I'll be creating multiple
ones more than ten, and I'll be using varieties
of the colour to do the. And for the 12th project, I'll also be doing a
little bit of doodling and create more pattern in the
designs for the background. Let's add hatching lines. For this one, I decided to add a little bit of more hatching
lines near its neck. I decided to make the feet a bit larger for personal teats body. If you want, you can
create a bit smaller feet. So we have got three waved feet for the three little chicks. Let's create the feet
for the second one. And as I was mentioning, you can always add
accessories for the feet to like you
can add boots or sous. You can also cover the
feet with grasses. Let's make the wings a
little bit more detail. A few more lines to create a clear distinction between the wings and the
rest of its body. Last one, adding the last
feet for this last tick. And with this, we are
done with the fit. Now let's make the eyes a
little bit more darker. So another layer of the
black for the eyes, I'm leaving a little
bit of white space for the highlight or
you can see the iris of this eyes And with this, we are done with the
outlining and see that the ink has dried and then lightly erase the pencil marks. Apply gentle presser with
the eraser to erase it. Otherwise, some of
the ink will also. Otherwise, if you will apply heavy pressure with the eraser, you will subdue the intensity
of the ink a little bit. Let's remove the eraser dust, and now let's dive
into coloring it. And here I decided
to add a little bit more detailing for
some of the chicks. Adding few more lines
here and there. Wherever it's required,
you can do the scene. Let's make the
distinction between its body and the wings
a bit more clear. And now let's dive
into coloring it, starting with this yellow color. So here I'm using the Cambogio completely filling the
entire section with it. Since we'll be using
a bit darker tone of the orange to do the beaks, you don't have to
worry about it. And for the ice too, you can use a little bit of white
to add highlights, or you can leave it as it is. I'm also coloring
the feet with it. Later on, I'll be going
in with the orange to add another layer on
top of it for the feet. On top of this, I'll also be using orange as
the second layer. Primarily, I'll be adding it
on the regions where we did. Primarily, I'll be adding the oranges near the
outlined section, as well as where we
did a lot of hatching. So where I added more broken
lines for the sading, I'll be adding the
orange on those regions. And moving on to the third one, completely covering the
entire section with this. Let's add a little
bit more color for it and spread it a
little bit more. And now we will wait for
it to dry a little bit, and till it dries,
lets to the ground. In here, I'm using
this lighter tone of the green as the primary
layering for this grass. On top of this, we'll be
adding another layer. Carefully adding it
in between the feet. Even if you add it on top of the feet, you don't
have to worry. Since this is a lightrod sad we'll be covering
it later on soon. Here I'm using a
bit darker tone of the green, comparatively darker. On top of this, we'll be going with more darker
tone, but for now. It will blend on its own because
of wet-on-wet technique. Moving back to the chicks,
here I'm using the orange, creating small strokes with the brush and primarily
adding it for the regions where we did hatching lines and a little
bit for the outline section. I'll be adding more
of these lines on the right side since I'm considering that the light
is falling from the left, so the right side
will be a bit darker. Doing the same for
the second one. Adding more colour to
the regions where we did a lot of hatching
with the fine liner. Moving on to the third
and the final one. Adding it near the
outlined region, a little bit more for
the regions where we did a little bit of hatching
with the fine liner. If you want to subdue
this color a little bit, you can use a little
bit of water. Now add more colors wherever you think it's required, a
little bit of hatching, a little bit of seeding and a little bit for the regions
near the outline sections. Now I'm going with
a bit of orange. I'll be adding in primarily for the outline regions
and a little bit for the regions where
I did a little bit of hatching with a fine liner, not for the entire regions. Let's create a little bit of blessing fact for this orange, a little bit around the beak. Et's add a little
bit more orange. The intensity the intensity
of that orange was decreased. So going in with a bit
more concentrated orange, creating tiny strokes with this, and it will blend with the
cambie ju that we used earlier since it's not
dried up properly. Let's see the coloring
for our feet. So using orange, I won't be covering the
entire section of the leg. So for most of the reasons, I'm leaving a little bit of the earlier colour to be seen. Adding the color
for the last fee. And with the fee, I'd done with the orange for the chicks. And now let's do the beak. So once again using the orange, this time it's a bit
more concentrated and completely filling the insides for the beak with this orange. Let's make the feet a little bit more darker for
the upper side. So for the upper regions, a little bit more orange. And yeah, with this, we are done with the coloring for our three little chicks. Lastly, let's go in with the
darker side of the green, and I'll be creating
this kind of strokes throughout
the entire region. Entire lower regions, I won't be covering the other
two layers that we did. So some of the sections from the earlier two regions
will be a bit visible. Gradually moving towards right. And with this, we are done
with our tenth project. I'll see you in the next
one, the 11th project.
17. Birthday caps: The seventh project,
the body checks. This is going to be
quite different from all the projects that
we have created so far. Here the proportion will
be quite different. The side of the body will be comparatively larger than
the side of the head. As you can see, I have
already started doing the outlines a circular
C for the head, bean like C for the
rest of its body. I'll also be creating
the tail feather, but it won't be that much
defined as the last project. Tiny little feeds. I'll be creating only
two webbed feeds. If you want, you can
do the three leg. If you want, you can do
the three webbed feeds. Let's do the second
one. So these two are facing towards each other and the third one that I'll be creating will be
facing towards the left. I won't be covering
the entire insides of the birds with the coloring. I'll only be adding
it for the sides. By the side. By the side, I mean near the
outlined section. Here I'll be using
the fine to do the outlining and then add the aqua color and a little
bit of orange stone, been light see for its
body, three tail feathers. Let's create the last one. On top of this, we'll be
adding the party hats, colored three different
colored party hats. Instead of this, you can create
any other accessories or any other kind of hats
you can add caps too. And as I mentioned earlier, you can add other
accessories, sunglasses, sunglasses, walking stick, tie, bow tie, purse, et cetera. Do the outlining for the
wings and the tail feeder. A little bit
fluffier texture for the lower half of its body. And these are the basic
shapes for our three chicks. Let's add a little bit
of more detailing, adding the wings,
adding the wings, tail feathers, beaks and eyes. I'll be adding the
circular eyes for them, and the size of the beaks will
be comparatively smaller. Small waks. I'll be using
orange for the beak. It moving on to this one, let's do the outlining
for the beak. I'll be creating oval seeps for the eyes and a little bit of highlights to sow the
reflection on the eyes. You can create any
other kinds of eyes. Here, the three chicks
are quite happy. I want to add if you want to
add expression to the face, you can do that just
by changing the eyes, adding the eyebrows, or making the beaks a little bit
larger or smaller. Moving on to the third chick, and let's add the beak and
the eight for this one. After creating the
pencil outlines, I'll be going with
a fine liner to add the outlinings making
it a bit more detail, adding texture, and a little bit of broken lines to
create for like. Adding the last feat
for this chick. I won't be creating this
foreground or the bees. I'll be creating a little bit
of shadow below the feeds. Now, let's do the outlining
with a fine liner. Be free to make changes and
adjustment to the seams you don't have to stick
strictly with the outlines that
you have created with the pencil sketch. In here, I made a
little bit of mistake. The heads would be a
little bit more curvier, so it won't matter that
since I'll be including the darker regions
of the outline with the remaining part of the cap
on top of the chick's head. Going over the outline for the remaining section
of the chicks body. If you want, you can
add a little bit more textured like we did for
the earlier project, a few more lines, or you
can do a little bit of hatching or cross hatching to create a bit of
shadows and depth. So this is a mistake
that I'm talking about. The heads would be a
little bit more curvier, but I made it a bit slanted. I'll be covering this
mistake by adding the cap on top of the stick
and I'll be using darker colors for the cap. For the other two chicks, I'll be using a bit lighter tones. Let's do the outlining for the last chick. Let's
do the outlining. Let's do the outlining
for the last chick. Going over the outlines
for the lower section, adding these kind of broken
lines or a little bit of hatching lines to create
a bit of furry appearance. Going over the outlines
for the beaks and now let's do the oval
seeps for the eyes. Now finally, let's do the
outlining for the feeds. As I mentioned, you can create
the three webbed feeds, but in here, I decided
to make it simpler. And with these, we are done
with a basic outlining. If you want, you can
make a little bit of changes and adjustments. If you're not satisfied
how the feats look, you can cover it with
the boots and the sous. And yeah, we are done with this. So let's cover the
mistake I made. Creating this triangular
see for the body cap. For all the three
chicks, I'll be creating these triangular caps. But if you want, you can create totally different kind of caps for each individual cheeks. A bit of either for the
lower section of the cap. And now let's add the
pom pom on the top. Let's do the cap for this one. And here I decided to
create a straight cap. I'll be creating
simple patterns and design for the insides
of this cap like star or like stars or moons or simple square or
rectangular shames. Let's darken the eyes. So using this black and leaving a little bit of
white of the people to act as the highlight. Yes. The outlines that I did for this chick is
not that clear and bold, so I'm going so I'm
going over once again to make it a bit more
crisper and more darker. Now let's do the
coloring in here, I'm using a combination of a little bit of white
along with the ocher. So this is kind of peel
ocher color that I'm using. I'll I'll mostly be
adding this near the outline section and I'll be creating kind
of dynamic lines. By dynamic lines, I mean, I'll be wearing the thickness of the lines for some
of the regions, as you can see, I have created a bit thicker lines and
for the other regions, a bit thinner lines. Adding this below the
eyes and the beak. On top of this, we'll be
adding more colors to create a little bit of
texture and patterns. For now, let's continue with this combination of
ocher and the wine. So this is the kind of patterns and the texture that
I'll be creating. This is our first layering. If you want, you can
cover the entire section like we did for the
earlier projects. I'll be trying but I'll
be creating this kind of chicks for this project.
Moving on to the second one. For all the three
chicks, I'll be using the same
colour combinations. If you want, you can use
other color combinations. To create this kind
of pale colors, you will just have to add a little bit of white
to the colors. For yellow, you can
create pale yellow. With the orange, you
can create pale orange. Adding fine lines near the neck. For this tick, I added a little bit of more ocher so this a bit more darker. Now moving on to the
tail fether with this, we are done with the second one, moving on to the third
and the final one. Once again, I'm using the
same color combination, a bit more car and less white. If you want, you can subdue it by adding a little bit
of more white to it. Adding fine lines for the neck. Now, let's move on to the
remaining section in here, too. Once again, I'm creating
a bit smaller strokes. This is a little bit different
from the one we used. This is a little
bit different from the one we did for
the first chick. In here, I'm trying
to create a bit of textured coloring
for the lower part. And with this we are with the primary layering
for these three chicks. Now let's do the base.
So here I'm using ocher, a bit concentrated ocher. I'll be diluting it
later on, but for now, let's create a circular seam to represent the sados
below this chick. Creating this kind of
circular seam for the sido. Let's do the same
for the other two. Instead of using this ocher, you can use the grade to
create a bit darker sado. I'll be using this ocher, and then I'll be creating
another layer of this circular ring with
a bit lighter tone. Moving on to the last one,
doing the same thing, adding it just below the foot
and adding it just below the feet and then creating
this circular s for the sado. Anna, with this, we are done with the first
laying for the sao. Let's wait for it to dry a
little bit until it dries. Here I'm using orange
to do the feed. I won't be covering the entire section of the feet like we did for the remaining section of weed for the
remaining section, the upper part of the bird,
I'll be doing the same thing, going over the outlines
and a little bit near it with this
orange for the feet. If you want to cover
the entire region with the orange,
you can do that, or you can use a combination
of both the color, pale ocher and a bit of orange to create a bit
more detail feet. Anya, we are done with six
feet for our three chicks. Moving on to the beak, carefully filling
the entire section of the beak with this orange. If you want, you can use
two tones of the orange, a bit lighter tone
for the lower part of the beak and a bit darker
tone for the upper part. I'm using this orange to
create feathery appearance for the wings and the remaining
section of its body. Treating small strokes
with a brush to create this kind of texture
for the entire section. The let's do the same thing in here. Small strokes. You can
do a little bit of outlining and then use it
to create a small stroke. Small strokes throughout
the entire region. My entire region, I mean the region in which we
added the peel ocher. For the smaller sections
and the thin lines, I'm not creating this
kind of small strokes. I'm just overlaying
a little bit of orange on top of the peel ocher. Moving on to the
third one in here, we have got a bit larger
and broader strokes, so I'll be creating this kind of small strokes to
overlay on top of it. Let's make the ground a
little bit more darker. Let's use this orange to create a bit darker region
for the sado. So we have got two regions of the sado a bit darker
and a bit lighter. Once again, creating a
bit more smaller strokes with this orange to
create more feathers. Can add a little bit
of more feathers wherever you think
it's required. And, we are done with the
orange for the chicks. Now let's color the caps. For this one, I'm using black as I have to cover the
mistake that I did, and here I'm creating the patterns of
moons and the stars. You can treat any kind
of pattern you desire. These caps are optional. If
you don't want to do that, you can just leave it as it is. And with these, we are
done with our first one. Let's do the second
and the third one. Here I'm using the pencil to do the outlining for the patterns. So this one got circles
as the pattern. For the next one, let's
do the same thing. Stars in the moon. For this one, I'm
doing the same thing, stars and the moon. We have got two
stars in one moon. For this one, as I mentioned, I'll be using lighter tone, a bit diluted form of
the blue to color it. Carefully surrounding the
circles with the blue. For the lower regions
of the two checks, I won't be adding the
coloring for the cap. I'll be leaving white as it is. If you want, you can do a little bit of coloring with the gray. And we are done with this cap, let's do the coloring
for the last one. Here I'm using a bit of red. A bit of concentrated red. First time doing the
outlining for the stars and the moon and then let's feel the remaining
section with it. Two. Carefully filling it since we are using a bit
concentrated red in here, I have cut a bit more precision
and accuracy with it. So with the concentrated
form of the color, you will get more precision
and more accuracy. But with the diluted form, you will lose a little bit
of precision and accuracy. You'll have to we extra courses. And with this, we are done with our second cap for
the party chicks. I decided to add a little bit of coloring for the
insides of the caps, so using yellow, not yellow, this is camo zio. Let's do the coloring for
the other two yellow dots. Sorry for the fluctuations
of the light. And finally, let's
add the coloring for this stars in the moon. I decided to make
the upper section a little bit more darker, so a little bit of fine lining to make the caps a little bit
more detailed and defined. And with these, we are
done with our project. I hope you had fun
painting this. I'll see you in
the next project.
18. Garden of little hatchling : Welcome to our 11th project
Garden of little hatchling. This and the 12th project are one of the biggest
project in here. We'll be creating
21 little chicks. I'll be using only
two layering I won't be adding the colours
for the entire section. And here I have already started
with the lighter side of the yellow to create
our first hatching. To create our first hatchling
or the first chick. So we'll be creating
the chicks in the same manner that we did
for our earlier project, the seventh and the eighth. So only two layering
of the color and I won't be feeling the
colors for the insides. On top of this, I'll be going
in with a bit darker set. And with each color,
I'll be creating four to five little
chicks or hatchling. Apart from this yellow, I'll also be using a
little bit of pink, blue, gray, and ochre. I'll be creating a
total of three or four coloured different
chicks for the ground. I'll be creating grasses, and I'll also be creating
small flowers with a yellow. If you want, you can do the
skies. Let's create one more. I'll be creating the chicks in various poses facing
in various directions. These are quite simple chicks. If you want to make them
a little bit defined, you can do that. You can add the colors
for the inside, like the second project. So this is our fifth
chick with yellow. Let's wait for it to dry. First, I'll be using
the colors to do the primary laying
for all the chicks, and then when it
dries a little bit, then we'll be going with
another side of the color. I decided to create one more
chick with this yellow. So with the yellow, we
have got six chicks. Let's just go with
different color. In here, I'm using a
bit of pink color. I used red and dilute. I used red and added a
little bit of white to get this tone, creating
the outlines. You can increase or
decrease the numbers of the chicks that you will be
creating for this project. In here, I created 20 ones. If you want, you can even
increase that number, you'll have to make the
chicks a little bit more smaller or you can also decrease the numbers by making the chicks a bit more larger. Instead of placing
these chicks randomly, you can create a row or line. Let's do one more in here. If you're not that comfortable, you can start with
a pencil sketch, but I believe that till now, you'll be familiarized
how you can easily do the outlining
with the colors. So I directly jumped into it. Creating one more chick in here. And as I was mentioning, you can clearly see that
I'm creating chicks in various poses and facing
in different directions. After this, I'll be using
the light shade of the blue, a little bit of gray stone
to create more chicks. Creating one more chick
with this in here. So this is facing
towards the center. Adding one more
chick. Initially, I said that I'll be creating
four to five chicks, but in here, it seems I'm
creating more than that. Let's make it six to seven
chicks with coloring. Now here I'm using a bit
lightest blue colour, so I mix a little
bit of white with a blue colour to get
this pale blue colour. Let's create some
more chicks in here. You have to be bit
cautious with your palm, otherwise, you will get
smudging throughout your paper. So try to keep your palm away
from the paper or keep it a little bit up or keep it a
little bit above the paper. In here, I won't be using the fine liner to
do the outlining, but if you want, you
can do that, too. Let's create a few more
with this pale blue color, and then we will move
on to the gray color. Till now, I have used
three colors yellow, pale red or pink. Then this is pale blue. And after this, I'll be
using a bit of gray color. Adding one more chicken here. Right now, it's not that
much clearly visible, but when we'll be doing
another layer with the broken lines and a
little bit of hatching, then it will become more
clear and a bit more bolder. And in here, I'm
using the grey color. This is somewhat similar to the bluey stone that
we used earlier, but when we've been doing
the second layering, it will become more
distinct from each other. Adding few more chicks for the remaining portons I
can add four or five more, two or three for the center,
and one for the top. The whole video is in real time, so you can always
follow along with me. Once again, I'm going back with a yellow colour to
add few more chicks. Here, once again, I'm going back with the yellow to
create more chicks. Instead of this yellow, you
can use any other color. I will be adding
one more chicken here later on, but for now. Let's wait for it to dry a
little bit until it dries, I'm using a little bit of this orange tone,
this orange color. It's a bit concentrated to create the small
beaks and small feet. Here, I'm creating
three waved feet and triangular C for the beaks. For some of the beaks,
I'll be making them closed for the others, open mis. Instead of using a single colour to create the beaks
and the feet, you can use multiple colors. You can dilute the orange to get a different lighter seeds. You can use a bit of aqua color mixed with the orange
to create bigs, feel free to experiment
and use other colors to create the beaks and the feet
for all the chicks in here. So let's continue with creating the beaks and the feet for
the remaining chicks in here. After doing this, we'll
be doing the outlining or you can see the second
layering for the chicks, and then we will proceed
with the greens. I'll be using one or two sets of the greens to create
the small grasses. I'll be adding them
below its feet. I'll be adding them below
and beside the feet of the chicks and also for some of the random
places in between them. I'll be using yellow to create small daffodil flower or
small flower resemblance. You can also use
any other colors to create small flowers. You have got pink, red, blue, and you can also create
different tonal seeds, adding a little bit of white or a little bit of gray to
create a bit darker tones. Just by adding this
tiny weeks and feed, these are looking
much more better. Since we have to create
the small lines and small triangular seeds
for the little chicks, that's why it's taking
a little bit more time. Instead of this, you
can use the fine liner. If you have that
instead of this, you can use the breast pin, if you have to make this
process a bit more faster. You can also use the gel pins. Right now, we have got five more, six to add the
beans and the feed. For our next project, I'll be creating a bit larger
chicks in the same manner. Instead of 20 ones, I'll be creating 18 chicks and I'll be completely covering the background,
not completely, but most of the regions with
different kinds of lava and small buses and a little bit of doodling with the broken
lines using the fine liner. If you want to do the
doodling in here, you can do that, too. And apart from that,
we'll also be adding the colic on top of each
chicks for our next project. Now, the first
layer has dried up. I'm going with this
lighter tone of the orange to do the outlining
for the yellow chicks. Create the broken lines, a little bit of organic lines, and a little bit of hatching for the lower
section, the wings, and the remaining part
of its body to create the resemblance of
fur or feather. Let's quickly do this for
all the remaining chicks. The yellow chicks, for the
yellow chicks, I'm using this. We have got six or seven
yellow chicks in here. Instead of using one color, you can also use two colors. You can mix a little
bit of ocher to it and make it a little
bit more interesting. You can also proceed with
adding a little bit of Cambo along with the ocher
or along with the orange. Let's do two more.
Adding another layer of pier on top of the wings. And with this, we
are done with this. Now, oh, I forgot to
add for this one, adding it for this last one. Add more color wherever
you think it's required. Let's move on to another side. For this pink chicks, I'm
using this orange color, creating a little
bit of broken lines and a little bit of hatching to create the outlines for the remaining pink chicks
that we have in here, two row of hatching
lines for the wings. And this is somewhat similar to the coloring for the
feet and the beak. If you want, you
can make this color a bit lighter, a
bit more darker. For now, let's do the remaining
pink chicks with this, and then we will proceed to either blue chicks
or the gray chicks. I'll be adding one more
chick in the upper section because this area seems
a little bit empty. For now will be continuing
with this pinkish chicks, and then we will be doing it, either outlining
the other chicks or adding another chick
in the middle portion. Moving on to the last pinkish
chick that we have in here, a bit of broken lines
and a little bit of hatching to create this last
outlining for this chick. Now, let's do this blues chicks. So here I'm using a bit
concentrated blue colour and we'll be doing
the same thing, a little bit of broken
lines for the outlining and this kind of hatching
for the remaining section. We have got four or
five bluish chicks, and then we have
got grays chicks and more chicks to add
for the empty person. For the bonus project,
I have included a ink illustration
of real chicks. So that is going to
be interesting, too. After that 12 project, I'll
be uploading that video. Let's do the outlining for the last bluey stick
we have in here. And with this, we are done with the blues sticks. Let's
do the grays one. For this, here, I'm
using a bit darker. For this, here, I'm using
a bit diluted black color. It will lose its intensity
a little bit when it dries. But for now, let's
do the outlining for the remaining three or four
chicks that we have in here, a bit of broken lines
and a little bit of small hatching for the feathers and the remaining section, the lower section of the chicks. And with these, we add with the gray or black
chicks in here. Let's add one more chicks. So using the same
colour combination, starting with yellow to do the outlining Risk
for the chick. Now, let's add the beaks and the feet for it, using
orange to do that. And then we'll be
doing the second layering till it dries. Here I'm using a bit saturated
green to do the grasses. I'm leaving the feet as it is. If you want, you can cover
some section of the feet. Small strokes with the green
to create the grasses. I'll be adding them for
each individual chicks that we have in here below
and we side their foot. Let's continue with the green
for the remaining section. Instead of creating this
small and uniform grasses, you can experiment and create some larger and
some smaller ones. You'll have to be a bit
cautious not to mix it with the heads or the
remaining section or the parts of the chicks body. So add it carefully.
And with these, we are done with the
greens for all the chicks. In here, I'm using
a little bit of darker orange to
do the outlining. Instead of this, you can
use the Cambio hue or a little less saturated
yellowish colour for the chicks outlining, like we did for the
earlier yellowish chicks. And yeah, we are done
with this last chick, the outlining for
the last chick. Let's continue with
the remaining section. Oh now let's create
more grasses. So here I'm using a bit more
saturated greens and I'll be creating small patches of grass for the empty
spaces in between. If you want, you can use totally different
seeds of the green. But for now, let's continue
with adding small patches of the grass in between the chicks and for the
larger empty spaces. After this, we'll also
be creating the flowers, small strokes with the breast
to create the small patches of the grass throughout
the remaining section. Adding a little bit of more grasses for some of the regions. I have decreased the
size of the glasses a little bit so as to feel
for the empty spaces, using a bit darker set of the gray for some of the
regions of the grasses, particularly for
the lower regions. Well let's continue with
the remaining section with this bit darker
tone of the green. You can also use a little bit of orchard to create the
resemblance of some ground. For the flowers, I'll be creating this kind
of small strokes. And on top of this, I'll be
adding the yellow, orange, or any other colour
lighted tones of the colour to create the flower. In my keys, I'll be
using the yellow. You can use any other
color that I mentioned. Let's create this
small strokes for all the grass patches that
we have created in here. As you can see, I'm not adding the small strokes for all
the sections of the grasses. If you want, you can
add all of them. Instead of adding one or two, you can add multiple ones. It will take a bit of time, but it will become more interesting. And with this, we
are done with this going with the yellow to
create the small dots, a little bit of ununiform dot to create the resemblance
for the flowers. I'll be adding this
on top of the greens. You don't have to worry about this mixing with the greens, as since we are using a bit concentrated form of
the yellow and the green, we use Was bit
diluted consistency, so it won't mix that much. And even if it mix, it won't be grating your
project that much. After this, we'll be
using the blacks to add tiny ice for our chicks. H you can also
create resemblance some small butterflies floating
around using pinky stone or other paler colour to create the resemblance
of the butterflies. And with this, we are done with the yellow for the
small flowers. Let's go in with this black. I'm using the fine
liner to create the small eyes for our chicks. For the chicks that
are facing towards the center that are
looking forward, I'll be creating two eyes, and for the remaining ones,
I'll be adding single line. We have got eight or ten
more chicks to add ice to, and then we will
finish this project. After this, we have
the last project and one more bonus project. Let me know how many
chicks you have created for this project if you
are attempting this one. So this project in the next
project is somewhat similar, but a little bit different since we'll be adding a little bit of curvier lines for our second
project, the 12th project. And with this, we are done
with our 11th project. I hope you had fun
painting this, and I'll see you
in the next one.
19. Springtime Hatchlings: Welcome to our final project
Springtime hatchlings. In here, we'll be creating
16 different hatchlings, and for the last project, we used four colors in
here and we'll be using six different seeds of the color to create this 18 hatchlings. Here I've already started
with the pale yellow color. I used a little bit
of white along with the light yellow to gate this
kind of pale yellow color. This is a little bit different
from the last project. We only created the
outline for the second. We only created the
outlines and did another layer on top of
it for the 11th project, but in here, I'll be
filling the insides too. Very simple seeps
for the hatchlings, a little bit more defined as compared to the last
project that we did. And on top of this, we'll
be doing the layering, create the outlines
and a little bit of additional texture for
the feathers and the wings. If you're not that confident, you can start with the
basic pencil sketch and do the coloring later on. But I believe now that you are capable of creating
the hatchlings on your own without doing
the pencil sketches, as the seeps are very simple and they are quite easy to do. I'll be creating three
hatchlings with each color. With these we are
done with a pale yellow to create the hatchlings. Now in here, I'm using
a combination of ocher along with the white to
get this pale ocher color. With these two, I'll be
creating three hatchlings. And with these we are done with a silhouette for the first one. Let's add one more for the top, circular see for the head, somewhat of watermelon
like see for the rest of its body
and a triangular see, and a triangular see
for the tail feeder. So these two are facing
towards each other. If you want to make it a bit more saturated, you can do that. But in here, I'll be
trying to maintain this kind of consistency
for all the coloring, and mostly I'll be trying
to create pale colors. Now let's do our third one. So in here, I'm witching
this grey color. Let's create the outline
or silvet for the burn. A little bit of colour
was muched in here. How about we turn into
another hatchling? Hey, is a little bit
greenish in colour, but we will be
covering it later on, but for now, we are done
with the second one. Let's create one more in here. Very simple sames. And with these, we are done
with this one. Moving on to another color. Here, I'm using red, and
I added a lot of white to get this kind of
pale red color in here. Here, too, I'll be creating
three hatchlings with it. You can add hatchlings
anywhere you want, and you don't have to stick
with the same thing that I'm doing creating three hatchlings
with the same color. You can increase or decrease the numbers of the
hatchling and you can use other color combination and other colored schemes to
create the hatchlings. Let's create one more in here. So far, we have
used four colors. I'll be using two more colors. I'll be using blue
and a little bit of Cambozio to create
six more chicks. In here, I'm going with
the light blue color. So here, too, I add a little bit of white with the blue
to get this kind of peel blue sand starting with
the circular C for its head. And now let's do the
remaining Saxon for its body. You'll have to be
a bit cautious, otherwise you will smirge
color from your palm. So either keep your
palm away from the paper or you can keep your palm a little
bit above the paper. Et's add one more in here. So how about this in here, okay? So the last chick with
this piel blue color? And with these, we are done
with a pale yellow color. Now I'll be using
another color here. I'm using Camboj. In this case, I did not add the white. In here, I did not mix
the white with it. If you want, you
can do that to get somewhat of pale Cambo color. But since I used pale
yellow and pale ochre, I decided why not let's use a bit concentrated camo Ju to create a bit more
distinct chick in here. And with these, we are
done with the second one. Let's do the final one. So where can we add it in here? In here, I have
created a total of 18. Let me know how many chicks and hatchlings you have
created for your project. Feel free to make adjustment. You can increase the sips
a little bit if you want. And now let's create the feeds. I won't be creating detailed
feed, very simple feeds. I'm using this
concentrated Camboj to create the outlines
for the two little bits. If you want to make the feet a little bit detail,
you can do that. You can also make the
feet a little bit bend. Adding the last pair of wheat. And yeah, we are done with this adding the feet for
the hatchlings. Now let's create the beak. For all the hatchlings in here, I'll be creating this
simple seed for the beaks. If you want, you can
create the open mix too. Keeping the beaks a bit simpler, so I won't be adding
another layer of the color on top of it. But if required,
I'll be adding it. But otherwise, I think
it's looking pretty good. For the feed, on the other hand, I'll be adding another
layer of the color, orange on top of it, and I'll use broken
lines to redo it. And let's add the last
beak for this one, and we are done with these, we are done with the beak
for all the hatchlings. I decided why not let's create small webbed
feet for it to add a little bit more
characteristic. This is optimal. If you don't want, you
don't have to do it. Creating waved feat for all
the hatchlings in here. I'll be covering some
of the section of this waved feet with
the grass later on. So if you don't want, you
don't have to do this since we'll be covering some of the section with the grasses. And with these, we are done with the webbed wheat creations. Let's add let's add the
cow licks on the top. So coxcomb we have got. I'll be adding three or four
small strokes to create the coxcomb or colics on top
of the little hatchlings. Instead of this, you can use any other color combinations.
You can also use red. You can also use red to make it a little bit
more contrasting. And, we are done with this, so let's proceed with
doing the outlining. In see the color has
dried and then proceeded. Here I'm starting with the blue, using a darker tone of the
blue to do the outlining, here, I'm not creating
the broken lines nor I am doing the hatching. Instead, I am
creating this kind of curvier lines to
do the outlining. Creating this kind of line for the entire section
to do the outlining. Andrew so Jeho will be
doing the outlining for all the chicks
using different color. We have got two more
to do, so let's do it. Defining the outline
for the feather and let's add another
layer for the wing. The last blue hatchling
that we have in here. Let's do the remaining section. We small curvy lines, and finally going over
the outline of its head. And with these, we are
done with the blue. Let's do another one.
So this time I'm using black. We'll be doing
the same thing. You just ensure that
the ink has dried and use a little bit
of concentrated color. If you use bit diluted one, then the colors will
merge a little bit or spread a little bit,
which we don't want. Go over the outline
for its head. And we have got
two more in here, one at the top and one at
the bottom, right side. Outlining the wings for it, outlining the wings for it, and let's do the remaining section. Finally, let's do the
last one. Same thing. This kind of curvier lines to do the outlining for its body, a little bit of more
curvy lines for its wing, and few more lines
for the wings. And with this, we are done with this gray chicks
and the hatchlings. Using this black to
create tiny eyes. Since all the chicks are facing either in right or
the left direction, so for all of them, I'll only be adding one e. I'll add the eyes later on what phone now let's do
the remaining thing. Using red to do the outlining
for the pinkies hatchling. Here I'm using dark and concentrated bright
to do the outlinings. You can also experiment
with a little bit of broken line that will add another layer of characteristics
to these hatchlings. And the final
hatchling at the top. Let's do the outlining
for its head, creating the wings with
it, the tail feeder, outlining the tail feeder. And with these, we
are done with this. And here I'm using ocher to do the outlining for this
pale ocher chicks. So we have got one at the top right side and
one at the left side. So yeah, let's continue
doing the outlining for the remaining chicks
three hatchlings of this poca colour. Doing the outlining
for this one, let's do the outlining
for its swing, a little bit of more
detailing for it. And, we are done
with the second one. Let's do the final one
that we have in here. Same thing, a little bit
of curvier lines to do the outlining and a little bit more detailing for its swing. And with these, we are
done with this aqua color, moving on to the Camboj in here, I'm using orange to
do the outlining. A little bit of this
orange to add on top of the Cambou that we used
earlier for its feet. And with this, we are
done with the second one. The final one in here, same thing, curvy lines, a little bit of more
detailing for its wing. And now let's do the remaining
section of its body. And with this, we are done
with the three hatchlings. And as I was mentioning, I'm creating this kind
of broken line on top of the Cambou that we used
earlier for the feet, overlaying this on top
of the Cambojeu feeds, a bit of broken lines. Instead of using this, you
can also use a little bit of red to add more characteristics to the feet of the hatchlings. With this, we are
done with this one. Now let's do the outlining for the pale yellow chicks
that we have in here. I mistakenly used this ocher
to do the outlining here. So I decided, why not? Let's use this. If you have
not made this mistake, you can do the outlining with the yellow color.
So light yellow. Moving on to the
second one. Let's do the remaining section
for the second one. And finally, we have
got the one last stick at the top left side. Creating a little bit of
broken line for the top. And now let's do the
remaining section. A bit of curvier
lines for the wings. And with this, we are done with the outlining of all
the 18 chicks in here. Let's do a little bit of
grass creation and flowers. Before doing the grass, here I'm using this
yellow to create small five or four
petals flower. Apart from this yellow, I'll also be using a
little bit of red to create this four or five
petals flower and Cambo. I'll be creating
numerous flowers in empty specs in between
these little chicks. This is opson if you don't want, you don't have to do this. You can just create the same
kind of background that we did for our 11th
project, simple grasses. And with the, we are done
with the light yellow. In here, I'm using Cambooh to
do the pipe petals flower. Let's add a few more
for the upper part. Apart from this,
you can also create a small butterflies
flying around and you can use a little bit of pink pinkish colour
to create Earth one, one other kind of bags
or insect on the ground. Add few more wherever there
is more empty spaces. And with these we are
with the camera you. Now here I'm going with the red. So we'll be creating more five petals flower with this red. Let's move towards
the upper part. After this, we'll be creating
some small patches of the grass and then
two leaves along with a little bit of then
a little bit of broken lines to create a bit of simple doodling for
the background. For now, let's continue with creating the five
petals red flower. You can also use a little bit of blue pale blue colour to create another layer
of the flowers. You can add another layer of the flowers with the blue and a little bit of pinkish color. And, with these, we are done with red for the
five petals flower. And this is the kind of broken lines that
I'll be creating to do a little bit of
doodling in the background. Simple pin broken lines
throughout the background. So these lines are a little bit curvier and going
in no direction. So for the entire section, I'll be adding these lines. I won't be over saturating
it, but if you want, you can make them a
little bit more detail, add more patterns
and designing to it. I did the remaining on my own, and now, and in here, I'm using a bit darker
tone of the green to create this
kind of leaf buds. So small see with the suens I'll be adding this green for the entire background
in this random manner. And after that,
we'll be creating small patches of the grasses. As you can see, I'm also
overlaying this green on top of the doodling lines that we did with the fine liner. You can also connect
this leaves to the flower by creating a stem. The whole purpose of adding these leaves and
the flower is to fill the entire background with this flower
and leaves motif. And now I'll be adding a
few more since I think I have covered most of the
section with the screen. Adding few more here and there. And I think now it's enough. So if you want, you
can add a few more, but I think I am
satisfied with it. And now using the same green
to create small patches of the grasses below the
feats of the ticks. So I'll be adding these patches for all the chicks
that we have in here. You'll have to be a bit
cautious since some of the chicks feeds are on top
of the heads of the other. Also, I'm overlaying
this on top of some of the section of the
feeds of the hatchlings. I think we are done with this. You can add a little bit of more grass patches
here and there. And finally, going with the
fine liner to add the eyes, single black oval
sees for the eye. Earlier, I was creating the
eyes with a watercolor bus, but I thought that since we are creating
such a small eyes, I might make mistakes. That's why I am proceeding with the fine liner
to create the eyes. And let's add the ice
for the last chick. And with this, we in with the 12th and the final
project of this class. I'll see you in the next
video with the bonus project.
20. Extra hatching pen sketching : Welcome to the bonus
project, and here, I'll be doing the ink
lustronOPin sketching for somewhat of
real looking check. Let's start with doing
the basic outlining. Here I'll be starting
with the basic simple Cs that you can easily copy. Here we have got some I like
C for the top of its head. Now let's do the
remaining portion. So somewhat of triangular C. Somewhat of triangular
C for its neck and the upper portion of its body. And for its remaining
portion of the body, here we have got somewhat
of a small arc like sea. For the steel freezer, we
have got the rectangular sep And for the rest of its body, I'll be dividing into
two sections here. Let's do the remaining
one somewhat triangular somewhat
of triangle C for it. This will be its feet, a little bit more
detail and defined. Another, another feel that
lies on the other side. So these are the basic shapes, and I'll be adding more
details to it. Let's do that. Then we'll be trying
to create a bit of texture like the real chicks. So somewhat of this
kind of lines. In here, we'll be
adding the meek, a little bit of mere
beak for the upper part. Now let's do the remaining
section. The eyes. The eyes will be a little
bit behind the beak, the upper portion of the meek, a circular see for the eyeball and then this kind of same. Et's make the head a little bit more fluffier, a bit larger. I'll be making a
little bit adjustment to the pencil skis that ended with the basic saves and I'll be going with the final end to add the final detailingsF
all the sections, we'll be doing a bit of
hatching, crosshatching, and I'll be using a bit of
broken and curvier lines. I'll be creating
the feathers for this little chick
in this manner. Not all the feathers will
be clearly distinctive, but some of them will
be more clear as compared to the other the
lower portion of its body. And in here, I'll
be adding the feet. Some portion of the second
feet won't be visible. So this is just the outlining that I'm doing with a
pencil later on we'll be making more adjustment to
the later on we'll be making more adjustment as we
add the fine lining or use the fine narrator
to do the outlining. The outline that we did earlier with the food was not that good. So here I'm making
another outline. So this will be the remaining
section of its food. And if you're not confident
with creating the food, you can cover it with the twigs and broken sales of the eggs, which I'll be doing since I made a little bit of mistakes, so I covered it
with the twigs and a little bit of broken eggs. Sketching out the guideline
for some broken eggs. Eggl we have got one Ecell
in here and another in here. If you want to
make adjustment to the seeds in the sides,
feel free to do that. But I am done with the
basic pencil outlining. Let's go in with the fine
and to do the outlining, and then we will
do the hatching, cross setching, add a
little bit of seeding. For now, I'll be just going over the outlines with this kind of small broken lines
and create a bit of texture for the
outlining section. Small strokes with the breast
to create this kind of pattern texture
for the outlining. The whole video is in real time, so you can always
join along with me. Let's make this
beak a little bit more detailed and a bit larger, creating a pointed
edge for the beak. Now, for the upper
section of its wing, Mall jig jag lines, for the
outline for all the sections. Let's do the outlining
for its tail either. Here I'm wearing the sizes
of the lines a little bit. Moving on to its wing. Same thing in here,
same kind of line. If you want to make these lines a bit more bolder
and more darker, you can use the breastpin. And if you are using
the breastbin, you can make this process
a bit more faster. So we are almost done
with the upper part. Let's do the remaining section. Same kind of texture
to create a bit of fluffy texture for
the lower section. This bootson will be a
little bit more fluffier. The chase tigon
for this hatchling will be a bit more fluffier. And now let's do the
outlining for its speed. This is the first fet that is visible from the side. The other feet on the other side won't be that much visible. Let's do the outlining
for the second feet. The waived section
of the feet won't be visible the front since it's
covered by the front feet. Moving back to the eyes to
make it a little bit more darker and a little bit of
white space for the highlight. Now, small tiny lines
to create a bit of depth for this eye to give
it a bit more volume. Doing the same thing
for the upper side, small tiny lines. Now, let's erase
the pencil marks, and then we will add the mount detailings
lightly erasing it. Insure that the ink has
tried and then proceed. So as you can clearly see, I did not create it
in the second feed, since I'll be covering
it with the twigs and the broken
parts of the Eggl. The outline that we created with the paint is
looking quite good. Now, let's do detailing, adding more depth and
diamonds into it, starting starting with the
axel that we have in here, Allptical C for the axel. Broken section of the axel a
little bit cracked portion. Here's another exel
here's another egg. It's complete egg
that we have in here. Oh. And these are the small lines that
I'm creating to represent or resemble the twinks that are present in here. I'll be adding lots more later. For now, let's move on to the remaining for now, let's
move on to the upper part. Creating this kind
of line a little bit of hatchings to create a little bit more
depth to the painting and and define the parts
of this hatchlings body. I'm considering
that the light is falling from the top right side, so the left side will
be a bit more darker, so I'll be adding a little bit of more lines on that side. I'm creating small
hatching lines and using this to do a
little bit of sading. For this region, the
chaste of this hatchling, I'll be adding more
lines to create a bit more fluffier texture. The region just behind its eyes will be a little bit darker. Let's create a little bit of more hatching lines in there. I'm creating very small
lines to do the hatching and using that and using those hatching lines to do
a little bit of seeding. I'm trying to create the
round conte for its head. I'm trying to create
the round conte for its head using
the hatching lines. Its head turned out platy well. A little bit of
more hatching and seeding for the region behind its wing. Sma tiny lines. If you want to make it a
little bit more bolder, you can do cross hatching
instead of the hatching. It will take a bit more time, but the result will be worth it. You can also do a little
bit of stippling. Now for the tail feather, I'll be dividing two
different section and then we'll be
doing this kind of slanted hatching
to create bit of more texture and pattern
for the tail feather, for the wings, not
for all the wings, but some of the wings that are clearly distinctb
from each other. For those, I'll be
creating this kind of texture and dividing
into different sections. Now for the upper
part of this wing, this side will be a
little bit more darker, adding more lines to create
a distinction in mid this section of the wing and the tail feather
on the other side. And now we'll be adding more
small hatching lines to create a little bit
more depth and provide a bit more volume
to so that the wing is a little bit more fluffier as compared to the
rest of its body. Here, I'm creating the
lines a little bit curvier and following
the contour of the wing, so a bit of curvier lines. For the region below its wing, I'll also be adding a little bit more lines so that it's a bit darker in there because of
the cado casted by its wing. So I'll be moving from one
region to the other region. Sorry, I'm moving
from one region to other region since I'm just adding the seeding
depending upon how one area looks
compared to the other one. So this is the
reason I was talking about that I'll be
adding more lines to make it a bit more
darker so that the cado casted by it is making
a bit more darker. In here, too, I'll be adding a little bit
more longer lines. Adding a few more lines in here, following the contours
of the chest. So a little bit
of curvier lines. And the reason just above its leg will be a
bit more darker. I'll be adding a
bit larger lines and a bit of sading using
the hatching lines. Et's make the outline a
little bit more textured. The check has turned
out pretty well. Now, let's add more
linings to it, make a little bit
more detailed work. You can add few more feeders
for the wing if you want, but I think it's
looking pretty good. And to make the outlines a
bit more bolder and more distinguish you can add two or three layerings
of hatching lines. Here, let's make this
lower region a bit more darker bit more
hatching lines. A bit larger hatching lines
for the lower region. I did a little bit more siding for the lower section
to make it a bit more darker and molder.
Moving on to the egg. Here too, I'll be doing a
little bit of hatching. Instead of creating smaller
hatching lines, here, I'll be making a bit
larger and curvier lines following the conto the
curvier seep of the egg. So this kind of lines, a bit larger hatching lines and following the
contour of the ing. For the lower region,
for the lower region, add a little bit of more lines. Make this region a little
bit darker so that the shadow casted
by the hatchling is making this
region a bit darker. Let's make the outline
a bit more pronounced. Yeah, we are done with this egg. Let's do the other
one, the broken egg. Before doing that, let's make the feet a little
bit more detailed. Since I was not able to create the feat in more defined
and detailed way, I decided to cover it with
the twigs on the ground. I decided to cover
it with the wigs on the ground, moving to the egg, creating a bit of
more hatching lines, following the broken contour of the egg and kind of creating
bit of broken lines, making this region
a bit more darker. The area in between the webbed feet of this chick is a little bit more darker. Let's make the outline of
this broken salt more bolder. The surgeon is on the
other side of the all, so it will be completely covered with
these hatching lines. A, we think we are
almost done with the eggs and the ground
the twigs on the ground. If you want to cover the
remaining section of the feet, you can add more twigs around
here around that region. This small simple
hatching lines to create the appearance or resemblance for the twigs on the ground. And with these, we are done with the basic simple
ink illustration of this nice little hatchling. I hope you have
fun painting this. I'll see you in the next video, the last video, the conclusion.
21. Conclusion And Thanks : And I would like to congratulate you to completing on this class. Here's an extra
illustration that if you want to do,
you can do that, you will have to just decrease the playbacks speed and
follow along with me. So here, I'll be creating
three boss checks. And thank you so
much for joining me in this cute watercolor
chicks class. I hope you had as
much fun painting this little tattlings as I did guiding you
through each project. Over the course of this class, we painted two adorable
watercolor checks, each with its own personality,
color, and charm. You learned how to skate symbol
checks chips, mix color, create soft blend and add tiny background details that makes your painting come alive. We created different
kind of grass patches, a little bit of
backgrounds like skies and a little bit of doodling
for some of the projects. Whether you are a
beginner or just starting your watercolor journey or an intermediate artist
exploring new ideas, I hope this project helped
you feel more confident, creative, and relaxed
while painting. I'd love to see what
you have created. If you have created any project, don't forget to upload your class project in
the project gallery. Share your favorite artwork, your practice sketches or even your full
collection of the 12, sing your interpretation and unique styles truly
makes my day. I hope you enjoyed this class. If you enjoyed this class, please take a moment to leave a review and share
your feedback, your comments, help me improve future classes and inspire other students to
join in the fun. And if you did like to
keep painting with me, B so to check out my other
classes on watercolor, oil pastel, and
ink Illustration. You can follow me here
on the skills here. Thank you once again for
painting along with me. I'm so happy to have you
here, keep practicing, keep experimenting
and most importantly, keep having fun with your art. And if you're following me with this project, as you can see, I use two different seeds of
the acre for the two checks. For one, I used pure
ocher and for the other, I diluted it a little bit with a white to create a bit of
peeler seed for the ocher. For one sides, I use a little bit of darker
sd and for the other, I used a little bit of lighter
sad and on top of that, I added a little bit of white to make it a
bit more lighter. For the third one in here, I
used a little bit of yellow, and on the other side, I added a little bit of orchard to make it
a bit more darker. Right now, I'm creating
the textured pattern, the same kind of textured
pattern that we used in our fourth and fifth product, the little grumpy bass. We'll be doing the same for the other two chicks, small pattern. This is our second layering. On top of this, we'll be doing other two or three layerings
to make it a bit more flafier and add more texture and patterns for the
three little chicks. You'll have to wait a
little bit for it to dry, not dry completely, but a
little bit, and on top of it, we'll be adding these
small strokes to create this appearance
or resemblance of like taxian it will blend on its own because of
weight and wet technique. Now, let's make a clear
distinction between its body, its wing, and the
remaining section. This time, I'm using a
bit more darker side of the ocher to create this kind of br strokes to add
more detailings to it. A bit of more texture
and fluffiness to the grumpy little checks. Add a little bit more for
the regions below its beak, its eyes, and the neckline. Doing the same for
this main boss. Here I'm using a bit
more concentrated chart to do the outlining, creating a bit more
smaller brussi stoke, creating this kind of smaller brussetokes to add the texture. Let's do the outlining
for the upper section, adding a little bit for its
eyes and below and above it. And we will wait for it
to dry a little bit. Until it dries, lets
to the third one. This time, I'm using a
bit more ocher in here, and I added a bit
of Camboju for it. Until it dries, lets
to the foreground. So here I'm using
the combination of ocher and a little
bit of burnt siana. The feet are not that much
clearly visible in here, but we'll be adding another
layer on top of it. I'll be adding it
later on, but for now, adding a little bit
more coloring for its cow legs on top of it head. Let's make the feet a
little bit more defined. So here I'm using
a bit of orange. I added a little bit of burnt siana to it to make
it a bit more darker. And simple plain
orange for the beak. Going in with a fine
line to add the eyes, wear a simple oval
sips for the eyes. If you want, you can
always add accessories. Let's make the beak a little bit more clear with this outlining. And yeah, with these,
we are done with this. And I'll see you in the
next class, happy painting.
 Vishal Munshi