Creative Paper Quilling: Design Unique Bookmarks with Ease | Saba Faisal | Skillshare

Playback Speed


1.0x


  • 0.5x
  • 0.75x
  • 1x (Normal)
  • 1.25x
  • 1.5x
  • 1.75x
  • 2x

Creative Paper Quilling: Design Unique Bookmarks with Ease

teacher avatar Saba Faisal

Watch this class and thousands more

Get unlimited access to every class
Taught by industry leaders & working professionals
Topics include illustration, design, photography, and more

Watch this class and thousands more

Get unlimited access to every class
Taught by industry leaders & working professionals
Topics include illustration, design, photography, and more

Lessons in This Class

    • 1.

      Introduction of the class.

      1:16

    • 2.

      Materials required to make Bookmarks

      0:42

    • 3.

      Let's start with measurement of paper.

      3:33

    • 4.

      Start making paper quilling shapes for 1st bookmark (red colour)

      2:43

    • 5.

      Final touch-up for 1st bookmark

      0:18

    • 6.

      2nd bookmark - Start with tight coils and petals design

      2:24

    • 7.

      Let's stick and complete our 2nd bookmark!

      4:16

    • 8.

      Time to show your creativity!

      0:38

    • 9.

      It's a Wrap!

      1:02

  • --
  • Beginner level
  • Intermediate level
  • Advanced level
  • All levels

Community Generated

The level is determined by a majority opinion of students who have reviewed this class. The teacher's recommendation is shown until at least 5 student responses are collected.

40

Students

--

Projects

About This Class

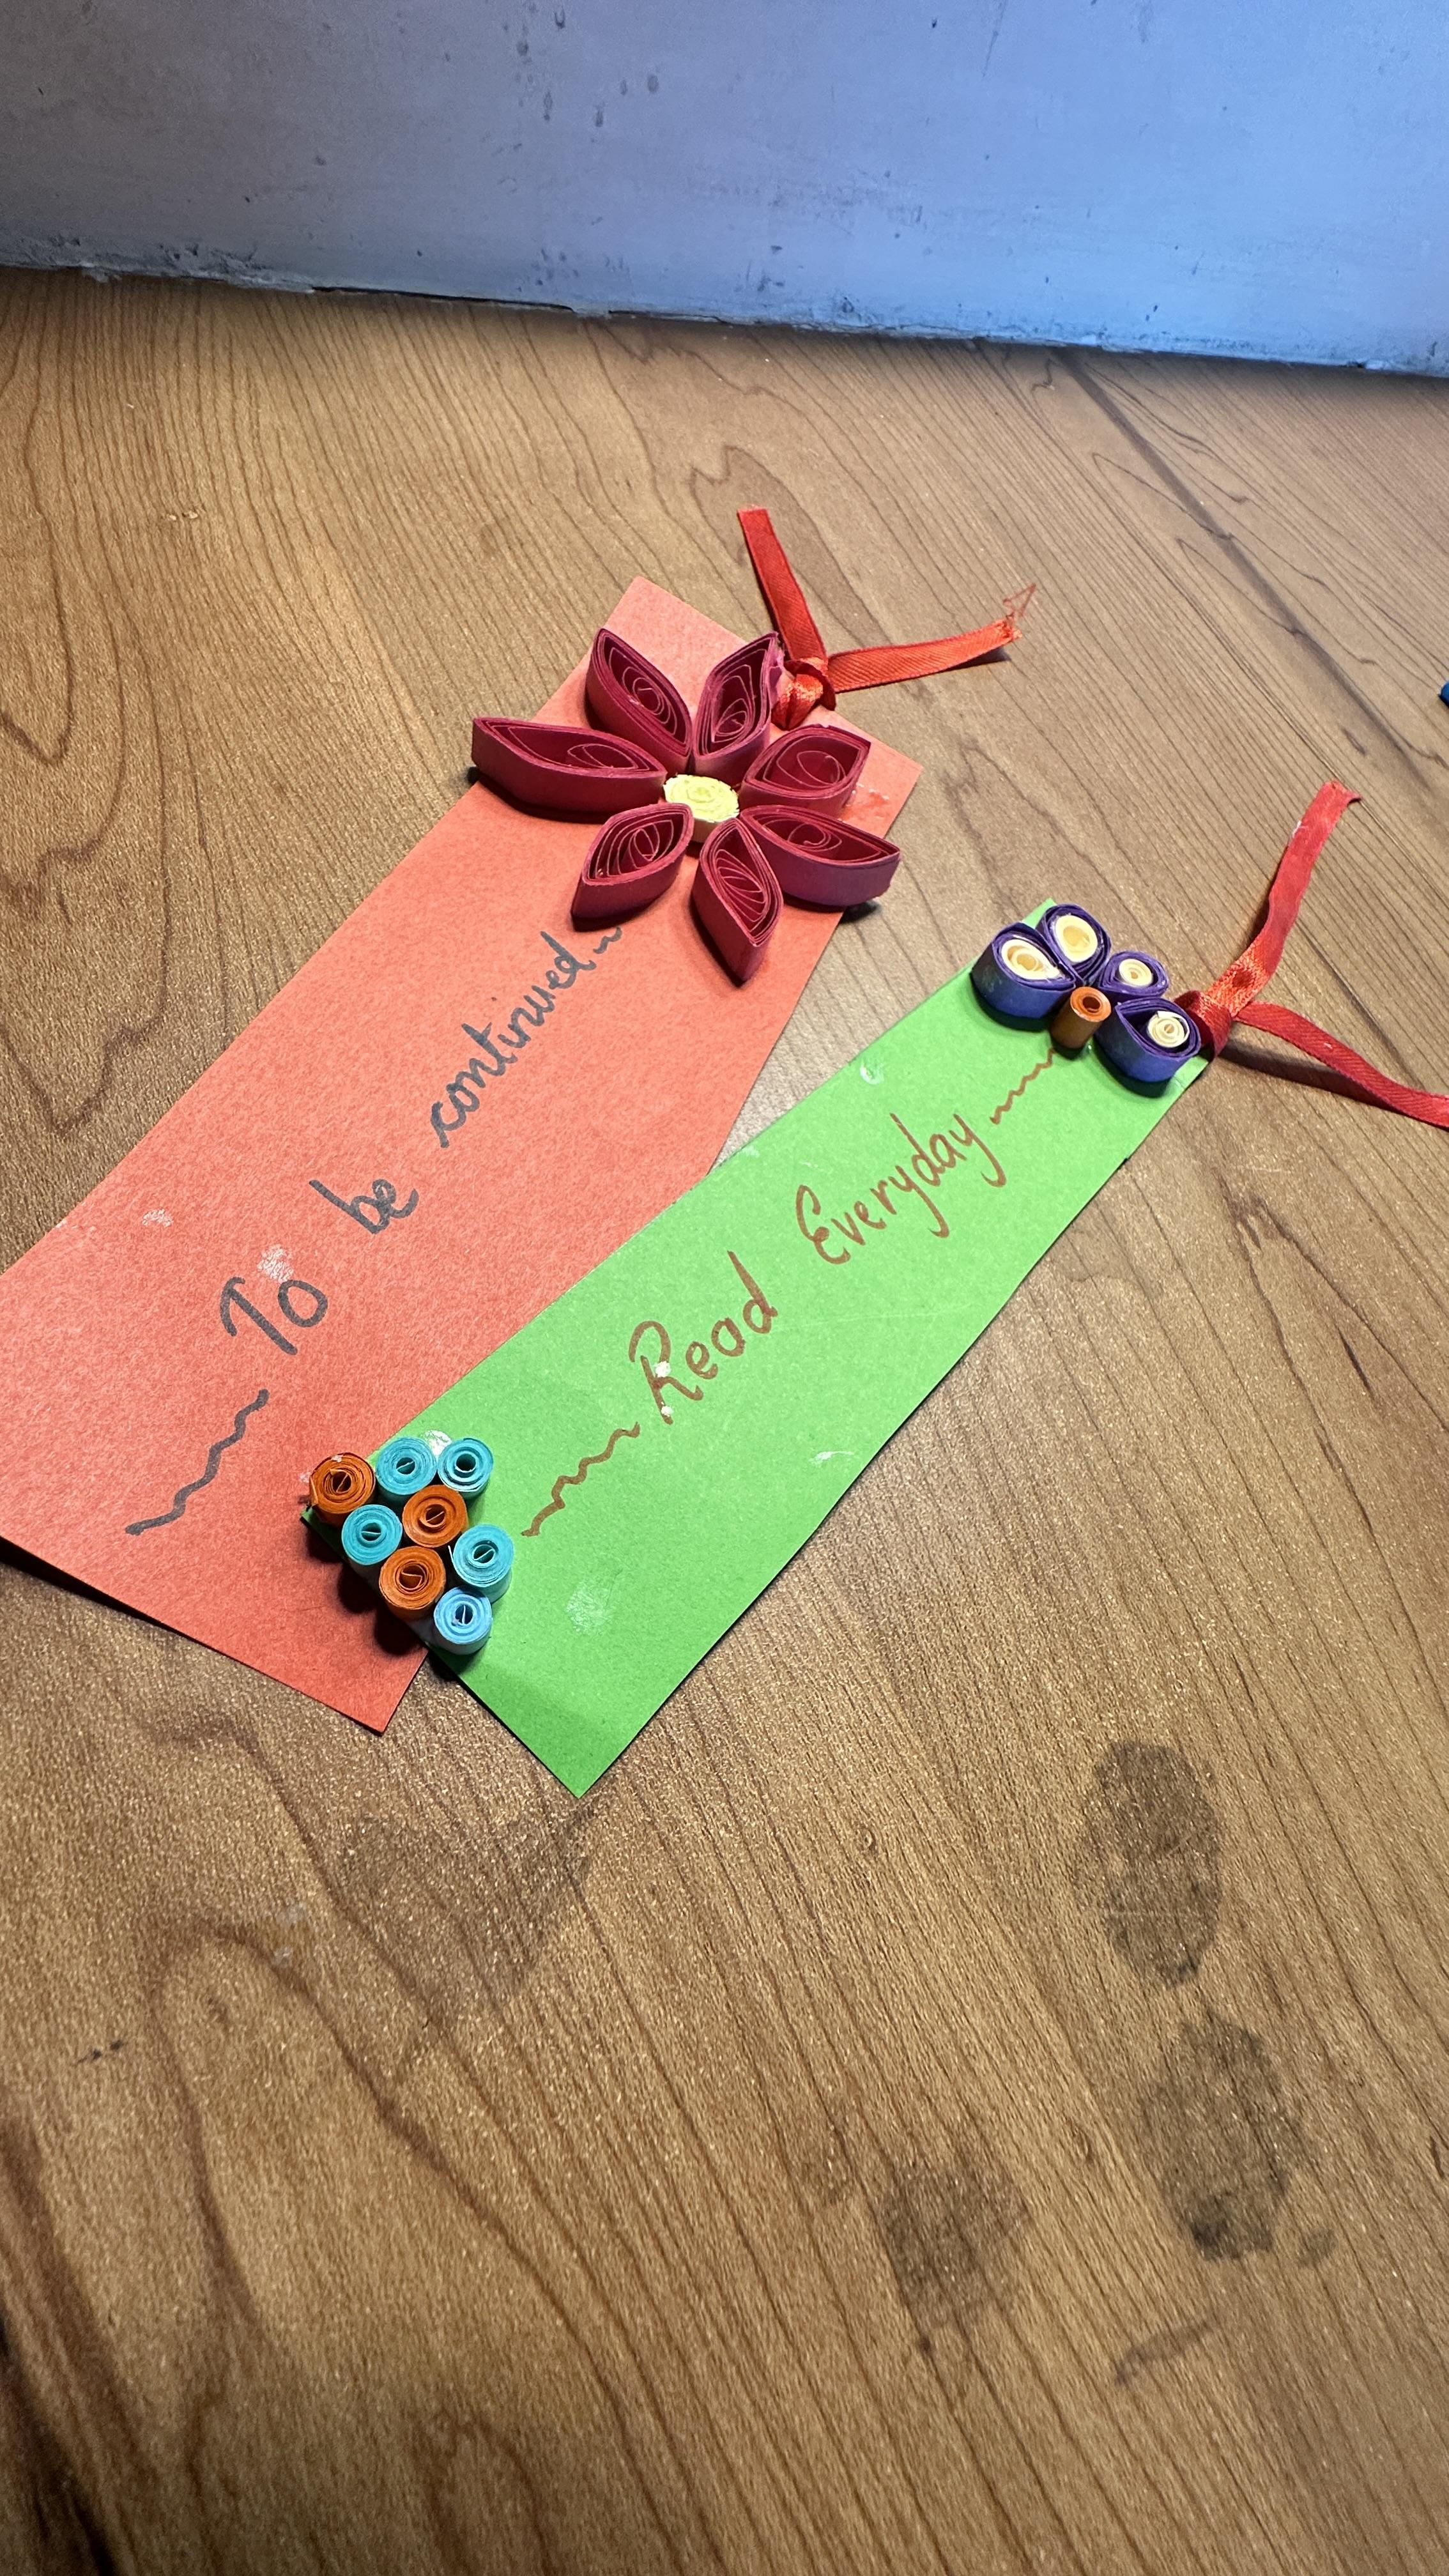
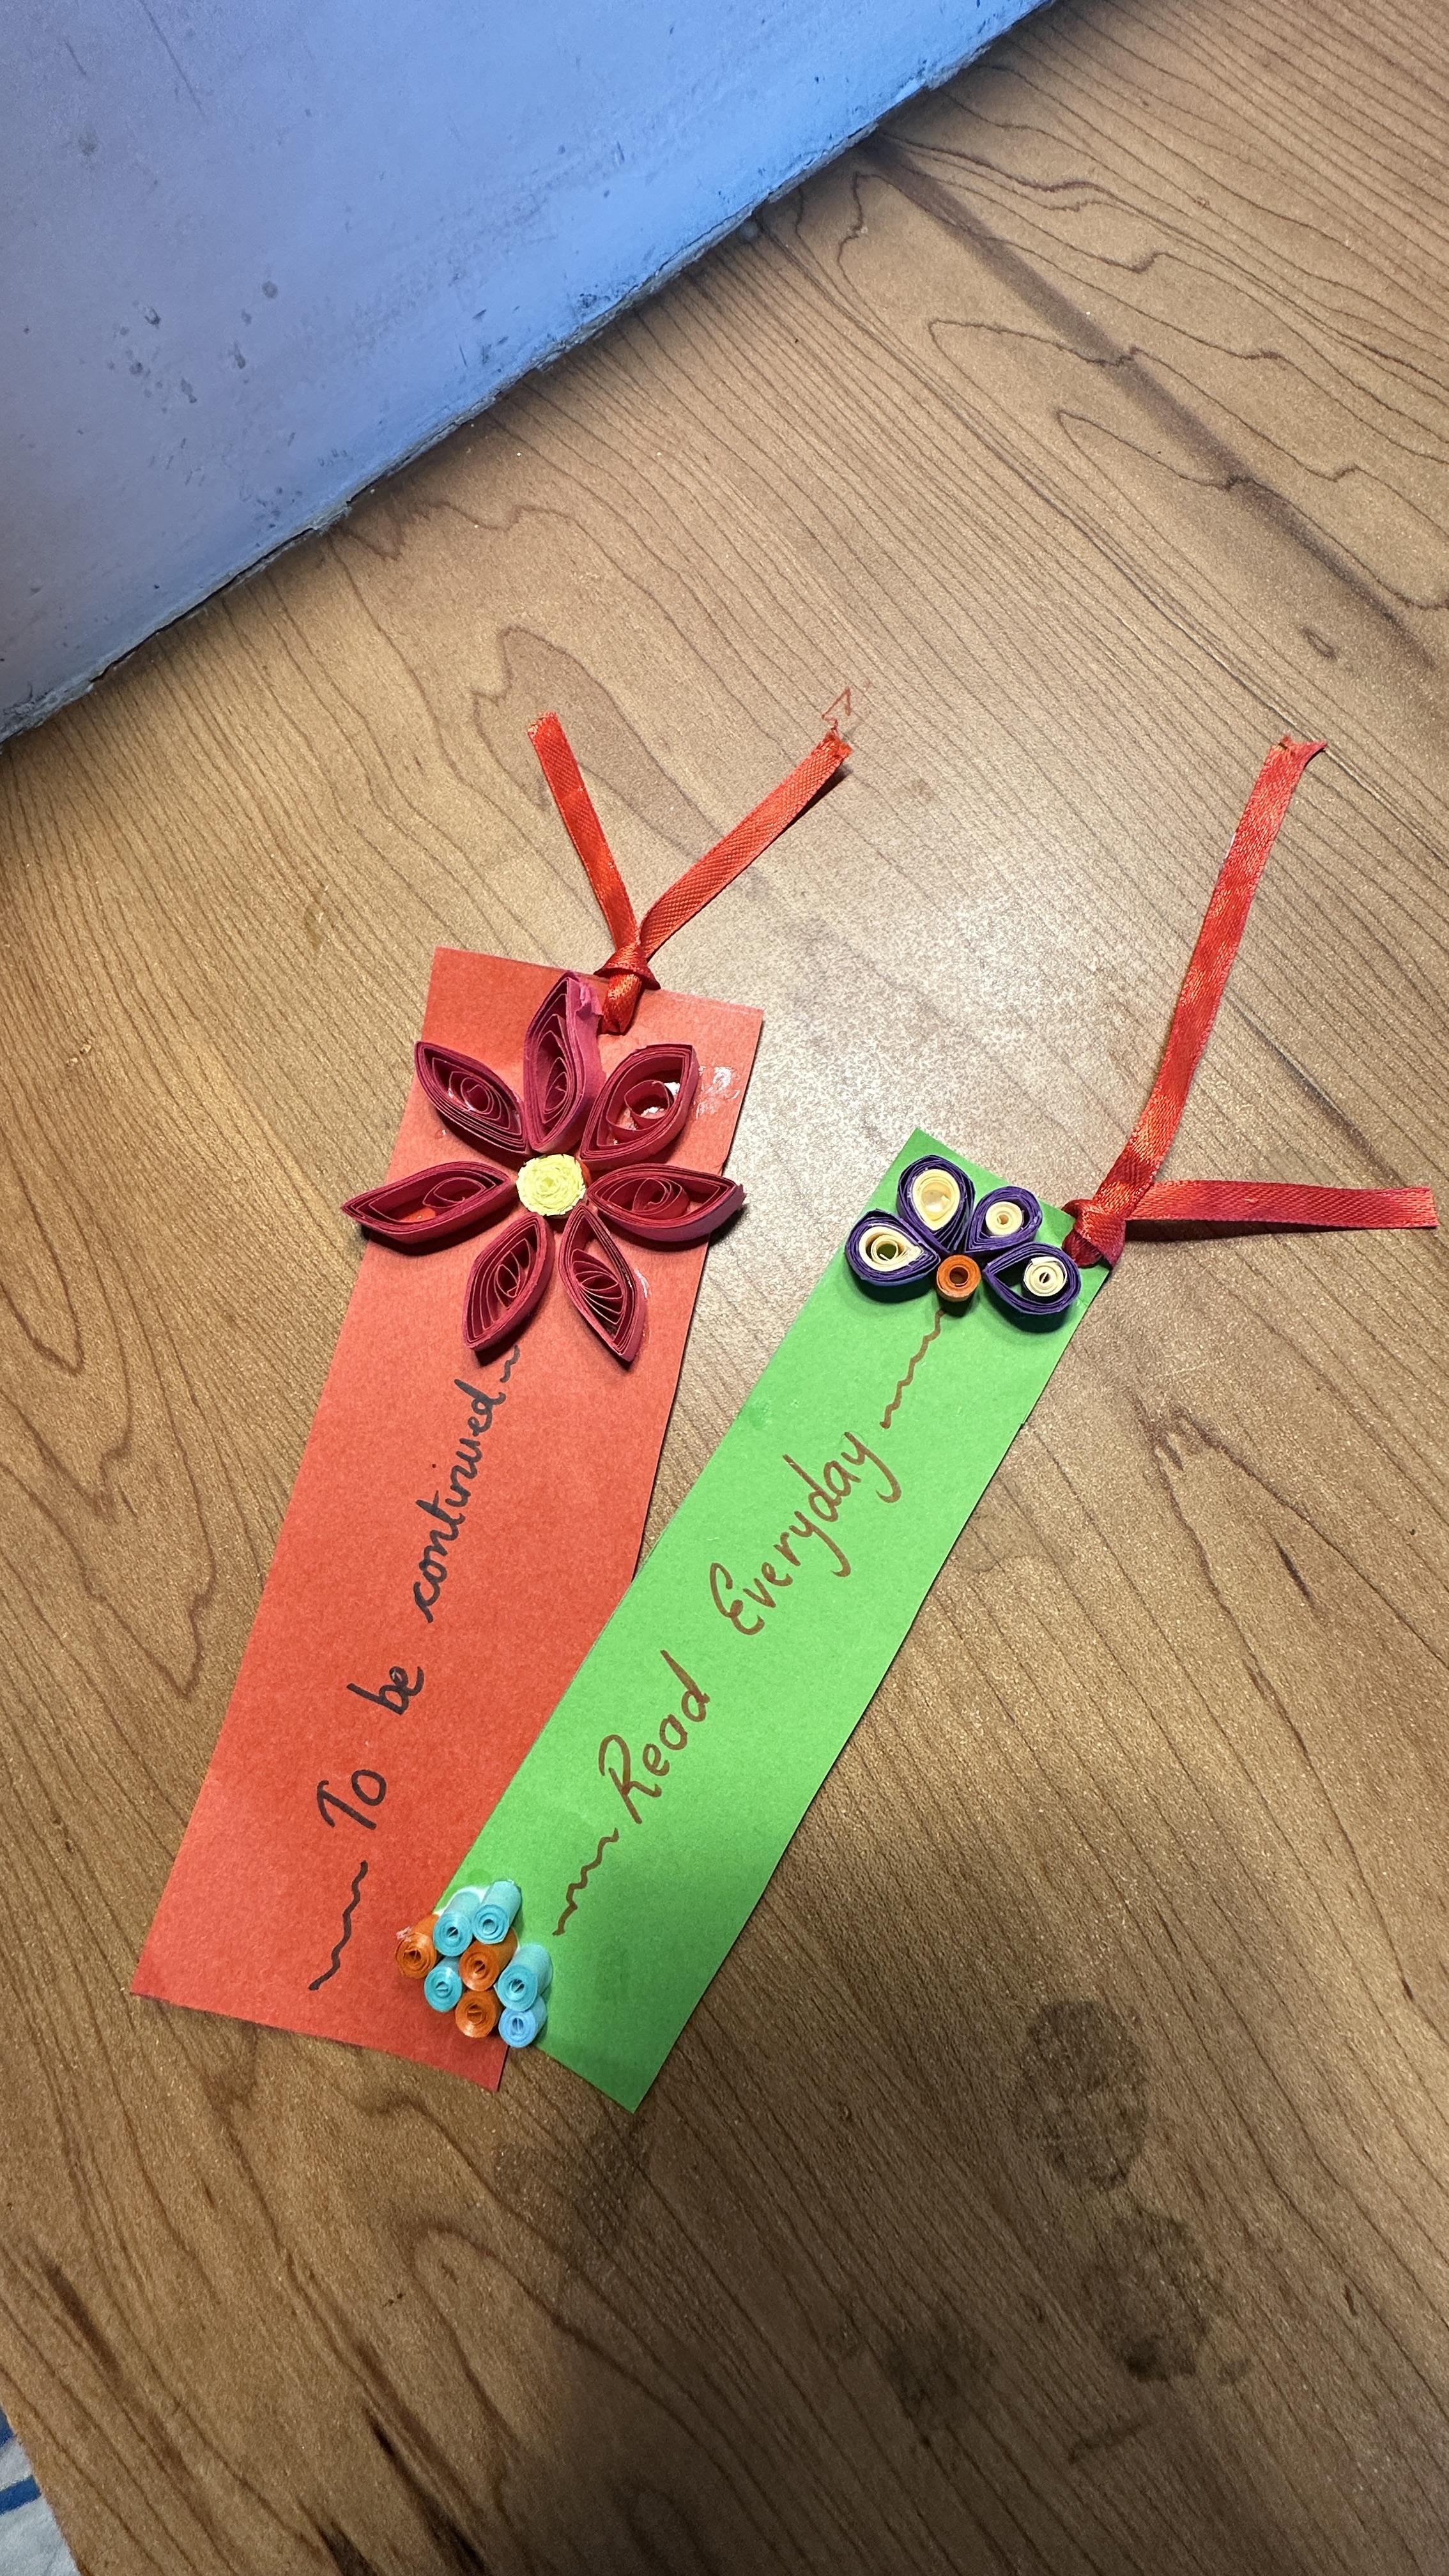
Welcome to this creative class where we explore the art of paper quilling to design beautiful and unique bookmarks! Whether you're a beginner or have some experience with paper quilling, this class is perfect for anyone who loves combining creativity and functionality.

In this hands-on session, I will teach you step-by-step how to create TWO stunning bookmark designs using simple yet elegant paper quilling techniques. You'll learn how to shape coils, form patterns, and bring your ideas to life.

This class is ideal for students, craft enthusiasts, and anyone looking to make personalized bookmarks for themselves or as gifts. By the end of the class, you’ll have the skills to design your own unique creations that reflect your personal style.

Meet Your Teacher

Teacher Profile Image

Saba Faisal

Teacher

"Hello, I'm Saba, a passionate graphic/UI and UX designer with several years of experience in the industry. I've worked with numerous clients, creating impactful designs for their brands. Now, I'm excited to share my knowledge and skills as an instructor on Skillshare."

In my classes, I believe in a hands-on approach where students can actively apply what they learn. I provide step-by-step instructions, practical exercises, and real-world examples to help students develop their skills and gain confidence in using sketch tools.

By taking my classes, you will gain a detailed introduction to sketch tools and learn how to create professional logos for brands. Through hands-on projects and guidance, you will develop the skills and confidence needed to bring yo... See full profile

Level: All Levels

Class Ratings

Expectations Met?
    Exceeded!
  • 0%
  • Yes
  • 0%
  • Somewhat
  • 0%
  • Not really
  • 0%

Why Join Skillshare?

Take award-winning Skillshare Original Classes

Each class has short lessons, hands-on projects

Your membership supports Skillshare teachers

Learn From Anywhere

Take classes on the go with the Skillshare app. Stream or download to watch on the plane, the subway, or wherever you learn best.

Transcripts

1. Introduction of the class.: Hi, everyone. Welcome to my class. My name is Saba and today, I wanted to tell you something that is very exciting. So today, we are going to learn how to make not one but two unique bookmarks with the help of paper quilling. Yes, this paper qulling it may look simple to you, but no, it's really wonderful. So what does paper qulling helps? They help to turn into a simple strip of paper into a very eye catching and beautiful designs. And it's very fun, relaxing, and it also helps in unleashing your creativity. So whether you're a beginner or you have some skills about the paper quilling art, it's fine because this is a hands on activity and it's for everyone. So I suggest whenever I'm going to start this class, please be ready because this is totally practical class. So bookmarks are not just practical. They're for the personal sake. They are also very useful for gifting someone or even if you want to sell as a very small business. So let's gather the tools and the equipment in the class. 2. Materials required to make Bookmarks: Hello, everyone. So today we are going to make the bookmarks using the paper queling art. So this is the cardship paper. The tools which we are going to use. The first is cardship paper, so I'm going to use these two colors, green and red. This is quilingNle. These are paper quilling stripes, crimpler, glue, tweezers, and sketch pen to write something. So yeah, these are the tools which we are going to use for this class. So the next class, we'll start with the bookmark. Thank you. 3. Let's start with measurement of paper.: Hello, everyone. So let us take the measure and we'll cut this card sheet in a bookmark shape. Here is the ruler. Okay. And for the red color. Oh. These are the shapes of the bookmark. So let us start. I'm going to make a flower over you. So for that, I'm going to use this. First, we'll do for the red bookmark. For that, I'm going to use the yellow and the orange stripe. So I will show you one very simple technique. Let us fold this. Again, one fold. And again, one full. And now, let us cut this into half. Now you can cut this. As you can see, I'm cutting almost to the half. Be very careful while cutting. Okay, open it. Take the quilling needle and just roll it. Okay. Okay, here we get the center part. Okay, so now this is done. So let us start with this. So this one is done. So for the petals, we are going to use this color. So see in the next class. 4. Start making paper quilling shapes for 1st bookmark (red colour): Hello, everyone. So let us make the petals. I'm using this pink color. Here is the needle. Let us roll it. Make a coin. Okay. Now loosen it. And secure it with the glue. And just press and make it as have from here and here. So in this way, we are going to make flowers. So here I have this much. So let us stick now. So let us use pinces for that. First, let us see roughly how we are going to arrange. It two 56. Okay, so now I think this looks perfect. So we should start sticking now. And the last. So here we go. So allow it to take some time. So it will take time to dry now. See you in the next class. 5. Final touch-up for 1st bookmark: Hello, everyone. So this is the final part now. So now using this sketch pen, we can write something. So let us write. Here we go. So here we get the bookmark. 6. 2nd bookmark - Start with tight coils and petals design: Hello, everyone. So for the petals, we are going to use this two color stripe. So let us make this half. Similarly, we have to make this half. As you can see, I'm doing the same thing. Okay. Now let us join this. Okay. So now, let us roll this starting with the white so that the light colour stays inside. Secured with the glue. And just make a tear drop, shave. In this way, we are going to make the petals. Okay. So for this petal, I've already made three more petals, and also I've made the coils. And also, I've made the coils of different color, and I've made the tight coil of single strip of paper, as you can see this for extra design. And these are the three petal design which we have already made. So now let us start sticking. See you in the next class. 7. Let's stick and complete our 2nd bookmark!: Hello, everyone. So let us start the sticking part now. So first of all, let's arrange it and see. Here is the one, one, two, three. And here we go for the fourth one. Okay, so this looks perfect. I think it should come a little upward. Okay. So here we go. Okay, so let's start taking now. Plus we put this. And then let us go for the petal. Number one. Here is the second. This one is the third. Here is the? Fourth. Okay. So the four are done. There is one more way. Just put it over here. Take this Okay. So I'm using one over you. Another over you. Next over here. This will be here. Okay. So this is some random design we are making. Okay. So here we go. So we are done with this design. Now we can write something on it. And also, we can make a hole and just tie the ribbon on it. So let us do that. Here is the hole. Okay. So here we go. So we are ready with the second book Mg also. I hope you liked it. Thank you. 8. Time to show your creativity!: Hello, everyone. In this session, I would suggest you to make at least two bookmarks for your reading experiences. So for that, in the class, whatever we have done, please just don't replicate this. You can make your own designs, too, because now I'm 100% sure that you're aware about the basic shapes of the paper quilling art. So you can use those techniques and apply it on the bookmark. So all the best. And yes, once you're done with your wonderful creations, please don't forget to share it in the project gallery. I'll be waiting for that. Thank you. 9. It's a Wrap!: Hello, everyone, and congratulations on completing this class. So now you have two unique masterpiece of bookmarks, which you have made with the help of paper quilling. So bookmarks are more than just placeholders. They mark your unique creativity and also add a personal touch to your reading experience. And plus, they are also a best handmade gift for any of your loved ones. Or you can even start your own small business with the help of this. I hope you have enjoyed this Hanton class and learned some valuable skills along the way. And paper quilling is in osatile activity, so I suggest you to experience and experiment more and more ideas by using different shapes, sizes, and your unique creativity. If you love this class, please don't forget to share this with me in the project gallery. I would love to see this. So stay tuned and till then, happy crafting Bye.