Transcripts
1. Introduction to the class: So, hello. My name is Saba, and I'm here with
another new class. So in this class, everything
will be hands on. Yes, everything will
be practically done. So my suggestion is to stay
with me throughout the class. And it's okay for the beginners, it's really okay if
there is any mistakes. You can ask me whatever
problem it is. I'll definitely resolve that. So without wasting our
time, better start.
2. Materials required to make the stunning Bouquet: Everyone. So let us start with the tools about how to make a flower bouquet with
the help of stockings. So the best part
of this class is my kids have also
participated in this. Yeah, it's because they have
holidays today in school, so they thought to
help their mama, and also I don't
have any options. So yes, so they are
also going to help me. Okay, so let's start
with the tools first. Here we have the
wire, as you can see, and the polens and this
are the stockings, with the help of
which we are going to make the flap petals. This is the tape green tape, with the help of which
we are going to wrap everything to hide
all the things like small things
which you have, when we tie the petals with the help of the thread
for that to hide that, we have to use this green tape. And this is especially
for the green leaves. And yeah, this is the
green colour wire. As you can see, this is the green colour wire which
we already get in the market. So it's just that only green
tape is wrapped around it, and it is really thick so that
we can use this as a stem. And these are polens
and, of course, thread. So yeah, these are all the tools and materials which you are
going to use. Better start.
3. Learn how to make petal of one flower out of five: Everyone. So let us start now. So we'll be making
the petals first. For that, we are going
to use aspire and simply if you want a petal of
this size, for example. So we have to cut over here. We have to leave small space more so that we can twist it. So here we go. We are
going to cut over here. In this way, we are going
to make five petals. So just measure this. This one. Here we got two petals, two petal shaped wires. Here we have third one. As you can see, fourth petal, as you can see, a fifth one. So we got the five petals, let us make the shape of that. For that, I'll show you. We simply need to twist this and leaving some
space like this as a V, as you can see this
and just twist it. Now you have seen and
we have twisted it. In this way, we are
going to do this with the remaining one. Let us start. Okay. So here we have
all the five petals. Now let us put the cloth on it. So I'm going to use a pink one. So for that, first, we need to open this and it comes in this way,
like fully squeezed. So you just have to
remove it like this, as you can see,
Yeah, here we go. There is a hole on
the other side, too, and as you can see,
now it becomes loose. And also, you can see this
color is transparent. Stockings are transparent. If you stretch so much, it might get tear, so it's
better not to pull very hard. So let us start. So we are going to use this now. Okay, simply, you have to put the stockings over this petal. And you have to stretch
and pull it down, as you can see, I'm doing that. But don't pull very hard. Otherwise, it won't
give any shading. If you keep it little
light and from the down, you have to make a pinch. So as you can see, there's a lighter shade above
and the dark shade down, which already gave the
shading effect to the petal. Okay, once done, you
have to tie this with a thread simply Okay, four to five rounds are enough. And then you have to tie it. Here we go. Then cut. My kids are here to hold
me and help me with. Okay. Can you hold this? Me. Is fine. Yeah. So as you can
see, I have two kids. One, the other want the other. Okay. So here we go. As you can say this
pet In this way, we are going to make all the remaining four. Let us start. I Here we go. We are done with the
petals of one flower. So now we are going to do for the rest of the flowers.
Let us start now.
4. Now time to make petals for all flower of Bouquet: Hello, everyone. So now, as we have done the petals
for all the pink flour. So we have made five, one, two, three, four, five. So in this way, we are going
to use the red colour, pink color, and yellow
and white color. So these four colors
we are going to use for the same making the petals. So let's just start. Oh. So in this way, we have
made all the petal shape. Now in the next
class, we are going to put the colorful
stockings on it.
5. Time to put all stockings on petals: Hello, everyone. So as we
have made all the shapes, as you can see, and now we are going to put
the colors on it. That means I'm going to use the stockings to make
the petal more colorful. So we'll start with
the pink first. So let us start then. As you've already
done with this, we are going to do in
the same way only. So first time I'm going
to use a pink one. Only five petals. So I'm removing the five, one, two, three, four, five, keeping this aside. Okay. So let us start now. And I As you can see, we have done with the pink now. So let us take another shade. So we have removed
the next five, and now we are going
to use the red color. So let us start now.
I hope you are also doing with new because doing practically helps
you to learn a lot. And don't worry if you're not able to do it
the first time. I understand for bigness, it becomes very
difficult to do it. But if you practice, then you are going to be the
best. Don't worry about it. Because more and more practice,
it will make you perfect. This is the one. We are
done with the red color. Similarly, we are going
to do the rest for. Here, we have five red
petals, as you can see. Now, we'll go for
the other color. Okay, not two more on left. White and yellow.
Let's go for it. This is the first
one, as you can see, similarly, we are going
to meet the other four. Let us arrange the fetters
and make it as a flower now. So the next flat,
we are to do this.
6. How to arrange petals, pollens to make a beautiful flower for Bouquet: Hello, everyone. So let us
start with the new video. In this video, as you
have seen that we have already done with the pets. Now let us start with the polen. So as you can see that for
the yellow, I'm using orange. For red, I'm using white, for pink, I'm using red. And for dark pink, I'm using maroonish,
and for white, I'm using light pink. So, now let us take the stem, green color, and let us
first make it straight. It is a little curvy. After doing that, we have to
arrange the petals on it. Let us start. First
we are going to curve the end part like
this, as you can see. Here we go, okay? All right. Let us start first with the first color
flour, which is yellow. We have to arrange
yellow colour petals and polen on the stem. First of all, we have to keep the petal and make it little
curve as you can see, or else you can get
the shape later on. Now let us open this polen Okay. So first, we should put
the polens actually on the stem. Here we go. We have to put it inside
and then make a curve, bend it so both sides
of polons comes up and then tight we can secure
it with a thread. We can tighten it and
here you can see, I think three to four
rounds are enough. Okay, so now I don't remove the thread because we
have to tie every petal too, as I've added one petal
two to three rounds again. Here's the second petal. As you can see, again,
two to three rounds. This is the third petal. And here comes the fourth. Slowly, slowly, we have
to arrange everything, and it's fine if it is not looking proper or something because we can make
it proper at the end. Okay, now we can tie the knot. I have tightened it, and
now remove everything and you have to
give a nice shape. Already, it is
looking very nice. So what we can do is, we can just make the petals
look more broader. We can just stretch it or as you can see, as
I'm doing that. But we'll do it very
lightly as it is stalking, it is a cloth, so it might get tar as you can see, this messy part, we are going to hide
this with the help of green tape, don't
worry about that. If it looks messy,
that's perfectly fine. Just press it a little And here we go
with the green tape, you're not supposed to stick it. There is no need to
do that because it has already sticky
part at the one side. Okay, start with the messy part. You just need to press. It gets sticked automatically. Just press and make a roll
so that it goes slowly, slowly, you have
to pull it down. With the other finger,
you have to pinch it hard so that it
gets ticked properly. And as it is already
a green stem, so it is not mandatory
to put it till the down, it's okay if you
just make it a half. Okay, so it's done. So as you can see, I have hidden all the messy part with the
help of the green tape. Okay. So I think this
flow is understood now. So let us do with the
rest of the colors. See you in the next video.
7. Time to complete the remaining flowers: Hello again. As we have made already this flower
in the last video, now we are going to make the flowers for the
rest of the petals. As you know the steps,
how are we going to use? First we are going
to take the stem and then arrange the polen. First, we are going
to fix the polens. We are going to secure it with the help of the thread
and then slowly, slowly. Without cutting the thread, we are going to
use the petal one by one and we are going
to tie with the thread. With the help of the stem,
we are going to start again. So let us start. As we know the procedure, first, we are going to bend the
upper side of the stem, and then we are going
to put the polons, bend it, and then you have
to secure it with a thread. So I just start. All right, so we are doing with
the red one first. So start arranging. Okay, so we are
finally done with the last petal and let us arrange and don't forget to
move your fingers from down. It helps to stick and keep everything intact and
in the proper place. That's it. It is secured now. Now you can arrange
the petals as per your wish and now you can
stick the green tape, which will help to hide
all the messy things. Don't forget to press
with the help of fingers. Actually, this activity
is very helpful. When you do it with your kids, with your family, they
also love to do this. B. The next we are going to make pink
one. So let us start. Again, the same
process because we are going to bend the upper
part of the stem. Now, start with the polens. Now tying the polens with the help of thread and
then starting with a pink color petal
secure with a thread. G Okay. Now arrange it with the help of your fingers. We can stretch. But again, remember, don't
stretch it so tightly. Secure with a thread,
tie the knot, press a little and you can make the petals
sheet as you want. Because the wires
are very flexible, so it becomes very
easy to stretch. Okay. So now you have to cut the thread, and again, to hide
the messy part, we can use the tip. Here we go. We are
done with the flour. Okay. Now let's start
with the next flower, which is dark pink colour. Again, with the same
procedure, taking the stem, bending the upper part, and then inserting the polons. Let's start. Okay. So now we have secured it
properly with the help of the thread. As you can see this. Good And now we have to cover all the messy part with the help of the green tape. Okay. So here we are done. Let's take the next flower, which is the last one. That is white colour, and
we have pink pollens. I mean to say light pink polons. So again, the same procedure
and let us make this fast. Okay, now the end part
which we are going to do is covered all the messy things with the help of the green tape. Okay, so here we
go. So in this way, we have made all the flowers. I hope you have understood
and you liked it. So now, see in the next video,
8. Learn to make leaf for Bouquet: Hello again. So now, as we have done with the flask, so the main thing is still
remaining, which is leaf. So for leaf, you are going
to use the o and we are going to make a leaf
shape, as you can see. And one thing which you have
to remember we have to leave this much wire because
when you are going to make a turn main stem, we need more wire
space so that we can twist and turn
it to the stem. In this way, we are
going to make the leaf. First, let us cut
it into the shapes. First, let us cut it
into the same size. Now we have two. And So now we have full leaf. So you have to turn it as
you have done in the petal, leave some space down so that we can make
it turn on the stem and then just secure it with twisting and turning
of the wire. In this way, we'll get the leaf. So now we have to do similarly
with all the leaf petals. All the leaf shapes. No. So as you can see, this becomes very easy to do it. So again, I would say, if you're doing
it along with me, it will be easier for you. Okay, so here is the last one. Okay, so now this all
four leaves are down. So now we have to put the
green colour stocking on it. As you know, of course, we have to stretch the stock in. But as we have
already used it in the previous class, it
is already stretched. So you just need to put it on the leaf shape
wire which we have made. And as the procedure is same, you are not supposed to
stretch it very hard. Okay. And just secure
with the thread. Now, remove the
remaining stalking cloth so that we can use it for
the rest of the leaf. Here is the first leaf. Similarly, we have to
make all the three. So let us start. Just
the same passage. We have to put the
stalking on the wire, stretch a little, and then secure with the
thread, tie the knot. And again, only two to
three rounds are enough. Otherwise, it looks more
messy and then remove and then cut the thread
as well as stalking. Okay. Okay, so here
is the fourth one. So we are done with
all the four leaf. Okay, let me cut
this extra part. Okay, so here we are done
with all the four leaf. Now we have to just give
the shape, as you know, the leaf has little oval
like shape. So yeah. And again, it is your
wish you can make it. You can give the
shape as you like. Okay, so here are the leaf. So see in the next video.
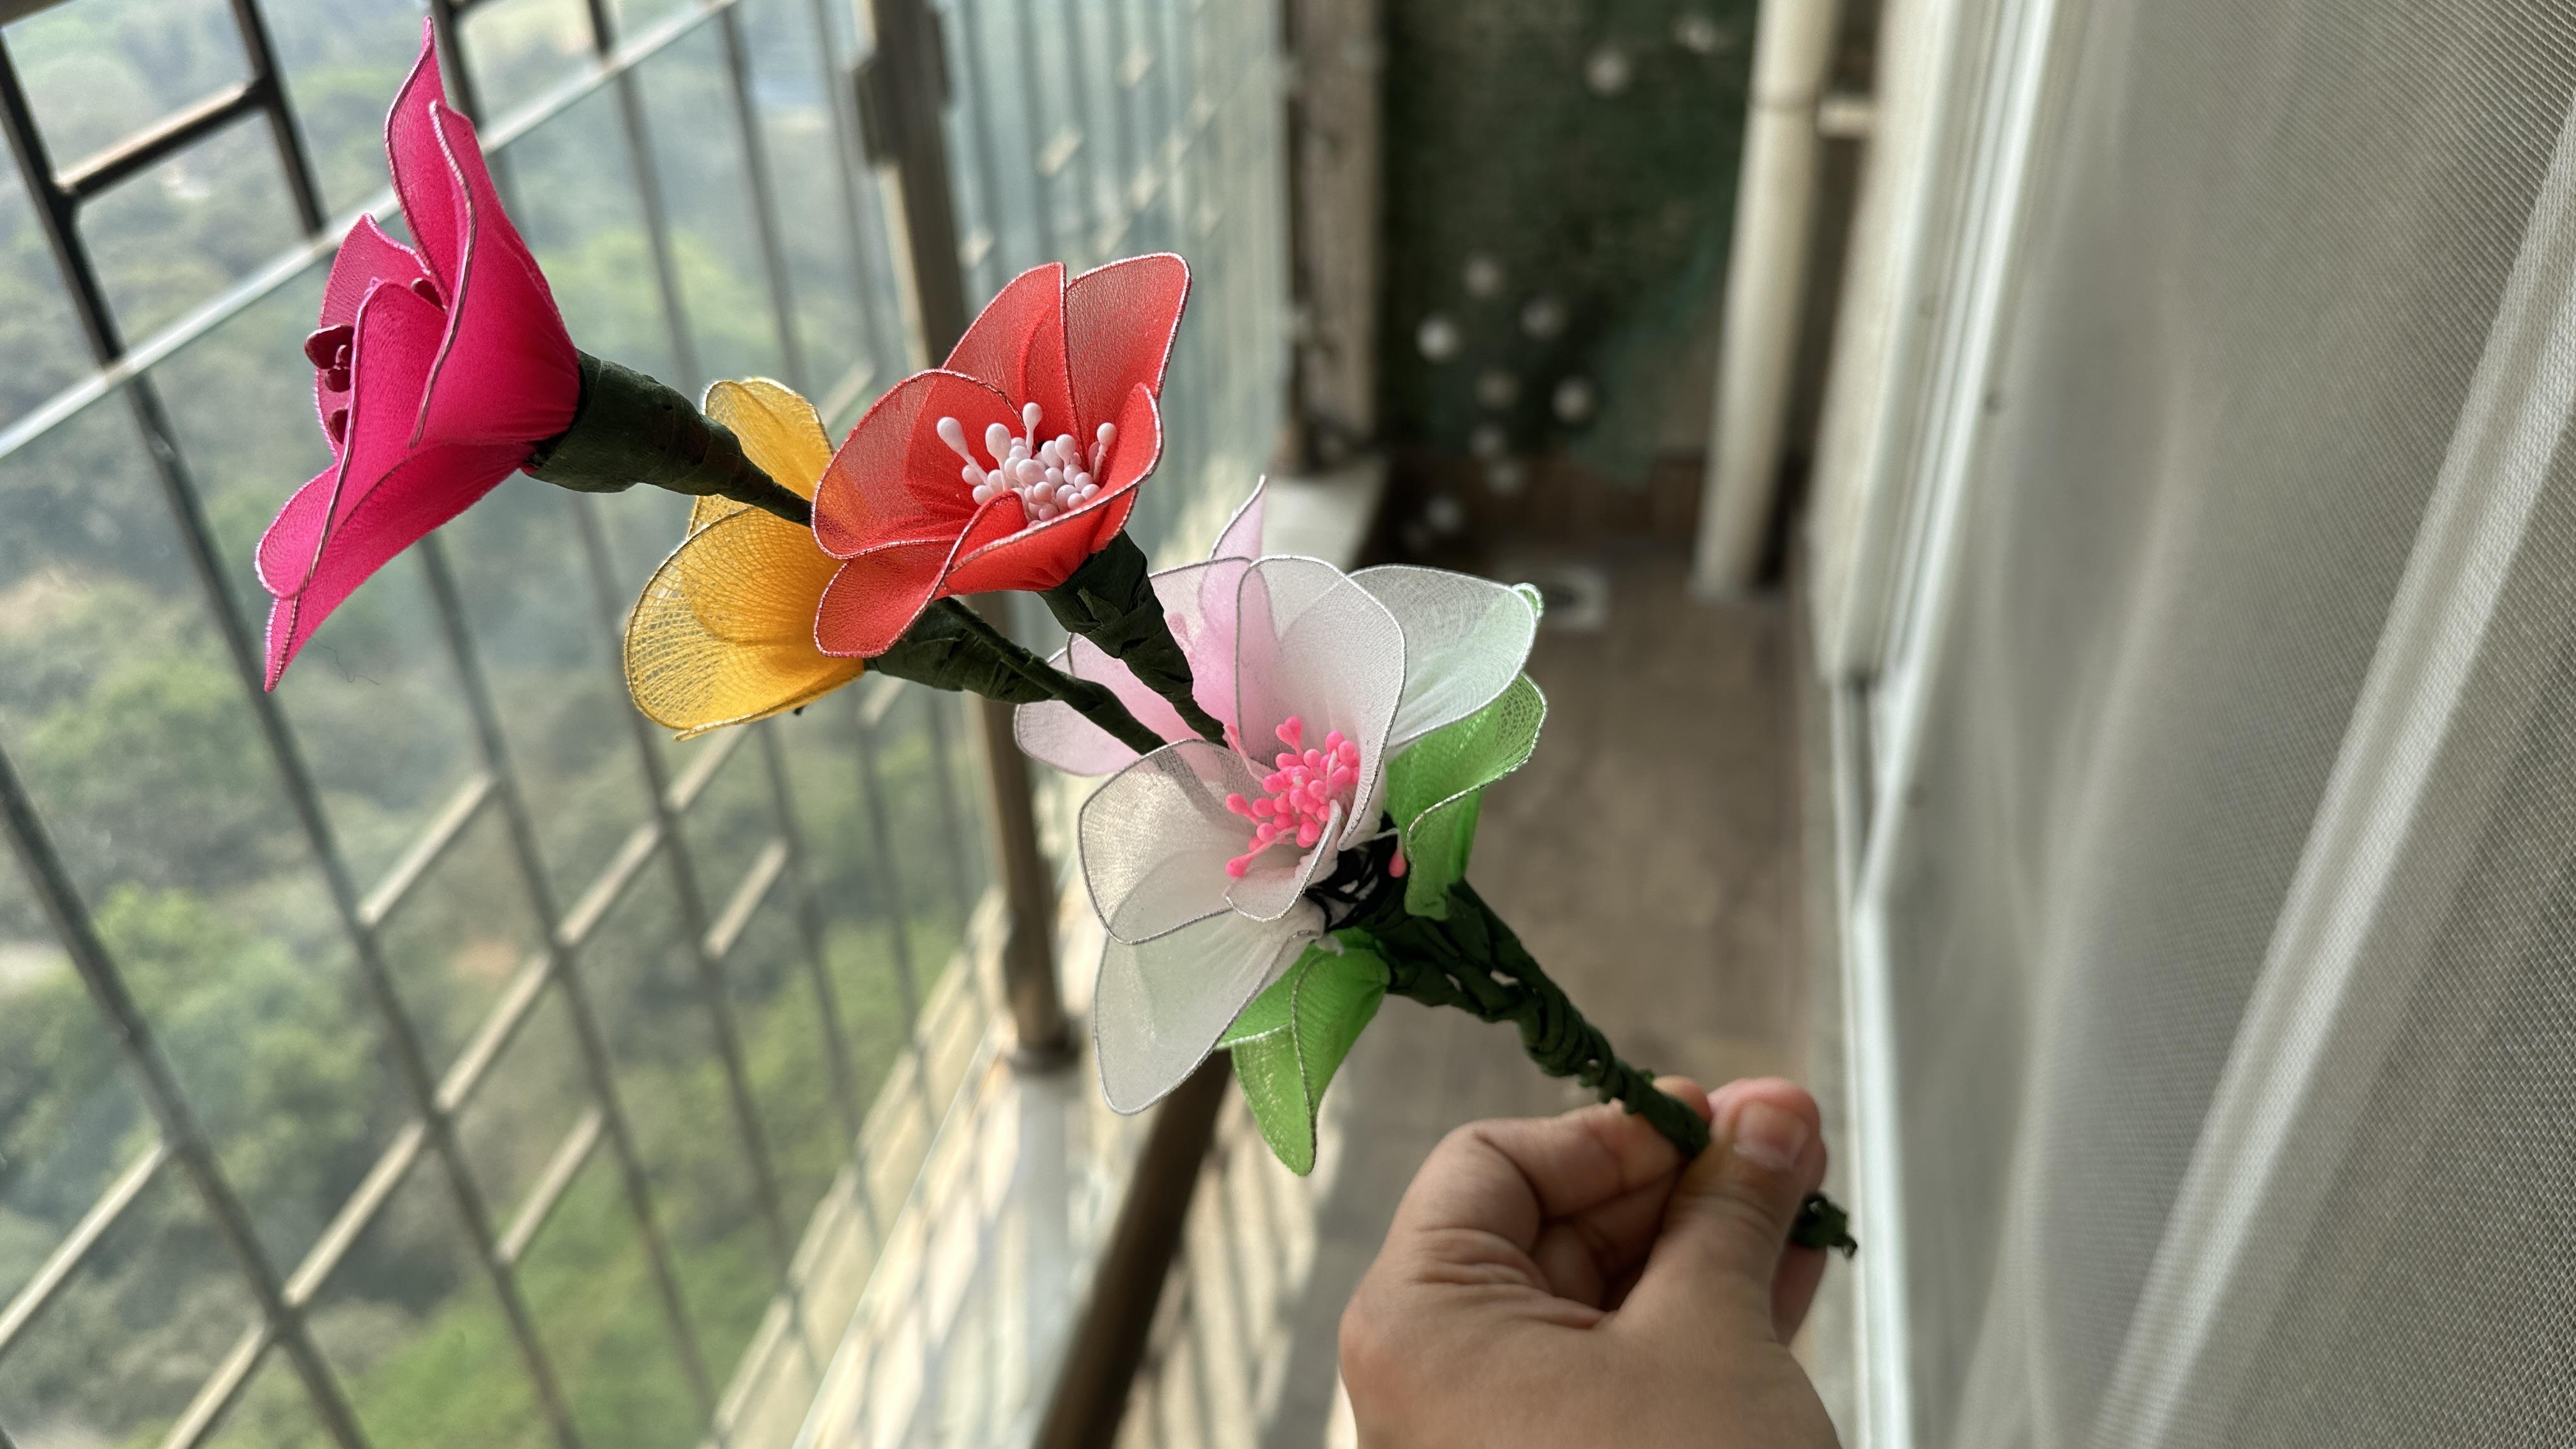
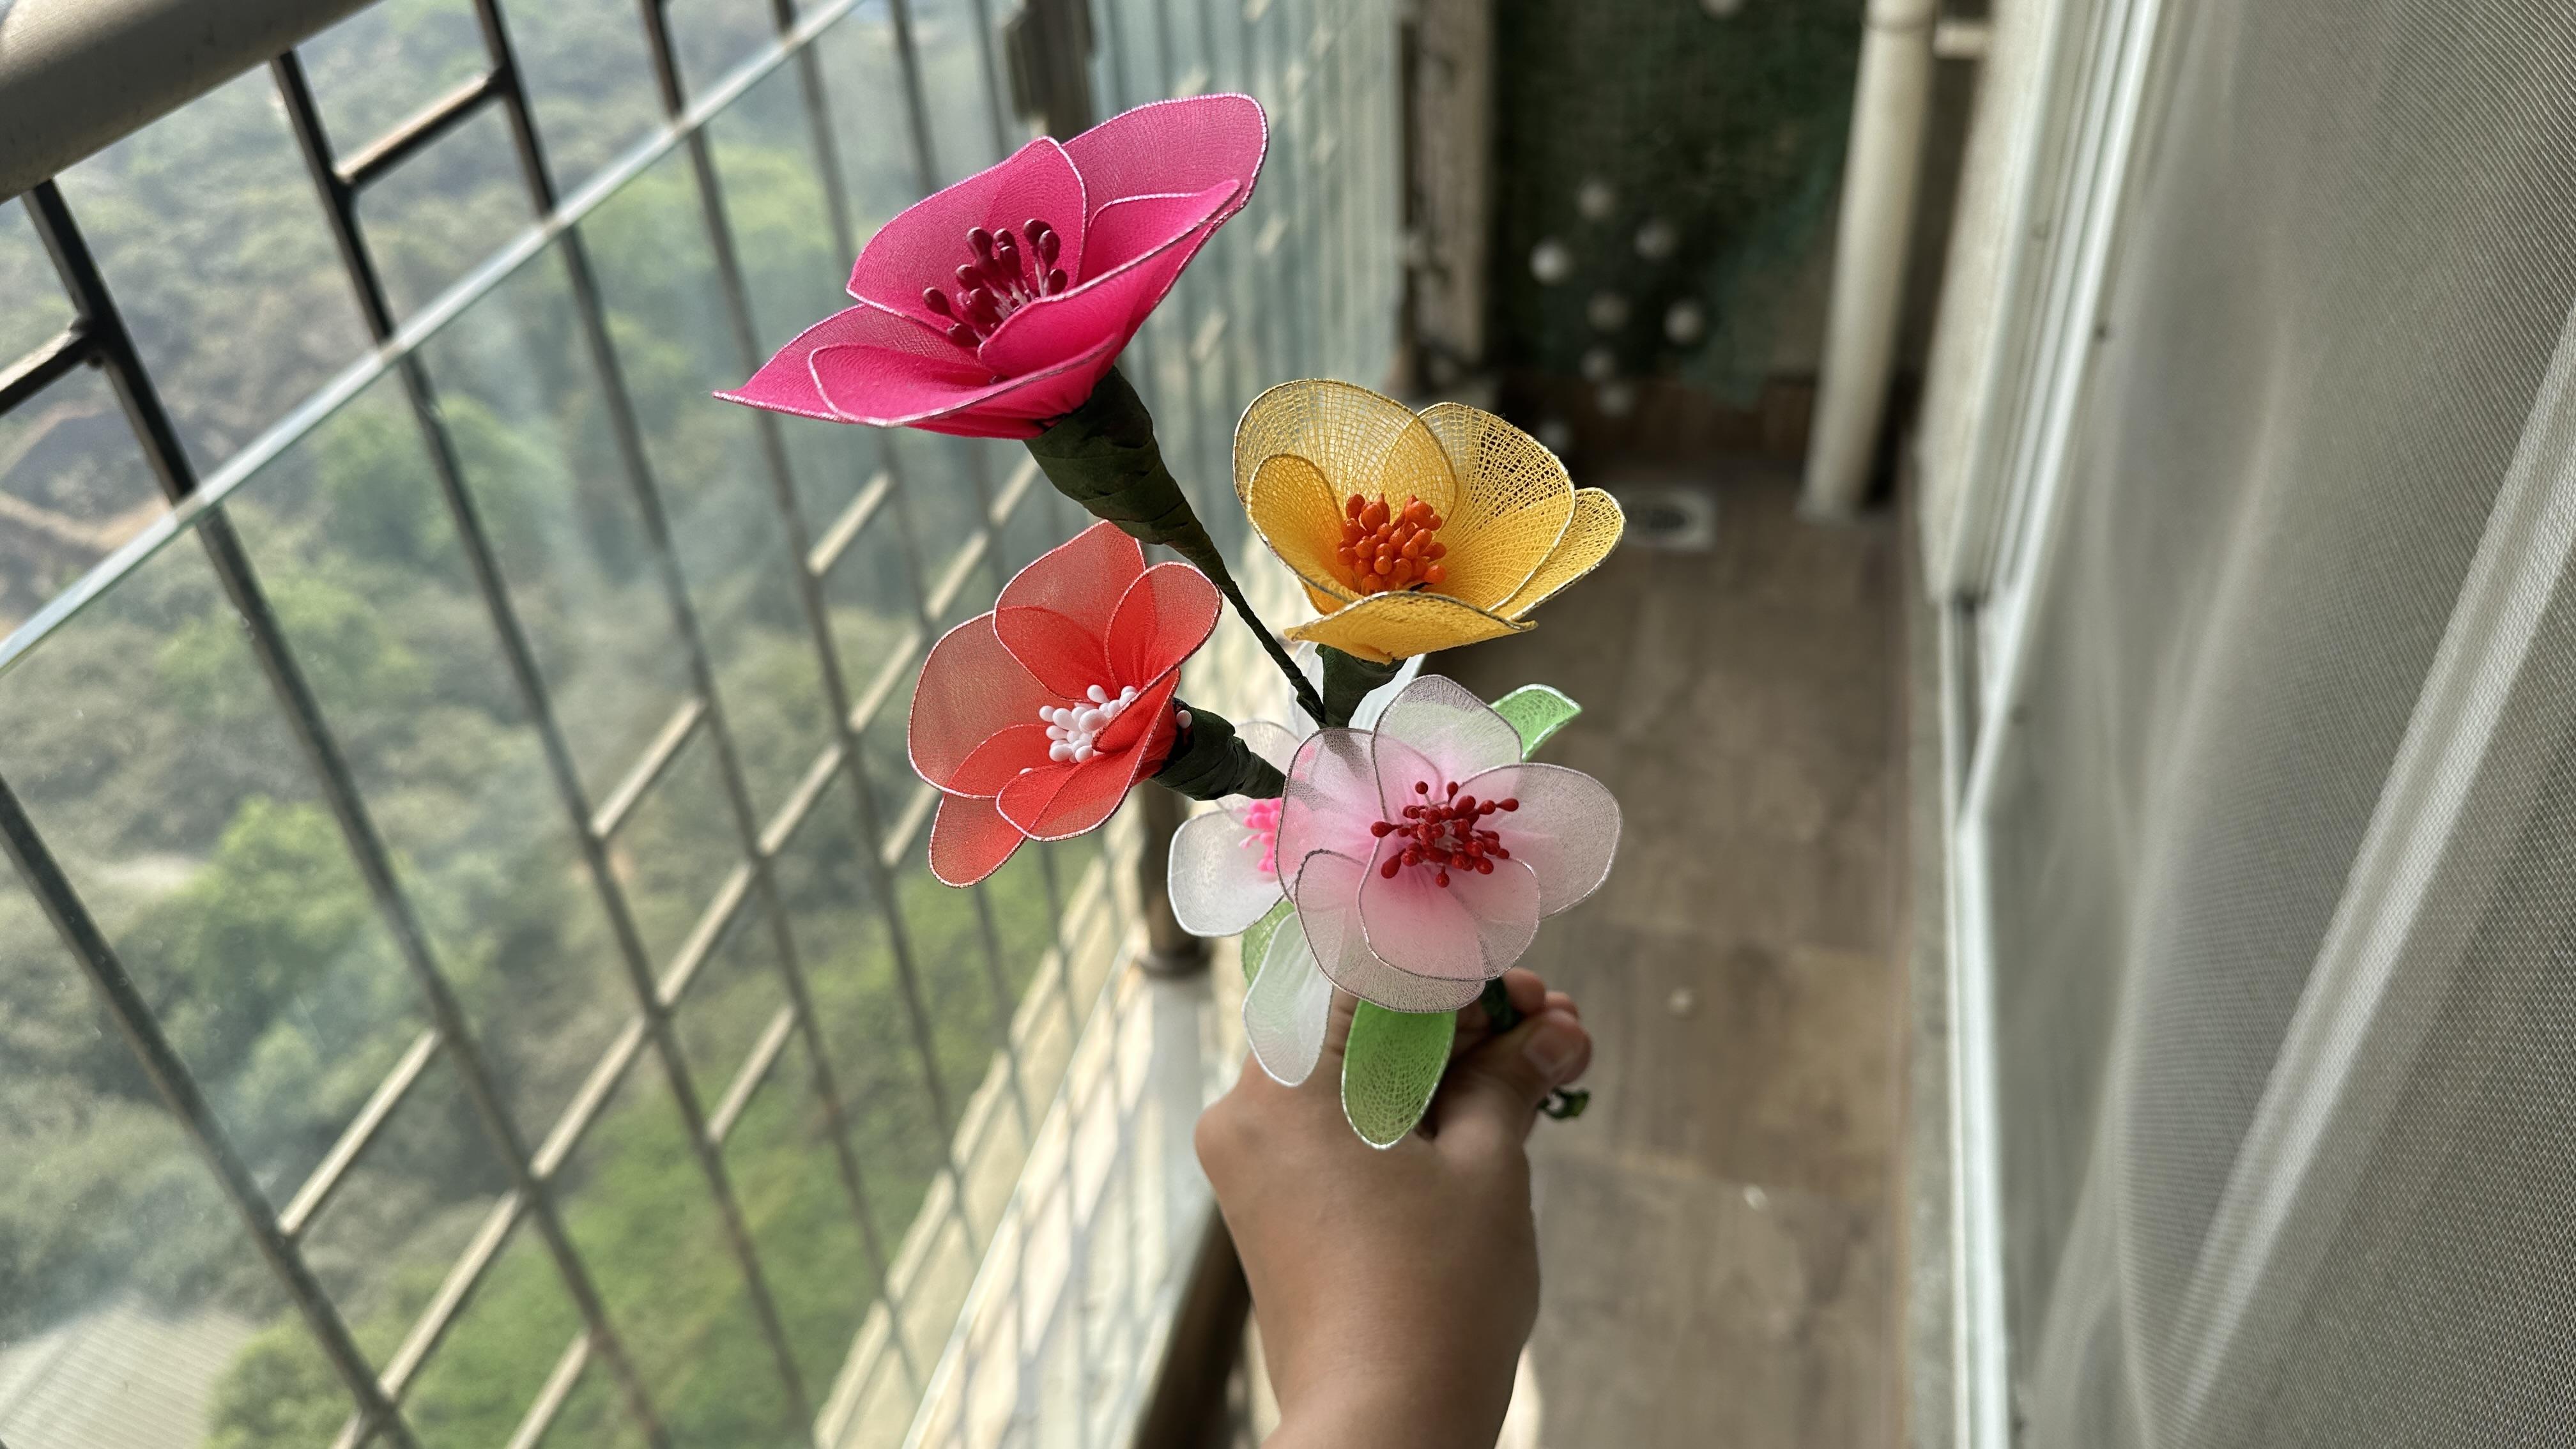
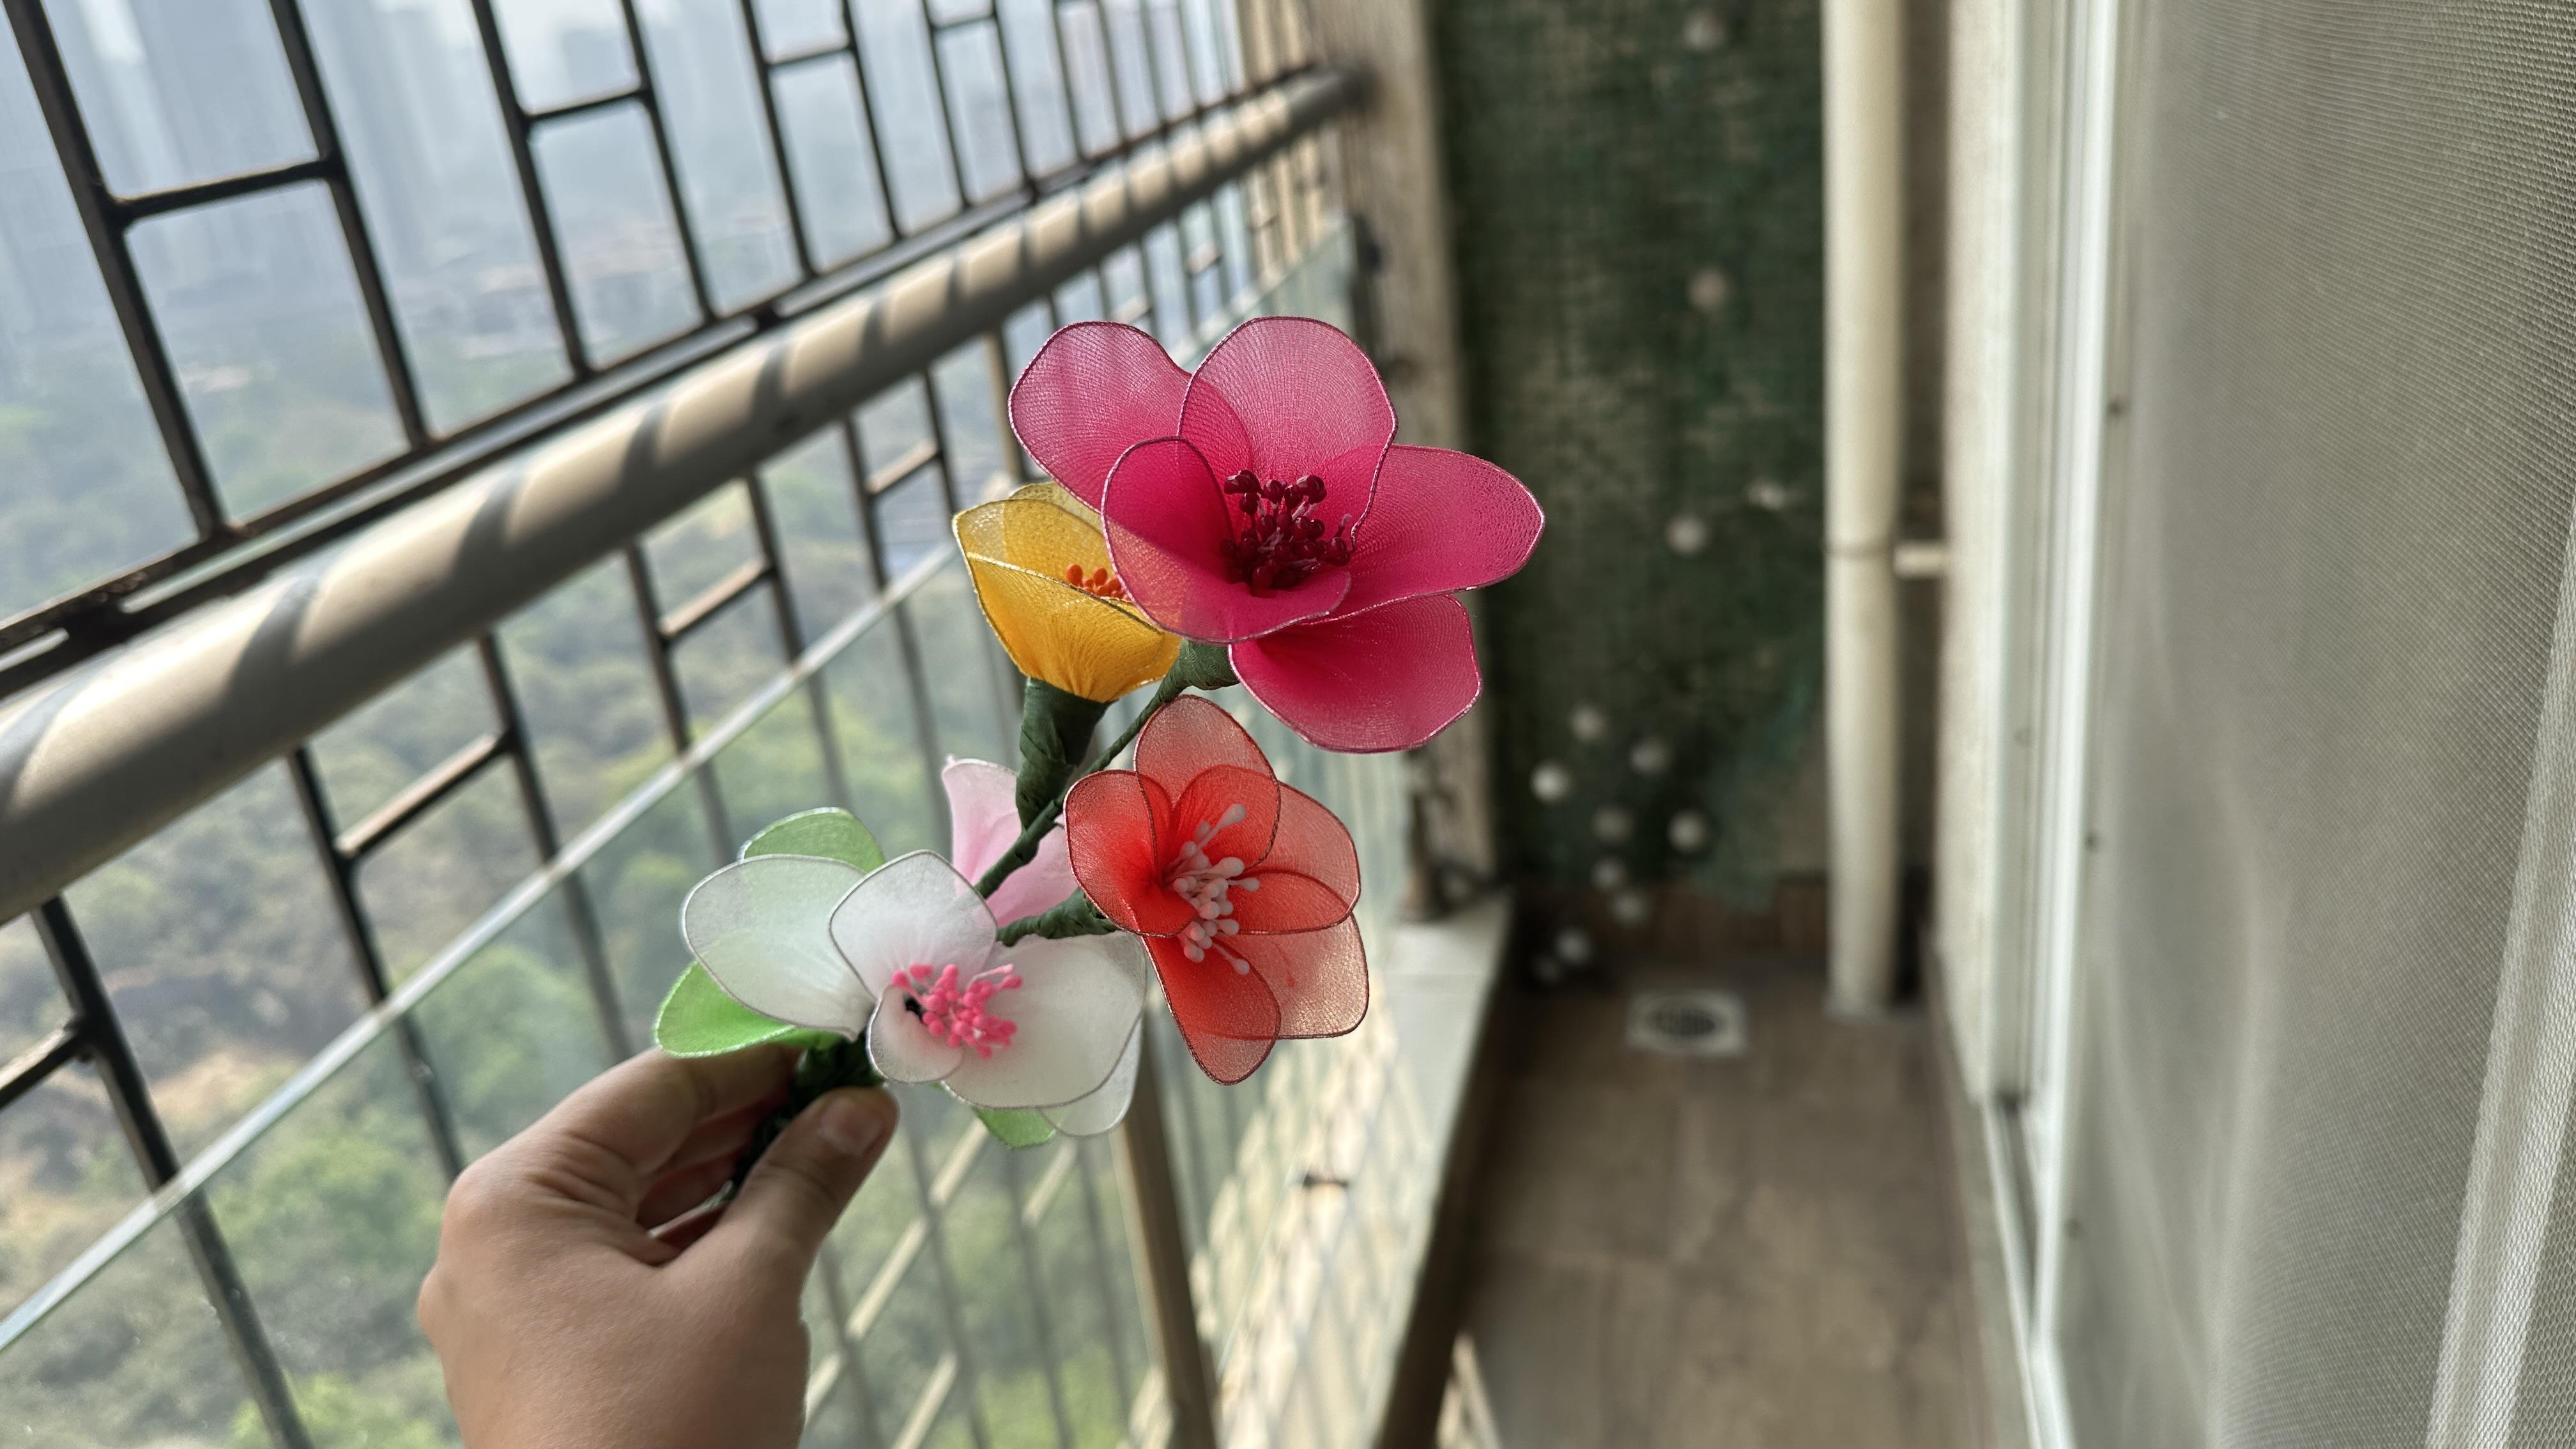
9. Make a Bouquet: Hello again. As you can see that we are done with
all the flowers. But sometimes the
green tape comes out, but it's okay, it's fine. You just need to
stick it. You just need to press it hard again. As you can see again,
it also come out. Now how we are going
to arrange the bouquet is we are going to put
flour one on the other, as you can see, I have arranged yellow on the dark pink one. Sorry. What you can
do is, first of all, this stem is very big, so you need to cut the
stem once you are done, then take the big flour and
with the big stem, I mean, and just you need to tone
and twist on the stem, as you can see this. Okay. You just need to
twist it and press. But as you can see,
there is a double line. Of course, when we put
one flour on the other, it has two stems then. We have to simply cover it
with the help of green tape. Here we go. We just need to properly twist and turn
and roll the green tape on the stem properly so
that it looks like it is only one stem and press it
with the other hand finger. Now, it looks like it
has only one stem. Here we go. Cut the ring tape. All right. Now we can use the other flask. Whichever side you want,
if you want it down, if you want it up,
it's totally wish. Simple, we just need to cut the stem because the
stem is very big, and then we have to
twist and turn it on the big stem like this and just remove the extra stem. Here we go. Let us turn it very nicely
so that it looks very even. And even if some green
tape has come out, it will be getting covered
with the help of this one. I Okay, here we go. Now, three are done.
Now next is fourth one. Here I wanted to put it. So let us start. Again, you
have to twist the stem on the bigger stem and
just cut the extra one. Okay, so now here's
the fifth one. The last one. And now
secured with the green tape. Here we go. Okay, so now we are
done with this. Now we have to put the leaf. So first of all,
we have to cover the leaf stem with the help
of green tape. Let us start. As the wire is silver in colour, so we have to cover
it with the green. It's very simple. Just keep
on rolling and pressing. This is the only technique
to use the green tape. It already had the sticky
part from one side, we have to do it with
the rest of all. Okay. So this is the last one? So let us use it on the bouquet. Simply, we have to just
roll the stem part. As I've told you that we
have to remove the stem. We have to leave
the wire so that we can twist it on the stem. So I'm putting all
the four leaf now. And again, it is your way, you can use it your way
wherever you want it. So here we go. Here I'm
done with my bouquet, and I hope you liked it. So you can use it anywhere you want for the decor or for
gifting to your loved ones. So thank you for
watching my class. I hope you liked it. Bye bye.
10. Time to work now!: Hello, everyone, and
welcome to this video. So in this video,
I'm going to talk about the project that
you are going to do it. You are going to make
one or two flowers and out of which you
can make a bouquet. So as we have done
already in the class, you can follow the step. You can use whichever
color you want, whichever polens
you want to make, it is totally your choice. But my request is not to replicate whatever
I have taught. Innovate your wishes,
invent whatever you want, and use all the imaginative
power which you have. So yes, you can just take
the two or three flowers and make two or three leaf and just try to rule it
and make a bout. And don't forget to share your masterpiece with
me in the project gallery. I'm really excited to
see your masterpiece. Thank you.
11. Congratulations: Congratulations. You have
successfully completed this beautiful class in
which you have learned how to craft the bouquet
with the help of stockings. I truly appreciate your time and effort that you
have put in this. So thank you for joining me
on this creative journey. So by now, you have learned how to shape the delicate petals, assemble standing
flowers, and create the complete bouquet that can be used for decoration
and gifting. I hope you have enjoyed this process and discovered
something fun and relaxing. But remember that
creativity has no limits. So try out your new
color combinations with the stocking flowers, try some different shapes and make your bouquet
really unique. Don't forget to share
your creations with us. I would love to see them. Stay tuned for more
creative classes till then, stay creative. Bye bye.
 Saba Faisal