Transcripts
1. Introduction of the Class: Hello, everyone, and
welcome to my class. My name is Saba Maimon, and today we are going to
learn something unique. Yes, we are going to make
flour out of stocking, but the flour will
be curly flour. Yes, this is something very
unique which I've got. So this class will make you personally very
happy. You know what? Whenever you want to give someone a flour, you
buy from the vendor. And after some time, it fades, am I correct? But when you make
the handmade flour, it is not going to fd. This is going to
stay fresh forever. So when you want to
give to love one, you can give it anytime. And also if you want to
start your own business, small business, so you
can use it for that, too. So yeah, in this class, you're going to learn
everything step wise. So my request is to stay with
me throughout the class. And don't worry. If you're a beginner, it's fine. If you do some mistakes,
it's totally fine. Just make sure to
practice because practice makes man 100% perfect. So let us start.
2. Materials required!: Everyone. So now, let us
start with the curly flowers. For that, we are going
to need this wire. Of course, for
making the petals. We'll need this pollens. These are the beautiful pollens, as you can see, green
color for leaf. And with this color, we are going to make the petals. And this is the green tape, which we are going to use
for wrapping the messy part, which I'm going to
show you in the class. Thread for tying and
securing everything. This will be a thick wire which we are going to
use it for the stem. The difference between
this and this reus, it's very thin, as you can
see. It's very flexible. You can make it anything
if you want to make petal and this is a little bit
tough for making the stem. So yeah, these are the materials which we are going to
use for this class.
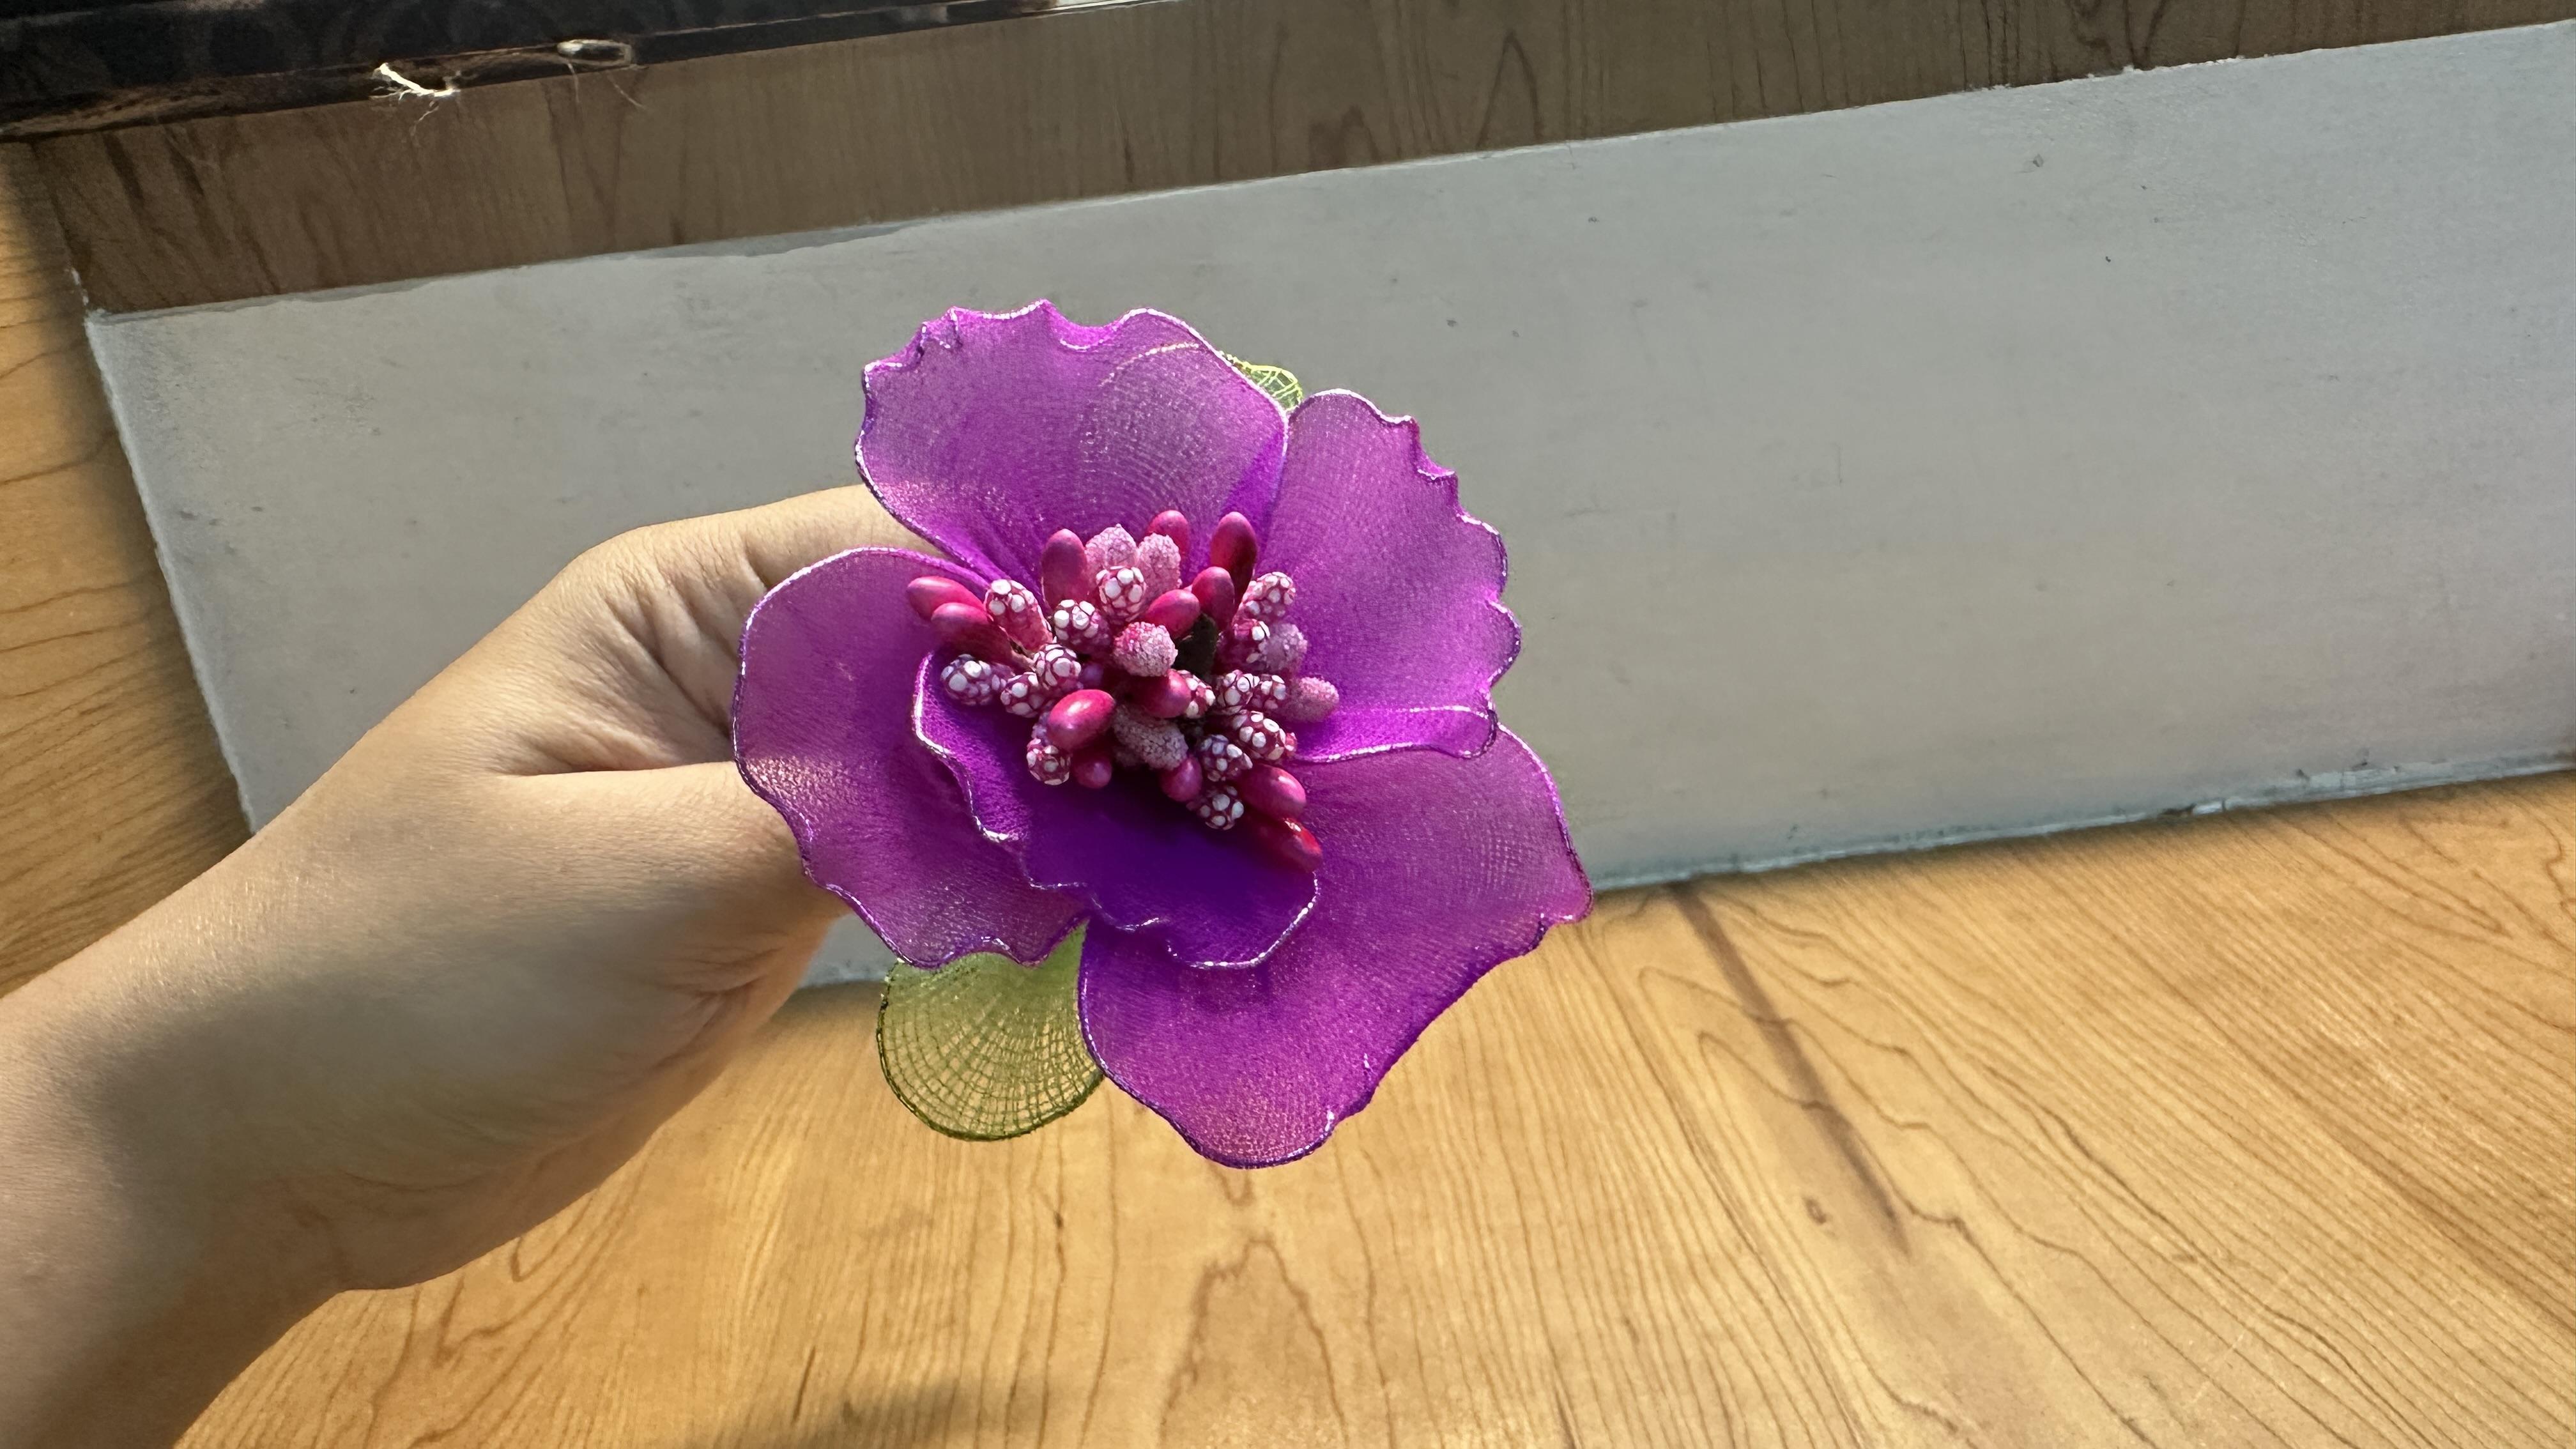
3. Learn how to make a curly shape petal: Hello, everyone.
So let us start. So in this video,
we are going to learn how to make a petal, but a curly petal. Yes, it is not so
simple, but, yes, there is a technique and tip in which that will be
done within a second. So yes, in this video, we are going to learn how to make a petal out of the wire. And after that, we'll start with the
stockings, of course. But in this video
only the petal, we are going to
learn petal shape that is curly shape.
So let us start. Hello again. So with
the help of this wire, we are doing the petal. So if I making petals, you have to take the shape
and measure the size. If you want the petal, I suggest you to
make the big petals of this much size because the
collie will come over here. So it will be very easy
if you make the big one. Or else we can start
with this see. So this is the thick one. So we can do one thing. We can twist it on
this thing. Okay. And we will remove it. And then we can make petroche. So here we get Ci design, and then we can leave
some space to make a ti. In this way, we are going
to make four petals. So instead of four, we have made five, as you can see this. Now in the next class,
we are going to cover it with the stockings. Oh.
4. Learn how to put stockings: Hello again. So now we are done with making the
shape of the petal, which is curly petal. So now we are going to
put the stockings on it. Yes, actually, the color choice of stocking is very important. So let us start.
Hello, everyone. So we are going to use this color for making
the stocking flowers. This is the dark purple. So you can see the stockings. So we have to first, pull it slightly and make it
loose, as you can see now. So basically, this is a
cloth which is very thin. If you stretch it more harder, then it might get tear. So make sure not to
do it very hard. So simply, if this
is the curly petal, just put it inside
and give it up shape. Okay, so make sure you
don't pull it very hard because if you pull it
and stretch it very hard, then there won't be
any color shading. I'm going to say this is
the lightest color if you leave it and gather
it at one place. So the upper side will be the lighter shed and down
one will be the dark shed, which quite look natural. So here we go. We
have to pinch it. And with the help of the thread, we need to tie. Only three to four
rounds are enough. Make a knot and just tie. Here we go. And just cut. And also this remaining part, as you can see, we don't
need it in this petal, we can use it for the
rest petals. Here we go. So as you can see, we
are done with this. Similarly, we are going to make stocking flour
petals for the rest. So let us start. So here we go. We are done with this.
Now, the next last, we are going to arrange it and convert it into a
beautiful flower.
5. Arrange and tie petals, pollens together.: Hello, again. So as we are done with covering the wire
with the stocking, that means as we are
done with making the petals of the curly flower. So now we are going to make the arrangement of
pollens, petal and stem. Yes, it looks and sounds
simple, but it is not. But again, if you
are practicing, then it will make you perfect. So we are going to take a stem, and we are going to
arrange the petals and polens and how we
are done, watch out. Hello, everyone. So now
let us go for the flour. First of all, we are
going to take the stem, as you can see, and make
a little fold over here. Here we go. Okay. You can simply I already has stem
over here, as you can see, Okay. So we can fix it on
this stem. Here we go. Or else if you're not
satisfied with this, we can use the
thread and then tie I and then make a knot. So we can make like this. And now we can use the petal. Okay, now we can put
the petal, and again, we can do it with the help of Three rounds are
enough for the thread, then you can just make
a knot. Here we go. Then let's do one thing. Take the small
petals inside first, and then we can
take the big petal. As you can see the big petal, so we can keep it at the back. Here we go. So as you can see, the small petal which
we had made is in the middle part in the center, and the remaining all
are at the backside. So it looks quite
natural, as you can see. Okay. Now, as you can see, this looks quite messy. Am I correct? So we
have to cover it with the help of the te.
So here is the tape. Let us wrap it properly. You just need to
stretch and stick. It already had a
sticky thing inside, so you don't need any
glue or something. You just have to
line up properly. There we go. Okay,
as you can see, we have covered everything. If you want to give shape,
of course, you can do it. Now in the next last,
we are going to make a leaf. So see you then.
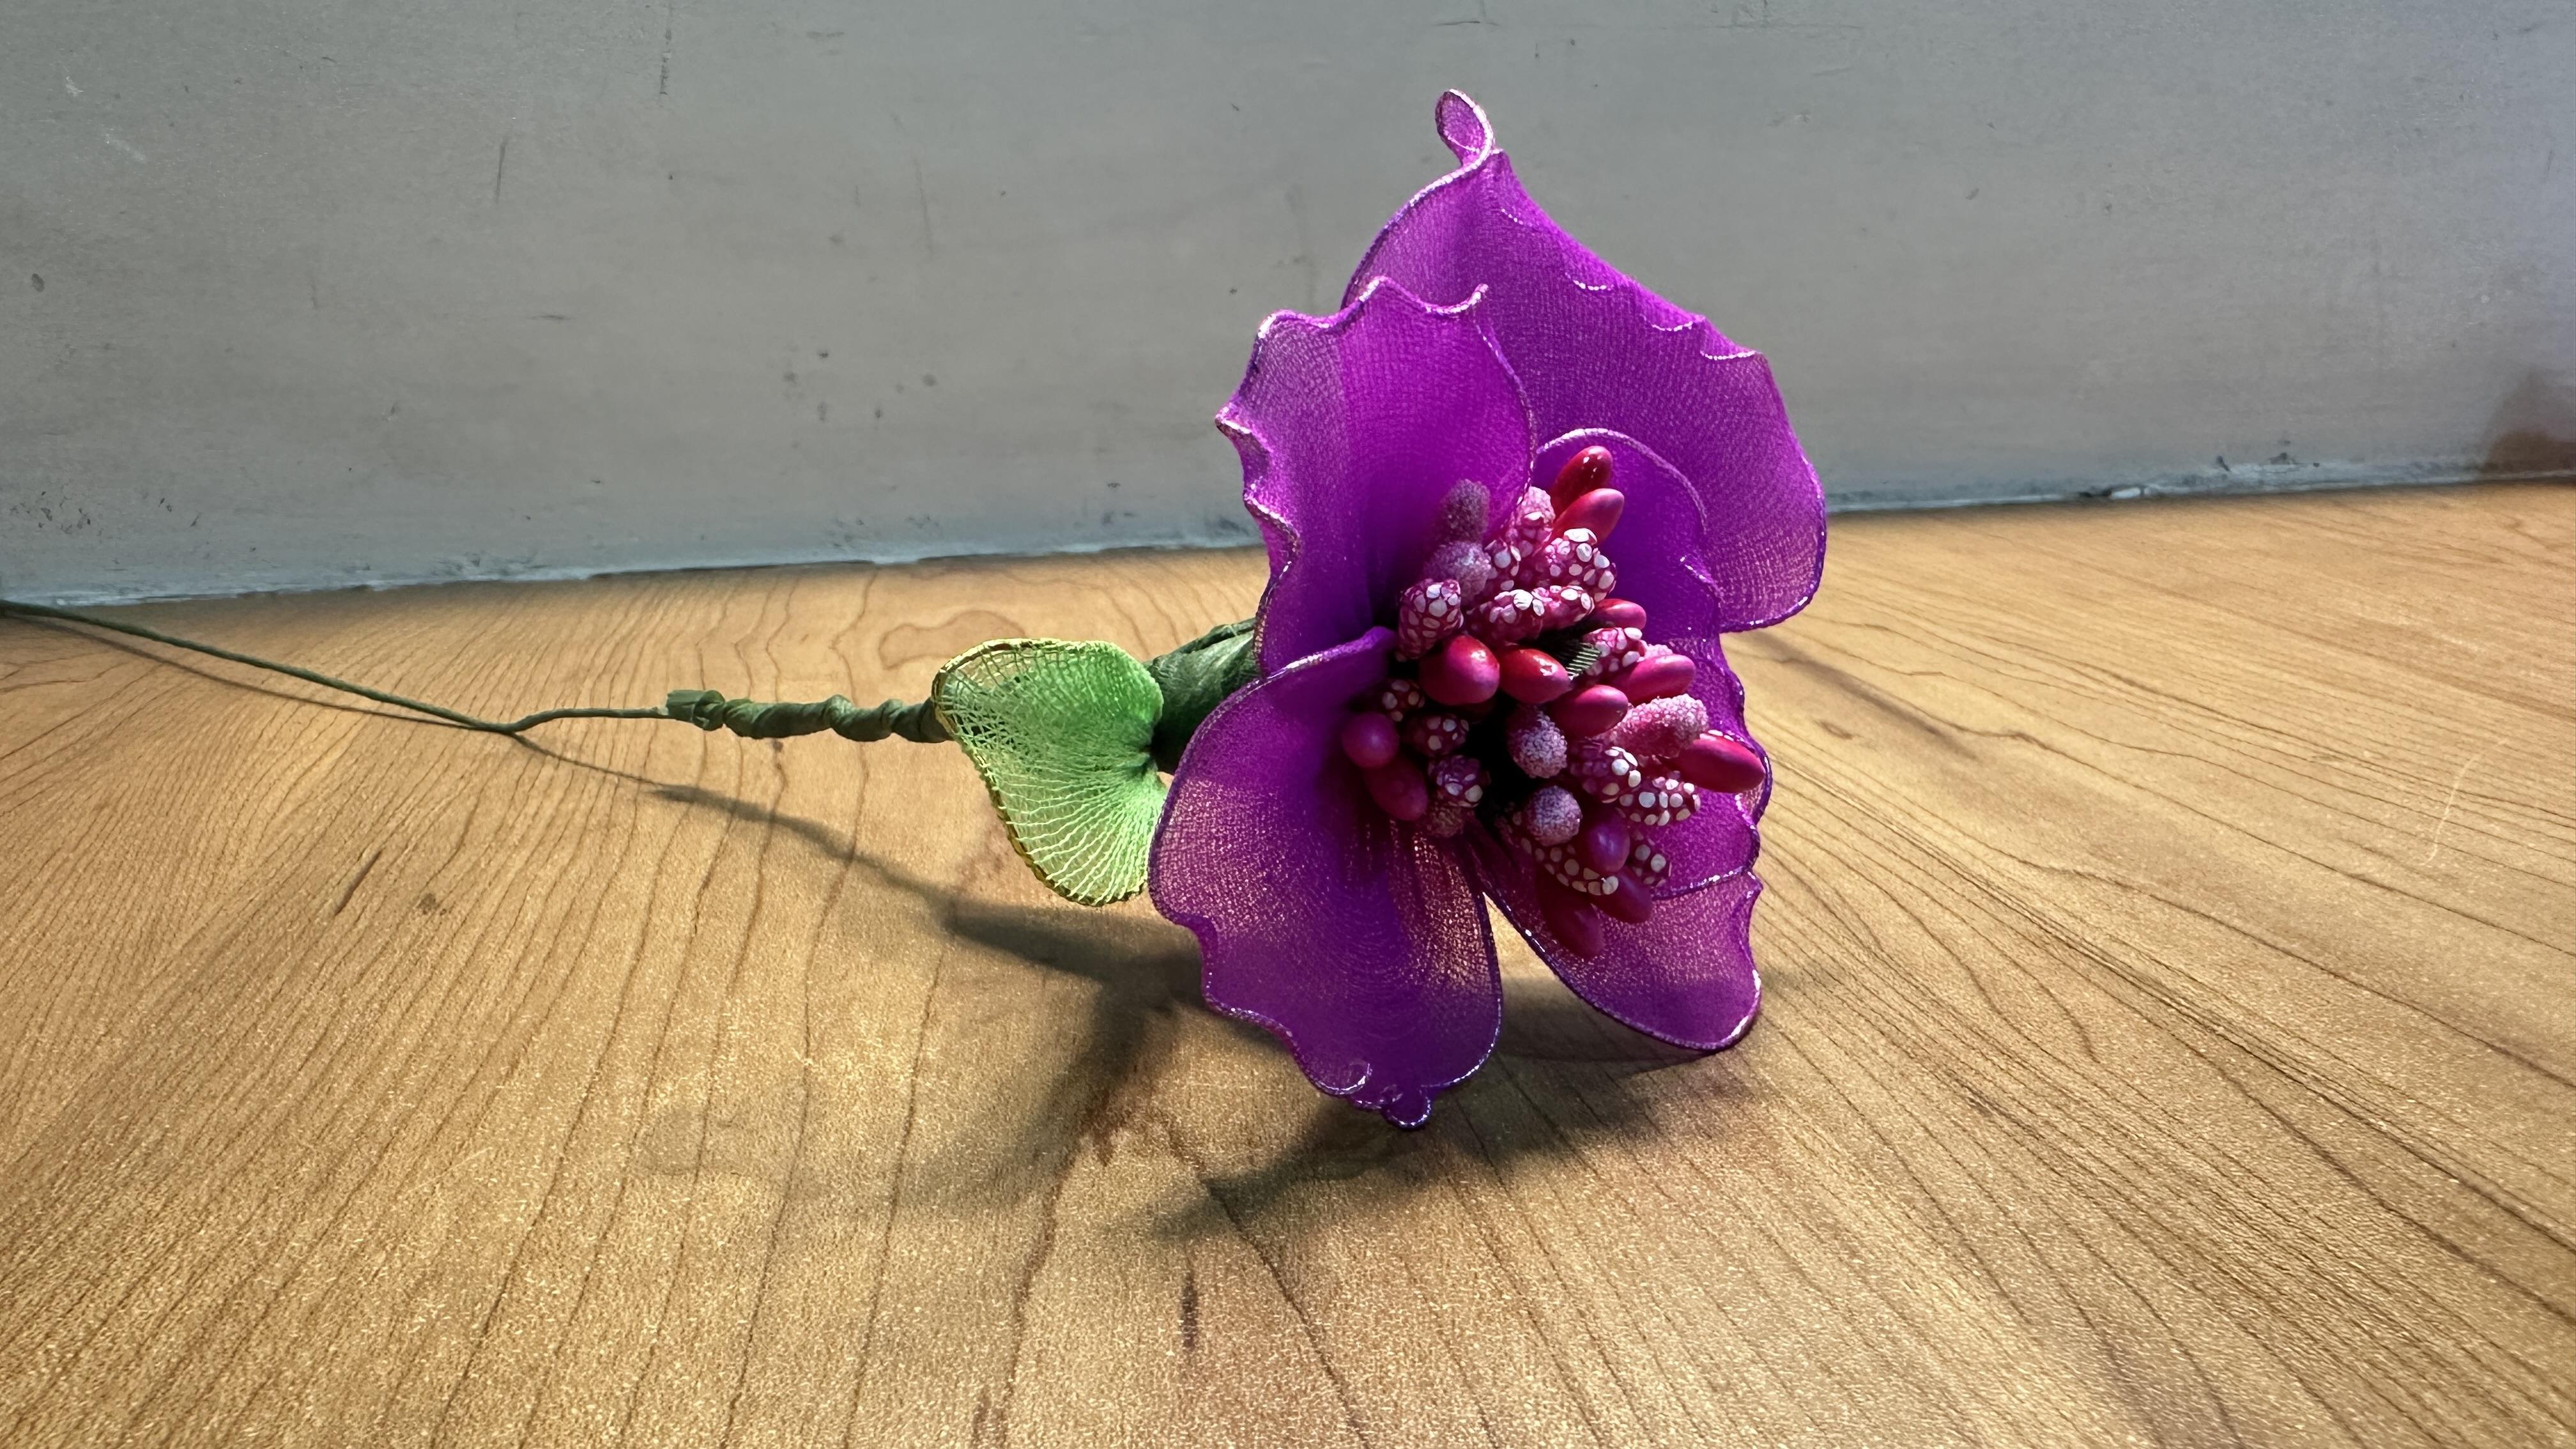
6. Learn how to make leaf and arrange it on stem: Hello again. And welcome to the final part of
this curly flower. So now, as we are done with
arranging the pollens, petals, and the stem together. So now it's time to
make leaf and also to cover all the messy part
with the help of green tape. Yes, as you have seen, that when we arrange all
the two things on the stem, like petals and pollens, and when we tie it with
the help of the thread, somewhat it looks messy. So yes, but don't worry. We can cover it with the
help of the green tape. And yes, we are also
going to make the leaf. So let us start. Hello again. So now we are going
to make leaf. For leaf, we are going
to use, of course, green colour and wire. Okay, so now we are
going to make a leaf. For leaf, we are going
to use this wire. Simply, you have to wait, let me only two leaf are
enough for one flower. So first, we are going
to cut it into half. Okay. Now for leaf, simply make the leaf
shape in this way. And don't forget to keep this to leave this because this will be helpful
to wrap it on the stem, so it will be easier, and this will be for tying this, as you can see, Okay.
So here I'm done. And this will be for leaf. Okay. So in this way, we
are going to make two. Here we go. Now we can put
the green color on it. Now we can put the
green stocking on it. Here we go and tie
it with the thread. And we have to remove
the remaining one. And now for the other one. Okay. Okay, let us tie this now. Okay. So here we go. We
have made the leaf. So now to hide this again, this mess, we are going
to use this green tape. Here we go. Again, I'm going
to do it for the next one. Here we go. So both
the leaves are ready. So now, simply, we have to put this leaf on the curly
shape flow in this way. You can simply wrap
it up like this. Again, you can wrap
it up like this. Okay. Okay. Now, just use the tape to again
give the finishing thing. And you can give shape
to the leaf like this and this in this way. This is the curly shape, and trust me, it
looks really good. And here we have the
flower and leaf. And also, the stem is very big. If you want to cut, you can. But I'm not going to
do that because I'm going to put it inside the vase. And also, if you
want to give shape, you can give shape as
per your convenience. So I hope you like
this class. Thank you.
7. It's your turn to do!: Hello again. In this project. So for you, the project
will be to make, of course, a curly flower. But I suggest you not to just replicate what I
have taught in the class. Yes, try your own thing, try your own innovations. You can try your own
color, own pollen colors. Of your choice and also try to make it
a little innovative. Like, if I'm using
four to five petals, you can make it six
to seven petals. Your flower will become
this much pay. Say, yes. And after making
your masterpiece, do share in the project
gallery because I will be waiting for your
creation. Do share your work. And don't worry. If it
is not coming proper, if the shapes are not coming proper, that's absolutely fine. You can try it again. And as you know, practice is the
key. So thank you.
8. It's a wrap up time!: So congratulations on
completing this class. I'm sure that you had learned
something very unique. I'm very happy that you had learned something
very unique. And I just love to share my ideas with you. And
this is one of it. And I know this curly flower is going to help you
in a number of ways. Like, you can start
your own business or you can give this
to your loved ones, or you can just simply use
it for your home decor. Again, I want to say
that don't worry if you are doing some
mistakes or something. It's perfectly fine
as you're a beginner, if you are a beginner, so
mistakes are mandatory. But Remember one thing,
practice is the key. So practice till you
reach your goal, and don't forget to share your masterpiece in the
project gallery, of course. I am waiting and I'm waiting to give my
feedback to you all. So yeah, stay creative, stay happy, and thank
you once again. Bye bye.
 Saba Faisal