Transcripts
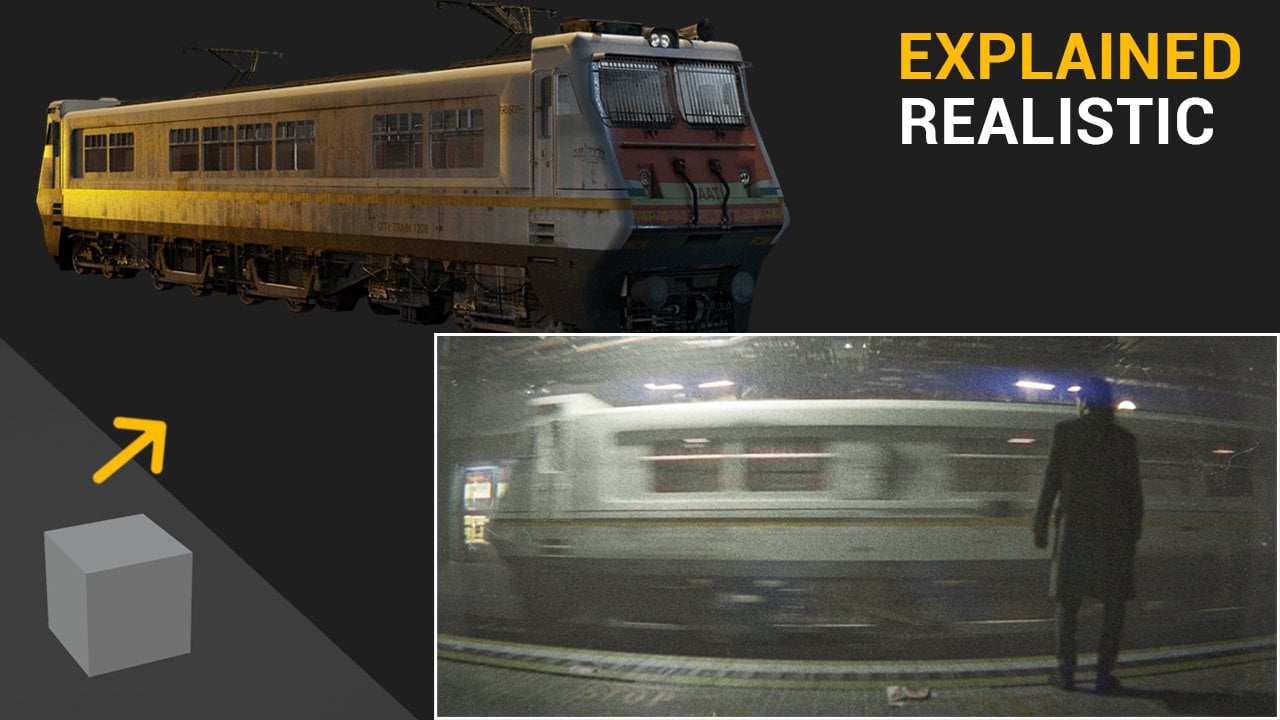
1. 1 - Introduction: The land is a former
Scotland yard policeman and works as a private detective who investigates
paranormal events. A long time ago when I was
collecting comic books, I especially remember discover In this step by step tutorial, we will try to make discover realistic using the
free program blender. We will talk about
modeling, texturing, lighting, unwrapping, composition, post
processing, and more. I will show you my
way of creating a realistic human
face in blender, which otherwise is a
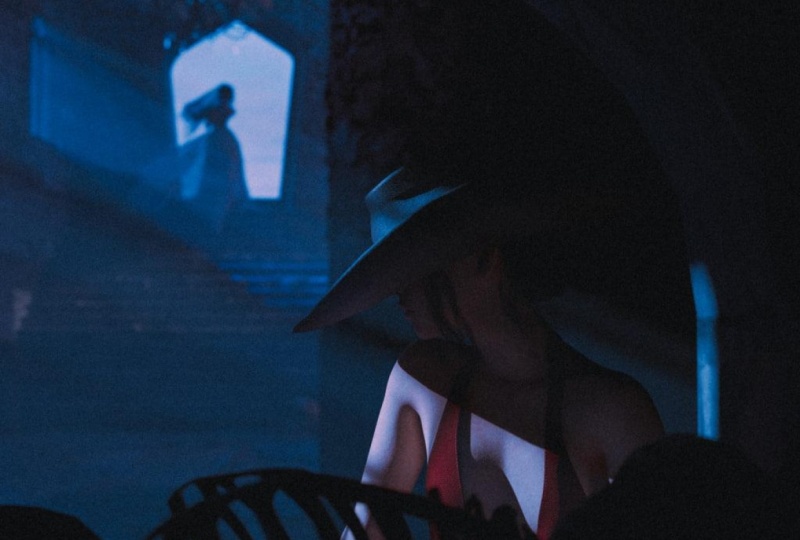
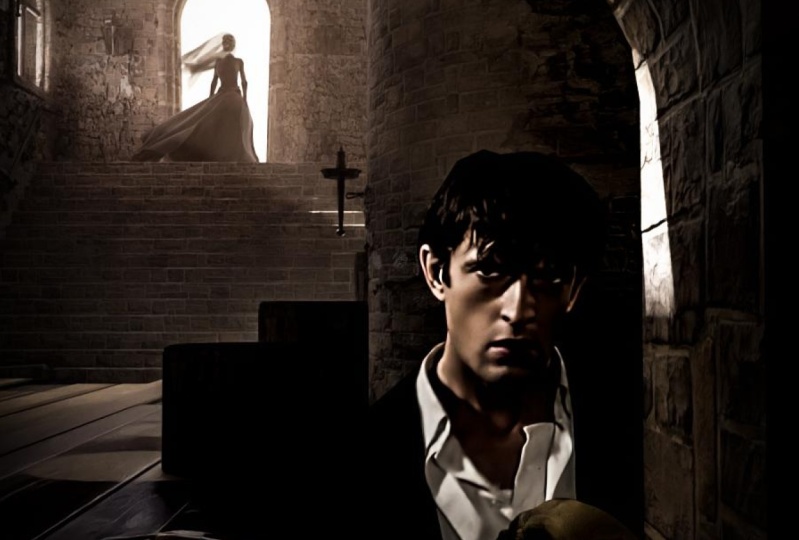
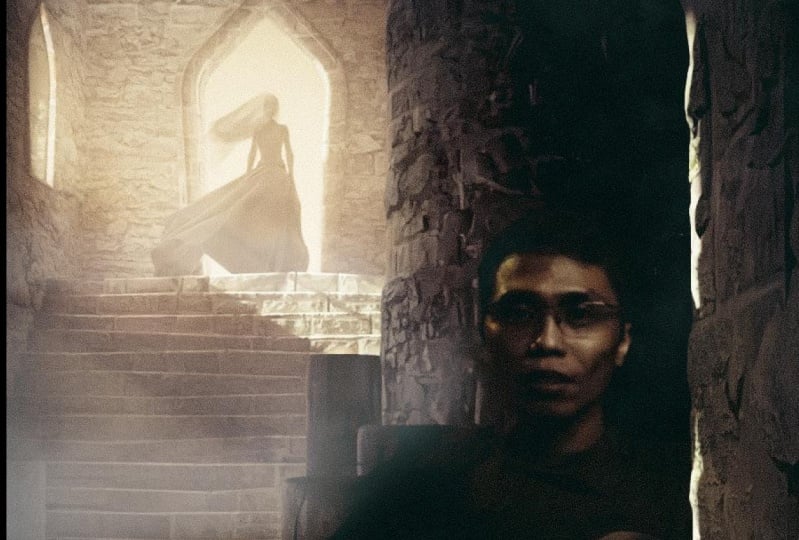
very difficult task. We will also create the
lady in Black, of course, the castle, and all the details you can see on this render. The tutorial is step by step and suitable for blender beginners. The final blender file and all the resources
are included. I will also share with you
the Stone City asset pack. The asset pack consists
of photo scans, mainly of all stone walls, ground houses, churches,
and similar buildings. About 40 assets ready
for asset browser.
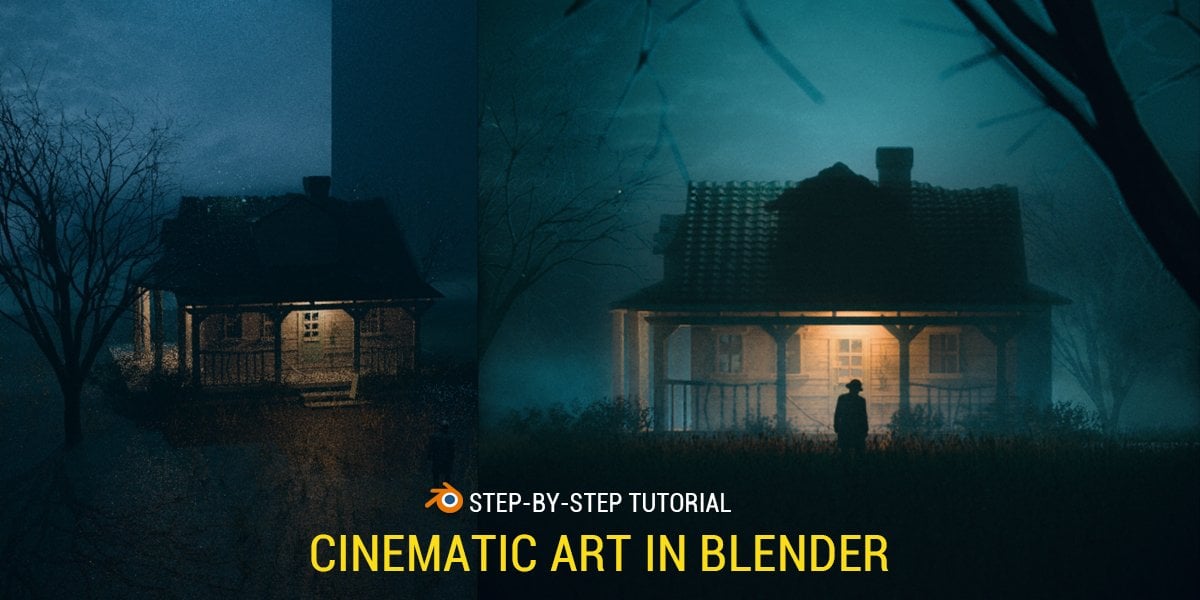
2. 2 - Castle, basic shape: This is our reference image. This is my final result
I get last time. We should get something
similar like this. At the end of this tutorial, I will share these
images with you and also all resources we will collect to the end
of this tutorial. I also create this folder
where I want my Blender file. I will start with blend. This is version 3.6 and
I will now go with file. I will call this Land Tutorial. Okay, And where to start now? First I will bring this
aspect ratio or resolution from original Lando cover so
we can see dimensions here. And I will now type
this here in blender. And I will switch
from V to cycles. And under output, I will
type here 450 by 600. I will also bring this
resolution to double. I will type here 200% All
these values will go double. Let's now delete this four cube. I will start with playing, this will be our shift. I will press here to
open this step here. And I will type here
20 for 20 meters. Now we can set camera. I will select Camera, and let's go with
Numpazero camera View. I will set this to 1.3
meter from ground. We can see on this reference
that camera is pretty low. I will also set z axis to zero. Let's go out of camera view. If you type here zero, we line up this,
the axis on x axis. I will go with 90 degrees here, but I will also go
about 92 degrees. We bring little camera up. Let's now go with number zero. First I will go with number
seven to top ortographic. I will bring this to about
center on y axis here. Now when I have selected camera, I will set focal length
to 35 millimeters here. Now we can start with modeling. First I will make
this wall here. You can see this wall here. And I think this go
to this direction. And I also made this
in my last render. First I will go with num seven. Here is my blender file. This is how this wall look
from my last blender file. And let's now make something
similar like this. First I will go with
shift and cube. I will make this wall on
axis about 14 centimeters. I will type here 40 centimeters. And I will move
this on y axis to about half of this camera. Now we can bring on axis. Now I will split this window, when you see this
cross, you can move this on right, on left, I will switch to Render Preview here and I will just bring
this samples to about 22. And also for render. Now this will not
slow down too much. Our computer on left, I will press zero to go to camera view and I will
press N to remove this tab. Now we can work on right and we can look what happened on left. Let's now go to edit mode. You can go here to Edit mode, or you can just press Tab on your computer, on your keyboard. And I will now go
with control R. Let's add one loop
cut here, okay? I will go with control. I think better
solution is to just move this on x x about here. I just want to see
this little edge here. And now we can go with
control R about here. Now we can go with x x x. Let's now add another ball here where this
skeleton will go. Later. I will go with
control R about here. And I will now go with x
and move this on x axis. Now if you want to move down, you can just select
this and move this little down. This is okay. But if you want to also
move this edge here down, I think better
solution is to go with Numped one and x ray mode. Just select this. Edge select, and you can move all this down. Now we need make
bevel here so we can select this agent.
Go with control. But I will now undo this because I think there is
better solution for this. First you need check scale
to make bevel correct. Let's disable this x ray mode. First, we need to go with
control A and apply scale. If we go here with control, we will make destructive bevel. If we want to change
this shape later, we will not be able. If we go with control B, I will now go with control Z. We will for use Bevel modifier. But now we have one problem. We get level on all these edges. We want level only here. We can fix this if we set this limit method
from angle to weight. Now in edit mode, select only this edge here. Now in under item, we have this level weight and we can bring
this all to one. This refers to 100%
of value here. If we hold shift, we can move this
slightly on right. We can increase this value here, and we can also
increase segments here. This is now non. Destructive. That
means that we can in any time go to this value
and change this value here. Of course, if you want to add, for example, bevel here, you can just increase
this bevel weight. Let's now create another wall. I will go in Np seven. We have this cylinder type of wall here and also
in our reference I go from about 5 meters from this wall with another cylinder
wall with the dimensions. We can copy this here. I will go with cube. This cube will be just for measurement and I will
type here 5 meters. Now I know that I want
our cylinder about here. And I will go to shift a cylinder and I will
keep this 32 vertices. And let's now press scale this to about 4
meters on the axis. I need a little more. I will press Z to scale
this on the axis. We can move this about here. And now we can delay this cube. We have now this cylinder
wall here on our reference. We can see that here
is about middle of our scene and this
cylinder is more on left. If you want, you can
select camera and you can under this viewport display, you can enable the limits, you get this line. Or you can go with
composition guides and set this to center. We get this line here. I will move on about here. We can move this light. This is just for preview. We will delete this later. But now it's useful. Let's now make main walls
here, shift and cube. I will press to scale this. I also want to make about 5 meters from
this cylinder here. I will shift cube. Let's type here five. Let's bring this
wall about here. Okay? And now we can
delete this bend. Let's scale this on Z axis. I think about ten meter is okay. First I will go with
control to apply scale. I will remove this
ceiling because we can now not see what is
inside without zooming here. I will select this face
selection and I will press first I think I will add Solidify Modifier
to add some thickness. Here I look a lot of reference and thickness of costal
wall is pretty big. I will type here 0.8 meters. Okay, now we cannot see, but we have thickness. And I will go to Edit mode. And I will now press P, and separate by selection, you can see this
thickness of this wall. And we can bring this little up. Now I will rename
this two ceilings. So we will know later that
this is ceiling ceiling. We can hide this from port here. But I think this is not the best solution
because you can see that this affect our lighting
in Viewport render. If we press 12, this will not affect
our lighting, but because we will
look here on left, a lot of Viewport render, I don't want to
make this disabled. I have another solution. We can go here under
Object Properties, and we can click here
Viewport Display, and we can set this
as bounds here. You can skip this part, will, this is just for test. I will set this to 200 and I will do it orange light
here, you can see that. Get this sound lamp here, for example in
Viewport, click here. We now get this sun lamp here, because we just basically
deleted this from Viewport. But if we press F, well, we don't get this sundlap here. Better solution is to
back this preview. In Viewport, we go here under object
properties and set this. This object is still here, but in Viewport is just bounce.
3. 3 - Stairs: Okay, now I will
delete this sun lamp. And let's now create the stairs. Here we can see the stairs. And also in my last render here, I will go with nut
seven if you hold shift and right quick you can
change this origin point. So we can create first
stay here mesh cube. I will go with x to scale
this on x axis to about here on Y and Z axis. I will type here 20 centimeters. This is how one stay is big. You can go with,
with holding shift, you can move this precisely. I will go with X and
move this about here. Now we can now we can go with numpad key to isolate
only this object and we can work with the taps. Or you can go with local
view and toal local view. If we press, we can
remove this step here. Now I will go with
modifier here. Let's check scale First we need to apply scale
control and scale. Let's now go with RA
modifier and I will set this on X axis to zero
and on Y axis to one. Now we can move this on
the axis, this is one. And I will bring little
down to intersect little, maybe 2.9 We can now
increase this count. Let's back with pales
key to our scene. And I think last time
I go with value of 15. You can see on render preview
that this is not visible. And that's because we
don't have any bevel here. If we go with modifier here, you can see now that this
is much more visible here. But I will bring this value
down With holding shift, I will bring this maybe 15
centimeters level here. We can increase the
segments, maybe just one. If we move this light, we
can see this little better. We can also, from time
to time, go with 12. I will just set this
to slot one with 11. And now we can go with, we just to preview
what happened here. And I want to move
this little down. I will go with GC, and with holding shift,
I will move this down. Okay, Now I just want
to connect this stairs. We can move this
maybe on y axis. Now I will go about here. And with shift, and I will set the origin
here and I will go it. And y just to connect with
this wall here and numpt seven and now X, okay?
4. 4 - Doors and windows, Boolean modifier: Let's now make whole
for doors we have here. And for this window first, I will go with shift and
right click about here. I will go with
shift a mesh cube. This is about 2 meters. We can scale this
little on y axis. Maybe we can type here on
the 3 meters on Z axis. Now I will again
go with numpkey. Let's scale this little more
on yaxis control A applies. I will go to edit mode. I will add one look here. Now I just go on pictures.com to see how this type of doors look. And we want to get something
similar like this. Okay, I will select this edge here and I will bring
this on the axis. If you want, you can
select the two edges. And with holding Shift, click here and shift
is for Add selection. And we can go with
X just a little. And now we can go with control B. I will say this for now
to solid preview so we don't slow down our
computer and I'll go six control for Be also, we can go with control but
I will be careful here because I want to insert. I will go maybe just for
three vertices here. Now if we press A, we can go with delete
and limited the sole. This will delete all these
unnecessary loop cuts or edges we have in this part. We can now work
easier with this. Okay? Now I will
go with Napes key. I think this bevel
is to be here. I will go again with control
Z. I will go with control B. Maybe just one loop, cut a delete, limited the. So let's back to
render preview first. This wall here too big. Let's fix this numplashkey
to isolate this numpad one. And we can now go to X ray mode and just select
all this wall here. And let's bring this up. Okay, now we see
this door better. And I will go with num key because we will use
this object as bullion. I want to intersect
this to another side. Let's place this here. Maybe here, one thing which
is important here in render. We don't see this edge
of this wall here, but in our reference, this edge is
something about here. And here I will go to edit mode, and I will select
this face here. Let's move this a lot on x axis. Let's move first to this door, and now go again to edit mode. And this edge here, we need this little more. And now we see this edge here. If we move this point lamp, we can see this better. Now let's place this lamp here. Okay, now we can clearly
see this edge here. I will go again to edit more, then move this about here. Okay, now we can use
this object as bullion. I will select this wall here, and I will go with
bullion modifier. And I will now select this wall. Now we can see we get this
hole from this object first. I will go with double
here and rename these two bullion bull objects. Will always know that
this is bullion object. Now, I will not apply this bullion object
because I will be later. Change position of
this door here. I think this is pretty big. So I will press S
and move this down. Now this object work as bullion, but we cannot see hole here
because we have this object. I will now just remove this from port and also from render. Now we see this hole here. When we need this object, I will go to edit mode. And I can always scale
this down and move this, but this is only in
Viewport Preview, we can see that this
is disabled in Render. For example, go with 12, we can see this door here, okay. Now to add another
hole here for window, you can see this here
and also this reference. For example, if you disable this object and if we
go with another cube, we need another
bullion modifier here. But I don't want to do this. There is better solution if
we go here to Edit mode. If you go with Shift
and another cube. This cube is part
of this object. Here you can see that we have selected
this bullion object. This is same object. These two objects are
part of same object, but in edit mode we
can always select with L. Or if you want
to select this one, we can go with L to
select loose parts. If we go to object mode
and if we disable this, we can see that we have
one bull modifier. We have two holes. Now I
will bake this to Viewport, and let's now press
L to select this. We can make this smaller. We can now start shape
this window here. I will go with, again
to scale this a little, I will control to
add look cut here. And let's go with Naples Key. And let's model something
similar like this. I will bring this little up, we can go with
maybe Y little and control B to add level here. I will go with L and
delete limited the sole. Okay, we have
another window here. We can see that this
part here go up, so we can make this also here. If we go to edit mode, we can grab this
edge here and we can maybe move this down
and this little up. Let's see how this look. Okay, we get this edge here.
5. 5 - Doors and windows, frames: And we can now quickly make
this frame of door here, make this bullion object
in Viewport here. And I will go to edit mode. And I will first press
L here and shift, they move this on y axis. Now this is still part
of this bullion object, but I will go with and
separate by selection. Now this object is
another object, This is not null. We can rename this
door frame door frame. And we now need back this visibility in render
because this will be visible. We can go with Tricln, set origin to geometry
with Mpsleski, we can start modeling
this door frame. I will go to a mode, and I will select
both of these sides. And I will press to Insert. Now I will press Alt to
extrude along normals. Now I will go to insert this. If we go too much here, we get these intersections. But I will back this about here. There is one solution. If you press we now
just scale this down. Okay. Now if we go with all you can extrude this along normal. If we go again with, we can
again go about here and press now I will
extrude along normals. If you have enabled, you need to enable this
under added preferences. Ads just type here, loot, enable this ad. You can go click Go for Bridge. Let's now select few
of these faces here. I will bring this down
and also the two. Now I will select this edge, select will select this edge. And withholding
control, you can find shortest path from
one point to another. If here Blender will
select all this line, I will select this one. And now to go to another edge, we need hold Shift
Now we can go again with control Control
here and control here. And now again shift
to skip to this edge. And now again control. Okay, we can now go
with control B to be level this about here. And let's also do with this
edges here, control B. Let's back with non pales key. And let's disable
this in viewport. Now we can place this
to position here. Okay, now we have nice
door frames here. Let's do same with
this window here. I will back this for
second and added model to select this lose part and ship the X mod little on X axis
separate by selection. I will rena this to window frame and bag this
to render preview It mode. And we can now nplakey isolate this
set origin to geometry. And let's model. Okay, I will press L and X
to scale this little x axis. Now we can do same we do before. I will press to insert this, all extrude along normals again and again. All x strut along normals. And maybe one more time now
I will go with the bridge. But with bridge we
get this problem. Because these two phases, let's select these two phases. These two phases are
same dimensions here. If we go with bridge, this
will not work correctly. I will just go with
quick solution and I will just
go delete phases. We can now continue working, so we can go with
selection here. First edge withholding control, we select all the line here. And now shift to skip
to another line here. This one I will also
select this one here. Shift again with control. Let's now go with
control to level this. Let's now just place
this here to position. This is what we have for now. Let's model this
metal mesh here. Shift right click and I will go cylinder and I will say this, maybe just to eight, maybe 12. I will now go with
x 90 to rotate 90 degrees and now
I will go with Y. Now I will go with Nps key and control R to add
one loop cut here, control to bevel and scroll mouth down to remove
the loop cuts. And now all ex along normal, now we can press L and shift D, Y, n, x, n to rotate x axis. In my last blender file, I'll also made this hole here. I'm not sure how this
effect on our lighting, but let's now do this quickly. Just go to bullion
object and edit mode. And if we now add
another cube here, we can see that this affect bullion and we can
just make this hole. We can make another hole here. But I will go with and
scale this little down.
6. 6 - Lighting: This is what we have for now. And let's now set lighting. So I will go to slot two and we can compare later,
before and after. And for lighting, I
will this point lamp. And you can see that only
light we have here is from this world, this gray color. Last time I go with
slightly orange color and I will bring
this about here. Okay, now I will
go with Sun lamp. I will go with Shift click
Place Origin About Here. Now I will go with lamp and sun. Now we can rotate
this sun with X Y. Let's now say here
under light properties. And I will send this also
to slightly orange color. And I will say
this, maybe to 15. You can see that this
is not so visible, but it depends on angle. If for example we can see that we get
this sun lamp here, I will go with num seven to top portographic
view and I will rotate this about this direction because we will create
this sun effect here. We see also on this
reference here because we get a lot of lighting on
the face of the land dog. We also have this here. I want to create this
sun effect here, but we will play with this. I will now just bring some little more samples on
viewport to see this better. If you like, you can also use
the noise under Viewport, but I like little grain
than this splatch is here. We can also increase
this in render. In my render, you can see that I put a lot of focus
in background. I don't want too much
light here in foreground. Also go with area lamp here, shift light and area lamp. I will bring this
about here last time. I go with value of 30 here. Let's see, in my last render I also go with
slightly orange color. Okay, now I will
press to scale this a little and maybe
move about here. What I also do last time because this is not enough
lighting here, I go with shift x, X minus N to rotate to
opposite direction. I will place this in front of this wall here, this doors Y. Let's place this here. To scale the axis Y again. Now I will do same
with this window here. Ship Y, L, Z, night, and X as to scale this down. And let's just place this
here, this is before. And if you press J on keyboard, you can skip between slots here, but we have a lot of
brightness soles on this area. If you look my lender, you can see that
I made this part dark just to match this land. I will later show you how
I made this in blender. If you don't know, we can
also set a negative light. I will now go with Numpad seven to top orthographic shift. Click Place Origin here, and now we can go with shift and light point lamp. I
will bring this up. If we go to negative
about, for example, I will go with -1,000 We can see we get this negative
light color here. But last time I go with -75
I know that this is pretty slow because I
didn't say this to P. I will be sure
to say this to GP. And let's press F 12 again. And now this is much faster. Only a few seconds on my system. You can see here, Okay. So this is before, with this negative light here, what I do last time, I also add two of the
very small lights here. This is value of seven. And also one on floor. Just to get a little
more details on this floor here and
also on this edge here, because if we go
here is pretty dark. We can do this now, but this is not so important. And I will go with
shift and area lamp. Let's go with L Y. The Y minus might rotate
to this direction. And I will now go to Ump seven. And I will press R Z to
rotate about this direction. Now this effect only
on this wall here. And let's bring this
value also to seven. Now I will go with ship X, and let's go to this direction and bring this all about here
to get this effect here. Basically, now we have
the same lighting set up as I do last time. This here is still pretty dark. And what I do last time, I just go here, render properties and
color management. And I said this exposure to
1.15 we get more light here. And I also increase this a
little to 1.15 this gamma. While let's go with shade
smooth for this object here. So I click shade smooth
and we can under normal, set this auto smooth
to 30 degrees, okay?
7. 7 - Stone material: And let's now add brick texture here or stone texture here for this main part of this stone texture
come from polygon on. This material is free. If you search for polygon Don, you can find this link here. I will copy this
address of this link. And I will also share for
any case with you and I will make this links file. I will paste this here, just download this
here to download this. After download the, just
copy this address and go to Edit Preferences and
install this Don. Select this and
install this Don. And you should get something
like this polygon Add. And if you now press
on your keyboard, you should find
this polygon here. Last time, search
for I think Stone. I found this material here
because I download this. I also have this here. And I will now just
select this object. And I will click
Apply A Preferences. I said this resolution to one K because I think
this is pretty enough. I don't want to
Big textures here. I will now press Apply. We cannot see anything here. We see that this
effect to our render. But if we go here under
Material Preview here, we can see that this material. But when we are
in solid preview, we can do one thing. We can selected this material, we can go to Viewport Display, and we can change color. For example, this green color. And now we know that only this
object have this material. Select this material,
and I will just drag and drop to all
these objects here. Also to the stay
here in this wall. Okay, now I will check scale. I will select this
object and I want all scale back to one control, A apply scale also we want
this material to the frames, this one and this one. I will apply the modifiers because I don't want to change
the stalls here, right. Convert this to, now we
apply all the modifiers. And let's now again
select all these. If you go to edit
mode and press A, we can go with you.
And Projection. Let's now go to
Material Preview. And let's see how scale
of this is too small. And I will bring this editor. And now I will press here
A to select all end. Let's scale this down
maybe a little more. Okay, this part is not correct, so I will press L to this
part and scale little up. Okay, this is what
we have for now. If we go select this material
and go to Shader editor, we can see a lot of options
for customization here. Last time I just change this saturation to minus two because we have a
lot of color here. And make this more black
or white brightness to 0.7 last time just to add a little more
brightness here. Okay, We cannot make test. This is before and this is out. We can just create another
material for this metal part. We can call this metal. And I will for now just
maybe change color something like dark, dark brown. But because this stone
texture is part of our scene, you can see this
stone everywhere. And I'm not so happy with just this flat texture with
this bump and displacement. I also want more details. I have one Photoscan I made
maybe a few years ago. You can see how this look, I made this with
reality capture. If we go to render preview, you can see how this look. This is material preview. I will share this
Photoscan with you. I will not share
separate file with you, but I will also share
my last Blender file, which is this one. You can just go here and you can just select this object and
you can go with copy objects. You can also do with all
these objects in this. Let's now copy this. Let's go with paste. You get this object here
and you can now starting to your what I want
intersect with this. I don't place this completely to be only
this part visible. I go with x and we shift just slightly
intersect to get more details. You can also do this in solid. Okay, now I will just take some time to
cover visible places here. I will go with one thing
which is very important here. Don't go with ship
D to duplicate this with a D to make
instance of this object. This will save a lot of
memory in our scene. If you go with a D and C, if you change something
here in added mode, you can see that this is same
instance of this object. Okay, now I will go with x and move slightly
to intersect this. I also make one smaller piece because we don't have
too much space here. I don't stretch. If we go with X, we also get this part
which block lights. I made one smaller piece here. I will now grab this smaller
piece here with copy object. And let's back to our scene. And let's now paste
this here, Y. You can also go with air xs
to rotate this if you want. This is before and
this is after. Let's also try cover
this part here. This will be much harder
than this part here, but I will, I will go
with shift D for now, because we will change
this inedit mode, I will go with six. Place this here and now Z
to rotate this on the axis. Let's go with Nopal key to
isolate these two objects. And now I will go to x
ray mode, edit mode. Let's place this here. Now I will select this part in middle and I will go with
proportional editing here. If we now press,
we get this brush. If you don't see this brush, just mouse down and
we can now move this and try cover this one. Scroll, mouse down and RZ
to rotate this on the axis. And just try place this here. Okay? And this part here also. And grab follow shape of this cylinder here. Okay? Let's see how this look. I will disable
this mode for now. And let's see when we place
this here, how this look. One thing we can do now, let's disable this
render for now. We can go to edit mode
and go with vertex. We can select few vertices
which are not visible here. And if we go with,
we can move this out vertices which
are too visible, we can move side. Okay, and also this part here, I just want slide
intersection with this cylinder here. Okay. Let's see how we can go with
Y to move this little out. And what we can do,
we can go to the, and let's go with z to
rotate this on the axis. This now should also fit here, z to rotate this. And let's see how this look,
let's bring this down. Okay, let's see how this look before and after we
get some details here.
8. 8 - Details on the stairs: Let's fix the stairs now. They are perfectly flat, which is we want,
and we can fix this. If we go to add mode, we can add some betters here. I will go to edit mode. I will go with control and
add few loop cuts here. Now what we can do, let's go with this edge select
control flop cuts here. We can go with control
B to add bevel. If we go with all we
can ext along normals. Now we can move this
slightly in. Okay? If we now go with control amped, we can expand selection. And we can go with control B
again to add one level here. What we can do, we
can select this with this first phase
and with holding control this last phase here. And I will now just press, you can keep this
proportional editing, but you can also disable this, just make some
randomization here Y. My recommendation is to take
a look at some reference. You can see how the states
in Castal usually look. Okay, now we can
back here and we can continue and just rotate this and just make
randomization. I will show you
another method here. If we go with control again, control to add look cuts and control B again and
add one more loop. Cuts in the middle with
scrolling mouse up. You can go now
with control amped minus to subtract selection. And now we have only this
middle part selected. If we now scale from center
of these objects here, but we don't want this, we need scale this on individual origins if
we enable this here. And now press, we scale this
from individual origin here. Now we can go with
control numpad plus to expand selection and
control B to bevels. And now we get this. And let's go again to edit
mode and do same we do before, so this is before
and this is after. I think we can also do more of this control nut minus
scale this down. Just rotate this, okay? If you look render, I also made the wood plays here, because we have
too much stone and I want to make
something different. So I made the wood playing here. This is how this looks. And we will do this now.
9. 9 - Planks: And we can do this easy. I will go with shift right
click and shift A mesh cube. And I will isolate
now this object. Now I want to make this on
maybe just two sent to M, and the x axis may be 15 sent. Okay, and now we have one plan. I will go with control
a and apply skew. I will do, I will go with num seven and I will
go to edit mode. Shift the x and move
this about here. I want place this edge
about this origin here. Now we have only
two objects here. But if we go to edit mode, then we can shift the x
to move this on x axis, I will make two more. And what I will do now, I will go with ray
modifier here. We can array this on x axis. I will just go with
holding shift and move this right to make
a little offset here. Maybe 0.01, Okay, now if we go with
another array modifier, but not on x axis, now I will go on y axis. We get another plan here. But I will move this until
we connect this here. Maybe 665 or seven. Okay, if we go to edit mode, you can see that we have only these four
different plans here. And another plans go to repeat. With this array, we can increase this count five or six times. And also on Y axis here. Okay, let's now deck Naples, key to our scene. And Y. Also move this here. And I will increase
this one more time but on X axis here. Okay, let's go with slightly
Z to bring this little up C. Let's now continue work with texture
of the plans here. Now I will create new material
and I will call the plans. I will open here. You editor. If I
press and I will remove this tebeditor here. Now I download this from Texture.com but I think I
will share this texture here. You can use anything
similar like this. Bring this to Blender. I will now plug this base color. If you go to Material Preview, we can see what we get. They need to go to edit mode. Then let's just check
scale projection. Now I will select the top faces of the
four plans we have. Let's now project
this correctly. It to rotate this on the axis. I will now care only
about one of the plan. I will scale this down. Now we can select one by one
and we can reproject this, maybe one here,
another one is okay. Let's project this
one here. This one. Just scale down
scale on Zxiskay. Important here, bevel,
very important. I will go to edit mode
and press Select All. I will go with control
B to add bevel here, and you can see this bevel, even in this solid preview. Let's go to Render preview. Okay, this look pretty good now, but you can see that we have same roughness in
all these plans. So we can create another
variation here with color M, color mp. And let's plug this, let's
plug this to roughness. We now get a lot of shiny
parts because we have pretty dark color of the
plans here. I will now. Bring this dark part. D blender is value of zero
which is shiny and white. Value of one which
is pretty rough. I will bring this down. Okay? We can also
make more contrast. If we move on left and this one. This one on right and
this one on left, we can make another color
Emp for bump color. Let's here to normal, but we need bump here. Let's plug this to height. And now we can control
bump intensity. I will bring this to
0.1 and this down. Let's add one more array here. Let's move to about here. Okay, Now we can go
to see how this look. Okay, This is how this look. Maybe we can bring
this little more to white bump more to left. If you want, you can
increase this array. But we will place here and
this will not be visible. This look for now last time. I also the photos
can so this peoples, if you want, you can
copy these objects. And you can place in these
corners if you want, just paste this here and
let's bring this here and GC, bring on Z axis. But one thing which
is important here, we also need to make
some randomization here. This is too perfect. We can now go try and
convert this to mesh. And now we apply
this RA modifier and each of the part
is now a table. If we press L, we can go with Z, Y and make some randomization. Here. I will press
a few times L here, maybe z, y or x. But one thing we
can also do here, let's see which one is visible. Let's select this one
and add loop cuts here. If you now go with
proportional editing, we can select this edge here. We can go with, and we can also change the shape
of this object. But you can see that we affect all these plans
at the same time, depend on size of this brush. But if we select here connected, we can it only connected part of this object because we have
space between the plans. We will now edit on
this plank here. Let's select this part. And we can now change
shape of this plan. And we can do same
with few of this. So this is before end. This is Ch planks.
10. 10 - Skeleton: Let's now import
this skeleton here. Let's see how this looking. And this is from Blender. I will pay this link here if you want buy
full version of band. This is a free version. You just need to do
same with polygon. Download this ad here and go to Edit Preferences and
install activate this ad. You have full instruction
in this video here, you get this bar here. If you search for example, Skill, and this is
what I do last time. You can see this locker here. These are paid, but you can find a lot of
free stuff here. If you want to activate
this paid version, you can do this link
I share with you. I think about last time
was only $6 per month. We have another one here. I think I use this one. Not sure, you just need
drop here for example. Just place this here. And when you see
this empty object, this is usually parent objects. So you can control or the separate object
with this parent. So if you go with x, x minus np, x 90 and Z to rotate
to this direction, and we can just place this here. This is what I do last time. But just be sure when you
download objects from Internet, just check which texture this use and mesh
of this object. This look pretty
low poly object. This object is good. But just be sure if you have
a lot of vertices here, you can go with me clean up
and that's in my geometry. And you can bring
this, for example, 0.5 to reduce mesh. But this also depends
how close from camera. If this is something
for background, I will always use this
Decimate geometry option here. One thing you can use here, if you press Full
Stop on your numpad, we will blunder, will
navigate to this object. We have a I will go right,
can select objects. I will delete this for now. I will copy this one from my
last scene because I'm not sure maybe I made some
modification with texture. Will stop here and I will go select objects in this
skeleton collection. And I will just copy
my object from last. Copy objects and I'll
just place this here. Okay, I think I have selected
more than just this. So I will go with control. You can go with Full Stop key on keyboard and Blunder
will navigate to this object and you
can just go with right click and select
objects in this collection. And now we have selected only this to our scene Paste object here
and just move this. This is what we have
for now and I will continue with the recording
tutorial tomorrow.
11. 11 - Dylan Dog character: This is where we
stopped yesterday and let's now create land. If we go to my
last blender file, you may not 13d model here. You may think, okay, this is land model, but no, this is just a low
poly model and low poly model and I use this
just scale and foreshadow, I found this in
my asset browser. This is model from photo
scans from an hubert, But this is not important. You can use any
threat model here, but I will also share this
blunder file with you. You can use this
model if you want, but as I say, this is just for
scale and foreshadow. Let's put for now this in place. So I will go with x and I
will place this object here. If you select this
object, if we go here, object properties and
under visibility, you can see that I disabled
this in camera view. This is reason why you
cannot see anything here. I use this model
just for shadow. Let's back to my
last Bender file. Let's create this
silouette here. If you select this object, you can see that we
have one plane here. This is our silhouette here. You can see that this is
playing with one photo. I found this photo on this link. This is the land movie from 94. If we go to Youtube, just take a screenshot
from this moment here I take this screenshot
and this is what I get. Then I go to I image up
scaler and I get this result. This original photo
is this resolution. And then upscale about
double resolution here for image upscale to
this tool is not free. You can try this tool, but to remove watermark
from image, you need pay. But because I will share
this image with you, you don't use any tool. You can just use
this image here. But I will also show
you how this works. I will copy this
address here and I will choose this low
resolution image. You have a few models here. Last time I used this sharp, I will show you how this
look with a soft model. Okay, so this is before,
and this is after. You can, you can upscale this all to 800% to this resolution. And let's try with
Sharp Up scaler, also have desktop version with, I think, more options. Let's also this desktop version, you can see that we
have here a few options and more options than
this online version. Let's click here to Preview. And this is a sharp version and you can see how this look. If we zoom here, you
can see that this back, all these details and
also the tiny hairs, all these tiny details. Now when you know how
I get this image, let's use this
iplender Last time I just go with right shift. Right click here to
set this origin point. And I go with shift with
image images as P. Now I choose this resolution
image, this is what I get. Let's now isolate this with Fasl K and with the
material preview we can see how this look what
I do last time I, I remove the specular. I don't want this to
react with light. I plug this color tom. We basically take
lighting from this image. I think this is a
little too bright. We can control if we plug
this to emission strength. And if we go with
shift and search for Matt node now we can multiply
this by negative value. If we go to less than one here, we get less light here. Last time I go with 0.8 I
think if we go all to left, we basically take
light from this image. Let's type here zero point. Next thing I do here, I go to edit mode. And just with K, or if I cut part I don't
need from this image, it's a little hard to see
what we don't care too much about this details here because it's all black
and we add black color. This is reason we add
black color here to merge this image better
with our scene. Let's now just roughly cut this, we don't need from this image, but if you want, you
can also just copy this object here and you can
place this in our scene. But this is what I do last time, I just start cutting
this part. I don't need. Okay, Something like
this. And now I select these two phases and
I go with delete faces. Okay, now this intersect with our three D model and I
will just move this little. I will now just copy this
last object because I don't want to lose
too much time placing this in position with scaling. And these things. I will go with just
based objects here. I will go with x last time. I just take more time
to cut all these parts. I don't need here on left side. I don't need care too much about these parts because we have
a lot of black colors here. But on right side, but on left, I need to care little more
about these edges here. Let's quickly go to Edit mode. I will just move
this part little down with x ray mode and
we selected this part. I will move this little down. This is how this look for. Now what I do last time
because we have here too much contrast between
land and this background, I just place random cylinder
objects with dark material. This is my blender file. If you look render, you can see some materials
here, just basic cylinders. Let's copy this object
and I just this in background to merge
this land dog with this background here.
12. 12 - Lighting, detail: One thing I also do in
my last scene to merge better this image
plane with our scene. You can see that we
have a lot of light on this right side on
land, dog face. And I also put a little light
on this threat model here. Now this light have
much more sense I do with this small hole here. Let's now try do
same in this scene. We just need make hole on
the right place to put this sun light on
this wall here. How we create holes last time we use this
bullion object here, we can now break this object. If we go to edit mode and if we in edit mode create new object, this will work as bullion I
will go with shift and cube. Now we create this cube
place in this object here, this will be a bullion object, but for this we need disable this for second in the
Viewport preview here. The only thing we need
to do now is find right place to get the
highlights on this area here. I will now back this
in Viewport preview. Let's just move this until we
get the light on this area. We can start scale this up. Okay, now we see that we
get a lot of lights here, but I want to keep this as smaller as possible because now we get too much light here. What we can do here, we
can basically select one phase and we can move
this few times, okay? Now we get light only
on this part here. I will move this now down. Let's try move this
top part down. Okay, I need to move this up
and this part down. Okay? This look good on axis. Let's now remove a
light on this axis. Okay? This is too much. So now just back
this little here. Let's move a little more. I think this looks pretty good. We just have this
small hole here, which creates this light here. This is a little too
much about here. If we move, for example,
this model here, see that this will
affect this shadow. If we move to here, you can see that we
get this shadow here. But I think we don't need this
for now. I will back this. That's because we disabled
this only in camera, but it's still visible in
shadow and all the passes here. Okay. Now I think
this is too flat. What I do also last
time I also play here one piece of
this, small photos. If you want to play with this, you can go with all the. Let's now isolate
these two parts. And you can go with minus T. You can just maybe
scale this little down. What I need to do here, because this piece is too big and I don't want to stretch. You can go with shift to make a duplication
of this object, and now we can go
with npkympa three. We can just cut
one part of this. I will go to edit mode. I will delete this. We delete vertices
and also this part. Now I will go with set
origin to geometry and we can now play only
with this small part. What you can also
do, you can go with a Z and you can go with Y. And maybe place this
here to this corner. Just to get more
details on this part. Let's go with all the
X and Y minus night. Maybe place one part here, this is before and
this is after. We also get some light
on this skeleton here. I think this light
here is too intense. What you can do, basically place something here
to block this light. For example, you
can go with plan y n to rotate this on yaxis. If we now go to
edit mode with tab, we can go with subdivide
this few times. We can set this as wireframe. We can add wireframe
modifier and this will add thickness to all
these edges here. Now we can increase
thickness here. Okay, this is before
and this is after.
13. 13 - Lady in black: Let's now create Lady in Black. This is how this look from
my last blender file. If you want, you can copy this and use this in your scene. This is how this look in render. For this I go to am I use
one of the free character? If you go to a am com and you just need sign up
with free ado account, then you get access to all
this character and animation. Last time I just found one
of the character here. And let's try find this now. Okay, I use this
a character here, we can switch to this character. And now you can
go to animations. And you can pick any
animation from here. Maybe I search for standing
pose or something similar. You just need to
watch reference. Here is our reference. I just want the
fore standing pose, and I use something like this. But because we need
only one frame, you can use any of the
poses you like here, Then when I'm happy with
the pose and character, I just click here to
select this seven FBX 7.4 You can choose any frame per second here
and just click download. But I will also share
this FBX file with you. So you can use this blender. We can create another
blender file. We can work only in black. For now, you can create another blender file If you go right click and click here to this blender to now
I will go with file says I will call
this lady in black. Okay, we can select press A
to select all these objects. And we can delete this
because we don't need this. And I will go with file, import FBX and we can
import this FBX file here. This is what we get. What I do last time I
deleted all these things. I don't need this part. And also now we create
this address here. And how I create this For this, I use cloth simulation and
some force field effect. Use a clot simulation. We need a collision object
because I want to create this dress type
of object and you can see this in our
reference how this look. The last time for this is
best solution is to use, to start with a cylinder, I go with mesh and I
create one cylinder here. I think we can reduce
this to only 16 vertices. Let's try the 24. And now what I do, I just place this here and scale this to right dimensions. I go to edit mode and I
scale this part down. Now I try model this according to this
object with one look at here and maybe as to scale and maybe control
to be this part. Okay, something. Now we need something to
create simulation. I go with shift a plane. I placed this above this object, and now I go to edit mode. And I go with subdivide
maybe two times to create more mesh because we
need mesh for this clot here. And let's just check scale
control a and apply scale. Now I sat here under physics, I said this clot object, okay, let's first set
this collision object. If you go to frame one, if you press with space, we will start this simulation. I will now press space on my keyboard to start
the simulations, and you can see what we get. That's because we don't
have enough mesh here. I will select this object
and I will add here one subdivision,
surface modifier. And I will set this to simple. And I will increase this
maybe to three here. Okay, I think we said this
before, this cloth simulation. Let's see what we have for now. This look much better. I think we need to
scale this a little. Apply scale and maybe we
can set this to four. Okay, this looks pretty good for now to get this
wind effect here, we can see this reference. We can use force field. For this, I will go
with shift and I search under force field, I think wind. Let's now place this here. Let's go with the Y minus
to rotate this direction. Let's see what happened here. Nothing happened because
more power here. I will go here under
physics and I will say this, maybe 100 start. Let's see how this affect now. Okay, we need much more. Maybe 1,000 or maybe 10,000 Let's bring this
closer to this object. You can see that this
affecting this object here. Okay, I think this
look pretty good. But we can scale
this little more. Let's see how this look now. What we need to do now, I think this is now a
little too intense. Maybe 800 here or 8,000 here. Let's see how this look now. We just need to press space to stop this
simulation when we are happy or you can just move this key frame.
Time line here. Okay, time when I
was happy with this, I just go click and
cover the two mesh. Now we apply all
these modifiers here. Now we can go click and shape if you want
more details here. We can add another
subdivision surface with value of one and we
can cover these two mesh. Let's go to Edit mode to see. I think this is pretty good. I think we can handle
this mesh here. Okay, If you want
to play with this, you can go to scalp mode. We have in blender
brush to brush here. If you want to play with, you can add more details. You can play with radius
and strength here. But I didn't play too much with this because I think this
is pretty good for me. I think it is much
important to spend more time playing with
this clot simulation than this brush tool. Okay, Now we can go set
origin to geometry. And when you are
happy to this here, what I do last time because this skeleton have
skeleton instead of head, I basically just duplicate
this skeleton here. But this is not so visible
in my final results. If you want to play
with this, you can. I do last time, taste
this object here. I go with Z to, to this direction and Y or
X to line up this here. And now I just go to edit mode, to x ray mode, and I
just cut head here. And instead of this head, I just place this skeleton
here. This cool here. Okay, now we can place
this to position. We also need this clot on this skeleton here,
or this cool here. You can see how this
look in our reference. What I try last time
I go with shift X, I try make cloud
simulation on this object. But before I do this, I go to edit mode
and I go with mesh. Cleanup. Decimate Geometry. I said this maybe 2.05 or 0.02 but last time I didn't get the result I
want and I will show you why. Because Blender have a lot of problem with clod simulation. When we have
collision object look like we don't have a
clean geometry here, then will have a lot
of problems if we go, let's try make this collision
object under physics. I will say this collision clot. Let's back to first frame added, mode subdivide two times and
maybe one subdivision here. Let's say this here. Simple. And let's play this. You can see what we get. We have a lot of problems
with this simulation. How I fix this, I basically
instead of this school, I go with icosphere here. Or I think we can go
with Sphere here. Now you can just,
instead of this school, use this object as collision. So we can model this
a little if you want, you can use this
proportional editing. And go with, and maybe to scale to get something
which is more similar to, okay, I don't care
too much about this. And let's scale this down. If we now set this as collision object and
if we now press play, I think pro why this don't work is because if we go
to phase orientation, for some reason this is
oriented in wrong direction. I will go to edit more. Then I will press F
three and search for flip, flip, this normal. Now this should work correctly. Okay? Now we just need
more one subdivision here, and I will say this
to two to simple. Let's now see how
this look, okay? This is better. And let's
drive it three here. Let's bring closer this
force field, okay? This head is a little too big. Let's scale this down.
Let's see how this look. Now. Let's try to increase just quickly this
force field, maybe 250. This value also depends
how much vertices we have. If, for example
said this to two, it will work
completely different. You can see now this
is pretty strong, but if we said this to three, it will not be so strong. Okay, I think this
is a good effect. And we can now
cover this to mesh. And we can add one subdivision
here and shade smooth. Now we can use this object, and if you want you can go to x ray mode and
you can scale this. Let's set this set origin
to geometry and let's place this here, okay? So this is how I
get this effect. We can go with y to
scale list on y axis, and this is how this look. The only thing we need to do
now is choose right shader. I will delete list for now. And if we go to Material
Preview, we get this. But now we just need
nice shader here. I found one on Choco
for.com If you go here and I think we need
click here to Store. Now, products here
must be one free. Category. Okay, last time I download this Choco
for shader bundle, you just need free
profile and you can download all
these materials. This is how this look, you get all the
shaders we have here. Bricks, concrete, and fabric. We need a fabric last time. I just maybe this one, but you can choose
any of this you like or maybe I use
this black one. We just need to
copy this object. So I can copy this. And what I do, I paste this object here. Now we can just go to
Material Properties, and we can choose this material, and we can just drag
and drop this here. I think this looks
pretty good for now. But if you need, you
can go to editor. You can just scale
this up or down to fix this UV I also this shader here. Now, one thing is
important here. If you look this reference, you can see that this is
a little transparent. This should be transparent. And how I get this, I
select this object and I go to shader editor. And if we first I
go with color M, I use this base color
to alpha value. Now we plug this to alpha value. What is white it
will be transparent. And what is black?
Not transparent. If we go with control
shift and right here, you can see that we have a
lot of black colors here. This is reason why this is
not transparent for now. But I think we need
to go first to Cycles Preview and GPU here and we can go to Render Preview to see how this looking render. Let's go for now point M to see how this
react with light here. Let's increase this to 100 and maybe we can
bring this world. I just need to play with
this color lamp here. We need more white color here to make this
less transparent. But what I do last time, I separate this to
another object here, I will call this transparent, and this one will be
less transparent, okay? I will first play with this one, and I will move all left to make this
less transparent, okay? And I can keep this part more transparent,
but not too much. I move this little on left
and I get this effect. So you can see that we have some transparency
also in this part, but not as much as we have here. Okay, And this is how
I get lady in black. Let's copy this object
from my last project. I will go to x ray mode here. I will just d and select all these parts
here with control. All these parts I don't need. And I will now press them. I will add this to
play imply collection. Okay, now I can easy
with full stop key, find where is this collection? And I can go with
select objects. Now copy objects and I
will say this for you. Now I came back to my new scene and I can place this here. Let's now just place this two position Z. Let's place this here. This is how this look. One thing which is
important here. Last time I use my last scene, I use this volumetric cube. So let's just see settings. If I go to Share the
editor and press okay, I used the values last time
and let's now create this. In our scene, I
basically go with shift, a cube control, a apply scale. Let's with Full Stop, find this object and we
call this Volumetric. Volumetrics. Now I will go to, okay, I will go to Share the Editor here and
I will create new material. And I will call
volume metrics also. And I will go here with volume scatter I used last time, okay? We can add little
orange color here, and we can plug this to volume. Last time I go with 0.0 35 v, I also bring this anasotrophyup. Okay? So let's see
how this look now. This is before, and this
is a before and after. We can also say this as bounds. We now cannot see
inside this queue. But if we go to here under object properties
viewport display, we can say this as bounds here.
14. 14 - Details: My last scene, I also
had some details here. I create this fence here, we can also create
this very quickly. Basically, I maybe I
go just with cylinder, let's set this maybe
to 890 and Z 90. I scale this a lot down, y, to scale this here I think I go with x to
rotate this on x axis. You can now switch
from global to normal. Now we can go with Z to scale
this in this direction. And now you can select this
part with environ remote. And you can go with Z
to ex this on axis. But I will move now, Just disable this
proportional editing. Now we come back to
global orientation. It is much easier now I
just go with Y, okay? Okay, this is, I
make big mess here. I will now go to global and I will move
this on y axis here. And now we can move this down
and maybe X to rotate this. Now we just need to create
some dark material, maybe black, and just
change color of this. One thing I also
modeled last time is this candle holder or something. This is also very
simple modeling. If you want, you can
copy this object and you can this few places
in our scenes, I place one here and view here. We can go with copy objects
and we can place this. This lamp here is
from Blender kid. I'm not sure what I
searched last time. Maybe old lamp or
something similar, but you can use any object you like and you can
place in your scene. I will, for now just
copy this object and I will place in minus. I will press and call
this to New collection. And I will call this lamp this before. And this is after we get
all these details here. I think we need change brightness
of this land dog here. If we go with an Numpad zero, we can maybe bring
this little down. I think we are mostly done with blunder and we can
now render this. I will go 100 samples, maybe for post processing I will use maybe glossy direction
and ambient occlusion. We can check this for now
and we can now press 12. After 29 seconds, we
can go to compositing, and we can see how
the passes look. If we go with Control
Shift and click here, we can preview this image. And this is past glossy
direction, ambient occlusion. But I will go now with 11. And I will now save this. I created this folder here. I will go with Image save. I can save this main, now I can go with Control
Shift and click here. I need to Node, because this is Node and this is Render Preview under
View Node to save. And I can call this GL for Si direction and O
for ambient occlusion.
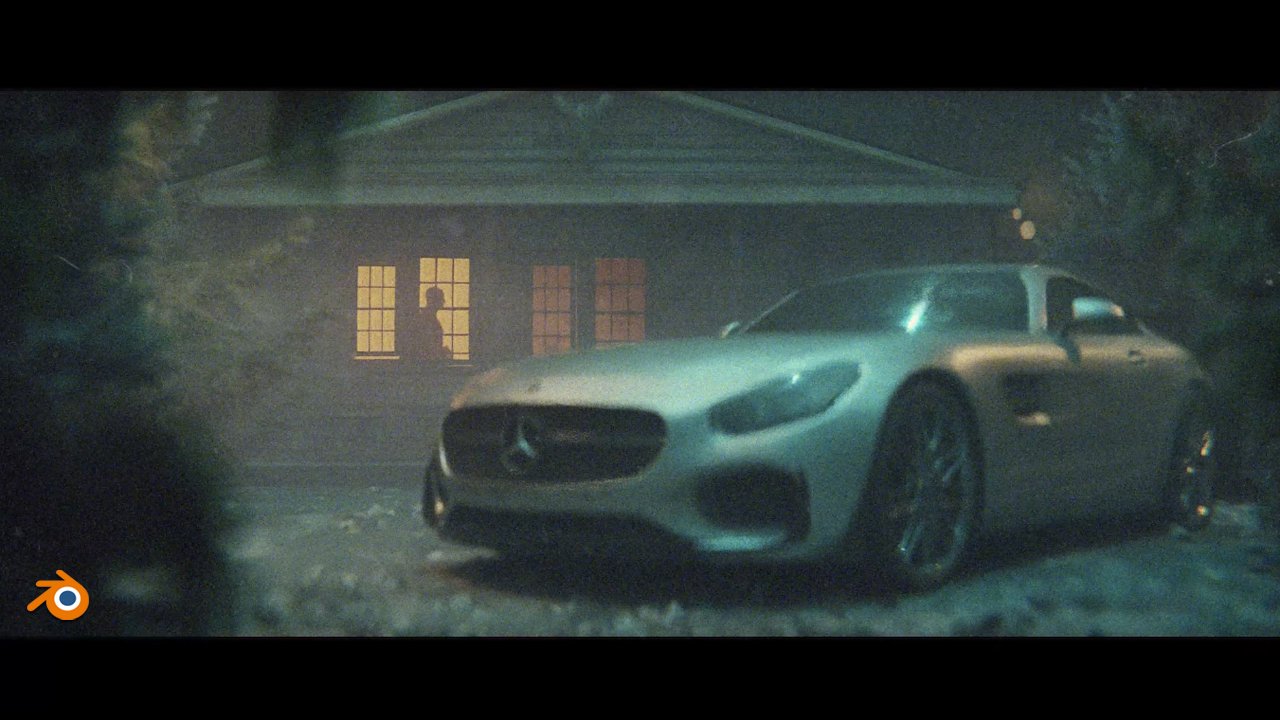
15. 15 - Post-processing: This is our final
result from Brand. I think we can do this
better in post processing. For processing, I will
use after effects, but you can use any
graphic editing program because effects we will use in after effects
are pretty simple. And I think you can follow
this in any program, but I usually use a
effects for this. This is my last
after effects file. We will just now go through this file and see
what I do last time. This is after effects file, this is before,
and this is after. Let's first disable all these
layers I created last time. And we will now go through
all these layers one by one. The first step I do here, I just add some dark
areas to this lady here. If you look before and after because I want to put
more focus in this. I think this volume, this lady was to wash out. It is not too much
folk how I do this. I basically add
the lumetric color and I just bring
exposure to minus one. This default one, if we
go to minus for example, we just make whole image darker. Because I don't want
the whole image darker. Just make this, I
make this mask here. How I create this mask, basically I duplicate
this original image. And I make this mask with
this mask tool here. Now with levels, what I do, I isolated this
black white color from this black color here. Now I get this mask
and then I tell after effects that use
this mask made here. If we said this track, get after effects
this mask Alma made, we get this effect. This is before and after. And then I bring opacity to 50% This is 100% of this effect. But I said this just 50% here. But you can make
this very easy in Photoshop or any graphic
editing program. The next thing I do here is
this glossy direction pass. We save this glossy
direction here. Basically, I said this to screen blending mode if we
said this to normal and if we increase opacity
to 100% we get this. When we said this to screen, we add some glossiness
to these highlights. Here I use only 10% of this. This is before and after. Not too big difference but we just back some details here. I use the same with
this ambient occlusion. I said this to soft light. If we increase this to 100, this is affect what we get. But because let's now
said this to track made. I don't want this
effect to affect land. And this part in foreground I
use this is pass Alma made. Basically I tell
blender white color, put this effect, dark color. Ignore this effect. This is pass here, this is before and after. But I said again, this maybe just 20% or ten, this is before and
this is after. I just add a little more
details on this stone here. You can see before and
after the next I use this collation and in
almost all my renders, you can see when I
increase this to 100, I get this red
glow on the edges. I also very low value of this. Let's quickly create this. But I in my last
tutorials also if we find edges after effects
will find the edges here. Now I go with tint. I color these edges to red
color here, orange color here. Now I click Invert. To invert this effect. And now I go with
fast box blues, just to blue edges here, because now they are too sharp. And let's set this to normal. This is reason why we
don't see anything here. If we now set this to 100, we can see how this look. Now I need les. Okay, let's see how this first. This is find edges. This is within the two red and now I add fast box blue here, maybe to six levels. Now we have too much
this and with levels we can just remove some parts. Let's increase this to ten. Now if we set this to
screen blending mode, we get this red glow
effect on these edges. Okay, now I will set this maybe just to 20% this very subtle. After that, I use
some overlay here, but you can see
that this is not so visible if increase pass, you can see this
fog effect here. I found this overlays
on this link here. I will share this
Youtube video with you. I will paste this
here. Overlays. You can just click on
this link and you can download this pack here. This is how this look, you get, I think 12
of the overlays. Now you can, for example, bring this one in any
graphic editing program. If we said this here, we can press to scale this
down and we can use screen, for example, screen
blending mode. What I do last time
because we have this missed past here. Let's say this. Okay, now
we can set this luma mate. We will add this fog effect
only where is white color. But we need to
tweak this because we have a lot of white color. Also in foreground, we can go
with levels under med pass. We use as lumasicly remove
this from foreground. We can set this
only in background. Okay, this is what
I do last time. We can now bring
opacity maybe to 50% Now we have
folk in background. After that I add this film
convert color grading. This is not free Don. This is paid Don. But if you don't have this
Don which is not cheap, you can maybe go with
Lumetri color and use some free ad bloods
from the pack here. If you go here under Creative, you can find a lot of this. You can play with
these values and you can use any of this you like. But all the effects
are too intense, the slots are too intense. Just be sure to
bring opacity down. But I will for now disable
this and I will use this film convert last time with this here back
skin tone on land dog, what I do last time. So basically I go with
new and solid color. And I choose from here
some skin tone color. Now I said this to
color blending mode. We get this. After that, I create from this original
image on this part here. When I said this to glumat, I get this effect only
on this face here. Okay, I create mask
on this part here, but I also use this
original image as Alma, this effect only on
this gland face. If I press for opacity, if I bring this up
you can see effect I get this is before
and this is after. But I use maybe
just 10% of the 20. Next is this CC light. This is effect I found
in after effects. If you go search
here for light ray, you can find this effect. Now we can set this to position where we
have a lot of lights. We can now just play
with these settings. I will now set this to 100
so you can see better. If we increase the
values, we get more. This effect, if I go here, for example, just
for test, to 200. And if I bring this down, we get this effect. Now we can use this maybe
screen blending mode. We can bring opacity maybe to just 20% and this is
before and after, but this is too
intense last time, maybe bring this
value a lot down. This is just a quick way to
add focus to this part here. But this is obviously
too intense and I keep this
value very subtle. The last thing we have
here is this land cover. I made this overlay here, basically land title and
this title down from strip. If you like this effect, you can set this over, okay? This alpha value, this part is transparent so you don't
need to do anything here. This is how this, this
is before and out, and this is the
final result I get. I hope you'll learn something new and see you
in next tutorial.
 šime Bugarija