Transcripts
1. Introduction to the tutorial: Hello and welcome to
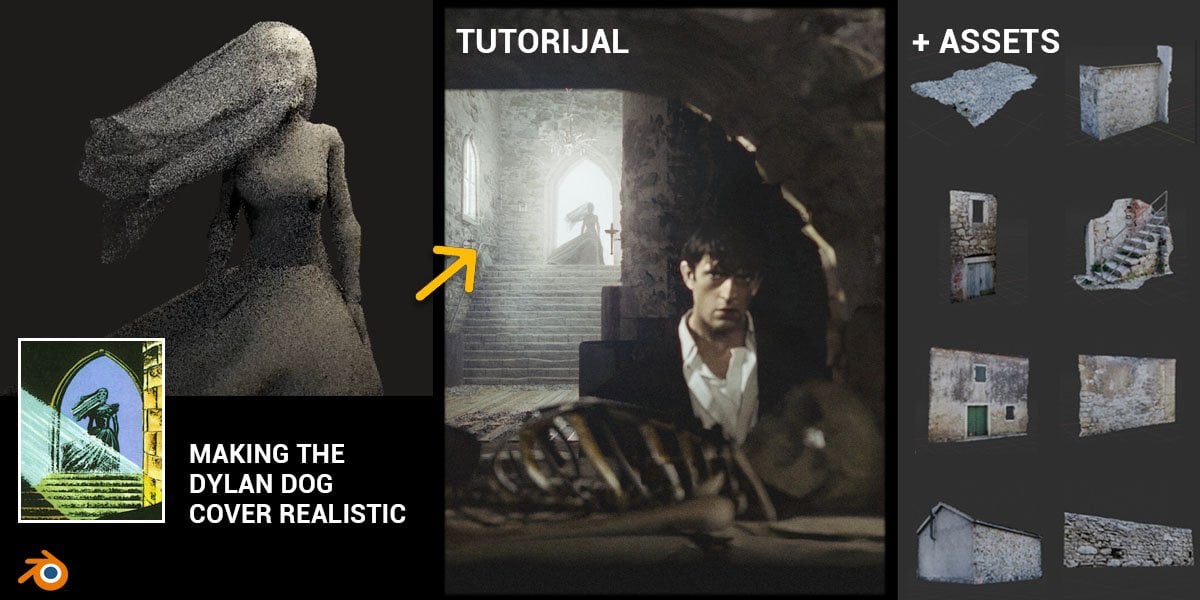
another tutorial. In this tutorial, we will
create this scene who are watching now in three program
blender step-by-step. We will talk about
how and where to find best free car
models online. And we will solve most
of the problems you meet when downloading
objects online. You will be able to
download any model online and optimize it
for easy use in Blender. After that, we will animate the car lights or
the imperfections, trees, animate the leaves
and other details. We will talk about the camera, how to animate it, adept and field bouquet
and other settings. Finally, we will do
post-processing. We will work with buses in Blender effects
and color weight. I will show you where to find free overlays and how to
achieve cinematic look. In the last tutorial we create
and these three scenes, if you haven't watched
the previous tutorial, I recommended that you do, but it is not necessary. I will share it with the
blender file with Kevin, ground and lighting
we created last time. So we can immediately start
creating the first see.
2. Introduction to Blender for beginners: If you are completely
new to blend there, I'm going to share with to
our terminal window I made for a pass tutorial where you can learn the
basic of Blender. If you have experience
with Blender, you can skip this part. You can download Blender
for free at blender.org. First, I will introduce
you to Blender a bit. After that, we will
start with this. See, this part is intended
for Blender beginners. If you have experience, you can skip this part. Since blender is a large
and complex program, I will try to show
you only the basic in about 10 min before we start working on to see when you open Blender
for the first time, we see a lot of options. The good news is that
you don't need to know most of them
to create a scene. We will spend most of our
time on the Layout tab. And we will also use shading
for creating materials, UV editor for projecting
materials on 3D objects. And finally, a bit of
composite determine. All these tabs above are actually made up of
these tools here. E.g. layout consists of 3D view port and timeline
because we will use them a lot. They are here by default
when we opened Blender. We can create a workspace according to our
wishes or needs. E.g. if we separate this window, we can add UV editor
or shader editor, or another 3D view port. Here. In the 3D view port we have three
objects by default, camera, object and point
line pass light source. To create a render, we must have at least one camera
in the scene. To switch to camera view. We can go to view cameras, active gamer, but all these
options have shortcut keys. Searching for this option, for this menu is waste of time. If you use blender, you have
to learn some shortcuts. We will cover the most common
shortcuts in this tutorial. And with time later
you can learn shortcuts for advanced
options as well, e.g. to switch to camera view, the shortcut is not at zero. Then we have our select a
camera in the Properties tab we can find option for
this camera, e.g. focal length, which
is actually zoom, Depth of Field and others. Each object in the scene can be deleted by Delete key or x. In Daniel, one can
be created with shifting or by
going to add menu. We will mostly use the options
under Mesh that we have basic geometric
shapes from which we can model anything we
want in the edit mode. Once we have the
camera and object, we can make the first render. Shortcuts horrendous, F to L, or you can go to
Render, render image. We now see our object because
we have a light source, which is this point lame. If we remove the point
lamp and press theft, Well, we still see something. And the reason is because
in the word Properties tab, you have a darker gray color, but not completely black. Which means that our ward or
environment ME, sunlight. If we switch to black, we won't see anything. Lighting in Blender can be from three different
types of sources. The first is worth
or environment. They're in additional to call. Or we can also use an
external file called HDRI. We can find many of them
on the internet for free. And we can also use procedural our sky texture
with comes with Blender. We create the second
group or flight with Shift D that we have a point, sun, spots and area. Each of these source
emit light differently. We can also turn any object
into a light source if you k tan emission material
for this subject in shaded in red there we have
to render engines. The first is EV and
the second is cycles. Evs less realistic but is
much faster than cyclist. If we can be very realistic,
similar to cyclists, but you need to know how
to set some settings manually While cycle C3
realistic by default, because it's a physical base
path tracer render engine. Speed depends on
the computer power and seen optimization. In the Properties tab, we have our different options. One that we will use often
is the Modified tab. There we have a large number of modifiers that speed up
the modelling process. E.g. the array modifier enable us to quick can
easily duplicate soldier. With the mirror modifier. We can easily mirror everything we do on one side
to another side. With the Boolean modifier, we can cut one
object, hit another. There are many other modifiers. These are just up
to you that we use. Most of the tools on the left allows us to
quickly transform the object. E.g. we will often use the move, rotate and scale tool, but we usually use
them with shortcuts, g for gravity,
therefore rotate and S for scale most often
combine it with X, Y, or Z for X, Y or Z axis. E.g. if we press S for scale
and then x for x axis, you can scale the
object only along the x axis or y to rotate
only on the y axis. Or G to move along
the z-axis only. To edit an object, we need to go to Edit Mode, the shortcut for this system. Then we have three
types of selection, vertex, edge, and
face selection. We can jump between them with
12 or three on keyboard. Now we can grab vertex, edge and face and scale, rotate or grabbed S or G. There are a large number of portion that we
use in edit mode. Some that we use often is
Control R to add a loop cut, extrude, and control B2B. Shortcuts that we use often
to navigate through the scene is numbered one for the
front orthographic view. Number three for the right, paid nine for the left, and the non-bird,
seven for the top. You can get the same by
clicking on this gizmo. By pressing the enter key, we open additional tips. You can find all this in
Properties tab and much more, but this is sore cough, or these views over the
first three types can be blender and the rest is the add-ons that I
personally style. We will mostly use
the transform tab. We can see location, rotation, scale, and dimension. There we can see the dimensions
of all selected object.
3. Introduction to Blender file: If you are a blender beginner, I recommend watching
this introduction to blend that window. So this is from my
last tutorial and you can find here basic or blender. I will also share with you this template Car N
carbon blender file. So you can just double-click
and you can open this file. This is part of sin we
created in the last tutorial, and we will use this
for another scene. And if you press NumPy zero, we switched to camera view. So we have already
set the camera here. And if we press F value, we can make first render. And you can see
what you hear here. So here is our cabin
from last tutorial and ground photo scans and
lighting and atmosphere. If we look to render settings, we can see that I
said these two GPUs. So if you have GPU, you need always use GPU because it's much
faster than CPU. And I said Here samples to 100, which is good for tests, but for final render
we will lose a lot. I use last time about 500. And of course, the noise that, and if you have optics, you need always use objects
because it's much faster than this Open Images isn't for lighting views,
this volumetric cube. And if you go to Shading tab, you can see that we use principle volume
with density of 0.1, which is very high. And in combination with this three point
lamp, which are same. And with this very strong
value and this bluish color, we get volumetric effect. You can see how
this look here and we can switch here
to render preview. You can see how this goes. This three point limb
with a very high valuable through this volumetric cube
and we get this effect. So this three-point lamp is main light source here with
combination of hollow matrix. And we have also this
two-point limbs here, which is not so important. This should imitate street lamp. This more color. They don't affect too
much to our scene. It will keep them for now, but we will see later
this street lamps here. And the next we have
here, this ground. So they are in this folder. You can move them,
scale or rotate. So if you press Z, you can rotate them on z-axis
or you can press G and X to move them on x-axis
or G and wipe or y-axis. But if you want more of this, what else can you just need to duplicate them
with altered D, shift D. With the Aldi you make instance of this object and this will not slow
down render time, but if you use Shift D, this can slow down
your render time. So just be sure to
duplicate them with all d, So d and x, and you can move this here. One thing I forgot
to tell you if you have a slower computer or laptop and you have problem
with this volumetric, you can always disabled this in render preview and
you're seeing me, it'll be much faster. So your scene will
look like this, but later we will cover
this background with trees and this
should look better. But my recommendation
is to use volumetric because you'll get a
better final result. And the next thing we
have here is this cabin. So I will go now to
solve live preview. And this can be consist
of objects as you see. But I parent all this
object to this empty queue. So if you select this cube, you can move all Kevin. Or you can press S to scale
this or air and rotate this. And all of this in
this can be products. So if you need more
of these, Kevin, you don't want select here
because we will get this. Rather be sure to select this cube and you can
move this camera. If you want to use this
cabin in another scene, just be sure to go to
this collection and select down and hold Shift and Select all of these objects
and then you can go with copy object and you can use this in another blender scene. You can just paste object. And you will get this Kevin. So if we go to
material privilege can see how this looks in material. And let's go to render preview. So I will vote to
cycles and GPU. And I will switch
to render preview. And let's for background
art, bluish dark color. And let's quickly
add just so light. So I will go with Sam and I will rotate this on x
or y axis to create shadows. So this is just for tests. You don't need all of
this and let's try to switch to grayish
color. Morning light. And this loop recognize it, but we have this
hard shadows here, so you can, okay, this angle here to get
soft shadows here and e.g. you can add another point them with some warm color and
you'll get nice scene. You can use this in
any project you want. But if you want to learn
how we create these, Kevin, from start to finish, you can watch my last
tutorial and we will now be 2 h. Let's talk about camera. So if you press numpad zero, we switched to camera view, and now we need to
select our camera here and we get this
camera settings here. So I use a panoramic because
we get these edges here. For tests, go to perspective,
which is default. So if we press as well. And if you now press
J on the keyboard, you can switch between
these slots here. So this is before and after. And I think this panoramic
look a little better. So you'll get this
distorted edge here. So this is before and this is basically all your camera settings and we will later use that field. But first we need
to add card 2 h.
4. Car 1 - Volvo: In the last tutorial,
I talk about the car option for blended and you can watch
for free this part. So just find this
file here and I talk about corruption and how to import FBX or OBJ
file in Blender. And you can watch this
part in this tutorial. We will also import
three car in this scene. So you can find car you like. First of these three
option is Blender kid. And in lots of tutorials, I also talk about Blender kit. And if you want, you can
open this window and you can learn about
these great add-on. So quickly about
blend that keeps, you just need to go to blender.com and I will
also share my link. So if you want to get through this link and you just need go here and
download Blender kit add-on. And then you need to go to here, you can instruction,
stop this add-on. You can find it also
in my last video. But basically we just need
to go to Edit Preferences sent here to install
injustice town. Just download. Then you'll need to
search for Brandon. Just kicked. And just
enable this last scene. I use this
transportation add-on, but because this is
not a free add-on, talk about free oxygen in this tutorial and the
person has been their kids. So after you install
Blender keep, you shouldn't get
something like this. In this cell body. You can search for your
objects, materials. Since HDRI and we will search. And you can look here that
we get some free options, which is without this locker and all this with this
low caries block. So if you want, you can
go to vendor keep them. You can combine
these four grand for $6 a month and you
will unlock all this. In this tutorial, we will
use only three assets you can search for any
of these three. You can see there is lot of
free options like this car. And last time I
found one nice wall. So I will stop share
for just one node, it, for some reason this add-on don't work for you or you
cannot find this car. Don't worry, because
we will later work with another two cards
from another source. So you can, in this
case skip this part. So when you find your card, you can just drag your
car and place it. You're seeing. All these objects
are created from different outdoor
should look different. So first thing we need here, we want to make this
in one collection. If you have problem to find this object here you can see
that nothing is highlighted. There is one trick you
can use for find objects. You can select one of these
piece and you can put your cursor here and
non-fed keyboard toucan, breast, stopwatch and Blender will navigate to this object. And we can see that these
objects are in this collection. So let's mean that this car have, already have collection. But this collection is
in our main collection. So I will just move this
and replace this car. So now we know that all these objects from
this collection is here. And the next thing I will do, I will select all these objects, objects from this collection. So I would select the first one. And I will scroll down to
object here to Select All. And now I will press plus an unpaired slash key to isolate only this
car from our scene. Or I will go with you. Local view, toggle, Local view. Now we have much cleaner
seem to work with. And now we can, we can fix
some problem with this car. Reason why we'll play with the three different car in
this tutorial is to show you how you can find
the nice options, but also to show
you all problems. You can get with the
important concepts from different creator because all of them working differently. The first problem we have
here is this double objects. So if you look on this card, you can see this glitches here. And that's because for
some reason we have double objects on our car. So I will first select
this window here. So you can see the slides that I select only
this window of skin. And I will now press Delete. And then I will
delete this part. So just be sure to delete this main object and I just
didn't want delete this. I see this leeches. Sometimes you need to click a few times to select
only this object. We have double door
here. Delete this. Okay, and we fix first problem. Now, I see another program here. We don't have this
part of the star. And I will back with numpad
slash key or view cameras. You local view
toggle, Local view. And I will check various in which collection
is this part. So I will select this object and I will press Full
stop on numpad. And I see that this
is in our collection. But because before this was this part was closed
and we didn't select this. So I will open this
sub folder here and I will again select the first object in this model collection called
Shift and click on last one. We now select all these objects. I will now go with competence slash key to isolate this card. Next thing we need to do here is parent discard to one object. So even e.g. select this
object and we move this. You can see that we
separate our card. So every time we want this
carving it, select all car. And which is problem
if we are e.g. here and we'll now
select all this object. And then we need this Select, which is a big problem. So I want to, I will
again selling this car kill with non-pathological
back to our synth. So we want to parent
this to one object. It will look better. This card, you can see these lines here. And if you see this, that means that the object
is parent already to one object and our creator
already better in this object. And you can see where
this empty object here. So you can see that these
are ready warp. This one. So if we press G or more
of the song left or right, you can see that this is already
parented to this object. But I don't like
this empty object. Empty plain axis. I want the parent
discard to empty cube. So I will, what I will do here, I'm going go to x-ray mode to be sure that I select all car. And I will be I will clear that this car is not parented
to any of this object. And if you can see that if you now move this parent object is
not parentage anymore. So I don't need
these two objects, so I will get it to them. So again, I get problem with
this part of this course. So I will compare
slash key scene and I just want
to be sure that I select all of these parts so
we can use method one last time or end because this
car is now on empty space, I can just go to wireframe
mode, X-ray mode, and I can just drag and
select all these car and just be sure that you deselect all these
objects we don't need. So hold Control. Just slide them, they select this part and also this camera. Now we can go with
non pet slash key. Okay, and I will
back here because I select this light source here, you can see you must be sure that you don't select
anything except car. So I will again hold Control and just drag and remove this. I will put in this
car to empty cube. So I will go with sheep day. So empty and cube. And now I will go
with number seven. I will cover this car with cube. So I will go with SY and I
will go with numpad one, and I will bring this cube
down to scale this on z-axis. And now we have this empty
queue covalently scarf. I will go to x-ray mode
to be sure that I select all objects inside car and I even just drag and move this
here and I will select all. You can see this yellow line over this empty cube and you
can see this reddish line. For all rest objects here. This yellow line means that
this is last selected object. If for some reason is e.g. this object yellow, you should hold the Shift and
you can click on this empty cube and you must be sure that
this empty Cubase last selected object, we will parent all this object
to last selected object. So this must be this cube. So now I will go with Control P and I will choose Set
parent to option. Now you can see all these lines go to center of this object. That means they are
parent to this object. And now we can turn
on this x-ray mode. And now you can see when we, we just need to select
this empty cube and we can move out car or you
can use g for Grab, or z for rotate and z-axis. But the oldest car objects are
parental this object here. Okay, I'm not sure why
this happened here. Having just align this
with holding shift, we can select all these objects. I will go with number three
and I will just line up this. Okay, and just be sure to select this empty cube and press M. And said also these
two mobile collection. So first problem we fix here is we remove this double objects. And the second problem
with fixed repellant or cut object to one empty cube. And we can easily control.
5. Car 1 - Volvo (Part 2): I see another program here. So if you move this curve, you can see that our
viewport, this slope. And this should not happen here. When your render view-port
display is slow. That's means that you
have a lot of my SSH key. If you select this
object and if we go to modify properties and stool, modifiers are good
and also shrink. This is necessary butter
if you will, here, subdivision, equivalent
to survive remote. And you can now remove
this optimal display. You can see how this look. So this is from
just from viewport. You can see Cao Pi is in viewport but in random
variable press F2, me get four of
these subdivisions. And if we move this to four, you can see how high density. So we have millions and you can see here we kept
3 million basis. Just for this object, not all these remainders, but it's way too much. So now I will bring
this only to one. And you can see that we still
get a lot of details here, but it's much
better than before. Two subdivisions. So
I will bring this, this object, maybe two. Final render just
for two or three. We're now two and the
viewport display, I will go to zero or one. So because my computer
can handle this, I will will be one, but
you can go all to zero. Here. This is just report and these norms
affect our render. This value here. Because my computer
can handle this. I will go, I will now select
all this object can divert, see what I have here. So again, with this, we have seen with
these tiles here. And I will also bring this. I'm going to bring it all to zero in the viewport display. So I will also go here to zero. And I will select
different objects here, and I will go with this one. And this small object
here is also too intense, so I will go here, zero and here to one. In this part we will
not see in camera. So I will move to some, I would say this one here. And we have also
this object here, which is too intense. So if we remove this, you can see how much vertices we have on this object which
is not visible in camera. But the slow down our event. I haven't said this to
zero and I will go here. And if one, if we select
this parent object, and if we move this,
you can see that this car is now much
faster than before. But if it's not case, we too can always go
down with this value. My recommendation
is to go to zero. So we need select this empty
object and you can see now it's faster than before. If you are a blender beginner, maybe you can be
a little confused because with this model card, which is high-quality object, we get a lot of when
these problems. But if you search for
another options here, most of these objects are
very simple than this car. But we are here to fix problems and to learn how
to fix problems. Already fixed the problem and
we remove double objects, repairing this car to one object so we can
easily control them. And we clear this subdivision
self-paced model personnel is much faster and we can
now less numpad slash key. And we can back to our scene. And now we can bring this
closer to our camera. You can see how this is
fast now an optimized. And one common problem is some car is not
real world scale. I think this car
look like it is. So if you have this problem, if you get like
the car like this, you can always go press S, select this cube and
you can scale your car. Okay, So we can now place
our car where we want. Then we can try first render. So for this, I mostly
split to this window. So if we will see
put mouse here, you can see this cross and
I can move this right. Now on left, I will press number zero to switch
to camera view on life. And I will select this camera
to see this outline button. And now I can, I can go here and
I can place car. So I will bring this little op. And I will go in
toughness numbered seven. Alright. I will place car about here, Z to rotate this on z-axis. And I would try place
my car how I liked. So I will go with G Z to
bring this little on z-axis. And if you hold Shift, you can slightly move this. So this is tau sheets
and this is which. And now I will press
F2 to make first trend that we have here. Third problem for some reason, some of part, This car
is disabled in render. I don't know why
someone making this, but we can fix this easily. So I will open this card collection
here and I will search. So we can see here that this
part is disabled in render. If you don't see this icon, you can enable someone disabled
this in render preview. I'm not sure why. But in this case is disabled, so we can go again. And we get first
render with our car. Okay? I will just move this camera a little
on the y-axis. And I will go maybe 34 lanes
to zoom this little out. So this is before and
this is if you want, you can make this
double resolution. So if we go here to render
properties and they said no output properties, if you said he's still funded, you will get the double
all these values. So last time we wait 9 s, and this time we will wait
about maybe 20 s. Okay. This is very fast, so we get double
resolution quality and not so slow render time. So I will use this resolution, but this depends on how
fast your computer. Let's now talk how to
change color to this car. So if you select
this object here, you can go here to
material properties tab, and you can see
that we have a lot of materials on this object. And if you are not sure
which material this is. For this main part, you can go to object from
object mode to edit mode. You can with the Face Selection, select part of car you want
to see which is material. If we select this face, you can see that when
they're navigate to this car paint Material and
now we can go to Shading tab. You can see here this material. So if we press on
prolonged bed zero, we switched to camera view. And I go back to object mode and I will select this
material preview. So we need to wait a little
to load all these materials. Okay, I wait to almost 1 min. But if your computer
is not fast enough, who can work also in
Viewport Shading. And now I haven't just
make one of these. We'll put subdivision
because this To low poly and
change color here. So if you want pure white color, who can play with
this saturation value and make this to white. And I will now bring this being this value
also, almost 21. Here we can hear another color. So I will change also
this saturation to one, and I bring this close to one
to bring this brightness. Or of course, you can
choose any color you like. You can make. This can
make this car black. And you can make a few test render and you can
choose color of your life. This is a white car and
this is black coffee. Next thing we will do here, we will turn on lights here. So this is before and I will
now go to layout and I will break this cage on
keyboard to hide this. If you press Alt H, you back this back. So I will press H to hide this. We have here chrome
metal, you can see. But I will add another material
and I would type here. I will create a
mission material here, and I will navigate to
viewport display down. And I will set this to
about reddish color. So if we now go to edit mode, and I will select
this part here, and I will press Control plus
to expand this selection. Maybe two more time. And now I will sign, assign this object here. And you can see that we assign these emission material here. And if we now go to Shading tab, we can create this
emission materials. So I will select this
principle because df and press Delete
and I will now move it shift day and
served a mission. And now I will plug
here to surface. And if you want, you can
change the color here. But in Blender we have
this black body node, which is basically color. So if you search on internet
for black body temperature, you can see that we want to go 2-3 thousand this value or
this black body temperature. So I will go to one called thousand
and we plug this here. You can see how this look and I just wanted to
raise this to maybe then let's make another vendor. And this is how this look. And we can improve this in composite or if we add
some gouache and glare. But we will do post-processing at the end of this tutorial. So I will for now what
weekly fixing compositor. But before I do this, I will change this
weird white color because it's looked
so on natural. I will go here and I will change this color
to more to gray. Now, when I'm done, I'm, I will go to compositing, but this car is doesn't match to this environment because
it's too clean, too perfect. And later in
tutorial we will add imperfections to this
car or another one. So you can also use in this C21. So let's now go to compositing and this from my last seam. So I will delete all this and I will start from beginning. Okay? So we need this composite
and you will note here, and this, this is how this local venue first-time
open this composite are. And I think I will
clear this for you. If you don't see
this background, we just need to
enable this backdrop. And if you don't
see these nodes, you need click here, use notes. And if you want
to zoom this out, you need press V
on the keyboard. Or all three. Zoom this in. And let's now add the lens
distortion and dispersion. So if you search phone lens, you will find this node, then. First click Fit here and
just give a small volume. So this is distortion and
you can see before and after I use 0.03 and
this is dispersion. If you go a bit crazy volume, you'll get this chromatic
aberration effect, but this is too
much, so maybe 0.03. So if we select this node, then if you press M, you'll
mute this node for a second. And you can see before then, press F 11 to bake
our render results. You can see that what is plug here is our
friend, the result. And if you want to see
this viewer node can press F 11 and you can
solve for V over R naught. But if you want, if you are
happy with this result, you can plug this here. And now this is
also render result. Okay, and let's add
some glare here. So if we go with Shift
a and so for layer, and I will start
with four Googler. You can see if you press M, can see before and after. You can increase or
decrease this medium, low or high end, I will go. So low is high. In this example. You can say that if
we switch to Hy-Vee, lose this effect and
if we switch to low, we get more and
more this effect. And I will now go with Shift D and I will duplicate
this and I will now switch to streaks. So we get this effect
and this is too intense. So I will this all down. I just want a very small volume. This or I will go with, I will try with simple star. I'm going back to streaks and I think this is too intense. So what we can do here, we can mix node and we can. So this will be first input, this glare, focal glow glare, and this will be secondly. And now I will plug this over. And now we can control basically
how much we want this. If we move to one, we get only this length
here, which is nice. But if we go all to one, we get combined into
this one and this one. Because this streaks
glare is too intense, I will I will use
only small value, this second one. Okay, maybe 0.37. So if we go with Control Shift and click
here, this is before. And if we go with Control Shift and click on this
last node, this is, it's a little
better if you want, you can add more of this lens
distortion and dispersion. But I will not go too much
with these options here. If these don't work for you, when you click Control
Shift and click here, go to Edit Preferences and you
need enable Node Wrangler. So click here and
this should work now. So control shift
and make this note. And plug this when
you are happy, you can plug this last node to composite and you should
get this render result. We have done with
this Volvo cars. So my recommendation is to
save this file as wal walk because we will now create
this scene with another car. So just add here. And we can start working with another car here.
My recommendation. So to go to your folder and I will go here and
I will create a folder. And you can always go
here, image save this. So I copy this address and I will go to Image Service and I will
pay this others here. And I will navigate to
render. I were saying this. For now we can image here
so we can compare our cars.
6. Car 2 - Dolomite: Next to source you
can find free cars is CG trader and Sketch Club. So these are two
biggest websites. You can find the
free 3D objects. And today we will talk
about CG traitor. But if you use Sketchfab and
if you want find three cars, you can click here. We can search for cars. And then you can click here on downloadable to find
only break-offs. And you can see that
there is a lot of nice objects you can
download for free and you just need to search
for these three icon. If you see this icon, that means that this
is a paid assets. But all this with this icon, you can download for
free and you can learn about Sketchfab more on this window I shared with you. But before we continue
with CG trader, we will back to our vendor file. If you want to use this
fall or we can backup for this render we made before. But for now, in this main file
we will delete this model, can be sure that you
delete all this car. Best ways to select
everything in this folder. Scroll down and holding shift, just select all this inside
this folder and press Delete. And we will also
delete this folder. We delete all object
from our Volvo car. But if you select any object and if you scroll
here in material, you can see that we still have all materials from all of us. And I think this don't affect our render and this
don't slow down. I render time, but we can also delete all this material
we don't use anymore. So if you go here, if you click here and
if you go to all data, you can see all these
materials here. So if you press here, we can see that we have 146. This is meshes, but
okay, let's click here. And in material we have 52 materials we
don't use anymore. We can click Curves
and we can delete all these materials and images. So again, and now we have only five and let's clean
this few times. You can see that there
is no more material from Wolbachia. And now we can
back to you learn. And we can start with a new car. Essentially told on CG trader and I found this nice models. So you can open this file and you can
copy this link here. Now we can go to this link
and only thing you need here, you need the free account. So if you are first-time on CD3 that you can search for car, you don't need,
uses this object, these two objects
we will use today. So this is first
one and this one. This is second one. You can search for
any of this car. You just need to
click here for free. So you can see how much
options you have here. But today we will
talk about this. And there is another nice car. So you can you can
download any of this and you don't need the search
only for Blender files. So this one is bundled file. In. In this part I
talked how you can import OBJ or another
file into Blender. So let's start this car. So you need three accounts. So just first make the account and then you
can click here to download. You need to wait this time here, 20 s. And I will now make
the card folder here. So I will call this CG trader. So we can download this car. And now click Download. And we can bring this in, this CGT that for now, I will click here, right-click and extract files. And I will delete
this zip folder. You can see here we have source, which is our blender file, and we have here textures. So we can now click on
source and we can open this file. This is what we get. Here is first problem. You can see if you are
a blender beginner. This layout here is not like
our default Blender layout. Then this is because
creator of this car is change default
Blender layouts. So you can always be here and
you can in general point, find this default
Blender layout. And the next thing
we will check here is this car in collection. So you can see that
this already is. So if you can just click, double-click here and
we can call this Dolan. And the next thing
I will do here, I will add this card
to parent objects. So I will go with shift day and I will go with empty cube. And I will press number one,
forefront orthographic view. And then we just
press S to scale. This, maybe SSE to
scale on the axis. Now I will press number three for right
orthographic view. You can go to view, Viewport. And right. Now I will pass as white
scale is on y-axis. And now we can like before, just go to work, remote and select all. And we see that our
empty cube is yellow, so we can now press Control
P and set parental object. And now we can move all this car objects with
this empty queue. Next thing, I will note this material to
see how this Carlo. And if you see this pink color, this means that our materials
are missing the texture. So if you select any, Let's go to Edit mode and let's see which material
is, is this one. So this is both the material. And if you go to and you can also know that there
is no shading tab here. So you can go here too. General. And shading. If you
want to can always move this on left and you
can hear shading editor. But I will for now go
to Shading tab and you can see that we have
image texture here, blogging diffuse, and we
have here one image texture. But if we go to F and
search for texture here, you can see that this
is just empty object. And if we click here, you
can see that there is no body strike PNG image. So what we need to do here, because we get this
texture folder, you can see that this
texture is here. So we just need to copy
this address with Control C. And we need these other
skills and open image. So basically we get blender file with wrong but to our images. So I will now go to
all these images. And if you enable this preview, we can see that this
material is okay because this is just diffuse, be SDF, we talked image texture. But if you click
on other material, this material works and
these go to right folder. But let's check
all this material. So we have same problem
with this glass material. Glass material I will just use. I will go with shifting
in glass, transparent. And if you have
enabled Node Wrangler, we can just hold Control Shift than we
can with right quick. Mix these two material and we can plug
these two surfaces. And now we can thus
material here. So next is this number, and this is also
just diffuse VLDL. And we have another
material with our texture. So I will try plug this
to our texture folder. Okay, We fix this and
there is another one. We fix all this material. But because this term
here is separate object, we can feel materials
here to fix this one. And another one here. Okay, Let's now
go back to Layout and let's say
another object here. We cannot find this image here. So because this is inside, we can just apply this image texture and
we can maybe like color. Now we plug all texts or two, right place and we have
already nice Material. And if you see
this because PSVF, this means that this is made in old Blender version
before 2.8, I think. But if you want to, you can always delete this and you can go the sheep day and you
can search for principal. And now we can plug
these two base color and this top surface. Now we have all these
options we want. And because I want make
this car more shiny, I will bring the
roughness almost to zero. We can try CFL this look in
render preview in cycles. So you can go up to
cycles in G fuel and the noise and optics. So we can now add
some lighting cues. And first I will go
toward the center over here to use no center. We'll bring this
almost too late. And I will go to the light
and maybe area alone. But we can do also this in this layout tab to see
better what we hear. And it doesn't go to lifeboat, put the stove and
I will go here. Maybe one wandered off. And maybe I will
duplicate this light. It's the eggs and we can
like from this side.
7. Car 2 - Dolomite (Part 2): This car look pretty clean. So we can always
improve this with just a simple concrete texture. So if you want, we can
go to texture.com. And I think they
update their site. So you now need to make three profile and then
you can click here on library and you can search
for this first result, PBR. So these are not three, but because scroll
down you can find our image texture
of concrete and you can download you like I think, I don't know last time this one and I also include
this link here. So if you want to
open this link and then you can download
these and use these for. Now, I will make
the shading tab. And we can select this body, may show that this body
material is selected and we can now set up for our material
and textures.com folder. And I will use this texture. And I will bring this here. And now we can use
this for roughness. So now for roughness is using
this low value in all car. But if you want make variations, we can go with the color, then we can plug
these two roughness. If we press Control Shift and click here on my Node Wrangler, we can see that this car
is already unwrapped from, but we can always go to Edit Mode here and we can press
a to select all car. You can go with u
cubed projection. If you want to
scale this texture. We can select this
texture here and we can go hit Control and t. Not wrangler will create this texture
coordinate and mapping node. And now we can select
this and we can type here to scale this
texture, maybe three. Okay? And now if you bake with Control Shift and
click here our material, we can see that we have
variation in our roughness. But because like color
means value of zero. So if we back this Control
Shift and click here, we can see that if we
move this on right, we get more black color. And black color means a value
of zero means no roughness, and the value of one
means roughness far. So if you make this material, you can see this is
Nora, completely shiny. And this is completely wrong. Because I want, make
this car shiny. I want more than black color. I will move this, alright, to get a lot of
black color here. But I don't want
completely shiny, so I will just bring
this black color a little more to white. And I don't want complete
together rough parts, so I will also bring this down. And if we make this material with Control Shift
and click here, we can see what we get. And we can also use this texture to add
a little to our car. So we can go with mics, RGB. And we can plug this here. And now I will use
this aspect or so. I will plug this
texture here and we can now add any color here, e.g. if we have this gray color, you can see here on this area, you can make more
brownish color here and we already are
a lot of scratches. But if you want, you can create, use another map for this, so we can plug this here and now we can play with
this color ramp. If you want more
of this dirty part two can move this, all that. But I think this is too much. Let's go back to Layout and
let's see how this look. So I will duplicate
this with shaved the Moody's little on y-axis. And you can see all these dots. So I think this is too much, but you can always
control this here. I will also add this texture, concrete texture
on glass material. So we can select this
glass material and we can go to Shading tab. I will go here Leadership Day, because we already have
this concrete texture. We can select this. We can search here for concrete. And just, I will go first with Control Shift
and click here to see how this is
applied on this texture. Okay, and now we
can follow them. And we can plug
these two roughness. And now we can just tweak
these settings here. But we can also do
this in material. And you can see that this
is much better than before. One thing, you need
to check every time you download
object from internet with Image Texture Unit to check image
texture resolution. So if you go to this folder, you can see that
this is only 3 mb. Sometimes you can
download object with aka resolution or
even 60 K resolution. And this can kill your render time or
memory on your computer. Because this is discard is okay. We don't need to
do anything here, but if you download e.g. even this texture
is a k. You can always copy this address
and you can go with 11. And you can find
this image here. And you can go to image size and then you can
change the resolution. E.g. we can bring this down. But this texture is okay, so I will not do this here, but let's check
another texture, e.g. this image here. So we can go with 11 to open image editor and we can
find this texture here. We can go to Image, Resize and we can bring
this maybe to 512. But I will not do this now
because this is one case. Nice resolution. I don't want go down. You can always use this
option if you want. If you have a lot of images
with high resolution, you can reduce the resolution to all of them if you
go here to render properties and you can
find this simplified tab, and you can find this texture limit
auction so you can set, so if you set here e.g. one K render will automatically reduce all texture to maximum one K resolution. I think this is
enough for this car. So we can now import
this car in our scene. And I will delete these slides because I don t want select
this and copy our scene. And we can now in x-ray mode, copy all this object. So right-click copy
objects and we can back to our scene and we can go with
right-click and paste this. And now we can own left of
the screen this window, and we can let rest
number zero to switch to camera view. On the right. We can move this cart. But you can know that
this card is not the real world scale dimensions. So I will press S
and scale this down. Okay, I think this
is from Alaska. We didn't delete objects, so we can delete this and we can now place this car position. So we can scale these
down and place this here. And you can always, if you
don't see these icons here, you can press middle mouse
button and you can move this. Alright, and we can turn
on this render preview. And now we can look on
left and right side. So you can know that this
card is much simple, that last card, because there
is only two objects here. And if you go to edit mode, you can see how this car is very low poly and
without modifiers. So much simple and easier
to work with then last car. And we can scale this
car and buy, I buy. My recommendation is to
always go to Google and find, try and find dimension
of this car. Maybe we can find this. Okay, I think this
is four meter. So we can scale this. Let's press. So we can select this body here and we can press
N. And we can see dimension of this is 4
m and 70 centimeter, which is almost like this. So this is the leaking out. I will press f 11 to open
image eddy currents. I will make these two
slot one and we can now make first test
render with this guy. And now I will press F2 where you can see that even
low poly car can look nice. Then if we want to highlight this roughness texture
we add before, we can always add another
light source here. So I will, I will try playing
another area lamp on site. So I will go with the shifts day and I will go with light. And I will solve for area. Now, I will go to when
we can select that, this lamp will go
to Shading tab. And I will go with to use
notes so we can add them like body temperature through
this emission here. So I will search for black body. And I will go about maybe 3,000. And I will plug these
two color to get this color here I can see how this light source look now and I will
increase this magnitude. Now, I will try to place, you can see how this
effect to our scene. We get the light from this side. Then I will try to get some
nice highlights on this. I will put this on site
and I would have y or x to rotate this in this
direction and also have Z. And I will look on
this reference and I want to get to this nice
highlights on this area. You can always switch from
global to local orientation. And you can easier to
control this light source. So x2 rotate this
on x-axis or Fc. Okay, and then we get
this nice reflection, but don't want to
see this light here. You can always disable
this multiple importance. Okay, I think this
is pretty good. Angular. So if you want, get soft shadow here, you can just press
S and scale this. Bigger light means soft shadow. But if you want
hard shadows here, you can scale this down. And I think this is maybe
a little too intense, so I will bring this
power to maybe 50. And let's make another test. Render it. Okay, So this is an issue pressing
G on your keyboard. This is before and after. And we get this nice
highlights here. But I think this is too intense, so I can maybe bring this to then key and press
S to scale this. Okay, we can always
back to this later and this is before and after. Again, these few nice
highlights here. And I think it's much
better than before. The non lights to this guy. So I will for now
just join this area and we can see how we can
turn on lights on this car. This object is also separated. And so I can ask before
and just press H to hide fight this object. And we can also add another material and
I will click here to New, and I will call this emission. Now, I will change viewport
display color to see. But what we do here, I will go to Edit Mode. And I will select
one part of this. And with holding shift, I will do same with all these lights and now
I will press Control, control and numpad plus
to expand selection. And now I will, I will search for
emission material, select this material and aside. And now you can see that this material is
assigned to this mesh. We can now get to
Shading tab and we can link these
principle PSVF and we can search for admission. And again, we can use like body temperature or
you can change color. Here. I will go
with maybe 2,500, which is pretty important
color you can see here. And I will increase
this value, maybe two. And let's press F to, well, to see how this book, and we cannot see
any lights here. And that's because this object
here is not transparent. So we can all legs. We can select this
object and we can select this headlights material. And now we can go
to Shading tab. And I will turn on
this render preview. And now I can go with
the VSD up here. And let's plug this to base color and this
surface and we can now move it
transparent. Be as df. And if you have enabled
Node Wrangler here, we enable this before. We can go with control. We can hold Control,
Shift and right-click. And we can connect this, mixing these two material. And now if we go, all right, We will get completely
transparent material. You can see that there is
nothing difficult or left. We get only this material
with this texture. So we can move this and make
this a little transparent. Now we get this. We lose a lot of
this texture from this slide because this
is now transparent. So I will try and prove
this first texture here. So we can plug these two
emission, emission string. Let's make another test here. And you can see that some
of this material here, but I will try and grow this if you go to
makes up newbie. And I think I will multiply this with this yellowish color. I want to increase this
ambition straight. So I will go with Matt. And I will now multiply
this with two maybe power or value of maybe
ten, or even more. And now if we go to make
another test render, we can see how this look. Okay, So this is before
and this is after and we beg some of these lines
here and this texture. I think we have too
much orange color here. So I'm going to desaturate that these are lethal and we
can go to compositing tab and we can shift the duplicate this four globe and we cannot
maybe these things texture. So I will say this a lot. And I will put this to heightened because
this is too intense. And now we can plug
this when we are happy, we can always apply these
to compose composite node, and this will be now
our render result. Okay? And now we can save this
rendered as before. I will call this Dolan. We have done with the
second card and we can start playing with the
third and last car. And later we will animate
these lights here. Gemara, we will add
the trees in scene.
8. Car 3 - AMG: Before we start with the car, let's first make
makeup of this car. So I will go to File Save As
and I will call this car. And now if we want to
use this calculator, we have here a
backup of this car. And we can always back here. If you wonder why
you don't see this. The icon here, don't worry, this is been the oil, but because last night I tried starting with Blender version when they don't work for me. So I uninstall new
Blender version, and now I get to this icon here. So I always need to select this last version with which for no reason why you don't
see this blender icon. Now we can delete this car and we can download new car here. When I select this car, I think in this collection. But you can always
press full stop. And if you put mouse, alright, then press post-op. Lender will find
various objects. So in this collection, and we can select all this
and we can press Delete. And now we can go to
orphan data and we can delete all materials and the
images we use in this car. So I will press here. And you can see
we have all this. Let's press again and we
have all these images, views in last card. And now we can press curves. I can delete all these images and now we can make
to you overlay. Now we can cope will
invoke second car. And we can download this car. So this is from this outer
and just click here, read down road and wait 20 s. And we have
here two options. And because we have
blend file us options, I will download this. And I will navigate
to CG trader folder. So we can download
this in this folder. And now we can just drag
and drop this here. And we can double-click here and we can open
this blender file. I will switch to
material preview now. And you can see that we
have here who materials, but all of them are procedure. So you could click here. You can see that there
is no image texture, which is really nice so we can easily controlled
all this material. And the next thing
I see here that it's already parented
to this cube. So we can also easily
control this car. And I will make here
to view the left and it's already
in a collection. So I can rename this to EMG. Next thing I will
check is modifiers, so it's already applied, so we don't have modifiers here. Next, I will check
his mesh density. I will go to Edit
mode and I said that this is pretty
high mesh density, but because this silver
pretty fast for me I don't want to do is
this summation density. And I will use this car
for close-up shots, so I will keep
this high-quality. But if you have problems, handle this high density mesh, you can use modify. So you can try subdividing
this value of one. And you can see that you
will lose some details here. Okay? You can go even with two on sub-divide
the end. If you e.g. apply this, you can see that measure density
is lower. But I will. What is Control Z. And I
will make original mesh. This car is ready to use. So I will press a because we don't have any other object
in scene except this car. So if you press a,
you can select all this and we can go with right-click and copy and paste. I will just go with
double-click here and I will rename this to EMG car. Now we can select
this empty cube and we can move this car. But I will split
this window van on. Let me go with zero. And now I can play this card. I want to, so I will go
with number seven, right? So I can see better
what I do here. And I will go with LLC to rotate this on z. I think
this column pretty small, so I will check the dimensions. So I will copy this
name of this car. They shouldn't be 4.5 meter. And I will select
this body of content. I seen this is only 3.2. So I will select this
empty and diverse skin. Let check now
again, still small. I think now it's
real world scale. So I remembering
this now and see it. So be sure that you select
always this empty cube. And I will bring this up. I will press f 11 to
make this image editor, and I will select this one and
I will press F to L. Okay? I want this car lift up. Close up to this Kevin, so I will remove this. This is a thing yet, and I don't like
this light here. So I would want you to
play with disliked again. And I will go to render preview. And I will leave it
to dislike more. So I think I will
scale this down and I will make
hemoglobin orientation. And I would play me pair x, y. I rotate this scale and play with disliked and I
get to this result. So this is before, this was too strong, so then this is not done. So I get only subtle effect here on these edges and
also on this sheet. If you want to copy
this rotation. So this is from the
front orthographic view. This is from top
orthographic view. And this is, I use
the power of 20 here. So if you want, you can
easily copy this angle. And we can now continue
with this car. I would change color
or discard to white because I want separate this car from this darker background. I will select this object and I think this material
is body material. So you can always check. If you go to Edit Mode, then you can select
Bartle this material. And you can see that we
have here both the material and go to Shading tab. And now we can
change color code. This. I lived back to object mode and I will switch to material. You can see that
this material use facing aspect or so
what phasing is, if you go It's Control
Shift and click here. You can see that this
depends on the view angle. So when we move around the car, you can see right there on site. So Blender basically take
this brighter color here and put on site,
depend on camera. And I think this is nice effect. But just be sure when
you change color to make this color
brighten than this one. So I will go here,
completely white color. And I will desaturate and this, so it will be completely white entry
to this second color. I will also be
saturated this end, but I will not go
completely to white. I will choose this
gray color here. Now we still have this,
This facing epic. And you don't be confused about this subset of base color
because we don't use subsurface here and don't affect to how we can make another test render
to see how this works.
9. Add Dirt to the Car (Method One): This look pretty nice but to
clean for this environment. So I will show you
another method you can add to your car. So if you go to texture.com, you can search here
for leaking texture, just linking and the skip
this PBR materials so you can download this
PNG textures here. You can download any
of these you like. And I already download
two of these. So we can use this
to add in our car. So I will go back to
Layout and for now I will join this area. If you are confused by
this car is still blue. So this is just viewport call
or you can always change this color here to what? Now we can use another
method to add to this card. So if you go to
Edit Preferences, you need enable images,
aspirin, add-on. Just search images and click
here to enable this add-on. And now we can put cursor here. And I will go with Shift a. And you have here under images, you have here on images
as playing auction. And I will copy this address to this folder
where I saved this texture. And I will paste this here. I will import this one
of this PNG image. And I will go with material
privilege here to see better. And now we can see that
this is because this is, this image is PNG. We have alpha value here. If we go to Shading timber, we have here alpha value
connected to alpha. And this already work. Now we can go with Z to try
match the angle of this car. Now I will switch from global to local
orientation and I can, I can easily rotate this. Now, this is z-axis, so we go with f, z and I will update
this on the axis. So you can do this manually, or you can just type one day this and z
axis by 180 degrees. We can place this texture
manually like this, so you can use to
rotate this on it sucks is why rotate
this on y-axis. But we can also use one model
to measure this car shape. You can use for up here. And get to the videos. This one problem. This is just one plane, so we need to subdivide
this two times two mesh. We can use a little offset here. You can see that this, this leak intentionally try
to follow this curved shape. So I will go with S
to scale this down. And I will try plays
this bolt here. And those get this
done about this. And we can always
copy this shape. And we can also copy
this modifier here. And I will place one about. And I will go with RZ
to rotate this z-axis. And I mentioned this. And we get this here, which is much
better than before. But we can play with this more. So we can go now to Shading tab. We can change the color of this. I will go to hue saturation
and I will be saturated this, because this is too brownish, so I will go its
saturation down. And you can go, make
this more darker with if you move this value down
or up to make this brighter. And you can also play with the transparency
to go with the color ramp. So white color is
completely transparent. So if we bring this light
color of more tube-like, it will be less visible. So I would go to about here. I think I will scale
this on the y-axis. And I will now bring this down. So SY, those stretch. And you can always try copies with shaving D
and move this here, but it will be a
little harder to follow this angle so
they can be saved. But for now this
shrink-wrapped and we can try glazing this about here. Let's try enable this now, but I think this
will be too hard. We can add some details here. This offset is too big. So I will go with 0.02. And this is much better. So 0.02 to stay this on
this call, or even 0.001. What I can do here, I kept problem with this because
I have lot of mesh here. This shrink wrap, or let's
try fall of this angle. Maybe we can apply this
shooting for our modified. And now we can easily
move this down and use LY to rotate Z to
try follow this angle. And I will also,
I will move this little up to get
this nice edge here. And I will fly this. And I can now move this
and place this here. And I can always move
this closer to car. And I can use ethics
to line up this thing. I think this is now pretty
good button then before.
10. Add Dirt to the Car (Method Two): Now I will select
this body material and I will import here
concrete textures. So you can just drag and drop here material,
this concrete texture. And if you go with Control
Shift and click here, we can project this
texture on this card. If you click Control D, you can see that when
that use UV default. And we need to make
your remark here, we need unwrap this car. So I will select, go to Edit Mode and
press a to select all. And I will go with
you do projects. And I see this stretch
at texture here. So I will press N and I
haven't checked scale. So you can see that
the scale is not one. So we can go with Control
a and apply scale. And if we go now with
New Deal projection, you can see that this is now an object that much
better than before. Or we can try it. You smart
TV project, which is similar. And I think this is pretty good. I will now just play with
the scale on this tree. And we can use this vector to
add some depth to our car. So now I will go with the Shift D and I
will duplicate this. The SDF principally be FDF, and I will choose a color I want for some brownish color
and a dark brownish color. And what we can do now, we can go with Control
Shift and right-click. And we can connect this,
mix this together. Or you can always
search mix shader. Because this is a
shader and we can plug one here, another here, and now this will be
this second input. Okay? And for factor, I will use
this concrete texture. And we can back this material with
Control Shift and click. You can see that we already
have some dirt here. And we can now
control this shift. They can call on them. So if we preview
this color ramp, we can preview this color ramp with Control Shift
and click here. And you can see how this look. But if we make more
conscious here, I will make this material with Control Shift
and click here. And now I can see what I
get with this color ramp. So we can control how much
we want this second input. I think I want to switch this. So I want to get a small volume, this brownish texture here. I don't want to go over
all this car here. I just wondered terms
some areas so we can use noise texture
to control this. So I will go with nice
texture and color ramp. And I will now press Control
Shift and click here. And I will tweak this
to make more conscious. And maybe we can scale this
down or up and now varies. If it makes this makes RGB. I will set this
to one and I will use multiply blending mode. And now we can plug this here. And if we go with Control
Shift and click here, we can see what we get. Now. There are
various black area. This texture will not appear. So we can come back
to this material. We click in here and we can see that we have only this concrete. There are various white
only on this slide. And now we can play with this. You can control how much you
want to this under text. And we can also
reduce the roughness to this second value we get. Is this like area or this dirt. It will be also more rough
than this. First one. We can see this subtle effect. We can also add
some roughness map and the roughness variation to this car window glass so we can select this window material and let's see what we have here. So I will press
numbered slash K to bring this object here. And I will also add
this concrete texture. I will go with that color ramp Control Shift and click here, and we need to unwrap this. So let's first check scale. Control a applies K View, smart UV project or
new queue projection. And Control T to get this mapping and texture
coordinate and scale this up. And now we can plug
this too rough. And I will make this
material and so we can now black color is shiny or no rough and white
color is rough. So I don't want I want
more of this black color. To make this more shiny. I will not move over to
completely black color. I will go something like this, and I will also reduce
this white color. And you can clearly
see this effect here.
11. Animating the lights on the car: We can now animate car lights. So I will select this object here and I
will press Backslash key. Or you can go to View. Flocal will toggle Local view. And now we can work
only with this slide. Next time we'll do here,
I will go to Edit Mode. You can press C to get to
this brush and you can select some area here and you can play press H to hide this part. I will go here with solid view. And if you know which
selection, select this part. You can see that we can different
material for this area. And this one here. I will change viewport
display color to red, this to see better. This material here. Here we have this lights. And if you look on render, you can see that we have in
the slides material here. Because we already felt
like material inside. I will go with old age to hype, to beg this here. And now we can play only
with this material. So first, I will make this material to zero to
turn on, turn off disliked. But first I will
bring timeline here. So just right-click here
and horizontal split. And now I will open
timeline here. And I will, from
about 20 frames, I will select this emission, press I to insert keyframe here. And now about five frames later, or maybe three frames later I really disliked
and I will type here maybe now I will
press I to insert. So now we have
like turnoff here. And we cannot preview this
in a material preview. We can preview this
only in rendered mode, but if we press
mapped to zero here, If you switch to render mode, we can see that we have
turned off the lights here. And when we go to frame 23, we have turn on lights here. So we can make to test
render to see better. So first I will go to frame 20 when this emission is
zero, and I will press that. And now I have to go
to slot 3.3 frames later or one piece of
Secondly, have liked one. Okay, So this is
before and this is, so this is how I get
this effect here. And if you want, you can
make this light reddish. So we can go with black body again and we can plug
these two color. You can see that this is
already yellowish orange and we can continue this temperature two,
maybe 30005020105. And let's see, before and after. Okay, maybe we can
increase this to $3.
12. Importing trees into Blender: Let's now import
trace in our scene. So in the last tutorial I talk about ray trace
options and you can, if you didn't watch
my last tutorial, you can open this window and you can look this
eight-minute video. In this video here I use what
tonic from polygon a codon. So you can see how this works. So I will make with number
slash key to my scene. And in this video here you can find instruction
how to install this. So basically you need to go to this link I will share with you. And you can download this
free version from here, and you get few trees for free. And then you need go to
polygon and on and you can swap these assets and I think you get this
first tree for free. And some of these from
different categories here. But I use this one and this one. So I will just click here and I will import
this, my scene. Now I will go as before, I will speed this window and
I will go with not at zero. You can turn on if you want
this render preview here, and I will press N to
remove this tab here. We can now place and scale and rotate
this to cover this RC. And just be sure to
use all to D to copy this shift D. So all the wagon, I can place this oversee. But I will also show you another link where
you can download free quality, this pine tree. So I will just
duplicate this a few times and we can import
to another tree. So all DY and you can press L, z to rotate around z axis, scale and move this
over this thing. And another tree I
will download for free is from this
3D shaker link. So you can copy this link here. Or you can go to 3D shaker.com. And you can go here to
Library and you can find this nice tree and
you can just download, download this for free. And because I download
this last time, I will just find this
on my computer and I will open this model here. Okay? And I will now go
to layout here. And I can just go with the
right-click and copy object. Then I can take
this my scene here. And this tree is very small, so you can just press
S to scale this and I will back to global
orientation is easier for me. And now I can also
play with this tree.
13. Animating leaves on a tree: Last time, when I publish this, I get creating that. This tray here is not animated. And we can paste this. Now. I will show you how we
can animate these leaves. So before we start duplicating
this with all the, I will show you how you
can animate these leaves and I will join this area. I will not put slash
key to isoelectronic. This first i1 animate only
leaves not to this part. And we can isolate
this leaves from. This would park with material. So if we go to Edit Mode and
select this leaf texture, we can go to Select
and then that will automatically select or
parts with this section. And I will now go to
Object Data Properties. And here in vertex group, I will create another group
and I will call this. And I will assign this if we deselect here and you can
press Select button here, you can see that we
select this vertex group. And to animate this, I will use
displacement modifier. So I will go back
to object mode. And I will now go to here
and I will use displaced and the strength down to maybe
0.1 and see if we move this, we already have some
animation here. But we need the texture
to animate this. And I will press
here new texture, and I will use the
procedure or blend them. Sure you can use any of these, but I will for now use
this cloud texture. And you can see
that we switch to this texture properties tab. For now. Keep this volume. And I will back to
displace modifier. And now we can scale
this, maybe 2.1. And now I will select
this vertex group. So this will affect only
these leaves, not all tree. And you can see what we get. But I want to create the object, which will control
this animation. So I will now go hit Shift a and I will add
empty object here. So empty, you can
add any of these, but I will go with empty sphere. And I will move this left. And hybrid scale is not only now we can
select these three. And we can choose here
from rock up to Object. And I will select object, which will control this tree. So I will just click here and I will select this
empty object here. Now, if we move this object, you should get some
animation here. So I will move this z-axis
and you can see what we get. So this is too intense and
we'll go with going plus. So I will go with 0.1. Let's see what we have here. I think I will go with 0.05. And now when we move
this empty object, you can see that
we animate this, leaves with this object. So I will now press I
to insert one keyframe. So I'll go with we change
only location here. So I will press I and
location and just be sure that you are on zero. And now I will go
maybe to keyframe ten, and I will move this
little up again. And I will again
go with location. Now, if we press
Space, it gets this. And we have two problems here. One, this is too fast. You can fix this easy. Just move this second keyframe. Right? Can we now slow
down this effect? But I think this is too
intense or so, so maybe 0.02. And let's try now. And I will also play with
this cloud texture here. So we can play with this size. Let's now try to call this loop. Now I will go here with value
of one and let's multiply. We get more subtle effect. I will try also,
maybe one or two. Okay, I think this
is much better. And you can hear also
increase this straight or you can decrease
this will be 0.03. Next problem we have here, after 22 frames, this
animation just stop. And we can pick this
easy if we go with, if you put most scared
and if we will shift. And now we can choose here
cleaner extrapolation. And that's mean that
this will be on repeat. So this will now be animated
even after this 22 things. So this is how you
can quickly and easily animate any object. And I will now go
with number slash key to this, to our scene. And I will go with all today. I will start placing
these tree over this. You can see that this
one is also animated. So you can just now start
placing these trees. This scene and see you
later in a few minutes. These two trees is my recommendation for
free trees, high-quality. But of course you can always
go to CG trader or Sketchfab and you can search
here for object. And you can see that we have here three options and
also high quality. I play some of these
trace around the scene. Be sure to not blocking
this slide here because you will lose this
nice reflection here. And I will now try to move
this camera liberal on, rotate this camera lethal on x-axis to see this
Cambrian little more. So if we bring this up, we can see this
Caribbean little more. And if you want to
bring this camera down. And now we can take
this even more. And two, because these trees are not so visible behind this, Gabby and I will bring
this z-axis like this. Now, I'll render will be slower because we
have now a lot of this scene and this is
normal, so all depends. So your computer identified this in this double resolution
and with the 200 samples, 23 s, with this is my system. So I don't have a
very strong computer, but I can still render
this very fast. You can now change
to frame 2025. We can get rendered with
this light turn-on.
14. Depth and field: Let's now add depth and faith. I will go with the joint areas and I will select camera here. And we can go to
camera settings. So I will press M on the keyboard to
remove this step here. And we have here
that field option. If you use this distance, I will go with number seven. You can see where is
this ten meter distance? So it can always
bring this here. And then this here
will be focused. This point will be unfocused. You can select this e.g. this car, which is not a good
idea because now we select this object and the origin of
this subject is about here. So renderer will put
focus on this point. I want to get with this
is when I dislike. I will focus this
area here even more. So maybe it's subtle, but you
can feel these lights are, are the non and now I will add more depth and field and put this
lights morning folks. I will not for now
select these slides. So I want to see where. When I turn on these slides, I will go to Shading tab. I will select this emission. So I start the non
lights on 22, 23 frames. Long vector to layout. And I want this depth and
build a few frames later, so maybe 23-27. So here in frame 20, We will turn on these slides. And few moments later, I will increase this
left-hand field effect. Let's now make been test
render with this low value. So I will put about 30 and I
will make another question. So this is without the time
field, and this is me.
15. Camera animation: And let's now animate camera. So this will be very simple. You just need to go
to this link here and click here on code
and download zip. I will put this on
desktop for now. Then you need to go to
Blender to Edit Preferences. Add-on installed, and find
this on your computer. And just select this
and install add-on. And after that, just
enable this add-on. So just click here to
enable this add-on. And the venue you
have selected camera. You should see this
camera shake it by n. And now we can choose the
type of animation here. If you press Plus here to get all these detonated types
and if you press space. So let's go with the
numpad slash key because this scene is very slow and I will preview
this animation here. Okay, I will back
to our scene and I will just select
part of this car and we can now see better
this camera shake to play. This is xik effect and
you can always simply, this implies maybe
220 because this is very subtle effect for is
a maximum for this one. And you can see
this camera shake. And you can type, you
can try any of this, e.g. this is bike one. And this one is very intense. This is walk to the store. But last time I use very
subtle effect and I use this investigation effect here. I bring this to 0.1 because I want to only subtle
effect here, maybe 0.2. So we have now animated
slides, turn on, turn off animated camera
and this animated, this depth of field.
16. Bokeh: One thing which is nice when
you can blow this value, we can add block effect in bedrooms because we
have one light here. I think this is not visible. Here. I will move this. Let's see where he's visible. So I will go left
on render preview, and I will move this slide. Maybe here. Let's make another vendor to see this. We can see that we
see light here, but these don't create
bouquet effect because we need emission objects
to create this effect. And I will go to slot seven. I will now create one, just one emission cube. So I just go shift day and they will just make
this circle with Control V. I will just, I will know
this is to scale this. And I will make this smaller. And let's go with Control
a to apply scaling. With non-fed seven,
I will try to position this disliked. About. Now. I will create
emission material, but I think we already have
one emission material. Some shading tab. And just delete this
principle VSD or plan a mission like this surface. And I will go or
start with a value of ten and make this orange. I will go with temperature. How about 2005? Because I want to make
this look anamorphic, because I can bring this ratio to two and
I do this before. So just if you make
this tissue type one, it will be completely circle. But if you want to
stretch this z-axis, you can type this. And this is effect,
which anamorphic camera. And we get this nice
bouquet effect. But I will now bring
this value down. I think this is too intense. So first, select this object and I will go maybe
to it value of two. And maybe we can duplicate
this shape dy and y. So we now, can, we create now to this effect? I will skip this slide down
and maybe bring this up. Let's now make another test and this is the result I get and I'm not happy
with this result. So you can see how this should
look, something like this. But this depends
distance from camera. So if this is more than this, it will be more like
this result here. And also depends of
power on this slide and depends on this value here. But if you want play with
this bouquet effect more, my recommendation is to download this one add-on which
is called Rawlins, which is from
William Land Grant. And you can search
on YouTube and on. And you can watch this
video here so you can get to this nice
bouquet effect. And there is another add-on which I buy on brand and market. And it's called the So Kim
effects from reproduction. So you can float
this bouquet effect and you can choose any
of these type here. So if you want, you get
better results than I. You can play with
these two add-ons and with these settings. But I think for, for now is this k and
we can render this.
17. Render: Let's now render this. So my recommendation
is to first run that low resolution animation. And then when you are
happy with the result, you can increase this
resolution and simple. So you can type here
maybe 50 or 100. Depends how much you
want this animation. And I said here, 50 frames. And because we use
20 frame per second, this is about only 2 s. And I will increase
this maybe two frames, which is little more than 3 s. Post-processing later we need more than just this, combine it. So I will go here to
let proper descent. I will, I will enable ambient occlusion and
we'll see that x. Now I will go to
my Render folder and the other dictate
this render folder. And I will just
create animation. I will create main. Main animation and I will read, no, we don't use summation, so I will go with the GAL4 Gosset direction for ambient occlusion
and missed for me. So now I will copy
back to this folder. In here. Render properties, no
output properties. I will select this main folder. This will be our main vendor, and we will render
this in this folder. And other maps we can
plug in composite. So you can see that
we have here or this plus this and I will make another render so
we can see how this passes. Look. Okay, and I will go with
all three to zoom this in. And if we press Control, Shift and click here, we can
see how this nice past look. And we can see how
this glossy direction puzzle ambient occlusion. And if we switch to
material preview, and if you go here
to combine them, we can switch to miss. Now we see how
dismissed past look and we can play with
this nice path. Here in the word Properties tab, we can find this
nice past and you can play with this value here and you can
see how this looks. So this is a maximum
depth of 36 m and I think this is too
much because our cabinets here maybe on 15 m, so we'll bring this down. Okay. And now we can turn off this
weekend back to combine it. And we can remove this window. You can now save
this file and let's now render this again. And I think this dismiss pastors little
better than before. So we can now plug this mist, glossy direction and
ambient occlusion, this folder scheme. And we can do this with
old book for file output. And because we distort this
image here, for this value, we need to duplicate
this with Shift D. And then we'll
bring this dispersion, this chromatic
aberration to zero, because we don't need this. We need only this dispersion
of distortion effect. And I will plug here,
missed two image. I will plug this here. And now, because this is missed past, I will select this
nice path here. And now I will
duplicate this two more times, these two nodes. So Shift D and shift again. And I will plug glossy
direction here, and I would choose here. You'll see that extra folder. And last one is
ambient occlusion. And I will plug this
to ambient occlusion. And now we can go to
Render, Render Animation. And after a few
minutes or seconds, we will, we need started yet. I'll pass it to
this folder and you can see that I already
get the first one. So this is main. This is ambient occlusion. This is missed and
glossy direction. So see you later after this render is done and we can start with post-processing.
18. The scene with the man: Hello, and I'm here
after rendering, and this is how this look. So this is my render. And here I have also all these passes and I will show you how you
can export this. And for this I usually
use Premier Pro, but I will show
you how you can do this in London for a minute. So if you want to render this without post-processing
is very simple. You just need to go
to File New Project. And you need to save
this project. You want. And now I will go
double-click and type along, go to this main folder. And I will select
first the sequence and just check this
image sequence. Open. Bring this to your timeline. And now we have our animation. And I also make
another animation with a light tone in Kevin and I
will show you now and later, I will just explain
you what I do. To get to this. I will also
add another animation here. You can see how this looks. Now to explore this, we just never go to
File Export Media. And you can choose where
you want to save this file. So I made this
animation three folder and I can just type name. She is export. And to make this in Blender, you need to go to video
editing and video editing. And now here I will go
to Add Image Sequence. And I will navigate to
this folder so main. And here in blended unit, select or so, press
a to select all. Because we don't have here
image sequence settings. So a to select all and
now odd image strip. Now we have our animation here. And hearing output properties, we need to select all
the saved this e.g. desktop. And now by format. So you can select this
J peg or other route. And then you need to go to
Render, Render Animation. And we have our video file. So this is without
post-processing. And this is post-processing. Before we start with
post-processing and After Effects, I will show how I made this guy walking in this light inside. So you can also do
this if you want. So first my recommendation
is to duplicate this Control C and Control V. So we can back up and
you can call this boy. We met likes e.g. just to know that this
is another blender file. And I will now open this
with light and branded. And now you can see that
we have our guy inside. And if I select this bone, you can see that here. He's animated. And this is from camera view. I will go to x-ray
mode and you can see this guy is walking. And I made this from, I download this guide from blend slip and I animate
them through Mixamo. And I, I explained how
I made this last time. So we just need to go
here to this widow five, I will share with you and so
you can just, in this video, we learned how to download this guy and go to import
them in mixed someone, how to animate them. Next thing which
is important here, I liked Inside this cabin
and this is how this look. So you can see that I
basically add one cube and I create new material and I
add this orange color here, very saturated with
power of the 15. And the next thing I do, I also add two point
clamps here with the same color and
width power rule 120. So here is first one. Here is second one. Same point left. So this point limb
sense in real-world. But this one, this summation
cube, don't have sense. This is not physically accurate. But if you look my render, this is with this cube and this is just this two-point lamps. And you can see a
big difference. And even if, if this is
not physically accurate, I like this result. So this is why I decided
to make this cube. With this, I basically
put in focus this next thing which
is important here. If you look to final result, you can note that first
car is in-focus here. And after that I put
focus on this guy inside. So you can see here. Now this guy is in focus and
the car is now not in focus. And how I made this. So if you remember, we have used this, this empty plane
here, Ross focus. And I just need, after this guy cross here, I just need to put focus
from this point to this. And I select the camera
and this focus point here. And I will now select this guy because this
is in render preview, viewport previous very slow. So I will just show you when
I select this and I will now isolate object and we can
see if I press Play now, focus is now hidden card. And after few seconds, this empty playing
Go to this guy here. And you can make this very easy. So this empty plane
is all time here. And I go to frame 60 and they just go press
I and location and fuel for them slate and I. I just take this and
move this to this point. So I will now show you, I will delete this keyframe. So I'll just move this here. And I go again with
AI and P7 location. Now we get this. So we just moved this focus
point to this guy here. Then if you select camera, you can see that lift and
fill this empty object, this object, and you'll
get this result. So that's basically all I
also had. Cheated on ground. You can see how this
look and I go to all d and duplicate this instance. So this all the time. And I think this is
from Excel bridge, but you can find
similar like model like this where you want maybe
on that kit or Sketchfab, blender, blend swap or
seizure trade them. And you can see that this is barely visible
in the underbar. So if you want, you can do this. If you don't want
to, you don't need. So here you can see cool
piece of this grass. And I also had one shape here. I find this on Blender kit, so you can do this. And this is also barely
visible in the background. You can see this here. After I am done, I make
this animation to folder, and I also had
this folders here. Then in this new file, we just need to go to
Output Properties and just change from this first
animation folder to second. And also don't forget to do this in this composite in temp. So for animal from animation
to just go to animation, from animation, go to animation tool and
just select this. So this is Smith. And just
change all three folders here. And after then,
just go to Render, Render Animation and you will get this second animation here.
19. Post-processing, work with passes: Now we can start
with After Effects, but if you don't
use After Effects, you can find most of these
effects in Premier Pro. Or you can use
DaVinci Resolve or any video editing
software you want. Because we mostly use very basic effects and settings like blending
modes and similar stuff. So now I will open After Effects and I will start a new
composition from footage. First, I will go
with main boss here. So I will select the first frame here,
important JPEG sequence. First thing I will do here, I will make one folder here to keep this organized and
I will call this renders. And I will bring this sequence here and right-click Rename. I'll call this main random. And the next thing, because
we render this problem there in 24 frames per second. But in After Effects
by default is 34/s. I will click here, and I will change this to 24. And now we need more time here because
this is now slower. So you need to go
to Composition. Select this here, Composition, composition Settings
and just start. Maybe here 7 s. And now I will move this
to see all my timeline. And I will just move
this to the end. And now I will move this here and composition during
composition to working area. To delete this part,
we don't need. Now, if you press play space, you can see how this look. If you want add mist or haze effect that weekly
in After Effects, you can just go
with control C and control V. And he's
in Effects Control. You can search for
Gaussian blur. And you can increase this to about 300 and set this
blending mode to screen. This case effect. But this is too intense, so I will go maybe 10%. So this is a before and after. And I will rename this to volumetric, volumetric CapEx. And I will now
bake two projects. Next, I will import this
ambient occlusion pass. So I will go with A0, select first image here, image sequence import and
again 24 frames per second. And rename this to a 0. And bring this to
this render folder. And bring this here. And I will set this
to soft light. You can see before
and after results. So we get a lot of detail here, this ambient occlusion pass. But this is too intense. So I will select this here and I will press T and I will
bring opacity maybe to 30%. And now we lose
glossiness to this car. I will set this to 100, so it's easier to see to you
and to make this glossiness, we can use glossy
direction pass. So I will go to dorsal direction image sequence and send this to 24
frames per second. Go with, rename this
to GL or glossy. And set this here. If you see this message, just press Caps Lock to refresh. And now I will use, I will set this over this ambient occlusion and I will use screen blending mode. And you can see
before and after. And I think I will
make these two. Here's 250 per cent because
it's easier to look for me. So I think this is too big. So this is before and after, and you can see that we
make some glossiness here, but this is also too intense. So I will go with plus D and I will maybe 50
per cent of this. And I see that these
don't match perfectly and I'm not sure
why this happened. So this is lossy direction and we use this lens distortion. And I think this will
not happen with you, but I will try this. If I press S to scale and
maybe if I scale this 1%, I see this fits. Now. I'm not sure
why this happened, but I fix this quickly. If I press Space to play, I see that this direction, it pretty well now. I think this is
maybe too intense, so I will bring this
maybe to 40 per cent. Okay, and I forget to save this, so I will save this
on my computer. So I was called
justness tutorial. Let's now import missed past, and I will show you
how you can use this. So double-click here and
let's go with midst, pass. 24 frames per second. I didn't name these to miss. And more in this render folder. Now you can read this
basically odd missed. And if you put this here, and if you screen
blending mode to ignore breaks and
keep only whites, you can see that we
basically have missed here. And if you go with the levels, which is similar,
like follow them in, but that we can tweak this. So if we move this on right, you're going to basically put
this mist behind this car. You can see before and after. But in this case, I don't
want to put white color here because my car is pretty white and I want to separate
this from this background. So basically I want to
use black color here. And we can also use
this little mermaid. So I will now go with the new solid and I will use
a black color here. So basically add the
black color here. And if we put this here, we can use this mist
passes Little Mermaid. If I use click here, Little Mermaid
After Effects, now, remove this from
visibility here, and we basically use this as a luma made or in Blender
is this vector. If we'd now like this here
you can see how these look. Very white color here After
Effects will take this layer. And if we now
disabled this, again, you can see that we can choose how much you
want this layer down. So you can now tweak these
settings and you can choose how much black color you
want in background here. You can always preview this, only this force here. And you can see how this looks. Very similar. Cooler
After Effects will not take this down. We are sure that we don't put this black
color on this car. So they put this black color
only in this playground. And this is before and after. So I basically add more focused on this card when I add
black color in my ground. But later we will add smoke window texture here
between the car and Kevin. And we will make some
white colors here. And that's the
reason why I will, I can put more black
color here because we will make some whites light.
20. Effects and color correction: One thing we can do here
is alkylation effect. And you can see how this looks. So this basically add this red glow around the
edges or highlights. And you can see
one example here. And also here. And we
can do this weekly. So now I will go to New
Adjustment layer and I will call this correlation, and I will go with
five edges here. And this will basically
find this asia scale. And now I will go with thin. I want to make this red, and I will choose
red color here, but I will go with more
with orange color. Okay? And now I will click
Invert, invert this. So I want the red
color on these edges. I'm like in background. And now I will go
with the levels because I don't want all these edges make
Revelation here. So I will bring this on right? To isolate only highlights here. We isolate only this edges here. And now I will go, I
need to upload this. So I will go with
fast and walks and Raj and I will set
this maybe to 107. And I will go now with curves. I want to expand this, I will bring this up to
make this more visible. And now we get to this. And I will set this to
screen blending mode, to ignore blacks and keep
only this red color. So Screen blend mode, and you can see
this effect here. I will go more
with orange color. Okay, So this is a
before and after. You can see this effect
also on this window, but it's not so visible. And because this window
is also reddish color, we basically see
most of these here. But this is pretty intense. So I'll go with
maybe 30 per cent. Just took him this last time I use this
lens flare effect. You can see this here. You can see this silence
anamorphic lens here. Just rambling here. And for this, I use one
effect which is not great. But maybe if you
want this effect, you can find similar texture online and you can
put this here. Let's create a new
adjustment layer, and I will call this lens flare. So if you search for
lens in After Effects, we have 13 similar effect. And if you want to can add this here and you can
play with to this. So basically you can add
this effect if you want. But I want something different. Here you have three types. But because I want
anamorphic lens look, I have one add-on
which is paid lens, I think is called
optical players. And maybe you can find this
add-on for free. If you want. You can click here
on Options and you can choose different
type of this lens. Basically you have
a much more option that this prevention. And I think I used
this one last time. Okay, let's, let's
try with this one. I will just select
this one here. And what I do here, I basically set this to
screen blending mode. And now I can just
put this here. And you can use
this for direction, this point for direction. Okay, there's basically this and I can now say change
here, brightness maybe 50. And I will now
animate this opacity. So at the start, I don't want this fx, so I will set, click
here to stop watch two. Now I can add keyframes
and I will set this to zero opacity. Here. I will set this
to 100, hopeless. And after few frames, so we look back again to zero. And we basically
get this effect. So this is now too
slow because we have a lot of these things here. We need to wait after
effects to load this, all these effects. And you can see
that effect we get. And because this is
not a camera moving, I also need to drag this. So I will enable this stopwatch. And I will now move
my cursor here and I will now just be more
precise with this. So this is effect we get. And if you don't
have this add-on, you can always search for optical flips and
amorphic color overlay. And let's e.g. I. Will save this on my computer and I will just
show how we can use this. I would call this optical, and I will just quickly
save this on this top end. Now, I will import this image here and
I can just set this. Let's disable this in render, and I will just play
this place, this here. And I will use screen
blending mode. I will scale this up. And you basically get this
here and this image here. And I will now press
T for opacity. And I will go here
with opacity of zero. And be sure to check this
stopwatch to add keep. So here is zero and I
will now go with 100. And again with a zero. And we get this effect. So you can see how
this appear here and now again disappear. And we get this effect, but this texture is not so good. So can always search for
a better texture here. Maybe this one, and then
you can get better results. So I will now delete this
here and we can continue. And maybe better solution is to fight to try find
the veto overrides, not just a still image and
you will get better result. Now we can add some
color correction. And for this I will
it right-click and new adjustment layer. And I will call this C
for color correction. And main color
correction tool in After Effects this
Lumetri color. So basic look over here, all this color
correction options. What I do here, I
basically go with plus and minus and I see which
option I like more. So e.g. I. Type here plus 50. And I see how these look, and then I type -50 and
now I see how this looks. So I won't go in plus, and I will go with maybe 20, 50s, maybe too intense. So you can try it
with ten or 20. So this color
correction is different for different projects
and you cannot just type same value every time
because every project is different than the
best option here is to type different numbers. But basically for tint, I mostly go to minus to
get the green effect here. So if you go to plus 50, e.g. you get this purple color and I will go to minus -50 and
I get this greenish tone, but this too intense. So I will go to -50. And I will now just copy
values from last time. And this fit best for me. But if you want, you
can always play with these values here and you
can choose values you want. Because this little too dark, I will go with plus two plus with this
exposure, maybe 0.5. And with the contrast
I will go to plus ten highlights, -20, shadows, -20 also
and also whites. And with black side
will go to plus ten. And now we can see before
and after color correction. And I will now go with
another Lumetri color. So we can rename this
to low monthly base. And I will go with the Lumetri. Didn't MDs to rename it. So we can now add
some vignetting here. So if I go here to plus one, I basically white collars
on this edge is butter. So I won't go to
minus, so minus one. Maybe too intense, so -0.6. And this is before and after. We basically put this car more in focus with
this vignetting here. And I will also use curves here. So I usually add one or the raw score or
two shadows here. So I will go to this blue color and I will just put
two keyframes here, and I will just now bring this. So this here is black
sand, here is highlights. I want affect this
black scholars here, and I will just bring up
bluish color to this. So you can see if I go crazy, how we get a lot of
blue colors here, but I don't want
overkill with this, so I will just
slightly move this up. And you can see
before and after, we add the little bluish color
here on this dark parts. This is before then.
21. Overlays: Okay, the next thing we will
lose carries few overlays. So I will create here
overlays folder. And I will share
this link with two. First thing we'll do is make this more cinematic black
bars on top and bottom. And I will go with composition. So select any of
these layers and go to Composition,
composition Settings. And out here, maybe 1,000. And we get these black bars. So I will go with
again and I will add little more, maybe 1,100. And we get these
black bars here. But later when we add overlay, overlay will be
visible on this area. To fix this, we can
always add very simple over here and
show how this look. So this is just
one PNG image with this black bar here and with transparent this middle part. So if we import this end, I will send this
to overlay folder. And if he said this
on top of this layer, basically get to this. This is called the slope.
So if we now press S, We can, we can choose how much we want this bars
here and I will go to here. And now if we keep all
old-time this on top, we don't need be
careful about overlies. We can put all the advice
about all this area. And I will share this simple
image PNG texture with two. So just copy this link here and just go with
right-click and save this image. And you can use this as your overlay to get
these black bars here. We can now continue
with overlays. And one overlay I use a lot is this dust or particles overlay. You can find for
free on this link. You can download this for free. So I will just import this
in After Effects now. And I will put this in
this overlay folder. Now we can add this. If we add this on top. And your screen blending
mode, you will always, without this scope overlay, you always need to be
careful to put this here. And then you need
to move this here. But with this scope
overlay on top, we don't need to care about this because we always get
to this black bar here. I set this to screen, but I would try it
lightened blend mode. And I'll press S to
scale this down. And if and I'll press Paste. You can see how this looks. Use this overlay a lot because there's a lot of
life to our scene. But I think this is too big. So I would escape this
down and doing tests. I will press T and I will maybe use them per cent of this. You can see how these look. Maybe we can bring this to 15. And if you want to go with
control C and control V, and we can now move
this maybe here, and you can scale this up. Maybe we cannot. 20 per cent. Okay, here you can see I think
this overlays two sharps. If you bring a plastic
block branded, can see this sharp. Look helium. But if you go too fast, rule, you can always bring
this here and maybe go get them more to this, okay, This allows me just
to make this more smoke. Before and after,
or maybe just 1%. I've been doing this too clunky and we can go with another. Next overlay pick I use
often is this lens. From excellent three effects. I said also this link
you can download. Also, and this is
high-quality for, for k PNG images
you can find here. So you can choose any of these. Let's try this one. So I will bring this
to After Effects. First traveled back to projects. And now I will move this
in this overlay folder. And if we set this here, I will press S to
scale this down. And now we can choose
screen blending mode. And we get all this length here. And of course you can change your opacity maybe
to the present. If you want, just go over some area here,
e.g. this window. You can always go with this pen tool and you
can drag mask here. So now this appear
only on this area. And we can now hot
maybe another one here. Maybe this one. We can place this here and maybe we
can keep this very subtle. So I will skip this down. Screen blending mode
and I will press T and maybe ten per cent, maybe it's too much, maybe five per cent. But you can play with
all these overlays here. And let's now add
smoke or fog effect. So this is when the
overlay I found on Pixabay and here's link. So just download this for free. And now I will back to After
Effects and drag this here. And now we can use this. We can pull this smoke here. Let's isoelectronic this,
because this is on, this frame is not visible. So I will move this on left. And you can see how this look. And I will now remove this here, and I will set this
to screen blend mode. And because I don't want this, I want this between
card and Kevin. Here. I will now go to I will
use dismissed past again. So I will set this
over this smoke effect and now I can use
this as luma me. And I will again go with levels. Now, if we tweak these settings, we can choose where
we want to put this smoke widow effect. So if I move this on right, I can click here to see
how this means possible. So I want a car
completely black, because black is value of zero. And that's mean that this
blue man-made overlay will not be visible.
There is black. So I want to isolate this car and make him
completely black. Okay, something like this. And if I want this smoke
effect more visible, I want more white color here. So if you want to
move this on left, and if we remove this
from visibility now, you can see that we
have this widow effect, this smoking after this car. And if, and I'll load this, you can see better this effect. After I load this, you can see this smoke
effect in background. Maybe a little too intense. So you can always
scale this down and you can play
with the opacity. And I think also
this dust overlay, particle overlays too intense, but you can always
play with this value. I will now bring
this mist past this. I will bring down this positive, so I will bless
thee and I will say this maybe 50 per cent, and I will set this
particle overlay, maybe ten for ST. Now, when you are happy
with this result, you can go to File Export and you can export
this from here. But I have this Adobe
Media Encoder program. And with this program you can
export this much faster and you can reduce file size a lot with this
adult Media Encoder. So you can see that
This only 8 mb. And if I increase
quality palatal, this is still just 25 mb. And now you can just choose where you want to save this
file and filename. And just click here to render. And after a few seconds, this will be done.
22. Video and audio editing and combining with AI (Artificial Intelligence): Hello and welcome
to a new tutorial. In this tutorial,
I will show you one way how we can
make the animation created in Blender
more interested using ai image generators. I created this animation in
Blender and record that for hour-long tutorial
is the PC coordinate and the tutorial is
suitable for beginners. Look for our tutorial
in the description. This is the result
after combining with AI images and overlays. If you want to
follow this tutorial render animation and links to the overlays I use are available in the description
for this tutorial, I will use Premiere
Pro because it is a simple software for use. But since we will use only
tools such as cutting, blending modes and
some simple effects, you can get the same result
with any other video editing software without
much previous experience. This is folder I
will share with you. We can hear animation. We got from a blender. This is animation one with these men passing
through this window. And this is animation
with current lights. And I will share this
to animation with you and this images folder. So here you can find all these passes
from this animation. We got from Blender. This is ambient occlusion, glossy direction, main
end, missed paths. This is same for animation to, if you want to learn how you
can get this process here, you can watch my tutorial. I will also share with you
these three folders with image generated with AI we
will use in this tutorial. So if you want the same images, you can download this folder. But if you wonder how
I get these images, I just go to ai and I search
something like forest. You can see that we get
a lot of results here. You can click one. You like. I subs for something
too realistic here. E.g. we can click this result and here you get similar images. And you can just
click download here. Or if you have some screen capture
program like I kept this, like fruit, you can just
click Print screen and you can just save this image
is on your computer. And that's basically
what I do here. So I just go with
green screen and I save some of these images. And I get these three folders. In this tutorial, I will also
use these three overlays. So this is just bars
to get cinematic loop. And these two overlays I
downloaded from internet. And I share links with you. So you can find here
link for first one. And the first one is, I download from YouTube. I think I found this
on these two videos. So you can just download
this spec from this link here or from this link here. And second one is from
this mux, no luck. Website. So you can just
click here and you can download just this one overlays. You can download a full pack
of these similar overlays. But you don't need to use
specifically this to overlay. So you can search on the
internet for anything similar. You can type glitch
here, vector, field, gradient overlay,
or you can just static overlay or
something similar. I showed you this crayon, a website where you can find a lot of generated
images from before. But if you want more
control, you can install. You're over an image generator and I use this table diffusion. If you want to know
how I style this, you can visit this
link and then you get a lot more control and you
can generate images you want. E.g. you have options to
generate image by another image. And this is nice
option because you can get similar result
like this image here, and I will show you how so. I will select my render result. Most important
option here is this. Cfg scale. So if you go more to left, you will get similar
results like this one. And if you go more to write, you will put basically stable that fusion
to be more creative. And I will go to about
this and I will set here then to get ten different images and you
can just click Generate, and this is the result I get. It is not so similar, but they forget one option. You can change the
resolution here, and I will match this resolution and I will make this
CGI scale on lead. This is the result I get. I'm not so happy. I think this is because
this image is too dark. And I need play more with
this option and this prompt. But this is not stable diffusion tutorial
just to know for this option, if you want, you can
search on YouTube and maybe we will talk more
about this in future. And let's start now
with primal problem. Let's go with five new project. I will call this tutorial. Now, I will just copy
address to this folder. And so we can easily
paste this here. And I will import
this to render. So I get from Blender. If I press Space, I get this. Okay, I forget this one. If I press Space, I get
this animation here. But because this animation
is without sound. So you can see here
we have widow, layer one and layer, but we don't care audio here, so I will just
right-click and unlinked. So now we can delete
in this audio here. And now it's much cleaner. Now, I will start with overlay, so I will move this little own, right, and I will import
this overlay for. And I will place this here. So this again, don't have audio, so I will unlink this and
delete this audio track. And now I will cut
this to about here. Let's press Space to
see how the slope. So first thing I want
scale, these are lethal. And you can see that we have here these black bars
because I render this from Blender and here we
don't have this black bar, so I will import this scope PNG texture and just be sure to keep
this always on top. You can see that now
we have this bar here. If you want, you can
scale this up or down. And now we have this animation. Okay? I will just move this left. And that will place this. Next. I will import this
first ai image Peck, which is this tree. So if you click enable
this image sequence, you will get the image
sequence from this. But for this, you must
be sure that you have now order this by
numbers, so 1234567. And then you can get
this image sequence. And I will call this a one. And I will place
this above here. And let's see what we get. I think this is too fast. So I will go with right-click
and I will go with the speed will decrease. This may be 250 per cent, so now is a double slowly. I will scale this up. So select this here
and you can just increase K to about here. I don't want to
strong colors here, so I will search in
Fx, Lumetri color. So lumetri color is basic color correction told him Premier Pro
or After Effects. And I will search for saturation and I will
bring this maybe only 20%. And now this is almost
black and white here. Next, because this
is a square image, I want to fill also this
part, empty part here. I will move this up
to get one more. If you call it bolt on your
keyboard and drag this up, you can just duplicate
this layer here. And I will select this bottom
layer and I will scale this up to cover all this area. Here. Bring opacity for this bottom layer
to about maybe 30%. And you can now play with
these blending mode. I think I will use screen to ignore blacks and keep
more white color scheme. And let's try also to this one. Now, if we press Space, we get this effect. Let's now back to our folder and let's important for path. So I will go to animation on one end
with ambient occlusion. So image sequence. And I will rename this to A0 for ambient occlusion
and animation. And I will hold this here
and this is what we get. So we get only this
ambient occlusion pass. I will now keep this
maybe only one or 2 s. And I will use this tool
to cut this into two parts. So now we can basically just
use different blending mode. E.g. we can set this maybe to hue to make this
just black and white. And let's try this
maybe too dark. And let's maybe delete this one. And let's see what we get here. Okay, I think this is too slow. So I haven't just made
this much faster. So I will keep only one frame over here and I
will delete this. And let's move this mult here. Okay, and we get a much faster animation
here and much more dynamic. Last time, I use also
this image of trees, which I also found on AI. And let's now importantly, in Premier Pro, I will bring this up so we
can place this image here. And let's cut this about
here. Scale this up. And I will go again
with Lumetri, color effects and
search for color. And I will just bring the contrast up domain
is more reasonable. And let's gotten this. Ambient occlusion costs again. And we can also play with
these blending mode. If you said the dark
and you can see basically part of
this trace images. Or we can go with light and get this effect so
we can maybe cut this. Basically all these
processes playing with these overlays and creams. So you can do what you think is interesting and you don't need to follow
any of these steps. But I will show you
I do last time. Let's now back to our project
and let's say import, lawsuit that extra paths here. So again, image sequence. And I will call
this animation one. And this is how this
loss of that extra loop. And we can again, they
consume this here and we can just take group B. And I will, for this use
mostly screen blending mode. If you set this to screen, we get this reflection
here and I'd like to make offset of these little more so you can play
with the scale. Now I will set this
one also to screen. And I will duplicate this, it holding Alt and
duplicate the times. And we get to this effect. Let's now go with AI
folder to image sequence. I will show you if you don't
have order this by numbers, you can always select e.g. this, all these images. And you can import these here. And you can go with
right-click nest. And now you can just, you can basically 11 sequence here and you
can speed up this may be for 40 times, so 4,000%. And you'll get similar result. But I will go with the
image sequence now. So image sequence, because
this is ordered by numbers. And I will get sequence
from this and I will call this AI tool. And let's bring
this to about here. And this is what we get. But I will scale this up. And I will duplicate
this it all. And scale this bottom part
more to cover this area. And I will now play with
blending mode scheme. Let's try with overlay. And let's bring the opacity
down to this bottom one. And we can move this scope
up to make one layer. And I will also bring this up. And we can duplicate this
overlay views at the beginning. So let's bring this here. And I think I need to change
the blending mode because this is now dark and move it to maybe screen or difference or the soul. Okay, let's try it. Nice and maybe we can bring opacity down. And I will also
bring opacity from this lab to see this
car little more. And let's, let's try multiply. Okay, and we get this effect. So I will gotten this
folder like about here, and I will move this bar. And let's see how this looks. Okay, and I will now change the blending
mode for this part. Maybe soft light,
I think so flight. Good, so we can bring this here and let's see
how this book, Let's now import from animation to glossy
direction paths. Animation to end. Let's go with glossy direction, GL animation. And let's bring
this to about here. This is how this look and
let's do same we knew before. So I will just make
fuel costs here. And now delete this part and I will now set this
to screen blending mode. I will make some offset here. I want to get to this blinks and before we turn on
lights on this car. So we turn lights here and get this brings one moment before. So this is effect I get. I want to increase this
effect so I will go into old. Let's duplicate this. Two times. And then just bring
this scope to all this animation because
we get this part here. We don't want. So
just move this or to end and we can just scale it. This. Let's now import
this few months. So a sequence three. So a few months. And now we can bring
this to about here. And let's do the
same we do before. So I will scale this up. And I will go with hue saturation effects
and Lumetri Color. And I will just bring this
saturation to the present. And let's see how this looks. So I will bring
this overlay notice alone and they will play
with the blending modes. So before I will also scan this bottom left up to
cover all this area. Let's bring opacity,
maybe 224, maybe four. And let's now play it
to blend mode here. Okay, Let's try this one. Let's just bring
your opacity down. I think this is little too fast, so I will right-click Speed, Duration and I will
set this negative. So 60 per cent make this slower. Last overlay we
didn't choose for now is this VHS static overlay. So I will go here
and I will import this week a static noise
so we can bring this here. And one different
with this overlays, this overlays with sound. And that's the reason I often use this because we get
this sound effects. So let's cut this part. Okay, this is too intense, so let's work here. And now delete this. And we can now start placing
over this composition. So I will, I will set
one on the Start Here. I will first scale this up
and we get this effect. So I will play with
the blend mode here. Okay, and let's add
another one may be here. So scale this up. And again with blending mode. And we get this effect. I get a lot of colors here. So I will again go with
effects and Lumetri Color. And this saturated,
this almost to zero. And we get this effect. And I think this is too intense, so I will just keep
one, a piece of this. And let's put this
part maybe here. Okay, Still too intense. So just keep one piece, one piece of this and delete
this part in the middle. And let's see how this,
That's basically all. We can just add some
music here and I will show you which
music I chose for this. This is a music I will
use for this video, and I found this
on YouTube Studio. So if you have YouTube account, you can search here for a lot of free music and you can
search for these titles. And I will now import
this in Premier Pro. And let's place this here. Okay, I think I like
this, so I will, I will cut this first
part and to about here. So let's now move this on left. Let's play with another
old your point here. So this is how this one is just one part of this. And let's place
this to about here. So we can get this effect. Okay? And we can use
here one effect, which is called dip to black. So if you go with Toby
though transition, you can find this
under the soul. So dip to black. We get
this effect to this clip. We are almost done and I
just make one poster before. So I will find this poster here. Okay, this poster I made and
I will just bring this here. This is how this look. And I will again go with
effects and the two black. Let's set also this
here. We get this. Okay, this is too intense, so just bring this solid. I think I'm happy
with the result, but I will also fade this music here so we can just
quickly do this. So one keyframe here
and another one, right? Bring this down and
we get this effect. Thank you for watching
this tutorial. I hope you learned something
new and see you next time. Hello and welcome to
another tutorial. In this tutorial, we will
create this scene we are watching now in three program
blender step-by-step. We will talk about
how and where to find this free car
models online. And we will solve most
of the problems you meet when downloading
objects online. You will be able to
download any model online and optimize it
for easy use in Blender. After that, we will animate the car lights or
the imperfections, trees, animate the leaves
and other details. We will talk about the camera, how to animate it, adept and field, bouquet
and other settings. Finally, we will do
post-processing. We will work with parses in Blender effects
and color weight. I will show you where to find free overlays and how to
achieve cinematic look. In the last tutorial, we
created these three scenes. If you haven't watched
the previous tutorial, I recommended that you do, but it is not necessary. I will share it with the
blender file with Kevin, ground and lighting
we created last time. So we can immediately start
creating the first see.
 šime Bugarija