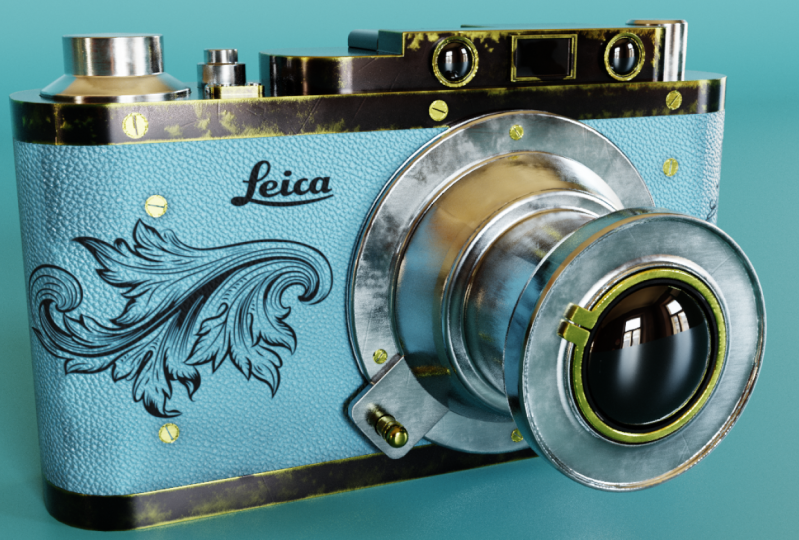
Transcripts
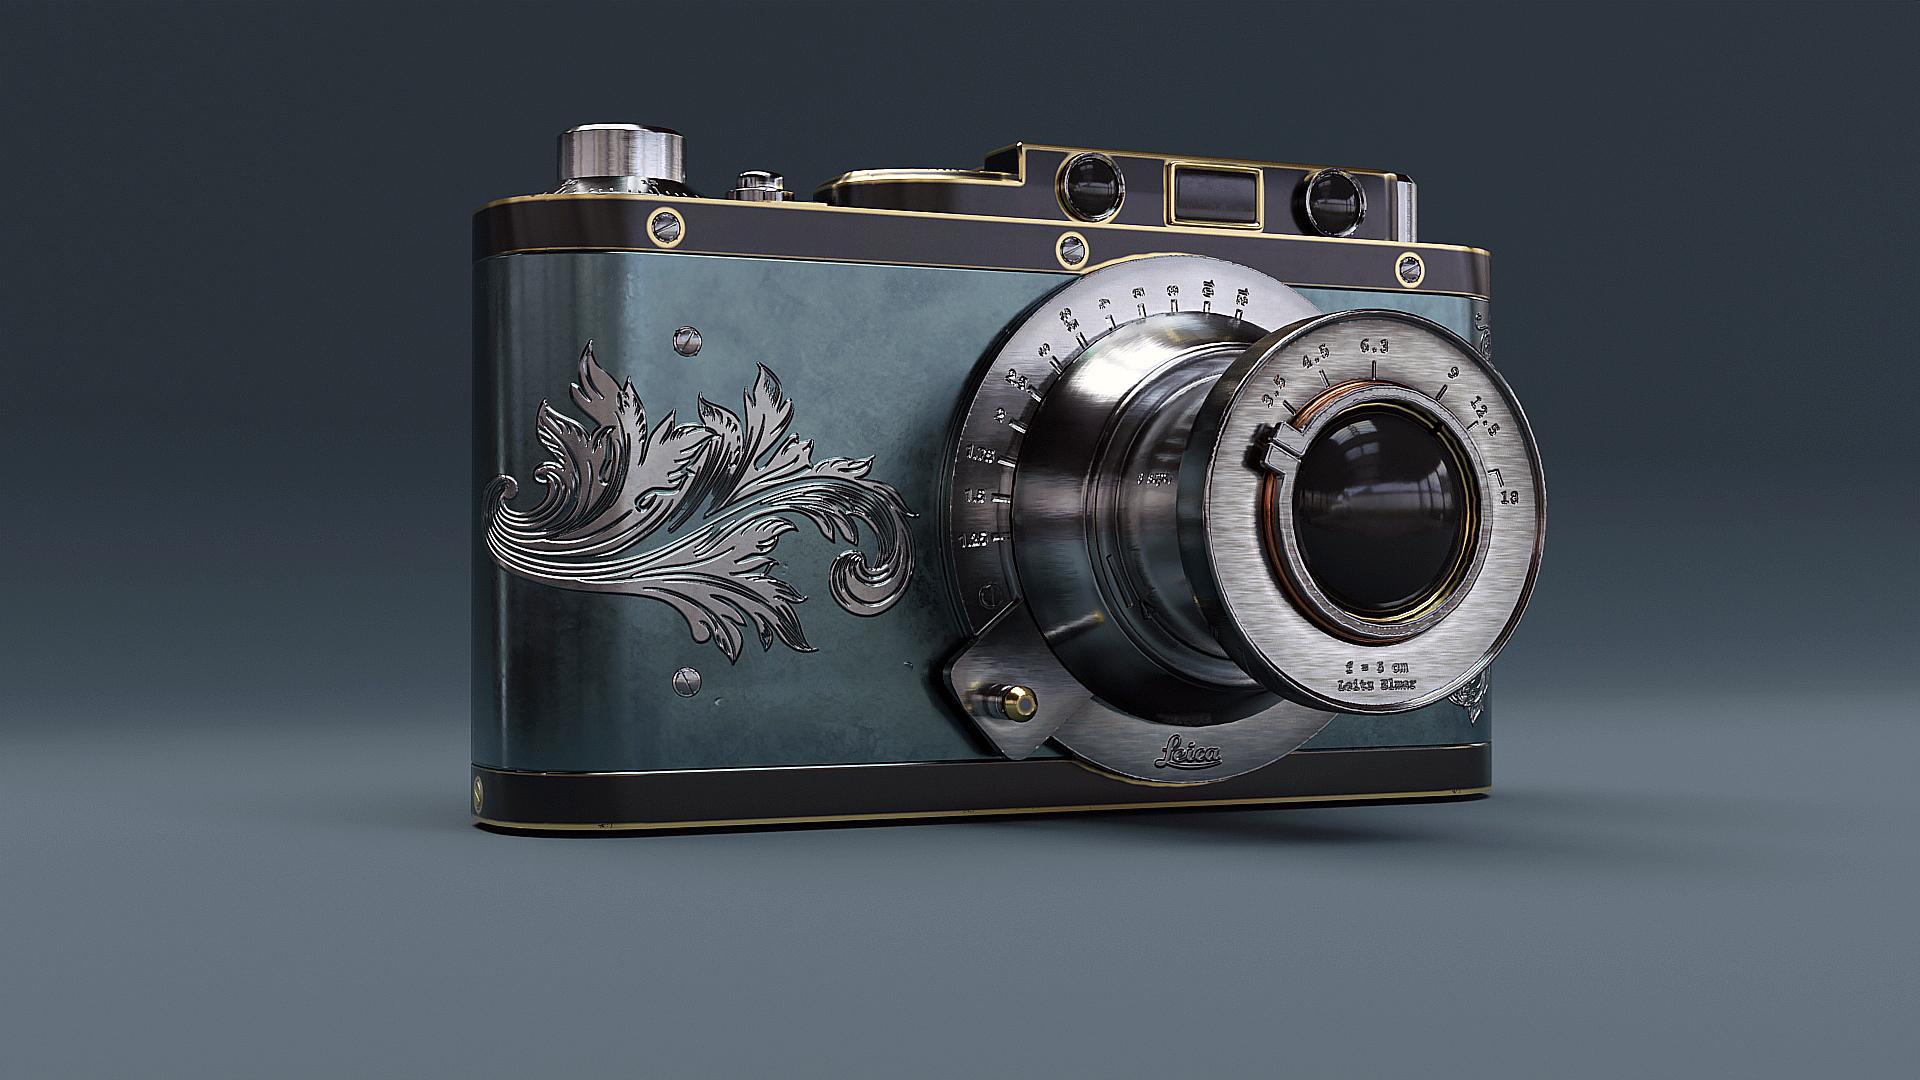
1. Introduction to Class: Hello everyone. My name is and get at Harvard and I am a 3D artist. I like to create high-quality, realistic 3D prompts and asset. But this is a great mandate you will see on your screen is the final result of this course. If you follow along with me, you can have really similar to this one. I will take you through everything in this course, starting from modelling in Blender, UV, unwrapping and giving it all their duty is actually indent, actually in substance being done, applying the textures and then rendering the final senior lender even go through the complete process of creating this has been best camera from start to finish, and also learn a lot of techniques and 10 and pink. Along the way. We learn and understand what it takes to create realistic prompts like this is of course for users or our types. But if you have a basic understanding for Blender and Substance Painter, it would be really helpful. So we will start by VAP, this complete model with details in Blender. Then after UV unwrapping it, maybe take this model and do Substance Painter. Then the first being the mesh maps and then shared it completely. We will also add video stuff, slake, scratches and everything. So we will learn all that. And if you don't have substance painter who don't have to worry about it because you can either get it for a dry lake for 30 days just to rope in this course. Or you can just get it on a student license they give you are a student and have an ID card of your college or school. And then you can get it on a shrew and license for free for one year. After this, we're going to take this back to Blender and you will then that final scene in vendor. And then we will see in this image. So I will be providing you with each and every failure due to this project. This would include all the texture, the images being phase, difference images, etc. So and I will see you in the course.
2. Creating the Base Shape: Hello and welcome to the first chapter of this new course. Well, let's get straight into it. That general. To create a new blender file, press a to select them all, and now delete the existing object. We don't need them. Also, I've done my being passed on. But whenever I perform any kind of shortcut, you can easily see whatever I'm doing. You don't miss any of my moves from the stock modeling the SOC, modelling the camera. The first step that we need to do is we need to add some reference images that we can follow easily what our model. So what I will do is press 1 on my number pad, on my keyboard, go into the front orthographic view. The front orthographic view is like the 2D view of our model on the same side. So if I have less than one, then it is sent out to that review is for right. Seven is for top and bottom. So I was breast one and go into the front orthographic view, shift a window, image and defense. And now I will hand over to that. I've saved these. I will also be providing you with these images in the portfolio. And also all the files that are related to this course, like the models, exports, textures, everything. So I will add this trend refund to the front orthographic view. And now I will press seven to go to the top orthographic view. And similarly at the top but offense image to our project. So now what I will do is I will rotate this top left hands immediately when a 2-degree, the best are. Then presented to lock it on the z-axis and on your number pad, type one. This is a easy way to provide accurate a yeoman. I will move this image a little back on the y-axis by pressing E and then locking it on the y-axis. And millennia and lock it under their data and move it a bit outputs. Next thing, press Shift a, go to Mesh, an ADA. So now 37 to do under the top orthographic view. And let's align the funder. And now you see that cannot be true this image. So easy fix for that is select this image willing to object data properties enable classic Vietnam here and reduces this too lazy to blank. And again, still easily see our image. We just need to follow the lines. We can also see a few easier to work with. Also one more thing that I will do is before starting this image, any level only access the lane. And for this integral flow, I will select only. This will do is it will keep our immediate invisible until unless you go into the respective orthographic view, then it would be visible again. So this is very handy as it does not like block I view. While we're working into perspective. The purpose then this one becomes visible and seven, then this length. So now let's select a few. But as dab, dab to go into exec mode, collect this exit. What this will do is like now if I select these top vertices, all of them would be selected. But if I turn this off, I'm going to stop you again. And now I will select them or lead. The top two would be selected to make sure you have this on and link them back on the y-axis. Then you will read this, and then y, and then x. Okay, now we have mastered with desktop reference in it. Now press the gland. So right now our cameras like thicknesses, not length is not matching with the top reference image for the frontline. So we just need to scale this up so that it matches these lines here. And then you just need to change the scale of this image only and not the actual object. Okay, right now, I think it's fine. The next step is to select the cube again, estab, collect the stopwatch, and match it with this line. This line. Okay? So now you have this very basic shapes. To the next step is to add these around you. They do report that. Press Tab again, head over to the edge select mode, and do that, we need to press to an odd number bags. So what this will do is we can now collect edges. If I bled 1, I can select vertices, week four edges, and plead what? The brush tool and select all. And then press 7 plugin, go to the top and press Control V. Now Control B, then we can add them to our edges. But now we need to put all our mouth. We increase the number of hair began increase the number of edges, which in turn increases the smoothness on the bed and will increase the number of edges and give it like maybe one to five or six. Whatever you feel like, fine. You see around it. And so the next thing is to right-click and you see all the novels are messed up and the shading looks very weird. Too easy fix for this is head over to normal, enable auto smooth. And now all the shading is fixed. Also, I will enable my karaoke and shadow for that you can easily see, Okay, maybe not Shadow cavity so that you can easily see the edges. Next thing is the bevel modifier, head over to modify that. And either they will modify adjustability modifier and do something like this. Now it's really enabled the heart and normal. And now are the basic shift what our camera is finished. So thank you for watching. We will continue from here in the next lecture.
3. Refining the Base Shape: Welcome to the second chapter, but let's get straight into it. That's one. Doing the different art graphic you enable this X-ray. And we will start off by creating these two pieces we stop and the bottom line separates men who can do that. Tab to enter the egg mode. Press Control Alt. Control R is the shortcut for adding edge loops and using a leftmost button, lint this window, this lane on the reference image. And add, let's add another edge loop or didn't bottom line. If you want to move your edge loops, more precisely, you can just hold Shift while moving it and the momentum will become clear to you, then just place it. Saved me. If they don't worship, it is moving very fast. But and I hold shift, I can move it accurately on the flame only VS. Now what I need to do is press three who go to the face mode and select this whole edge loop. So to do that, you just need to hold oil. And then we'll shift to select this face together and then press P and then selection tool. Now if you come out of the exit mode by pressing tab, we have separate these two. Similarly, I will do this for the bottom one, but a whole lot and then select the face loop, then hold Shift, and then separate debate, pressing B and then selection. Okay? So the next step is to, but first I will hide this middle piece by pressing Enter. You can hide any of the object by pressing L and U, we can bring them back, or you will express H to hide this. And now I use, right now these species are hollow. Tubes have not been feeling. So we need to visit the glide between. Don't do that. Then further down the course, you will be using Booleans a lot. So Booleans don't work with the shift of each Adelaide. Booleans only leave work credit limit shapes which are water tight, which means that closed QT ship. So we need to make them close. So could do that. Press Tab to the edit mode, breast lung disease, and then hold Alt, select this complete edge loop and then press F to fill this space. Similarly, I will do this for the bottom line. This bad boy, the best. Another thing that is I will join these two objects. Let's select this one, then hold shift, and it can block them, run, then press Control J to being the Hadean objects back. And now I will hide this object and fill in the pieces for this one. Welcome back. Now let's reduce this Devan lake, not a bevel, looks too much like the veto points 0, 1, 2. And part of the causal needle finds you don't want to. And these values you can put up according to your preference. I did on this one. So now we are done with the body. So let's look on these some of the shapes on the top. Who could do that? There's seven. We'll do reared-apart to graph it, you add a cylinder. And let's sit here. Now. Best one for the front article with attributes and more desired desktop by pressing G and then dead. But, but before we start making this, I need to tell you something about Boolean. So we could do that. We will be using when add on quite a lot. Already pre-installed. I don't go into the offense and references in add-ons type bool. And if this iodine is not enabled, you just need to enable this because we will be using this quite a lot to enable this. And before making, let me tell you some things about Boolean. Let me just add Tokyo. And late boolean is a technique which we use to create Lake complex shapes. For example, if right now I have to show you an example. So I will use this field and so in dem intersect like this. Now that I first read this, then this field and then best control plus, minus on our keyboard. And now you see this, US created a cutout on this film. So this can be very helpful in creating the complexion multiple Boolean to create any kind of shame that if I add another hue and select this London, and you've given me using this quite a lot in our project. So let's delete these first. But there are three Boolean operations. The one that I showed you, the difference operation, we call this the difference operation. Will select this one, and then I will select this one. Then press control minus. So this object relied as the petal. Another Boolean operation is the union boolean operation which ads to all objects. Earlier when subtracts to object, this one adds the Boolean operation has been done. If I move this, you'll see this as being connected to the object. And the last one is the intersection. Intersection is also quite important. Like if I select this object for us, then this and I press Control plus slash on my keyboard. And you can see here this intersection part has been created and you can move inside. Also, if I add a bevel modifier on this, you can see it quite prominently. This this technique is very useful by creating lake sci-fi designs with a view to lock this Boolean intersections. So let's start. We will know these one by one as we go further down the words. I was here on this object, Plus I will share more and also enable auto smooth to credit the VHL seven to go to the top view. And I will scale this just a bit more than that evident even in a standard. Right now via, via your deck. We will use the Boolean operation here only to select this object. Then select the Default and best control minus. So now you see the Boolean is not working correctly and we also have some weird shading issues. They did a very easy fix for that data as a general rule of thumb, that vital using or while working with Boolean, the bevel modifier should be at the bottom of the stack. So I will just move the Boolean modifier at the top. And you see the shading issue does slow down. And now that I will do in the cut-out has been created, now I've been cleared this actual cylinder. So one way that I can do is I can add a cylinder. Then I can just move it here. But the scene, and then scaling it down and matching the line. But another good way to do this. So let's first delete this, and I will select this object. Then I will press Shift S, shortcut Shift S, then go further to selected. If you see because it had been brought here to the origin point, select. This will help us a disclosure pointed like whenever available like the discursive point. Any new object that I create would be spawned on discursive point only. You can change the position of this point by holding Shift. And then right-click, you can move this leg does three, and that is to press Shift S. And you can move this blue lake colder to the Eulerian tour, distributing it to the 200 point. And we can also bring the colder to any selection we make to the objects to collect this object, then Shift S, and then there are two electrons. Now if I bring in a cylinder, it will respond in this exact location. And I just need to scale this down. Now. We have a little bit up. And you see now we just need to do auto smooth and vivid modifiers. Also apply the skin. Make sure whenever you scale any object, Eunice, apply the scale of it by pressing Control 8, Lenski leg. If you scale it, make it smaller. Just need to remember that anytime we change the scale of objects, you need to press Control a and applied it to the legs picked up the bevel modifier. Like this finite do is select this object, press Tab to go into the facility. Let me stop face. Press I to insert this insect like this. And then plus e to explore this. Mark them in the downwards direction. And then again push Tab, press IE again to integrity. And then again, best to create something like this. Another thing that I will do is to go into the edge, select mode, old oil, and then select this outer edge. You can press Control. B is down a bit. I will not add any segments like this. And maybe I can add, no, I will not add any segment. Is press Control V, then ventrally and remove the segment. And also enable harden nominally. Allow, I think it's a lithium downward. So I think this much is enough for this chapter. In the next chapter is more objects at the top. And he's looking for, Thank you so much for watching. See you in the chapter.
4. Creating the Top Part: Hello, welcome to Chapter 3, the legs start from where we left off. Before that, I should've mentioned that by now you should save your project. So there's Control S and regularly senior project for that you've gone through any of the progress. So one more thing that I do, I want to mention is that in the discourse, I will be providing you separate bank blank file for each and every chapter so that you don't have any following me, the discourse. This one. And you can see this is not really matching with the different X-ray stab wound to a small one or the word elect more and collect all these vertices. And next we will start by making the piece. So it could go back to express controllership. And before that I should turn on land, screencast, press Shift. And the now, if I go into the front view or the top view, there are a lot of, of your state law and that is really blocking our view. And they did a nice little feature in Blender. And if you select any object and then pass slash on a number of bags, you isolate the object that we can work with this. So this is what we really look at this discipline. And then B and then this slack on an AMA back to isolate all these P. And now you can vote them in. Really, the only thing they estab, going to ignore it, you're going to exit. And now the select and move the vertices according to the reference image. I'm just pressing D and then buy it back. We select this, then z and then x. Now, best line to go into the new line. Now, I will start adding some edge according to the line through press Control R and R1. And then I'm one of them. Also, I will select this face best treatable into the face select mode and seven and 10. Okay? Now we have got our basic shape. And now you can see clearly that this is below. That we need to link below. But do that, we need to extrude the best. And extrude this below. But you can see we have still got quite an issue very easily. Press Control Z again, and make sure you have not extruding them by mistake. Then it will be excluded. If this is not appealing for you, you just need to press P to bring this on this extra. And then Script select, Extrude manifolds. Manifold. Hangeul is made what exactly these type of operation for this blended and bring the town. And you don't have any ongoing basis. Now this one city, and let's just bring this down here. Okay, Now the next step, left side up bevel modifier. Apply the scale that I modified it marked early voting. They can either disable clamp overlap and the verbal modifier starts to work. Will I will adjust the bevel modifier. She would be subject to enable lot of knowledge on here and I'll just increase the revenue. Okay, now, what I will do is press seven again and you see headed head RVs don't do that. Now to create them, the stab, we had a kind of fit selection mode, the election mod 7 again, and then controlling the matches accordingly. Yes, DAG Lake, maybe extinct. And the better you do much Angus started interfering with the press Control and again, be a little better lives. But make sure this layer is needed. You should not hit the fan auditory. Start to create completed by. Okay, this is fine. And we don't have any elect the sage on the stage. And now I would never do. This. Does not have to be exactly matching with the different mismatches. Fine. Now this slash again to come out of the isolation mode. And this, and this, and I will move it a little bit on the x-direction. And you can do it on the line. Or maybe this much only on the x. So these are not overlapping or anything. But this is fine. Now. I am on the cylinders, get the best. Then I added cylinder. The next scale down to this much. Press one to go into the authoring. Thank you and best stab. Do a bit more. Also, select the selection tool and not the extra manifold. Hegel a bigger. Let's select this topic and this will extruded. Bring it up. And then down. Here. Then again, press. Okay, Now let's move again and enable partners. And also add a bevel modifier. Make sure to apply the scale and adjust the plan. Enable harder than normal. Now, another thing we need to create the Boolean cutout. We'll select this object, this shift, to select it and bring enough billing. Now, let's scale the cylinder a little bit bigger than the object. And autism, DAG this object and this object and press Control minus b. So if you remember I mentioned the bevel modified has to be at the bottom of the stack of enviable. Boolean would like to bring this at the bottom of the stack. And now the shading issues. So yes, I think that's enough for this lecture. We will continue from here in the next. Thank you for watching.
5. Modelling the Dials: Hello and welcome to Chapter 4. Let's make the remaining top pieces by 7 toward the top view. And let's make this one 50 and add a cylinder. And then press S to scale it down. Press one to go to the front orthographic view. There's the toggle button. And then let's just scale it a bit more and press Tab to go into the Edit mode, select all the stock vertices, ring them about here. Now I will press I in second. I think almost here. Then again, best one, then excluded. Extraordinary. Now, first let's apply the scale shapes more depth and enable auto smooth from normal. Outmoded. Really important. Right now you see we have this very vivid shading going on, but I believe an artist would, everything is correct. Canal attack, the modifier decreases. We're almost here. Then also enable hard and nominal. Next, select this, then press Shift it goes there, be selected, and then bring in another cylinder. Elite about this much more tick enabled auto smooth, like this one, and then select this one, then press Control Minus. Again, we need to do the same thing. You must remember that bevel shouldn't be at bottom of the modifier stack. And it was nine. Now you can see everything is working perfectly. So let's head on to the next peak. Let's link this link. For this, I will add just a plain. I will keep this plane here. And let just select a single vertices. Or maybe I will just delete everything of a liver disease by sex and delete them. And this one also work with one-word is the only land breeze to exclude this. Keep it there then again base e. And then let's just go through the complete outline. And then where you don't have to relate exactly the same, just follow the general outline. So you can follow along with me. And the spacing, then placing it, then leasing it using Shift so that it does not move rarefied. Pressing shift makes it more, a little bit slow and the momentum. Now let's join them by pressing F and then press a to select them all. And then again press F to fill in to fill in the face. Now let's press Tab again, select them all by pressing a and then extrude them in their downwards direction. Kids more depth and also enabled auto-scale. Best one to go into the front view. And as you can see, sorry, yes, here it is somewhere around here. So let me click here. And now let's create the things on the top. Left sided cylinder. In this gown. Move this enable auto smooth level modifier. Apply the scale and then reduce the debit. Somewhere here. Also. Apply the skill and adjust the altar enable higher than normal for both of them. Now, similarly, what we get for this piece and this piece we will look for this piece. Also. Duplicate this by pressing Shift key and then right-click to keep it on the same condition only. Scale this up just a little bit and then select falls this piece, then select this piece, and then Control Minus. Again, we need to deselect the bottom. And now as you can see, we have there, well, we have brought a bevel modifier at the bottom of the stack and we still have a lot of shading issues. So data very, very easily fix for this and just go to the Modify tab and recognize moments best as soon as I added the wicked normals. Modify and all the, all the shading issues have been fold. So now you have to remember two things that bevel modifier and awaken normal modified need to be at the bottom of the stack to have codec shooting, black collect cheating. Now, firstly, let's make this right and we will make next altogether, these are discrete because we need to place them. Head also had a really, really made them together early collapse link this piece, add another cylinder. Leader down. Also enable artist. And the same exact the bevel modifier apply the scale. Often enabling how hard anomalous best Tab to go into edit mode. And let's select all leave less hold oil and select this edge. And then press Control V to bevel this and also add a few segments like 23 to this. I have to give this a little bit different look. Again, the same thing, press Shift D to duplicate this. They clicked to keeping their scale it a little bit. And then just select this one, this random controlled minus. Again, Let's move the bevel modifier. Because every time we apply the Boolean modifier, it gets added to the bottom of the stack. So every time we use Boolean, we need to move bevel and making numbers at the bottom of the stack. Okay, Now the basic shapes, I mean all the dope sheet. Now let me make this clear. First, I will add a cylinder. Place it here. One more thing. I will select this piece and then select this image. And let's isolate them by placing Slack. And now I can look much better. Now what I will do is I will select this top face by pressing plea to go into the face select mode unless I insect this elegant vector. Okay, now plus one to go into the, what is the select mode? Where does the hair? This one here, this font here, and, and this one, this one, and this one. And then j, remember to Willebrand j and not F because we are joining the vertices on willingness. So now what I will do is select this face and then breath be extruded downward. Let's add a bevel modifier. Apply the skill level higher than normal. One thing that I can loop over here, select all of this as 3, okay, No, maybe I need to do is just create another edge loop here. But it's going to the face select mode. Click here by pressing oil to select this complete phase, and then press E to exclude this from here. Bring it up. Also remember to share more and bring it here. Okay, so now let us take this shifted, duplicate and rotate this on the x-axis plus r, then they may be located. Then I will just copy paste, move it on the biaxial indeed invite and then bring it here. Also one more thing that we can do to make it look better. Make it look better. Bless our controller, and then add an edge loop almost here. Again, press 3, 2, select these all. And then while holding OIT to select them. And then best OIG. And then extrude faces allowing normal and then extrude this leg lift? Yes, I think this is better now, I just best to go to the face select mode enabled this. And then let's just copy paste. This new link shift can be 30 again and again shift. And the one thing that we can do to create a little bit of variation is press R and then press and rotate differently so that they are not in the exact same position. I'm just pressing R. Then pressing Y would locate them on the y-axis. Now let's copy them all. Select them all. Now press Control J to join them. Press Shift D to duplicate them all. Looked at them on the dead accident by name be humanity. And then let's place them here. On the backside. Aldo, move them inside. By moving them on the y-axis will be for now, I think this is fine. But I think this much for this lecture we will continue from here in the next chapter. So make sure to save your file Control-S. Thank you for watching.
6. Adding more Details: Hello. Let us continue from where we left off though, past seven or the top view. And let's create this piece. For this, I will fly a plane. And there's Tab to go into edit mode. Toggle is extroversion. And then in the vertices select more and just select these vertices and lazy according to this. Then led to a lot of x-ray mode and bring this up. Now again, best stab, best tool to go into the edge select mode 11, these two agents to extrude them, bring them up until here. Then again best. And now this leftmost working to keep the edges there only. Now I will press S, then I will press X to scale them inward. So now our shape builder, so press Control a and then apply the scale. Now I will add, this is just a plain right now. I will add some thickness to it. So to do that, add a solid effect modifier. And let's increase the thickness a little bit on the x-axis and little recap on the leg. Now to establish. And let's select these two edges. And then press Control V to be the limb. And then right-click and shade MOOC. And also enable auto smooth. From here. I'll collect even thickness, even detect even thickness. The thickness is even if we don't check it. It kinda rounder. Just enable this and it will have even thickness. Just increase the thickness of that. I will increase the thickness on the entire lake on the inverted face or take it to the negative prediction. I now I will scale this up and match it with this object. And now let's either bevel modifier enable higher than normal. And now I think it is fine. So the next step is to press F1 will be the prank. You enable. And let's create the shapes. So for this, I will add a circle rotated on the x-axis by 90 degrees, but less than plus x. And then type nine. Google gave this. Let's scale this down to match this outer line. Okay, Now press Tab to go into the exec mode, press one button vertices selected. Then let's exclude this best art. And I will, okay, you can just press E to extrude them. Then right-click to keep it on that position only then press S to scale them in. Some their hair. Now I'm out of the y-axis. And now select everything. That's a to select everything and then extrude this, like this. Shapes more enabled auto. I. Just go into the face select mode and select this outer edge and scale this up a bit. And scale everything down so that it does not relate. Nightingale did find, though the next thing I will do is select the tab to go into edit mode. This controller, but a lad edge loop here. And add another edge loop here. Then basically for Select and select this face. This. Then I will do the extrude along normal, mistaken, excluded. So this would be fine. And now let's add the bevel modifier. Apply the scale. Naval hard nominal. It is fine. So now select this object that has Shift S and then go to the liberal selected because you want to create a new object here. And now I will press Shift and scale it down. Something like this. And then scaling this on the violin section. We'll make it something like this. Highly push this in Word and elute up a bit and shoot. And now we have got ourselves that camera lens. Now I will select both of these objects and press seven will be the top view. And this shift we could duplicate them. And then without thinking, Oh, I mean, clicking anything that's located on the X axis and just place it here. Okay, Now, again, I will select these 27 and let's copy Heroku shift could be. And without doing anything, this fly to lock it on the y-axis. Again shift than x and here, okay, The last thing remaining is this. The ship that will add a scale it down, move it here. And this tab to go into exec mode when four vertices select. These replicated in that we are doing. Though I think this should be easy by now. According to the defense establishment and then crank goal to apply the skin. One more thing that I will do is press tab and then select Art, hold Control and Alt. And click on this edge to select all four of these ideas. And then press Control V to better than this, I will reduce the number of segments to maybe do and give this a very small bedroom. And now this shapes more dispersed. And then tell him this object and this object and Control minus. Again, we need to bring the bevel modifier at the bottom. Now, we're getting very weird glitches. Post we can distribute the developing the systolic blood to 0.01 maybe. And they can all go in. One of the golden get any kind of shading artifacts that I can now move to this tool. And now I can increase the level to maybe back to the top and middle line. Okay, So now I think it is fine. Okay, disabled, keep up. The next thing that I will do is clear the entire piece. Let's add another cube. Okay, wait, I will delete this and I will select this piece again. This bevel piece then press Shift S and closer to selected. And now I will add a cube for that. It gets created in exactly the center of this, that it is easier to place it. Now I will scale is on the x-axis. Again, push is enrolled. Maybe being a little bit down. If you're getting late, getting the Achieving like it a little bit not be visible then leaving actuarial model. But if you don't want and you can just try to move your Boolean a big lake. If I move it a little bit upwards direction, it has dollar discount. So now what I will do is select this, press I to insert this and proceed to extrude it backwards. Will excite them, they will modify it now, apply this, enable hard and novel and rpois move this back even further. Okay, now I think it is. So the only thing that is remaining in our camera is right in this nice front pieces. And also, I really like these three zeros. Select this piece. Okay, this isn't a complete to select only thing that one of them, what I will do is press Tab. It will get more. Google at any one BCE and pests. Click to select this and then press Shift D to duplicate it. And now I will press B to separate the selection. The now this is a separate collection from all of this to now let's rotate it. First, used as the origin is here. Now if I try to rotate your view, again very vividly for the fall is just change the position of this origin point. So to do that, head over to object and sacral region and origin do geometry. Now though it again and back I had the same that and now if I rotate it, it is locating collectively public our OKR x minus 9. And I listed here. The next scale this up. Move it up in the direction. Seven again, part of the top few. Press Shift D to duplicate this row, gave this to a random collection, and then duplicate this and rotate something like this. Now I think I'm Martin is starting to finally come along. In the next chapter, we will finally complete. I think that in the next video we'll complete the model and create the part in the front. So I will make you very next video and you're watching.
7. Creating the Camera Lens: So let's start with the modelling of this front part here. So before that, what I will do is I will just bring this piece out. And y-axis. It looks better. Now we have to start with the Marlin Road on the eggs, active by 90 degrees. And Gaelic according to their left hand. Okay, now plus 7 and match it with this cylinder over here. First, let's scale this down. Okay, now, from the front view. Yet now it's fine. Now let's duplicate it by pressing Shift key, press and Y, lock it on the y-axis and bring it in the front and keep it here. Now shared smooth them both. And let's all could join them both. Select them both and then press Control J. Enable a horrible smooth and add a level modifier. You see the bevel modifier right now is not working correctly, so apply the skill. And it is now looking at it. Enable hard and nominal. And let's move further. Move to the top view to see properly. So there is another filling them in front of it. So let's add another cylinder macros. What I will do is I will take the corridor to this position here because we need to spawn all our objects here only now. Select this object and then press Shift S, then cause there to be selective. And now press Shift a and add a cylinder. And let's rotate it 90 degrees. Moving to the top view. And then it lives on the line. And add a bevel. Applied a scale. Enable hard and normal and also reduce the burden. Let's create this piece. So for this, I will just add a vertex v less than one on the keyboard to go to the vertex select mode. Now maybe here. And then this tree is this figured out. I'm just pressing E again and again and then placing it along the lines of. Now let's join these two, select them and press F, then plus a, and then fill in the paste by pressing F again. And now bring this out on the y-axis. And then press tab, select them all by pressing a and Extrude and Bevel modifier to this. This vertices here, I can play with this. Okay, Now, let's move further. We will now create the big piece for this. Okay, This one is here. And now let's add another cylinder. Rotated 90 degrees on the x. I'm done. This matches with this. And then let's scale it on nearby press tab. But before enable exiting oil, doing this our pair and then press S to scale this down. I will give this hair for now. And we will arrange later on. Insect the face by pressing I. And you can see the vertices moving. I will get the head at least then beth E to extrude it and bring it in the front. Then again, I will extrude this, fill here. And now let's scale this by pressing S. And then extrude this again. Now shares more smooth and hired a bevel modifier. Workforce next, apply the scale enabled harder than normal. And now we'll select this. Go into the face select mode. Select this interface members in one city more difficult to see. And what I will do that industrial plague. Or maybe I can just isolate this object with this. Let's press I who integrity. And let's place it in here. And now press Control R and add an edge loop here. Now press click to go into the face select mode, hold Alt and select all these faces are the 0s and extrude faces along normal and push this down a little bit. And now select this face. And we should do or the backward completely. Okay. What is remaining? The shape and these. So first, let's add a cylinder again. I rotated this 90 degrees, this in the front. Isolate this and delete the front and the back. Chris. Select them both and then press X, then delete the faces. This enabled lot of smoke and back down. And now I add a modifier to this and apply the scale. This is not placed correctly, placed it here. Now, let's just select this and again, make it smaller. In the down things in the front that enable auto. Scale it back on the y-axis. And now we need to just create this one thing. This piece over here. What I will do for this witness, I will just select the image press Slash who go into the isolation mode and I will go just head on that. Now let's add a circle. Rotate this by 90 degrees. Lift this. When this line. Press Tab to go into edit mode plus 1. And now let's rotate the circle and place these vertices somewhere around here. Now let's press I to insect this i e, e, and then scale this down to here. And now let's clear this part. For this, I will select this toggle x-ray. This here, extruded along the line. By pressing E. Let's delete this vertically, select this and press who believed there were busy. Angling. Clear. And join these two by pressing f 11, this whole loop, by pressing Alt and Shift to select them all, then press F to fill him the face. Similarly I will do for the silos and then bread. And now we have to come out of the isolation mode. And now let's extrude this by pressing a to select them all. Then press E, extrude backward. And now add a bevel modifier to this. And apply the scale. Enable higher than normal. Liver can scale this down. And now I think. So the last thing is to create this piece over here. Let's add a cylinder located on the X and cut through this object. I will select or deselect this piece, this piece and best control minus. Then move the bevel modifier at the bottom. Let's first move. But this thing and lists were dizzy and move them back over here. You don't see them. Again. Now I will select this piece by Shift S then Kosovo selected. Add another cylinder down by seven or top view the x-ray and select it from here. And again, Let's add an edge loop overhead press controller and add edge loops here plus three for the face select mode and press Alt and click here to select this. And extrude faces along normal. Again, Let's create another cylinder. Scale this down first, rotate on the x-axis. These are very, they're predictive tasks that I'm doing. Writing, it must be easy by now. Again, I will duplicate this cylinder by pressing Shift and press Tab, but I get mode, select all these work is being done here. And what I will do now is apply the scale first and plus three. And then celebrity stop this and I will be the ligand like this. By pressing Control B and shade smooth everything we have here. Also enable or if you want, you then join all of them. So just select them and buy them, then press Control J. And enable auto mode for all of them. And also left side the bevel modifier. Then, okay, now I obtain the modeling of a camera is finished. Let's see the fentanyl you one more time. And this piece here will, I will call from here. I think this is a single piece only suppress shift could do to copy, but located on the X axis by 90. Best one. If you wanted to again place them in some other places also to create variation. And here in this middle piece, press Control and one for the back view. And let's hide this image by pressing X. Then press Control 1 for the backside. Bindings for front view and control plus 1 is hot backside you would like to add another cylinder. Rotate this 90 degrees, place it somewhere in the middle here, and bring this out. And then let's select this full control, my modified here. Let's shift to select them both down. Back here. X plus tab, what I get more, press I to insert this. Does this fit on the top then dress I select 311 facing by pressing Alt and then collecting is holding all the faces a little bit outward. And the bevel modifier enable auto smooth and all of the shapes that I pink now, a camera model is finished completely. So in the next lecture, what we will do is we will apply all the modifiers. Because right now, if I move this right now, I can move this thing. And modifiers that not a plate. So in the next chapter we'll apply all the modifiers. And after that we cannot make any changes to your margin. Margin. So we'll apply all modifiers, unwrap the urethra, and then export the model to substance painter protection. And the US should save your files. Also save your file. And I will meet you in the next lecture. Thank you.
8. Finishing Touches: Hello guys. So before I went ahead and actually apply it all the modifiers, before that, I wanted to do a few more things. So the first Did I forgot to create this thing. Over here selects best stab wound to the exec mode, press Control, and place on edge loop over here. Now what I will do is press Control B and make sure you bevel this and you only have one segment in between, the discount one segment in between and their religion. You would have this modality. And then Norman plus 2 and select this middle edge holding Alt. And then click here and select this middle edge loop. Then press Alt and S to make it like this. Okay, now the next thing is, if you feel like this is looking very low boiling, this is not looking like smooth distinguish thing. But what we can do is we can make this mood, but it will increase our polygon. So what I will do is I will make them smooth because they are not making this model for late games or anything. So again, we get a high-quality food will become loop but hyperlinks. But if you want to keep it local evenly so you can get with this destroy. So you cannot do what I'm about glue. So what I will do is we'll select this object and add a subdivision modifier. And we still make these mood. Now as you see, if I press Slash to isolate this using the can hear a real kind of glitches with us to solve this, press Tab. Key for face select mode, select this top face and fess I do. Insect is dismantled the issue. Then again press Slash to come out of this mode. Now I will add a subdivision surface with this one. Look now it has more smooth everything out. So it looks a lot better. Now what I will do is press tab, select this object, press Tab, but it is. And then add an edge loop over here. Who made this a little bit sharper? I'll say we'll add an edge loop here. And one here. They're tied, run a loop here. And I think this may define a subdivision modifier to this one also. Select them then that insect, the phase that they sing, I left side the subdivision modifiers too. If all these glitch, the leg, the stop pin, this top face and best, I like this one. Picks isolated first. Isolate this one and this one. What we can do is we can join them both. And let's solidify. And let's add a subdivision modifier. So now this is looking something like this. So to solve this and just move the subdivision, put on the top of the solidify modifier. So what this will do is further subdivision modifier, subdivision surface modify. It will make everything smooth. And then we will apply the solidify modifier. So now I think, sorry to bring everything back. Now I think everything looks very smooth and high-quality. Also just isolate the function by pressing slash and also ADA. In fact, on the Mac side. In now I think everything is done. Let's check the model from every side. Nosy. If a lake remove the subdivision modifier, you see how low quality and low quality this is looking. So if you're making lake the object for games or something, we can keep it the same because we want to keep our nor does that look well yet possible. But if you're just making it for creating high-quality assets, you can just enable it. And we have a high poly model here, writing them or lingual. Finished. In the next chapter, we'll apply all the modifiers and then go ahead and share it and everything will thank you for watching.
9. Exporting to Substance Painter: Welcome back. So in this video, we will be applying or I love modifiers and also complete the UV unwrapping. So at this point I would suggest you always to create a separate bring that file, put applying all the modifier. Because after you apply the modify it, you cannot, you cannot make any changes to your model leg right now I can move this box here and create this boolean, all it here. Or I can move this boolean over here, or that you and I can change the value of bevel or something like that. But after I apply everything, I cannot do such thing. So I I would suggest you to create a separate file for this. We'll just go here and you Ben, see that. And then create a simplify. So to apply on the modifier, just press a on your keyboard to select them all. Then press FV and Type Convert to mesh, where it is going to work to mesh. And then this click on it. And now you see all the modifiers that applied you cannot be any modified here. If I move this box now, nothing happens. So now what I will do is first I will hide these reference images because you don't need them anymore. Select them both. This M, create a new collection and name this at a friend's images. And let's just hide this collection. And now the next step would lead to delete all of these boxes that you can be the cause data? No, you know, just select them and given them. Make sure you don't delete any actual Barto the margin by an escape. All of it. I think it is the null, the null space of a selected them all. Rest controlling and apply the scale or the scale set a plate. We need to do this before you reinventing the necessary steps for their celebrity, more than continually apply the scale. Go every turn on my screen bust. Though you are going to apply the skin. Let's head over to the UV Editing Tab. You'll hear. First, let's enable this and enable display spreads from here. Press a, select them all and press U on a keyboard. And press Select the smart you reproject options, and then click Okay. So we haven't got ourselves a pretty nice UV unwrap right from the get-go to be using this UEN rapidly, the base e. And now we'll do the average length scale. And then back I linked. Now, when we are finished with the UV unwrap, I will export this model load or substance to interrupt. So press a again, select them all. Go to the export, then elect NBS. And I haven't explored this here. Let's name it camera. And I have already created like a preset for it, all this export setting for substance they interested, I would connect this. You can copy my settings. The first one we could check selected objects and make sure you have selected everything because it will only export the selected objects. Check mesh from there only mesh because the other one lives 40 mesh and not anything else. And the rest of the thing remains him. Also, you can create a pleasing from their late. You can make your own heading. Then click this plus icon. So blender will remember or low settings and you can just choose the preset from air and all the settings will be applied. I will select substance. These two are the main options. Everything rest, everything remains same. So now I will export this out, export FBX. And now let's open up firstly painter and check if the export disconnected. Also, if you, if any of you who don't have substance painter, you can get it for like a totally dry. Or you can also get a license for free if you have college ID or shouldn't I ID card from your school, you can get it for free. But when you say I'm also using a spoon and additionally, you can get that if you don't have it, select new file here and then camera, and then this file we just exported. Open it up, rest all the settings that immense him, and then hit Okay. Now just check the margin. Put any kind of weird glitch at anything. If you see anything, then export this again. Right now I think everything is fine. But you guys have a small glitch. Not a glitch, but the edit while we export. While exporting, you should check this head over here and then select piece or the annotation. And just check that all of your objects appeared in blue and bite down. They appeared indirect. And don't worry, just need to later. For example, is one of your object looks like this. That means just the normal sub flipped out. And if you export this to Substance Painter, you won't see this object in substance thinker leg. If I export this piece out, I go to Export As and effects for this fanout with the VCF and create a new project. Just to show what kind of air. You see. This looks very real AND cannot see I'm Meghan Greece properly. This is because the normals are flipped. So if any of you, by chance have a red colored object here in the face orientation more mature this properly, Brendan, we should know is that when we go to Substance Painter, you won't be able to see this object properly. So let's do this. Go to Face Orientation. Select your data objects as bad. Press a to select them on. And then if the end to we calculate Talmud, the SUV calculate are the normals and you have the Flip Normal would be solved. Let's export this out again. Better to select them all. Export FBX and just replace this file. Yes, now, let's import this once again. And now you see everything is fine. So let's first go here to the display settings and enable. I'm releasing. This will remove all the unique you see here. If a dividend, it will appeal appeared almost. So now whenever you bring any model to Substance Painter, the first step is to make the mesh maps. That mesh maps are used for lake whenever in other down a project you will use stuff like the smart man, smart material to be using mesh map for that by the Amina substance painter would be using mesh analysis for that procedure. We need to make them. So to start, I will make the mesh maps. If your computer like loss, loss fx, then we'll put one key or to kick. And if it is high so that you can go for today or even focus, I will select to enable this. And all. I will go to MDA leasing property and a delayed. Again, if your computer is both peg, you can move it to a folder for now, disable this ID map. We don't need this in the ambient occlusion, 10 to a 100. You can keep it on 60 board on leave if you don't have a powerful machine. And the second law, you can indeed on default, if your completed in the loop, I will leave them like this. And now let's big the selective pressures. And now the making of the mesh maps is finished. And now you see our model looks much better because not all the ambient occlusion and everything is coming in. So now first let's see, let's press Control S and then save it as gamma texturing. Okay, I think that's enough for this lecture. In the next lecture we will start with addiction process. So I will see you then.
10. Texturing the Camera: And it combines there to start with the texturing process. So in the last video, we big the mesh maps for our Martin. If any of you guys are having issues in baking mesh matter, I will save as this substance as camera underscore the NorTech shooting. This is the file. But just met mesh maps big. So if any of you read that having issues with baking mesh map, you can just directly use good pilot which will be provided to you within that is rooted. So now I will list the fixturing and we're going to lecture in this. So let us start. First. I will select here in your shell and type item. This item brush women used as our base material. For these. What I do is click here. This is the geometry mosque, right? Noise appearing on everything. You don't want to run everything. So just click here and right-click and then exclude or do you think this has moved from everywhere? Then our diluted click here again. And now I'm going to just click on those pieces on which I want this layer or this item dredged material to appear here. I learned here on this discipline, this one, this one, and maybe this phenomenon. All knock over here also. Just click on those pieces on which you learn this effect to appear up in this cartoon. This. And now I think these are the pieces that we learn, the island Madeira. If v by 10, forget any of them we can add later on just by clicking here and then just clicking on the UK. And we don't learn this and this. So now I have any goal here in the prediction that light now you're actually looking lady disconnected everything looking really weird. If I change this from Dr. Lynette, everything will look a bit more uniform. You can change this ripening and prediction. Now what I will do is say that roughness to maybe something like needle pointing to one over 0 is minus 2.1. Next step would be to increase the sale of these brushing pattern by Lynn domain is something like and indeed, and let's in-degrees the brushing and density to 0 blank. We learned glowing effect to be too harsh. I'll still be left with this piece and this month we collect this again and the filling them both. I by mistake, select or deselect them. Okay. Now, based materially them even polystyrene only based materials, then we relied even more layers on top of them to make it more realistic, vague, roughness, and then everything will create a new layer. By clicking here. Let's name this. You can change the metallic value from here by adjectives and megadiverse FDA metallic value to one. And this value is 0.17. Yes, something like this. And then I will change the color. Something blue. I think I rewarded for being in the layer. Double-click on it. And I just want this on this middle piece. Click here. And you can move it any color you want, mainly on your preference. And now let's click on this layer, press Control C and Control V, and duplicate the layer. And we will make this black. And I'm going to block him again and click on Boolean. And Let's rename this to blackmail. Create a glass for the lenses. Will lead to add another layer, which black with the roughness. And this will be a glass material. So again, click here. Let's first rename this to black. Click here, click Exclude all this one. Now I will show you something like, for example, I wanted appeared on this piece also. But I don't want on this lake the complete piece. I just wanted worn get on this, on this face. Before that. Do geometry mass want we use usable because the geometry mass locks on complete objects like I cannot select a singular face like that. So for that I will just click here, include them all. And instead of genetic tree mask, we will use something else. And for that, I will go here and add a black man. Now if, now that I've added a black mark, everything disappears. And now if I select this tool, this one. Now this tool will paint or whether we divide on deck on this black life for black. And white means wherever right, it's painted black part would be visible. Leg effect. Take this brush and take the color to white. And then I start painting, you know, material appears the wet here, but I haven't been laid. This material would appear the God died down thinking on that mask. So I will undo this and I will select this tool. This tool is specifically for this purpose only. So I will select this face. And right now, if I come out of this and even see only the face is being affected with this Medea. Okay, Now again, the black marks and let's start adding. So now you see I cannot go and just click on every single field. But there are a couple of different mode. This is the face select mode and this one is the object select all of the mesh. I will click there. And if I click on this object, and this will completely get for, this is exactly what we need. And on this big piece also, okay? Now what I will do is I, the top of this view as a golden late Michael, we just duplicate this Ivan brush. Let's bring it on the top. Exclude everything. And then click here. And now if you see, if I again click here this whole mechanism. First, let me change the color to yellow. So now I want this to appear on this. Could you head on the top? I don't want this to appear on the whole thing. So I will again include them all. Had a black mask. While selecting this, will select this tool and the mesh fill tool, and then click here. Now only this one piece gets affected. Let's add the gold metal to displace. Also, click here again and click this link. Okay, Now, I think each and every part has gotten a symbol based mechanism. Now we will start adding some detail. So the first thing that we will add is the roughness variation. But now you see, you see this thoroughfares is completely realistic. Objects don't have it absolutely smooth surfaces like that. So again, add a fill layer. And this layer we don't need the pellet information, are the metallic information normal or height? We just need the roughness in condition. So what I will do is as you change the roughness of the complete thing with this single layer. For now what I will do is first let's change this to radiation. Had a black mass disappears. Now add a fill layer. And I will type here. I have already told it, but we show you I will add a grunge maps for brand map is Laker detection, legged dirty mass, which we can use for to create some kind of looks like. If I click there you will see, You see. Now just go visit, not smoke anymore. And we can see clearly some mediation will increase the quality of my textures. Now if I increase the effects, very clear to see. Now if I select this map and we can control the effect and everything. And now as you can clearly see, the surface is not smooth anymore. It is very late, but we don't want the effect to be this harsh. Just undo everything. And I again select Dr. Leonard from here and go here and mess to maybe something like little point to it. This is very subtle. I will take you to 0.25. Yeah, this is better. Now let's select the grungy map and that I had to create a nice effect. Yeah, I think this is looking fine for you. Right off the back. There isn't much bigger defense. In how the modern loop, if I turn this layer on, you can clearly see that effect. And you didn't make the model look more realistic. Maybe reduce that of negative 2 high freight. Now, with this Medea is finite. So you can take it to a year according to their preference. It really does not matter that much. So now the next thing that we would add another layer and we will make this Asda does start the dirt layer. Yes. Naming dirt, dark color. And left either lack mast again. And this time now, I've been warned you with any grungy map, but we will use a smart man. Smart math actually acts like a similar way in advance. In the similar way a grunge works, but it has more than like customization that we'll go here. And being in this edges blur. So if I just drop it over here, you see a marble looks really weird because for the dirt to work correctly, we don't actually want all these channels. We just want that color channels. The one-by-one miscible on the channel. And you see now the mortal model looks very, very dirty and just click OK. You can see the defendant. So what I will do is click here and then click on this Moscow. And now I will just reduce the 3050 Vinci. You can increase and decrease the direct effect. You're going to increase the contrast and many other things too late. A picture in your own. So this was the reason we actually big those mesh maps in the starting because we wanted to use Martin mask like this. So I will just decrease the valence and start increasing it. So what I will do is you could fill here. But now I'm Martin, looks very dirty, so good for this. I will just decrease the opacity of this layer altogether. But we'll take it to maybe something like 65. Now you see it has a very nice little defect menu. Then choose your breath. And even in Greece at OU and declared it more. I have infected at 65 or leak. Again. Now, the next thing would be to add, okay, renting it did not actually, despite before this, I will just use this black mega lonely called copy paste this again, let's review them all. And what I will add a black mass. I feel more isolated. I think that is all done. So I think it has been not have added that of metals will appear in this one guard by level, like this really happens a lot in substance I elaborate selecting here for the basis. Let me show you then you select like this. If I select here, the bat feces will also get selected. So we don't want that. Let's undo this. And what I will do is change the color back to black. If I told you guys that way, it means the effect would be visible and black means it would not be the dividends. Just paint this in black. Okay, now what I will add some more pink. So I want this black pieces to have leg avoid our claim. So what I will do, I'll just duplicate this island, bring this agriculture or maybe here and include them all written like color. Okay, Now let's add a black man. And from the mock, mock select this. A strong idea that I've got is I've got the material effect on them and I will make it a little bit bright. Okay, now, the problem that guys, is that we don't want this effect to appear on these vitals, are these, but I just wanted it on the black pieces. So the thought that I haven't guessed, create a new folder in this folder and let us name the folder. And now if I click here and exclude all lake effect disappears completely. And if I click it again and just select both objects, you can see we just get the object effect on me that deliver pieces. This one. I think this is all of them. So now I will just open this. And again, this mask. You can increase or decrease. You'll be balanced from here. It would increase the effect and increase the balance and the settings. Then I think something like this. It may be, is this flamingo. Who could do that. Click here. Let's add a blank layer to this and paint over it in. Now, if you've seen AND the color to white and white to black. And let's just now one more thing that we have not added any heightened condition. And in this lab ingest new data. And I will add a black mask. Finland. I'm just choosing which map. There's nothing happens because we are not saying any height information. The high desert, the Hiking folder has appeared, but it isn't very hard. We don't want to set this to negative or needle pine beetle. When we learned the hiding, Purdue faculty will again decrease the balance. Increases scratch styling, make them smaller. And I think something like fine. Now if England, if the effect is pronounced few degrees even further, they could do something like pink circle. Now you can see the blood also have this effect that we can easily remove this by adding a paint layer and then just color to black. And the effect. You should alarm to add Lake some more detail. You can go ahead and add another layer and add like this also. Again, this is very hard. And you get something like this. But I will not use it. I will miss you in these scratches. I think this is fine. In the next level. Even go ahead and export these textures out in Blaine. Export these textures for the blender and then remove it. And that I would like to thank us for watching in the next one.
11. Exporting to Blender and Rendering: So before we export them all our textures out and then blend that, I would like to make some additions to this. So in the last chapter, the scratch, but I would like to add some more hiking to add a little place it below the pain cleared. And let's add grungy map. This one. I think this lady cycle and loop through the night. And now we don't have our classes anymore. They have all disappeared. So there's an easy fix. And yes, we need to go ahead into blending mode. Like if you have low good for the sharpening might be familiar with. There are many different types of blending mode and we just need to select the Linear Dodge. And you feed back to that Vietnam, Denmark, many valence, then you can, even, if even that they are here. So we can add this. It makes them much more realistic, I think. And again, we have to remove these from here. So let's select the paint layer, light and been kicked off. Another thing that I will add it just to give the flake a little more detail. I add these I have provided to you. In the resources only you can select these three, bring them in, and press Control a to select them all. And then select action and net encode them all as texture. We can import them could occur in patients that have peak load. The data be a nutshell. If we add them to the project, maybe it'll be added only could disaggregate me to apply to absolutely be limited in any other project. They won't be available till I will add this to my lab video leaked like I can access this at anytime on any project. So let's import them, make sure to import them as Alpha. Now are typing, I will add another paint and they are the same. I will add a paint layer. But what the difference between a paint get an affiliated we can get information of a paint lead at any given time and it won't change the information of the earliest true. What this means is quite exam. But if I collect this thin layer, so this is a thin layer right now if I took a lot of them, you can easily see this affected in our model. But if I go to a plant here and I will get bent, I haven't changed the color to red. You see that? This light color, the main museum and knowledge, I think you see red color being painted. This isn't a difference between bilayer and paint layer. I will add a paint layer, select this alpha, go and double-click on it to get it. I can just stamp it like this. So what I will do now is when we select a color, you can, if all of them are collected and you need to select only one, hold Alt and then click on it. Now only color selected. And you see implemented like this. And now we're diving, do it color to something light. We will also activate them making channel and make it clean metallic. And now I relayed the height channel and give it a height of 0. Okay, in this field, ha, I haven't given you my needle Fade maybe of electrically neutral blank. For now. Points to the I think it's not displaying doing you can scale this leg holding control. And then moving that I acknowledged button to scale this. Scale it by holding Control and left and on the bottom left. I'm here to take a look. If you really don't like this type of shape, you didn't just skip this and not add it at all. I think it looks good. I will add another line here. Yeah, I think this looks good. If you guys don't like this one, a different color, you can change it. I will add another pin back with this, this lower measured, actually the company that made this camera, Lake company in which the camera is based on their logo. Next sacred to something like yellow. And maybe, maybe you can do one more thing. This is the Gould edges live or die. Can you go over here in this lead in the paint layer, then tell him this logo and I can paint it like this. You see? You can get good with the paint layer, select the Alpha, and then just bend. The leg is not necessary. You can just skip it altogether. But I think now the model is complete. On my site. You can add anything more if you want or make any color changes as you like. Now I will export the picture or to export them, that's Control Shift. Select the output directory. You can save this anywhere, I will save it. I will also provide you with the textures to have any browser and you can connect B and needing to say is I would take two foci, you can reduce it if you don't have a strong beat. And then the final thing is to select the output Template. So they know that output template I've created on my own. So I would need to write how to create one. So let's start from the beginning. Elec this PBR, metallic roughness, and just loop again. And let you guys can name it blended, but I already have a blend that out. Cook and blood. Name it Blender temporary. But I will later on, but you can name it, blame them, and you can always use it whenever you are exploiting stuff too. So the only thing we need to make it an anomaly tannin, we've got clean and direct text, but blame that actually. Just drag and drop it over here. And select the RGB channel from our new channel. And now do them. Linda, normal in the OpenGL from actually need to use the OpenGL format. And this is the only thing that we need to go back to setting in the output template. The bottom there will be oil per template. And now this hit Export. And the clinic to finish, we'll export is done through this. And you can save this and close this substance on, maybe just opened Blender. Now, I've written on the face orientation and create a separate file for the name. Okay, Now the first thing that we need to bring in our textures and let it go. I really felt your shortcut. You'll be shocked to bring in all the textures at lunch. Plus lets you go into materials tab and give this a McKeon. Let's name this camera and select. And while selecting this object only press Control L, link medallion. Now, each and every part of the Martin has the camera on Wikipedia normally do now to use the shortcut that I'm about to tell you, you need to enable them nor granulate add-on, enabled the noradrenalin add-on, and then collect your principal VSD here, and then press Control Shift Enter. This will open this folder in File Explorer. And let's head over to the received data. Just select your texture and select them all. And now I'll just press principle it extra setup and set up everything on its own. We have our actual set of really easily bridging have anything. And now let's render it out. Head deliberately lender. And let's select cycles. Because I got very realistic, has completely legal. And GPU if you have when handling there could be enable adaptive sampling and denoising, enabled phone book. And that I will choose the object. So now we just need to add some lighting. Hello to Bali Evan, I've already downloaded this HDRI. You can also download a photo studio lended oil from polyhedron. I will also provide you with the link if you aren't good at it. Or you can just go to Bali, haven't downloaded, either leave, the link will be dead and that is force it, but it's downloaded from here into gear for anything. And in dense to stay with the HDRI, elect them void. Best, shifty and virtual environment texture. Open. I have saved in my Download. Open it from here. And let's just connected. We have. So the next thing that I read in the film tab, I've been enabled so that we don't have to feed the HDRI again and again because it is kind of unnecessary. What I will do, I will create a work in normal, different tab. And then bringing together the camera. Let's dab to go into the play integrity mortar and then extrude it on the upward direction. Enable. Apply the skill. And then press Tab. Mcdonald on tab, then select this edge and then press Control V. And then they'll live. And now I feel like over time we'll do very quickly. Or maybe just you go to the layer. And let's just delete this Agnew and electric light color. Tag, the high point. Oh my God. Yeah, this looks much better. And the global Venus quickly Control Shift E and then hit export. We don't have any done and the textures automatically update here. Now, It's hard to look at and compare shift and add the camera. This first layer, set your screen, I'm paying like this, whatever the angle you want during that egg. And then rest control. And to bring the camera like this. And then press M to bring this tab and then click the View, then enable camera. Now I can just move it this way and I can easily aligned with my camera. Okay, now, let's head over to the render view. Instead enabling that region. But we don't have to look at. Next, select this plane and the bottom. And the complimentary colors. Now I think you'd find that you have. I think that came out pretty nicely. I don't see any problems. Now if you would like that and then you can pay deliver the image tab. And you see in this slide here only 100%. Now, if you want another camera, the shift they add another camera. This camera, I don't know the editing, editing, but now we need to change the active camera. There are two cameras now in our theme. As you can see, this camera has a black triangle, which is completely, which means this is the active camera. If I press 0 on my numpad, you'll see I've taken to this camera and not this one. But we change the active camera. Just select this camera and press Control 0. And this is the active gamba. And this is not the active camera anymore. But if I use the control oil shock, I would be changing the position of the camera, the lake I can and the leg this maybe even yesterday and that it any way you can eliminate it from the back, fatal like this. It is totally up to you. I will take off from here and disable list. And now if you want to go back to this camera, select this press Control. And you will get into this camera. And now I will select this camera as the active one because I want this one. The active camera. This up on the x axis, the next Hippodamia. Now you can see from my site that I wanted to go if you have any kind of dropping moments and I will be happy to answer them in any kind of traditions. And watching. I'll see you then.
 Aniket Rawat, 3D Artist