Transcripts
1. Introduction to Class: Hello everyone and welcome
to this new course. In this course, we will go
over the entire process of creating a whole clock using blender and
substance painter. From start to finish,
we will go over the complete
pipeline of creating a high quality realistic prop. Starting with modeling
the prop in blender, texturing in substance painter, and finally, lighting and rendering a portfolio
piece back in blender. This course will
help you improve your three D prop modeling
and texturing skills massively as we go through each and every step together and learn many
different techniques. After finishing the course, you would easily be able to create the renders shown in the trailer and create high quality
props of your own. This course has 4 hours
of content and we will go over each and every
step in this course together, and nothing will be skipped. The course does not have
any kind of time lap, so that you can follow
every step easily. We will start by
modeling the prop in blender and learn about
various modeling techniques, and also learn a lot about
different modifiers. After finishing the modeling, we will apply all the modifiers and we unwrap our
model for export. We will import our model
into substance painter. To start with the
texturing process, we will start by baking the
mesh maps for our model. We will learn to create high quality and realistic materials and the key features
of substance painter like smart masks, generators, smart
materials, et cetera. At last, we will take our models back to blender and render them. We will set up the material, lighting and the cameras
and learn how to use HDRIs to light
up our scenes. We will finish the
course by taking a portfolio Radi render and a little bit of
Photoshop editing. This course is for everyone who has a basic understanding of blender and substance painter and wants to upgrade
their skills. So I hope to see you there
in the course. Thank you.
2. Creating the Base Shape: Hello and welcome guys to
this new tutorial pay. We will be creating a hall
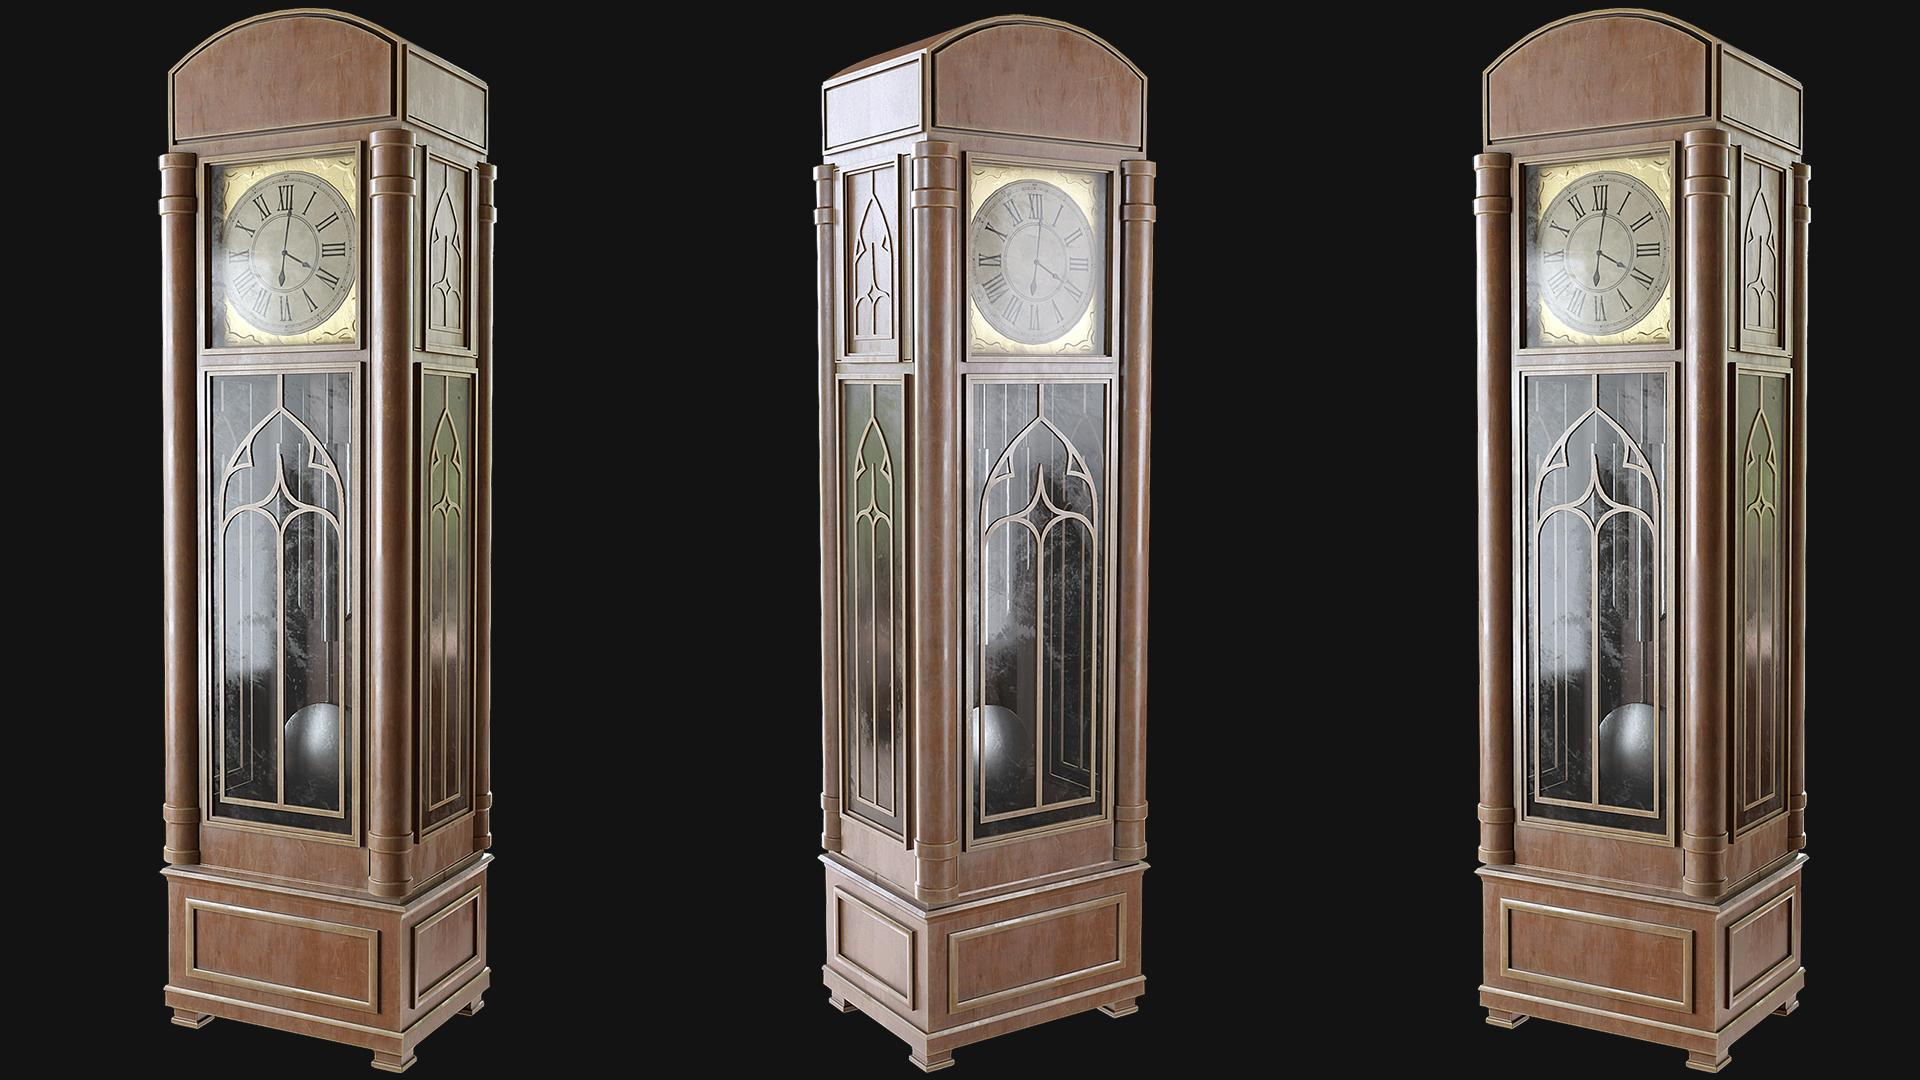
clock or also known as a grandfather clock in blender
and substance painter. Here I have opened
up a new blend file. You can just click on General
Area with a new blend file. I will just press
quickly a and then press delete to delete everything
over here in our scene. Also, I will turn on my screen cast keys that you can just see all the shortcuts
that I'm performing over here in the
bottom left corner. As you can see, if I press all the shortcuts and also the mouse clicks are
being repeated over here, that makes it a little
bit easier to follow. All right, in this
very first lecture, we will just directly start
modeling of our oil clock. If you will go
over in the course files over here
in these folders, you will find the
reference images folder. And we have these two
reference images, the front and the side, which are basically
created by myself only. We will bring them into
Blender and start working. Press one for the front view. All these views are different orthographic views to help you better in working. You can see over here, currently we are in the user
perspective mode, but if you press one
on a number pad, it is the front view,
three is for right view, seven is for top, and
nine is for bottom. All right, for the front, I will press one first shift and go over to Image and
add a reference image. Then just select
the folder in which I have both my images and select the front
image over here. Like this, you can
select pres, then y, lock it on the y axis and move it a little bit
behind, just like this. Now you can press three
for the right side view. Now I will press Shift and
add another reference image. And this time we will add
the side reference image. Again, I will select press then X and move it a
little bit backwards. All right, we have a
simple set up over here. If you press one, then you'll
see it from the front side. If you press three, then you will see it from the right side. This way we can work on our model with both of the angles and get
everything correct, all the measurements
and everything. All right, with this, we can just right away
start working. What I will do now
is I will just press Shift and add a simple cube. First, let's just scale it down. And first create this
bottom piece over here. You can scale it down like this. First, we need to make sure that both our reference
images are matching. Now, press three. Yeah,
I think they are. You can press Y and
scale it up like this. You can just move it around and scale it down to make sure
it fits all the corners. Obviously, you don't have to go like exactly by the
reference image. If you want to add some
things on your own, you can definitely do that. But we will for sure
roughly follow it around. Now, press one, just again. Press Nx and scale
it up like this. Now press three and make sure everything is
matching up perfectly. Yeah, that means our
reference images and our model is aligned
pretty much correctly. Yeah, let's go ahead. All right, next what we
can do is, let's see, let's just create
the basic shape first and then we'll work on creating these
ridges and everything. Let's add this thing now. I'll just press
again, add a cube. Place it over here again, scale it down according to my
reference image over here. Press three for the right
side view, and select it. And move it over here like this. Press G, then Y, and move
it over here in the front. Now I will just show
you a nice little trick that you can use the mirror
modifier to copy it around. We don't have to duplicate it like this by
pressing shift pre. Just select go to modifier, Add a mirror modifier. You will notice
that nothing really happens because
currently we want this object to be mirrored
according to this object, because we want it like all
four sides of this object. What we will do now
is we will select the mirror object as this thing. Select this object, and in the mirror modifier,
select this piece. Now you will see
it is mirroring up perfectly on the x axis, on the y axis, and
on the as well. We don't want it over
here at the top. Remove the Z axis. Then you can see if you
select it and move it around, all of them would be affected. Let's press one. And now we can shift and add the
larger cube over here. That is at the top. Scale it up. Press three for the
right side view. And sorry, this press then, uh, just a second
press then Y, I think. And scale it down like this. T here, just like that. We are looking pretty
good over here. Next thing that I want
to do is obviously we have this curved shaped
over here at the top. Okay, just a second. I'll
have to scale it down a little bit more on
the x axis like this, just so it fits these lines. Yeah, that's pretty good. As I was saying, we have
this curved shape over here, but I won't be adding it
right now because we have to add like a lot of
edge loops like this. If you press control R, you can add edge loops very
easily across your model. If we give this shape right now, I will just quickly show you
how we can give this shape. You can just select
press control and add edge loop in the center. Right click, and we will
have something like this. And then you can just move
both of these edges down. Move this a little bit up. Also make sure your
x ray is enabled. That way you will be able
to select all the vertices. But I'm just showing you right now, I'm not really doing it. Then you can just
select this edge tens control like this. And if you scroll it to
increase the number of edges, you can see you can
smoothen it out. As you can see, it
is not perfect, so you can just move it
up a little bit more and it takes a little bit of like tries to get it perfect. We can just give it
a shape like this and select it all
and move it upwards. Now it is pretty
good, but as I said, as soon as you like
add this shape, it would be like
really difficult to add these edge loops. As you can see now, they won't go around the
entire object this way. They will, but around
here they cannot, because we have a
weird Ene in between. We will add this
shape at the last, I think when we have created all our live ridges and all these windows that we have to create in our main object, this is what I was getting at. I will just undo everything
and keep it just like that. All right, first we can start by creating this small piece All, let's go with the smallest. Let's create this one first. This one is really easy. You just need to add
edge loops wherever you feel like there is
like a shape change. If you want to put it that way, then you can just select that particular loop
and scale it down. Like this press to scale down. Now you can place one over here. Again, scale it down. I think we cannot really
see it properly, but we have something like
this over here. Obviously. Again, as I said, we don't
need to follow what I say, the reference images exactly. We can give them a little
bit shapes on our own. We can just select this
face at the bottom. Press to insert this, then press to extrude
it downwards. Yeah, as I said, you can create any of
the shapes on your own. Then you can select
shade, smooth this. And the shading will go all weird to smooth from over here in the object
data properties. And then it will
have nice shading. One more thing that we
can do is to improve the visibility of the edges that I like to do
with my projects. Go over here and enable
cavity and shadow. Just make everything
look a little bit better and easier to
look at this way, everything looks a
little bit nicer. You can just enable
these two things. Also, if you want, we
can select this go into modifier and add a
Bevel modifier as well. You can see the Bevel modifier will smoothen it
out a little bit. If you want to add that, you can definitely go ahead with it. Enable harder normals. As soon as you see if you
disable harder normals, the shading is a
little bit weird. When you enable it, things
look a little bit better. You can increase the segments, but I will keep it at one only. If you want to select
the complete loop, you can hold Alt and
select the loop. You can see if you
scale it down, you can create
these small edges. All right, I think I'm pretty happy with this small shape. Before we actually proceed, let's just quickly save
our blend control. Plus in the blender
files folder, I will just save this as. Let's save it as a block. Yeah, let's move ahead.
I will select this. Now, one more thing that
I want to mention before we actually start working
is whenever you like change the scale of the objects like this or like anything, Whenever we change the scale, make sure to always press control and apply the
scale just like this. I will just quickly do it
for all three objects. Select press control,
and apply the scale. I've explained this in
a lot of my tutorials, but let me just
quickly demonstrate by an example that why
we have to do this. I will quickly add two cubes. You don't have to
do this, I'm just showing this for
demonstration purposes. I will press and X and scale
them on the x axis by three. You can type in three
on your number path. They will be scaled
just like this, just so that they are both
scaled exactly equal. Now, both of them are scaled on the x axis by three times. And I will apply the
scale for this one, and I won't apply the
scale for this one. This one has the scale applied
and this one does not. Now when I select this one, the one that does not have
the scale applied and try to bevel it to
bevel any of the edges. You can select them like
this by holding shift, then risk control will be
to bevel it out like this. Let's select all of them then risk control and I will
bevel it out like this. You will notice that the
bevel looks really weird. It looks as if it
is stretched out. I will select this one and you'll immediately
notice the difference. Select it all the rest
control and bevel it out. You can see that the pebble is like much more uniform over here because we applied the
scale for this and we did not apply the
scale for this over here. Yeah, that's why I
wanted to mention, anytime you do any of
these scaling operations, make sure to apply the scale
because if you do not like, everything will
look a little bit. We had the pebble
extrude in set, all these commands, this
things a little bit skewed, so I will move it over here. Now let's come over
to this piece again. As I said, to create
these ridges, you can just keep on pressing control R and add like a
bunch of different loops. It does not really
have to be accurate. You can just add the many where, then just hold Alt
and select them. We can scale this one up. Make sure to always
select them all. It is not being selected
for some reason. You can just select
it like this. Hold a, select this loop
and scale it inwards. Now add burn edge
loop over here. Again, scale it down to
have this straight line. You can also snap
it to have it like perfect can go over here
and enable vertex snapping. Now when you scale it, then you can just press control. You can see it will
snap it over here, but it's not really
working right now. Press the, lock it on
the x axis like this. Then hold control. And you can see it will snap them perfectly. If it is not working, make
sure to go over here and enable scale so that it
affects the scale as well. Then it will start to work. Now let's hold
again, select this, we can add one more loop
over here and scale it down, just like that. Add one over here. Scale it up. Yeah, this is pretty much it. As you can see, we have created like a nice
looking shape. Hit right click, shade
smooth, enable or to smooth. Yeah, that's pretty good. All right, let's
create these things. Now, over here, the faces, there are multiple
ways to create this. You can either like press
control R and add like edge loops this way and
just place them exactly. According to the edges in the
reference image. Like this. The other way would be to just simply press three
for the face, select, select this face, press
one for the front view, enable x ray, and then
just press to insert this. You can insert this
face like this, then scale it according to the reference
image. Very simple. Both these ways are totally up to you how
you want to do them. One more thing that I
want to do before I actually create this
thing is that you will notice that if you press
three and enable x ray, this thing is also
present over here on the front as well
and on the sides. Instead of creating like two times over here and over here, we can just simply, again, use a mirror modifier
for this as well. How we are going to do
that, The way we can use mirror modifier for this
one is just select it. Press Tab, press control R, and add edge loop
right in the center. Like this, hit right so that the edge loop is
exactly in the center. Then press one, enable x ray. You can just select everything over here on the right side. Then press x and delete it, just so we have exactly half of the object left.
Just like this. Then you can come in the
modifiers and add a mirror. As soon as you do that,
you can see simply, we have a mirror modifier
working perfectly. Now, whatever you do
over here on this face, it will automatically
happen over here as well. That's quite handy
in my opinion. Let's press one slash to come
out of the isolation mode. I forgot to mention it, but whenever you press like
slash unit number pad, you can isolate any
of the objects. It is really handy as you can work alone with those objects
without any obtrusions. That works a lot
better, in my opinion, because sometimes you have a
lot of different objects in your scene at those
times works really well. What I will now do, I want to have them exactly
like in the center. Make sure both of them
are perfectly aligned. To do that, what
you can do is we can use just a copy location. You select them both.
Press control C, you will see the Copy
Attributes menu. And if you don't see it, go to Edit Preferences in
the add on section. Make sure to search for copy attributes and just enable it. It is quite a handy add on.
Make sure to enable it. It is added like by
default in printer. Now you can select
this, then select this, then press control C
and copy location. Now you can see both of them are exactly one place only like the origin is
at the same place. Now I will just select it and
move it upwards like this. I want to make sure
that it is fitting the reference image
perfectly. I think it is. If it is not, you
can move around the reference image instead
of moving them around, because now we have
it perfectly in the center. Let's hit Save. I think this is pretty good
for the first lecture. And we will continue
detailing these pieces in the next lecture adding all
these ridges and everything. Thank you watching. I will
see you in the next one.
3. Adding Details: Hello and welcome guys. So now let's continue
modeling our hall clock. Press one again for
the front view. Let's enable x ray. Let's select this piece first. And what I will do now
is I will just press control R. And let's add
a bunch of edge loops. Press control R, and you can scroll to increase
the number of them. Let's add two. Now hit right click to place
them at the center. Then you can press the Z and
scale them up like this. Now press three for
the right side view. Let's add two edge loops
over here as well. Again, it right ling and press Y and scale
them up this way. All right, Sable, X ray. And let's select this face and select this face
at the same time. Now when you press, you
can insite it like this. But the thing is if you
press one and able X ray, if I try to inst it this way, you will notice it is being insted from all of the corners. And we do not want
to inst over here, We just want it on these
three sides to turn that off. Just press once and then press, turn the boundary off. And now you can see it is being inserted perfectly how we like. Let's insert this still here. Yeah, yeah, yeah, that's fine. I have selected both of them. I thought I did select this one. Now you can hold Alt. Select this loop,
hold shift and Alt. Then select this loop. I will press, if you
press to extrude them, you can see it is not
really working properly. Hit right click and just
undo everything again. Make the selection this time, press Alt plus E, then select
extrude faces along normal. This will help you like extrude them perfectly. Now
it is pretty good. Let's extrude this still here, you'll see it is being
mirrored as well. We do not really need
it on the back side. Yeah, over here is fine. Next what I will do is, let's see, I
remember this first. I just want you to reduce the height of
this a little bit. I think till here is fine. Then you can press Tab, press control, add
edge loop like this. And add another edge
loop like this. Now just select this loop. First, hold Alt and just
bring it out a little bit. Press G, then y, and
bring it out like this. Similarly, do the
same thing for this. Hold Alt and select
the loop again, just bring this out till here. Then I will just
again select both of them while holding shift
and press control. Bevel them to smoothen
this a little bit. To create something like this, I think this looks pretty good. Let's and continue working. Next step is to work
on our main piece, that is this top part. Let's start right away. Let's see increase the
size of this a little bit. Press Tab, and let's just roughly add a
bunch of edge loops. First, we can add one over here. Can add one over here like this on over here as well. Before I actually
start working on this, what I will do is I
will similarly use the mirror modifier like
we did with this piece. But this time, instead of
dividing it two pieces, let's just divide it into four. Press control R, add group
in the center, right click. It will be divided like this. Then press control and
add group like this. Again, hit right
click and you'll see it is being divided
into four equal parts. Press seven, enable x ray and carefully press one for the Tic. Select and select this
side completely x and deleted so that only
half of it remains. Now again, press seven
for top view and select this side as
well and delete it. You can see we precisely have only one fourth of
our piece remaining. Now we can add the
mirror modifier and just mirror it
on the x and y axis. Now it is being divided
into four equal parts. We basically only
have to work on this one fourth of this and the rest of it would be
copied automatically. That is really handy for us. I'm just adding a couple of edge loops that we are going
to work with later on. That's add one over
here. For now. I think we can add a couple
of them over here as well. Let's see if we can
just hold select this, scale it up a little
bit to bring it out. Now after we have added all
the related edge loops, let's just quickly
work on these pillars. They're pretty simple to create. Let's just add them first. Add a cylinder, scale it down. What I will do is I will
again use the isolation mode. Just select this cylinder and select both of the
reference images. Then press now, let's just
scale it up accordingly. I think again, I will
just quickly use the mirror modifier only after we have scaled
it like perfectly. Press control, apply
the scale press tab, press control R and add the edge loop
right in the center. Y x rays enable you just delete
the bottom part like this and just quickly add a mirror
modifier on the z axis. I think disable both
X and Y and just keep the Z pretty simple. Let's add a couple
of edge loops now, like this, three. Let's select these
two like face loops, I think this one is a little
bit bigger, I feel like. Let's create
something like this. Then we can hold three, press three and hold Alt and hold Shift Alt
and select these two. And then just press Alt
plus X troupe faces along normal shade smooth. This enable A to smooth
while this is selected. I will scale them down
because I want to reduce the size of both
of them individually. Go over here and change the
two individual origins. And you will see the
difference earlier. It was being like scaled
as a single piece only. But if we select individual
origins from here, you can see it scales
up much better. I don't know, it looks weird. I under all, let's just increase the
size of them a little bit first and match the reference image. Let's see, Instead of
extruding them out, let's just try scaling them. I will add another.
So poker here. Yeah, I think
that's much better. I'm just making
some small changes to better fit, just
the proportions. To scale it along like
two axis at once. You can press the press
shift and then you can see you can scale it along
the x N, Y planes at once. All right. I think
that's pretty good. Now, suppress latch
to come out of this and select the pillar. And let's try placing it over
here is fine, pre three. And move it out over here it is a little bit bigger in terms of the right side
view suppress S. Then again, shift scale
it down just like this. Very easy. Now let's try to create some like cutting space
for it in our. Like main body, we already
added all the edge loops. What we need to do
is just select it. Let's just select the
cylinder first, hide it. And select our main
model or object. And select all these faces
over here like this. Then what I will do is if you directly extrude
them inwards, directly extrude them inwards, you'll see we have
this weird face issue that appears over here. We don't really want this
face to appear over here. Instead we will go over
here in the tool bar menu. You can press to
make this appear. Then hold over the extrude tool and select extrude manifold. When you select this
tool, you push this in, you'll see it works much, much better and gives
us the desired results. Let's press three in
eval x ray this time. Don't use the yellow bile. We have already
extruded it once. We just press then Y
and move it till here. Just like this, you can see the cutout is created
on all four corners. Now press old plus H to
bring the pillar back. Just try to fit it in. I think this is pretty good. Let's just again select it at a mirror modifier once again. And this time select the
mirror object as this. And just copy it
on all four axes. This looks pretty good to me. I will press, then
shift z and increase the size of this a little
bit on the z axis, on the x and y at once. This looks pretty good to
me. I'm happy with this. Let's say if you want, you can do more changes
to it to the pillar. You can hold Alt, select all these faces. You can press insert them. Press once again to
insert them individually. Then let's say I press Alt
plus extrude faces along normal to give it
some of this shape. Yeah, I will just try and
keep it simple. We want? No, I think just this
simple look is fine. We can add a bevel
modifier to it. Enable harder normals
and enable to smooth. Yeah, just make sure it is not really
overlapping with anything. Okay, so it is
just a little bit. Yeah, now it is perfect. I wish I'll do it. All these things, these are really according
to your preference, only just trying to make it
fit a little bit better. I think this is fine. Yeah, it is overlapping
a little bit over here, so we can move it in
the forward direction, but I think it does
not matter that much. It looks fine in my opinion. Let's move forward x ray. Let's see, Select
the main object. Now what we can create first we can press three
for the right side view. Again, enable x ray. And just add a couple of
moorish loops over here. Let's add one over here, one over here like this. So that we can create
all these insights. Let's save, and yeah, I think this is pretty
much it for this lecture. We'll continue detailing our main piece in
the next video. Thank you for watching. I
will see you in the next one.
4. Adding Some More Details: Hello and welcome guys. So let's continue
modeling our object. I'll press one for the
front view enable x ray. And let's see, let's
start creating these edges over here. So we can just press
three for face select. Let's select this face. I'll just make sure quickly to apply the scale
of this object. And there you can just press
to insert this like this. Then press to turn
the powdery off, and we can insert
this still here. Then hold all select this loop. Press three to bring
this face out like this. That's Select it and also add
a Bevel modifier to this. You will notice that
the Bevel modifier is not really doing
anything right now. You can open up this geometric section
and disable clam overlap. Now everything will go like
a little bit weird because everything is
colliding with each other because we
disabled overlap. You can just decrease
the amount of this, just make sure that
there are no like shading issues and none of the geometries colliding
with each other. I think this is pretty good. We can, let's keep
it 0.001 For now, enable harden normals and
also enable auto smooth. I will go in the edit mode. Press three, select
this phase again, I will just press to
insert this a little bit and then press to extrude
this backwards like this, we can press three, select
this phase and just delete it so that we have
something like this. This will be the place that
where a clock will be there. We will just create
the clock later on. For now, let's just
keep it this way only. Yeah, let's move further. I will now select this face. Is it over here again? Press Insert this out like this. Let's create another
insight for this thing over here like this. Then just hold a select
press to extrude it out. Then I will just
select this one. Also, press to extrude
it a little bit. Yeah, that's pretty good.
I'll just move this behind a little bit. That's
fine for now. Actually, I think what
we can do is we can just select this and press
three, and press X. And delete the face over here so that we have it
empty like this. The reason for that is one
thing that I just now noticed, that we are mirroring
it on the backside. Also, we do not really need
these things over here, like things we are creating over here on the back
side. We'll fix that. Later on, we'll just
delete this all from over here and fill
out the face normally. Let's just keep it this
way, only for now. The reason I deleted
this face from over here is because I intend to create like a
glass panel over here that would be like through. That's why I deleted this face. Let's move on to the right side. Now press three for
the right side. Press tab, enable x ray again, just select this face over here, press to insert this up. Now press to extrude
it out like this. Let's select this face again. I and hold select this loop. And now press to, issued it out. Let's create this
thing also over here. This time you can select
both of these faces. Then press to insert them
like this, this loop. Now hold, select this loop. Let's create this
inset also first, I think I will just do it. And the better way
to do this would be just come out of it first. Yeah, I will just select
both of these phases. I will just press to make
them into a single phase so you don't have all
these edge in between. Just press to fill
them out like this. Now we can create the
Int properly like this. One for vertice Select. And just make sure to move apart these vertices because when the vertices are like
too close to each other, sometimes it causes like issues. I think this is pretty good also then y and
move it like this. Yeah, select this
loop three for face, select select this loop. Now just extrude out again, select the inside loop, press ex. That's pretty good. I will now select this face, press X and delete the
faces to have it like open. Just like this. Now let's
create the top part over here. Let's see. First press
three for phase select. And we have this
thing also over here. So we can select
this phase press. It is not really
fitting perfectly, but that does not matter. We can just insert it
out according to us. Before we create that, let's create this
part over here. Let's see, hold all press X and dissolve this
edge loop for now. Just so we have these
things over here, I will move them down, select this loop, I mean, and press control to level
it out, move it upwards. I think the reason
control is not working is we first need to
apply the mirror modifier. Let's just go ahead and apply
the mirror modifier for now when I think the
pebble should work. Yeah, now just move
it upwards like this. Or we can increase the number
of segments in the level. This obviously, as I said, it does not have
to fit perfectly, but I think it's
pretty accurate. I'm happy with this. I
will select this press. All right, so now I
will just quickly fix this issue at the
back side of our model. What we want is basically
we want to make this flat so that it has
like a flat back side. It looks a little difficult, but it is not that difficult. I will just show you
how we can do that. First what you need to do is
whatever you like extruded out of your model, you
need to select that. I will select this
part. First, Hold a, select this, hold Shift
Alt, and select this. And then just press
X and make sure to delete the words from over here. Now you will have this isolated
part inside over here. So you can just press
L over it and it will select it completely the press X and delete all the words. Now it is really simple. We just need to
fill out this face. Make sure to select this
edge and press two times, and we'll fill it out to
make it completely flat. Similarly, you can it
over here as well. Just select the areas
that you've extruded out. Press X and delete the vertices. Press L to select the inside
part that is isolated, press X and delete the vertices. Now again, fill
the not like this. You can see how
easily we create like a flat back side. That
is what we wanted. Select this right click
and shade smooth. Make sure to enable or
to smooth once again, now we have a smooth
top side as well. Select both these edges. You can press two times to move them along the edge like this. I just wanted to
make it a little bit smoother slash to come out
of the isolation mode. I think we are doing
pretty good now. Now as we don't have
the mirror modifier, we need to select both of these faces over
here at the same time. We can also use mirror
modifier once again, but not much of the
modeling part is left. I think it's fine. We can do it this way as well. I will just insert it once. Select this loop,
Select this loop, shift a, press a plus, extrude faces along normal. We can insert it a
little bit more. Now, I will just select
the face in the middle. Both of them press in
the press extrude, you cannot just directly press. It will be suppress all
extrude faces along normal. That's pretty good. Let's create this part over here as well. What we need to do
is we just need to select all these
faces over here. You can also press to quickly
make a selection like this. Then hit right click to
come out of that mode. Press inside this,
let's inwards, press once again,
extrude outwards, Scale it a little bit
in. That's pretty good. Now what we have to do for next lecture is let's
just hit Safe first. First we have to create
this design over here and these
designs over here. In the next video,
then we can focus on creating the clock part and a little bit of
inside piece that will go in here so that we can create like
something to show off through the glass
panels in our clock. This is pretty much
it for this video. Thank you for watching. I
will see you in the next one.
5. Creating the Wood Designs : Hello and welcome guys. So let's continue our modeling
in this lecture as well. What we will be
doing now is I will start by creating this
little design over here. What I will do is I will just select this
reference image, press on my number
pad to isolate it. There is a couple of different ways you can go
around creating this thing. First, I will just quickly show you the very
simple way to do this. You can just press
Shift plus A and first it over here in mesh, single word, add a
single word like this. If you don't see the option of adding a single word over here when you
press Shift plus A, go to file in Edit references. In the add on section, you can search for extra objects and you can enable both of them. They're pretty handy when
you enable them both. You'll find a lot of different options in your Shift
plus a menu in the curve, as well as the mesh options. I will just delete this word. Let's just add it
once again like this. Right now it is at the
center of this object. That's why there are no issues in creating the mirror modifier. But if by chance your Dic is not added
at the center of this, what you first need to
do is let me show you, let's say if it is over here. If you press Tab into this, you can see you can move
around the vertice. But if you come out
of the edit mode now the origin is at a
different place and the vertice is at
a different place. Make sure you not just
move it in the edit mode, come out of the edit mode, and then move it around so
that the origin moves as well. And place it roughly at the
center of this like this. Then what you can do is select Press Tab to go into the edit mode and
press to select it. And when you press to
extrude out like this, now you can go over here in the modifier section and add
a mirror modifier like this. You will see all your
actions would be replicated. Another thing, if
you want to exactly make sure that it
is in the center. There is one more
thing that you can do. You can just select this image. Let's say this thing currently, wherever this thing is present. This is the cursor.
Your new object will get spawned over here. You can move it around by
holding shift and then using your right click,
hold shift and right. And you can move
it around wherever you see this thing is present. You can add a cube over there. What if it is like placed
over here and you want it to add it like exactly
at the center over here? You can just select
this reference image, press Shift plus, then
cursor, select it. Then it will get
added over here. Now you can easily
add a single word. You will be sure that it is
like added in the center of your object, not
just this thing. You can select any of the
objects that you want. The select them and then
press Shift plus cursor. Select it, then the object
will get added at the center. All right, let's start by
selecting the vertice. And select the image as well that press. Let's
come over here. You will notice that
the origin point and the vertice are at different locations because
I moved it in the edit mode. So you can just go to Object set Origin and origin to geometry. As long as the origin
is the center, it is. All right because if the
origin is not correct, the mirror modifier
won't work properly. That's why we have
to make sure that the origin is at
the right place. Because whenever you
add a mirror modifier, it will work around this origin point only
as you can see. If you enable the set access, you can see it gets mirrored
around this origin point A. As I was talking about, the easy way to create this, do we call it this design? I'm just pressing
again and again, extrude to trace this image
out on the reference image. Trace this design out. You will notice
that when you come at exactly at the center, these to like
overlap each other. Make sure to enable
clipping from over here. So that when you come at exactly
at the center like this, they will just collide
with each other and don't move past like each other. It will stop over
here in the center. That works better for us. Now what you need to do is
just go over here, let's say. And just move it around. Press G to move it around
a little bit, till here. Then press to extrude it out, create the exact shape as it
is in the reference image. Let's do that over here as well. This method won't
be like perfect. It won't look that
good in my opinion. But yeah, it is useful
to use this method, just trace it out like this. And then we will use a simple
modifier to make it work. Let's just join it like this. And then we can select this, and select this,
and then join them. To create this shape, it is roughly accurate. Now the way we can create
design out of this is go into modifier section and just simply add
a skin modifier. You will see something
like this on your screen. Just press Tab to go
into the edit mode. Press select everything,
then press Control, and you can scale
it down like this. You can see you will
roughly get this design, let's say if we look
at it from this far, you won't see any
issues with it. It's pretty good to go and
I think we can use it, but if you look closely, there are some issues. We can enable smooth
shading from over here so that you don't see
any of those weird edges. Also enable to smooth. The main issues that I have with this one is right
around the corners. You will see we get this weird shape which is
caused by this modifier. Only there is a fix for this. It gets caused by this modifier, like you get these
weird corners. You cannot really fix it. If you are okay with this, you can definitely work with this. It looks all right
from far away. The benefit of using this method is that
it is really quick. You can easily create something
good within like minutes. You don't have to do
too much with this. You can also adjust the
size of individual points. You can select this
point, let's say risk control and decrease the size like this if
your design demands it. That's what I'm
saying. Also, it has like subtle overlapping
going on here and there. It won't be that visible. But yeah, it has some flaws. The better way I would say the long and tedious way to do it would be to just
trace it out completely. That way it would look like perfectly as you
want it to look. Yeah, it would take
a little while. I've just deleted that thing. If you want to use it,
you can definitely go for it. I'm just
going to delete it. I'm going to add a
new single word. Let's move it over here. Similarly again, we can add a mirror modifier
and start excluding. You will notice that
the origin point is over here and the
vertice is over here. This time it does
not really matter. It does not have to be
at the exact location because as long as the
origin is at the center, the mirror would work perfectly
and there is no issues. We don't want to this time, place the vertices
in the center of this because we are going
to trace it properly. Place them over the
edges like this. Let's just create this
thing as well like this. You can take it till here. Then press and make sure to enable clip and
then just join them together over here.
Let's start now. Now you need to just trace out the entire outline
of this design. It won't take that
long, but yeah, it is definitely relatively longer than the earlier method. Press the X to lock it on the text axis. We have
something like this. Now what I want to do is to create all
these inside parts. You cannot raise them directly. You need to just press a and
press to fill out this face. To create the complete
face over here, Enable x ray press tab to
go into the edit mode. And now we will start using the knife tool press
for the knife tool and place your point over here first and then just
start tracing it out. It's pretty similar to extruding only just trace
it out like this. You can hit right click in
between, stop the tracing, you can move around your screen
to place it around again, perfectly click once again and then you can
again start tracing. Don't worry if you like place some of the points incorrectly, it does not matter because you can obviously edit
them later on. These will be converted
to vertices only. As soon as you press Enter, make sure to create your
cutout properly first. Now we will just make one over here and then
just join it like this. Then you can hit right as
your cutout is now complete. Then just hit Enter
to make it permanent. And you will see these are now made on the object itself and converted
into vertices. And if you press three,
now you can select this face press X and delete it. As you can see, you have created the design partially,
very simple. Again press and let's create
the small cut out over here. One other thing, if
you want to look at all the small little details or settings of any of the tools, you will see them over
here at the bottom. For something like knife tool, I don't use much,
but if you press, you can lock it
in straight lines for all the intricate details of the tools. You
can look over here. But let's just continue now to create the cutout Again, join it, hit right click, and then press Enter. Let's remove this face as well. Next, let's create
this one over here. You can hit right click and
continue from over here. All right, this is done as well. It adjust it a little
bit if you want to. I think it's pretty good. Now press three,
select this space, press X and delete it. Now the only part left
is to create this thing. Let's see, we can
press over here, press then click over here, press lock it in. A straight line cards again, click over here,
click over here, then press to turn off
the straight line. Now let's just continue
tracing this curve out. Similarly again, hold, press and bring it here, right click. Click over here, Pain
click over here, right click, and press. All right. To make
sure these two are exactly in a straight line, what I will do is I
will select this, make sure snapping is enabled. Vertex snapping is selected. You don't have to enable it,
you just need to press then Z and hold control and
hover over this vertice. Now they are perfectly
in a straight line. Select all these vertices over here and move
it a little bit in like this, That's perfect. Select this face over here, press X and delete. Our design has been created. I think this result is a lot
better than the last one. Now press to come out
of the isolation mode, let's bring it out over here. To actually see it properly, we first need to plane over here. Let's see
how we can do that. I will select this press shift, add a plane rotated
by 90 degrees, press R, then X type in 90. This will be actually
like a glass pane. Just scale it according
to this window over here like this. And bring it out here. Select the design
you just created. Also, bring it out.
Press tab press to select everything and
extrude it like this. Sorry, push it in. This much is pretty good. Right click, shade, smooth, enable or to smooth. Yeah, that's pretty much it. If you want to, like later on control the thickness
of this thing, what you can do right
now is just undo this instead of like
extruding it manually. We can just add a
modifier to this solidify modifier this way. The benefit of this is we can control it whenever we want. It is much simpler to add.
It works much better. Again, I will shade smooth
this and it will smooth. I will set the mode to complex. That's basically it. Let's see if there is something
else we have to do. I'm pretty happy with how
the design turned out. Let's just quickly
select this glass pane. Duplicates, shift to duplicate. Press R, then Z, rotated
by 90 degrees once again. And this time bring
it out over here. Press three for the
right side view. Make sure to just scale it
accordingly, it's not visible. Let's just scale it like this. Let's bring this still here. Again, I will select it and add a mirror modifier to this. Obviously, we need to select
the mirror object as this, so that it gets exactly
mirrored over here. All the glass panes
have been added. Select this one, press one, press Shift plus D, and
place this one over here. We can move it back. Let's move this one here. Glass pane would be somewhere
around here like this. I think this is pretty good. Let's sit safe now. I think this is pretty
good for this lecture. In the next lecture
also, we will keep on, continue these designs over here at the side of the model. These are pretty similar but a little bit different
than the front one. Yeah, you can try creating
them on your own. In the next video,
we'll be creating them with that modeling would
be pretty much do I think. Then the only thing
left would be to just create something on the
inside of the clock. A bit of the actual
clock over here. We won't be like actually
creating the clock, we will add that by
the textures only. We just need to add a
simple cylinder over here. We'll do all that later on. So let's just hit Save and we'll continue in the next lecture.
Thank you for watching.
6. Creating Remaining Wood Designs: Hello and welcome guys. So let's continue
with the modeling. In this lecture, we will be creating these
designs on the side. Select your side
reference image, press slash to go into
the isolation mode. Let's press three for
the right side view. Just press shift and
add a single word. I think we are
currently in edit mode. Press Tab to come out of it and just move
it up over here. Press Tab once again, let's a to select it and just start extruding
it like this. Now you can add a
mirror modifier. This time as it is on the side, we will be going
over the Y axis. Turn off the X axis like this. Let's select this word,
place it up over here. Extrude it towards the top, Enable clipping And
just join them. Where is it? Yeah, just
join them like this, select it and start
extruding it over here, then y and make the meet in the centers
to lift everything. Press to fill out this face. Now enable x ray. And again we will be using
the knife tool to create these cutouts. Suppress K. First let's create
this small one. Alright, this is
done for the face. Select. Select this face, press X and delete it. Let's press K, and
start from over here. Over here, Pz, bring
it down till here, Zd once again, turn it off. We didn't really need to
press head over here. Turn it off and make them
join like this, ten. And let's just quickly
fix this up like this. Let's select this and
this phase as well. Press and delete them both. Let's create this small space. Enter again to lead this phase. I think this process
is pretty simple, but it's quite repetitive. That's why it takes long and
it is a little bit boring. Let's just finish this up. Create the straight line to turn it off. Bring it over here again. Bring it up here. And let's just
quickly fix this up. Select the need, hold control
and snap it like this. Just to make sure they are in a straight line
Over here is fine. Select it and delete the faces. All right guys, now
the shape is finished. Let's just add a solid
modifier to this. Come out of the isolation mode, let's bring it out over here. Make sure to control apply is somewhere
around here Like this. Add another mirror modifier. This time this mirror modifier
will be used to mirror it. Over here, select this
object as the mirror object. As you can see, we have
successfully mirrored it. Let's save. And
the last design to create is over here on the side. This one. This one
is like a small one. Let's just finish
this up quickly. Quickly add another
single Word tab to come out on the edit
mode mobile, up over here. First let's just add a mirror
modifier on the Y axis. Select this. Move
it up over here. Make sure to enable
clipping as well. And now just start
extruding to trace it out. Press Select everything
to fill out in the face. And again, press K and start cutting to create
all these cutouts. Does X and delete the face. Join them. Hit right Clk, Enter
and just quickly make sure to have the
ministry line like this. Res three, select this
Sass eggs and delete it. I'm noticing that this design is not really fitting up perfectly with the
reference image. Honestly, it does not
matter that much. I think it looks all right. As long as it is symmetrical, I think it does not matter. It is a little bit skewed off of the reference
image over here. I think maybe we can fix it
up by bringing these in. Yea, I think that's much better. Let's just create
this last cutout. Now it enter once again and delete both
of these phases. Yeah, our design is
pretty much done. Yeah, I think it looks
pretty good. Where is it? Over here again, bring it out. Make sure to add the
solidify modifier and apply the scale shade smooth
This enable auto smooth. Make sure to shade
smooth this as well. And also just set the
solidify mode to complex. Because I have seen it to work a little bit better
than the simple mode. I will add another
mirror modifier and select the mirror object. As this our designs
are pretty much done. Let's save and
look at our model. I think it looks pretty good. We can also add the bevel modifier to them if you want to. You can see it makes the
edge a little bit smoother. If you want, you can
go ahead with this. Let's just add it,
enable harder normals. If you turn it on and
off from over here, you can see the
difference it creates. I think it makes it look
a little bit better. I will go ahead and add the
Ble modifier to all of them. Let's select this one as well
and add the Beble modifier. Let's reduce the Bebble
amount for this one a little bit and make sure to enable harden normals
for all of them. Sometimes your Beble modifier might not work correctly
and the reason for that is sometimes these vertices
are too close to each other, that's why it does
not work properly. What you can do in those cases, let's say you just turn off clamp overlap and then
control the pebble manually. As you can see, you can
do it that way as well. If you increase it a little bit, you'll see all of
the problem areas wherever the issues
are being created. As I said, vertices are
too close to each other, then they can create all
these weird shading issues. We're not going to change that, I will just reduce
the pebble amount to a very low number so that they don't collide with each other. Let's just disable clamp overlap for all of them and make
sure to set the amount to 0.001 just they all
have uniform levels, this one already set to 0.001 Now I'm pretty happy with this. Let's just hit Save. I think this is pretty
good for this lecture. In the next video, we'll just
set up the clock and create something to look
over in the inside of the glow through
these glass panels. Thank you watching. I'll
see in the next one.
7. Creating the Inside Piece: Hello and welcome guys. So let's continue the modeling
in this video as well. If you will quickly look over in the reference images fold, you'll find this reference
image that I've added. We will be creating
something like this to add inside our clock. And these are like a couple of clock hands that we
will be modeling. The rest of the clock, we
will be just adding through the textures only like all
the numbers and the stuff. Just the clock hands
we will be modeling. All right, let's start first. What I want to do
is if you'll press three and enable x ray, you'll see these small things
are also added over here. Let's just quickly
add them on our own. I will press Tab, and let's select these
two faces over here, and over here as well. Press to insert them like this. Let's insert them once again
and extrude them outwards. A little bit old old. Select this loop, shift a, select this loop,
extrude them out again, like this, to create some shape. Now if you will, remember, we don't really have
the mirror modifier. We might have to do
it again over here. But there is like a
nice shortcut that we can do without using the
mirror body fire as well. I'm noticing that because
this is really close, it colliding with each other. What we can do, well, first insert this once and
then insert it once again. That they are not really
close to each other. Hold, select this,
then select this. I think it is still there. What you can do is just add
one edge loop like this. And add one over here as well. Now we can select these
two faces and insect them all. Now that's pretty good. We don't see any
collisions or anything. Yeah. As I was saying, we need to copy them over here. Also, without using
the mirror modifier, what you can do is just
select this press tab to go into the edit mode,
press select Everything. If you will go over here
in the mesh section, you will find this
symmetrized command. If you select, you will see that over here we
have created these things, but they have been copied
over here as well. This is like a manual
mirror command, but you need to make sure that the axis is correct right now. As this object is placed
the wrong, the x axis, we need to copy from the
minus x to the plus, because we created things over here on the negative
side of the x axis. We need to copy them over here. Make sure to select the
direction as minus x plus x. Because if you select
something else, like let's say if you
selected plus x to minus x, you'll see both of
them have disappeared because it is copying from
this right side to left side. There was nothing
on the right side, that's why there is nothing
on the left side as well. But if you select
from minus x to plus x, it will appear back. You can also select any of
the axes and it will give you totally different
results according to them. As you can see, if you select
from plus y to minus Y, this thing has disappeared
completely from over here. Both of the front and the
back are completely flat. And setting it to
minus Y, t plus y, you can see both of them have
the same thing appearing. Just select minus x, two plus x and we
are good to go. All right. Another thing that I noticed was a very small issue. If you look closely over here, you can press the dot on a
number pad to focus like this. There is some weird
geometry over here. I don't know how these
three edges were created, maybe because of the
mirror modifier. That's why we have
a small shading. It is really simple to fix this. Press two for X select. What we basically want
to do is we want to collapse them into
a single like this. How you can do this, make sure to select vertex
snapping from over here. Press then X to move it
around, hold control, and it will exactly snap over here and make them meet
all at a single point. Now you will notice that they are overlapping with each other. To fix this overlapping issue, just press A to
select everything, press to merge the vertices
and merge them by distance. This will collapse
all the vertices that are on top of each other
into a single one only. You can see now there
are no double vertices. All right. The issue
is also fixed. It would be over here,
also at the back. Do the same thing, just
collapse them like this. With the next hold control
and snap left together, press a M and by distance you will see
removed four vertices. It is also being
written over here. Yeah, with this, press
one for the front view, press shift, and let's add
a new reference image. Let's add this one. Let's place it over here. Only a little bit back now you can press to
go into the isolation mode. And let's start creating this. It is fairly easy
to create this, I think just press Shift
and first add a cylinder, scale this cylinder down. Enable x ray and just try to match it with
the reference in it. Yeah, that's pretty good. Shade smooth, this
enable auto smooth. Let's just duplicate this. Press X and place it over here. Now to create this
cut out would be to press Tab Edit mode. And again we will be
using the knife to press, just click outside, then click through this complete loop and clip over here,
hit right click it. But you will notice
there is one issue, that it is only appearing
on this side of the half and not on the
back side. Let's undo this. And to fix this issue again, just press to start with the knife to before you
actually create the cut, make sure to enable cut through. You will see when
you press this, cut through is being toled. Make sure it's turned on and now you can create
the cut like this. And I think that should work. Yeah, you can see that
created the complete cut. And delete the bottom vertices. Now hold a, select this
loop to fill out the face. Again, we can use
the mirror modifier and select the mirror
object as this. All right, that's perfect. Maybe we need to save
it down a little bit. Now again, duplicate this. Place this over here. Press Task, and make sure
cut through is set to press. Now again, create the
same cut out like this. Delete this portion. Select this loop to
fill out the face. We basically have this shape. Now what I will do is make it a little bit
more interesting. We can select all
these top faces and the bottom ones hold. Shift to select them all, press to insert them, we first make sure
to apply the scale. Then we can insert
them like this. Press all extrude
faces along normal. Add a Bible modifier. All of them I think to control all of them
at once. You can hold Alt. Now if move the amount, you can see all three of them
are being affected at once. When you hold Alt, you can
adjust all of the settings at once, enable harder normals. Now if you see if I
enable harder normals, only this is being enabled because this is the
active selection. But if I hold all, all of
them are being enabled. This is a nice little
handy command. Next, let's add
another cylinder. Place this over here. Scale it up like this. Now, instead of using
the mirror modifier, the better option
would be to just simply use the array modifier. Because these are
like same things being repeated over
and over again, we can simply use
the array modifier. With this, what this will do is basically you
give this X offset, we can also give it Y or Z
if that is the requirement. But right now, we need
to set the offset only because it is a
straight line on the X axis. Now when you increase the count, you will see it will be repeated according to that
particular offset. What you have set, I
will add it once again. We have 12345, set
the count to five. And now just increase the offset according to
the reference emission. Really simple, something
like 3.5 let's say. I think 3.45 fits the best. Yeah, right click, shade, smooth, enable, or to smooth. Another thing that
we have noticed is that this particular thing, I mean this cylinder over here needs to be
extended till here. What you can do is there are
two things that you can do. Either you can
just simply create another cylinder and scale it down from the bottom because
no one would really know. Or another thing that
you can do is we cannot extend this cylinder, particularly because this is like a part of the
array modifier. All of them would be
extended together. If you want to extend any one of them or
edit any one of them, you have to first apply
the array modifier. And now you can edit
them individually. But I think just simply adding a new cylinder
over here at the bottom is a
much better option, really notice as well. All right, so now let's create this portion over
here, the cylinder. Add a cylinder rotated on
the x axis by 90 degrees. Scale it up accordingly and
scale it down on the Y axis. Shade smooth, enable to smooth. Let's see, Press three,
select this face. Let's insert this a little
bit like this. Bring it out. Apply the scale first and then just press control
to be level it out if you want to have like
an even more smoother look. Because you can see, we can notice the circle
in the center we can do is basically just
decrease the scale even more. Now control, let's
decrease it a little more. Now you can see it
is pretty smooth. We also scale it
down on the y axis. Add will modify to this
enable harder normals and the small scale this thing
down a little bit as well. Maybe I will give it
a bit more thickness. Yeah, I think this
is pretty good. Let's save look at it. Yeah, I'm pretty
happy with this. Maybe I just made a mistake of coming out of the
isolation mode first. Let's just select all these
things and hide them. Now, just select this and bring it out over
here in the front. Now you can press All Plus
to bring everything back. And let's see, To control
this a bit better, I will just select
it all over here. Make sure to press Shift
less cursor to selected. To bring the cursor over here, press Shift and
add empty object. Add empty object. I will this parent all these objects to
this empty object so that we can move
it around easily. What you have to do is
just select it all. Then select this empty object so that this is the
active selection. Right click and parent
and select object. Now when you select
the empty object, you can move it around
at once, all of them. That gives us a little
bit more control. Now, I will select this
and all these items express so that I can
place them in here easily. Scale it down. Let's remove the glass panes for now. Yeah, I think this is pretty
good. Let's select it. Increase the scale of
this a little bit. This is totally up
to your preference. How big you want to create this? I just want to make sure that it is roughly in the
center, I think it is. Can turn off all the overlays from over here to look at it. I'm pretty happy
with how this looks. One thing that I'm
noticing is that we can see these things over here. Maybe we can select them and decrease the size of them a little bit so that
they are not really visible. Okay, we cannot decrease
it much. Let's see. Select this press. All right. The next thing that
I will do is it cannot really like fly
around in the air this way. Let's just, let's
select this piece, shift S, select it and simply add a plane scale,
this plane now. And move it up over here just so they have some
kind of covering. Make sure the plane is not really poking through
any of the geometry. Make it small enough so that
it only covers like this. I think a really nice way
to do this would be to select this press control
and add a edge loop. Like this is a really
nice things and separate the selection this way we will have a loop that is
exactly of this size. You can scale it
down a little bit, press press A to
select everything, and press this will give you the exact
shape that you want. You can set the origin
to geometry or display. Scale it down a little
bit and it's perfect. Now we don't have
any small spaces. All right, perfect. I'm pretty happy
with how this looks. Resolved. Glass edge, bring
back the glass panes. Right now they're opaque, but when we do the texturing, it would be like
translucent so that we can see through this thing that we have created inside. Now, the last part of the
modeling is quickly hit safe. I will turn off this
glass pane as well. Let's bring everything
back first, I will select this plane
pressure plus D to duplicate it. And move it a little
bit behind like this. Just create like a base for the clock somewhere around here. Select this plane, pressure
pluss color to selected. Now add another cylinder. We can do the same thing
that we did just now. Rotate it by 90 degrees
and basically this will be our clock that will appear
over here, shade smooth. This enable to smooth. Again, I want to give
it a shape like this, a little bit like
smooth in the center. Selsab. Make sure
to apply the scale. First three for face select inside this
face around here, I think Ps to move it up. I think this mug is pretty good. Control and level it out. Increase the scale of
this a little bit. Yeah, this is pretty good. Not really sure. Let's
just try something out. I'm just looking, uh, like, how round I
want to create this. This looks too much
to me because I think love faces are
a little bit flatter. Just move it back a little bit. I think this is pretty good, obviously just selected press S, then Y and make it flat
like this prestoliply scale at the bevel modifier decrease the bevel amount just so it is like only
appearing at the edges, only ad normals and a
smooth is enabled to move it back. That's nice. We are pretty much done with the modeling lecture
is pretty long, but I think I want to finish
the modeling in this only. Let's just quickly add
another image and that would be the clock hands. You can choose any one of these, you can even anyone on
the Internet as well, you can find on your own. But let's just go with this one, the G. I will be
going with this, the way we will create
them is shifting. Let's add a plane,
a single plane. You can place the origin right
over here at the center. Really handy. We can easily add the mirror modifiers M and merge it at the center. We don't really need that
many words, we just need one. Now, add the mirror
modifier on the Y axis. Disable X again. Just quickly place it out, make sure the name
is shipping and joining them over
here like this. I don't really want the
needle to be that long. Let's just go till
here, I think. And then just join it like this recipe to select
everything to fill it out. Shift and add a single
word this time. Move it over here again, place the origin
right over here. One. To select the
word set over here, simply add another mirror
modifier on the y axis. Let's just begin from here. It's a little bit easier. We don't really have
to be too precise with this because, okay,
just a second. Is the mirror modifier
even working? I don't think the mirror modifier is working
with this one. Let's just turn it off, bring it back again. For this, we need
to select the Z. For some reason, I think
we rotated the plane, that's why and we didn't
apply the rotation. So just select the z axis
and now it is working. Score here and just make
them join, enable shipping to fill it out. Select them
both and lift them over here. It is really easy to
place them first. Select this, First we can shift and add a cylinder right over
here at the center, rotated by 90 degrees,
make it really small. Something like
this. First, let's reduce the scale
for both of them. Now it is really simple
to copy them over here. If you remember, we turned
on the Copy attributes menu. If you did not, I will again
suggest you to do that. Enable the copy attributes
menu from over here. Select both of these needles and then select the small
thing you just created. Control and copy location. You will see because
we have placed the origin at the right
location for both of the needles to select them
both and bring them out. As I was saying, because the
origin point is over here, it can exactly like fit over
here without any issues. Would be really simple
to rotate them as well. You can press R Y and rotate
them around like this. The now give them a little bit of thickness. Add a solidify modifier
to both of them. Obviously apply the
scale for both of them. Let's set the thickness to 0.001 I think that is
pretty good for them. It's them both and enable
to smooth for both of them. All right, let's look at it. Yeah, I think it's pretty good. I'm happy with how
this turned out. I will maybe select this breast, n Y, to flatten it
out a bit more. Lie the scale and move them all backwards like this. Select all of these
clock pieces. And select this plane and move it where you
want to place them. I think having them this
deep would be pretty good. We will also have a glass
pane in front of them. Obviously, these things can be edited at any point of time. All right guys,
so basically this was it for the modeling section, poll edge, to bring
everything back. And the modeling is now done. In the next lecture,
what we will be doing is we will apply all the
modifiers for this and, and wrap our model to take it into substance painter to start with the
texturing process. Thank you guys watching. I
will see you in the next one.
8. UV Unwrapping and Texturing: Hello and welcome guys. So now we're done with the modeling. In this lecture we
will be applying all the modifiers and
an wrapping this to start exporting it
to substance painter so that we can actually
start the texturing process. So the first thing that
I will do is I will just make it a bit
more organized. Just quickly select all
these reference images. Now you can press M to move
them to a new collection. This collection to
reference images. Now we can just easily
turn them all off at once. Next, select all the
pieces of our main model, and again, press M. And let's move this to a new
collection as well. Hall Flow, we can
delete this collection. All right, so now
we basically have two collections before we actually apply all
the modifiers. But I want to tell
you guys right now we have all these
modifiers appear over here. You can select like any of the objects and you can
see them over here. Basically what this means is, let's say right now you
want to change things like the bevel amount or maybe
the axis of the mirror. You can do all these things, but after you apply
all the modifiers, you won't be able to
make any changes. Basically, all the changes to your model would
be permanent. And you won't be able
to make changes to the thickness of the solidified modifiers
and things like that. Make sure you're happy with this and then only apply
the modifiers. But what I usually do is I
will create a copy of this, like a duplicate
of this, and not apply the modifiers for
that particular copy. So that if things go
wrong in the future, I can always come back to
that duplicate and use that. Let's just press A to
select everything. Press Shift plus D and press X. Just move it over
here, basically. Now both of them are in
the same collection. Only press to move this
to a separate collection, let's to hall clock and apply this will have all the modifiers
applied in this. Basically, you can see now we have two different Hal clocks. This one can be with all the modifiers intact so that we don't
change anything. If you want to make any change later on we can always
come back to this. For this one we will apply all the modifiers and
just start working. All right, before I apply
the modifiers right now, noticed one thing that we
have a weird shape over here. If you press seven for the
top view, you can look at it. We scaled it
incorrectly, I think. Don't worry, it's
easy to fix this. Just select this face and select all these pass over here. Then what I basically
want to do is right now you will notice these are like weirdly shaped in a straight line to make
them in a straight line, you can see this is the Y axis. We basically have
to scale them zero at the Y axis, press S, then Y, and then just type in zero, like this, and they
will all be flat. Similarly, I will
do the same thing for this loop as well. Select press then and then
type in zero. Yeah, perfect. Let's do the same thing
for the backside as well. I don't know really
how this happened. Yeah, these things happen sometimes We can
easily fix this issue. Press then y and
zero. All right. Yeah, now it's perfect. We can apply the modifiers
for this one. There are multiple different
ways to apply the modifiers. You can just select
this, go over here, and then apply them one by one. But this is like a long
and tedious process. Just select them
all, press eight, select them all, press three, and search for the commands
converted to mesh over here. Just hit Enter, and automatically all of the
modifiers would be applied. You can see they won't
be appearing over here. Now, everything is fine. We cannot, obviously,
you would still be able to make changes like moving the word Cs
and things like that. But yeah, it's better to
have all the modifiers. It's a rule of thumb when
I apply all the modifiers, I usually won't make any change
to the model after that. If I have to make a change, I will just go back
to this thing, make the change over there, and then again create
a duplicate of this. And then apply the
modifiers for that also, let's just quickly fix this
thing over here as well. Press to make quick
selections like this. And then hit right click
to come out of it. Press and zero. All right, let's turn this collection off. Enable this back
again and quickly. Just select everything. Press control and
apply the scale. Make sure to always
apply the scale before you actually
start UV and wrapping, because it can mess up the UVs if the scale
is not applied. Also, I will just delete this
empty object result plus H. Let's select any of the model first I will add a material to it so that we have a proper texture set when we export this two
substance painter. Select any of the object and
just add a new material. Rename this material hall block. Now we just want to copy this material to
all of the objects. It's very simple. Select
this object first, which has the material added. Press A to select everything. Then press control L, and then select Link Materials. Now you will notice that 22 is written by the side
of this material. That means it's being used
by 22 different objects. All of the objects have
the same material. All right, Into the
UV editing tab, Press A to select everything. Press Tab and press again
A to select everything. In the edit mode, we can enable display
stretch from over here. Press U and just
hit Smart Project. I think that would be a easy way to quickly UV unwrap them. You can play around with the
angle limit a little bit. Let's set this maybe
something like 80. You can give it a
island margin of 0.001 so that they are all
spaced out a little bit. With that we can export this substance painter and
see how everything works. Obviously there might
be some issues. We might have to go back
and forth a little bit, but that's not an issue,
we can always do that. One thing that I would do is it might be a little
hard to actually texture this thing
like this clock in substance painter because we have this object in front of it. What I will do is for now
let's just H to hide this and select all of these
objects from over here. Or maybe we can just
select this thing only we don't really
need to move everything, or do we have to? Let's see. All right, now what
I will do is just select all of these
objects over here. Press then X and press one. That later on when I come
back to my model in Blender, when it's time for rendering, I can just press G,
X and minus one. Bring it exactly back at
its position x, then one. I will also select
these three pieces and move them a little
bit further ahead. Spx 101, once again, press x 0.5 Yeah,
that's pretty good. We're just doing it so that
it is a little bit easier to texture this clock
because we have to like add numbers
and stuff on this. That's why I placed
it over here. Now we can press allusH
to bring everything back. For now, let's just export
this substance, painter. If any issue arises,
we will see to it. All right, one last
thing, sorry I forgot. Make sure to enable
face orientation from over here and quickly
look at your model. You will notice that
these two planes are showing red color. That means their
normals are flipped. What you basically need to
do is any of the object, if your object is red
color, you can select it. Press Tab to select everything. Press Shift ten, and
then select Inside. Basically, that will flip the
normals. Now we go to go. If you will hide
all these glasses, you will see it shows as red from the inside
of what is this, the main model, but we don't have to actually
worry about that. As this is like a plane, it does not really
have any thickness. That's why we are
seeing the red color on the insides of it. But that won't be an issue for us because when we will export
it to substance painter, I will show that to you. All right, with
this we are done. We can now press A to select
everything over to Five, Export and select Vx. Now in your exports folder, we can name it as
Hall Clock on Enable selected objects so that only the selected
objects get exported. This is just to make sure
nothing extra gets exported. And select mesh from over
here because we only want to export the mesh
type. Then hit export. Also, just quickly open up
substance painted as well. Okay guys, substance
painter has opened up. Go to file. Hit New. To open up a new
project dialogue box, you can click on this
Select option and then select the
export you just made. Select Hall. Rest of the settings can be
changed later on, so I will keep them at
default only for now. Just hit okay and wait for
it to import right away. You can just quickly look
around your model and see if there are any,
like visible issues. At first, you can hold shift
and right click to move the lighting around
in your scene. One thing that you
might notice is all these jagged edges
go over to display, I think, and make sure
to enable temporal TLS. This will solve the
jagged edges problem. The next step to is whenever we import anything into
substance painter, the first step is to
bake the mesh maps. Because to use all
the features of substance painter like
smart materials generators, smart masks, you always have
to bake the mesh maps first. Problems might arise when
you bake the mesh maps. Like you will be able
to locate the issues with your model when you
actually bake the mesh maps. That is like a nice test
to do for your model. If the bake comes out nice, that means we have done pretty
much everything correctly. Also, if you don't see any
of the windows over here, you can go over to, I think, window menu from over here. And you can disable
all the views. You can also move them around
to however you might like. I'll just keep it
over here only. All right, In your Texture
Set Settings menu, click on this Bake
Mesh Maps button. You might have a different dialogue box for
the bake mesh maps. It might be smaller
if you are running an older version of substance painter, but
that does not matter. Like commands remain
pretty much the same. The only things that we
will be changing is setting the output size to four
k to get a nice bake. You can maybe get away with
two K as well if you have a slower machine
because it will take a little while to set four K, enable both of these options. Apply diffusion and use low
poly mesh as high poly. Because we only
have a single mesh, we don't really have
a high poly mesh. Another thing that I do is
set the ND L sing to 16 x. Maybe that is pretty good. And also we will
disable the ID maps because we are not using
the ID map workflow. That's basically it, you
don't have to do anymore. All the default settings
are pretty good. Now just hit Bake
selected Textures and wait for it to finish. I will resume the
video when it's done. All right guys, the
bake is finished. Now I will just return
to painting more. Now also notice that the
model looks a little bit better as we have added shadows with ambient
occlusion and everything. You can just, again,
look through the model, I don't see any
issues like right away. That's a nice start. That means we are good to go and we can start with
the texturing process. What I will do now is
before actually starting control to save your
substance painter file in the substance painter folder. I will again save it as a. That's pretty much it.
In the next video, we will start with
the texting process. Thank you as watching. I
will see you the next one.
9. Creating the Wood Material: Hello and welcome guys. Now in this lecture,
let's start with the texturing of our
hall clock right away. We will just go into
the layer stab. Make sure to delete any of the layers that are
already present. There might be some you can just select them
and click Delete, like you can just, if anything is added
over here already, you can select it
and hit Delete. What we will do is first we will be creating like
a wood material, because that will be our
main material in our model. We have to create like a
nice looking wood material. All right, what I will do is I will create a folder so that we can categorize our materials and we will rename this to wood. We can start creating all
the layers in over here. Basically what we
will do over here, we will keep on adding
different layers into the wood folder to create a nice
looking material with all these layering effects. We will add the base layer. Then over it we will
add some damage, just like some edge variations, color variations, and
things like that. First we need to add like a base color or like a
base layer to work on. So you can click over
here in your shelf. That is the materials
and search for wood. This is preinstalled with
your substance painter only. This wood plane material that will be provided to you
with substance painter, we will be using
this as our base. Just drag and drop it onto
the wood folder right away. You will notice that
it looks really, really bad and it does not look good at all. But don't worry. We will customize it and make it look according to our needs. The very first thing
that we need to do is obviously we don't want this wood material
to appear over here on this clock or on the
glass or things like that. How can we like separate it out? There are multiple
different ways to do it. If you are already well versed
with substance painter, you obviously know
about masking, We can add a black mask. As soon as we add a black
mask, everything disappears. Because a black means
everything is invisible. In terms of masking, black means invisible
and white means visible. If you start painting with
the white color on this, you will notice that this
layer is starting to appear because we are currently painting
with a white color. We just select the brush and start painting with white color. Because we're
painting on the mask, currently we're painting with white color and this layer
is starting to appear. Let's say if we paint
with the black color, you'll see that it will
start to disappear. Basically, this is
the use of mask. Mask is basically a
black and white image that you can see over here that decides what portions of the layer should be visible and where they
should be visible. Wherever there is white
color, they would be visible. You can press X
to switch between the colors X like
it is white color. Now, wherever there is white
color, they will be visible. Wherever there is black color, they will be invisible. Obviously, we are not going to paint each and every
single part like this. To add the wood material, there is like a nice fast way. I will show you 23
different ways. You can first just add a black mask and then
select this tool. Obviously, the very first way
is to just paint like this. Next is to use this
tool over here, that is the polygon fill tool. Basically, with the
polygon fill tool, you can select entire
faces at once. Even that is like
not fast enough, it has like multiple
different modes. This is like half a face, like it will fill according
to the triangles in the face. This mode, it will
fill complete faces. Obviously, it is
already triangulated. That's why it is filling in triangulated mode only because
the model is triangulated. But these pass you can see
it is filling completely. The third mode is filling complete meshes
at once. Like this. As you can see, you can see it will select multiple
complete meshes at once. This is the one that we can all the meshes that we want
to add the wood material to. The last one over here
is the UV chunk fill. I rarely use this one because
it's weird to understand. If you will press F one, this will appear over here. Basically, this is
the UV islands. You can press F two
to switch to crew UV. Basically, the UV
chunk fill will fill according to the UV islands
that you have created. Yeah, I don't really have a use case for this but we
have this mode as well. But now I will show
you even better way to separate these out. For this, we will just
completely remove the mask. Let's say we have this
layer or any of a folder. You can do this with layers
as well and folders. I will just select
the complete folder. I don't have to do it for
each and every layer. You can click over here. This is like a relatively new feature. Basically, this
is geometry mask. And it will separate the, what do we call the objects according to how you
created them in Blender. It works similar to the mesh
mode of this black mask. This mesh mode, it
works similar to that, but it is even faster than that. We don't even have
to add a mask. We can just click over here. Right click and exclude all. Now the wood material is not
present over any of them. You can see zero is written. Now select them one by one. Select all the objects that you want to add
the wood material to this over here.
These two things. And yeah, that's basically it. The rest of it would be
like glass or other things. Obviously, we have these things over here on the inside as well. I don't know if
you can see them. These things, we will
texture them later on, but make sure, do
not forget them. All right, that out of the
way we can finally start to texture or create
a wood material. I will select the
wood plane layer and let's fix it
up a little bit. The very first thing
that I want to do is I want to change the UV
projection to triplana. Because triplana
works a bit better. It is like according
to all these phases, we cannot really see
any seams right now. But with the UV projection mode, there is a chance
you will see, yeah, like this, you can see the seams which are very prominent
and look very weird. As you can see, there will be some seams present in your model and they
don't really look good. The first thing to do is
to change it to Triplana. As soon as you do it, you can see the seams have
totally disappeared. The model actually looks
like a little bit coherent. Yeah, I do. Back to you to show you the
difference set, describe Yu. The next thing to do is I don't really like
the color of this. Also I will press two. Come back to three D view. Yeah. As I was saying, I don't really like
the color of this. Let's make it a
little bit bigger. The property section, if
you'll come over here, you can adjust the wood color, the darkness, and
things like that. I will be going for
a pretty dark color, around 0.75 I think it is. Pretty good,
something like this. Over here, you will notice
that there are tons of wood related settings
that you can do to create your
very own material. You will not go over
all of them, but yeah, you can just play around
with them and you will automatically
understand them. You can also select
picets from over Here is like a nice
little addition, but I will be
creating my own only. So we have this, we change
the color. Let's see. The next thing is,
as you can see, it is currently, what
do we call them? The Ensor, whatever this is, it is running along this way. I will change the rotation to 90 degrees, that
it is like this. I think this feels a bit better, in my opinion than this. Obviously, we can change
it whenever we want. And it is completely based
on your preference as well, how you want to do things. Let's try putting it at
a 90 degree rotation. Next thing, let's see we can adjust these ans
color basically, these are the wood beans that
are appearing over here. This is the color
variation we like. A little bit of coloration. We can put this at one and beans density can
also be at one. Can also increase
the in's color fade because right now as you can see they are really prominent. Let's increase them so that
it fades away a little bit. Right now you will notice
that the texture is looking like low resolution. You can change the texture
settings from over here, because it is currently
set to just one K. If you increase it two k, you will notice that
the quality has shot up by a lot and
it looks much better. If you increase it to four K, it will look like really crisp. But your substance
painter might get a bit. All right. This way we can actually see all the
details and everything. When you make changes, you
will notice that substance painted takes a little
while to make the changes. But yeah, it looks much better. You can see with
the Fd set to zero, the ans look like really
prominent in our put. I don't want that. I will
set the fate to one as well. Maybe we can decrease
the density to 0.9 and variation
to 0.9 as well. Next thing to do is you can
see these spots over here. Very huge spots. I don't think they're looking
that good in our put. Basically, this is
the knots setting. This is the setting that
controls these knots. So I'll just set this to zero so that they totally disappear. All right, Much better. Next you can see this tiling
option from over here. We can adjust the
tiling as well. Let's set this to a
little bit larger number. Something like five, maybe. Now I think the
looks pretty good. Let's try setting back
the rotation to zero. I don't know, This
looks pretty good, but. Over here. The pillars
look really weird to me. I think the pillars look
much better this way. Yeah, I think I'm going
to go ahead with this only let's set the tiling
to something like four. Yeah, something like this. You can just play
around with the rest of the sliders as well to
see what they give you. And yeah, with this we have like a nice base
to work on with our wood. It still does not look that good because it
looks really flat. But yeah, it is definitely
something nice to work with. The next thing to do is
we'll be adding some dust. What do we say? The model just add another fill
layer over here. This time you can
select the past color. We have all these different
channels with our filler like the color and the metallic
said this to one, it will be metallic roughness. If you said this zero, it will be really
reflective and set roughness to it won't
reflect any light. That's why I will set the settings back to
default only for now. And also decrease a
texture set size to two K so that everything is a little bit more
responsive as well. You will notice that
our wood material has disappeared because now we have like a fill layer on top of it. Substance painter works on
basically a layering system like Photoshop because
the fill layer is on top of the wood layer, that's why it is appearing. But don't worry, we'll just mask it out to make
it appear, right? All right, the base color, obviously we will go for
something dark because we are creating a dust layer,
something like this. Maybe we can increase
the roughness to 0.45 so that it is a little bit
rougher compared to the wood. Now we can add. First let's rename
this roof dust. Let's add a black mask. This time we will be using a fill layer along
with a black mask. To control the black mask, basically click over
here and add a filler. Now in your fill the
texture section, you can search for various
different gun maps. You can see we have all
these different grunge maps. And when you drag and drop any of the grunge
map onto the fill layer, it automatically masks
the layer out as dust. You can see now this texture is basically controlling
the dust layer. You can change things like the color and everything
at any point you like. Basically, this is like
the power of masking. You can control the balance, contrast anything you want. You can try out
different El layers. You want to see whichever
one fits you best. But the one that I
have decided on, I've decided on how I want
the texture to look like. I will be going with
directional noise one because this will give us a nice feel of the wood and the way the
dust runs along it. You can see it looks like the wood ans only I
will be going with this obviously first said this Triplana because we can see the seams over here
in the dust as well, said Triplana. Much better. Much, much better. Then we can adjust the things like tile. Again, this is
totally up to you how you want to set this. I think something like
this is pretty good. Now the next thing
to do is we can adjust to things like the
balance and the contrast. Basically, if you
increase the balance, the amount of effect
would increase. Setting it to one is
completely black. That is, this layer and setting it to zero will be
the layer below it. That means this layer
has totally disappeared. We can set the balance to
something like 0.6 contrast. Basically, as you
can see right now, the effect is smudgy. If you increase the contrast, it will become
sharper like this. Obviously with dust, we do want it to look a little bit smudgy. We can set this
to 0.2 like this. All right, so now you
might be wondering that this dust is a little
bit too much for our wood. Obviously, we can control it from over here
through the opacity. Because obviously we are not going to make our wood look like this because this is too
much decrease the opacity. Let's try 80. Let's
increase it even more. 60, I think 60
feels a lot better. Maybe I will go 15. Obviously, we can increase
it later on. Yeah. Create another dust layer, copy this one, and paste it. And drag this one out outside of the wood material
or the wood folder. The reason I'm doing
this is the reason I placed it outside the folder, is because I want this
dust layer to affect every single object
in our model. That's why I placed it
outside the folder. Now select this mask and
remove it from over here. For this one, we'll be using a smart mask, like
a smart material. We also have a smart
mask for dust. I will go with dust
occlusion, very simply. This one works pretty
good right away. I don't think you will notice
the changes with this mask. But you can see it will add like dust in all these corners and crevices of your model where
dust should be appearing. You can select the
generator and you can increase the dirt level
and you will see it effects as you keep
on increasing it, your model will look
like overall dirty. To basing, we don't want to
make it look that dirty. Maybe setting it like default
values is fine for now. Let's return back to our wood. All right, we have
added the base layer, we have added the
dust layer onto it. And then now we can
add variation layer. To have a bit variation
with the color, we need this color variation. All right, now we need
to choose a color. Basically we will be going for something like a woodish color. Only the one we have over here, like this color, but a little
bit lighter than that. I've already decided on a color. Obviously you can
play around with it and you can choose
whichever color you want. If you want to use mine, you can just directly
copy paste this. The time using going to just
copy it from over here and paste it onto my substance
painter over here. The hex code, you
can just copy it if you want to use
the exact values. I will be going with
something like this. Now again, let's
add a black mask. This time what we
are going to use, we are going to
use another fill. This time I will be going
with directional noise only. But let's select the
directional noise to that we have a
bit of variation. Again, tribe projection. You can see with that added, the color gets a lot lighter. That looks better. I think again, let's increase the
tiling to two. Yeah, and then we can maybe increase the
contrast a little bit, because right now I think
the effect is too much. If you increase the
contrast, you can see, now you can clearly notice that like color
variation changes, we obviously don't want
to make it that apparent. That's why we need to keep
the contrast at a low number. 0.3 is fine. You can see in this way can make a difference between the
different colors of the woo. Also, maybe we can set
the rotation like this. Let's try changing
the dust as well to 90 degree rotation and
see how that works out. I think it looked
better earlier. I think the color variation works better with the
90 degree rotation, but the dust was fine, The earlier effect only
like these settings only. Obviously, as I'm
saying again and again, these are like totally
up to your preferences, how you want to
make these changes. I think now I'm pretty
happy with this. Let's add another layer. This will be like our
main layer that will add all the value to
our wood material. In my opinion, this will
be the edge sharpen layer. Basically, we will
be adding like a goldish yellowish color to it to give a nice look on
the edges onto our wood. Again, I will be just
copy pasting a color. You can choose that if you
want to from over here, something like this color. Also, one thing that
I forgot is we can maybe tone down the
color variation as well, so that it is not that
much in our faces. I think we can increase it a little bit to maybe
something like 75. Let's come back to
the sharpen layer. Let's see we have
this color again. We can add a black mask to this. And this time I'm simply going
to use a Smart material. We have a lot of different edges related smart material which
will give you a nice result. Let's try this Edge rust, Something like this only,
but definitely not this one. Then we have this edges blur. Obviously, you can select
the mask editor from here and play around with the
balance to control the effect, change all these settings. This one also is not that good. The one that I will be
using is edges scratched. This one right away. This looks a bit too much, but let's adjust the settings
and fix it up a little bit. I will decrease the beer level, 2.6 then I will make a
tripler true because you can, again, see the seam, You can still see it. Don't worry, we still
have a fix for this. We can fix it just in a while. This way it looks a
little bit better. Let's keep on making
some changes. We can increase the
contrast maybe to 0.1 Another thing that I will be doing is I
will be decreasing the curvature weight to overall tone down the
effect a little bit more. This, as you can
see, adds a lot of value to our good material. I think it makes it
look a lot better. The last thing to
do is obviously to turn down the opacity
a little bit. We don't want this that much. Something like, let's try 50, I think that's a little bit
too less. Let's try 70. Yeah, that feels
pretty good to me. As I was saying, to
fix this a little bit, see that we have
going on over here. What you can do is you
can also make changes to these existing masks by
just adding a paint layer. Now we can treat it like
a simple mask elegancy. Currently, because I'm
painting with white, this layer is appearing. But if I paint with black, we can easily remove the seam. But this way it will
look like really weird if I directly
remove the seam this way. A better way to do this
is just select a brush. Maybe we can select this dots
brush because it is similar to the effect that is
going on over here. Select a black color and
just remove it bit by bit. I don't think it is working
but not work that well. It will take a while. Let's
choose different brush. Let's write dirt three. I hope you know these shortcuts. These are pretty basic. You can hold control, use your right click,
Hold them both. And move left and right
to increase the size and move up and down to increase or
decrease the hardness. I turn down the size
and just remove this. You can press X
in between to add a little bit of effect so
that it does not look weird. Just try to tone down
this Sam a little bit. As you can see, that
feels a lot more natural. Maybe we'll remove
it from over here, also a little bit so that it
feels a similar in a sense. Now, I'm pretty happy with how the material
is turning out. You can see when you turn
off the edge sharpen, the material looks
pretty bad to me, and that's why I think
it looks a lot better. All right, let's see
what we can add next. We can add a couple more things, like maybe we can add
a bit more scratches. Again, add a fill layer. I will just quickly copy
paste the color again. It will be like a similar
yellowish color only, but this time a bit darker. Add a black mask game is scratches and add a
filler in substance sin. We have a lot of scratches. Textures already present. Use Grunt Scratches. Rough. This is like a
really nice material. You can see scratches are
appearing on your model, but they are like to large. Let's start fixing
them up. One Y one. First, set this triplin, then we can come down over here and you can increase
the scratch tiling. And you'll see it will
decrease the size of them. Just set this six. Next thing to do is, let's see we also have
this scratch masking. Basically, if you
set this to one, it will randomly remove some scratches from
here and there. We can set this to one
because we obviously don't want like scratches
to be that much, we can maybe increase the
balance a little bit. Because we are obviously
going to tone down the acid to something
like again 50. That they're really light. We can come back to this
edges sharpen material, maybe we can decrease
the grunge amount a little bit as you can see. If it decrease the
grunge amount, these things that are present
over here will reduce. If you completely
set it to zero. It does look a little bit beard. Maybe we can set
it to 0.17 Maybe 0.15 Yeah, that's fine. The scratches I think, yeah, they are pretty good. You can adjust things
now according to you, only how you want to
adjust all these things, like the width and
things like that, but the default seems
pretty good to me. We also have the
spots, small spots. Let's see, we can add one or two more
layers and then we will be pretty much done
with the wood material. Let's save while we're at it. Again, add another layer. This will be a little
bit of damage layer, a little bit more color
variation, basically much. I will just again
copy paste the color. Let's increase the
roughness value of this 2.5 just so we have a bit of variation in
the roughness as well. Because the last layer we will be adding is a
roughness variation layer. And I will show you it adds like a lot of value
to the material. All right guys, now again, time to add a black mask. This time I will be again,
using a smart mask. You can now go through them, Try whichever one you like. You can see this
dirt smart mask, You can add this dirt
damage type effect. You can just turn
them on and off and try out different ones,
whichever one you like. There are honestly
lots to choose from. As you can see, I'm just
dragging and dropping them. All of them do give you a
little bit of different look, but this one is too much. This one also looks pretty good. You might have to work around
with some of the masks. Like you need to add
like a paint layer and then try editing
it on your own. If you want to remove some of the areas or if you want to add like a bit more definitely
you can do those things. Let's remove these two layers. The one that I will be
using is which one? I think this one does dirty. I tried out a couple
of different ones and I was feeling the most. This one select this, you can see you can increase
or decrease of mask. You can also like
visualize the mask from going from going over here. You can see you can play
around with these settings. As I said, wherever
there is white, the material would
appear over there. Wherever there is black, as
you can see over these areas, the material would not appear. That is the basic
concept of masks. Let's increase this to 0.6
Don't want to do too much. I think I'm pretty happy
with how this one looks. Obviously, this is making everything look like
a little too dirty. Let's stone it down
back to 30 as well. As you can see, maybe
increases to 40. All right, now I'm pretty
happy with my wood. The last layer to add is
the roughness variation. Let's rename this basically
roughness variation. How this will work is you can
disable all these channels. As you can see, these are
like different channels that can be enabled and
disabled from over here. We will only keep the
roughness channel enabled because you
only need that. I will also show you
a quick shortcut. You can hold Alt and click on that channel that
you want to keep, and rest of them would
be disabled on your own. You can hold Alt
and click on Rough. You will see now
the whole roughness is being controlled
by this layer. As you can see, now the wood
is like really shiny, shiny. And now it is not really
reflecting any light. The decision is
totally up to you. You can also look a little bit shiny if you want a
totally up to you. But with the help of this layer, we are going to make it have a bit of variation
with the roughness. Obviously, we will add another black mask
and a fill layer. And this time you can
look through any of the looking grunge
maps and search for grunge and just drag and rob them and you will right away. Notice the, again, it's not a huge difference but it
is really subtle one. If you can see over here, if you move the
light, you can see the roughness variations if
you turn off this layer. We didn't really have that much. We did have some because we gave all the different layers
different roughness values. Like this one has
0.45 then we have 0.3 0.3 this one has 0.5 You can switch them up a
little bit if you want to. Maybe we can set this
to 0.4 This one can be less 0.25 As you can see, it will add a lot of
value to your material. Again, select the mask, currently we drag
and the crunch cop, as I said, you can just try
out various ones of them. Whichever one you
think fits the best. Make sure to change
it to Tribe Dana, because I think that
looks pretty good. You can also play
around with things like tiling to make the effect
seem more prominent. So let's see which
one do I want to use? Let's try this one. You can really see it
on the front door. Yeah, we can see
it a little bit. 0.25 is fine for now. Obviously, I don't
want it to cover like too much of the space. I will keep the balance too
low number, only like this. I think that's pretty good. I'm happy with this.
Let's just say with this, we are pretty much done with what is this,
the wood material. In the next video, we
will be setting up the other different
materials of the model. We will be creating the clock, we will add the iron
material on the insides, and also we will be setting up the glass material already. This is a pretty long lecture. Thank you guys Watching I
will see in the next one.
10. Creating Some More Materials: Hello and welcome guys. Let's continue texturing
our hall clock. Now what I will do is let's first set up the glass material. Just the basic class material
so that we can actually see through the model
and see how it looks. First, add a folder, let's rename this to glass. Now I will simply add
a fill layer to this. You can change the
color to anything. For now, let's set this to red, just so we know
it is this layer. Click over here, right
click and exclude all. And just make sure to select all the objects that
you want to add the glass to is selected now. All right, the way we can
create things like that are transparent or translucent is we need to add the opacity
channel over here. In our properties you can see there are five
channels currently. The color, that is
the base color, metallic, roughness,
normal and height. We don't really have a opacity
channel because for that we need to do a little bit of things in substance painter. First you can go over here, over here in the shader
settings and you will see over here it is currently
set to ASM metal rough. You can just click over here. However, over this one we
need to select this one. Pbr metal rough with alpha blending as you can see
in the thumbnail as well. You will see this
transparency mode over here. Basically, this has
the opacity channel, that is the alpha blending. Just click over here
and now it is selected. Now we have changed the
shader so we can go over to Texture Set settings and actually add a new
channel over here. The new channel
would be of Opacity. As soon as you do
that, you will see opacity has started
to appear over here. Let's rename this layer to base and set the
color back like this. All right, now to create
the glass material, we need to enable the
opacity channel like this. When you turn this down, as you slowly turn
it down to zero, now it is completely
transparent. And as you set it like a value 0-1 it will be translucent. Basically, this is the way we'll create our grass material. Let's set the opacity
to something like 0.4. Right now it looks really weird, but the way we can fix this
is to make it look more like a glasses select the past
color and make it darker. We don't have to make
it completely black, because I think that way it
looks like really hollow. We can set this to
something like maybe 0.2 I think this value over here, 0.2 The last thing to do is just set the roughness
to something like zero. Because as you know in real world glass is really
reflective this way. We have made it look like a real world glass only because technically it
is not really glass. We are making it look like glass and
trying to simulate it, but it won't show like exact
properties of the glass. But this is the best we can
do in substance painter. Maybe let's make it a
little bit more darker. 0.18 Yeah, I think
this is pretty good. Now we can actually see
through the glass and we can see our things
that we created inside. All right, for now, let's keep the glass
material this way. Only next we can
create another folder, and this will be
our iron folder. One thing I'm feeling like it is difficult to texture
things over here that are inside because we will be also creating
some things over here over on this panel
that is like inside this. Because obviously we
don't want it to be this grayish color or even
the color of the wood. I want to give it like
a gold color material. Over here, we can
quickly just go back to blender.
I will show you. It will be like a nice little
learning thing as well, how we can update our
model at a later onstage. I will just select
all the glass panels. I will again press
the X and type in minus one to move them
over here on the site. Let's type in X minus two so that they are a
little bit further away. This way we can easily work with these with
this thing as well, this plan that we created, because I want to add a
gold material to this. All right, now that
we have done this, again, just select it all. A to select
everything it's save, go to file, select FBX. And now make sure to
change the name of this so that we don't
have the same name. We can make this as
updated selected objects mesh and hit export. Now we don't need
to do anything. Come back to substance painter, It is really easy to
update the project. Just go over to Edit
project configuration and again select
the file over here. Okay, where did I
actually export it? I'll just quickly go back, export it once
again, Select FBX. Actually, I exported this in
the blender files folder. Let's come back in
the exports folder. Hit Export once again. I will delete that
file later on. So yeah, now hit Select and select the hall
clock updated. You don't need to
do anything rest. Everything is fine.
Okay. Just wait for it and you'll see now the glass
is appearing over here. You will notice that it has the remains of like these
models from over here. To fix that, again,
it's very simple, just go back to
texture set settings, hit bake mesh maps, and just re bake
them once again. Now once you rebake them,
everything would be fixed. Let's just quickly rebake them. All right guys, the mesh
maps have been rebaked, returned to painting more, and you'll see everything
has returned back to normal. Even these things look
better with the dust because earlier they were totally enclosed off because
of the glass. That's why they were
appearing very dark. But now they are appearing fine because the glass
has moved this way. I think that worked out
for the best this way. We can also easily work with
them without any problems. All right, let's
start working on the iron material again. Add a filler to create the iron material.
The color is fine. At default, only
this color is fine. Just set the metallic
value to one. And you can see already
it looks like a metal. We can maybe make it a little bit less rough, make it shiny. Let's just set this 20.2
click over here, right click. Exclude all, and select
this and these things. Yeah, pretty good. Let's
rename this to base. Also, add the material for
this thing over here as well. For this, I will be directly
using a smart material. Click over here and
search for gold damaged. This one again,
drag and drop it. Now again, we can just click over here on
the Geometry mask. Right click, Exclude All, and just select Display, so that the material
only appears over here. You can see the color fits
really nicely with the model. Obviously, I want to tone
down on the dust as well, because right now
it is too much. As you can see, if you disable the dirt layer, it
totally disappears. I do want to keep it
a little bit though. Just tone down the
opacity to maybe 50. Yeah, that's nice. Maybe a little bit more. 35. I will remove this thing, that is the grainy texture. You can just turn the
layers on and off to see which one is affecting
these two layers. We can just turn
them off this way. I think it looks really
good. All right. Rest, everything is fine. All right. I will move
back to the iron material. Once again I will show you one thing that
we can just select, the base layer and from over
here, add a filter to this. We can use the filter to enhance the look of this
material even more. If you click over here,
there will be like various different matt
finished filters. All these filters will give your metal a different
type of finish. You can hover over them and
see what they look like. Like this is the
brushed linear look. As you can see, it will
appear something like this. You can do changes
to it on your own, like adjusting the length, the intensity of it, make it more or less. You can remove the filter
and try something else. Like this filter
is something else. It is the mat
finished, galvanized. Then we have all these
different filters. You get my point. The one that I will be using is this one Matt finish rough. This gives it a nice rough
look as you can see. It gives it a
roughness variation. Let's adjust it a little bit. I will increase the
scale grunge to 16 so that it's really small, like the gun weight
is really huge. 16 is pretty good, obviously, I don't want
it to be this much. I will just decrease the
brushing intensity to 0.2 As you can see, it has add like a subtle effect of these roughness
variations over here. Also, I will just select this dust layer and
move it to the top. You'll notice that as soon
as you move this to the top, it will start to affect all
the layers that are below it. It will affect this
gold damaged layer. Then the iron layer, maybe I won't keep it above the iron layer because I don't
want it to look this way. Because it is really taking away from all the shiny
look that it had. Move the dust below the glass, below the iron layer
so that it does not affect the iron as well
as the gold damaged. Yeah, you need to make
sure about this order of the layers of the
folder For the iron, what we can do is
basically we can create a separate dust layer for this that can only stay
in this folder. So. Affects the iron material only. I'll just select this
dust layer, copy it, and paste it over here
in the iron folder. The main reason this
dust layer looks like really weird with
the iron materials because this base layer
has a metallic value of one and this dust layer has
a metallic value of zero. If you set the metallic
value to one as well, you'll see it looks much, much better compared
to the earlier one. And we can also reduce the value of the roughness
to maybe something like 0.3 that it better matches with the overall like the roughness
of iron material. This way it gives it
a nice dark field without looking really weird. This looks much
better, in my opinion. We'll add another layer
in the iron material. Just select the base
layer and paste it. This will be our edges layer. I will just brighten up the edges so make them
completely white like this. Let's just use a
separate smart mask. Again, we will be going with the edges smart mask on
something like this. As you can see, this will make it pop up a
little bit more. I will reduce the
wear level a little bit because I don't want
this effect to be too much. And also, I will reduce the opacity to maybe
something like 50. Let's select the
color back again and make it a little bit darker. We'll select the dust, maybe increase the
roughness late. I'm just trying to tweak around
the settings. All right. I think this is pretty good. We can obviously
create all the things, render them out in blender
and see how they look like. And then we can make a couple of changes according to that. This way I think the iron material looks
pretty good to me. Let's just hit safe. One more thing that I
will show you how we can improve the colors a little
bit of substance paint. Because I think the
default color space a little bit flat, it's fine. But if you want to
improve it just so your project looks a little bit better in
substance painter, you can go over here and scroll down and activate post effects. Enable tone mapping and
select log from over here. It will make it
look a little bit darker when you scroll down. Again, enable activate
color profile. Now it will be even more darker. Just select the profile
from over here. Acs for you can
see automatically. Now colors look a lot better if you don't have
this ACU for log file. It does not matter.
The earlier colors look fine and you can
definitely work with them. But yeah, this is definitely a little bit better to look at. I will decrease the
metallic value a little bit to 0.9 maybe increase the roughness to 0.25 I'm just
trying to tweak it around a little bit because I was feeling like it was
looking a little bit too shiny. I think this is
pretty good for now. I will keep it this way only, and we can edit it later on if you feel like it does
not look too good. All right, let's save basically I think this is
pretty good for this lecture. We'll continue texturing the
clock model in next one. Basically the only things I
think that are left for us to do is to set up the textures
for the actual clock, these two parts, and to make the glass material look
a little bit better. Right now, it looks
like a glass, but obviously we have to
add a little bit of damage and other things as we did with the wood
in the iron material. Yeah, Thank you. Watching.
I will see the next one.
11. Creating the Clock Material: Hello and welcome guys again
in this lecture as well, let's continue
texturing our model. In this video, I will be focusing on the
clock part again. Let's create a new folder,
rename District Clock. Let's start by adding a
new fill layer under here. Rename this to Base layer. I will right click over the geometry mask,
exclude everything, and just select this piece
for the color of this. Basically I will be giving it like a light yellowish
beach color. You can copy the X
code if you want to. This color, I will add another variation
layer. Add a fill layer. Let's rename this two
variation color variation. I mean, for this basically I will be going with like a dark yellow
type of color. Again, just copy the X code, paste it over here
and select it. Let's add a black
mask to mask it out. And add a filler now in
the texture section, search for a texture
map called clouds. And I will be basically
using the clouds to drag and drop it over here right away we cannot
really see any changes. Let's enable the
mask from over here. As you can see, it is
like really faint. First, let's increase the
tiling, Something like this. Then what we can do is we
can adjust the balance and the contrast so that it
is a little bit sharper. Now if we come back
to the material, just press to come
back to the material, You can see over here it is appearing like this,
the color variation. Let's select it once again. And I will decrease the balance because obviously I don't want the effect
to be too much. As you can see, if
you set this to zero, it is completely the base color. And as you keep increasing it, the variation starts to come in. Set this to 0.25 I think. And the variation, the
contrast can be a little bit more like 0.35
as you can see. Round it off. I will
set the tiling to 15. All right, now let's add a
dust layer to it as well. Again, create a new fill layer. Rename this two dust, give it a dark color. Again, I will be
adding a black mask. Let's use a smart mask. I
will be going with this one. Only dust, just drag
and drop it over here. Select the generator
and increase the lid. Let's see. We can maybe increase the grunge
amount and reduce this. Basically increasing the
grunge will increase the dirt. Yeah, I think
something like this is pretty good and now
we can just tone down the opacity thing like this. Now, right now it
looks like weird, but when we will
add the numbers, I think it would look pretty
good to add the numbers. Basically, if you will go
in the resources folder, open up the textures
in the alpha section, I've added these
two clock alphas that we can use to
simply add the numbers. I've added two of them.
You can definitely find more on Google and create some of your
own if you want to. I will be using this one. The second one,
let's just drag and drop both of them
into the shelf. You will see this pop up appear. Make sure to select
them both as alphas. Now we need to select where we want to import our resources. If you select current session, basically they would only be imported to this
particular session on. If you close substance painter, they won't appear back. If you select the project
then they would only be imported to this
particular project. Only if you create
any new project, you won't find these
Alphas in your shelf. And the last one is the library. Basically, they would get
imported permanently into your shelf so that you can use them for any of
the projects you like. Let's just select for
this particular project. Only import, and you can see
they've appeared over here. All right, to add them
onto here like a sticker. Basically what we can do is Let's create a new
paint layer this time, or we can create a new filler. Let's just create a new
filler and add a black mask. Again, let's set the color
to obviously black for now. This can be named as
numbers. All right. The way we can add this thing
over here is if you notice, you can paint with
the brush onto your like model very easily because the mask has been added and you're currently
painting with white. Let me just change it
to something else, like a red color so that
it is not confusing. Yeah, when we paint with white, you can see this red
color is appearing because the red is the
actual layer of the color. And we're painting with
white on our mask. That's why this red
color is appearing. If we paint with black, then this red color would
start to disappear. Now basically what we
can do is we can double click on this alpha
and you'll see it has been equipped in
your brush and you can easily paint
with this first, set it to white, and now
you can easily paint with this onto your model. Perfect. Let's just undo it and I will show you the
perfect way we can add this sticker exactly
on this thing. First, I will remove this
mask so that there are no old strokes present. And add a new clear black mask. Make sure to set orthographic
view from over here. Because you will notice
in the perspective view, things can get a little bit skewed as it is a three D view, when you like stamp it around, it can get a little bit from the edges and it is not perfect. But when you select
the orthographic view, now let's say you
hold all ten shift, then use your left click to
exactly snap it like this. In the front, you can
see it is perfectly straight at 90 degree
angles and you can easily stamp your
alpha onto the model. Now I will set the color
back to black like this. And select the brush once again, make sure this brush is selected and you've selected the mask. Double click on the alpha. You can hold control
and use your right click to move it left and right. And that will increase the scale or decrease
the scale of the brush. Make sure to make
it fit perfectly. What I do, basically,
is I will look at this dotted line that
is at the complete outside of the circle and make it match with my circle and then just stamp
it like this. All right. I think that's
pretty good basically, if we increase it to four K, it is bloody right now, but when I increase
this to four, it would look pretty sharp and I think it would look really good as you can see. Now, with that added, you can see that a dust color variation has started to look really good If you just kept it
with the base color, you can see it
looks really flat. But with the added
color variation and the dust, it looks really nice. What I will do is
I will move it at the bottom, just above the base. Okay? It is looking weird
because it is getting clouded by our like
a color variation. And dust like that is also a nice effect if
you want to have it like the clock is sold, that the numbers have worn off. But yeah, I will just keep it at top only because I
don't want that. All right, now we
can remove the alpha from over here so that we
have our old brush back. Or we can go to the brushes section and select the basic hard
brush from over here. And that will give us back the normal brush
that we had earlier. I will decrease the
dust value to 25. Okay, maybe to 30 and decrease the color
variation to something like 70. Yeah, also right now, they all have like
same roughness values, that's why it's
looking really flat. Let's switch up the roughness
values to give them a different look
for the dust layer. We can maybe increase it to 0.4 You can see as
soon as we did that, it is looking a
little bit different. Variation layer can
be increased to maybe 0.6 For the last one, I will decrease it to maybe 0.15 This way you will notice that we have a
roughness variation going on. That's pretty good. Let's see, I will decrease it 2.5 maybe. Yeah, that's good for these. Like the clock hands, we can also add the same mask. That we used for the numbers. The way we can do
that is very simple. We don't have to like paint
them or anything like that. We can just select
this tool over here, the polygon field
that we used early, select the mesh and then
just click over here. Okay. Yeah, I was wondering why this was not working
earlier as well. That is because we
have completely enclosed this in a folder and the folder has the geometric
mask set up for this thing. Only you can just select
these pieces as well. Then it will start to appear. You can click this again
and just fill them out properly, just like this. Now if you zoom in
onto your clock hands, you might notice a small issue. You might or might
not have this. But let me just show you
how we can fix this. We can see this little
bit of color bleeding out onto your like clock hands. The way we can fix
this is we need to go back to Blender once
again and we need to adjust the UV islands for this clock or the clock
hands specifically, just go to the UV editing tab
and select the clock hands. Press tab and press
Select everything. Press and smart project, okay. Basically what we want to do is we want to increase
the scale of them. Earlier they were
like really small, but now this is really huge. But we can keep the scale of them to around this
much, I think. Then you can just
select everything. Press eight to select
everything, the stab, You will notice that these
are like getting overlaps. Just press to select
everything once again. Then go over here in the UV options and
select pack islands. As soon as you do that, these
will be packed perfectly. We can give it a margin
of 0.001 All right, now the size of them is a
little bit larger than earlier. I think it should work
perfectly and not bleed out. Now just select everything
we need to export the file. Once again, select everything. Over to file export FBX. Now in the exports folder, selected objects
and select Mesh. We can rename this as Final, Hit Export, come back
to Substance Painter, and go over to Edit
Project Configuration. And just select Final
from over here. Okay, everything will go really weird because the
Us have been changed. It will look weird as everything would be
overlapping each other like this. Don't worry, we
just need to bake the mesh maps once again and
everything would be fixed. I will also decrease
the size to one K, maybe before now, so that
it is a little bit faster. Bake the mesh maps and
just don't do anything. Hit bake selected textures
and wait for it to finish. All right guys, the
bake is finished now, it returned to painting mode. Yeah, you will notice
everything is back to normal. Just quickly look for any
issues with your model. We can still see a little bit
of bleeding out over here, but let's see if we increase
the size of the texture, I'm pretty sure it
would get fixed. Yeah, as you can see, when
we increase this to four K, I think it would look perfect. As you can see, we don't have any color
breeding over here now. Just quickly look if there are any other issues
with your model, but I don't think there
are the textures. Everything looks
pretty good to me. Let's just say, I think this is pretty
good for this lecture. The next lecture, in my opinion, would be the last
one for the text, in that we will be
just setting up the glass material a little bit. And then we will export
all the textures to blender to set up the
rendering and everything. Thank you guys. Watching. I
will see you the next one.
12. Glass Material and Exporting Textures: Hello and welcome guys. So in this lecture, let's
finish up with our texturing. We will be mainly
focusing on our glass, but before that I want to
fix up a couple of things. The one thing is this
edge sharpen layer, this golden part I think
is a little bit too much. So let's just tone down
on it a little bit. I'll come down over here. Selected. We can maybe
select the generator first, and then we can push back
the beer level to maybe 0.45 Let's see the
difference between the two. This is 0.6 and this
is 0.45 Let's go 0.5 I think also the thing I'm noticing over here is that the yellow part is completely covering
this wood over here. You can decrease the edge smoothness if you
completely set it to zero. You can see now it is completely pushed
back to the edges. But I think this
is also too much. Let's decrease the edge
smoothing by 1.3, maybe. Let's one. Yeah. The last thing that I will do is I will just
reduce the opacity to 40. That way I think it
still adds a lot of value to our texture
as you can see. But it is not as much in
our faces, obviously. Again, this is like a
preference based thing. Earlier I feel like it was
looking a bit too much. Maybe we can increase it to 50. I'm just trying to find the
right sweet spot for this. Let's see, it's just
the grunge amount. Yeah, I think grunge amount
we can increase a little bit. That does not matter. We
basically increase all this. That is in between 0.2 is fine. I will also reduce the
opacity of these scratches to 40 because I think they are looking a little
bit too bright over here. Yeah, that's better. All right. Yeah, that's pretty
good in my opinion. I think much better. Next thing that I
will do is I will add a small little design over here on this
gold plated thing. If you will look in your
resource files once again, I've also added these
two ornamental designs that we can add Dragon drop
them again into the shelf. Select them both as alphas
and import them to a project. I will just add them
to the corners over here. Let's select this one. Basically, we can create a new layer in the
gold damage folder. Let's create a new fill layer, add a black mask to this. Let's go into the, once again
sorry, orthographic view. Select this and you can just
stamp it on here like this. As you can see, I think this much size
is pretty good. I don't want it to overlap with the clock
when we move it in. Let's just keep it like this. If you look through in
the property section, you can set the angle to 90, then you can stamp it up
on all of the four sides. 180 and then I think 270. All right. Something like this. Obviously, we don't
want this white color, so we can turn off
the color channel. I will also turn
off the metallic. Now I will increase
the height to 0.1 let's say make
it appear like this. And then we can also turn
off the roughness as well, so that it blends with
the like material. Only this I think
looks pretty good. Maybe we can set it
to 0.05 let's say. I will also show you something. We can select the mask
and add a filter. You can see it looks like
really harsh right now. Let's add a blur filter. You can do a lot of these type
of things with the filter. If you add a blur filter, you'll see now it
has gone blurry. Just decrease the
blood intensity. 0.8 is pretty good. Just said this two height. Line because we're
using the high channel. I'll once again select it and decrease the height
two, maybe 0.03. Let's decrease the plur as well. 20.06 Yeah, I think
that looks pretty good. All right. Now let's
move on to the glass, close this up and open
up the glass folder. Let's add a new folder. Basically, first
what I want to do is I want to mask out the edges. I will do that manually. Two edges, add a black mask, and add a paint layer as well. It's good to work
with a paint layer, remove this filter,
and select brushes. And I will just select
this dirt one brush. I usually use this one a lot. All of these dirt brushes are
pretty good in my opinion. You can use any of the
brushes you want to. There are a lot to choose from. But yeah, I will
just go with this. Basically what I will do
is if you start to paint, you will see this white
color will start to appear. It is the mask color as it
is the color of the layer. Change it, you can see it
is appearing up over here. Let's just set it to white only so that we can
see it properly. We will remove the
color later on. Basically what I want to do is I just want to mask out the edges, adjust the size and the
hardness of the brush. I'm telling the
shortcut once again, You can hold control
and right click. Just hold them
both. And when you move the mouse up and down, it will control the hardness. And when you move
it left and right, it will control the size. All right, just start painting with the
brush on the edges just like this and mask
them out completely. We will also set it to two K, I think it is lagging
up a little bit, wait for it to load,
and then we can work, I think, a little bit faster. Yeah, let's just do
something like this then What you can do is you can maybe select
some other brush. Let's say I select this to
press X and remove some of the areas like lightly
to have a variation, you can press X once
again and again add some of the areas,
then again remove them. Keep on pressing X to switch between both
black and white. And just keep adding and removing so that we have
a bit of variation. I don't want to come in toward
that it covers the center, so make sure it stays
along the edges only. Yeah, I think something
like this is pretty good. So this brush once again and yeah, basically something like this. And then we can move on to the other classes and
do the same thing, reduce the size for this one. Do something like
this and then remove it from the center. Then just select
some other brush, add some variation
along the corners. All right, so yeah,
this is pretty good. We won't be able to
work perfectly with the side mirrors because they are not really placed correctly. So we can just keep them
at an angle and then try to paint the edges like this. Make sure whatever we do
on this glass stays on. This only and does not get to the other glasses can
reduce the hardness to make more variations
like paint hardness and then reduce it a
little bit to remove from certain areas like this. As you can see, I've now reduced the
hardness to very low, that's why not much
is being removed. All right, let's work
on this side now. Let's increase the hardness
and paint the corners again, I'll just x once again, reduce the hardness a little
bit and remove these areas. Select some other brush, all right guys, to make
it actually look good. But we basically need to do is select the edges layer first. Just completely turn
off the color channel, there is no color information. Now what we want to do is we can also remove the metallic
roughness we do want to keep because roughness
and opacity would be the main things that
would make it look good. Right now, the opacity
is set to one for this, and as you can see for the base, it's set to 0.4 around the edges because dust
is collected over there. We do want to keep the opacity
at maybe something like 0.75 That it's still visible, but not completely
opaque is what I mean. Roughness, I will decrease. Let's see, we have set it to completely zero
over here in the middle part. For the edges, we can
maybe set it to 0.6 We definitely would have to do a couple of iterations for this to see how it
looks in Blender. Right over here, I think
it looks All right. Yeah, let's just keep it
at this only for now. All right, Now what I will
do is I will just duplicate this edges layer and
remove this paint layer. This time we want to fill up the center part
that we left out. Just add a fill layer for this. Rename this to maybe
something like damage. I will be using a fill layer. There are a couple of different
ones that you can use. One that I found out to work
pretty well is this one, the grunge smudge heavy
grunge wipe smudge heavy. Just drag and drop it over here and you will see its effects. As you can see it nicely
plaints in with our edges as well and fills out in the
center with all this dirt. We can set this tri plan And
like a just third tiling, something like this,
it gives a nice look. You can obviously
reduce the balance. To decrease the effect at just the contrast
and things like that. One Another that worked
really well was the leaks. One select leaks and
this one grunge, a small, this one just drag
and drop it over here. And you can see this one
also looks pretty good. Let's try setting it at three. Yeah, I think something like
this looks pretty good. As you can see, again, obviously I will decrease
the balance a little bit. So you can choose whichever
one you want to go for. I think the earlier one works a little bit better,
in my opinion. So I will just use
this one only for me. Let's try something
like this now. Let's just hit safe. And let's keep it
just like this only. And we can just export it to blender and see how
it actually looks. And then we can proceed
from there further. If it looks a little bit weird, we will tone down the effect. And if it looks all right, then we can just
go ahead with it. With this, we are pretty
much done, in my opinion. Let's set it back
to perspective and fill open up blender. Also one thing that I
want to show you guys if you want to adjust this
damage layer specifically, you can also add a paint
layer to this if you want to remove it
from certain areas like this as you can see, or if you want to add
it in certain areas, you can just press X and start to paint on your own where you can definitely do those type
of things if you want to. You can see if you turn it on and off, you'll see the effect. Let's just keep it like this. I don't want to spend
too much time now. Go back to Blender and
see what we can do now. First, I will come
over here and change the render engine from B to
cycles and set this to GP. Because we will be using
cycles to render everything, we can enable noise as well. All right, let's first export our textures from
substance painter so that we can use
them in blender. To export the textures, you just need to
get control shift in E. Basically,
that's the shortcut. And you can also go over here
to file export textures. All right, now we need to
select the output directory. I will save it over here in
the textures folder only. Let's just save it out
here, Select folder. Now we have the output template. Basically, there
are like templates present for all the
different kinds of software. Like we have under engine four. We also have like Corona,
Cry Engine Cycles. Everything I will be choosing
Blender Principal, SDF. I will select the file, types PNG and we can
just set it to 16 bits. Size can be four K. With
this, we're pretty much done. We don't need to do too much Hit export and wait for
the export to finish. All right guys, so
the export is done. Now let's come back to blender and go into the shading tab so that we can actually
create the material. There is like a
nice and easy way to create this material. Like if you will see in
the Textures folder, you will see all these
different textures that we need to connect up over
here to create. Like a set up is like a
shortcut for this process. But first you just need
to make sure you have enabled add on in
the preferences, add on, search for node Wrangler and make sure to enable it. This is like a nice
add on that we can use while we are working with nodes. Now just select your material, any of the object, then make sure you are in hall
clock material. Select the principle BCF and
press control shift ten. This will open up this
principle texture set up. Now you just need to go
in the Textures folder, select everything and just
hit principle texture set up, and wait for it to finish. As soon as it is done, you can see the texture
is appearing over here. You will not be
able to see through the glass because
we are currently in this real time
rendering type thing, which works like EV, and we won't be able to
see the glass effects. But if you move over
to the layout tab and actually view the
cycles render engine, I think it work as you can
see, we can see through it. Let's just select all of them. Press G minus two, I think x two. They're placed
exactly over here, and you can clearly see that.
We can see through them. The glass is working
pretty good. We will be adding lights and stuff to see how
it actually looks. Let's select all of this.
Let's first set this, then Px, then minus one. I think it is exactly
fitting over here. I want to see if I was
overlapping with these things. I think I'm good with this. And select this Px. Then minus two, I
think we did the -1.5 All right, perfect. Now we have basically completed our texturing and we have also set up the textures
over here in blind, you can maybe add a simple
light like something like now if you
press R two times, you can rotate it
around to see it work. The model is coming
along pretty good. We might have to adjust
the glass a little bit. But yeah, that's fine for now. I think this is pretty
good for this lecture. The next lecture would be
the last one where we will set up the lights and
the camera and take a couple of screen and then edit out the portfolio renders. That would be the
end of our course. Thank you as watching. I
will see in the next one.
13. Lighting and Rendering: Hello and welcome guys, and welcome to the last
lecture of this course. In this lecture, we will be basically setting
up the lights and camera to capture a couple of portfolio screenshots
for our model. In the last lecture,
we basically added all the textures and
everything to our material. Now let's add some lights. First, I will just
remove this sunlight. For now, we can go over here in the
shading tab and I will be using a HDRI
to light up the seal. Just wait for it to at a
little bit. All right. Now we can just from
object right now, whenever we select any material, we are currently in
the object mode. That's where we can
select the materials and we can see them
up here over here. We change this to world, then we can change the world
settings from over here, Shift and add environment
texture, basically, that is what we use for HDRIs over here in
the resource files. I've added a simple
HDRI that you can use. Obviously if you have
some of your own or you want to download
any from the Internet, feel free to do so, but I
will be using this one. Just hit open and select
this file from over here. And now just plug it in. When you have done that, if you view the rendered
view from over here, you can see the
HDRI has started to appear and we will be getting
some natural light in our. All right. Now what I want first I want
to set up a camera. Let's do that.
Let's come back to the layout only to set
up a camera simple. Let's just press Shift
and add a camera. Now what you basically want
to do is you want to set up your view just like you
want the camera to appear. Let's say I want the view
to be something like this. Now just place your view like
this, Select the camera, then press control Alt and
zero on your number pad. You can see the
camera has set up itself almost according
to that view. Now you will go, oh, sight rule, press N
to make it appear. Select View from over here
and enable camera to view. When you do that, you
can move your camera around very simply as you
move around in Blender. That works pretty good for us.
We can place it like this. Now make sure to turn it off because it will get weird when
you move around like this. It will get all messed up. Now, you can press
zero on the number back to view through the camera, and if you just move it around, you can normally
view your scene. If you press zero, then
we are back in camera. If you view the rented view, now we can see it.
Something like this. Now what I want to do
is I want to remove all this like GRI image that
we have at the background. I don't really want that
do that in the render settings only scroll
down and you will find this film option and make sure to enable transparent. As soon as you do that you'll see all of it has disappeared. Also, we can enable render
region from over here. Basically, it will just show the render region
and nothing else. We don't really have
anything else that does not matter for us. All right. Now, back to Shady tab in the render view in
the render view moves zero for the
camera view and now just select your
DRI that you just added and risk control plus D. This will add a
mapping node to this. Basically, with
the help of this, you can rotate it around. As you can see, you're
rotating it around. I think if you enable back
the transparent thing, If disable this, I think we will be able to see
it move around. Yeah, as you can see, basically that is what this node does. You need to just rotate
it around and find like a nice sweet spot for light. Basically what I will be trying to do is I will try to give it some lighting on the back to add a rim light type of effect. As you can see
something like this, you can increase it. Yeah, I think 300
feet is pretty good. As you can see, the backside
of it is getting lighter. What I will do now is I will add a simple area light
on the front, light up the front
of the R model. Now press seven for top view and just light and add a light. Let's go back to the
layout. Press R then. X rotated by 90
degrees like this. Press seven for top view
and just move it around. And press to rotate it
in the top view mode. On to make sure that it
faces your model like this. Now when you press
zero or camera view enable the tender view mode. Right now it is very faint, but if you select the area light and increase the power 100, as you can see, it
will start to lighter. We can see this. A light is
shining back in our class. If you don't like that, you can maybe increase the size of it, then it would disappear. But now the lighting
looks really flat. Let's go with
something like 1.5, increase the power to 200. Maybe it's too bright, so we can move it a
little bit far back. Rotate it like this per size two. And now it is a little
bit more dispersed. I think that's a little
bit too far away. I think this way looks
pretty good to me. What we can do is
we can just press F 12 to render out our
image and see how it looks. Then we can move ahead
from that point. Just go to Render and
select Render Image, or you can just press F 12. I will wait for it to finish
and then resume back. All right guys, the
render is finished now. You can just maximize
it and zoom in on it. The glass looks
pretty good to me. And a light as well
is looking all right. We can see all these
imperfections that we added in it are
pretty apparent. Maybe we can tone them down a little bit in
substance painter. But again, that's totally
up to your preference. Maybe I will do it a little bit. Even this I think looks
pretty good to me. Yeah, let's just quickly open up substance
painter once again. Then we can just tone down the opacity or maybe roughness of these imperfections that
we added on the glass. All right, another thing
that I want to show you is that when you press zero on your number pad
to view the camera view, you can also adjust the
resolution from over here. Let's say if you want to
render it out in 14 40 P, you can increase the resolution. Or if you want to
render it out in, what do we say, like a
square type of format. Because this is
like a long object and a lot of this area is empty, we can maybe render it out, let's say 2000, 5,000 Let's try 1,500 Then we can just
enable camera to view. And again, zoom it in, maybe something like this so that it will have a
different look to it. You can press 12 once again and render it
out like this as well. Basically, I want
to mention that you can change the resolution and things like that to
render it accordingly. I think our modeling textures
came out pretty good. They look really nice as well. In this light, a substance
painter has opened up. Quickly. Open up our five. All right guys. As you can see this render is done as well. It looks pretty good. Now substance painter
also has opened up. Basically what I will do
is just select the glass, let's select the damage. Basically, decrease the opacity
to maybe like something 0.5 for this as well, the edges. Let's reduce the roughness
as well to maybe 0.4 Let's try 0.45 for this. Now we can just quickly
hit control shift ten and export it out once
again, the same directory. All right guys, the
export is done now. And if you go back in
blenders, close this. We need to just switch back to the layout and again go
back in the rendered view. And I think the textures
should update themselves. As you can see, they look
a little less apparent. Now I will show you a nice that way you can
compare the renders. Press 11 on your
keyboard this time. This is the old render
that we just did, Slot 1-2 like this, and now press 12. Basically, this is getting rendered in the slot
two so that we can compare the renders of both Slot 1.2 wait for it to finish, and let's see how this looks. All right guys, once again,
the rendering is done. Now if you press J
on your keyboard, you'll see you can
easily compare the two renders and
see how they fare out. As you can see over here, the imperfections are a bit too much and they look in our faces. If you press this
is the new render, obviously it has
toned down a lot. If you want, you can increase it or decrease it,
whatever you feel like. But I think this
much is pretty good. I will be going ahead
with this next. What I want to do is zero. Once again, I feel like the light over here
in our light clock, main clock area is
a little bit less. I will just move it upwards like this or we can just
duplicate this. Light lows over here. Let's that just reduce the power of it may be like 50
size as well to one. So I'm just trying
out different things. I think this looks pretty
good in my opinion. Let's reduce the power to 35. Yeah, I think this
is pretty good. Now what you can do is you can experiment around with
this however you like. You can change things
like the color as well them like a
totally different look. Rendering is not totally up to. You can also create a
studio type of scene. Basically shift a, add a plane. This thing also I do
quite a lot when I have a single prop
to render out, create a plane, rotate it like this and move it back over here. Scale it up. Just apply the scale. Press tab and select this
edge press to extrude it out. Press Y and create
some of this thing. And just place it at
the feet of your model, just like that. Scale it up. Now just so you don't have
this corner over here. You can select this corner
control and level it out completely this way it will look completely
smooth at the back, giving like a studio
light set up. Go back to your rendered
view now select the next, Scale it up like
this, add a material. Now you can play around with the color to give you a model. Again, a different look. Maybe going with a shade of
brown would look really nice. I'm just trying to show you
different things that you can do to render it out. Now, I will also
suggest you guys to add different cameras,
add multiple cameras, and take shots from different angles as Let's
just delete this for now. What I will do is basically
select this complete thing. First, let's shift, press shift S and cause bring
the cursor over here, pressift and add empty
object, plain axis. Basically, I want to parent all of these things
to the empty object. This way it will get easier for you guys to place it around, move it around, duplicate
it, things like that. Yeah, I will just disable all of these
lights and everything. Just go over here to
select everything. Or just make a
selection this way and make sure that this
is your active selection. At the end, select
the empty axis. Active selection is basically the one with this
yellow color outline. Now, right click parent object this way whenever you select
just this empty axis, you can move it around easily. Scale it however
you like rotate it, you cannot duplicate it. Just select them all
and then duplicate it. Basically, this will
have the patent as well. It is like a nice little thing so that you can easily
move and rotate it around. All right, press Alt plus H, H and bring everything back. If you will, press F 11 now you can view the
render that you just made. Let's go to the slot three
and create a new one. Press F 12, and I will just quickly wait
for it to finish. All right guys, the render
is done once again. Now again, just cycle
through them by pressing J. Yeah, as I was saying, you can edit everything
according to you, add more lights, and do
all sorts of things. Let's just save this
render image now, because this lecture is
already quite long now. I will save it in my files only you can
save it wherever you want. Let's save it as JPG. I will save it as one. I will just save it
over here outside. Now, basically it will appear
over here with your files. Now, let's just quickly open
up this file in Photoshop. I will show you a couple
of things and then we will finish with the
course. All right guys. Now in Photoshop you can
adjust it accordingly, like doing things like
adjusting the brightness, contrast all those things, adding like a color taint. Basically what I
usually do is first I will just select
autotone from over here. Because I honestly don't
know Photoshop that well. But I've noticed that
doing this auto toon, we'll fix up your colors of
the render a little bit. One more thing that
I always do is I will just go over to filter
sharpen and sharpen more. I share this thing in
all of my tutorials, but you can clearly see
the difference with this. Let's just, uh,
undo it once again. As soon as I use sharp and more, you'll see how all these
edges are much more sharp and as if the resolution
has increased and the details are popping
out a lot more. It is like a nice thing that
you can do to your renders. With that enabled, everything
looks a little bit fuzzy. Sharpenre can work like
wonders with your render, making it look even better. So as you can see, it looks
really nice basically. That was pretty
much it. Not much. But yeah, it definitely
adds to your render. You can do all sorts of things. Whatever you want to
from over here to color will also sometimes
fix up the colors of your, but maybe this yellowish
tint is all right. So you can just save on this
and save it as the JPG file. All right guys, so basically
this is it for this course. I hope you liked
it, So thank you guys for watching. I
will see the next one.
 Aniket Rawat, 3D Artist