Transcripts
1. Introduction to Class: Hi everyone. My name is and you
get double it. And I'm a 3D artist. I like to create high-quality
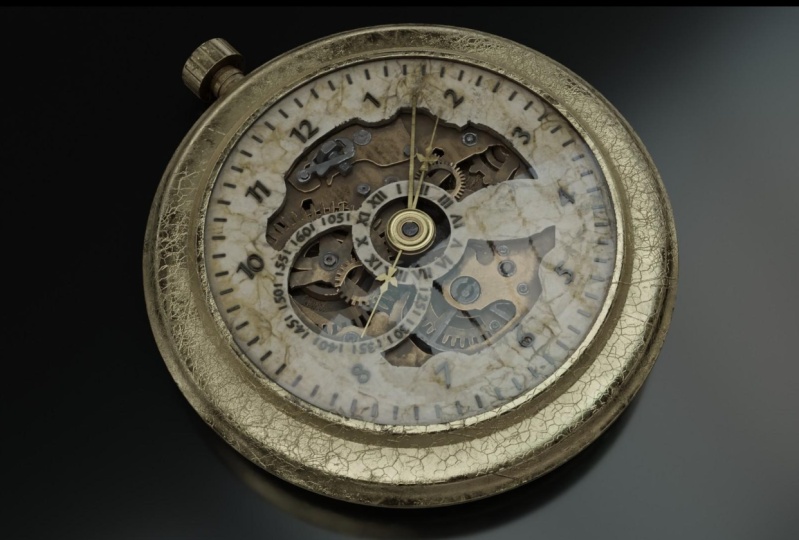
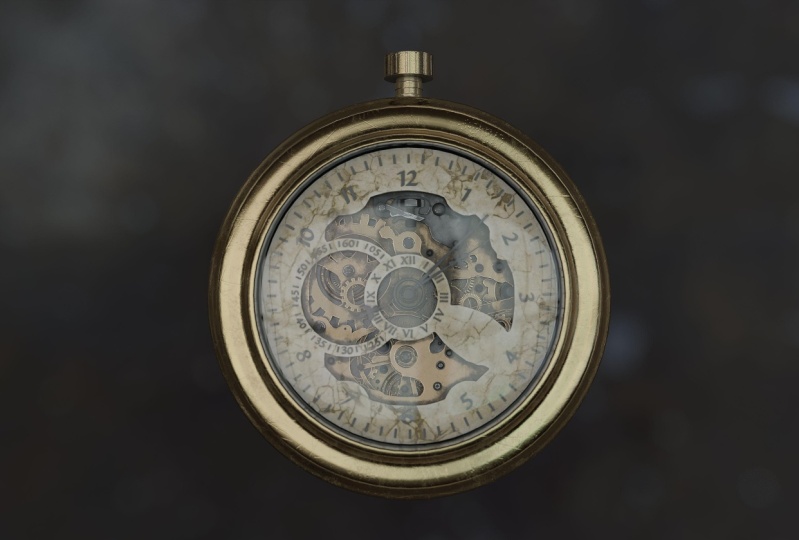
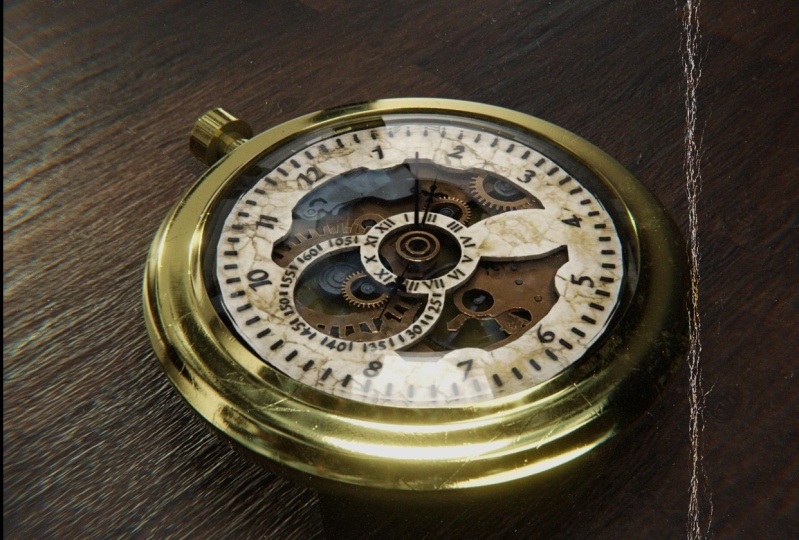
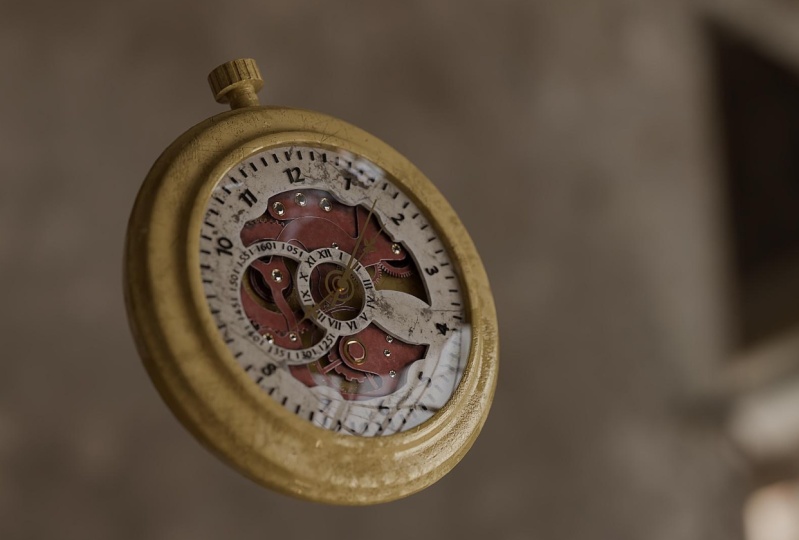
and realistic 3D prompts an asset like the
one you see on your screen. This alert right now
that is in front of you is the final
result of this force. If you follow along with me, you can have a very
similar for this one. I will take you through
everything in this course, starting from modeling and
blender, UV unwrapping, texturing and Substance Painter, giving it all the details, applying the texture, and then rendering the
scene in Blender. Leaves go through the
complete process of creating this pocket watch
from start to finish. And we will learn a lot of techniques and things
along the way. We've been learning in time
what it takes to create realistic problems like this is a course for
users of orotate. But if you have a
basic understanding for Blender and
substance painter, it would be really helpful. We will start by creating the complete model with
details in Denver. I'm really learn a lot
of techniques that could help us creating in
all the small details. After we have completely module the bucket watch in vendor, we will UV unwrapping and export this to a
substance painter. In substance painter first, we will tackle all these
problems that can occur while exploiting a 3D model from blender to any other
different 3D package. Then we will make our
mesh Madison and apply all the textures and give it all the details that can be
done in Substance Painter. We will act like
scratches, dust, dirt, everything to make this
as realistic as possible. And if you don't have
Substance Painter, you don't have to
worry about it. You didn't get it for free. If you are assuming
using your ID card of college or school for one year, if you're not a student, you can I would suggest
you getting it on a 30 day free trial and
using it just for discourse. And if you like it, then
you can buy it afterward. After this is we take our textures back to
Blender, will export them. And after applying
those textures in Blender vendor are complete
scene like this one. I will provide you with each and every file related
to this project. This would include
all the textures, the blank file, the
different images, etc. That if all from my site, I will see you in the course. Thank you.
2. Creating the Base Shape of Pocketwatch: Hello, welcome to the first
chapter of this course. So let's get started. I'll create a new file. And posting that I will do is delete all these
existing objects. So press a to select them
all, and then press Delete. Also, as you can see, I've
turned on my screencast. He's, I don't know if I perform
late any of the shortcut, it will appear here
in the bottom left corner that you can
easily follow it. So the first thing that we
will do is especially seven on your number pad to go into
the top orthographic view. So the topographic view is like a 2D view of a margin
from the top side. For example, if I add a cube
here and I passed seven. So now I'm in the top view and I can exit this tube
from the top side. Only. Very helpful when
creating models from reference images like through the different images
like this one. Then I go into the front
orthographic view is far right, and seven is for GAAP. Also, if I hold Control
and then I press one, and then I will go to
the back autograph. Mux, control plus 3 is the
left or to the attribute, and control plus seven is the
bottom orthographic view. Let's be seven or top autograph. If you delete this queue and post legged tie
that deference in it. So I have also provided you
with the reference images. You can use them. They're in the Images folder
of your courses. Resources file. To press
shift D, major and reference. I will hand over to
where I've saved it. Now I guess top preference. So to move this image, I can move any object. You can go and lock it
on any single axis, x, y, or let go. I want to lock it on the bed and I will
move it below here. So let's add another leaf.
Hey, different makes. And now let's move
it on the x-axis, the next, and move. The negative is two legs, either lender and men be occupied by shifting mesh
and either blend up. Now I will match this line with this in this lane of
the different image. Let's scale this first, press S to scale it up. Enable this exit. And let's place it according to the different image to
move it and S to scale it. Everything that we may
need it right now. So yes, check if everything
is matching up correctly. Yeah, I think that is find the best tree or the
date or graphic view. So right now as you see
the image of the site or to residue is comparatively larger according to this image. And then let's scale this down and match this
line and this line. And just make sure you are only scaling that image and not
the actual object. So let's scale it almost here on the y-axis to
match it correctly. I think this is fine. So now let's edit this model
from the top and the bottom. So press Tab to go
into the Edit mode, select all the vertices
and bring them here. And now let's celebrate the
bottom and bring them here. So now to make this shape, we need to add some edge loops. So pest control, our controller is used for adding edge loops. You can also
increase or decrease the number of edge loops
by moving your own. But I will just add one or an L. And let's move
this edge loop here. Let's add another edge
loop and move this here. You and I will add
here a line here, maybe on here, to here. And now let's scale these edge loops
according to the shape. Tool. Select the edge loop, and then click on the a loop. We select this. Let's
select the topic loop. And this S to scale it did
here according to the image. Now let's select this block. I'm going to hold Alt and then selected press
S to scale it down. Let's add another edge
loop here and scale it up and down. Now I will do similar steps
to just create this shape, but keep on selecting your
edge and magnesium the image. Add a little line here. Now let's select this one. Okay. Down on the bottom most Gaelic towel
and up quite a large gap. So I think the
shape is Northern. Matching with the defense
immediate and late. Notice Slack shaded. Let's shade smooth, this select object of a click and move. You can see the normals are
kind of weirdly shaded. So go into the object
data properties normal and enable auto smooth. Now, also I will enable this cavity and shadow did
not do much to our model. Yes, it has to either
edges properly. And also now I will
add a bevel modifier. But one thing that I
need to mention it, anytime we create, for example, object in Blender and change its scale like we scale it or we
increase its scale, we need to apply the skill. So if I scale it down, then I need to press Control a and then apply it this scale. This is very important. I will show you I
didn't important. Suppose I will create when Q and I will
duplicate this queue. And now let's change. I will change the scale of
this cube on the x-axis. So press S then x, and let's scale this up by
five times on the x-axis. Okay? Also I will do the
same thing with this view. That scale this up on the
x-axis by five times only. And now what I will do is
I will apply the scale of this first cube or
repress controlling and then apply this
kid and I will not apply the scale of this second. So now press Tab to go
into the edit mode and now let pest control
B for bevel edges. So now press Control
B and you can see how this devil
is the acting. And now I will
select this cube and now I'll press Control B again. And you can see how different
the results that we have got on the queue that we
have applied the skill, they are much more uniform
and equity from all side. And on the tomb that we
have not applied the scale. This devil is quite large and this is quite thin
in comparison. So this is the reason that we all need to apply our skills. Because if we don't apply it, it can mess up with the
properties and functions. So let's delete this
and select this object. And as soon as I
apply its scale, you see how the authority
I've already applied it. So let's apply this hill
and add a bevel modifier. Also. Go into the shading tab
and enable pardon, normals. And let decreased almost year. And let's increase the segments. Maybe just lead
them to one only. And the next thing
that I will do it right now, as you can see, if I press seven, this is
looking like very low poly. Right now we are not creating
this model for a game. So anything that we do not
have to make it look like now we are creating a high
boiling realistic asset. So we'll make this MOOC. To make this MOOC, Let's just
add a subdivision modifier. And as you can see, everything is now much better than smooth. I will change that
also to monopoly. We don't want it to
be too much volume. For now. Select this, you press
Tab to go into edit mode. And now this or the
face select mode, 1 is the part of the
vertices select mode is for edge select mode
and hit Select, select the face and press I. And let insect this a little
bit, I guess still here. And then press E, extrude this, and extrude
this towards the bottom. Do you need here? Maybe I will add
one more segment to the bevel call the
shading issues. I think this is better. So now I think our main
body piece is done. It is looking quite accurate
to the reference image. So the next thing we will do is let's first move these
reference images to a separate collection to
select them both and press M, M new collection. And let's move them to
the reference images. You see here that they are now moved to a
different election. We can easily enable
them or disable them. And also let's rename our
cylinder. The cylinder press. To rename it. And let's name
it mean our main piece. And now we will
create this thing, this piece in the center. So first, I select your main
body piece and press Enter. I did. Right now
we do not need it. And now let's create a local. I will add 64 vertices
to make it a little bit. And now let's place this circle according
to this line here. Just scale it down, move it. I think this is good. For now. Press Tab to go into the Edit mode and press
a to select them all, and then press F,
build the face. So now we have filled the face, press Alt H to bring
this hidden object back. And let's bring this a
little bit at the top. And we don't want to
see this base here. So let's scale
this up till here. Then this year almost. Now, we want to do is
we want to create, as you can see, they've got
these holes in this piece. So to do that, there is a very simple method to
us should just follow me. So I will select this
piece and there's a very handy feature in blended to which we can
isolate our objects. So if I select, for example, this object and I press Slash on my keyboard
on the number pad. So you see I have
isolated this object completely from the
rest of the scene. Now I can easily edit it
without any hindrance. For example, if there are, if there are a lot of
objects in our scene, so it kind of becomes to work in any of the
orthographic views. So you can just
select any object, presses lash to go into
the orthographic view. And if you bless
this flash again, then we will come out of
the orthographic views. So I will select this
image, this image, and I'll maybe just
this image and this centerpiece and press Slash to go into
the isolation mode. Plus 7 doubled the x-ray. And let's first create this
cutout that will do this. Add another circle. Wait, maybe I will just
duplicate this big circle. Duplicate this press shift D, and right-click to
cancel the moment. Right now it is moving. If I right-click, it
will move exactly to this position on the lake from which we have
duplicate this object. So ligase to Lake cancel
any kind of commando. For example, if I'm
moving this to here and I feel like I do not
want to move this year. I will just right-click and
it will come back here only. So there are big circle. So I will press G and then
zed to move it above here, almost seven to go
into the Edit mode, toggle x-ray and
let the lid down. According to this
model, a falcon. Okay, this is fine. For now. I will teach you as
a very handy trick. So I need to create this
smallest circle cutout on this bigger circle so I can delete it from
this bigger circle. We could do this very
easy method unit to just follow exactly
what I'm doing. So best seven, go to the
top orthographic view, but elect the smallest circle. Then select the larger circle, press Tab to go
into the Edit mode, de-select everything as
a, to select everything. That's FP. And then let's type here knife projected
and press Enter. And now if I come
out in this view, select the smallest circle
and now you can delete it. And now if I select the
bigger circle press tab, you can easily see
the cut-out has been created plus 3 to go into
the face select mode. And you can see easily the
smaller face has been created. So now what I can do is I can just select
the smaller face, press X, and delete
the face quite easily. Create risk that out. In a similar fashion. We will
create all these cutout. So we continue from here
in the next chapter. Also, if you want, you can try to do some of these
things on our own to create these cutout. But we will continue from
here in the next chapter. Thank you guys for watching
you in the next video.
3. Creating the Watch Dial: Hello, welcome to Chapter 2. So let's start from
where we left off. So press seven on the
number pad to go to the top orthographic
view enable X-ray. And now we will create
the remaining cutout. So to do that, let us shift and go to Inglewood and
add a single vertices. What this will do
is it will just add a single word from which we
can clear this whole shape. So to select that, what
is the post we need to present one to go into
the working electrode. And now if you press G, you can see this is a word. I can move it. So I
will place it here. And let's start.
So what I will do, I will just go over this, complete our claim, and
collect this vertices. E, extrude it. And yes, lazy here. And now we just need to go
through this entire outline. So you can just pause the video and maybe skip it or just do it on your own
because it is really doing the same step
again and again. This press E, then move it and align it with the
different image. And just keep on doing this
until the shape is complete. One thing that I wanted to you see my Word if you've movie so I
can place it anywhere. But if you feel like it is moving too fast and you want
to do some precise movement. You can hold Shift.
And what this will do is it will make it
movements wife slower so you can place
it equity plus 30, that shift to move
it a little bit slower and then place
it wherever you want? Yes. Okay. I hope you whether it's
through then we're now. But now we just finished
this complete loop. What I will do is collect this vertices named Phillip,
this word, the end, press F to join them, and then press a
to select them on, and then press F to
filling the face. Now if I come out on this XA mode and just bring
this on the top, almost here. And then let's select
this one. And this one. I'll select, select
this reference image. And let's press work
in isolation mode. We don't really need
any other objects. Now. So again, we will
do that same thing. We will create the cutout that we created for
this smaller circle. To create that same cutout. In this bigger circle. Press seven to go into the top view for a
select this, then this, then press Tab to go
into the Edit mode as a, to select everything
and press F3 and knife. So you see the cut-out
has been created. So now what I will do is I
will just select this and delete this and press Tab. To go into the Edit mode, press three for the face
selector, then it does fail. The fifth plus x and the basis. Okay, so now we have
created two cutout. These two cutout. So let's
quickly create them also. I will create
another word to see. By now. The molar process. In creating this that out, you can just pause the video and create the remaining
cutout on your own. And I will just copy them. Always remember that if you weren't worried, if
you've not moving, that means you are not
in the vertices mode. For example, if I go to the face select
mode by pressing tree, I cannot move it. I can move this. If you want to add between the control
and then add a word. And let us keep it truly. Also, you don't have
to be like really, I could add with
dereferencing it. You then go along with
your own preferences. So again, via 11
Philip disorders, he destroyed the Vn
plus f to join them. And then now let us again bringing this above
the LIGO so-called login. We need to create
the cut-out compress seven or the top view. Select this small piece, then this local press tab, but I could press a
to select them all. And FBD and life trajectories already connected
to suppress anger. And now let's delete
this piece and again, go into edit mode, 3, 4, face select mode. Okay, so the last shape that is remaining is it is very similar to a lake adding cn tracing
complete shape out. What we can do is add a token, scale it down. With this. Make sure that it is
matching this line. And move it to match it. Now does matter.
But now what I will do is press Tab to
go into edit mode, press one for more. Listed here. By pressing Delete and delete. Now let's select the vertices
and join them by pressing F and press a to
select everything. Then press F to
fill in the face. And then again, those same steps bring this
above this bigger circle. That is seven, or top view was killing the speed,
the speed tab. To select everything and then delete the speed and 34
Face Select and legs. Okay, Now all of
the cutout harden. So the next step is to beat. Let's first apply the skin
estab to go into edit mode, but as a selectivity. And now press E and
extrude this downward, I miss my spine. Okay, now that exists right click and mortar.
And now you feel ready. We're shading as appeared in the data properties enable or to food in the
normal fiction. Make this a habit
of doing this to every object after
you shade smooth, AnyObject enable auto smooth
founder, give data property. Now, what I will do is I
will add a bevel modifier. Oh, I think this one level is high and Enable
harder than normal. So our second piece
is done for seven. And I think this is
enough for this lecture. In the next videos, we will create these boiler
inside pieces when island. So thank you guys for
watching even the next video.
4. Adding the Text: Hello, welcome to Chapter
3 of this course. So let's get started. In this chapter, leaving the pursed lips done
on the team passed. Here. In this chapter we
will be creating all these numbers and letters. Socket, pair shifting
and add a text object. First, let's just
hide both of them, select them both and
press Enter a limb. Select this text
object, press M, and move it to a new
collection that memory text-only are now press 74 top view and press
Tab to go into the edit. Delete this text and type 2
in this town listed here, according to the
reference image. So the font that
we will be using, a font that I have provided you ways in the
course files only. File as the font. You just right-click on
it and extract this here. And we need or anything, anything to this file from here. We just need to
select this object. The object data
properties in font. Regular. Open the font and to wherever
the font was themed. Your course files. Now select
this and font has appeared. The now just scale it up and
magically the left intimate. Ok. Now it is not
matching buffet lethal. The only thing that
we need to do is indirect detection,
increase the offset. So now it is, it is matching perfectly with
the different image. And it is really not necessary
to match it perfectly, but definitely we can
just eyeball something. And now let's press Shift D to duplicate this
layer, this here, press Tab and believed
the two and rotate it by pressing R. And
now scale this down. Again. Same thing, duplicate. Tab. Daesh type. Rotate this. Again. You can pause the
video or this on your own reading properly. Because the all too much
for this, for this one. And now it just fine. Now, again, I'm matching perfect living the defense
does not matter that much. Further. Now all the numbers are then, just select them. First. I will press Alt H to
bring hidden objects back, select them both,
and move them down. Now, right now I, objects are three
odd numbers are like Lin, Lin, legs flat. They're not ness to just
select them all one by one. Eigenfunction. Discipline
then hold shift and select. The last one is select them all. And now, if I change the
extrude value from here, you see we can extrude. So now we cannot elect the 10 every number and then extrude
them when violent. The shortcut for this is just
hold Alt and then extrude. And then all of them
will update to get it. So this is like a really handy
shortcut whenever we need to change a property of all the objects that
we have selected. So you just need to hold oil and then change the value
of that property. Will hit Control zed. And again, I will hold
and then extrude this. I think this is fine for me. This much I think.
And let bring them down the G and then lead to
move it under their doctor. All right, now, if I
enable statistics, you can clearly see that these numbers are actually
a lot of value on. So could decrease the
number of polygons. We just need to agree
that a delusion that we don't need such
high resolution of 12. So again, hold Alt and decrease the resolution
from all up for all of them. I think is fine. And actually there is
no physical change from the alertly number 67 for the review
text, this collection. And by making these numbers
collect, select this, and duplicate this by shifting
down the spam type 1630. Again, just like Finney,
them on your own. Or if you want, you
can even follow me. Duplicate 45 and then rotate. Shift or the tab. You can eat and then type
T and repeat this. Hi. Also, one more thing that I wanted to mention
it at this point, you all should have your file. And also one more thing that
I want to mention is I will provide you with Blender file
for each and every chapter. So if you are stuck
on some chapter, you can easily follow from all the files
that I've provided. Lake for every chapter there will be a separate blender file. I wanted to mention it.
Again, I will mention this. I am rotating this x. Or if you weren't
really precise, you can just type it here also. I prefer to do it
by holding shift. I think numbers are done. Now let's do this. I've
hidden it from here, so just enable this election. All of our objects are back. Let's check lens is
the thickness is fine. I think this event is fine. So this much is enough
for this lecture. Thank you for watching. Continue in the next chapter.
5. Adding Small Details to the Watch: Hello and welcome to
Chapter 4. So let's start. In this chapter, we will be creating these small
bars over here. Here. Before this,
we won't be using the difference image
because as you can see in the
reference image data, a little bit slanted. So what? We don't want them
to be slanted, decision them to be straight. We'll make them on our own
without using that image. So the first thing that
we need to do is we want this point to be at the
center of the model. The center of the model would be the center of this
big main piece. So why do we want this
is because, for example, if I put this cursor point over here to change the location
of the cursor point, we can just hold the Shift. And with the help of ray click, Shift and right-click, we can change the position
of this course. So what this does is if I can
use this for example here, and let's say I add a cube. So this q would be
added over here with the origin being
the cursor pointer. So that's why we want
the cursor going to be at exactly the
center of this model. So we can bring
the bar over here, they're small but over here. So I could do that. First, Let's select
this big piece. Go to Object, set origin and
Jews or the intergenic tree. It goes all the way
through the geometrics. They did not change. Now to change the position to
exactly on this origin. And just press Shift
and then select cursor to select which
has been the cursor here. And now let's add a cube. And then you move it here. Let's toggle the mat, the scale within this map, this is the incentives. So I think this much we haven't rotated are so ours
is completely straight. Bring this up on the zed
axis to almost here. So now to create
them all around in a circle and duplicate
this one by one. But we will just
use the spin tool for to use the pen tool, select this press Tab to
go into the Edit mode, press a to select everything, and then select this spring too. Now, you can just
rotate the cursor this way and they were
all will be duplicated. So now without
clicking anywhere in this menu in the angry type 360, because we want it to go all the way around in a circle,
360 degree angle. And now these steps mean number of fuel
that will be added. So I think I will go with 16. And now I think this is fine. So just press Tab and come out of the edit mode
and we are done. So this was pretty easy. Also, I will just select these all and bring
them down a little bit. Also just select them all. Test Tab, press a to
select everything. But as m, and then
select by distance. We just need to make
sure that there are not any overlapping objects
remaining. After doing this. All of them get eliminated, suggests we need to
collect them all in, then best m, then merge
them all by distance. So now we need to create
these small bars. These will reveal copy
manually only to select, to select just one of them. I hovered over any
of the bestseller, select that single piece, press Shift D to duplicate it. And let's just press P and then separate
this from selection. So now these two are separate
objects to enable X-ray. And let's just, okay now, one more thing that
I want to tell you is if you now rotate this cube, and if you haven't
tried to rotate it, you can see this is
a rotating lake, not rotating from here. We've sorted the origin, but it's rotating from here, the origin is misplaced. So to solve this,
just again go to Object Set Origin
and origin symmetry. This will bring the origin here and now I can easily rotate it. So when they say and
displace it here, heel is down according
to their friends. And now let's just
duplicate this. A lot of them so it
won't take much time. Yes. All our than just come out of the X-ray mode and check
if everything is looking. Okay. Part 2, we'll open. Just go here and just this witness for this
object that we loaded, collect this one and the bottom hold shift,
and select them all. So the first thing
that I will do is post haven't joined them all. After selecting them all, press Control J to join them. And now let's bring them up. So let's select both of these objects and let them
do the extra election. And I will continue the message text-only all
of them together. This is the text collection. Let's name this collection
to the main body collection. And now let's create
the stops to add a cylinder rotated on
the x less than x, and then type name b on the number pad down
their spring this year. Inevitable X-ray Shift
D to duplicate this, to scale it on the way. And let them both and move them. Below the flame. I'll imitate. Like shapes will enable
artist move on here. When we join them, both of them both then. And now, I'll press Control
a then apply the scale. And let's say that Devin, Devin, Devin enable
harder than normal. Now to create the shape that
is similar to the sodium. The spin doulas already selected, De-select,
defend, collection. Let's move this up a little bit. The stop words. Also make sure
your toggle exit is open. For example, if it is off, and I tried to
select all of them, only, the half pipe would be selected and bottom hub
will remain unselected. But if I have three neighbors, all of them will be selected. Let's move them up on the
y-axis and a lot of them also. Okay, Now to create these kind of ship, it is very simple. Press 32, go into
the fifth mode, old art, and collect
this face loop. Now go into the Collect tab
and choose this checker. As we'll alternate
your selection. And now press I insect this. And then press Alt and
extrude faces along normal. So this is really you peel them. For this bottom piece, I will add an edge loop
here on the left side. For edge loops like this. Press three for
the facility mode. Hold Alt and select this
one and Shift and Alt. To select one edge loop, I just need to hold
Alt and select this. If I need to select
this edge loop, then hold Shift
and then hold oil, and then click here
to select them both. Now let's test it and then
extrude faces along normal. On the right who are
top screw is done. Let's create what are these
cold hands of the clock. But I will just
automatically disable everything and let only
well-conducted centimeters. For this, I will just bring enough again to
move the vertices, press one to go and delivered, collect MOD, place it here. And let me just do
the same thing again. And spacing. Mm-hm. The one hand is then step two, what
do they get more? Select them all and then
press F to fill in. These two shapes are similar. So instead of creating
this all over again, yes, select this shape. Press Shift D to duplicate this. Rotate this, and place it here. And we can do a little
bit of clean up. And now look again,
exclude them. If we don't do actually
want to select default. So we'll just hold Alt and
select the whole loop. Just hold Alt and click
anywhere on this edge. Select this complete loop
and presets to billet. Let's move it a little bit here. Okay? Now, this one is pretty easy. Just add a plane
down. Press Tab. Collect Luneburg busy year. But then this one here. Now let's select this
one and this one here. The staff to come out
of their day ignored. And let's enable everything. And let's bring the top. Let's move. These
officials are clashing. Not collect them both. That this control J
to join them all. For a good view mode as a, to select everything
and explore them. Alright, hang and move this. Now, these simple, let's either broken down according
to lifting, press Tab doing drag ignored. Yes. Plus f two. Then plus i. And second the face still here. And let's press for the face
select mode and delete. Duplicate this piece. An electric field is down, and let extrude them all. And at the same time, both of them, I
relied a cylinder. Let's scale this cylinder down. Okay. I think I would collect
them all the shapes more time that joined them on press Control J and then
the label or the smoother. And let all fired up that will modify has enabled the scale. I'll apply the skill pest
controller then applied. And it looks all right, I think this is enough
for this lecture. We will continue from here in the next bill paying you for
watching. See you next time.
6. Creating the Inside Pieces: Hello, welcome to Chapter
5. So let's start. In this chapter. We will be
making the inside pieces. So first let's create this piece very similar to the things that we
have done earlier. Just press Shift to add. Let's go to the vertices mode. You can also go from here
to the vertex select mode. Just click here or press
12 or three, rest one. And now press a to select it. And then I will keep
it around here. And now we will explore this along the lines
of the blueprint. You might want to
pause the video and just tried to do
that on your own, because this is all we have been doing in the course flow. I think it should be
pretty undisturbed by now. We just, we are
distressing E and then extruding it or lower. You don't have to be lake daily accurate with the blueprint. You can just roughly
follow the light. Because this pocket voyage
was made by me only. I did not give Lake I did not think about the
pieces that I was creating. I just created random shapes to make the inside of the watch look more realistic and complex. And I mean, I could also just
fast forward all of this. I did not want to do it. I just want to keep it
everything recorded in real time with no cuts that you can
follow me from anywhere. So if you feel like
this is very easy, boring for you, skip
the part and do this dressing part on your own. Now as we won't be able to see
the part beyond this file, we'll just do this because we won't be seeing
what is we need. This does not matter. I will continue from
here over here. And the inlet flow that
looks like this one, this one and press
F to join them. And that's a to
select everything and then press F to fill the face. Now, let's select this piece, the one we just
created right now. And select this reference
image and press Slash to go into
the isolation mode. And let's create this cutout. Again. Let's create a circle. Decrease the scale to match the size of the
so-called Linda blueprint. And now prefab. And then press F
to fill the face. Now Let's bring it
a little bit up. Then the, the shape. Now again, we need to
create the cut-out. The first select the smallest
circle, then the shape. Press Tab to go into edit
mode a to select everything. Then press F3 and
type knife project. Now let's delete the small
circle and press 32. Go into face select mode, the cut-out is created. Select this face, that's
x and delete the face and are thus slash to go back
to the normal view mode, Let's bring it almost here. And we weren't given
thickness just yet. We will just first create all the insight pieces and then we will give it a thickness. Let's move it to a
different election. Click on it, press M, new
collection and move it. Let's name this
collection inside VCs. Yeah, Let's move
these two also to the inside only
insight collection. And now what we
will create pins. Let's make this circular piece, this one, the left
side of the circle. Yes. Really hard to see right now. So I will just select this
offense image press Slash to go into the isolation mode. And now let's fill this. According to the
reference image. Okay, I think that
could claim tab. And then filling the page, I save this and let's
place it around here. And now press X and
believe the face. Okay, now let's
create the shape. Press Control and
bringing the edge loop. The loop and bring this here. Now, again, let's exclude this. The Control R to bring in
another words he in-between. And now let's join them. And now we're in big slips
and then collecting this, this, this, this and this, and then press F to
kill him the face. We can create the shape also. From this piece only. I'm enjoying them to come
out of the isolation mode. Okay, Let us
excludable call them, press Tab, and then just
extrude them both downward. Like this. Select them
both and move them. And our toast multiple
auto AI enabled autos would hold both of them
by holding Alt and then selecting Auto food to affect
the property that we bought all the objects selected
her lips MOOC for that. And let's create this
big piece. Do that. What I will do, this
is a late though. Let's add it here. And yes, it is tau claim. And wherever you cannot
see the outline, just move it roughly. At the end of the day, no one would it be
able to see below this part does not matter. And now let's join them. Stab, Select, select
them all plus a, and then filling in the phase 2. Now, in this big BC euclid, all these small cut-out
could do that for us. Let's bring this here. And now this one and the
reference image press Slash to go into the isolation mode. And let's add another single
word and place it here. And then again,
trace the outline. If you want to follow this. And this will be the last one. Now select all these
vertices you can see, and this icon will
appear a new bin, just select this way. You don't want to select
these fields because we have already filled the
face for this one. And now to come out of
this mode, just click, right-click to finish
the selection. And now you can move. The normal way, Canopus F to fill all the phases come
out of the X-ray mode. And let's bring it above this. And now we will
create the cut-out. Select this piece,
this piece press Tab, press a to select everything. Then F3 and my project. Now delete this object, select this piece plus 3, and then press X and then build a model of
the isolation mode. And let's extrude this result. Polymorphism much. You can also
increase or decrease the extrusion at a later point. N does not matter how
much you extrude. Now let's create a few
more pieces in this one. Press one for the
word select mode. And again, extrude the
institution process begin. Okay, now we really can't
see the shapes with just roughly imagination
and editing. And now there are no
cut down on the top. And now this next less clear this piece. Okay, Now there's a
hand filling the face. And one more thing that
I wanted to tell you, Let's first move it up here. Okay. If there are two
objects in a single leg, two meshes and a single object, and you want to select
only one of them. Today the Event Hub could do it. First. Let's go into
the face select mode, hovered on any of the phase for the object that you want
to get selected and then press L. Then only this piece will be selected if I go
over here and then press L, and only this one
will be collected. Let's bring it a
little bit. Yes. And now let's create the cutout. Being in a circle,
decrease the size. A little bit of a read you that it is moving it. Above this piece. An APA
7, Eleven, this piece, this piece press Tab
to select everything, then F3 and nitrogen. Now let's delete this piece, select this object
or face select mode. And then the deceased. Now press a to select
everything and again extrude it towards the bottom. Enable auto smooth. Let's add a bevel modifier to the scaling, decrease the level
by a little bit. And they will harden
normal shapes, mortar or ladder pieces. We didn't not by Tn. And now go here in Ember oil was this little
bit and then enable it. I think most of the pieces
are done, some are left. I think this one, this one. So we will continue from
here in the next chapter. And then we will further create
all the Nazgul 10 years. And then we will finish
with the modelling and start with the extreme part.
To thank you for watching.
7. More Inside Pieces: Hello and welcome to Chapter 6. So let's continue from
where we left it by 7 or the top view. Let's enable X-ray. And first let's
create this piece. Again, add the vertices. One for the word select
mode listed here for now. And again, let's start tracing. I think this piece. And now let's clear the cutout. I had a silicon list this with this circle
on the blueprint. Press a to select everything. And then after preliminary. And again you will
create the cutout. We'll select this
small circle first, make sure you are
in the top view. Then tell him this small circle, then this piece or stab, select developing FP
and life projector. Delete the smallest open. And let's delete this face now. Feet for the face select mode
and giving best tab again. And let's extrude this
receivable, select everything, and then extrude this
word at the bottom. Let's also add a
piece at the center. So I will add a cylinder. You can listen and they're
down to this much. I think. If the cylinder head, I will press Tab to go to get more briskly for Face
Select polygamy, stop this and let's inspect
this and bring this year. And now I will shade smooth
this and enable auto smoke, shade smooth default fill
and enable auto smooth. Now what we can
create some of these, the left had another DC, but S1 for the word select mode. Let's place this here. Join them, collect
single vertices, and then duplicate this. And let's clear this again and again. Select everything and press F in the face in the supinator
top and press Tab. Everything is selected. Press E to extrude. I will just select this, these briskly slash
for isolation mode. Only select this face. And I will bring this
up here at the top. And also press L to select this piece only and
move it a little trickier. Okay, the knowledge shoots mood this and enable or the motor. Now, we can start by putting all these nuts and bolts
that are all over the watch. Let's first create
this big rent. So data, very easy way of
adding balls in blender. You can go to the
Edit Preferences and in the add-ons tab. Bolt factory. If
this is not enabled, just enable this
bolt factory add-on. And now when you press shifting, you can see a board option
here to just add this vault. And you see automatically we
have a very well-made goal. We don't have two more
than that from the start. Now let's just scale this
down for seven and now rotated on the x axis by
90 degree my a minus 90. And let's select Bold and select this image
and press Slash for the isolation mode. And now let's scale according
to the kidneys is finite. Slash to come out of
the isolation mode. Let's bring this up here
at the top. And also move. We have to move this piece, suppress L2 only select this
piece and move it up here. Okay, now let's create
all these nuts here. So let's add another bolder. And now we can also
customize these bowls a lot. For example, you can go here. First, we can choose
a bolt or a NAK. If you want to create
this kind of thing. We choose bold and
there are also a lot of different
type of shape, shapes like this
one or this one. And we can also choose this type of if you want to
create a cut in the mold. So I will choose none here, and I will choose
dome for this type of bolts that I will be using on the pocket
watch over here. But the first thing
that I will do is press Slash to go
to the isolation mode, and then press three, press Tab to go
into the Edit mode. Enable X-ray, maybe
not this one. And then hold oil and select
this edge loop over yet. Press X and delete the vertices. Again, Philip descending
loop, press, delete this. This way. In this
part is remaining. Okay, now we will
delete this completely. The bottom part, the
bottom part press L, and then deleted.
Why I'm doing this? Because this is a really
good extra geometry. We don't really need it because no one would be able to
see that bottom part. So now select this
Luke by holding Alt and select this loop
and press F, the face. So now I can place it easily. Let's play this over here. Bring this up here. And now you can understand
what I'm saying. No, and we'll be able to
see that bottom part. So that's why I deleted that. Now we can duplicate this, maybe selective bolt again
and duplicate it over here. This one. There's
duplicate this one. Press Slash again. And let's delete again
the bottom part, this tab to go into
the Edit mode. And let's select this loop, maybe less X and
delete the vertices. Now both of them
are disconnected. So hovered over the bottom part, press L, and delete
the vertices. Now let's fill in this phase. Rotate this on the x. First, let's change the origin, go to objects or the origin
to the antigenic drift. And now rotated on the X-Y 90, the slash to come out
of isolation mode. Top here. And now let's
place this over a year. Maybe one over here. This piece. Okay, we forgot to create one
cutout over here. Let's eliminate this piece. Had a circle down enable
X-ray list is here. This tab and filling
the faith by pressing F. Bring this up
here at the top. Now, select this small circle, then this piece press tab, and select everything
three and nitrogen. Let's delete this circle. Take this piece to isolation. Okay, Now the thing is actually we have
already extruded this. What we can do is we can easily just select
this bottom face, press X, and delete
the vertices, and delete this set also. Select everything and
now extrude this again. Because it was not
a 2D shape anymore. Why we had to do this again. And now you'll be blade
like doorway here. And let's get this over here. Let's add a bold again, and let change this to enable X-ray and let's
place it over here. Are there anymore? For now I take this bottom over here. And this one here at the bottom. Make shouldnt not be
playing this in the air. Now, let's create
the circular shapes. Support this. I will
just copy this one. Go for right now. These appreciates
the dispersed tab over it, over the medulla. Then press L to
select it should be. Or maybe I'll just
copy the outline. Press L to select this
press Shift D to duplicate, and then press B to
separate the selection. First, let's change the origin. Or you could you like actually
selected both of them. And now let's scale this. Duplicate this, and
place this here. And now I will do pick
all of them because DAG. Now let's move them
to the bottom here. Align them with the goals and also alerted to be
given piece over here. Again, press tab for
the object mode. Select this one, and you
get one more diamond. 11, both of them listed here. Okay, we all forgot to
create this piece over here. So let's put up here creating, making
them all of them. A single object was a bad
idea to just press Tab, press a to select everything, then press B, and then
separate by loose box. This will be a separate
object for each one of them so that I can
select them both. I can join these two and
then bring them over here. And let's select
these two over here. And we'll bring this up here. Before we begin this, my Shift D. And then
let's also do that. So I think I'm modeling, typing to come along. Let's see, missing something, any of the gold pieces. Okay. Um, this is at the bottom. And this too is like basically all about your percentile you want you really don't have
to follow me to go to 12. Maybe I can call
you and here too. And yes. Duplicate this one and rotate
it 90 degrees and lift this heel. Good. Okay. Through an API head, I really believed the
speed and let's bring this one only here, also. Scale this up. Here. Let's also place
a MacDowell here. And here. This piece. Right now let's check what I
need on deck is remaining. If I did not clear, I will create a different
piece for here, maybe over here. The, I think this is
enough for this lecture. In the next one we will add
all the remaining gears, and let's add a neck over here. Did you make three
and scale this down? Okay. Yeah. Okay. I think I'm done now too in
the next one and recreate all the remaining
years and some of these pieces and finish with the modeling part
in the next video. Thank you for watching. I'll see you in the next run.
8. Adding the Gears: Hello and welcome to Chapter 7. So in this video we
will finish with the modeling portion
of this topic watch. So the only things
that are left to model these gears and some
of these inside parts. Let's start by creating these years for
making these very, very simple in Blender, there is already a
pre-installed codon. So go to Edit Preferences, IPL extra, and this extra
objects will appear. So we just need to enable
this Add mesh extra objects. We don't really need
this one, article one. So just enable add
mesh, extra objects. And now when you press Shift a, you will see all these
options here and here it is. So Justin. So as there are a lot of
objects in our scene right now, so I will isolate this df and this reference image we're pressing slash so
I can work with. So the first thing
that I will do is create this big gear. So I will first match, match this line
with this length. Scale is correct. Then later on we will increase or decrease
the number of feet. Okay, Now I think
this is actually, it really does not
matter how it does. Can place it according
to your own style. For now, we will
increase the number of these teeth and
other settings to just to change the settings after you have changed the lake
scale or created object, we just need to right-click
on it and select gene here. And now we will increase
the number of 35, lake 14. Yeah. So now one more thing. These are uneconomic flatter. So if you want them
to be a flat legs, just decrease the pressure angle and they will become like this. Alright, so this one is done. Let's duplicate this one and just scale this and we will use the sun for the smaller gear. This fits perfectly. We don't really need to make any changes. So again, duplicate this and it's first match
with the scale. Okay? Now again,
right-click chain here. And let's decrease
the number of T. Something like this,
maybe in this. And let's increase
the pressure angle to make it work this way. Also, we can rotate
it if you want to. Now let's press Slash to go
out of the isolation mode. Let's select them all
and bring them here. This one will go below this. And Let's duplicate this. Bring it up here. And maybe I'll maybe every duplicate this one and place it here. Now. I'm just moving on based on
my Instagram not making any. You can add a media or add
as many objects as you want. It's really up to you now. Maybe I will add one more here. And another thing that
we can do is we can copy these and place them here maybe. Just to give a little
bit more detail. And if it does not work or we can delete it later on, it does not matter. I copy this one piece
and maybe keep it here. Let's bring it down. I just want to make the rocket was look
like complex form. Someone sees this
complex machinery to me again As a to select everything
and then I blessing and all called D to duplicate and
ellipse is going on. I think I by mistake
select period. Come on. Yes. Now defined, I wanted to delete this huge radius. The radius and now
decrease the scale. You cannot really
change the radius often the experience
something like this. Yes, this is fine. It's
more deaths and also enable auto food and gear down and beat this game. We can also decrease the number of adding. You can have it
any way you like. It really depends
on your preference. But I think I will have. Now the modelling of the
pocket, what is complete? I don't really want
to add more things. You can go ahead and add as
many inside objects you like. You can create even
more pieces with intricate modelling to
make it look better. Now what I would do
is I will create a glass piece for discovery for the color
of this pocket watch. So Grb2 jack, select
this main piece, press Tab to go into edit mode. And let's select this outer
edge loop to hold oil. And select this outer edge x2. Press Shift D to duplicate this. Right click to place it in
that same location only, and then press B to
separate the selection. So now these are two
separate objects. So now what I will do is I'll stab and then fill in the face. So now the slash to go
into the Edit mode, authorities who go into
isolation mode, press Tab. Now plus I said that the
phase in seconds like this, people in certain, in
taking this for a while. Something like this. And
now what I will do is, as it is right
now, just a plain. So I will give you solidify modifier. Place it on the top. And now what I will
do is press 32, go into the right
view, press Tab, going to the face select
mode and celebrities, middle phase three
and then enable this. This is proportional
editing toward this will do is Lake for example, if I move this single phase, all of the nearby pieces will also move depending on this. So you can increase or
decrease the size of this circle by moving
your scroll wheel. Like this is really
helpful if I close this, you can see I'm just
moving a single phase. If I enable this and moving all of them together based
on this so-called size. So what I will do is make sure instead of smooth
deselect sphere. And now you will see why if I now press G to
move this and then presented to lock it
on the z-axis and increase the size of the circle. And make it something like this. To give it like a shape
of a curved glass. Yes, I think this is fine for a slash to come
out of the edit mode. And let's scale it a little bit and bring this
entrepreneurial talent. All right, I think
this is good enough. Let's shade smooth. And our glasses done. Let's select this
object layer, press F2, and in this last H to hide this and you
can see all of it instead of just if you press
Alt H, it will come back. So in the next chapter, we will finish with the
UV unwrapping of this and we will export this
model to Substance Painter. I'm modeling phase is complete. You can add most of his murder, I think from my side You
didn't tell us watching. I'll see you in the next one.
9. UV Unwrapping and exporting to Painter: Hello, welcome to Chapter 8. So in this chapter we will
finish with the modeling part of pocket watch and UV, unwrap a model and then export our model to substance
painter. Let's start. The first thing that
I will do is I will organize Scene
Collection a little bit. So first, select this glass, this press M, and
then new collection. And let's move it to a new
collection named glass. Hide this section for now. So you need to just
clear your scintillation as I have created my renewed
three main collection, main body text and
entailed pieces. So we'll hide them all for now, and I will show you
them when bourbon. So first, the main body, when they should have
only three pieces. This piece, this
piece, and this piece. So if for example, your, these three
objects are out of this main body collection or
you have not created one. So just select all these three. Press M on your keyboard
and then select main body. Or if you've not created, just select new collection and name this, select main body. And now I will hide
these three for text. Select all these
texts and these bars. And then select them all. And then you can move it
to the text collection. After you have done these
two and the glass one, you can just hide everything and the remaining pieces
you can move it to inside. For example, if you
have some pieces this way that are not in the
insight visits collection, they're outside like this. So just press I mean, you can either press a
to select everything, then press M and move it to inside pieces are another thing that you can do is
just select from here, holding Shift and just drag and drop and do inside pieces. So let's bring everything back. So make sure you have
everything set up like me, mean mouldy should have
three pieces. These three. And then the text then
come to entailed pieces. And the last one is glass. This shouldn't be a
single piece only. Okay? I will hide the
reference images. We don't need them anymore. So now what I'm
going to do is I'm going to apply my modifier. So what I mean by
applying modifiers it, I will explain with examples. For example, we have
this glass piece. So you can see here we have
the solidify modifier. They will add subdivisions. If I change the value of
the solidify modifier, you can very well see the value or the thickness of
this glass material. The thickness of the
glass model increases or decreases according to the value of the solidify modifier. But if I go ahead and apply
all the modifiers, come here. And now I cannot make any
changes to this model. So make sure before you
apply all the modifiers, this I'm pressing Control
Z to bring them back. Because when you apply
all the modifiers, you cannot make any changes to the property, to your model. So you cannot make any
changes to the model except like going in and editing
by selecting faces, edges or vertices that you can do after applying
more difficult also to what I will suggest
you guys is that create a copy of
your blender file. So that been filed should
have all the modifiers, not a plate like one file should have in which none of the
modifiers are applied. And the another file which you
will be working right now, which has all the
modifiers applied. So even if something
goes wrong for us, you can just go back to your old file and start
working from there again. So you can just press
Control Shift S and save your file
with another name for. It has like all the
modifiers applied. So what I will do is I will press a and apply all modifier. If you want to apply modifiers
of just one single object, you can select it and
go here and apply this. But you wanted to apply modifiers of every
object in the scene. You just press a to
select everything. Okay, We forgot the text is
not enable, enable text also. Just leave reference images. So now press a to
select everything. Press F3 and then type convert. And now we will select
this convert to mesh. Now you can see no
modifiers that appearing in the Modify tab for
any of the object. So all the modifiers
are applied. So now let's start
by UV unwrapping. So what I will do is I
will just go here in the corner and do this
to bring another window. And now I will go on this
icon and select uvea, get a, this will bring
the UV editor tab. And we will study, if you want to delete
one of these window, just select here
and go like this, and this will become a win-win. Don't delete if you
want to do this. If you wanted to create
curb and full window back. And if you want to divide, just go to the corner.
Bring when mode. We'll select UV editor
and let's start by UV. Unwrapping are yet. So let's hide everything
except the main body. We will UV unwrap one-by-one in terms
of collections only. So first I will unwrap
this main body. So press a and press Control
a and apply the scale. Never forget to apply
the skill before. Before unwrapping
you of any object. So now I will press Tab, press a to select everything, select New and then
smart UV project. Also enable distinct. What distinguishes if I select some piece
of vertices, yet, those vertices will be
selected here also, if I press a to
select everything, everything is selected here. This rich. There's a
to select everything. Go into resection, average island scale and
then back island. So like this will be our
small procedure to unwrap. So you've either done
for these three, you can disable them. Now enabled text, press
a to select everything, press Control a and apply the skin press Tab to
go into edit mode. Press a to select everything. Then you end smartly reject. Again, have this island
scale and also back islands. Now again, there's higher this and bring back
the entire pieces. Press a to select everything. Was tab of 31st, I need to apply the scale, Control a and apply the scale. Then press a to
select everything and you then smart UV project, average island scale,
and then back islands. So also we will apply and
read the use of glass. Apply the scale, select
everything and reject. All right, so now from here, just move your mouse to the left to make this
too when we're lonely. And now what I will
do is, sorry guys. I will assign materials to this according to collections
only, hide everything. Select any of the
pieces. We go here. Click on New. And let's name
this material main piece. Now to give this
material to all three, One thing that we
can do is we can go from here and
select main piece. But I will tell you a
better, a better method. So first, select this
piece only make sure to select the piece you have given the material do then plus a, and then press Control L
and then link materials. So now as you can
see, all three of them have the same material. Now let's hire
this, enable Text. Select this, add a new
material and name this text. Again, press a while selecting, and these are the active
object, press Control L. And then link materials. Now all of them
have the materials. Again for inside pieces. Select flex, select this piece. And inside pieces. Again, I select this
piece and press a Control L and then
link equity deals. For this single object, we can just give this glass. And now let's bring
back everything. And now we will export our
model to Substance Painter. So before we export anything from blender to any
other software package, you must make sure
that we need to check one thing that is
face orientation. So if you go here and
enabled face orientation, you can see that everything
right now is blue. Blue means everything
is correct. All the normals are
placed correctly. We do not need to
make any king is, but we also need to check the
inside pieces in the text. Let's hide the glass objective. And you can clearly
see everything is red inside here too. This means all of the normals are flipped for these pieces. And we need to make sure that everything comes back to blue, because blue means the
normals are correct. So first let's select
this big piece, West tab, this a to select everything and
then press Shift N. The shift works, you have ten. Does it recalculates
normal and correct them for all the red objects? Redshift him while selecting
them for, select them. Stabbed would edit mode, press a to select everything
and then shift then. Well, I will quickly
select all of the red objects together only. Press Tab, press Shift
M. And now select this, this, this, this, this. I'm selecting as many
red objects as I can. Then press Tab, press a to select everything
and press Shift M. And the normal will
be the calculator. Most of the pieces are done. And this two. So it's against the earth can see there are some red pieces. We can see what this is. Let's select all the gear. Yes. Yes, This is all luggage. And this one, the slash. And you can clearly
see these are hollow. So if you want, we can fill in these. We can fill in the
hollow spaces to make them blue or lower.
So let's do that. First, select this piece
plus tab into edit mode. You can turn off the face
orientation for now. Press one to go into the edge. Select mode, hold Alt, and select this loop and hold Shift and Alt to
select the second loop. Then press Control
E and then rigid. You can also press F. Okay, No, I'm sorry. This is the thing
that we can do. So now what we can do is press
Tab to go into edit mode. All this lake, select this
edge loop while holding Alt. Then hold Alt and Shift
and select this loop, then Control E and then
bridge edge loops. This will fill in the space. Also, make sure to shade
smooth and enable auto smooth. Could you do it for all? All the gears are
done now and now if I press Slash to come
out of isolation mode, and then again, enable
face orientation. Now you can easily see all of the red objects are not
there, everything is blue. That means all our
normals are correct. If you want to know
what would happen if we exported model with these red Normal Flip doubt
or with the lead objects, what will happen if we
export out these red object? So what will happen
is that when we export these to
substance painter, we won't be able to see
them because all the normal would be
flipped inside out. So either these
will look like very weird or they would
appear at all. They will, they
will get invisible. So it is really necessary that p.sit turn all these two blue. So now this Alt H
to bring this back. And now let's export everything. What I will do is I will
disable glass because I will not be exporting
glass to Substance Painter. I just export these three. We will create the glass
material in Blender only to press a, to
select everything. Make sure you press a
and then go to export. And then FBX and Operator
Presets select substance. Okay. I'm sure you you don't have
substances operator presets. You can create a
operator presets by clicking on the plus sign
and then name it Substance. Make sure in that
operator presets, you have enabled selected
objects and mesh work. Okay, I didn't go to
the operator default. And what do you
need to do is just select this selected objects
and then click on Mesh. And now click on this
plus icon and name this substance so that
anytime you export this, export any modern from
blender to substance, you can just go to Operator
Presets and select substance so that you don't have to
make any further seconds. So now I will name
this as pocket watch. And let's explore
this here only. And now let's open
substance painter. Vietnam new project
in the pile will select and head over to Export. Export to your model
elects pocket watch. And let's open it and
then click on. Okay. Now we have an edit
field to load 3D scene. Let's re-exported. Maybe we'd get something wrong. Select everything by
pressing a go to Export, FBX, elected objects,
mesh or telex substance. Click here only and
re-export this. Let's go back to
substance again. Go to New and open this. Okay, now it must be
some kind of editing. So now you can clearly see we have some kind of artifact
going on over here. If I spin able
temporal aliasing. This main piece
seems very weird. So to correct this,
what we can do is let's first go
back to Blender. Select this piece, and let's give it the
wicked normal modifier. Most probably this
will solve our issues. If you have any kind of like normal issues, like
shading issues, you can always apply the normal modifier and it
will solve most of them. Let's say up to this funnel. So I think this one
can also cause issues. Because this piece we're
looking at over here, let's check for more pieces. If any of them
look this one too. And now press a to select
everything and press F3, then convert to mesh, because we need to apply all those modifiers
that we just gave them. And now let's again export this. Brings, create a new project
and bring this again. And you can see the shading
artifacts are still there. This one was solved, and
this one was also solved, but this one is still here. There is another thing that
we can do. This piece. Press a to select everything, and then press Control
T to triangulate this. Again, triangulate
this, and then press Alt to reduce some
of the triangulations. You can also do this if there's still some
issues that persist. You can also get a
normal to this piece. Apply this from here. And let's press a to
select everything again. And now let's explore this. Let's hope this works. This works correctly. Okay, Now that now
you can clearly see that all of our
shading issues are gone. I don't think there are any left remaining
issues in a model. Everything looks perfectly fine. So in the next
chapter we will first start with baking the mesh maps, and then further we will start texturing our model to
thank you guys for watching. We'll continue from here
in the next chapter.
10. Texturing the Pocketwatch: Hello and welcome to Chapter 9. So one thing that I forgot
to do with, as you remember, we selected all these
geared and we failed Ollie, all of these faces for them. So the thing that you could do is report to UV,
unwrap them again. As we created more geometry, we need to UV unwrap
this once again. So let me show you. First,
let's turn off everything except the inside
pieces because we just need to UV
unwrap them again. Then go to the UV Editing Tab. Press a to select everything, and then press tab
in the edit mode. And now you can clearly see there are many
overlapping UV. Because of those, because of these faces that we
created in all of the gears. So we just need to UV
unwrap everything again, press a to select everything new and then Marty reproject. And now just average island
of kale and track islands. But I think this will
be the last thing that we export our model. Let's turn everything back on. Press a to select
everything and Export. As in VX. Collect substance. These two settings. This booklet module
leader will replace this linda new export. And now let's open up
Substance Painter. Also add one more thing. If you don't have substance painter, you can just get the
student license, which which will get you one year of real
substance painter. If you have a student
college ID or a school ID, if you're studying so
you can easily get Substance Painter if
you don't have it. Or you can work with
the 30 day trial. For now. I will click here and
this pocket watch. And let's open this up. I'm pretty sure
everything is correct. Now, this usually
happens when we keep on going back and
forth with substance and blender for a few times
to get everything correct. So now let's start by making our Mishnah
right now as you can see, we cannot even see
our numbers properly. But when we bake our best snap, everything would be much better. For the making of mesh maps is first thing that we do
before starting in, exiting and leptons painter, you can just go into
the texture sex setting and go over yet to bake basemap. In this window is not appearing. You can go here to Window and textures exiting
the select basemap. This is that a solution
of the mesh map. Usually said you could too. But if your PC is low and you
can set it to 0 too good. But I would recommend
rendering this as 2048. Enable this, this. And we will add endianness
into eight by eight. If again your computer
with low spec, then put this at low
number. Also lead. Disable this ID map because
you're not using IMAP. Rest, everything would
remain the same. We don't need to do
any more changes. The default settings
are pretty good. So now just makes
elliptic texture. Now where this would
take a little bit while, I will skip the video here, and I will see you
in all the labs are done already by now, everything is done and you
can now see everything is much more visible and already
it is better looking. So now go here over
could display settings and let's enable
temporary anti-aliasing. This will, if you can see
all the jagged edges, it will remove all the jaggedy and Daggett edit
and make our model. So now, let's start
with the main piece. Let's delete this layer. You can select the layer
and delete it from here. So I want to make this a
gold colored pocket watch. So I will go here in
materials and type hell gold. Most of the materials that we want to create are
already given in substance painter that for it really excelling
in subsequent. Ok. Now, we don't want this middle piece to have
this role materials for 2D. Hold it from here,
we just need to go. This is the geometry math is right-click and
click Exclude all. So now you can pee, it is
removed from everywhere. Now I can click on this again. And whichever objects now
I select on those objects, the whole material would appear. Alright? So for this middle VCE. Anybody? But I feel like
this material is the best. You're going to go into
your mark materials section and type marble. And this marble find material
is drag and drop this year. And again, I will exclude
everything and click on this. Now. Right now we're only
adding the base materials. Afterwards we will add more layers over this
leg, the roughness layer, then the dirt layer and added layer of an outlet
forward would take step. This will be very simple, we just need to be black. So let's create a new layer. And the color to a dark color. We want this to be
a little bit rough. So let's prepare a zero-point to open this notifying
for this now, related item contains maybe. Now let go over to the
entire pieces and put these. You can go here in the third
section and type Bruno. And this material would appear. So I will use this
material for inside piece. Okay, now I don't want all of these pieces to be
this bronze material. Let's add another layer. Or maybe we can just copy
this layer, text layer. Let's name it. Copy this by Control C
and in inside pieces. Press control V,
paste control V. Now, bring this at the top and now right-click and exclude all. And I want the hands of the clock to be of this
black material and all. Oh, let me know. Okay. One thing that I wanted
to tell you, this thing, this mass that we are right
now using geometry Maslow, if I want maybe to put this, to give these hands of luck all over the black
material, I can do that. But if you want like
only this one hand to get the black material or this one circle
in the middle, one cylinder in the middle,
it'll get the Blackfeet. It is not possible with
this geometry model. So we can do it with
another method. So we will just right-click
over here and collect include all we are not
using geometry model. What we will do is
we will instead ADA go here to
select this layer, go here and add a black mask. And now the black mask, if you're worked with Photoshop, you would understand
how masks work. How a mask work.
Black kilometer, we have failed everything right now the blacks
through that mean, this whole layer is invisible. For example, if I
add a black mask to this grown dharma,
everything become invisible. But now, if I go into
this black mass, select this black mask and
try painting with white, you can see this black
material is appearing. So simply put, when we add a black mask, everything
becomes invisible. But if you paint
over with the bite, then those particles
start to become visible again with that
particular material. So I want these hands
of growth to be white. So I will select this tool. This tool, this is specifically used for
this purpose only. So if you see, if I
select one phase only when you see the cell
appeared with black material. So this is what we want. But we want this
full selling debt in Madrid to get
the black material. So we can now just go around and start with clicking
every single face. What we can do is go from here, this is the face select mode and go into the mesh fill mode. Now if I click on this
one, only black material. If I click this one, this one, and this one, sorry. These are ordinary black color
for this is what I wanted. So you can see how
handy it is to live. So again, I will give
more variation to this. I will add a different color
for these nuts and bolts. Let's type here island. And bringing this item four. These are all of these are smart material because we'd
big that mesh that play. These are working correctly. If you did not
make our mesh map, these would have not
worked in this way. Now again, I would
add a black mask. And now let's start selecting all the next piece
is negative on to give the desired in Meridian. Again, this is solely
based on your hand. If you go into learning
this material, if you aren't something
in some different body and you can choose
that from here. You can search in
the materials tab. We'll make this be
thoughtful item. If you want, if you feel like you're done something
wrong and you want to if you want to remove the iron material
from some of the pieces, you need to just
select this mask. And while selecting this, to turn this from
white to black. And now if I click on any of that material, it
would disappear. It would disappear and the bones material
would appear again. So black means again, we'll
invite me visible tag this. And we want to remove the blank. The shortcut for this is
x plus x on the BOT-2, like switch between black
and white by putting some white only and
correct some other. So I think this might be fine
to give this a variation. So now I will again select
the main big piece. And let's start by adding
some dirt to this. But could add dirt, what we can do it
create a new layer, gives the cell the
early black color. Again, add a black mask. And now we need to go into
the Smart Mask section. So this will help us giving this dirt lake to make
this look realistic. So just grab this
dashed occlusions, mark mask and drag
and drop over here. And now if I disable this layer, you can clearly see
how much they sell given all of these dust
on the closed spaces. And even here also,
you can clearly see. So if I go here, click on this and select dirt. The property for the generator
would open up and also you can increase or decrease
the dirt level. From here. There are many
other setting goals for like engineering and degrees of contrast and many more. This is the grungy amount. This would increase like if you can see here
the dirt over here. But I don't want this
much here to here. And the dirt level a little bit. Okay, I think this already
looks so much better. So now what I will do is I would select this gold
pure material and let's change its color and
make it a little darker. And also a little
bit. All right guys. So now what we can do
is let's add some, let's add some
roughness radiation. So to add roughness Venetian, what we can do is let's
add another layer. Let's name this dirt for us. Also again, I will
reduce the amount of investment related, I guess. All right, Now let's
add roughness iodide. Let's add another layer. So as you can see right now, we have kilohm Bechtel, roughness, normal and height, all the channels enabled. We don't want all
of these channels, we only want the
roughness channel. You can disable all of them. And if you see if I
increase or decrease, disrupt many guinea leasing, how we are manipulating the roughneck of
the complete model. But it said that
beautifying one for now. And what I will do it again, I will add a black moth. First, let's name this
roughness mediation. And now let's add
a fill layer to this and emits fill
layer type in brunch. You grunge maps are all these texture map
like dirt texture map, which can give a lot of
variation to your model. This one. And now if you click here and increase
or decrease that off, Let's put it here. And first we can
select the range map and let's change your
settings a little bit. But I don't know if you can see this has clearly affected
our model a lot. Earlier. Soap is when
looking very smooth, but now with the dotnet, I didn't looking like there
is enough next variation. We can also collect tribesmen, a prediction from here. And let's increase or
decrease the scale. To see what fits us. I will public I've
been only increase the value of this modifying. I think. You can see how much
elastic this already looks. If I disable all these
layer against the how, this is looking very flat and
looking very unrealistic. But if I enable
both of the layer, it already looks so much better. So now what I will do is I will add some height information. So let's add another layer. Let's name it. We will only live in the height
channel for this. And let's add again a
black mask, a fill. And this fill layer, we
will add them scratches. You see no scratches. And the reason I'm dizzy, the height invoice the leg. If I increase the
degree of you can even if we scratch it but we don't want it to be the strong
negative or 0 of view. You want it to be really
subtle and not very harsh. Okay? Also I want all of this height information
to just appear on this gold gold part and
not on this marble back. So I will just do it this way so that
I can easily see the now can do that to isolate this onto the only
the gold part, what I will do is I will
add another folder. Let's put this in the folder. Let's name this folder
gold height info. And now again select the geometry might
exclude everything. And you see all the
height information has gone like this. And now select the gold part. And now the only appear,
appears under the, again not heard
this two negative 10101 or maybe a little
bit more negative or 0.02. And this is what I get. Now again, Glenn, and lets you can increase or
decrease the balance. And the lake looks much, much better now, when done. Scratchy than the
height information. Legs increase with
Scratch painting so that they become a
little bit smaller. Okay, one more thing
that we can do it if you want to add some
more height effects, we can add another fill layer. And fill layer. Let's type in 0 and we will
add the branch manager 0 15. You can see it has
given a bumpy, bumpy texture all over
this gold material, but now all of our
scratches have disappeared. So now to make our
scratches work again, you just need to go in
then in this portion. And from normal,
select Linear Dodge, Add not-too-distant,
sorry, this one, we need to add Linear Dodge. And now you can see all of
her scratches or appeared. But again, we don't want the
effect to be the strong. Though you can from here
and go to base color, from base color to go to height. Decrease. This a 100 to something like 50. This is like the
opacity of every layer because we are only working in the height channel
for this conductor, I needed to change it to. If I, for example, want to change them, reduce the opacity
of the base color, then I need to go to
the base color in if I reduce your ANP the base
color and disappear. So I will end base color only. I think this is fine. All right, let's go
to the textbook. And what I can do is let's add another layer of dead
white color only, name it. Let's add a black mask. And in the smart mass section, Let's edges blur mark. With this had made this completely right.
I do not motivate. I just wanted to
be like the second whatever, decrease the
opacity from here. Just enabled roughness. If you want to select
only one channel, you can hold Alt and then click on that
single channel and all of them would disappear
and that channel will remain. Let's add firstname
into roughness. I had a black mask, the philia. And let you use one of the integrand map only
lets you this one. So it is really not
reliable, I know. But still we did
this because for the sake of it already, if you weren't all
these smart mass, they already have these dirt edge damage
the surface detail. Like for example, if I
turn these off from here, you can clearly see that's
why they are called smart materials because they
have been already aggregate all these
layer if you want, they're basically the same
thing that we did earlier. The dirt is again that one on the dirt mosque. The
sulfate details. I went over these again,
these mass and it is also one of
these edges mosque. This is really similar. If you want, you can delete. The layer, can try
to do this again. But I think for this
insight pieces texture, I won't add any PR now. I think this is
looking really nice. What I want to tell
you one more thing is, let's go back to the main piece. And if you want, you can leave the quality
of your texture from here. And right now we're
currently working at one key only if
I increase this. You can clearly see
how much accurate at scratches are now. Okay, now that I look at it, our scratches are
looking too much. So I will go back to the layer, collect height and let's
decrease the scratches also. Use something like 15. Okay? So now another thing
that you guys can do it if you want to remove just
one of these scratching. For example, I remove I want
to remove this huge crack, but I don't want to
remove the rest of them. So what I will do is I will
select this height layer. Go ahead, add effect and add
a paint layer to this only. Now if I go back to my
brush and I start painting, you can easily see
I have the move that one particular scratch. But I actually don't
want to do this. I just wanted to show it. Make sure you are painting invite or even in black.
A does not matter. Either way, it would remove it. So what I want to show, another thing that
I want to show you, let's add out outside
of this folder, Let's add another paint layer. So the paint layer
of paint layer work different from
tree layer. Right now. We have been only
adding two layers. So the difference between a
paint layer and a fill layer. Let me show you. For example,
this is a fill layer. If I change the color of this cilia right
now you can easily see the effect appearing here. And at any point of time, if I change the color at any of the or any of the properties
of the fill layer. And they will show
up in the model. But a paint layer
that's different. For example, if I select
this paint layer right now, is that white color? Let's paint something
too just to show. First painted white over here. And now I will go here and
change the white color to red. You see the white color
as the main light and it does not change to red. And now ocher paint red, you can see red
color disappearing. So this is the
difference between a paint layer and fill it. The paint layer does
not retain information. You can create any number of paint strokes with all
with different properties, but you cannot do this
with Philip fill. Fill layer has one same
property for all of it. If you change those
properties like the color or roughness or
metallic anything, they will show up that
a clean the module. Okay, and now let's
undo the paint layer. And now I worked, I
wanted to show you is, let's name this extra
scratches or something. I want to paint some
more strategies. But example, I will disable everything except
the height channel. Again, let's take it
to negative or 0.01. And now if you go here in the, yeah, you can maybe
go into brushes. These are all of
these custom brushes. So for example, I said I've got some brushes and
I start painting. You can easily see,
or maybe you can not. I will just increase
the high defect. You see, again, paint a height info easily with
the paint layer. You can create them very
good custom fields. So this is what we will do. Let's set this to again,
negative or 0.2 maybe for now. Let's see. You can add some of this hair, maybe add some of this here. To give it a little
bit of more effective. Let's search for
some more brushes. In the Alpha section. The Alpha section you can, there are also lots of cool
alphas you can use to create this righteous and
search for a burn. Did not there I guess. This one only rash
much would work fine. I guess. Not really that good. I remember having my alpha
with the bond market hunting, but I guess I don't have it. Selects work with brushes only. Had dirty brush to
create some high detail. This way you can create like a very custom looping detail. You don't have to rely
completely on Mars. Also, if you want, you can Lake the Alpha. Let me show you. Let's
select this Alpha. And instead of height, I will select color also. Now I can paint in this vein, come stickers or something. It is not good for this model, might look for some other model. Now also you might add
that if I'm painting it exactly here by a digit operating income
different position. Two, the reason for this is
these Eutelsat on the GTR, what did they add? A bit of randomness
to do your stroke. If I decrease all of them to 0. All of these position
angle fluent side. If I painted here, be it exactly neck tamed
eduction. Alright. What I would do is
I will hide info. I will decrease the
height input to name it. I'll maybe 35. And for this also extra
stretch it to let go to the height section
and degrees to 15. I distribute to show you well, I really don't want it so
much strong in my model. So now I think
everything is done. So I think this is
it for this chapter. In the next chapter,
what we do is we will export all our textures. And then we will take
our model to blend it. And we will learn
that it will add HDRI and ultimately the great
creator glass material. To thank you for watching,
I'll see you in the next one. Also, make sure to
save your project. Let's hit Control S and David, I've already created, I will
distribute glaze, this one. Okay. So thank you for watching. I'll see you next time.
11. Exporting and Rendering in Blender: Hello and welcome to
our last chapter. So in this chapter
we will export our textures and then we will
render them out in Blender. Everything our modelling
texture though, let's start. First thing that I want to do is let's select this main piece. And for this gold color, I want to decrease
its saturation of it. So this is the saturation line. So I will decrease
it to maybe 56. I think. This looks fine doing but, but this totally a
preference thing. Because we want
you can turn this down or you can maybe
live with their only. So now everything is
done in texturing part. So now I will export
all these textures. So to export them less
control shift and E. Now let's tackle
all these properties. First, the output directory. I will select this and let's export this to
my tutorial files. I will create a new
texture folder. These textured would
also be provided to you in the resources file. So let's export them here you can choose
any place you want. Now, the thing is
output template. The next thing is
output Template. This is the most important one. Substance for wide lake. Various different output
template for different programs. For example, Lake
for Unreal unity. But it does not have
a one-foot link that I have created one on my
own for blended in cycle. But if you're using it for the first time,
you must not have it. Let me teach you
how to create them. Go over to output templates. The leg, this one, PBR, metallic roughness and
right-click and duplicate this. And let's rename this to you
can rename it to blend that. I already have a
blender and a blender. Maybe I will delete them. Move. There I have now this one. Let's delete this. And also
I will duplicate this one, PBL, metallic roughness, and
now I will name it Blender. Ok. Now the only thing, one thing that we
need to do is then that uses there are
two type of normal, normal DirectX and
normal OpenGL. So blender uses normal
though OpenGL height. So we do not want to use
the buret text type. We just want to brag OpenGL. From here on to this
normal section. Make sure this is a normal
texture and drag it over on this RGB bytes and
select from RGB channels. And that, this is all
that we need to do. Now you can go into
your settings again. Let's put template and I'm going go at the bottom
and select blender. Now for file type, I will select PNG 16 bits. And for size, I will with forgive me because it
provides a great quality. If your computed is low end, again, you can go for 2k. I suggest you go her for k. It would take a little bit
longer in their injury, but those would be great. And here you can
select or deselect. For example, if I only want
to export the main piece, I will disable it, both of them, but I want all
of all three texture sec, but will enable all of them. And now let's hit Export. And they will be
exported. A few things. Now it's done. And
open a blender. I will open the
pocket watch file and let I will create a new file. I will say that and
name it as render, so that we handle all our rendering properties and things in a completely
different file. We will not mess up
the modelling one, the chapter one,
chapter two files. So I will create an another
one named rendered. So now let's go over to the first let me
down on Screencast. And let's go over
to the shading tab. Okay, So now, now you cannot see my green costs for some reason. I don't know Davis labor issue. So let's work in this tab only. What I will do is I will, again bringing this
done on spin cost. And let's change this to
action or the editor. No, sorry, not detection on
data like the shader editor. So we want the shader editor. Now let's select this. And this is that main piece. In a minute. This is the main piece,
this is the inside. And this is the new
material that we created. Let's select the main piece. And now I will tell
you a shortcut to bring all of your
textures at once. But before that, for
this texture to r3, for this shortcut
to work properly, go into preferences
and make sure you have the node nor drank, let add on activity. So if you have not enabled
it, just enable it. And now we need to
click on our PBS df, this main big and
hit Control Shift. And you can see
here Control Shift, select this and hit
Control Shift T. And this would appear so now to
where we save that texture. So here they are. So we
wanted the main piece land. So these are all
three texture sex. We want only the main piece
one to just search here. And these five textures appear. So now select all of them. I can hold Shift and
select all of them and just hit principal
texture setup. Now all of them have appeared. So now to see them, because this is the lake. We call the viewport shading. We share. We cannot
see our shaders here. We need to go in this tab. Click here, and
this, wait a minute, and you can see
textures have appeared. So similar, we select any
of one of the inside piece. Now let's hit Control Shift D again while selecting
this will be a VLDL and tool Shift D. And
now let's search for inside. And now select all of
them and interpret texture setup week
for a few seconds. And they are here. And now let's select any
one of the extra parts. And again, Control Shift T, search for text, and
let's bring all of them. Okay, Now, all of our
textures are here. Now let's start with the
rendering professor. We will hit this. This is the, I mean,
the head we can use. This one is for just to
work with us shaders, but this is our render view. Here we can render a
very realistic renders. So right now it is set on TV. So I will change this to Cycles. Cycles is much more realistic, but it takes a little bit
longer and not a little bit, a much longer time
than to render stuff. If you have a GPU, you can set from CPU to GPU
a lot faster than your CPU. So it will be much quicker. It also enables
adaptive sampling and in de-noising section, enabled denoising for both
rendered and viewport. And for Render tab I
will select optics. If you have optics,
you select optic, otherwise select
Open Image denied. And now we have everything just, we need a little bit of lighting for rendered to
show up properly. So let's go to the shading tab. From object. Here.
Object is selected, hit Object and select
a void and press Shift a search for
environment texture. So these HDRI, this light
up our scene properly. So the HDRI that
I'm going to use, this one, this old
industrial Khalid direct. If you want to use
this exact same idea I have provided with
the download link. You can just go on this link, search it on Google Chrome and you can download
this easily. And then you then
it would be easy to just extract that zip file and all these files
would be there. And we will use this
file as our HDRI. Okay, So we will not
use it from here, this row here, connect
this and click Open. And again go to that old
industrial whole folder. And this one, fin for
underscore REF dot. Make sure you do the exact
file and not the edge DFA. These both provide lighting, but this is like
very low-quality. We will use this
LaTeX hard pile. And now if I go back
to my layout tab, where you can see
everything is back. And this looks now very good lighting and
everything is nice. And now the last thing to
do is let's bring that, that gives us peace. And let's create a glass shader. Instead of going into
the shading tab, I will do the same thing again, bring the leg shader editor. Let's delete this PBS df. And instead of
this press Shift a and bring in glass via ZF. Plug this in. And you see a glass material
isn't only this much. But one thing is, if you don't know RUF
for glass is 1.33. This is a scientific
properties and just put 1.33 for equity deflections
and everything. So now everything is done. Let's move this back
into one window. And the last thing is
to bring in a camera. So Press Shifting
ringer, camera. And now to align the camera
port properly with this, I will press seven to go into the top view and then
hit Control Alt and 0. So what control all 1000
does this for example, if I am viewing it
from this direction and I want the camera
to be exactly here. So I will hit Control or 0, and this will appear here. So I want a top
view of this model. So I will look from
the top view after pressing Control Alt and view. And now let's hit N. And in the view tab enable
loved camera to view. What this will do
is I can now easily move my camera
according to my view. And let's just place it according to like this. There you go to the interview. And the first letter in
this enabled render region. So we can only see
the render region. So one more thing that
I want to do is we don't want this this
HDRI background. This is actually the SDI
backgrounds that you, again, you don't want
to actually see this. If you want to, again,
go to the camera view, hit 0, you will go
to the camera view. So I will apply depth of field so that this
becomes bloody. It will give a nice effect to go into your camera
property here, enable depth of field. Set. The first I will select
the focus object, lauren, the focus to be at this glass, hovered over this block of Jeb glasses peering to connect. And this has become
our focus object. Now if you said the f-stop to 0.2 and you will see everything at the
background becomes blurry. And now this pocket
watch is that focus. For now. I will increase that angle
samples to maybe 250. And now I will hit render. The shortcut for this is F2 L. We just hit F2 and
wait for it to render. If it takes longer
on your system, you can decrease the
number of samples. So till then, they can see
pocket watch looks very nice, all the details and
everything looks, it looks very realistic. So one more thing that
I want to tell it, if you like the finger, for example, you
can just go into image and then save this. And let's create a new folder that you can create a
new folder for this. So open the index. Let's save it as 1. First, I will delete this one. M81 also select the file format LGBT and quality to a 100
percent and then table. And now if you go here, that endless, you can really
see this hasn't been saved. Also, if you want to
increase the quality, you can increase the resolution
of the image like you can also render the SEC
to k or k. Okay, so one thing that I
want to mention it, if you press F11, you can
clearly see all these details. But if you want, like, if you feel like these
scratches are getting too much, what we can do is we can go
back to substance painter. In our statutes section, this is a scratchy
and go to the height, and let's decrease
this to AB 20. And again, we can export press Control Shift E after doing this chain and just hit Export. And now open, bring it. We don't need to do anything. All the changes would
update on their own. Will now open this. Let's close this for now. And let's render our scene again to see if those
changes appeared. We can now we can
already see that we do not see your
scratches a lot. We see a few here and there. But they're very turtle
now, light pink. It looks much better if you want it this way you can reduce, describe it like this and like you can make changes
and Substance Painter and directly exported and
all the changes would we then do blame them
for now if you want, you can again enable this and then direct from Lake a
completely different view. From here or somewhere here. Again, create a lot of angled
and create your lender and then maybe posted
on your portfolio. One more thing that we can
do is we can open Photoshop, and this is like
an optional step. If you have Photoshop,
I will tell you a few little wit when trick to enhance your
render even further. So let's wait for it to open and hit open and let bring our render
that we just rendered. Okay, this is that when
with all the scratches, let's save this one
that we just rendered. Rendered will say written as 2. Again, 100 percent quality. Let's now bring this one. Now you can clearly see the difference between these two here described to
you that a lot more. But you can hit prominent. And here they are
very, very subtle. So I think this
one looks better. So now I will tell you when you drink that I usually always do to enhance my
renders even further. You can go into
the filter section in the sharpen and
hit sharp and more. As soon as you return, you will immediately
see the difference. All your edges
would be a lot more sharp and add it will
give a much more, much more better
look to your render. It will make everything
look a lot more shot, which looks very nice. I think if you think the
sharpness is too much, you can go to Filter Sharpen
and deselect sharpen edges. It is the same, but this is like less sharpening and
more sharpening. So I usually go with
sharpened more. I used to do use it in
each one of my finger. So this was a trick
that I usually do. It makes your render
looks very nice. I mean, it notches
up to three steps. You can also hit Auto
Tone and Auto Contrast. But I will not do
this. I will maybe Luby Adjustment Color
Balance and give it like a tint of
red, little yellow. But this is like
totally up to you. So further what you can do with this project is totally
up to you how you edit it to agitate for
everything from my segue. And you are watching
this course. Thank you for buying it. I hope you like the goals.
So thank you.
 Aniket Rawat, 3D Artist