Transcripts
1. Welcome!: Who doesn't love a
cute busy pattern? I know I do. I'm also drawn to the clean, simple patterns like gingham. Gingham is a timeless design that truly withstands
the test of time. It's still being used in
popular movies today, Sold in almost
every single store and worn by celebrities. Hi there, I'm Jennifer, an elementary teacher turned
self taught creative. I've started working on my
ipad and affinity designer. I love to see my work printed
on fabric to be used for beautiful dresses and even
printed on poly mailers. I believe everyone is creative
and I hope to encourage you on your creative journey while learning how
to make Gingham. I couldn't really find
anything that was suited for surface
pattern designers. And somebody who needs a repeat design
after lots of time, trial and error, and
tons of mistakes, I've created this class for you. I hope to save you
time and effort while learning how to create
this timeless pattern. I've refined the workflow to make it as efficient
as possible. Plus by creating templates, we'll have documents we
can use in the future. This class is for
anyone familiar with affinity designer For
the class project, you'll create a document showcasing your favorite
gingham designs. Throughout the class, we'll
be making lots of gingham. So I hope you have
more than three, and then you have a
hard time figuring which ones you want
to share with us. Many makers use gingham as it's popular across many industries, from apparel to
stationery to home goods. These designs can complement your existing work as a
coordinating print for fabric or be used in
your next DIY project. Printing something like
gift tags at home, fabric and wallpaper lend
themselves well to this design. These designs will be
perfect to upload for your online store to an online marketplace or to be used in your next
project at home. Speaking of that project, let's take a look
at the details.
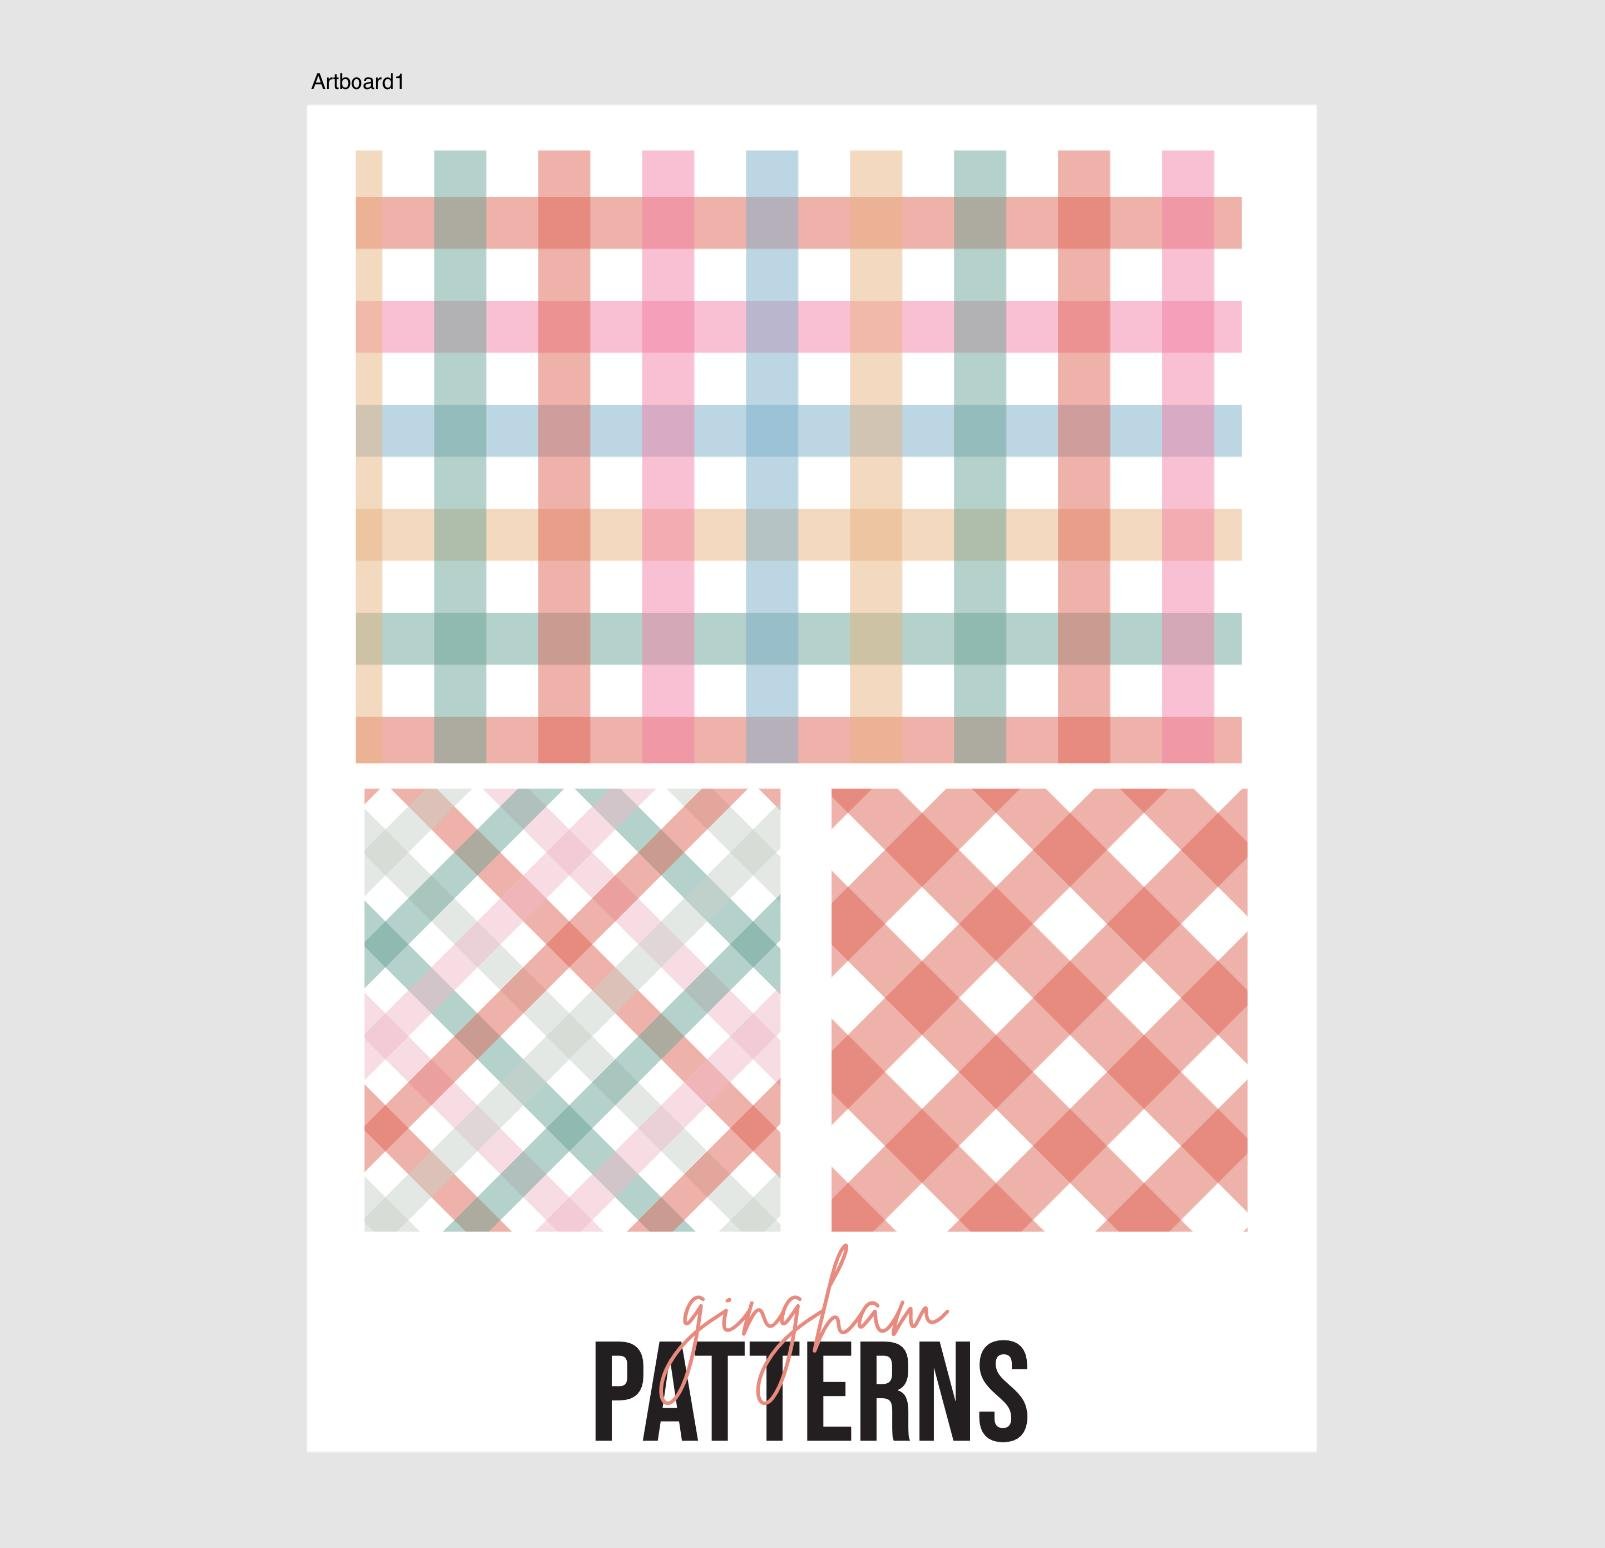
2. Class Project + Resources: The project for this class
is to create a document showcasing your favorite
gingham designs. We'll use the gingham showcase found in the resources section. Be sure to share your
work and the projects and resources section found
on the class page. As a bonus, I've included a wallpaper set in the
resources as well. This document includes
a phone, ipad, and desktop artboards, and
commonly used dimensions. Now you can use
your Am patterns to customize your
device wallpapers. If you use this wallpaper set, please attach an image
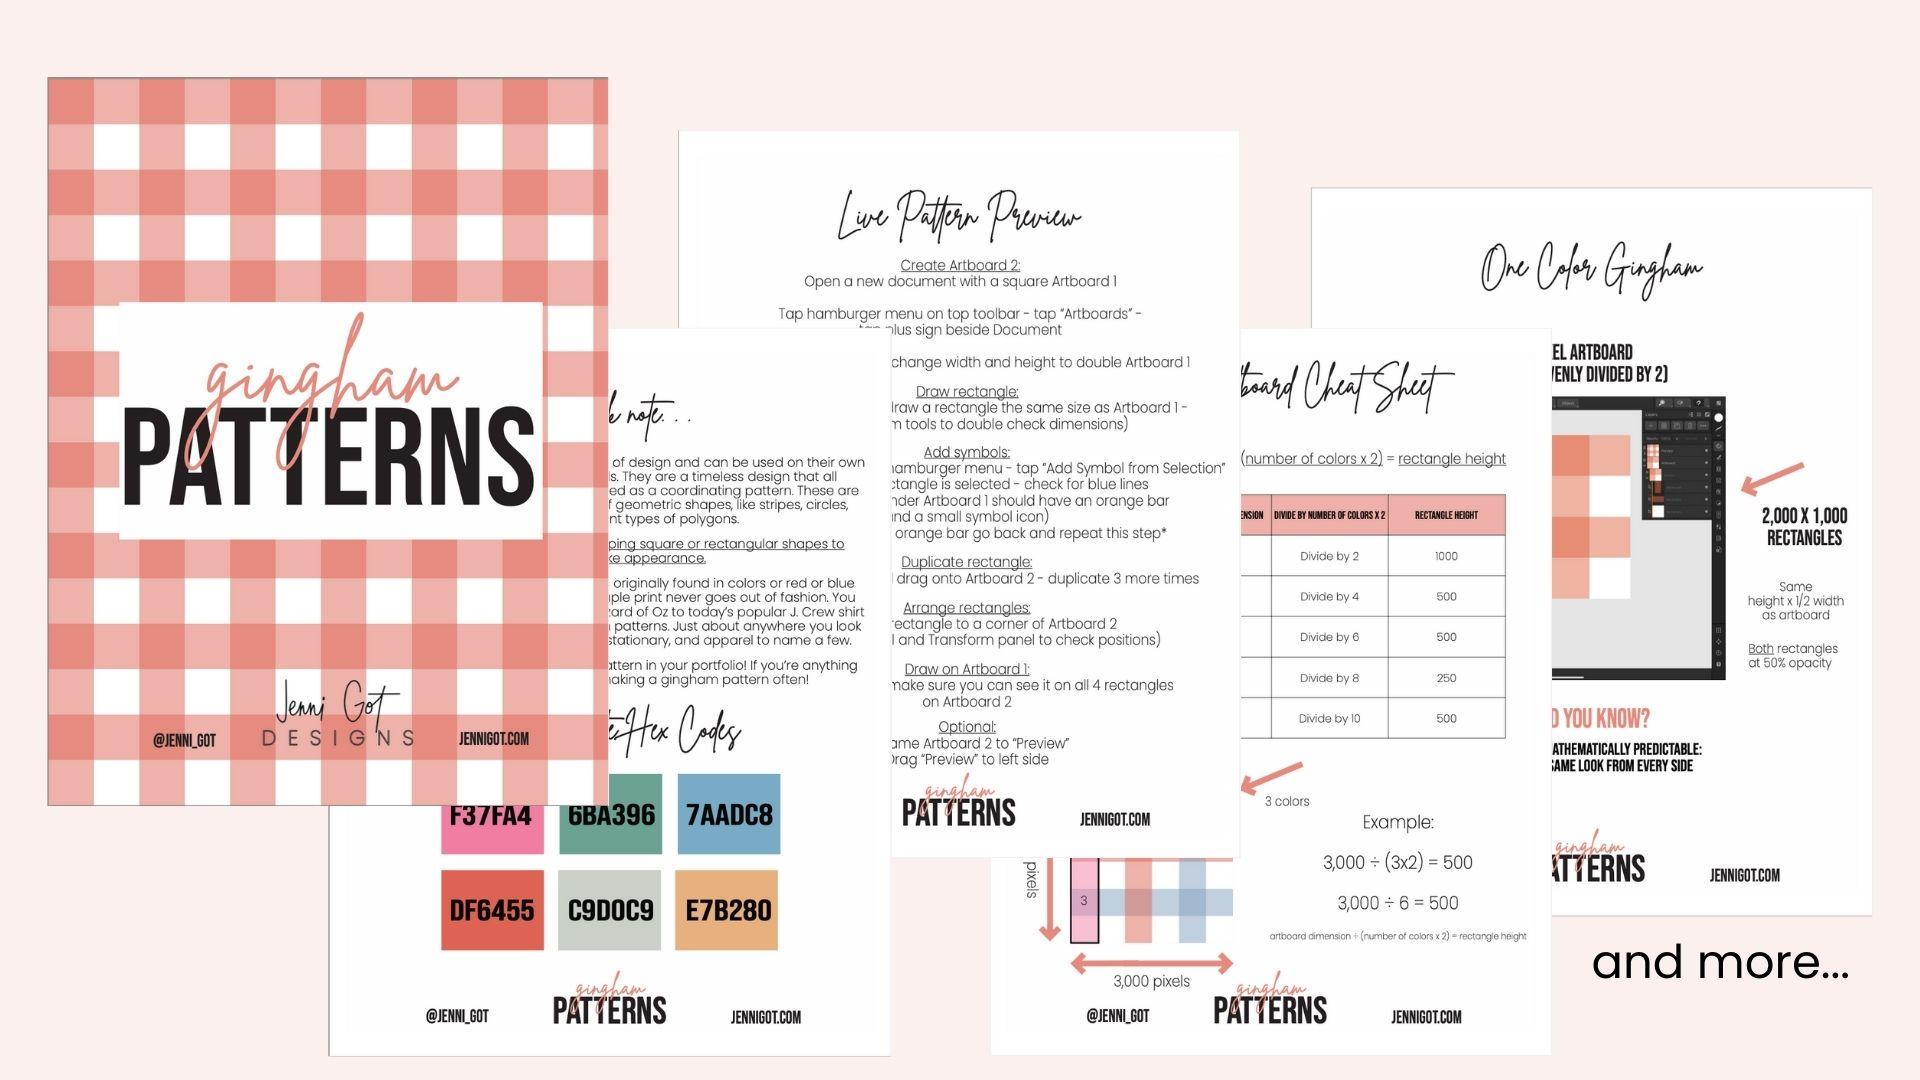
to your project as well. I'd love to see it. The class workbook is also
available to download. Make sure you scroll down
just a little bit until you see the bold text
Download resources. The workbook includes detailed instructions
for each template, a quick one page cheat sheet, and hex codes for the colors
I'll be using in this class. Next up, we'll create your first artboard.
I'll meet you there.
3. Live Preview Setup: In this lesson, let's create
our live preview documents. First, tap on new
and new documents. I want to make sure
that my document is in pixels like the dimensions
to be 2000 by 2000, the DPI of 300 with Artboards. I'll toggle on Create,
Artboard and tap. Okay. If you'd like to make
a document larger than this, like a 5,000 by 5,000 then you would just change the page
width and the page height, everything else
would stay the same. Now let's create
our live preview. We're going to first
need to add an artboard. So we'll come to our
hamburger icon in the top left hand
corner. Artboards. This grade out plus sign, will add an artboard
to our documents. This artboard is going
to be our preview. It needs to be double the
size of art board number one using the transform studio on the bottom right hand side, I'll change the dimensions to be 4,000 Double my artboard 2000 times two will give
me 4,000 for our width, will be the same for our
height, 2000 times two. If you like, you can
swipe to the left on artboard two to rename layer, we'd like it to say
preview instead. You can also, if
you prefer to have your preview to the left
hand side of your artboard, you could drag that to
the left or to the right, really anywhere that you prefer. Next, we'll use the
rectangle tool to draw a rectangle exactly on
top of artboard one. You can tell I didn't quite
get that full artboard there, so I'm going to change
my width to be 2000, my height to be 2000. My move tool, I want to make sure that that's snapped into place so I have my red
and my green lines. I can also check to make
sure my position is at zero for the x and
zero for the y axis. Now we'll use our
symbols Studio. Tap on the hamburger
menu to the right of symbols and add symbol
from selection. Now you should see the rectangle that we just made on artboard one as the selection we
used for the symbol. Now we'll duplicate
our rectangle and drag to the preview
or artboard two. You should see that
this is a symbol, because we have the
orange line to the left. We'll actually need to duplicate the artboard 13 more times. Each time we can drag it
over to another quadrant of the artboard we're
using for our preview. When we're finished,
we should have four rectangles titled symbol. We should have one symbol
under artboard one with the rectangle that we drew cap on the rectangle
for artboard one. And draw or change the color, we should see a duplicate. Our board one is red, which means our artboard two or preview will be read as well. We know that our artboard one, duplicating and previewing
on our artwork Two, we want to make any
last minute checks we can to make sure we
have everything lined up. The bottom right hand corner should have position of 2000. By 2000, the bottom
left hand corner should have position
of 0.2 thousand. The upper left hand corner
should have position of 00 and the upper right
hand should have position of 2,000.0 I'm glad I checked this is 1.9 We'll
throw off my live preview. So I'll change that to zero. Now that we have our live
preview document set up, let's start creating
some gingham patterns. I'll see you in the next lesson.
4. Color Palette: Let's talk about color. I have six colors I'll be using. Feel free to use those
or choose your very own. I have my live preview
document open. This could really be
on any documents. First we'll draw a
small rectangle. This rectangle we're going
to use as our Swatch, tapping on the color studio, and you may see a
different screen. Maybe you have color
wheel or sliders on. Go ahead and tap over
to RG B X sliders. This is where we'll
put in the code. Tap on the hex code and
we'll enter our first code, 6455, which will give us our
really pretty coral color. Now we need to add this
coral color to our swatches. Go down to the bottom
and tap swatches. The right of swatches
is the hamburger menu, Tap, Add Application Palette. An application palette will be available on every
document that you open and throughout the entire
affinity designer program. Sure name for your
palette and tap. Okay, I already have ones. I'll do gingham colors. Now we need to make
our coral color, one of our swatches. We'll tap on the
hamburger menu again and add current fill to palette. Now we have our coral color. We'll go back and
change this rectangle. I'll go back to our GB. He sliders and cap the hex code field and
type in our next code. Seven a C eight. Back watches. You may need to toggle over to find the
palette that you just named. Then cap the hamburger menu. Add current fill to palette. We'll do this for the
other four colors. Now that you have
all six colors, you're set up and ready to go. I'll see you in the next lesson.
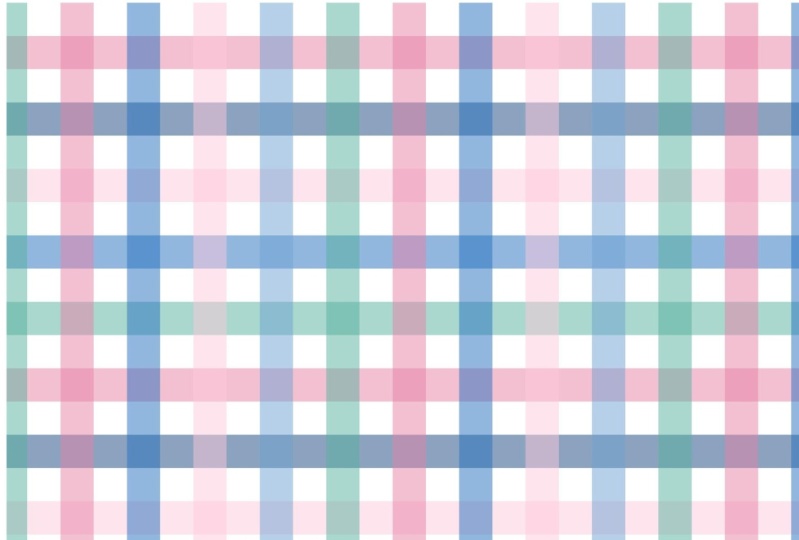
5. One Color: This lesson, let's quickly talk about the main
characteristic of gingham. And start making some gingham is actually strikes a horizontal and vertical
stripe that overlap. Where the stripes overlap
creates a darker shade. This is called fall on. This fall on is the main
characteristic of gingham. We're going to start with one color and keep white
as our background. You can always change your background to different
color if you'd prefer, but for now, I'm going
to keep mine as white. To start with, we need two rectangles to
create our stripes. Using the rectangle tool. Draw a rectangle
anywhere you'd like. I tend to draw mine off
of my artboard just to make sure I don't mess
anything up by mistake. Give your rectangle a color. I'm using coral in this lesson. Then with your moved
tool selected, drag your rectangle
onto your artboard. I have my snapping enabled. Snapping is in the top
right hand corner, looks like a little
horseshoe magnet. And then the bottom
right hand corner, you can tap and see enable snapping this circle
should it should be filled. If it's not, then go ahead
and tap enable snapping, and it should fill for you the dimensions of my rectangle. I want to go ahead and check
using the transform panel. Transform is in the
bottom right hand corner. My rectangle is currently at 2000 by about 900
for the height. I'd like to change the height
to be half of my artboard. That will be 1,000 Let's check and make sure
that our preview is showing. Since we don't see
our first stripe yet, I'm going to check
on our layers panel and move the
rectangle layer below the symbol layer but above the rectangle now we have
stripes essentially. With our rectangle
still selected, I'd like to duplicate
this rectangle. To duplicate, you can come
to the three dot menu on the top and then
tap duplicate it. Duplicates right on
top of my rectangle. Now I need to rotate
my rectangle. You can do this two ways. The first way is to
use the transform on the context toolbar, the top, the two triangles, then tapping rotate counterclockwise,
I'll undo that. The second way is that
you can grab the handle. This handle from the top will allow you to rotate manually. This is a little tricky to
get right at 90 degrees. So you can put your finger and just do a long press
on the screen, which will then enable
snapping to 90 degrees. Now with the move tool selected, I'd like to move this rectangle
down and over it snaps again to the left hand side of the board at those green
and red guidelines. To help me to create
gingham instead of stripes, we need to change the opacity. I have both rectangle selected. If you just have one, then on the second one you can swipe
to the right to select both. Then using the
opacity will change the opacity to 50%
Now we have gingham. Last but not least, let's
export our repeat tile. We'll come to the hamburger
menu and tap export. I like to save my
repeat tiles as a Jpg type in your
file name area, be sure to select Artboard one. The best practice
here is to only use Artboard one as
your repeat tile. Live Preview is really only there to help us while
we're designing. You can tap Preview if you'd like to make sure you've only selected the repeat
tile and then tap. Okay, while we're here we're also going to export
as a template. Go back to the hamburger menu and tap export as templates, Type in your file name and save by exporting
as a template. This file will now be saved exactly as we have created it. When you open it next time, all you might need to
do is change a color, maybe resized just a bit
and you'll be good to go to open a template. Tap on templates on the main
affinity designer interface. Find the template that you just saved and it will
open. Ready to go. And the next lesson
we'll look at ways to recolor and resize.
I'll meet you there.
6. Color & Size Adjustments: In this lesson, let's
look at some quick ways you can re, color and resize. The first way is to use the color wheel on
our layers panel. Go ahead and select
both rectangles and then tap the colored
circle on the top. You don't have the color wheel, you might need to
just tap over to the left or to the right
to find the color wheel. Or you can tap right
on color wheel and the menu will come up to
where you need to be. Then using the sliders, you can change the colors of the rectangles and
they'll keep the opacity. Another way to change
the look and feel of your design is to
use blend modes. Tapping back on
the layers panel, beside the opacity,
you should see normal. This is the normal blend mode. By tapping to the
left or the right, we can have a
different blend mode. Some of these will work a
little bit better than others. Multiply makes your pattern that much stronger and a little bit more vivid
in your colors. Some will not work very well, but there might
be a few that you could use in your next design. When you're writing to go back, you can tap on the name of the blend mode and then
you'll have the full list. You can also change the
rectangle that's acting as our background by choosing another color on
the color wheel. Maybe you want to use a nice soft off white color to re size. I like to group my
rectangles together. Then drag the bottom
right hand corner up until you have a 1,000
by 1,000 pixels square. With the group still selected, tap duplicate, and
drag to the right. Next, select both groups and
duplicate one more time, this time dragging both
groups down until it snaps. As you see, now our preview
is a much smaller scale. If you'd like to continue
to an even smaller scale, I would suggest grouping
all four together. Then repeating the
same process by dragging in until you
have a 1,000 by 1,000 and duplicating the next lesson, we'll add a few more
colors to our pattern. I'll see you there.
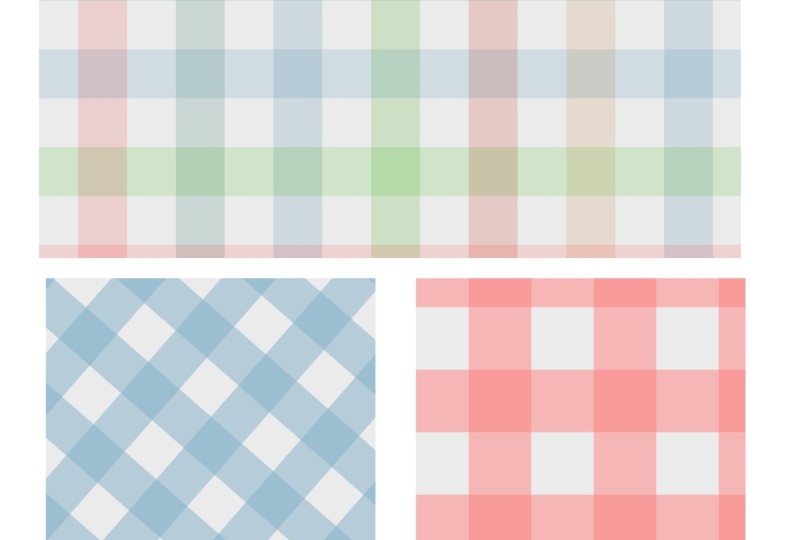
7. Two and Four Colors: This lesson, we'll build a
two color gingham pattern and then use our two colors
to build our four color. I have my first
document open with my one color on
the layers panel. Select both rectangles
and delete. Now we have a clean
canvas, so to speak. We'll repeat the
process by starting with a rectangle using
the rectangle tool. Go ahead and draw another
rectangle with the move tool. Move the rectangle
onto our board. Now let's resize our rectangle. Our rectangle still
needs a width of 2000, but the height is now 500. Our height is one fourth of 2000 because we will really
end up creating four stripes. Two will have a color
and two will be white. Next, duplicate your rectangle. Drag the rectangle below
the first snaps into place. Out looks like we have
a 2500 rectangle. This is just a placeholder. We're going to delete this second rectangle
in just a moment. Let's duplicate one more time. Affinity predicted
what I wanted to do. It automatically, snapped that next rectangle below the second, what I have are three
different rectangles. I've worn the top
middle and at the bottom one in the middle,
it's our placeholder. I'm going to delete
that rectangle. Now I do have four strikes. Let's make sure this
is repeating on our preview swipe to the right
to select both rectangles. Then drag the rectangles below layer but
above the rectangle. See we have our stripes starting to form to create our
vertical stripes. Going to group my two
rectangles together. Next, we'll duplicate this
group and rotate 90 degrees. The move tool will move this
group over to the left. Our last step is to select both groups and
change the opacity to 50% Now that we have our
repeat made, select one group. This group will be a new color. I'm going to select
the pink color, play around and see which color
you really like the best. Be sure to save and
export as a template, your future self
will. Thank you. When you have this
set up and ready to go now we'll use our
two color pattern to build our four color
select one of your groups. Each rectangle now
needs to be resized. I'm going to select the
rectangle on the left. You remember our dimensions
are 2000 by 500. Now that we have four colors, we'll actually be
creating eight stripes. Four with colors
and four without. We need to divide the height and half 500/2 will give us 250. Each stripe is now 2000 by 250. I'll do the same for
the next rectangle, the next group, now them
have a rectangles resized, we just need to add a
few more rectangles. We'll do the same thing we did earlier by using our duplicate. With the first
rectangle selected, I'll duplicate and drag down
until it snaps into place. Duplicate again.
Now I have three. I have one on the top middle, and the bottom, the middle
is now the placeholder. I'll delete the
middle rectangle. Now I can tap on the third
rectangle and duplicate. Drag down duplicate again, the delete the second of the
stripe that's in the middle. We'll do the same thing
with the next group. I like to do this
three at a time, so I can go back and delete the one that's in the
middle as the placeholder. Before I recolor, I like to actually arrange the
rectangles to make sure that one I don't have a duplicate on top of
another like I do here. Make sure you have four
rectangles in each group. Then I like to
arrange them so that the left rectangles
on the top of the group and it moves across
the board left, right. I'll do the same thing with our second horizontal
group here, making sure that the
rectangle that's on top is the first
in the group. And the group goes
from top to bottom, selecting the first
rectangle in each group. Let's change this
to our first color, which could be any
color you want. I'll choose my pink. We'll
make sure it either has a pink stroke or
no stroke at all. Then I'll select my second
rectangle and change the second rectangle to the
same color third rectangle, and each group I'll
change to a new color. Then the last
rectangle, each group, I'll change to the
same color as well. I think I'll do that
yellow instead. I like to wait and add color at the end after I've finished
building my pattern, and I've organized
my layers however, feel free to add color
anywhere along the way.
8. Modify Live Preview: First, we need to
modify our document. We need a 3,000 by
3,000 pixel art board. For our next two patterns,
you have two choices. You could go and
create a new document, creating a new live preview
with a larger art board, or you could modify the
document we've been working on. That's what I'm going to do. I'll go ahead and delete
any groups that we have. If you're not entirely
sure you want to modify this document
like I just did, you can go to the main
interface, find the document, swipe to the left and tap two documents are
overlapping to make a copy. First let's change
the dimensions of our artboard to be 3,000 by 3,000 We're going to link the dimensions by tapping
this chain in the middle, we'll go to the next layer, our symbol and make sure
our symbol is also at 3,000 by 3,000 Also the rectangle which is
already at 3,000 by 3,000 Using the move tool, I'll drag this over
just a little bit. Our preview needs to
be double artboard, one tap on preview. Change the dimensions
to be 6,000 by 6,000 Then each symbol group
also needs to be changed. To make it a little
bit easier to see, I'm going to give the
symbols a stroke. Each symbol needs to be 3,000 by 3,000 This symbol was in the
bottom right hand corner. Also checking to make
sure the position for the bottom right hand corner
is an X value of 3,000 and the Y value of 3,000 I'll select my next symbol and do the same thing,
changing the dimension. And dragging down to the
bottom left hand corner, I'll select the next symbol
and change the dimensions. Moving to the upper
right hand corner, the position here is X is
at 3,000 and y is at zero. Our last symbol, again, change those dimensions
and position. This position is at 00. To check our live preview, we can change the color
of our rectangle or we could also draw or write
something on our rectangle.
9. Three and Six Colors: Let's start working on
our three color pattern by drawing a rectangle. Dragging the
rectangle to artboard one and changing the dimensions. We want the width to be 3,000 and the height needs to be 500. This is the height
of the artboard divided by six duplicate to get our placeholder and duplicate one more time and delete the
rectangle in the middle. We'll start on the
bottom rectangle. Duplicate, duplicate, capping the middle rectangle
of the three in the. Meaning, if you'd like, this is where you could also go ahead and change your colors. I'm also noticing that
I have a black stroke. I'm going to select all three rectangles and
turn off that stroke color. Then I'll go back, select the second rectangle
and change its color. I think I'll use sky
blue for our film. The bottom rectangle,
I'll go with pink with all three
rectangles selected, grab the layers and drag
them below the symbol, but above the rectangle. Now I'd like to duplicate our group and rotate
using the move tool, I'll align this to
the left hand corner. The last step is to change
the opacity to 50% and make sure that you have
the blend mode on that you would like selected
normal for mine. However, remember
multiply works well. Be sure to export your repeat tile using
only the artboard, One area also
export as template. After you've done
both of those things, we can start using
this artboard to build our six color pattern. Remember, you can
always go back and duplicate this document
if you'd like to, before you start building your next pattern to make
a six color gum pattern, Then each group we need to modify the dimensions
of each rectangle. The height is half of
what we previously have. Now we'll have six
different colors, which means we have 12 stripes. I'll do the same for
the other group. Now we need to add more
rectangles and space them. I'm going to ungroup
each group that I have. I'll start with a
rectangle on the top. I can actually use the blue
as my next colored stripe. I'll delete second rectangle, tap on the blue, find
the middle and delete. Can use the pink
as my next stripe. And delete. I'll do the same for
the vertical stripes. Next, I'll group the vertical
and horizontal stripes in two separate groups. When I start adding color, I like to make sure
that the rectangles are in order from either left
to right or top to bottom. The vertical group here, I'd like to be arranged
from left to right. I'll take the one on the
bottom and move it to the top. The next one below the
blue, below the orange. Now to add in more colors, we'll take the first rectangle from the vertical group and the first rectangle from the horizontal group and change that to be
the same color. They look to both be the
coral color already. Then I'll take the
second rectangle from the vertical group and the second rectangle from the horizontal group
will change its color. Then I'll move down the list, selecting the next rectangles
and changing the colors. Now that I have my
colors changed, I'll select both groups
and change the opacity to 50% making sure my blend
mode is normal or multiply. Whichever you prefer, be sure to export and export as template. I'll see you in the next lesson.
10. Five Colors: In this lesson, I
wanted to walk you through the five color
gingham pattern. As I'm sure you've gone the
hang of how the make gingham. The art board for
five color gingham is a dimension of 5,000 by 5,000 Be sure you change
your preview accordingly. So it has a 10,000 by 10,000 pixel artboard and
each symbol is 5,000 5,000 Each rectangle for your five colors
will be 5,000 by 500. For the, be sure to order and arrange your
rectangles from top to bottom or left to right to make it easier to recolor them. And don't forget to
use your blend modes. I personally really
like multiply. I think it gives
it a great effect and a little bit more depth. When you're finished,
be sure to export your artboard and
export as template.
11. Bonus Wallpaper Set: In this lesson, I'd
like to give you a quick overview of the
bonus wallpaper set. When you open the template, you'll see there's three
artboards in the notes section. Once you've finished
reading the notes, you can come to the
layers panel and turn off the visibility
of the notes layer, or you can delete this
layer altogether. When you're ready to
customize this document, expand one of the artboard
groups and you'll see that there's the first
group called the text. Underneath the text is where
you'll find any groups that you can edit or use. As is, for example, Months group is fully
editable as it's a font that's readily available in the affinity designer program. Whereas nice to see you again. Hello and hi there. Those are actually
saved as PNG's. You won't be able to fully edit those like you
would with the months, but they're there for you
to use or to recreate, make them into
something your own. Then 2024 is also
fully editable. You can change the
colors, the text, and size for 2024. Next you'll see a
rectangle group. This rectangle can be customized
to be a different color. If you'd like, you
can add a stroke to change the width
of the stroke, make it into a dotted
line if you like. This rectangle is fully yours. Again to customize
or to leave as is. The last script you'll see
is the phone backgrounds. We've included one sample background here
which we have turned on and above we'll see
the bitmap fill here. We go ahead and turn off my phone background sample and turn on the bitmap fill here, this layer on selected it. And now I'm going to use
my vector blood fill. I'm going to set bitmap
fill by placing from files. We'll go ahead and find
one of my repeat tiles. Once you've selected it, you can just tap onto the artboard. From here you'll see
you have two handles. You can drag these handles in or out to make the design
smaller or larger. Also drag up to an angle. Here you'd like to tap
your finger on the screen. I'll help you just
snap to some of those commonly used portions. If you'd like another bitmap
fill layer to play with, I would suggest
duplicating this layer. Coming to the three menu
and capping duplicate. You can turn off the
layer you're just on. Make sure you have the
new layer selected and go back and choose
another bitmap fill. This will allow you to add
in your own gingham design. I hope you enjoy this template
and are able to create your own custom digital
wallpaper sets to share with friends or family
or just to use for yourself. I'll see you in the next lesson.
12. Creating + Sharing Your Project: In this lesson, let's talk about creating and sharing
your project. I hope you've already downloaded the project for our class, which is a gingham showcase. After you've read
the instructions, you can turn off the
instructions layer and tap on your first
rectangle layer. We'll use the vector
fill and bit map fill to select and place from
file our gingham repeat. Any of the repeat
tiles that you've exported will work
beautifully for this. Then you'll tap
on the rectangle. Once you have your
gingham design, you can use the handles to scale the design up or down,
larger or smaller. You can also rotate
if you'd like to show your gingham at an angle by pressing your
finger on the screen. It will also help to get that nice 90 degree
rotation we used earlier. Once you're happy with
it, go ahead and tap onto the next layer
vector flood fill, set bitmap film, and select
your next gingham pattern. You'll continue for your
third gingham pattern, choosing those top three
favorites that you've found. Feel free to modify
this document and add more rectangles
or take them away. You could also resize them. This document is made for you. Please make it your own wanted
to make sure you know how simple it is to
upload your project and share your gingham
showcase with us. You'll tap on projects
and resources, then you can submit your
project on the right hand side. Once here, you'll
upload your image, this is your cover image. Then you'll add a project title. A project description is where you can add a little information about the class
or anything you'd like to share about
your project. Then be sure to add
more content by tapping image and choosing your
project one more time. When you're finished, you can publish and we'll be able to
celebrate and cheer you on.
13. Congrats + Thank you: Congratulations, you've
finished the class. I hope you have a good
handful of new work and templates saved Your future
self will. Thank you. When you can easily
open up a template and pop in a few new colors, be sure to upload
your project into the projects and resources
section on the class page. Your beautiful work will inspire other students.
I just know it. Lastly, feedback is appreciated. Consider leaving a quick review. Reviews help other
students and teachers too. Again, thanks for being here. I'm honored. You
chose this class and best wishes on
your creative journey.
 Jennifer Gottleber, surface pattern designer + iPad art