Transcripts
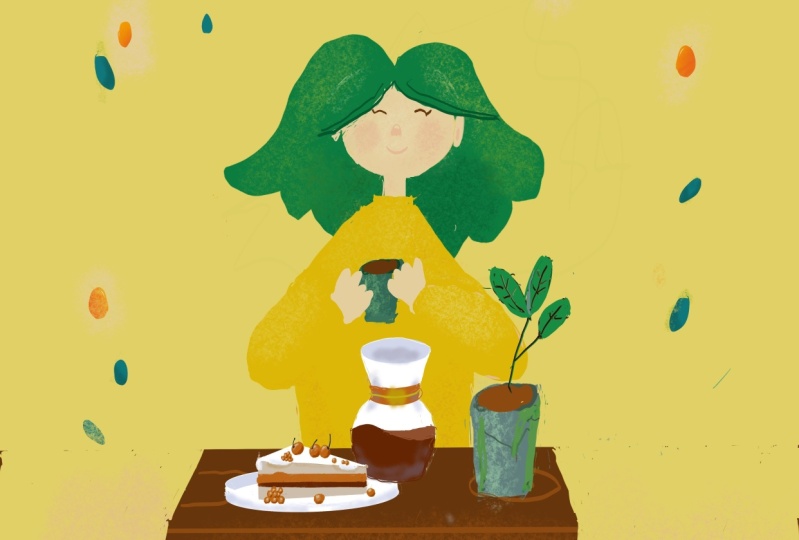
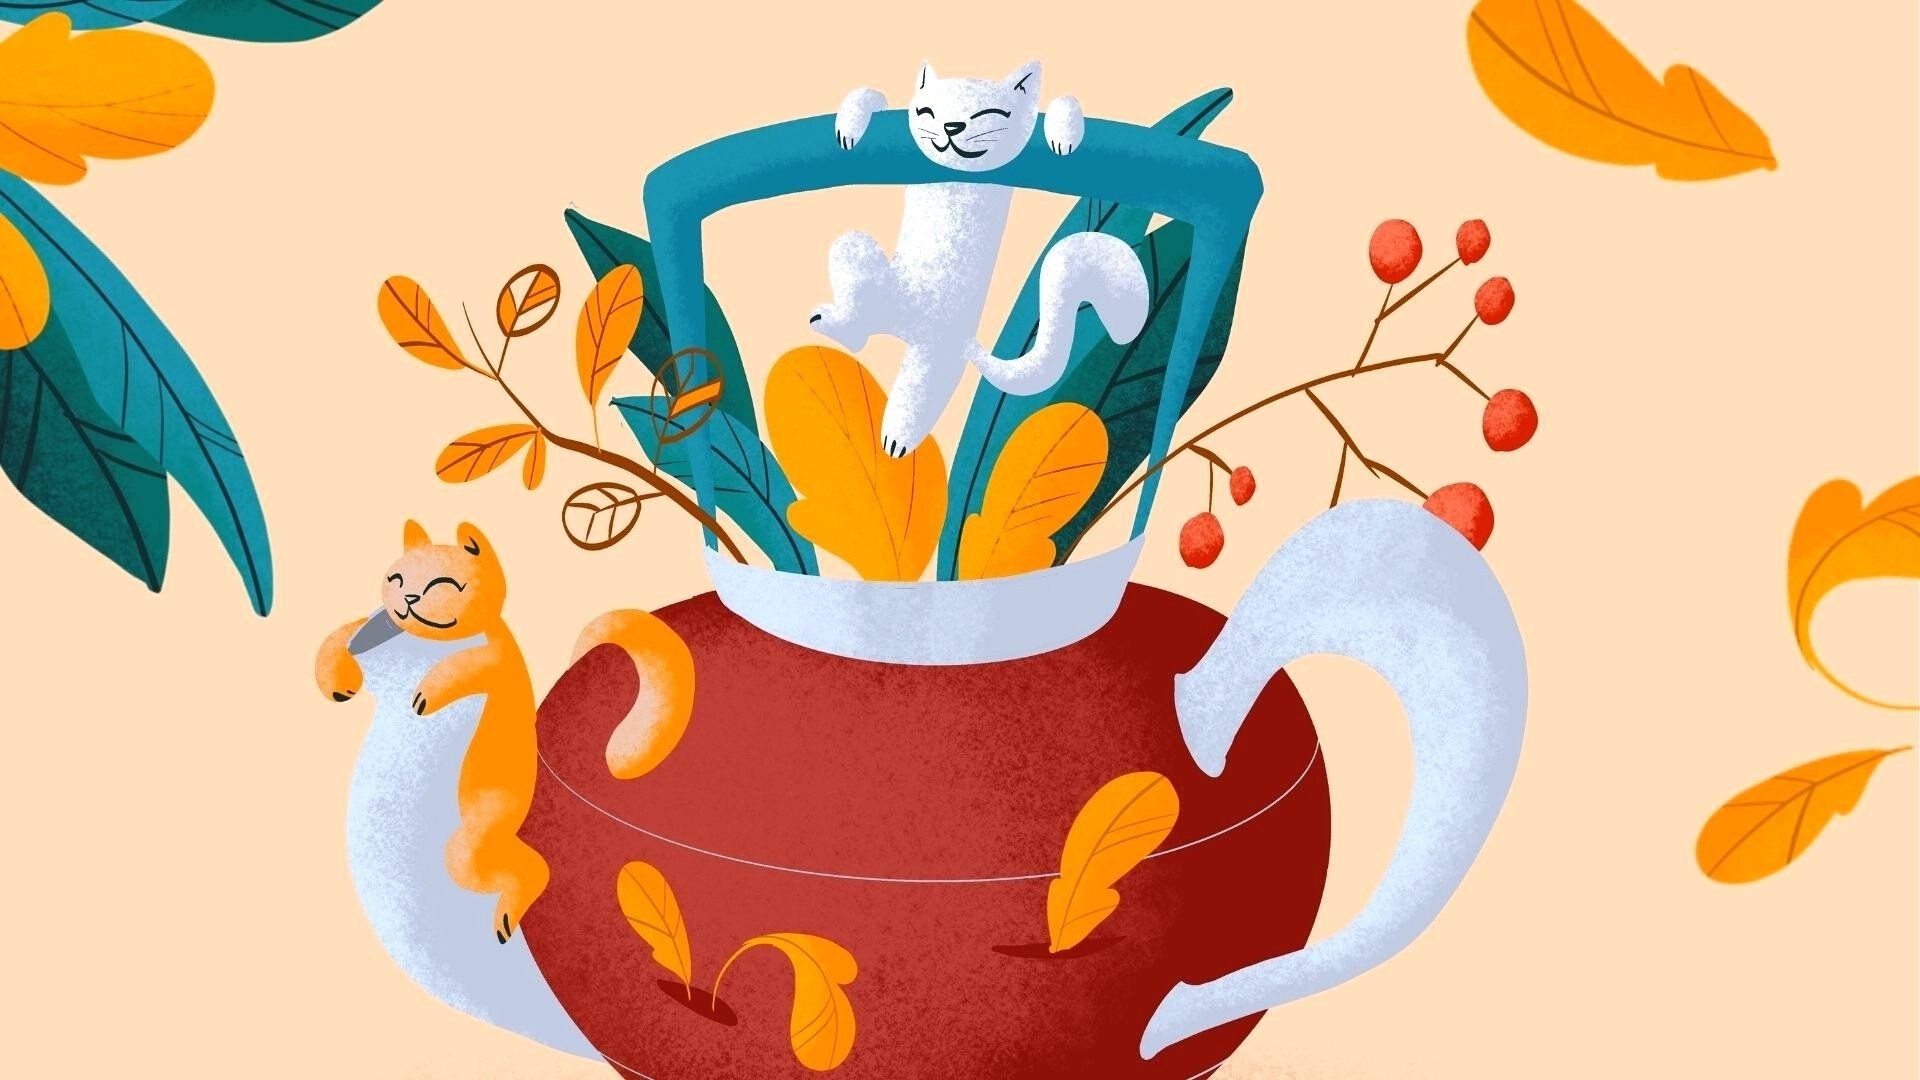
1. Hello!: Hi, my name is Christine, and in this course you will learn how to create a lovely cartoon of a girl holding a coffee cup. You don't need any prior experience in Procreate. The structure is very easy to follow and understand. After this course, you'll be able to create your own compositions using some very creative techniques. You will learn how fun and enjoyable it is to apply and practice your artistic skills. For this course, you will need the Apple pencil, the iPad, and the procreate app, with all of that being said, Welcome to this wonderful and easy Procreate course.
2. The Hair: For this lovely and simple illustration, you will need to firstly create a canvas in your procreate app. This canvas will need to have 4000 by 4000 pixels. For this illustration, you will use the nature corner color pellet, which you will find in the course resource page, domain brush used for the drawing is the hormone brush. The next brush is the KV brush, which will allow you to create very pleasant textures. The two brushes are available in the resource page as well. Now you will choose the light background. You can live from one of the lighter nuances of being. And then you can modify them a little bit so it can be maybe a little bit lighter. You can always change its brightness. Now you can go on the first layer of this beautiful artwork. Working with layers, it's extremely useful and easy. Now you will go on the color palette and choose this wonderful green color. The second from the top left corner. With this color, you will want to create the hair of your character. You can choose, of course, any other color for your illustration. Going to the right side, you will create a curve that goes upward and then it descends at the end, going inward, you will create three similar curves. Going to the left. You'll do the same, closing the shape on the bottom side. Then you can drag the color inside to fill it with color going into the moving tool set on rap, you can give the hair a more interesting look by dragging its form and shaping it a little bit more different. Let's drag it a little bit to the left to create more volume and maybe a little bit to the bottom to make that shape have a nice form. Now you can select the uniform and move it to the center of the canvas a little bit to the right side. Now let's unselect the move to and go to the layers to create the next layer.
3. The Face: On this layer, you will create the face of your character. So you will go to the color palette and select the third nuance of light from the bottom left side. Now, with the same brush, the hormone brush, you can move in the middle of the hair and create a wonderful simple circle. It doesn't need to be perfect. You can edit it to give it the right form. Let's create a circle and then go to the moving to select the rap too. And then you can modify its shape. Dragging the chin upward, making it a little bit bigger and moving it a little bit higher. And then once more change its shape a little bit so it doesn't seem like a perfect circle. Then you can drag the color from the corner and drag it to the face. Now you can decrease the size of the brush, increased to beautiful ears for your character. One for the right side and another one for the left, feeling the form as previously shown. Now you will create some delicate shadows for the face, starting with this wonderful light beige color. Now you'll want to select the textured brush and decrease its opacity before starting to shadow it, you will want to isolate the layer from the hair by alpha locking the layer of the face. Now let's go around the face, going on the top of it as well, and on the bottom right cheek, making sure it's face has a little bit of volume. You can go over the years as well. Now, let's choose a lighter skin tone and place it and place in the middle of the face and nice round highlight so its features can be more visible and contrasting. Now let's give the ears too little folder. So you will firstly select the brush and then the bash from the right and move to the little ears, making for each of them to beautiful, flipped, common like shapes. After that, you will go to the color palette and select the pink. With this pink, you can create a beautiful curve for the nodes. The brush will be a little bit transparent. Now you can go to the Kivy brush and create a little bit of a texture on the nose. So it seems a little bit more pink going inside the curve. Now, once more, select the hormone brush and for more light hue of pink. With this pink, you will make a little light spot on the nodes. So it seems a little bit more shiny. Now let's speak once more that beautiful pink and change the flow to maximum. Now you will change a little bit, the pink into a more intense you and towards the black. Now let's give this character a beautiful, relaxed mile, just in the middle between the chin and the nodes. Now, let's select a beautiful dark brown for the islets of the character. As for the nose, you will create a little tight curve with the flick at the end. And now for the other one mirroring the first, now with the bash color from the right and the textured KV brush, you will go to the cheeks and create two ovals just underneath the eyes, going on the bottom as well, and giving a little bit of shadow to the rest of the face. Let's zoom out a little bit. And now you can go into the pink and go over the chicks once more with this wonderful pink. Just a little touch of this pink will be enough. Now that the face and the hair of the character is then you will go to the Layers and create another layer.
4. The Front Hair: On this layer, you will create the next section of the hair for this little girl. Before that, let's shape a little bit more the base form of the hair so it can build a composition a little bit better. So you will move to the layer of the hair and select the moving to and the ramp. Now, let's modify the sides a little bit, making those curls from the sides a bit wider and symmetrical. Bring down the bottom curls and the top of the hair to make those locks more diverse. Now, the hair looks a little bit more groomed. Now let's select the layer and get a little bit closer. Living from the middle of the hair you will go with curve to the left on the forehead and close the form on the top following the shape of the hair. And another one for the right side, a little bit smaller. After that, you can adjust a little bit the shape from the bottom, making it more wider and going below with a couple of curved lines following the drawing for a couple of hairs going on the left side as well. After that, you will select the layer and select the move tool. You will want to make sure the shape of the last layer covered the one from the bottom. You can also drag it a little bit lower to cover more of the forehead as well. Now you can move to the color palette and select the light green from the middle. And with a textured brush, you will start to create some beautiful highlights on the top side of the hair after you made sure the Alpha Lock is on, decrease the flow and increase the size of the brush. And now you can go a little bit closer and create some wonderful highlights over the left side of the hair and on the right side as well. After that, you can take from the color palette a darker green and go Over the bottom side of the hair, decreasing the size and increasing the flow of the brush a little bit. Just a couple of simple passes over the hairline and on the left side as well. Now you can move to the first layer of the hair and alpha lock the layer, then select a lighter green from the bottom right corner of the pellet and go over the outside edge of the hair with some beautiful highlights blending those two layers of the hair and on the right side as well. Now, let's get into a lighter green and a little bit colder, applying another round of textures over the beautiful hair, Moving to the top side layer, giving it a couple of more highlights. This will be just enough. Now you will move back to the first layer and selecting a dark green from the pellet, you will create some shadows below the chin because this side of the hair will be in the back. This shadow will help you create that feeling of volume. So play around with this beautiful green on the edges of the curves from the bottom. Now let's undo the alpha lock of the two layers of the hair. And with the brush and a deep green, you will go over that beautiful hair line from the front with a couple of hair strings going to the back of the head with a little twist at the end. You can make them of different sizes and directions. So the hair can have some interesting textures. Now you can go and select a middle green from the bottom right side of the pellet. Now, you will grab the TV brush and with this light green, you will blend the ends of the darker hairs into the rest of the highlights to make them seem like they are part of the same hair. Now that the beautiful hair of the little girl is done, you can prepare to create a beautiful and warm sweater for this lovely character.
5. Sweater: In this step, you will start by shaping the neck of the little girls. So for this, you will want to create a new layer. And with the brush and the same skin color of the face, you will create a trapeze under the chin with two curves on each side and closing the form at the bottom and the top. And now you can fill the form with the color. Now that the shape is done, you can take the darkest view of bash from the color palette. Then, as for the hair, you will create some shadows with the Kivy brush before applying the shadow, don't forget to alpha lock the layer. Now you will play some of the shadow on the bottom of the neck and on the right side of it. Because in this illustration, the light is coming from the left side. Now you want to create the sweater. Now you will want to create the sweater. For this, you will pick the brush and a medium orange from the color palette. Now you will want to deactivate the alpha lock and then you can draw the sweater on the same layer as the neck. Then you will close the sweater on the base of the neck, and then you will draw two shoulders going down at a 45 degree angle so the shoulders can seem relaxed. Now, let's shave the torso of the character, going down with two lines and then you can close the form at the bottom. Now you will grab the color from the corner and drag it into the form. Now you will shape the two arms of the curl with two wide curves that go down until the middle of the body, and then once again, track the color inside. Now, let's adjust the color of the sweater and make it a little bit wider so it seems more loose. Then you will go into the layer and alpha locket. Now, let's grab the texture KV brush, and with a darker nuance of orange, you'll go around the sides of the container with a couple of brushes to create some really nice shadows on the bottom as well on the left arm. Now you will want to go on to the newly-created layer and draw the forearms of the girl, like two ovals going to the center of the chest, living from the elbows and closing at the end with a straight line. After you have shaped the arms, then you can feel with the same color the firms. Then you will go into the move to the rapping to adjust the shape of the elbow so it can nicely covered the layer from underneath. Now let's unselect the Move tool and also logged layer. After that, you will grab the middle orange and the KV brush. And let's shadow the right side of the left arm going ground. It's contour just on the outside, on the elbow from the right as well, around the U-shaped form. After that, you will place just a couple of lights on the left side of the left arm and on the end, one from the right, look how easy is create some shapes. Now you will want to go on the layer of the body, and with the same highlight, you will place a couple of lights on the left shoulder and on the left side of the chest. In the back of the left are a couple of more lights on the two arms. And the sweater is done. Now that the sweater is, then you can move into the next step.
6. Hands and Mug: After the sweater is done, now you will create a new layer between the harms and the sweater to create some beautiful little hands. So you will select the third nuance of light badge and the Armen brush and get a little bit closer to the arms. Now you will create two beautiful hands. You don't need to make them too complicated. Just a glove shape will be perfect. Underneath the arms. You will want to close the forums before filling them with color. After the two hands are filled with color, you can alpha lock the layer. And after that, you will go to the KV brush and the dark bed and give the two hands just a little shadow underneath that where they meet the sweater just a little bit will be enough so they don't seem a strange from the skin textures of the face. Then you will go to the color palette and select the dark green from the top right. You will create the mouth of the mug on the top of the hands, like a simple oval, not very thick. And then two beautiful lines that go inside of forms as they descend below the hands. One more curved line on the bottom to close the form. And then you can fill the form with this nice, beautiful dark green. Then you can feel the mouth too with the darker green color. So you can still see where the mouth is shaped. Then you can go to the KV brush and increasing the brightness of the base color. You will place on the left middle of the mug of beautiful highlight. Before that, make sure the Alpha Lock is activated. You can go over the mouth as well. Now let's increase the brightness once more and place one more layer of highlight over this beautiful mark. Now, let's grab the wonderful Elman brush. You will select the dark brown from the color palette and place a nice oval over the mail. There is no problem that is not covering the whole texture. Just a little bit will be enough. And with that, the step is finished and you can move to the next one.
7. The Table: For the next step, you will want to create a beautiful table in the front of the girl. So you'll start by creating a new layer in front of the sweater. After that, with the beautiful our mom brush and dark brown, you will go to the bottom of the canvas and draw over it a straight line, hold it down until it becomes straight. Then you can grab the color from the corner and fill it on the bottom side. Then you can take the lighter nuance of brown and draw over the middle of the brown section another beautiful line. You can edit it and make it trade. And as horizontal as you can. After that, you can grab the eraser and create two lines over the brown at 45 degrees, going outside composition till the light brown line. Let's get a little bit closer and draw two more vertical lines going down from the light brown line. Now that the form of the table is settled, you can erase carefully the two sides that are no longer needed for the table going on the one from the right and for the left side as well. Being careful not to erase the drawing. Now with the same light brown, you will get a little bit closer to the table, set the alpha lock for the layer of the table, and then you can create some beautiful concentric oval forms for some wood textures. To, on the top surface, on the right, two lines on the front side, and two more on the left side on the top of the table. And now you can go and select the KV brush to create some lights on the table. A little bit of light over the side from the front will be enough to give the illusion of volume.
8. The Plant : After the table is then you will want to duplicate the layer with the monk. And then you will select the Move tool and set on uniform. You will make the newly created part a little bit bigger and drag it to the right side. After that, you can go to the layers and drag it on the top of the table layer. This will allow you to place the part on the table. Now, let's go to adjustments and into hue saturation and brightness, and play a little bit with the color of the part to make it a little bit more different from the original one. Let's play with the brightness to make it a little bit more contrasting with the table and much less saturated. Now you can select the Move tool and place it on the table on the right side and make it a little bit smaller. Now let's go into the selection tool and select the inside of the Monk. Now you can drag the brown from the corner and drag it into the inside of the part. Now that the plan part is done, let's create a wonderful plant in it. So firstly, you'll select the oman brush and the green from the middle right side of the palette and get a little bit closer to the pot. After that, you will unselect the Alpha Lock and let's place the main shoot with a wonderful leaf. The right side with the shape of a teardrop and on its end, another one, a little bit smaller than the first, and a bigger one on the left side. Now, you can fill the form of each of them with the wonderful green from the corner. Then let's set the alpha lock on layer of the plant and select the light green from the top left corner and give to each of the leaves a middle line and a couple of veins on the left and the right side of the line going down. And now for the big one as well, a middle line and the couple of stripes on each side. And for the tiny one from the top as well, making them look extra preteen. After that, Let's make the plant little bit bigger. So with the selection to set it on uniform, drag it upward to make it maybe a little bit bigger. You can make it as big as you please. And with that, another simple and beautiful step is done.
9. Coffee Cake and Bubbles: For this step, you will do something very fun and interesting. So let's get into the gallery and let's make a crossover with the other wonderful coffee time historic course. So you will get into the project. Let's merge down the layers of the cake and coffee, drag them to the middle and hold the pencil. Now, you will go back to the gallery and back to the course. Then you can hold the pencil over the layers and put them on the top. Look how wonderful and easy ease to create new illustrations using elements from the others. Now, let's go into this layer and select the move tool, set it on uniform and making the coffee and cake much more smaller and put them onto the table on the left side. Now, you will go into hue saturation and brightness and adjust the colors so they may seem from the same illustration, you will want to reduce the saturation to about 40 percent, the hue to around 55, and the brightness can stay the same. Now, let's get back to the gallery and into the coffee time story course once again, and go into the Layers. You can do this with any other project you have on your procreate app. From there, you can grab the bubbles from the background and go back to the gallery and back to the first course and dropping them in. Now you can duplicate the same layer to make more of this beautiful bubbles, go into the Move tool, flip them horizontally, and move them around until the two layers don't intersect. Let's move to the other layer and find an interesting place for the bubbles. Then you can go into the wrap tool and move the bubbles around until the distance from between them. It's a little bit pinker. Grab them around, move them until they don't intersect anymore. After that, you can grab the eraser and erase the one from the left side. You can erase as many as you want if they don't fit in their place. After you are satisfied with the way they are arranged, you can go into the layers and merge down the two layers of bubbles. Lecture that using the same bright green from before, you can drop it on the circles. So they seem more integrated in the color palette. Going for the ones from the left side as well. Filling them. Very nice. You can do this with any kind of decorative elements from other illustrations. Now you can grab the yellow from the color palette and fill the bright side of the orange bubbles with this wonderful yellow so they seem more lighted. Look how well they blend in the newly created illustration. Changing once again the color for this tiny bubble from the bottom. And this step is done. Let's get into the final step.
10. Background and Bubbles: For this last step, you can make some adjustments for the background. So let's get into the Layers and create a new one. After that, you will have to drag it underneath the other layers so it can go on the background. Now you will go with a light pink from the bottom of the color pellet. And with the Kivy brush, you will create some beautiful textures around the bottom of the illustration and on the top, just lightly applying some of this beautiful pink around the edges. So the artwork can have a little closure. Now you can go into the bubble layers and selecting the lightest yellow from the pellet and alpha locking the layer, you will add a couple of nice accents of yellow textures over the orange bubbles. Just a little bit to integrate them in the illustration. Now, let's get that beautiful light, green from the corner and go over the blue dots a little bit as well so they can seem much more light. Now on the same green, Let's make it a little bit more bright and give a couple of more accents of light on a couple of these beautiful bubbles and on the left side as well. And now the illustration is finished. Congratulations on your progress and take you for taking this course. If you enjoyed it, make sure you leave a review and of course, share with the rest of the world your own beautiful artwork and see you in the next course.
 Cristina Handrea