Transcripts
1. Welcome Intro: Hello there. Welcome
to this course all about mindful crafting
and journaling. I am an yesterday snack and artist, illustrator and teacher. You may wonder, what
is a craft book? It's just a ring book or just the plain simple
notebook that I filled up with collage papers, cutouts, ripped papers for
magazines or old books. It includes letters and words, pictures and journal prompts that speak to me in the moment. It's personalized
to what I need at the time and what
makes me smile. Crafting has become
one of my main tools for unwinding,
relaxing, distressing, expressing my feelings
and emotions, and having just
loads of fun as I create something
beautiful and meaningful. Also, as a way to chart
and record my lessons along the way from noticing
and appreciating the simple, ordinary things, imagining and dreaming
up my future life. There are no limits to what I can put on these craft pages. And I let inspiration
lead as I get crafty, including loads of pretty
pictures of the things I love. And then I check in and I asked myself lots and
lots of questions. I write about my
feelings and emotions. I believe that crafting, making art can be an
amazing and powerful tool to help channel my creativity
to more joy and delight. No special art skill or prior knowledge is
needed for crafting. Some time to play
with your creativity, some cutting and gluing, whipping, writing,
doodling, journaling, and loads of happy moments. I'm so looking forward to going on this crafting
journey together. I'll see you in class.
2. Overview: So what is a craft book? What is a craft
page you might ask? It's a place where
you can express your emotions,
wishes, and dreams, put down on paper what you love, what lights you
up with passions, you, some of those life lessons
you don't want to forget. Maybe some aha moments,
some gratitudes. Just a place to let
yourself imagine and dream your special
place to be you. And to get more practical, it's a collection of cutouts,
letters, pictures, words, quotes, images, photos, symbols, cards, souvenirs,
stickers, what have you. There are no limits to what you can put on
these craft pages. Anything you may want
to include that simply evolve and go in the direction that your
heart wants them to. I'll take you through
the process of how I create my craft pages, the materials I use, some of the benefits I find in my own life and in
others as well. And how you can find
inspiration and ideas for what to craft about. Some ways you can
check in to make your pages most meaningful
and personalized to you. And the best thing of all
is that you don't need any special art
skill to do that. Just some time and
space to get to know yourself better and deeper. Well, having a blast of
fun with your creativity. So if you're ready to spend a little time for the
self-care ritual, come and join me as
we craft our way to more peace, joy, centeredness. All of those things
that you wish for that can take
us to new places, new horizons, as
we open ourselves up to new opportunities
and new lessons. So before you get started, something that I like to
do is just to ask myself, what do I want to gain from
this time, from this course? So add that little question
to your journal right now. Give yourself permission to
take this time just for you.
3. Some Benefits: Even before delving
into the how of how to create your craft
book or your craft page. I like to think a
little bit about my y. That way it helps to keep me motivated and inspired
to keep going. Here are just some of the few
benefits that I found for myself since creating
and using a craft book, we all need a place
to let loose, to feel free, to just be
ourselves and a place to play. Art can do that for us. And this craft book has worked like magic
for me in this way. So I'll list a few points
here, a few benefits. And I'm sure that you can think of more for you personally. A craft book can be a toolkit for when
life's challenges hit hard or when we need a little positive cheerleader
encouraging us on, it can be a place for us
to find our inner peace. A little nudge or reminder of some of our goals and wishes. A gentle reminder that we are worthy of this time
were important. A way to incorporate art
and mindfulness to our day. Even if we have
just a few minutes, whether early in the morning or just before going
to bed at night, or maybe you just have
some time on the weekend, finding a few minutes
a day and sticking to that helps to keep us
going and growing. It's an amazing
gift to ourselves. Chock full of wisdom and advice. Beautiful pictures
that make us smile and remanence over all
the wonderful things that make our life grand. To me, it's centering
and therapeutic. It's really one of those
self-care practices for myself. It's my private space to ask questions and to find the
answers and solutions. It's an opportunity
for me to learn and grow to become my best self. It's definitely
practicing self-love and compassion by giving myself, treating myself to this time. And through this Crafting, I get to set an intention
to imagine and dream big. It's like my getaway time, my artist's date or solo
rendezvous with my creativity. Even just a few
minutes of crafting, I find that it renews
my inspiration for whatever else I have
to work on in the day. And it challenges me, motivates me to keep going
doing the not so fun stuff. If I start out by
doing something that I really love,
like this crafting, It's a heart expression, time, time to listen and feel and
just be accepting of myself. It's kind of like a
meditation time as well. I get quiet, I listen, no other distractions around. I'm letting my heart speak, giving myself permission
to have a voice, even if it's just in a private way on this
paper, on this book, crafting with
pictures, with words, anything that I feel like
putting on the page, I get to practice
problem-solving as I think about the challenges or
the decisions I've made, or how I feel about things, or how I can improve
them in some way. I'm expressing my
emotions in a visual way, which is what I do as an artist. I need to see it visually, imagine it, and then put
it on paper somehow. And especially those things
that are sometimes hard to put into words or
express verbally. I also get to use
lots of my senses and motor skills for cutting, ripping, gluing, writing,
drawing, doodling. So to sum up the why for me or the biggest benefit I'd probably
say for peace and calm, and fun and play. So take some time now to list those benefits for
you personally. What would you gain by taking
this time for yourself? Do something creative,
something that you love using some type of art
medium that you choose. I'll see you in the next class.
4. Materials Needed: So in this class, I'm going to miss some of the materials that I use for creating
my craft pages. But before I get started, I just wanted to
encourage you that even though you may think you don't
have everything at home, you feel you have to do a shopping trip before
you get started, please watch this video first because I'm here to tell you that you
don't have to do that. You can get started
right now today. The things that
you have at home, you probably already have
loads to get started with. Because I find for myself that if I wait for the perfect moment or to have all the
perfect material than the time just
doesn't come for me. I just need to get started. No excuse. Even if I just have
regular paper, one magazine, one old book, that's all you need. If you wanted to get
some cheap options, you can find things
in secondhand stores, car boots, library
sales, flea markets, or maybe some of
your friends and neighbors have books
that they're getting rid of or magazines,
half-filled notebooks, someone else's trash can become your treasurer
in this case, and build your little
stash of crafts slowly. I think it took me a couple of years to have
everything that I have now, but I started with
barely anything which shows that you don't
need very much at all. Okay, so now I'll show you
what I use most often, but I'm not limited
to this at all. And I'm always willing
to try out and explore new things
into my craft books. And actually most of the time
I just tried to stick to two or three different things because otherwise it gets
a bit overwhelming for me. I have a hard time choosing
what to put on my page. That way it really helps to
simplify the process for me. There was one tip
I could give you. I would just go with two
or three things max, because when I get
up all my supplies, it's just too much and I can't
even decide in this case, I would feel that less is more and you appreciate it more. You appreciate
what you have when you have just a few things. And somehow my pages
just become even more beautiful when I don't have
so many options to use. So here are some of the
supplies you will need for the material that I will be using and some ideas
of what you can use. First of all, I start
with the magazine. Whatever you have on
hand, it really doesn't. Magazine. Maybe it
depends a little bit on your style page that you would
like to go for or create. I like having all these
women's magazines because I often like to
include pictures of girls, feminine stuff and de
corps, even flowers. I'm really not limited to that. I can work with any
magazine actually. So you will need
your magazines for the pictures and also
for the letters. So for some of the texts, for my big text, I use Greek letters like that. Just to keep that in mind. Magazines that have just not interesting
pictures but lots of nice clear bold letters, then you can also
use them for that. The first thing you may like to think about when you create your craft page or craft book is the size of page or book
that you would like to use. I have here a square
shaped craft paper book. I like to use also books that have large binding
or rings like this. That way, it doesn't matter
if I glue in a lot of stuff, envelopes, pockets, even
little notebooks inside. For some of my crafting, I've used looks like this. But very often I've actually
use just a regular notebook. This is a drawing notebook with, so it has no lines
and it's 120 g, which is what I suggest would be the minimum page thickness. That way you don't have
to worry too much about the paper bubbling up or if
you're including some paint, it again, leaking
or bubbling up as well as leaks from
markers or ink pens. This is a twelv pager. But really you can use
whatever you have. This is another size book. It can also be fun. This way I would
use both spreads, sometimes with the ring books, but sometimes with
the ring books, I use just one spread because I can only do so much at one go, whereas these are quite flexible and I find to work
really nicely. Another thing I like to add to my crafts is some old paper. I'm sure you could
find somebody who has an old book that is
not used anymore. Or maybe it's
already a bit broken and nobody really wants it. So instead of just throwing
it out and recycling it, you can recycle it into your craft book or
your craft page. I often just rip the page
or without a corner. They're very easy to rip. It just looks beautiful
and add some textures, some color and variety
to my craft page. Next, I look through
my cupboards and see if I have any old notebooks, started notebooks that
I'm not using anymore and that I could still
recycle a few pages from. So in this one, e.g. I. Like the yellow pages, it's a little bit different
and adds variety again, a bit of color to my page. Let's cut it out or
whip it out again. And I have a few
different types. Here's another little note pad. I like the different
types of lines. And here another very old book, agenda actually, and I'm again recycling
it into my craft. These are square-shaped. So as you notice, each one of these has a different
type of color of paper. What I find to be really
fun and also very helpful is to get yourself a block of craft
paper like this. This one I found very cheaply. It's got the colors
black, brown, and white. That way if there's
any of these colors that I need into my book, depending on the
craft book I'm using. If I'm using white, I won't use the white from here, but I might use the
crown or the black. Again, giving lots of
contrast to your page. This is not a necessity. You can also just take old
leftover wrapping paper if you have color brown
or black or even pieces of tape, black tape. Or sometimes I've even
gone ahead and use some old paper bags because
it gives the same book. You really want to go above and beyond all out with
your crafting, you could just get yourself a little block of
beautiful papers, patterned papers, some colors that you would
like that fits your mood, fits your style, maybe fit
your crafting project. I have a couple here, very different,
different colors. These also come in
handy if I want to add a bit more
color to my page. And I'll often find a page that matches the color of something on the photograph
that I've taken. This is not real necessity or obligation for
your craft paints. This is just in case
you want to go a little bit wilder and more
colorful than crazy. Last but not least of my materials for crafting
is some stickers. Stickers to me are
really that final touch, like the icing on the cake. When I need to give it an
extra little pizzazz or colored decor that I might
not have from magazines. I just got myself a sticker
book like this which includes a variety of styles,
colors, shapes, patterns. But again, fitting me
because I like all things pretty and flowers and nature
and some of these colors. And if not, if you
don't have stickers, another alternative
to that is I've made myself some sort
of made-up stickers. I've printed pictures
from Internet. I made my own type of stickers, just put them out. That way I can choose
my own colors, I can choose the
size that I want. So again, this is very practical if you don't
have stickers or if you would like something
very specific that you can't
find in a sticker. You could either paint
them yourself and then scan them and
print them out, which is what I've done
with a few of these, I made my own paintings. Way I can make them my
own color and style, ready and handy to
use when I need them. For my final touches on my page, I've made some just
black and white. So these are some
that I drew and then scanned and
printed them out. That way I can reuse
them if I want to. Or again, if you just want
to find them on Internet. Instead of drawing
them yourself. Again, these also work
like little stickers, just black and white, but you could color them
or keep them black and white if your page is
already loaded with colors, I like the variety
of using boats. Now moving on to the
art tools you may need. I like to use one or two little clips like this as it comes
really handy when I need to keep my
page together and sometimes keeping it from
flipping over by itself. If you want to keep
your papers together, especially if they
get big and bulky, as with some of my
large fat craft books. So once I got to the
end or something, it was just so bulgy and big on one side and it wouldn't
stay open so high. We're just keep it
together like that. Of course, you will need
some goods scissors. I found that narrow scissors, scissors like this or a
lot easier to use than big fat wide scissors
because you're going to be cutting
really small details, then you will need some glue. I like to use just a
regular glue stick, sometimes a wide one, sometimes a thinner
one for smaller areas. Once in a while you may need some extra thick
and stronger glue, especially when you want to make some pockets are
little notebooks. So these would be the three
types of glue could use. As far as pens go. I just use a regular
ballpoint pen. An ink pen, you could
have different sizes, ones if you want, when thicker, when thinner. Depending on the
details your greeting. And I have a little
thicker marker and a permanent
very thick marker, depending on what I like to
write or outline highlights. And for my brown
and black paper, I find that gel
pens are the best. So again, you could
have different sizes. I have here zero
point, 8.0, 0.5, depending on what you
would like to draw or little additions
you want to create. My trusty mechanical pencil. I like to use rather than a normal pencil because that way I don't have to sharpen it. The very last details
would be just a ruler. To make some lines. A culture if you need
to cut some details inside a closed area of
a picture or photograph. And anyway, Sir, I
think with all that, you're ready to
start your crafting. And I'll see you in the next
class where we'll talk about just a few ideas of how you could maybe store
all this material.
5. Store Your Supplies: Hi again. In this class, I'm going to show you a
few ways that I store my crafting supplies
just to give you a few ideas if
that could be helpful. I've tried many
different ways to organize and I found
certain things that have worked for some time and then I've changed and
I evolve as I go. I find new solutions, new ways that make it even
easier to simplify the process for me just to easily find
what I need at the time. So here we go, a few ideas. So to store some of my supplies, I like to use a little
basket like this, so easy, handy, and practical to just carry wherever I go. And I tried to keep
just the bare minimum, which you saw in
the previous class. That way, I don't have too much to go through and it doesn't
take too much time either. So this is when I
like to move around, around my house or maybe go
outside and craft in nature. But if I'm at my desk actually I have a little tray
like this and I just keep everything on my tray. And that way it makes
it just very clear what I have to work with and where everything
is very practical in handy to just
keep on the side. While I'm working on
crafting my page. As far as keeping
papers, newspapers. I find these plastic
trays very handy. They're about 5 cm tall. There, the size A4 page and e.g. here is where I keep
all my letters. It's just so practical in handy to just find
and go through. I also use one for all
my brown craft papers. That way I know that whatever
I need in this color, I find it in this
tree all the way from light browns and
beiges to dark browns. So again, this is very practical because I
can keep it color coordinated and I know exactly where to go
for what I need. And I have the same one for all my white and black papers. Since it's very easy
to differentiate, whether it's pieces of
literature, papers, letter writing papers,
or just some cutouts that I could do a little something here or
create a little pocket. I don't like to waste any paper. And as I showed you before, I have different sizes of trees. So again, these all come
in the same height. Some are smaller, and I can keep my smaller pictures
or smaller details. And what I love about
these is that they just easily stack onto each other and I put them
all in my shelf, in my cupboard, all stacked up. I have a stack for my
big containers and trays and another stack
for my small ones. So that's how I like to
keep most of my materials and cutouts, even stickers. So here's how I've
set up my cupboard. I have here my books to cut
out all the pretty papers. I put them upside down just
so I can have a quick look at them from my cupboard without having to
take them all out. Same here with the smaller ones. I want to delve a
little deeper into it. I'll just pick it out. Over here on this side, I have my old notebooks
that I can rip out from or just pick a little
notepad paper from it. So all the way on this side. And down here on this shelf, I have the magazines that
I'm working through, so I just keep a few at a time, otherwise it gets
too overwhelming. I figured if it doesn't fit here inside this little metal tray, then I have too many at one go and I can't decide
what I want to use. Here. I have all my trace as I showed you
with my materials. And they just stack up
nicely on top of the other. I have my letters, my cut out pictures, my stickers, and other papers. These are the big sizes and down here I have the smaller sizes. One with, again,
some sticker books. My little cut out pictures, just other little cutouts. Some cards. Other little Save keeps
or souvenirs that I could include one day
into my craft pages. So it's a place
to keep them all. I have three different
sizes of trees. So there's the medium, the small, and the
big ones up there. And on this side I have
some other folders with some current projects, maybe some other
cutout backgrounds, something related to my home. I kinda categorize my my
cutouts from magazines. Sometimes I just have
drawings that I can also copy from or cut out if I want to find the folder is
also to be very practical. If I don't have enough trays
for certain things that I might not use as
regularly as the others. Where is my lectures and any
girl faces or body parts? I keep them in these trays
that I just use very often. And the last shelf down here, I have my pencil case
that I travel with. So I just put in all my
usual art supplies in there when I need to
go somewhere or we'd like to go do it outside. And here are some nice wooden
boxes I found that I again keep extras that I
don't use all the time, but something fun like stamps. I haven't really
bought these myself. Somebody gifted them to
me and so I keep them. It could be a fun little
addition to a page one day. Now if you want to go all out
with your supplies and feel free to get yourself some
stamps or other goodies. Maybe some washi tapes like
here, some little buttons. Once in a while I've used these, but not even too much. Here's a little punch hole
puncher to round off my edges. That could be fun as well. Some glitter again
that somebody gave me. So I keep these and they'd
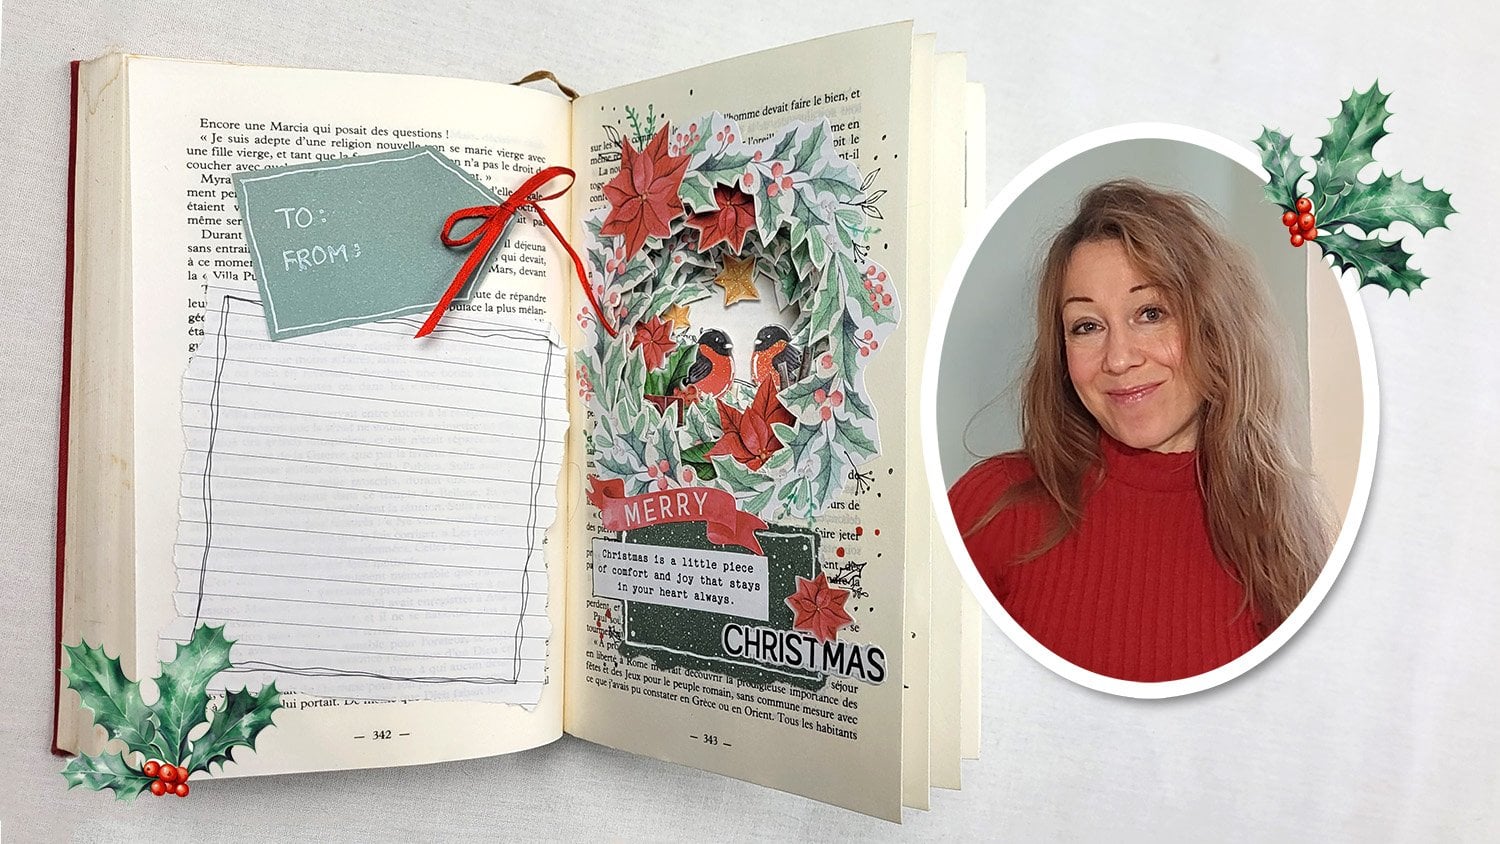
come in handy maybe for Christmas pages or
extra colorful pages. Back here I have the
other side of the tree. Anyway, these are just additions if I want to add to my page, but not real necessities. And then we have my
little crafts setup. I just have this cupboard behind my desk where I work and I take things
out as I need them. It's very practical in handy, and also, I can easily put things back
in place afterwards.
6. Make the Time: In this class, I'd like to
delve a little bit into the aspect of making the time, finding the time for crafting. Because I feel that there's so many things that get in the way. We're all so busy. And it took me a little while to juggle and make the time, find the time for this
creative time now, but I've found my key moments, my special place to get crafty, the best time of day to do it. There's no turning back. Now I've made it a habit. I think if you find something
that you really love to do, then you won't have
a difficult time finding the time to do it. And I did realize that
I needed to say no to other things in order
to say yes to this. So it's helpful to
maybe ask yourself, what could you trim
out of your day let go of in order to say yes
to something else. So I listed a few things for myself that I wanted
to let go of or stop doing in order to make time even just a few minutes of
crafting every day, e.g. low stopped going through
social media or Instagram, just keeping up with all my YouTube channels that I follow. Just letting go of that
gave me 1015 20 min for crafting and I felt so much more
satisfaction afterwards. So ask yourself, what is
it that you can trim out, let go of stopped
doing, say no to, in order to say yes to something
you really want to do. They also realized
that to be able to make this time count, it doesn't mean I have to do a whole page all in one go
because that can be a little overwhelming and it
can actually keep me from starting when I know
that I don't have that time. I waited so long for
the perfect moment, no distraction time,
and it never came. So I decided I'm
just going to get started with the few
minutes that I do have. And that's how I stuck to
it and made it a habit. Even just ten, 15 min a day. I added a little bit to
my page every time I had a free moment because when we wait for long chunk of time, it just doesn't come. We're all busy human beings. We have our lives, we
have our families, we have our jobs. So we just have to start
with what we have, the time that we have. I also found that walking
a certain time either before or after something that I'm already in the
habit of really helped me. E.g. I. Was very faithful
to journal every morning. I decided after every
journal prompt, I would take a few
minutes for my crafting. And it was so easy to build
that habit because I started right after another habit that I already was really
good at keeping. So you can try that if you want. Something else you could
do is maybe bringing, if you have kids, maybe invite them to
come and join you. We do that once in a while on a family weekly
evening activity. My kids love to craft. So if I don't have time during the day or in
my little morning journaling time than
I am so happy to invite my kids along and we
can all have fun doing it. Even if you have friends, you can also invite
them and have them join you in your
crafting project. That way your family times, your social times can also
become your crafting times. So if you can just find ten, 15 min a day for crafting, you'll find that
within a week you'll have one or two or three pages. Don't limit yourself to
a big chunk of time. What helped me get started
was I just told myself, I'm just going to break
my craft page up into this small piece of the
project at a time, e.g. the first day I just
collected my materials, everything that I wanted
to include on my page. The next day, I cut
everything out. The day after I glued
it all together, kind of made the
design for my page. Another day, I chose
all my little journal prompts and texts that I
wanted to include in there. Another day I took
time to journal to ask questions and to
write the answers. And then another day I added all the pretty little
last touches of decor with stickers or
doodles or more cutouts. Creativity doesn't care how much time we have to work on it. I think it just
matters that we do it and use whatever
time we do have. One thing to that
really works for me is finding that peak
moment in my day, when is the best time
to do my crafting. And then I try to stick
to that every day. That same time helps
to make it a routine, make it a practice
or a little ritual. I also tried to find a
place that I can leave, just like it is to be able
to return to the next day. I don't always have to clean
up all my art supplies because then it kind of keeps me from getting
started the next day. So I know that I can put
everything on my desk and cover it with a
piece of paper or cardboard to keep it safe. Or I keep everything
in a little tray, all my supplies that
I've collected, and I can just go back
to it the next day. It's not a big, messy,
overwhelming space. Those might be just a
few helpful points and trying in finding and making
the time for your crafting. And I'll see you in
the next class as we talk about the purpose.
7. Your Purpose: So in this course
we're going to talk very shortly about the purpose. We've already talked about
some of the benefits, which includes a lot of the Ys as we go
through the process. I think it really depends
on what I'm doing it for. What topic with theme,
how I'm feeling, my mood, the setting, what I'm going through
in the moment. Maybe some of the things that
I'm studying or reading, how I'm evolving, even how
I'm feeling physically. And as we go through
this course, I'll show you how I
personalize it for me, my ways of doing it, but I really wanted
to be a time. You personalize it for you. What fits best into your life, your situation, your
habits, your routines, your preferences, all
that is so important and that's what makes it meaningful,
purposeful, and mindful. So just as we did take
the time to think about those benefits
for crafting, for art, for creativity, for making the time and space at your little
journal book or a piece of paper and jot down some of these questions for yourself. Why do you want to do this
project, this craft page? What made you decide to take this course in the first place? What inspired you about it? What is your purpose, your why? What is your motivation to
keep going to persevere, to finish your craft
page or a craft book. What are you looking
forward to in this project? Is it for relaxation, to unwind it for fun and play? Finding a new hobby
or new ritual. For more mindfulness. For time to check-in, ask yourself questions,
learn more about yourself. So you can get a few ideas from this course, from the benefits, from some of the
things that I've mentioned about why I do it for me and then take some time to listen
to your heart. What is your heart telling
you about this time? Write it down and keep it right at the
beginning of your book. Glue it onto the
first page or add a little envelope and
stick it right inside. That way it's always
ready to refer back to as a gentle reminder
why you did this project. So a way to help keep you
inspired and motivated. So here's the time you
would write yourself a little declaration letter
or a permission slip, something like this one
that I've made here.
8. Start Small, Start Simple: In this class, I'm just
going to delve a little bit into how to start
small and simple, because that's the way
that we start anything. It's nothing heady or
intellectual to me. If it gets too analytical, too complicated, it just kills my joy, kills
my creativity. So I let all that go. I just want simplicity and fun. That's the reason for
this crafting after all, something else that
kills my creativity even before I get started
is perfectionism. When I wait for
the perfect moment or I'm afraid to get started
because I don't have the perfect materials may
be the perfect notebook or paper or size or the
perfect quiet space. That perfection just
keeps me blocked because I'm imagining the
most perfect craft book. I'm afraid I won't level
up to my expectations, so I don't start it at all. So when I get stuck that way, I find that I just
need to create a random page or quote
unquote, a tryout page. And I tell myself, okay, this is just an example. This is just a tryout. It's a practice run. It's not the real thing, it's not the end result. And that way I just whatever I want on the paper
and in the end ends up being a beautiful
page and I end up keeping it or adding
it to my craft book. But I just kinda trick myself, tease myself into starting
by telling myself, okay, it's not the real deal. I can just have fun
and play around. Doesn't have to be perfect. And I just asked myself, what do I love? What lights me up? Is it nature scenes, creative objects,
decorative houses, animals, beautiful faces, cute pets, cute kids, delicious food
or meal, plants or flowers. And then I go there, I
go in that direction. I find a picture
that speaks to me. I find one of those. I think about one of those and
I just go with it before I tried to think and analyze
all the reasons not to do it, which leads me to
the next class, which is finding inspiration
for your craft page. So I'll see you in
the next class.
9. Finding Inspiration: Welcome to this fun class
on finding inspiration. I'm going to list here
just a few things that I've found that
work really well for me in finding inspiration
for creating my craft page. Especially those moments
when I feel a bit stuck or I don't know
what to craft about. First thing I do is I sit with
my cup of positivity and I don't forget that little piece
of chocolate or something sweet as a special
treat to myself. And I sit down, think about and imagine, what do I love? What do I want to craft about? What makes me happy as I
enjoy sipping my cup of tea, then that t just makes me think of creativity and positivity. Another thing I might try is
to step outside in nature. I go out to my garden, to my backyard, or
to a nearby park, or if the weather
doesn't permit it. I just opened the window, look outside for a few moments before just a breath
of fresh air. Look at the flowers. I pause and listen to the birds, the bees are the
whistling of the trees. Just a moment to get
calm and to reset, especially to let go
of what's blocking me. I might sit on the grass with
the flowers and the trees, or I just close
my eyes and think about something that
I'm happy about, grateful for and still
with my cup of tea. Every time I take a sip, I think of something
that I'm thankful for. Another way I might
get inspired is just to pick up a book and
read a favorite quote. And that just seems to me up
and I get an inspiration. Or I read a passage
journal page, or I look at a past craft page. And that again lights me up, motivates me to do another one. And it just speaks to me. Sometimes I take a
moment to pet my cat, just have a little
cuddle time with her. She sits on my lap, she peppers and it gives me another little
inspiration boost. Sometimes when I don't
know what to do, don't know what to craft
that I just made out all my art supplies
and I just sit there and look at them for a minute until something
comes to mind, just taking the time to
be still and to listen. Sometimes that's
when the ideas come. You're inviting your creativity, you're prepared for
it, You're ready. Or I get all my papers. I put them all over the table, all my pictures and patterns
and colored papers. And I just wait and
wait and wait some more until a certain color
or pattern calls out to me. Or I just think about a wish, something that lights me up one of my dreams and
hopes for the future. And I might get a cool idea for craft page
just by thinking about that. Another one is I like to
look through my photos, sometimes on my phone
or my computer. Photo could also
give me an idea or inspiration of what I
want to craft about. Or might bring a smile or laugh, which again brings
an inspiration. Sometimes I pick out a
magazine and I skim through it and a beautiful
picture calls out to me. And I know, Hey, I want
to include that in my craft page and that's the
first thing I start with, and then everything
seems to fall into place after
that, basically, I just follow my
intuition and let inspiration lead
wherever it wants to take me on the craft page, would craft page, what
topic with theme, what to include in it. What's subject
would color scheme, what pattern, what
art medium to use? Listen, listen to your heart. And it will be sure to
tell you what it wants. You're giving it the
space and the time. There's nothing better
than to feel such joy and satisfaction from knowing that
you're on the right track. Just get started. That's all I can
say. Get Started. And you'll feel inspired.
10. Basic Design: So now that we're inspired, we're ready to design our page. Now that I have
the general idea, maybe the topic or the theme, or maybe a certain color pattern or a pretty picture I
wanted to include or quote, I have one thing to
get started with and now we'll work
towards putting it all together and designing that you'll notice it will all fall into place once you get your inspiration
and get started. I have I can make it this way. It since I have a spread, I'm going to make it
this way and I'm even going to fold it in half. That way. I can just
sketch out a rough plan, a rough look of what I would
like my peach to be like. So before I do the rough sketch, I might even make myself a list of what I want to
include on this page. So my first thing, my main thing is
my journal prompt. Since I'm doing this page on a specific theme for
a specific project, and this is my main idea, main project, a journal prompt. Then I would like to include some magazine pictures
or photographs. I would like to include a writing paper,
space to journal. And to answer my prompt. For this one, I might like
to include some flowers, flower designs
here on this list. I might even add the
colors I want to use. So I found one photograph
and it has the color pink. So I'm going to make my page have lots of pink to tie
long with that photo. And I might also
include some blues. So I challenge myself to maybe one or two
or three colors. Max. That way it's not too colorful, it stays within reason
and it's a challenge. Then of course, taking into consideration also my style of the page and I make sure that all this ties
along with it. And of course, ending with
some de corps and that's already a done deal
because I know that I will include
plenty of the course. Anyway, these are the
main things that I want to include for this
particular project. Other projects I might
need to include a title. I might need to include a
textbox, a few textboxes, a few other spaces
for journaling, maybe other pictures
or other details, or maybe a specific object. Now I'm ready to sketch
out a rough design. So here would be my spread. I know I have my little
photograph pictures that I already got
inspired with. Now if you don't have anything to start with, that's okay too. You can also draw
out your design. I find that that's
a first beginning, start to get an inspiration, but this could also be a
part two of your project. As soon as you found
a picture or if I'm a magazine or maybe a photograph
that you'd like to use. Then I'm going to my
main part of this page would be lined paper because
it's for journaling. I might make a rip look. I'm just seeing how it looks, That's why it kind of helps. Otherwise, I could
also draw straight. I like to add some big
flowers to this design. A little one here. And here. I could add maybe
my, my journal prompt. So did I include everything? I think so the de corps, I'm not going to
bother too much yet because I'll add those anyways. Now for this side of the page, I like to follow
the same pattern, but of course I'll have
different pictures to work with. So maybe I want a bigger photograph instead
of three little ones. It could even be in a pretty fancy picture frame
for something different. Again, I'll have my ripped
or straight journal paper, writing paper, lined paper, whatever you have and
whatever you need. And maybe another picture here. Little blocks of text ear
could be a different color. This time I have
the flowers that my big flowers on this side. I could put my journal prompt either up here or down here. Anyway, that's some look, I could add, of course, the cores on the side
and fill up the rest of my page with other things. If you know my designs, I love to add a little
leaves and flowers too. Each of my pages. Then you can see what it
would look like if you added a frame to some
of your photograph. Anyway, I think I
like this look. Then if you don't
like it, you can just turn it around and make yourself a
different sketch design. The reason I do this
is just to have one general idea if I
want to follow that, but I'm not limited to that. I stay very flexible with my ideas and inspirations
because most of the time they
actually just come as I cut out and as I glue, I don't really have to have this plan is more likely to help me remember all the things that I want to
include on my page. Anyway, I'll look forward to seeing you in the next class.
11. Main Idea: Hello again. In this class, I'm going to show you how to
get started with your topic, the main theme for your page. So I have here my, my sketchbook and I'm
continuing with my project, which is journal prompts. So I have my spread
that I'm working on. And the first thing for me, the most important thing is finding a picture
that I want to use. I either go through a magazine
and find a picture there. And I'm looking for something that fits the topic
that I'm working on. So that's the, one
of the biggest parts for me in starting my page, is finding that
first right picture. Because I think once
I have that picture, then everything else
falls into place nicely because then I have the colors
I know I can work with. So I have either magazines. I also have my basket full of pictures
that I've collected. And something might spark
an inspiration or follow, fits into the theme
that I'm working on. So I have such a variety, so it's hard to choose. Sometimes it takes some decision-making which
I'm not so good at. So I've got to really be
in tune with my heart. What it leads me to
do at the moment. Anyway, for this one I
already had to work with. So I'm going to
continue with that. And I'm also looking at the colors and taking
back my little plan, my little basic design. You can see that I think
they would look quite nicely here because I drew
it out on the paper first. And that's what's nice
about using a pencil because you can feel
free to erase as you go, as you change your mind or
think of a different plan, are just draw another sketch. So now I'm going to find
a picture for this side. So I would like
something that again, fits with the same color theme. I want to include a little pink. So I think I'm starting
to get the idea. As I'm looking at the
pictures and colors. Like I chose. Even hear my colors
pink and blue. I might even add this one because it's got
some blue in there. So I'm just going to see
how it fits with my theme. And I'm not sure if I
should include all of these or maybe just two of them. So play around. That's what's nice about it. Nothing is set in stone yet. Just let yourself play. This is the child
that comes out to me because I might move things
around all over four, lots of different ideas and it might help to cut them
out at this point so you can make sure it all fits the right size and
that way you know what else you have the
space for on your page. All right. I think we'll
leave it at that for now. We've got our
pictures all chosen. That's a big accomplishments. Another point about
this class is that this is the time to be
very clear on your, the purpose for this
page because that helps you to kind of choose
the pictures as well. What's your theme,
What's your topic? So mine, you might be
able to guess very well. It's on self-care and wellness,
emotional and physical. So that's why I like to add
in photos of happy woman. It's obvious that
they're taking care of their set, themselves,
their skin. They're also making
time to relax, which is what this one
means for me or letting go of certain things that no longer serve them at the moment. Also, making time for
emotional well-being, maybe some peace and
calm meditation, exercise as well out in nature. So depending on your
theme topic, again, if it's nature related, then you can add lots of
different photographs. And if it's just to add certain words or
maybe few quotes, then you can also be free to
add many more photographs. This page is mainly for
journal prompts for me. So that's why I'm
leaving lots of room for other
things on my page. And I think choosing
my photos is also would kinda brings
me the most meaning. And this is what I am
most attracted to. I think it's what brings
out the most contrasts with my white book and
my photographs. To me, it's the most
important thing because it's what
my eye falls on. First, I see this part is
like the base of my page and the rest comes without
too much planning, too much effort,
just inspiration. Once I get this part going, I'm looking forward to seeing
you in the next class.
12. Backgrounds: So now that I have my pictures, I can choose some other background colors
if I would like. Going back to my little example, something that I like to
include on each page is a little bit of brown
paper, old ground paper. I sort of count that as part of my background because
it's behind the pictures. I might make it even part
of a little frame for one of my pictures or on
one side of the page. It's going to whip it. I'm going to do the same for
the other side. And I tried out and
see how it looks. So background could be
either this sort of paper, could also be a darker piece
of paper that I include two, heart of my page
or my whole page. If I wanted one side
of my page all brown, I could also do that. So that's the fun of it. You just try things out. Helps to make my picture stand out to this
or even this one. Beyond a brown background. My background doesn't mean I
have to cover my page fully. It's just a part of it. It's kinda like the first
layer that I glue on my page. And I think it's important to, to help certain pictures are certain parts or details
of my page to stand out. And for more contrast, e.g. this one is very
light on my white, so I might give it more
contrast and put it on a brown or black
page like this, or that's when comes in. Some of these pages,
patterned notebooks. This has some brown and pink, so that might look nice, or even this page
is a nice color. So I think about what would
look nice with my theme. I like the polka dots. I think I would go
with either this or this because they blend
so much together. And then I'll bring in
some contrast with either brown or even
something in black. I also found here at
this picture frames. So I'm going to cut
it out and see if it could be part
of my background. Don't actually need
this middle part. So I'm just cutting
out the middle. I think for this page, I'm just going to choose
this as my background, but feel free to try out some of these other ideas
that we talked about, whether it'd be some brown paper or black, another patterned. So I think part of
my background for this page for this
project is going to be my letter paper because that's going to
take up most of my page. So I'm going to try out
the few that I have. I have here a yellow line paper. I could either put it on top or underneath or I can
cut it straight. So because I have this ripped, I might even just go
with this one straight. I'm sure yet. And I have some other options
of papers with lines. I like to include lines
to this one since it will be at four
journal prompt, I find it easier to
write on the line. So for now I'm just
going to cut it. I'm not going to get
so detailed yet. I'm just choosing my items. So I might go with the square. Look. Again, lots of
decision-making here. I do like the ribs looked
for my journal papers. And since I need two of them, I'm just going to whip
them right in the middle. And then on each side, be flexible as you go. As you'll notice, when
I create my pages, I have lots of times where
I just changed my mind. And I'm going to go
with the ripped, look for both of them. Since it's a spread, even though it's two
different questions, maybe two different things that way it just blends
nicely together. And yes, I'm going to actually
change my mind again. I'm going to keep these for another page because
I feel that it's too much straight lines
if I do those as well. So instead, I like the
contrast of this brown. Why is my page is just
a little bit too bland. I like the brown that comes out from the skin and the shoes. And I'm going to use a
corner pieces from here. And here I'm going to try another corner piece
on the other page. I can either put it on
the bottom or on the top. Another idea, I might even use this paper as a background or as a frame for my writing paper. Either way, if one doesn't
work for this page, I use it for another page, so it's not wasted. Sometimes I get too many ideas and too many
inspirations at once. But I don't mind trying them out because I'll use them
for another time. So here I'm bringing
the brown here, I don't mind something
different on one side. I'm going to even
choose the same brown. Alright, I think we finally, I finally have decided about my background and I'm ready
to move on to the next part, which is our pockets and
flaps. See you there.
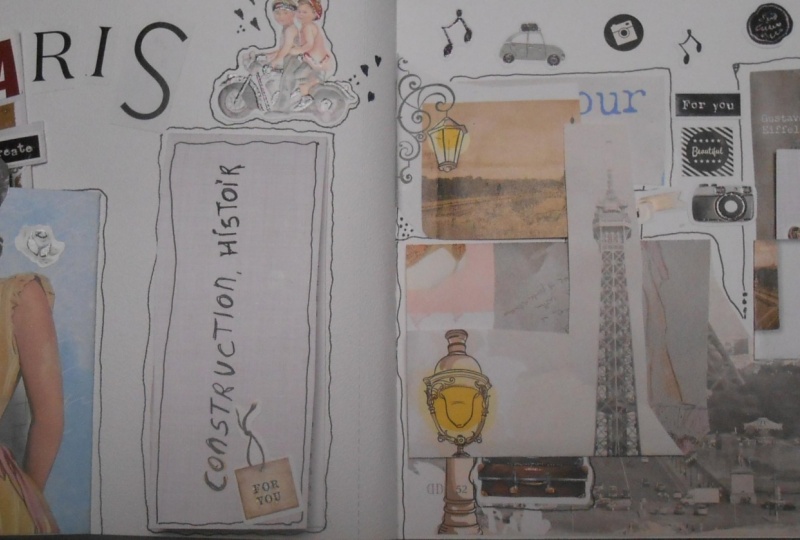
13. Pockets and Flaps: Hello again, Welcome to another class of our
crafting together. So in this one, I'd like to show you different ideas that I like to use for making
pockets and flaps. So if you go through
my craft books, you'll probably see lots
of different types. This one is just the flap
opening to a flower shape. And other times it's little books like a little
accordion books like this. Other times I like to use an envelope where I make my own. This is just a cardboard
and I drew it as if it were an envelope and I just added some papers in it. So if you don't mind your journal book being
very thick like this, then all the more pockets, flaps, envelopes,
books, little booklets. To me, it's all the more fun. E.g. this page, I just
made a little book open, just one page like that. But for each letter
that I cut out, each one with a
different paper pattern. So this was loads of fun, but it really depends on the
journal that you're making. Other times I've made
a little book taking the shape of my picture. I've made a little
flaps that can actually you can
change the year. So I just put a see-through
pockets and taped it here. Again, made this envelope
as its own pockets and added little books and
then another book inside it. So really the ideas are endless. I made this little sticker into a pocket for this little book. And then to open this, you need to take this
one out and open this. And then in here I
have another one which I just ripped out of paper
to make as another pockets. Here's a little just
paper that opens up so I can journal
something else. Here's another one underneath. So to me, the more the merrier, but just be ready to
have lots of thick, heavy books at the end. That's why for this one, I've already included it
on one page and not unto. You can go wild and
crazy even make a little wheel with a paper
fast Center under here. Again, little notebooks, little flaps that open into
little notebooks. What else? Sometimes
I forget that I have these little flaps underneath. When I made myself a little balloon with different
colors that I liked. Here, I've loaded
this little flap here with tons of more pictures. It's all about colors, how they brighten up my days and what I love
about each color. Again, an opening to a
book inside another flap. And even here comes
out as secret one. So these are just a few ideas. Sometimes I use a book
with a paper lined paper. Other times it's
just a photograph. Another old paper
with the photograph. So here are some other secret
ones that I just cut into the photograph and underneath I glued up papers so I
could journal into it. Nobody would be able to tell except me that it
actually opens. Then even behind that I have another little booklet again. Every time I needed
to add something, I've just added it to my
little paper fastener here. I find that very
practical to long as you don't mind a little bump
there for the fastener. Alright, so here's one idea
for your flaps and pockets. Actually lots of
them, lots of ideas. You can even make some
cutout ones like this one. Or I like to use little
tags, gift tags, and I can slide them in and out of an envelope
or made-up pocket. Here I cut a little card
and I just glued on the sides and use it
again as a pocket. Some other ideas. S1 again, I use the flower petal idea and here's a secret
pockets in a way. Here's a little wheel, which could also be a
fun little addition. Here I glued these flowers, just said the edge with
a piece of masking tape actually to make it
really easy for myself. Here I use some of my own
photographs or pockets. And again, instead
of this one opening, it just slides in and out. This one has quite a few
ins and outs pockets. Again, this one opens
up into a page. This one has a little
leaf sticking out, which actually comes out
into a page as well. It gets this little
basket picture and I left the top
open to include one. Envelopes also come
in really handy. Envelopes are really
easy to make. You can also find templates. That's when I found a
template and I just traced it on this pretty
wrapping paper. Sometimes even just a
note pad paper like that. And it doesn't look
like anything, but it opens it up
into more text. So I just like all these
hidden pockets for texts, anything I can add to. And that's why I
like these books, these smaller books because you don't have to
worry too much about adding lots of pockets because
it's only a twelv pager. So then I don't have to
feel bad about adding lots and lots of
pockets and openings. And so this one is a personal
growth journal book. So that's another reason
I've added an included so many pockets for myself so that all the
different aspects of my life. So again here, space to journal, and behind here is another
pocket, another envelope. So you see it's the basic
ideas of using little rip out to make its pockets
and I just glue the edges so that I can
easily slip something in. Sometimes I'll hide one behind the photograph
that I've cut out. And I'll add the corner to a flower and then
you can't even tell that it's a little pocket. Sometimes I'll add in lots of text and not just
on my little book, but also behind it. Alright, so I think that
covers the main ideas of using pockets and envelopes. And you have fun, you have, I'm creating any and all
the ones that you want. You could either, you
could also even find some little pre-made
pockets like this and have a whole
little collection of them, especially some things
that you would want to add into your book or journal that are a
bit more personal. That's why I don't
mind putting them into a pocket or into
just a closed area. Shi this one even has
a secret one here. I've made this whole strip
here to be a pockets. That way I can add anything in this little house
comes out as well. Also use your little
stickers or objects or photographs to make
it hidden pocket. And the last one I want to show you is a fun hidden one could also be something that you use part of a text or
part of your title. And you actually make
it as a hidden pocket. So I've used my D for
definition for one of my pages. I've made a little
bag and I've made the bag be a little
pocket, its own pockets. Can this one I've made the little booklet
with some pockets. I've just added a pretty
little tag to my papers. Can hear this one
comes out of the word. Here's just an envelope
and I've added a pretty color paper
to the back of it just for added design. And then I've taken
the same paper and added it down here. Here I've cut out
part of the picture, just looks like a circle, but I've actually cut
part of it out and included a piece of
paper in the back. Here, the U, again, the letter comes out like
this little accordion books, which is behind the picture. I've just left out a
little part without glue here and you can easily
slip something in and out. More space. For those personal
words to yourself. Just use this photograph
has an envelope pocket, and here I've just
cut some pictures and the TV actually just slides
in and out like that. You don't even have to
glue it down if you don't want to hear again, the S comes out. Well, I hope you enjoy those
little ideas of pockets and ways to add in some secret nodes and
fun journaling prompts. See you in the next class.
14. Letter Cutouts: Now I'm going to show
you a few ideas of how I add some lecture titles. So all I do basically
is just go back to my magazine and I'll look
up some font lettering, of course, for the letters
that I need to use. And I'll just cut them
out as I find them. For the project that I'm doing, I'm going to spell
the word self-care. And even though I see some other lectures that
I would need the c, the a, and the E. I'm just going to choose
one from this font. That way I can choose another
color or another style. I like to add variety
different colors, although I find the L here. So maybe instead
of using this L, I'll use this one. And then I can just get
my a from this one. So I just pick and choose what I find by half a basket where I keep all my extra
letters and I can even find some I
need from here too, if I don't have my magazine or sometimes it's just
more practical to go through my basket of all
these already cut out titles. So e.g. I'm just going
to take this E here. And already just with my basket I have loads to work with. But for the video, I'm going to stick with
using the magazine. So again, you look
for different styles. This one I'm not so
into because it has picture background and thus
I want one of these here, otherwise it won't
stand out enough. I make sure that
there's nothing on the other side that I really
want to keep and use. I'd like this one
because it has a black. Again that's going to stand out from the others because
it's got a black background. Instead, I'll go
through my magazine and cut out the letters
that I need as I go. And at the same time I'll take my page along because
I want to make sure that it fits the
size, even the style. Sometimes this style of font can make all the
difference for your page, whether it fits along
or whether it clashes. So I make sure to pay
attention to that as well. You wouldn't want one that is too big to fit on your page. So of course it
depends where I'm going to add my question. Let's see back to my design
page, but design sketch. I was going to have
it here. Anyway. I'll choose my letters
and then I can always move them
around afterwards. This for now is
just for the size. Here's another E. So I can even
switch them around. I like ending with
a smaller letter. I might put that one there. Oh, I like that. There's a pink one there. So actually, if there's a word like this
that I could use, I'm even going to that out
and keep the whole word. This is a French magazine. But since I'm French and I
speak French, it's okay. So as I go, if I find
words that I would like to use in one of my pages and
even if it's not this book, I'll take it and I'll
keep it in my collection. We're actually, which
is what I found. I found myself a word which I
might include here as well. And it's, takes the colors
nicely, especially this pink. And I also use a letter
sometimes to cover up some other things that
I don't want to keep e.g. the texts on this picture. As you can see, there's
some texts there. So instead of cutting it out, I can just hide it
with some text, moving on and finding
more lectures. So in my basket because I have such a wide
collection that since a few months of
collecting old magazines, I like the fact that
there's so much variety, some even really old
letters from the sixties. And I like the brown look. I have an a here, but I already have an
a next to a black sea, so I won't use that. Wants some that are
kind of the same size. If you want. You
can also switch, as you saw some of mine, I have here an R. I
liked this big R. It's kind of cool. I could use a thin font here. This time. I find it really thin, skinny F will fit. Again, a really old paper one. You cut out what you
like, what you want. I think I'm going to use this
E here that way brings out the pink on this side of my
page as well as on this side, this one I will use
somewhere here. And this one here, we'll see how it goes. Alright? We have it. The main thing about choosing
your lectures, I would say, is to just use a variety
of colors, shapes, fonts, styles if you wanted that or make
them all the same. So if you find all
your letters in here, it can also look beautiful, fitting them, matching
them all the same. So sometimes I've
just printed out my titles and that's
another option too. If you want, either with a
cursive font and you cut it out really close to the letters
or you leave it in bold. But most of the time I've used cutouts sometimes
all in one color. Here's a real crazy idea. You can cut them out yourself
from your own paper. Again, sometimes on
a black background, sometimes I've just
written them out. So there's really
no specific right or wrong way to do it. Sometimes I just use
one letter and then Right the rest of
it here as well. These ones I've went
really bold and huge, as well as this one taking up the whole page and
then including some little fun additions leading a bright
color to stand out. And this one I didn't
find a T that I liked, so I just cut it out from
a piece of colored paper. Again, this one comes
out as an opening, as a flap is when two. Also I take the colors
that fit onto my page. That's another
little tip for you. Take those same colors. So I brought, I have
orange and greens here. So black and white and browns of course go with all of them. Actually, my whole title here is a little
pocket, little book. Besides the last one. That way I know
where to place it. Anyway, those are fun
little ideas. Maybe. Here I've used some
little stamp letters. So that could be fun too, either as one word or as each letter and
it's not perfect. It's got the little
extra stamp bits there. But to me that's part
of the crafting work. Alright, I hope that helps and finding little inspiration and ideas and some tips
for your titles.
15. Artsy Additions: Welcome to this class
on artsy additions. So I have my page here
with the minimum, I have my photographs
that I've chosen. I have my journaling paper
on this side as well. And this is really
the fun part for me. I'm going to find and add in
a few little decorations to maybe give some style and
some beauty to my page. So for that, I often go
through my stickers, see if there's anything
that could fit in with my theme for one, with the theme of this
girl in a bathing suit. So I found these that are a bit more summary
and I also tried something else that I
keep in mind when I find my additions to add to my page is something
also similar in color. Kind of chose blues and beige skin color,
little pink tone. And of course I added
some black for contrast, and I like this blue
as well for contrast. So I could add any
color that I want. Really depends if
you want your page to be very colorful
or if you want to stick to just a few colors and kind of challenge
yourself that way, which is what I'd like
to do very often. So I picked out a few pages
that had those colors. I just take it and sometimes they're already
low cut things or sometimes they're
just from my basket of extra cutouts that
I've printed out. Here is also something that
I cut from a magazine. So I thought that maybe it
would fit in with this page. I like having a little bit of greenery on my page as well. So this is a sticker and another cutout leaf
I've collected from little bit of what I've
had now continue to look. This is also in the
same theme for me, and also colored tones. This could be a cute
little addition. So next come some
decision-making. I also like using
either some tape or something like this
or even some papers. So I'm going to look
through any tapes that I have that could fit
the same colors. For this page. I think I'm just going
to try out these two. I look at my page and I
kinda see what can fit. Of course, I'd like to
fit in a lot of things, but realistically
what can fit so that I can still have space
for some writing. So I kinda play around now
that I've chosen my colors and shapes and pictures of all
these little artsy additions. I think it just brings out the beauty and the
pictures even more. I love adding some green, kind of blend the two pages
together as a spread, even though they're
two separate pages, I kind of take them as one
because you open it up and you see them together by could add
a bit of green here, I have some green here. I like this butterfly
and it goes along with my theme of free and playful. Some of them I cut out and
others I just use stickers. If you have stickers,
It's very handy. But if not, then you
find something on internet and you print
it out yourself. And I find that to be
very practical as well, mostly because I can choose
the size that I wanted. So if I have a little
bit of green here, I could put the
butterfly on this side, or this is lots of decision-making
and also fun play for me a few little stars. So I start with the
bigger objects first, I like this little quote,
enjoy every moment. It kind of goes with the theme. And I like this
little radio as it, It's got the color
tones that I need and also I think fits
in the BCCI vibes. So before I glue anything down, but I just place them where I
feel they could fit nicely. So I think I'm going
to start putting things in place already. Here's a big sticker and I'm just going to cut part of it. I often use little
pictures as well to cover something
that I don't want. E.g. in this instance, there is an extra
something there. So I'm going to cover that up. Maybe I'll add these
little stars over here. I put it, I like to
give it a 3D look. So I kinda fold the two wings and then just
put glue on this part. Well, so many options, I'm not sure where to put it. Just let your intuition lead. When you don't know what to do, then you can see if you
have anything else that you want to fill
up your page with. You could add a little bit
more lined paper for writing. I like to use wrapping paper. Sometimes these come
in handy when I just want to cut out a little piece and fill up my page with it. These are nice and
bring some contrast. Besides stickers, I also have some colored paper like
this with a pattern. If you just want to add a little rip look as if it
were a little piece tape. That could also be pretty like if I wanted to add
a little piece here, I keep little leftovers
from cards or papers and some of these things
also come in handy for my extra artsy additions. Just give a little color
and pattern to your page. So if you don't have stickers, then save all those
little scraps of paper, they'll come in handy one day. I also like using these
kinds of papers and they also have patterns
here that are easy, practical to cut if you
want a little piece. Sometimes I even cut out
these flowers and use them singularly to
add to my page. Or there's these little
cards for birthday, but I find these also
very useful and handy. Again, these are nice for
cutouts and adding two. I also have this
one that has tons of little bit see
papers or pictures, all kinds of styles, all kinds of pictures. I never know when they
would come in handy. So I keep them into
this little box. I know I can always
take a look at this. Even a little piece like this sometimes could be
the perfect color, perfect addition to my page. Sometimes parts of cards, I don't want to get rid of them, so I cut it out. Anyway, those are a few ideas. This is also when some
stamps come in handy. If you have some texts you
would like to include. I have these little lectures. I have these letters as well. And then some ink or have
these little tags, stamps. These could be cute. I use these quite often, even if I wanted to add
just a little title. So I just place it on here. Then I'll put my income. And sometimes I'll just put
it on a piece of paper. Because that way, in case I make a mistake or
smudges somewhere, I can always start again. So that's just a
little trick I found. And then I just cut it out. That way you can even
make it a little bit 3D. You don't even have
to glue it flat down. You can always add a
little depth to it. Here for some artsy addition, I've added a piece
of lace behind my picture here of
cut out some flowers. I've added a wheel and put a little animals on
top just for fun. I've added some stickers here, sticker of a pen showing
the letter writing. Even added just a
little corner piece taking the same pattern
from the envelope. If I look back on
some of my pages, you can tell that I've
added flowers and leaves, maybe something related
to my theme here. Even a little sticker with
some words here you can tell I've added my color
pattern page, another sticker. So all that kind of ties in with filling up and
beautifying my page, those little beautiful
additions, stickers. And again, taking those same
colors from my photograph, which I've added here as
if it were pieces of tape and the leaves taking from
the orange and the browns. Sometimes I've added
black and white ones that I've drawn and cut out. Here's some extra
little pictures that I cut out from a wrapping paper. Even this color paper
was from a magazine. It was a background
of a magazine. So just so you can see that you can use anything and
everything that you have.
16. Final Decor Touches: Now moving on to some
final decor touches. So sometimes I like to
add in a black line around it and kinda follow
the pattern of the paper. So it's a ripped look. Either you can make a straight
line right in the center. But this time I'm doing
it on the outside. If you have different size pens, you can play around with that. I'm going to add a double
line with a thinner pen. I'm going to leave this one
blank and maybe outline at this one on this page
just for variety. So some are ribbed and I'm
just going to play around and basically I'm just
outlining my lined paper, whatever it is,
wherever it ends, even wherever it rips. Here, I can draw over the sticker wherever
my page would end. I could also make
an outline on the black around the black. That way you can tell it's
giving a little outline to it. And here's fun to
do with the white. So I'm going to add another
one on the inside and white. That way I'm creating
even more depth. Now you can play around and add in your own
style, your own art. That's why I call
this final touches, because you decide
what that is for you. If you know me, I love to add
flowers and leaves inside, inside the black, it looks nice to add in
some white like that. Then often where I
have some stickers or cutouts or magazines
of flowers and Ds. I like to continue with
that and add my own. Depending on the page, I'll make different
types of lease, but I generally go with
very similar ones. So as you can see, it
just really fills it up. And here's a flower. So I might add a second, something to maybe
a leaf or two. I tell myself If there's one
leaf than or one flower, then there has to be more. Here. I can add
some more as well. So I tried to do the same style of drawing or leaves within the
same page spread. And I can also take it further, maybe add some here. Basically, I'm trying to fill up all the little blank spots. But still of course, leaving some room
for breathing room. Sometimes I like drawing over the photograph to
doesn't bother me. I think that's all
I'll do on this page. I still like to leave some
spaces clear and blank. But as you can see, at times, I've drawn flowers. More leaves. Stick with the same
type of leaves. Here for my final
de corps touches, I've added some white leaves than it really stands
nicely on the black. Here again, I've added
the white on the brown, which also looks beautiful. You can even do
different patterns here. I've added some
leaves just to go along with the theme of freedom. Black and white ones
and little lines going all over the place
following the butterfly. Here again, some little
dots and leaves, again flying in the air
and even some texts. Looks like extra decor touches. Here I've added a little doodles of food to go along
with this page. So as you can see, just whatever fits in
with your theme and mood. Even sometimes I like to draw extra details that are
not on the photograph. You can add to that as well. That'll hearts coming out. Here. I've added some
roses and leaves, these ones as well. Here I've even added
some colorful ones. We don't always have to stick
with just black and white. And I've even added
a little polka dots together like that. And these flowers that I just
drew and then painted here, I've made a little compass, some little raise, more
leaves to add to my cutouts. Here again, I've added even texts with
white end outlined. Black, even little sayings and
speech bubbles looks cute. Some big ones here, some thick art,
different types of art. And these here are even
different patterns, something like this
could be pretty as well, or some decor like that. So as you can see, you
play around with lots of doodling and de corps. That's where you can play and experiment with your
little designs and art. I have a variety of leaves here. Here I've kind of added to the picture that
I originally had, again, drawing the
leaves of the flowers. Flowers here. These, I've made some
extra big flowers. I've even used stamps for
my final little details. You can do that too. Again, drawing some
big flowers to add to these flowers and
some on the black. I find that even
the gel pen works nicely on the photographs. I just found these on Amazon. And you can also mix the
black and the white. If you just learn some
very simple leaves, you can add your own beautiful little extra
touches like this. There's a few that I'm
comfortable with and that I enjoyed drawing and I just do
those over and over again. I don't find that
you have to have a whole repertoire of fancy leaves and flowers
to be able to do these. Just do a few that
you're comfortable with, that you do well, that's all there is to it. That's all that you need. Sometimes I like adding one
type of leaf in one color and then another type in
another color could be pretty sure I'm doing my
little leaves and white.
17. Journal Prompts: So in this class we're going to talk about are journaling time, journal prompts
where we check in. This is really
where the value and most meaning comes from
these craft pages. At least this is
what I find for me. My whole creative process,
my whole crafting. This page leads up to
this special moment. It's like the cherry
on top of the cake. This is a time to curious to ask questions about
yourself, to yourself. So most of the time I think about the questions that
I'd like to ask myself. Maybe after reading something or something comes to mind or listening to a podcast or I hear from somebody
else, from a friend. And it makes me think about, Hey, how do I see that? What do I think about it? How would I want that? So there's so many questions once I start asking
myself questions, sometimes there's no end to it. It's not that I get
analytical or intellectual in any way because these are
really heartfelt questions. So don't worry about
getting all heady when you ask yourself questions. Asking ourselves questions
is part of learning, part of growing, and that's
what I keep telling myself, reminding myself this
is finally being able to express myself
and my heart speak. Because I think a lot of my youth as a team,
as a young adult, I grew up keeping
all my emotions in just thinking that my voice, my feelings weren't
important, weren't valued. I think there's a
time in life when we realize that we are important. Asking myself questions,
getting curious is one of the ways that I
treat myself to self-care, self-love and compassion's
I'm taking the time to ask myself how I feel about something or what
I feel about it. Do I want to do it? And I think there's so many
journal prompts that you can find online if you don't
know what to ask herself. And I've even created some YouTube videos of some
of my journal prompts, some of my craft pages, if you would like
to get inspired, are some ideas you
can watch them there. And I've listed a journal
prompts for you if you'd like to ask yourself those
questions on different topics, different themes, just as a starting point and
then you can go deeper. You can ask yourself
different questions. You might want to word
it differently so that it speaks to
you personally, to your own situation. And that's what I use. All of those fun flouts and envelopes and little notebooks, little pages, little extra papers that I slip in and out
on my craft page. That's where I love to Journal. Sometimes they're hidden
and just for me personally, other times they're
just peeking out, waiting for me to just open it and find the secret treasure. So some of these questions
and journaling prompts, sometimes I typed them up because I know they
might be a little bit long-winded and I can fit more when I type it
up and print it out. Other times I'll use my
handwriting for variety. And I like to use
both the way it kind of makes my page look
even more artsy. And the great thing
about these pages is that there's always
room to add to it. If there's an envelope, you can just include
another piece of paper if it's a little
flap or pocket. Again, I can include another
piece of paper or I can switch it out and
change it around, which means there's
always room to evolve and expand
that I do go back to them very often and sometimes I think of new things
I want to include or new questions for
myself as I go deeper or as I experience new
things in my life. And that's the wonderful
thing about it. You get to personalize it for you at the time, at the moment, and enjoying every bit of it and making the most of
this craft project. Once I'm done my craft page, then the next day I take my little morning
journal time to go to that page and answer those questions or
include those questions, and then listen to my
heart for the answers. That's when you need
a time to stop, to be quiet, to be all by
yourself without distractions. Sometimes I noticed
that the crafting can be a little bit
more scattered around. You might have kids in the background or kids
in the same room, or you might do a
craft page with them, but then you're special time would be this journaling moment. This needs to be
yours solo time, you rendezvous, heart
expression time just for you. And I think that this
journaling part is how you'll get the most out
of this crafting project.
18. Notebook Covers: In this class, I'm
going to show you how I designed some
covers for my books. I like to use wallpapers, so I have a few samples here. Flowery 11 with some tags. They're just beautiful
patterns and it's something easy to find and paint shops, wallpaper shops,
and I like that. They're very strong and sturdy and they're
also very flexible. So you can find these and either paint shops
or wallpaper shops. And you will also
need some glue. I have textile glue or
just regular white glue. Will do. You just want something
stronger than a stick glue? Then of course you'll use
your trusty scissors. So let's get started. I have my notebook
that I want to cover. And I've already sort
of cut it to size. I like to have 1 cm or at least half a central media
are larger than my book, just in case it
goes off a little, sometimes it goes a bit crooked and that way I have some space. And I'm just going to
trim off the edge here. As I know, I won't
need all that space. Again, just half a centimeter. So I put it on this way. And I placed my book on top. I make sure the size is correct. Again, I open to the
first page. Yeah. It makes sure that it's even on both sides and on the
top and the bottom. Then I get my glue
and I'm going to dab glue all over the sides, the edges of my notebook. I start with one side at a time, and then I work my way in the middle as
well because I don't want air bubbles are some spots to be a little bit more
bumpy than others. So I make sure to put glue
all over and then I'll gently fold the cover on top and
just push down the sides. Now here is when you
want to make sure that it's straight with this
glue because it's liquid. You have some time to just move it into
place, which is great. Again, makes sure all my
sides are well glued down. Here. There's always a little bit
of extra glue that comes out. That's okay. I just wipe it with my finger and then I place it onto the other side of the cover because on
the glue there anyways, that makes sure to take
it all off so that it doesn't glue onto my pages. Now we're ready to do exactly the same thing
on the other side. This side, I'm just making
sure that the written edge of the book also has
some glue there. And then I just added
all over the back. And once again, I folded
onto my notebook. Here. I like to tighten it so I use
my finger there to push it. At the same time, padding it down into place. This wallpaper is almost
like cloth feeling, so it's really nice. You can choose the
type that you like. Here again, you take
off the extra glue. Sure, the middle part is
all very sturdy and strong. Then we're ready to
do a little trimming. So I just follow the sides of
my book and I like to leave maybe one or 2 mm on
the edge that way it's just a little extra
edge on my book and you don't see any
papers coming out. You can just use regular
scissors for this point. And because my corners
are a little curved, I'm going to follow
that curve as I cut. For now. Make sure my each side is well and there's no
more glue sticking out. And also I check to
make sure every page comes easily and there's no
glue stuck on any of them. Now would be the time to
verify that for my title, I print something out or you can just write it
on regular paper. I've printed a few options here because I'm covering a
few books at a time. I'm just going to pick one
for this particular book. And I draw a little
rectangle box around it to make sure
that I cut it straight. And then I'm just
going to cut that out. I like that it's white
and will stand out really boldly onto
my wallpaper cover. And I use white paper, you can use cardboard, you can use any other
color that you want. Oops, I noticed
that it's a little bit too large for my liking, so I'm going to trim
it to the right size. Again, I like a little bit
more edge on each side. So I'm going to
trim it some more. Even if I have to cut into the texts like
that, I don't mind. Brings out a little 3D
look and I'll do that on both sides. There we go. I think I like that size. I'm going to again use my white glue because
as you'll notice, if you try, the stick glue won't stick very well
onto the wallpaper. You might see some bubbles
to start off with, but eventually they'll even
out as with these ones. So here's some other samples of other color
paper patterns I've used and other books
I've already covered. And as you can see,
I've even added little extra pieces of de corps, some scraps, some cutouts, some stickers, even
little ripped. I'm old notebooks. And this is just to show you
the variety that you can do, whatever you would like. Since these are craft books, I added a little bit of Kraft
designs to the cover as well and even made a 3D
pop out for the butterfly. So these are a few options
and I hope that you enjoy and that you will find
ways that will work for you.
19. How and When to Use: Hi again. In this class, I'm
going to share with you a few ways that I use and refer back to my craft journals just to give you a few ideas, if you would like. So when do I refer
back to my journals? Often during my Wyatt
morning times, I go outside, I take a cup of
coffee or a cup of positivity and I
meditate on a page. I just go back to it. I take out all the little flaps, all the little
journal prompts and questions and I read
them out again. And I just let myself
go back to that page, go back to that moment. And it fills me with
joy and inspiration. Usually there is a piece
of wisdom that I can gain for my day to
motivate me forward. Or sometimes just
before going to bed, I opened my book. I read over a page
because I've left out a few spaces to add to it. Then sometimes I
get inspired to add another question or to
add another answer, a different answer, or during my mid-day coffee break,
That's another time. I like to just sit with a
craft page in front of me. So it's not big chunks
of time that I need. It might just take 2 min, but at least I'll go
back to it and it brings me a little piece of
joy all over again. I'm reminded of why
I created the page, how I did it, why I included those questions and
journal prompts. Listen and reflect on how
they might speak to me today. And because we made it
beautiful and artsy, it just invites me, it calls out to me, along with all those
little secret pockets. Sometimes I forget
that I have included a little piece of paper
hidden behind something. Sometimes I'll just
open the book in order and put a bookmark
so that the next time I can just go to the next page and it
just seems to lead me to the right page for the day and what my heart can
use at that moment. Another way I like to
use it as when I read a really good quote or
when I get an inspiration, I go to one of those pages
on the topic of that quote, and I'll quote inside it because I want to remember
it at a future date. There again, don't be
afraid to add to it. That's the wonder
of these books. There's always another pocket and other paper that
you can add to it. And when I want a
quiet little moment, I don't have an audio book with me or a meditation with me. I use my books as meditative. It will bring you so much meaning because
it's all from you. I get inspired, I get calmed and peace when I listened to other people's
guided meditations. For me personally, I would
think back, I was like, Whoa, I wrote that and
I'm all shocked and amazed because really that's
your heart speaking to you. That's where you find
the most wisdom, the biggest treasure. It's like a piece of
magic when you can be touched and inspired and
enlightened with it. So do go back to those pages. You'll not only remind yourself
how beautiful they are, you'll thank yourself for
taking the time to do it, the experience that brought you, but also the gift of giving yourself this wisdom
over and over again.
20. Final Thoughts: Here we are with
our final class. Just some final thoughts here, just a few questions
and I love to ask myself when I go back
to these craft pages, How did it feel making it? How does it make me feel? Going back to it later
as I look over it again, how have I changed or evolved
since creating this page? Do I think differently
about that subject now, what have I learned
or discovered about myself since I
created that page? So just to sum it up in three
small steps by process. And going back to these pages, I notice, I notice,
where do I see? What do I love about it? How do the colors speak to me? I wonder, are there any other questions that you can think of now at this time, looking over that page, if I see some of the
pages and I'm like, Oh, I could delve even
deeper into that topic. I could ask myself
another question that would trigger
even more questions. Get curious, leave
yourself open. I find that when I
leave myself open, there are even more joys and more opportunities in each page. Each page becomes a new opportunity for
more possibilities. And three, It reminds
me of dot, dot, dot. So you get to fill that out. Maybe you can go back to
the time you created it, the reason you created it, or some recent experience that confirms that for you or
solidifies that for you. So once again, I notice, I wonder it reminds me of, and that's it for
our crafting course. Life is, which is better
when you crafted. Thank you for joining me and I hope that you had as much fun, joy and fulfillment and satisfaction in this course as I did in sharing it with you, all my passions and creations
for these craft pages. See you maybe in one
of my other courses.
 Agnes De Bezenac, Designer of Tools for Wellbeing