Transcripts
1. Ho Ho Ho, Welcome!: No better whether you're
Christmas person or not, this watercolor series will bring out all those
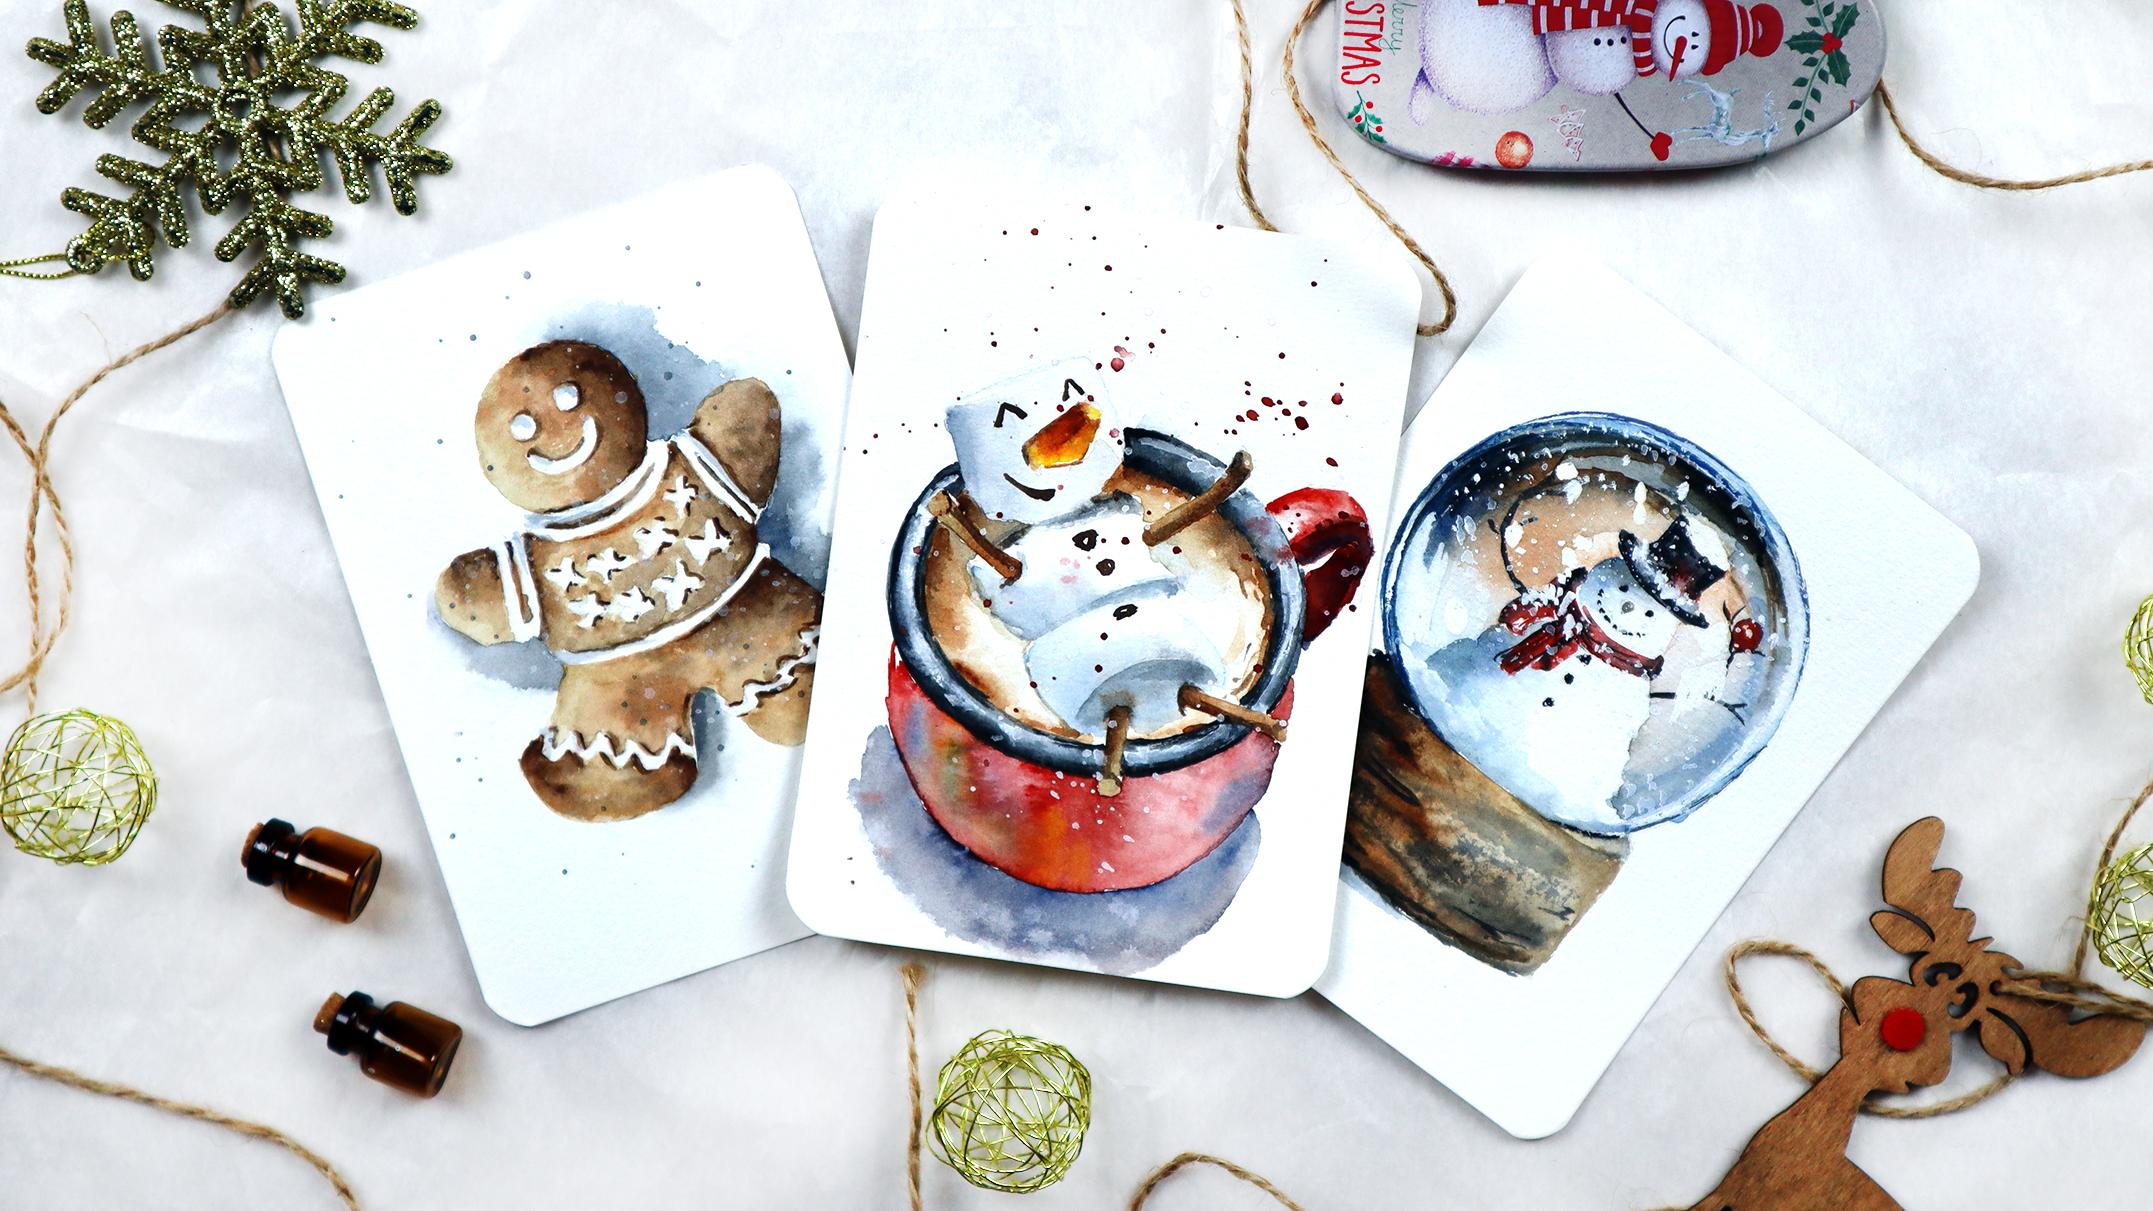
cosy feelings for you. We will paint a huge gingerman a Muchmellow floating in a
mug and a snowman glass bowl. You will not only have fun painting these three
postcard projects, but also learn most important
watercolor techniques, such as wet on wet, layering, wet on dry. We will dedicate a
special attention to a negative space technique, creating airy feeling
in each painting. You will also find out a few tricks on how to
paint snowfaction on a glass bowl Buffy marshmallow
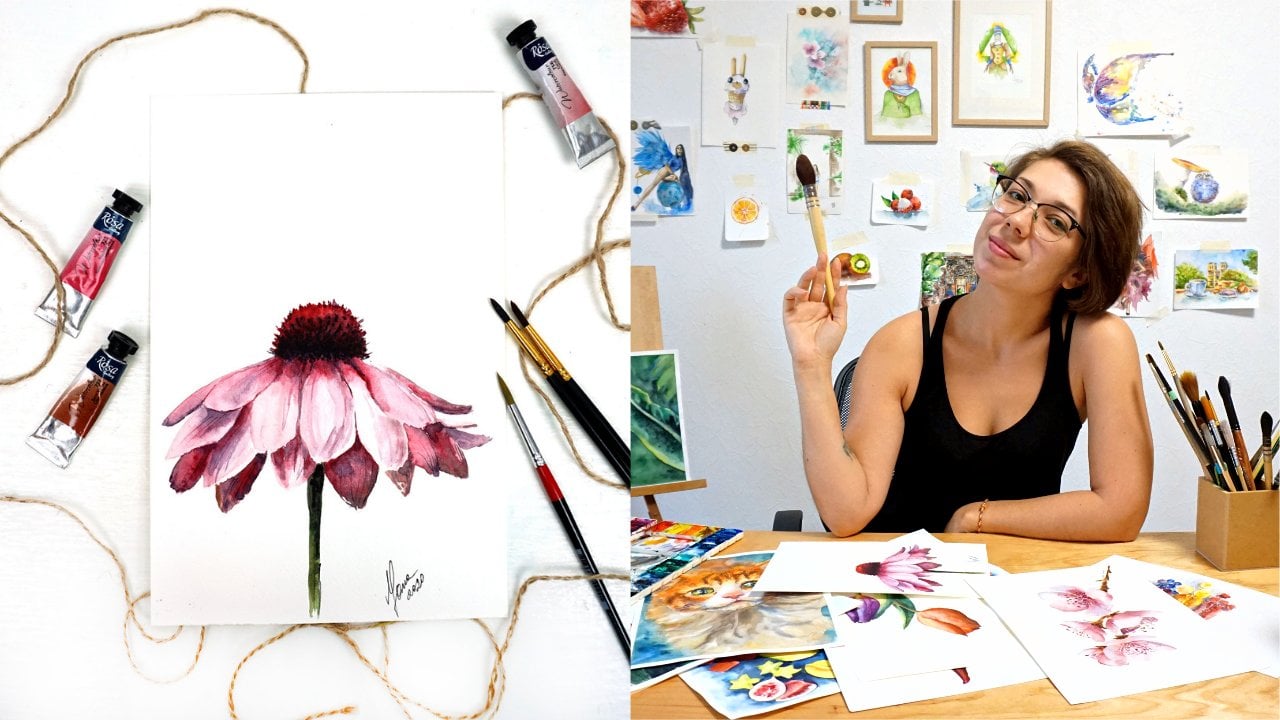
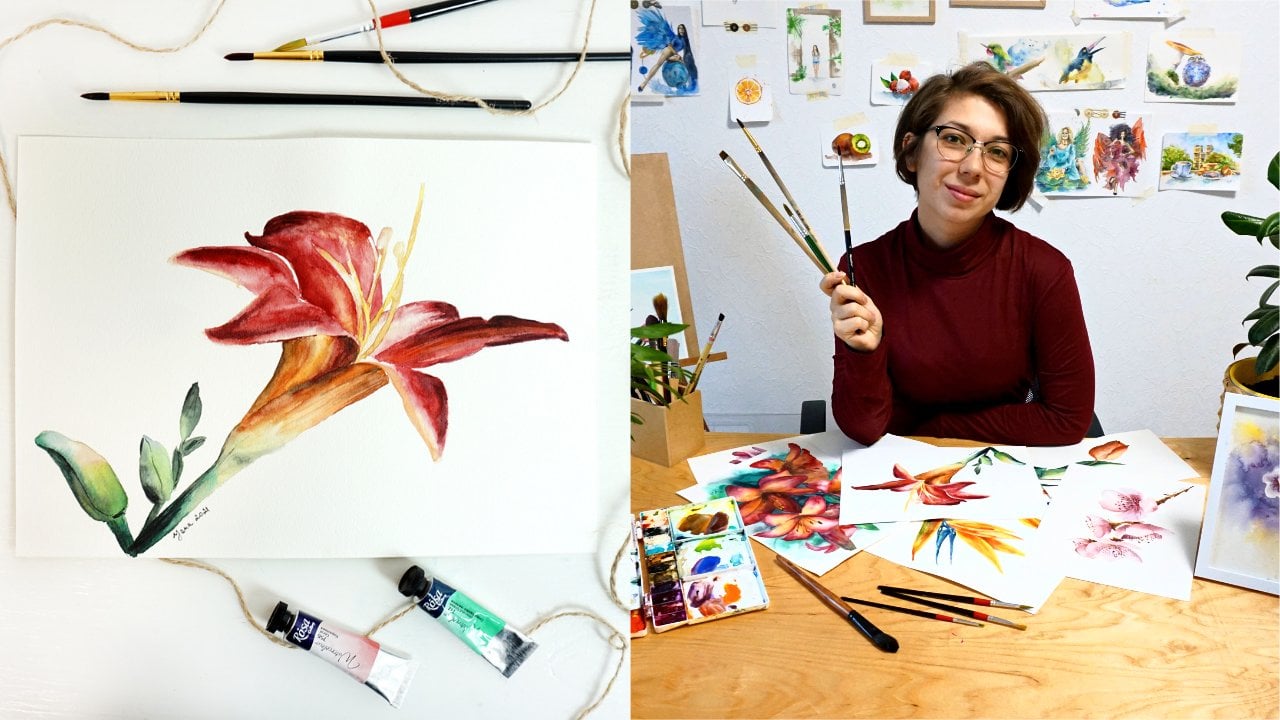
and glossy mug surface. My name is Jana. I'm a
professional watercolur artist with years of titian
experience online and offline, and I invite you to join me on this magical journey of
watercolor and Christmas spirit. Meta Christmas and
Happy New Year.
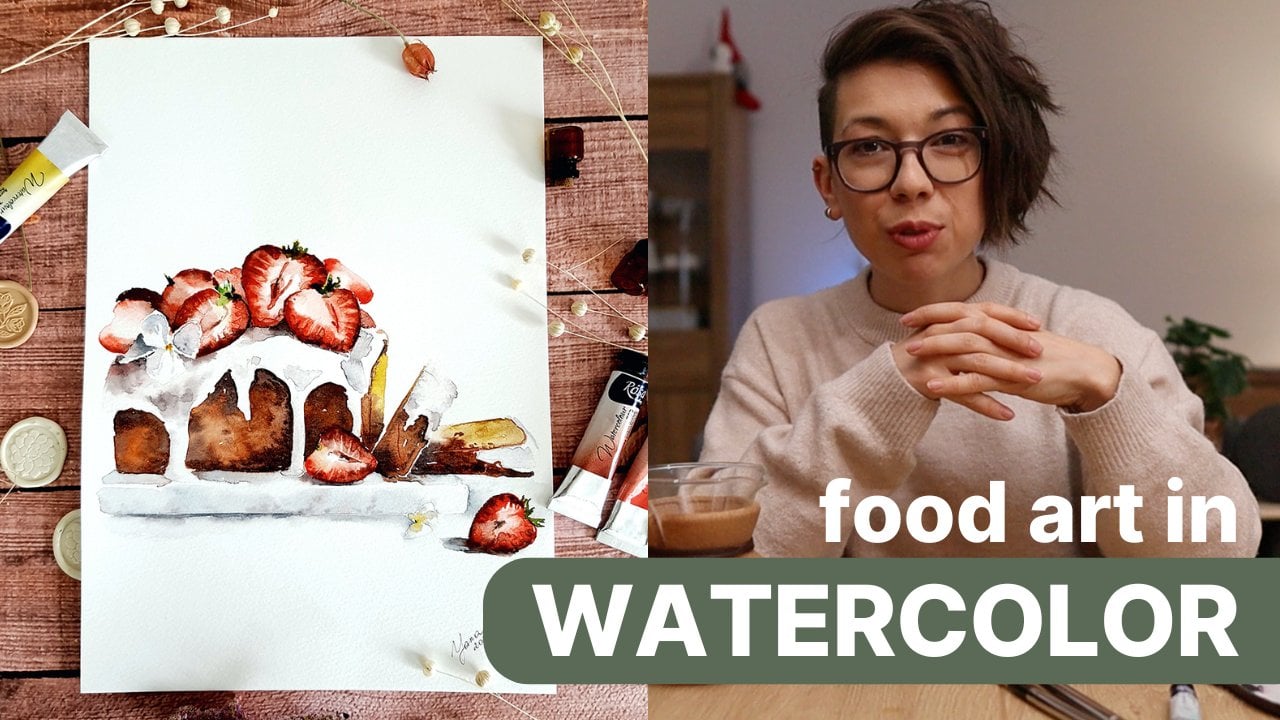
2. Materials review for 3 watercolor postcards: In this lesson, I will
demonstrate the set of art supplies for
all three projects to avoid repetitiveness. I'm using small postcard
size paper from S MLT. It is 100% cotton, but it is not a requirement
for the project. You can use cellulose
paper as well. The sheet is 300 GSM, which is very
convenient to work on. The pencil is hard
for nice thin lines. I would suggest
to use any pencil marked H with any
number like H one, H two, H four. Just one brush can be total enough to work
on all three projects. This one is round with pointy
end synthetic small size. Select your size depending on the size of your paper sheet. To remove pencil lines,
you will need a razor. I like to use kadabw Raser because it doesn't damage
the paper surface. But if you don't
have one, it's fine. You can use just a regular one. Now, additional tools
for special effects. We might need white gel pen to point out
separate highlights. White gouache will be needed for all three artworks to work
with the snow effect. Masking liquid will
allow us to reserve some areas on paper and avoid
covering it with paint. Of course, we will
need a watercolor set. But the review of
specific colors for our projects is in
the next lesson.
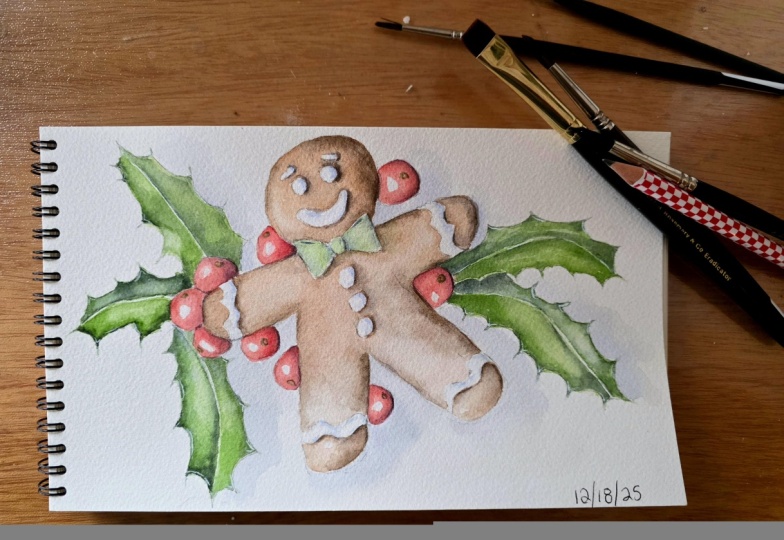
3. GINGERMAN: Pencil sketch: First, we need to decide how our gingermn is going to be located on the paper
sheet in the center, not too low, not too high up and not leaning to the
left or right sides. Basically, we need to visually
arrange it on a sheet so that our main character doesn't end up shifted to either side. Sketch slightly, do not put too much pressure on the
pencil to avoid dark lines. Watercolor is transparent and your pencil lines might be visible through the
layer of paint. After you're sure about
your preliminary outline, you can define your drawing with a bit darker line so that
you can actually see it. This is a good moment
to adjust proportions, correct the size of
arms and legs of our gingermen if you need it, of course, and find your
final version of this sketch. When drawing the icing, try to keep your lines soft, light, and avoid sharp edges. In case of icing, all lines must be
rounded at every corner. H If you don't feel confident drawing
your own gingerbread men, you can download our outline
and trace it on your paper. All you need to do
after is coloring. When you're done, take a look at your pretty cookie and decide whether anything needs
to be fixed or changed. This is your last chance
before we start painting. I
4. GINGERMAN: First watercolor layer: Important note before we start. If your sketch is too dark,
please, please, please, don't forget to remove the pencil lines at least a little. I carefully went
over my sketch with a kneadable eraser to make
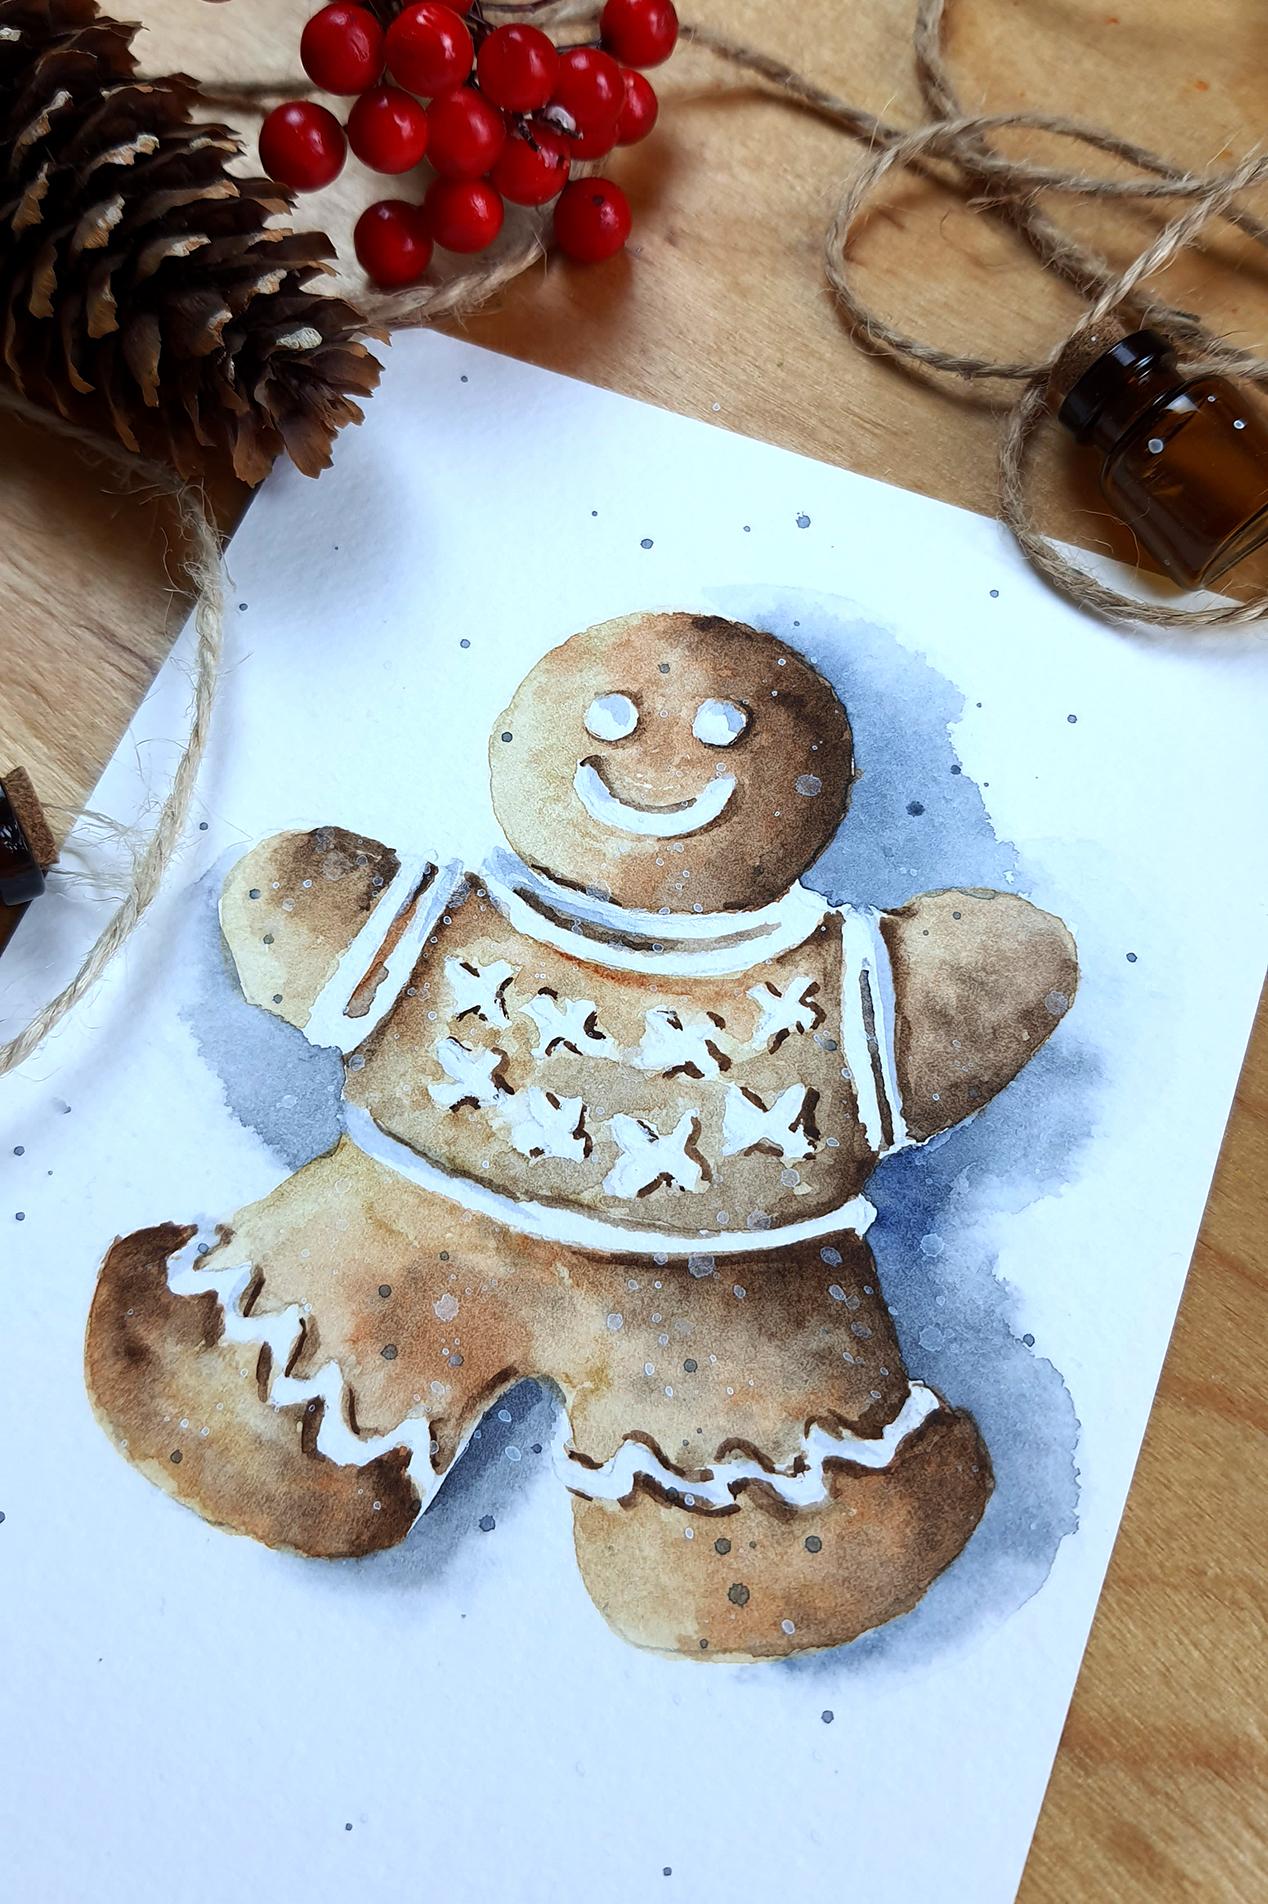
it as light as possible. It will ensure the cleanliness of the painting in the future. For the cookie color,
I'm mixing asiena with a bit of burn sienna to have a bit warmer color as a result. The brush carries some
water so my stroke, doesn't appear dry on paper. I apply the paint
directly on paper covering the shape of the
gingerbread man's head. This is called wet
on dry technique. The source of light
is on the left, so the right side
is a bit darker. That's why I added more pigment on the
right side of the face. If your brush has
too much water, you can rinse it over tissue. I carefully smooth out
the edge of my layer to achieve soft transition on the face of the gingerbread men. As in blue into brown, I mix up a darker
tone of shadows. While the first
layer is still wet, it is a good opportunity to integrate shadows without
getting sharp edges. We will do the same with
the rest of the cookie. First, we take light,
watery brown color, rosena in my case, and cover half of the
body until the waist. I'm carefully avoiding parts
where we drew the frosting, keeping them just white. Creating recognizable
shapes by painting the background around them is called negative space technique. While the layer is wet, we inject some darker
tones just like we did painting the had earlier. H. The frosting on the waist
is a good opportunity to split our work in part so that we don't need to worry
that the paint on top will get dry before you
finish covering the bottom. So now we lay down
light watery layer of oceana all the way down till
another breaking point, curvy frosting on the legs. Edding drops of burn sana, I get a nice color variety giving us a better feeling
of a cookie texture. The darkest tone of brown, which I mix by Eden
blue into brown went on the right side
of the gingerbread men. We keep consistency
with light and shadow. The final part is the
feet of our cookie. We lay down light brown first, then burn sienna and bits
of the darkest brown. Always remember that your
brush should be slightly wet but not dripping water
as well as not too dry. You may want to practice
on a separate piece of paper to achieve the
desired balance between water and paint on your brush. A
5. GINGERMAN: Painting details: Let's make that
frosting stand out. I got some thick paint of dark
brown Van **** in my case, rinsed excessive water
over the tissue, and painted around the
eyes to show the shadow. Important to keep your
strokes very thin, it is only a shadow and only on the right
side of the eyes. We remember that the light is coming from the
left and naturally, putting the right side
of the cookie in shadow. If your stroke turn out
too thick or too wide, you can carefully dilute it
with the tip of your brush. It is possible to do
with a semi wet brush, so make sure to remove
excess water over tissue. If the brush is too wet, it will pick up the paint from your background and
ruin your first layer. Also, to show that icing is
actually three dimensional, we need to showcase a bit of
a shadow under each of it. Three dimensional
objects cast shadow, and that's what
we are doing now. While my brush is carrying
some of darker paint, I use it as a chance to mark some of the cookie
textures here and there. Do not overdo it. Keep the
overall tone of the cooking. I lightly went over
all the frosting on our Cookie men and
marked the shadows. Notice that I didn't
underline every single icing. I did it selectively. We don't want to overload our painting with too
many dark lines. A.
6. GINGERMAN: Snowflakes: To create main cast shadow, we will use
wet-on-wet technique. To do it, first, we need to apply clean water under
the gingerbread men. Be careful to not accidentally cover the body of the cookie. Right away, I drop my
paint into that wet area. It will make our
paint flow nicely. The same principle of
cast shadow applies. We only paint the shadow on
the right side of the body. So on the right side
of the left leg, on the right side
of the right leg, this shadow is also connected
with the whole right side of the body and under the
right arm of the cookie man. The dark tone of the shadow is mixed using the same colors, brown and blue, but in the proportion where we
have more of blue paint. If your shadow spreads out too far due to lots of
water on paper, you can correct the
edges with the tissue. Just press it against
the paper and it will absorb some of the water
together with paint. This trick can only work
if the paper is wet. When it will dry out, the tissue will not lift off anything. Y. The final drops of shadow will go over
some part of the icing. Very light, almost transparent layer to demonstrate that
the icing has volume. It will make it pop even more. Make sure you don't
cover the whole icing with your
blue shadow paint. Keep it light and random. There must be parts of white
still shining through. With the white el pan, we will correct
some of the parts where the paint covered
more than we wanted. For example, if the ice of your gingerbread man
turned out not very round, you can correct the
shape with the el pan. Maybe some of the icing would
need to be corrected too if the paint accidentally leaked
into originally white area. If Jo pan didn't work very well, gouache will do a better job. It is very opaque and most definitely will cover
watercolor layer. I Most importantly, gouache will serve
us as snowflakes. Dip your brush directly into a tube and sprinkle it
all over the painting. If the brush doesn't
release anything, you might have taken a very
thick load of gouache. Try to dip your brush with gouache into water for a second, and then it will release
white droplets much easier. We can add more sprinkles of the same colour mix
we use for the shadow. This will create more of a festive mood as we are staying within our
color palette. You cute gingerbread
man is ready.
7. MARSHMELLOW: Pencil sketch: Marshmallow We start
out with sketch from organizing a mug and a little marshmallow
guy on the paper sheet. Lightly mark the
top and bottom of your subject and try to
draw within this frame. It is important to keep the
proportions right so that your final painting doesn't end up shifted somewhere to
the side of the paper, just like we did with the
gingerbread Man's sketch. Remember to keep your
pencil strokes super light. Do not pressure it. For now we're just figuring out general proportions
of each element, the size of the mug, the
size of the marshmallow. When you're confident with
all the main outlines, it's time to define your sketch. So I pressed the pencil a
little harder to finalize my drawing and also so that you can see
what I'm doing here. If you don't feel confident, draw in your own sketch today, please feel free to
doload our outline and simply trace it on your
watercolor paper. No stress. A Remember that we see the monk from above, so there is an influence
of perspective. The rim of the monk has a
shape of a circle in life, but because of the perspective, we need to slightly deform it, so it reminds more of an oval. This will give us a feeling
of looking from above. It also sort of shortens the red part of the muk so we
only see a little bit of it. Another nuance of working
with perspective is showing the bottom of
marshmallow man's feet sticking out of the mug. Altogether, it
creates a feeling of death and wait for
the watercolor part. Admire your sketch. Add any last minute
corrections if needed, and let's move to painting.
8. MARSHMELLOW: Painting rim of the mug: Before we start, make sure
your sketch is super light. Mine was dark as I wanted you to be able to
see it on the video. So I carefully went over it
with the kneadable eraser. I need the sketch to
be almost invisible, especially the part with
the marshmallow man. We don't need any
pencil line there messing with the perfect
whiteness of the marshmallow. We start with the black rim. I take black paint, tap my brush on a
tissue to release water so that my stroke
is soft but not too wet. Again, here we're using
button dry technique, but our brush is carrying
very little water. The rim is the
darkest on the edges, but inside there is a highlight. That's why we lay down
a dark stroke and then slowly wash it out into
the middle of the rim. To add some shine, I use Idathrineblue in the
middle of the rim. And with this strategy, we cover the whole
rim of the mug, dark edges and
light middle part. Using a mix of raw
sienna and burn Siena, I start working on the coffee. The plan is to carefully
paint all around the marshmallow guy and around his arms,
keeping them white. As we already know, this is called negative space technique. Okay. For more realistic feel, I make our coffee layer a
bit more saturated with burnt sienna in the area where coffee is
closest to the rim. So where coffee is touching
the mug, it is a bit darker. I even added a
darker brown tone. It is the same mix we used in
a gingerbread man painting, brown with blue where blue is the key to
darkening brown color. Because we add this additional
paint into wet layer, the color blends smoothly and our coffee looks
nice and even.
9. MARSHMELLOW: Red mug: To paint a mug, we will
apply wet on wet technique. Remember, we need to first lay down clean water on the mug, cover it everywhere without touching the rim we
already painted, then pick up saturated red paint and lay down where we
just painted with water. It will flow and
move everywhere. To make the painting
more interesting, I added vertical
strokes of blue to showcase some reflections
on the surface of the mug. It is important to do
while the layer is wet so both colors
connect smoothly. If your paint gets
too dissolved, go ahead and add some
extra red paint. Watercolor will become
lighter when dry, so you can confidently
add some thick layer of red now while it's wet to
make manga super bright. You can even drop
some orange colour in there for an
extra festive mood. Wineguah will do the
trick for highlights, add it lightly, and
let it blend in. Now, since we're already
working with red paint, let's finish with
painting the handle. It has a nice shown glare, so I purposely paint around it using that negative
space technique again. The handle should be as
bright as the mug itself. So add more red paint if you need to even
out the saturation. As well as adding
darker tone of red into the innerside of the handle as it is naturally
covered with shadow. To create a darker red color, I added a bit of green into it because it is a
complimentary to red.
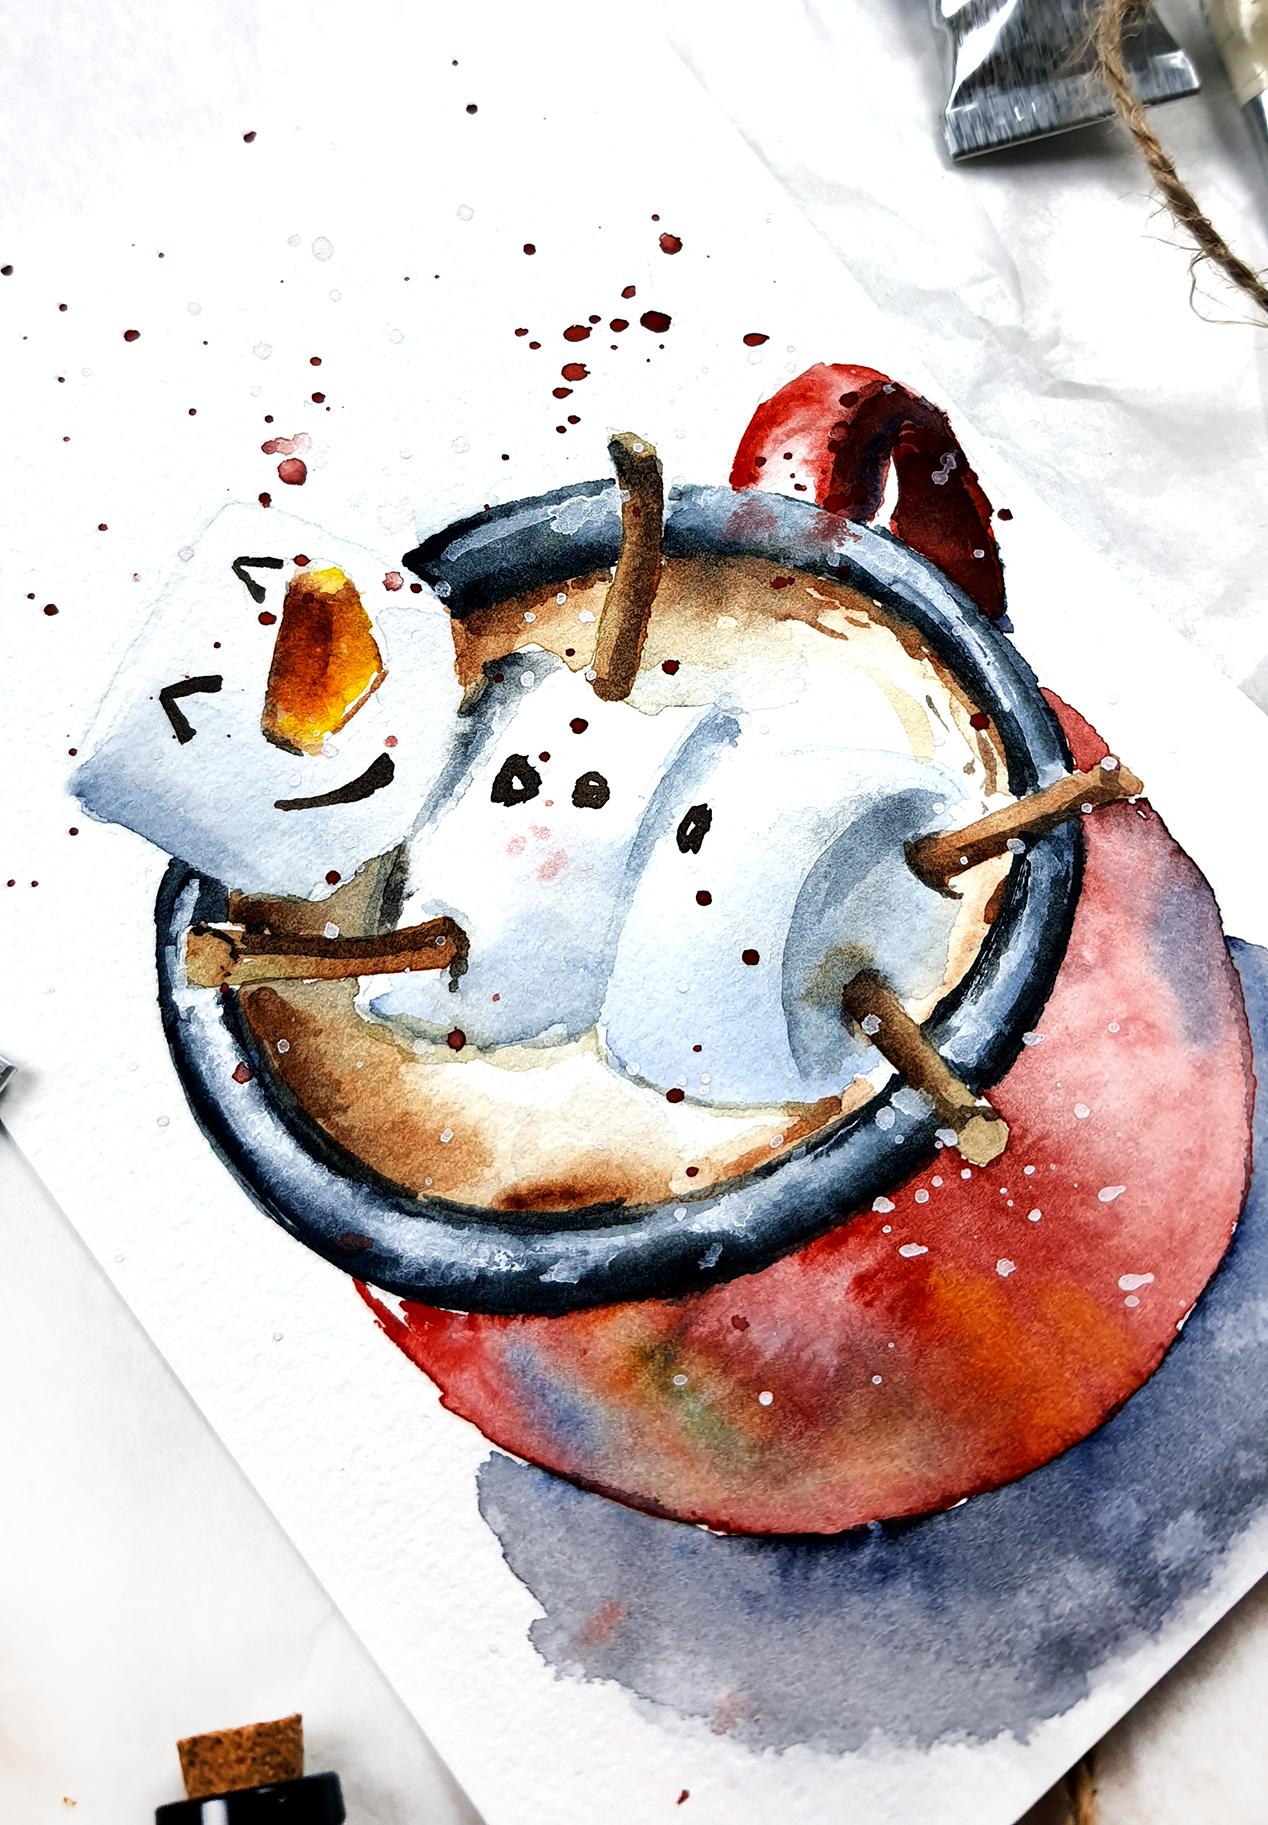
10. MARSHMELLOW: Cute figure: Time to paint our hero. Marshmallow is white, but we can't just
leave the paper blank, even though this is the best
way to show a white object. Our little guy is
three dimensional, so we need to paint the shadows on him to
make him look realistic. To avoid any dark line
on marshmallow surface, we better use a wet
and wet technique. So first, I applied
clean water on his face and then added the
mix I created for the shadow. Technically, it is a gray color with a hint of blue in it. I achieved it by adding a bit of brown into my blue
paint to calm me down. The contrast between
whiteness of paper and the shadow will create
a feeling of volume. To get a darker
tone for the area where the heat is
attached to the body, I just used more
concentrated pigment. So less water in my mix and found the best balance
between blue and brown. And you don't need to use
any black paint in here. Note that I only apply my
shadow mix a little bit, keeping most of the
marshmallow white. Same approach for the bottom of our marshmallow man to give
him a sense of volume. Make sure all your
colours and mixes are very light and
diluted with water. We don't want to end up with a fried marshmallow
with dark brown edges. Now, leave your postcard to dry as we need to
paint the nose, legs and arms on a
completely dry paper to avoid colors bleeding
into each other. I will paint the nose of a marshmallow man with
yellow and drops of orange. Remember to keep the
cone shape here. Also, make sure your brush
is not dripping wet as too much water may ruin the nose and bleed into the
white area of the face. For arms and legs, we will use the same
brown color as we used to paint coffee or a gingerbread
man, for that matter. I like to add bits of besanam for the
variety of color and especially in the area
where arms and legs are attached to the body
of our marshmallow man. I leave the painting to dragon, as we will use a
layering technique after to adapt and
create some details.
11. MARSHMELLOW: Working on details: As you already know, watercolor tends to lose its
intensity up to drying. So if you feel like your
marshmallow hero is too pale, let's add a bit of tone. Using exactly the same mix of blue and brown
for the shadow. I went over the same areas we painted before to make
them a little darker. Now, it's important to remember that watercolor is transparent. It means that the previous layer will try to shine
through the new one. So you don't need to apply
thick layer of shadow. A light and diluted grayish
tone will be just enough. Together with the
previous layer, we will get a nice dark tone, but not too dark. Important spots for darkening the tone would be the bottom of the marshmallow to show its three dimensionality and the areas where the legs
are attached to the bottom. I do the same for
coffee intensifying the edges of the coffee circle
with a darker brown color. I feel like the rim of the mug
also needs to pop up more, so I added a black outline over already existing
layer on the rim. Not too much, just enough
to make it stand out. I some extra shadows on the legs and the
nose and we can paint the final missing parts
of the marshmallow guy, the eyes, mouth, and buttons. Y I dipped my brush into neutral black paint and made sure that
it's almost dry. We need to have a
sharp thin line to paint the eyes and mouth. Be careful and make sure your brush doesn't have
too much water in it.
12. MARSHMELLOW: Finishing splashes: Time for gouache tricks. If you ended up covering
the highlighted part of the rim of our mug
with too much paint, we can easily fix that. Carefully apply white ache
in the middle of the rim. Make sure to keep
black line out of it. If your white stroke turned
out to be too sharp, you can glute it with
a semi wet brush and soften the edges. And when that's done, we can paint the shuttle
under the mug. First, we paint with clean water only where we
want the shuttle to be. Then quickly mix the final
color for the shadow, red, green, blue, brown. Remember, we use green to make red darker and brown
to make blue darker. So now we combine two dark mixes into one so that our shadow is, well, dark enough and also contains all the colors
we use for this painting. These colours will
shine through in our mix when you
will lay it down, and will be so much more interesting than just
the pure black color. And the final touch to add a festive mood is to
drop some splashes. Don't forget to
sprinkle wine gouache as well for the
snowflake effect. A
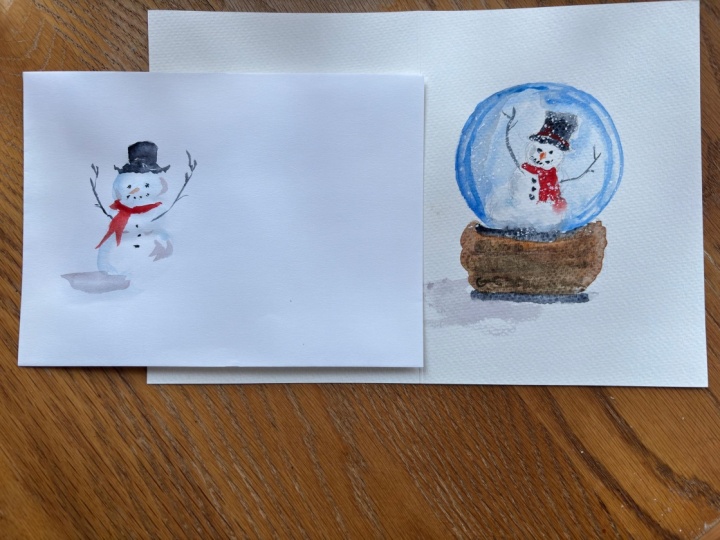
13. SNOWGLOBE: Pencil sketch: Sketching our last project
will follow the same steps, evaluating the size
of the subject, arranging it on paper, and fitting our glass bowl
right in the center. I prefer to start drawing
from the wooden base and then sort of paint
the glass bowl on it. Don't try to make
a perfect circle. We're having fun here, painting a cute Christmas bolls card. So if your glass bowl is a bit deformed,
it's no big deal. You can also take any
round object like a cup and circle it with a pencil if you really want to
have a neat shape. Position as snowman right in the middle of the glass bowl. It should be grounded
on the wooden base and be big enough to reach the
top of the glass bowl. Remember to build up the
snowballs of our snowman. The biggest one
is in the bottom, middle sized snowball
is in the middle, and the smallest one
the head is on the top. So it looks like a pyramid. And, of course, unloadable trace is available for you, too, if you prefer to trace it on
paper directly and coloring instead of drawing yourself. A
14. SNOWGLOBE: Masking liquid: Usual, we need to
remove dark lines of our sketch before
starting painting. I carefully went
over the sketch with my Nita bow eraser as it's very convenient and it
doesn't leave behind eraser traces like
an art gum eraser. Time to use the last tool from our supply set, masking liquid. It will allow us to mask, cover and hide some elements on paper that we want to
protect from paint. In our case, it would be all those nice reflections
on the glass bowl. Please do not use your
good working brush. Take one of the old
ones or damage. As muskin liquid will
destroy the bristles. First, dip your brush into water and after that into
your muskin liquid. It will make it easier to remove the leftovers of the
muskin fluid after. A I covered all the areas I wanted to keep absolutely
white on my snowball. Of course, we could try to use negative space technique and paint around the reflections, outlining their
shapes with a brush, but it would be long, difficult and might even not
turn out as planned. Preserving the white with the skin liquid is the most
convenient option here. After you are done, please leave your painting until the skin
fluid is completely dry. Also, wash your
brush right away and change the border before
using watercolors. I
15. SNOWGLOBE: Painting a base: We will start from painting the wooden stand using
wet on wet technique. First, I apply clean water
on the whole area and then add my first layer of light brown, sienna in my case. It is cupolt and transparent. After that, I add some saturated burn
Siena and darker brown, which I mixed the same way we did for our previous
two projects, just simply adding
blue into brown. I use the chance to get some light wooden texture
here with sharper strokes. They all blend for now, but we will add details later.
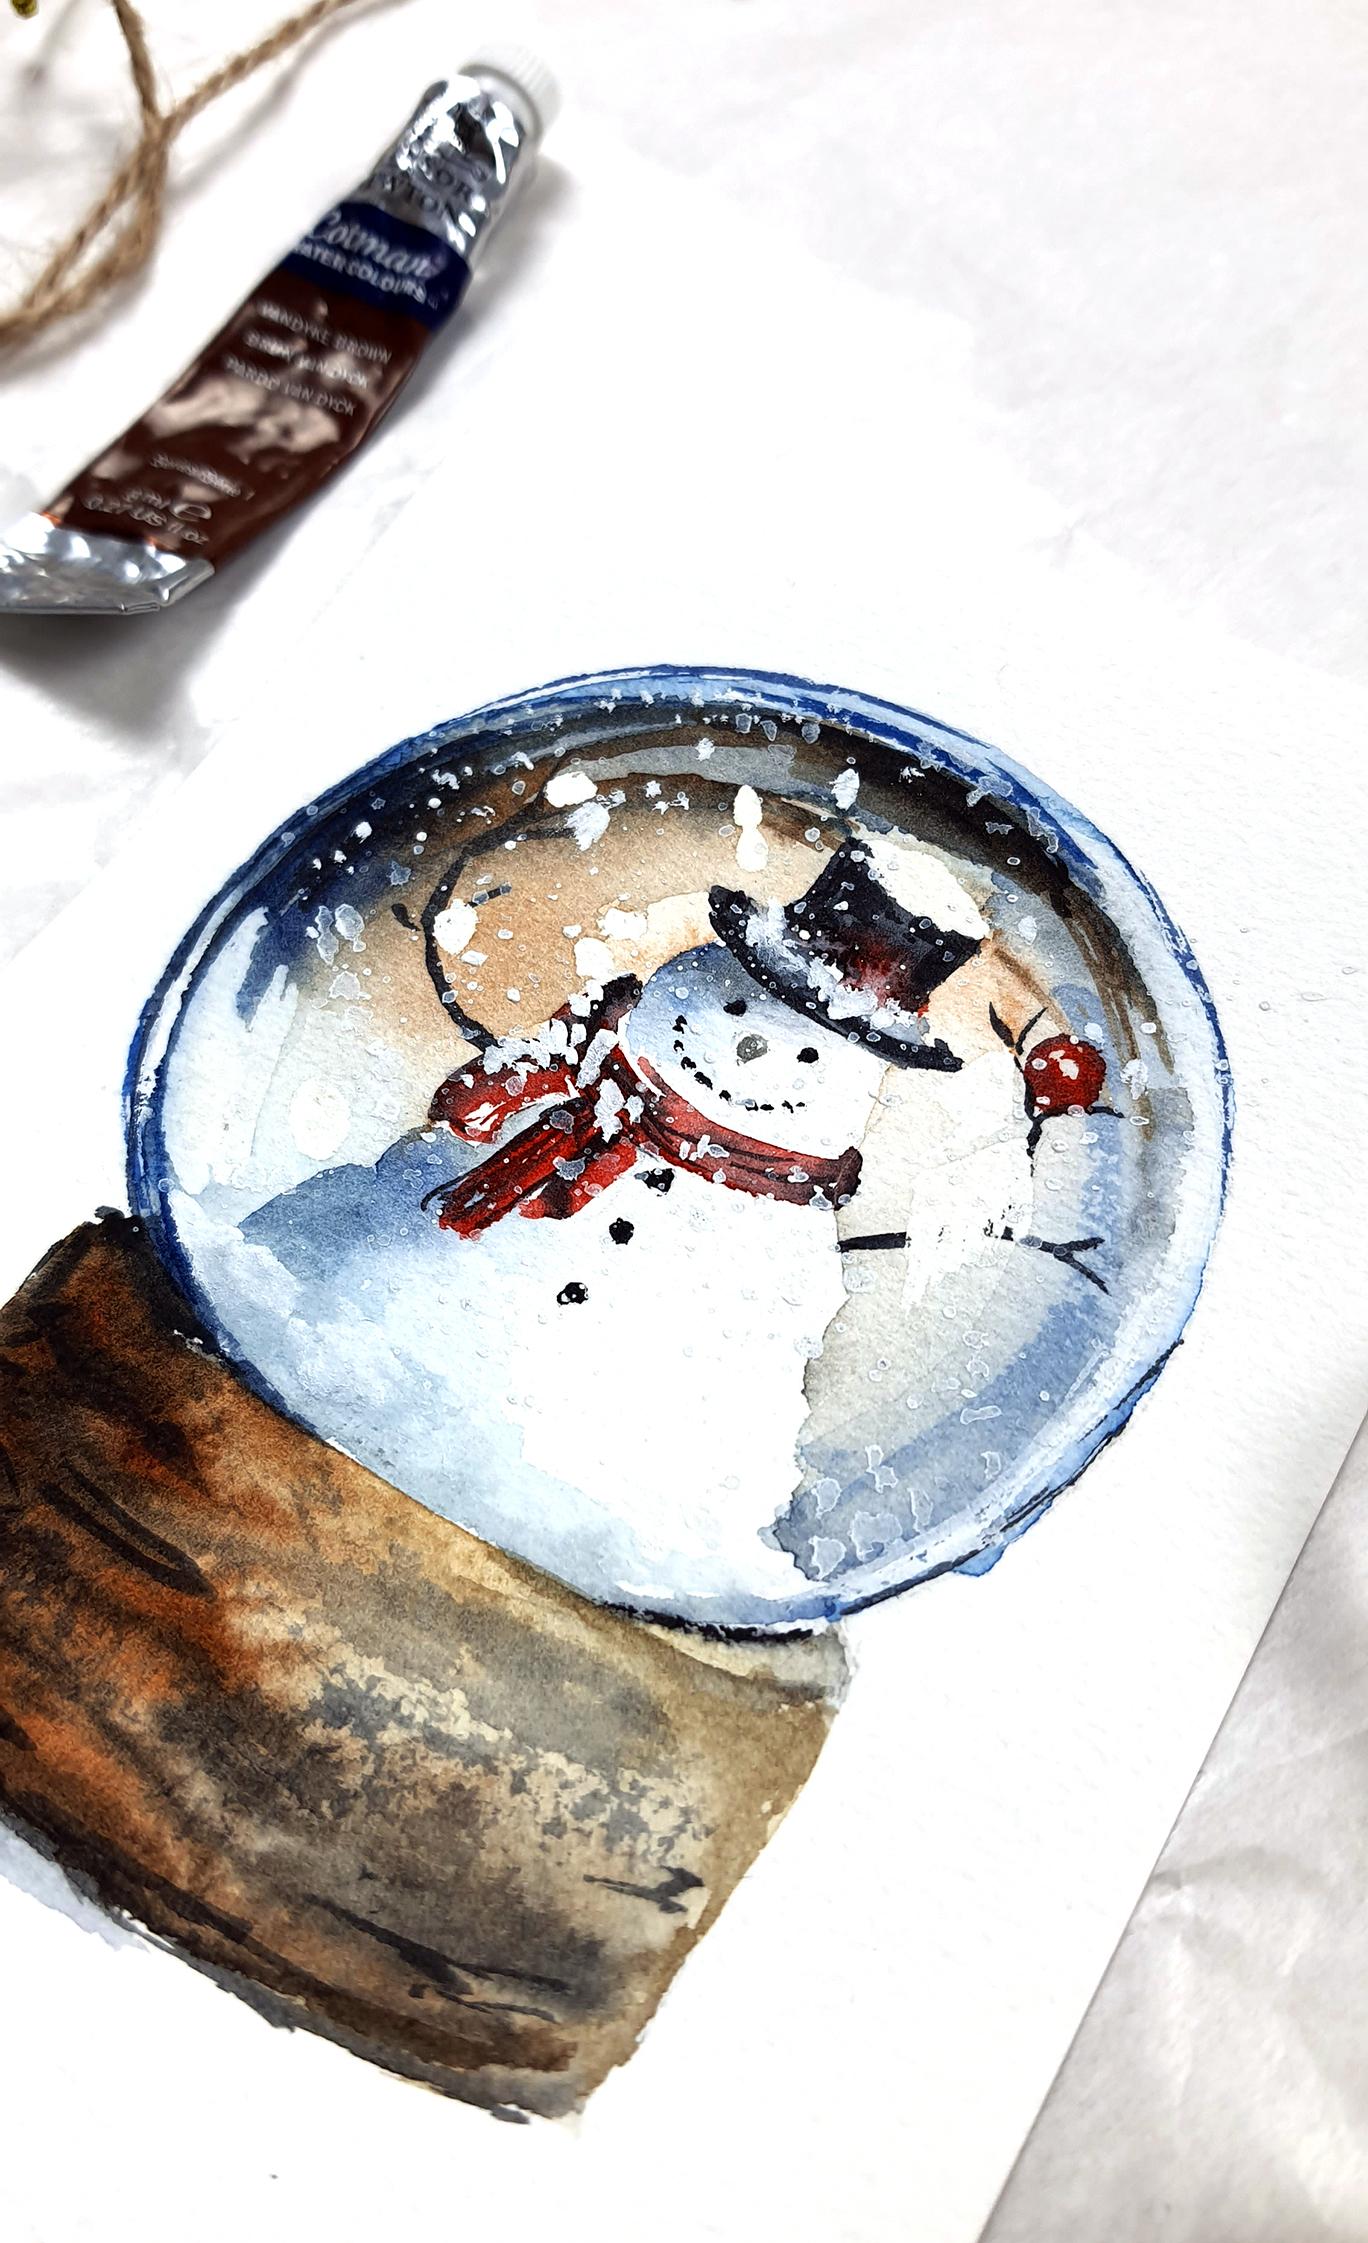
16. SNOWGLOBE: First layer on the globe: We will start working on a glass snowball with a
wet and wet technique. As usual, paint the ball
with clean water first and then drop some very
light diluted blue paint. Follow the sphere shape for now and do not go into the
center of the glass bowl. A a The next curved layer will be a greyish mix, same we used in
previous paintings, a mix of blue and brown. Right away, we add some
light orange paint. With a more saturated
blue color, we define the edge of the
glass bowl on both sides. A trick to paint glass
texture is to balance between soft transparent layer and sharp lines of reflected light. Essentially, it is all about
contrast, dark, soft, sharp. A For additional realism, you should leave some of the highlighted areas
following the rounded shape of the glass bowl
between the edge of the ball and the darker tone
on top and on the side. If your paint accidentally went beyond the borders
of the Glass noble, you can correct the
shape by adding water and lifting the
paint with a tissue. A
17. SNOWGLOBE: Painting a snowman: The strategy to paint a snowman is the same we used
to paint marshmallow man. We need to paint white
without using white paint. So we turn to shadows. I decided to start with light blue and then
add a tiny drop of gray mix to make blue a
bit more neutral, calmer. I went over all
three snowballs with a light shadow
layer only covering the left side and keeping
most of the snowman white. Make sure the top snowball is completely dry before you
start painting the hat. You don't want black paint licking into the snowman's head. The hat can be painted with black or a very
dark mix of gray. I left a few spots blank to
hint on the snow on that hat. The same story with the scarf. The area for the scarf was preserved using negative
space technique, where I basically painted
shadows around the scarf. Now we just need
to cover this area in with red paint and
maybe some shadows. With a dry brush, paint
eyes and a smile. Make sure your brush doesn't
release water so that the snowman's button eyes don't turn into
massive buck leg. Don't forget to paint
a little carrot nose, buttons and maybe add some
accents with the darker tone.
18. SNOWGLOBE: Accents: Let's place accent to make glass texture of the ball
stand out even more. Remember, I mentioned that the trick is to create contrast. So let's add sharp, dark thin strokes to create a stronger contrast against soft background of the
Christmas snowball. It is also a good opportunity to correct the shape
of the ball itself. I use dark blue paint to lay thin strokes following the
curvy shape of a sphere. Adding a few darker tones
on top will give us more feeling of depth and
refracted light on the glass. We use the same set of panes
for all three postcards, so no need to introduce
new pigments here. We can mix any
tone we need using those colors we selected in the beginning of this
Christmas series. Don't forget to add arms to your snowman and little
red Christmas bowl. Do it only when you're sure that the painting
has got completely dry. Otherwise, wet paints will
bleed into each other.
19. SNOWGLOBE: Removing masking liquid: And now the most
favorite part of all my students,
removing masking liquid. Take a rubber, any eraser or
simply an old credit card, and carefully scratch off the masking liquid
from the paper. You will see that even though
we were painting over it, nothing got under, and the
paper is perfectly clean. When you're done
with masking fluid, you can either
soften the edges of the white shapes we've
got here or keep moving. To soften the edge, just dilute it with
a semi wet brush until the edge becomes blurry. Add final details if needed, for example, scratches
on a wooden foundation. So if you get a very, very dry black pigment on
your very, very dry brush, which won't even paint properly, you can press this brush belly down on paper and make
a rapid move to a side. It will leave a sharp mark that looks like a broken stroke. Perfect to portray
the wooden texture. To paint cast shadow, we will once again use
button wet technique, clean water first, then a dark
color mix for the shadow. Remember, the shadow
has the darkest tone where it is the
closest to an object, so to the base of
our wooden stand, and it gets lighter and more transparent
as it moves away.
20. SNOWGLOBE: Splashes: To finish our painting
with splashes, we can protect the table and wooden stand from accidentally
covering with paint. We want to make it look like the snow is only
inside the glass bowl. The paper will help us to keep the sprinkles
stay in place. We use white quash once again, and you can also use it to
brighten certain areas. I If you feel like some highlights are
missing here and there, all the reflections are dull, you can increase the
intensity, adding some wash. It is generally thicker
than watercolor, so white paint will stay
noticeable in our painting. A And here we go. Our Glass Noble in the Best Christmas
traditions is ready. I hope you enjoyed painting all three
postcard projects with me. I want to wish you
to keep practicing, try new techniques and do not
shy away from challenges. Merry Christmas and
Happy New Year.
 Yana Shvets, Professional watercolor artist