Transcripts
1. Introduction: Hi, I'm Clarissa. I'm a geometric artist
and experienced educator. If you're looking for a
creative calming project this festive season, I'd love to show you how to draw a beautiful compass
star or compass rose, using just a ruler and a
different type of compass. This elegant symbol
has been used for centuries to represent
adventure, guidance, hope, and the light that
helps us find our way, which makes it such a lovely
motif for this time of year. Whether you're completely
new to compass drawing or you've explored
geometric art before, this project is a calming, satisfying way to build your
confidence and practice your skills using these
traditional drafting tools. I'll walk you through the
entire process step by step. We'll look at the
materials you'll need, how to set up your
page and divide your starting circle into
four equal sections, how to construct
a harmonious grid of ever smaller
diminishing squares, how to create the set of cardinal and inter
cardinal points that give the compass star its
iconic, elegant look. And how to trace and transfer your pattern
ready for decorating. You can keep it
classic and geometric or add color and a
little bit of sparkle. By the end of the class, you'll have a beautifully
symbolic motif that can be used
for festive cards, handmade decorations,
or even framed gifts. Plus, you'll have learned a new technique that you
can use again and again. So grab your tools, settle in, and let's draw
something elegant, meaningful, and perfect
for the festive season. I can't wait to see
what you create.
2. The Class Project: The project in this
class is to create your own compass
star or compass rows using only a ruler and a
different type of compass. I'll be guiding you step by step through the whole process
from start to finish. We'll begin by looking at the materials needed to
complete your project. I'll then show you how
to use your compass to divide your circle into
four and then eight using a classical
proportion that arises from a pattern of ever smaller
or diminishing squares. We'll then use this grid to draw a harmonious and
elegant compass star with cardinal and
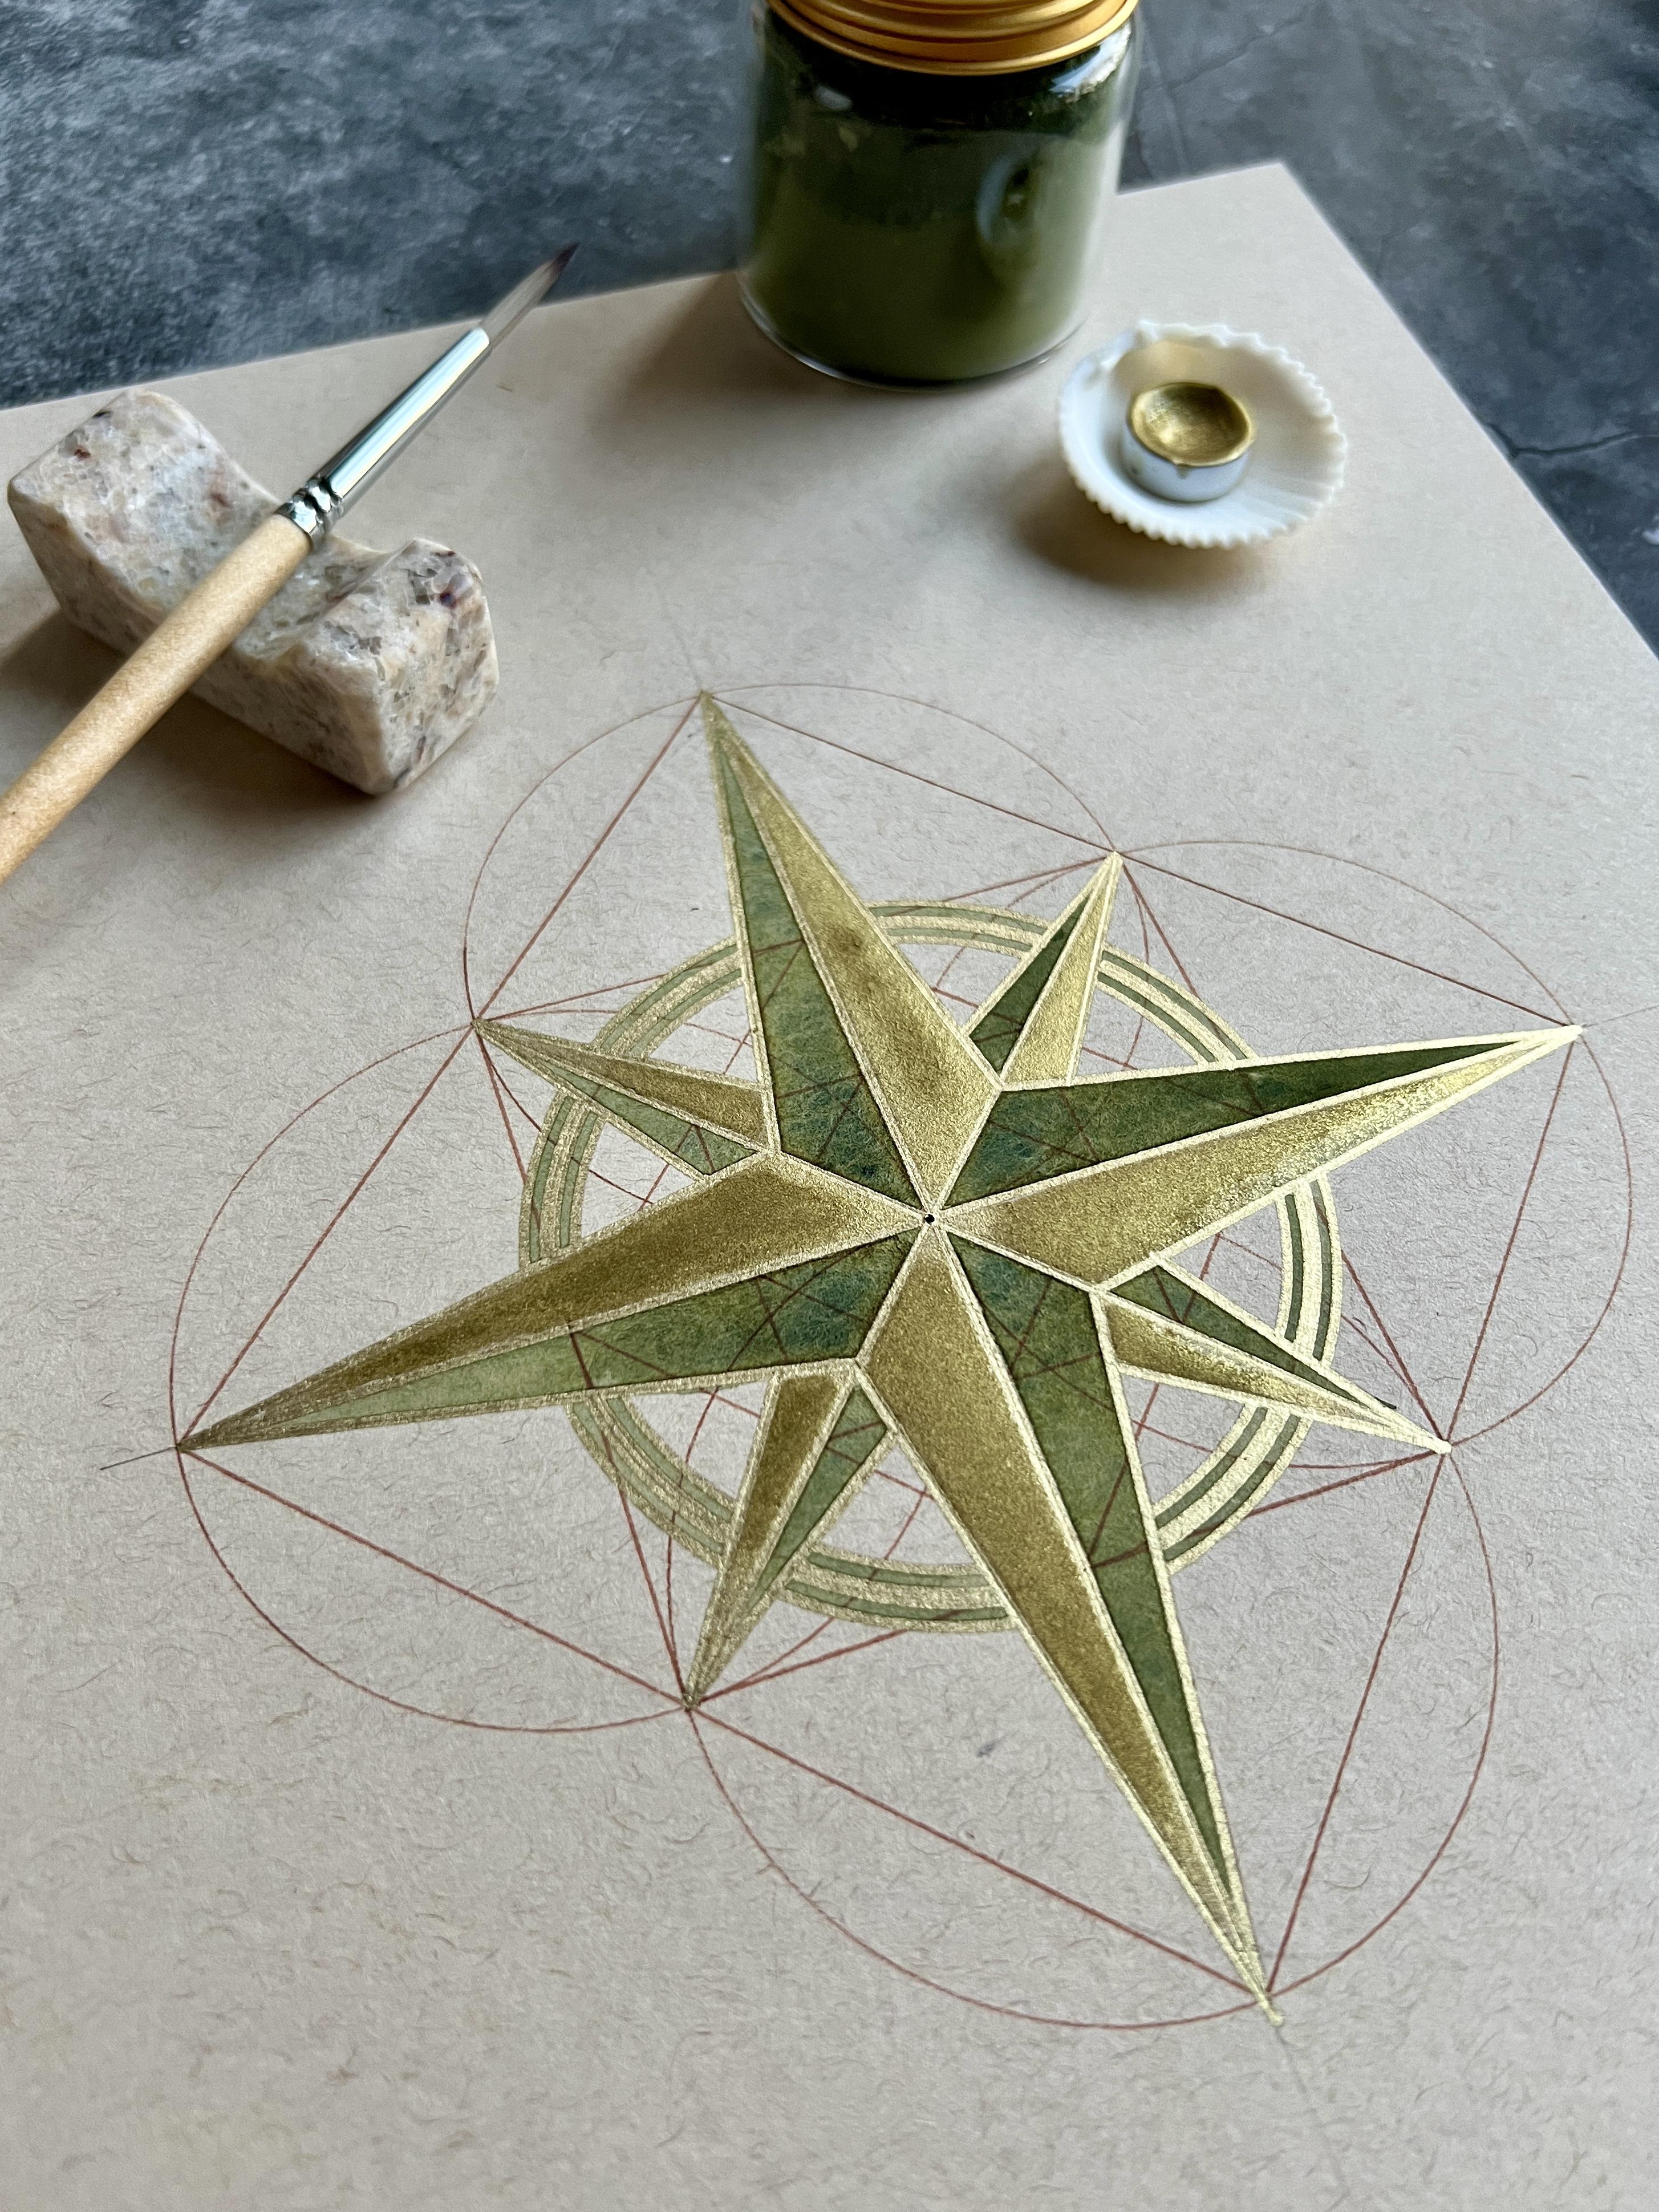
intercardinal points. Finally, I'll demonstrate how
to outline your star using a metallic ink pen and paint it with a simple wet on wet
watercolor technique. But of course, you can decorate your star in any
way that you wish. When you finished your project, remember to upload
some photographs to the project section because I do so love seeing your work, and it provides a useful bank of images for others
to be inspired by. So let's start off then
with a closer look at the materials you'll need
to complete this project.
3. Materials for the Project: So these are the materials needed to complete this project. We're going to start
by constructing our compass star with ruler
and compass appropriately. And for that, you'll just
need a sheet of paper. You'll need a ruler pencil
eraser and a drawing compass. You may also like
to have a copy of the step by step
instructions alongside you, but it's not necessary
because I will be going through everything step
by step under the camera. They can be a useful
reference if you want to redraw the
pattern at a later date. And it can also be useful
to have something to press on when you're
using your compass. So I tend to use the back
of an old sketchpad, but paper cutting
mat is also useful. Any surface that
will take the point of the compass and protect
the surface of your table. And then I'm going to show
you how to trace and transfer the pattern without all the underlying
construction lines. That's really handy
if, for example, you want to create a series
of greetings cards because you can reuse the same piece of tracing paper several times. For that, you'll need a
sheet of tracing paper. You'll need some low tech tape. And a softer pencil
can be useful, so a B or a two B. But if you haven't
got either of those, then your HB is fine. And I'm going to demonstrate
a method where I transfer the tracing
using a smooth, hard object such as a
dessert spoon or teaspoon, or you could use a polished, semi precious stone,
that sort of thing. And of course, you'll
need whatever it is you want to transfer your
finished pattern onto. So this could be a small
sheet of watercolor paper. It could be blank
greetings cards. It could be a larger
sheet of paper, whatever it is that
you want to put your final piece on and
add color to, if you wish. If you wish to add color, then you can simply use your
favorite coloring media. I'll be demonstrating
outlining with a gold pen and using
watercolor paints.
4. Constructing the Pattern 1: So first of all, we're
going to construct our compass star onto a sheet
of normal drawing paper. You'll just need your
construction equipment for this, and you might have the
instructions printed off as well, but I'll be going
through everything step by step under the camera anyway. We're going to start with a horizontal line
halfway up the page. So I'm going to measure the same distance
from the bottom of the page on the left
and on the right. I'm working on a four, so I'm just going to
make two small marks 15 centimeters up, which is approximately
halfway up. And join those marks with
a light pencil line. Min will be a little heavier so that it shows up
under the camera. And then we're going to start
at the center of the page, so I'm going to
measure halfway in. On my paper, that's 10.5 centimeters and
make a little mark. Next, we need to think about the starting size
for our circles. This is quite an easy
calculation to make. Essentially, whatever size you want your finished pattern, we divide that measure by four, and that gives us
our starting radius. So I would like to create a pattern that's 12
centimeters wide, which means I'm
going to start with a three centimeter radius. Now you'll be working with
a pencil in your compass. I'm going to work with pen because it shows up under
the camera more clearly. And I'm going to
place my pen inside my compass and line up
the tip with the point. I'm then going to measure out
my three centimeter radius. I'll do that on my ruler. Going to place the
compass point on the zero line and just use
either my quick release bars or the cog at the top to open up to my 3 centimeters
or thereabouts. And then I'm ready
to make a start. So I'm going to start with
the circle at the center, and I take good care over where
I place my compass point. That's really the most important part of the construction. If I can get that placed
as accurately as possible, then the rest of
the construction should stay quite accurate. So I've got my compass
point at the center, and I'm going to
spin my first circle by twisting the compass between the thumb and two forefingers of
my dominant hand. I tend to twist anticlockwise
because I'm left handed, you may be more comfortable
twisting clockwise. And there's my first circle. I'm now going to add a
circle either side where my original circle intersects
with my horizontal line. Again, placing the
compass point really carefully and just checking that I am indeed going
through that center notch. Circle number two and
circle number three. And now because I want to
create a grid of squares, I need to be able to divide
my central circle into four. And to do that, I need to create what's called a
perpendicular bisector, which is essentially
a vertical line that runs straight down through
the center of my pattern. Now, to do that,
I'm going to use these four intersection points I now have between my
three overlapping circles. And for each one, I'm going to place my compass
point at the cross, and I'm going to make a
small arc that sits either directly above or
directly below my center. So placing my compass
point carefully again on that intersection, I'm going to make a little arc
that sits above my center. Going to transfer to the other
side and cross that arc. And then I'm going to
do the same underneath. A little arc that
sits just below the center and cross that arc. And what I now have are
two points that are directly halfway between
these two intersections here. And therefore, they're sitting exactly halfway
through my pattern. And so if I join
now these one, two, three points together
with a straight line, I have a vertical line that
bisects or halves my pattern. To make sure I get
this vertical line drawn on nice and accurately, I'm first of all, going to place my pencil tip in
that center hole. And then I'm going to butt
my ruler up against it, and I can swivel my ruler
around the pencil tip now to find the best place to draw my vertical line running
down through the center. And what that's done is
it's given me two more intersection points north and south on my starting circle, and I'm going to
pick up my compass with the same radius
still measured out. Am I going to place a circle at North and a circle at South. And now I have this lovely
four petaled flower, which allows me to
create a set of squares, which will then
allow me to create my compass rose or compass star. I can put my compass away now because all my
circles are drawn, and I just need my
ruler and my pencil. I'm going to start with
two diagonal lines that run through the petals. So I'm going to take pairs
of opposite petal tips in my four petaled flower and join those up
with a straight line. Again, I'm going to place
my pencil tip first. Then butt my ruler up against
it and then swivel it round until I'm happy I'm going through my
other intersections. It's my first diagonal. And my second. Now I'm going to add a series
of ever decreasing squares. Each smaller square
will be made by joining the midpoints of the
sides of the larger square. My largest square is going
to go from the north to the east to the
south to the west and back of the outer
corners of my pattern. So joining up these four points Square number one. And then you'll notice
at the midpoints or halfway points of
each of the sides, I've got my four petal tips, and so I'm going
to join those up to make a new smaller square. Okay. Next, I'm going to join up the midpoints
of the sides of this smaller square to
make a smaller square. So I'm going to join up
the north to the east, to the south to the west. I'm going to do this
two more times. So I'm taking the midpoints of the sides of this
most recent square, and I'm going to join those up. And finally, I'm going to take the midpoints of the sides of this smallest square to
make the final square. What I've created is a rather lovely pattern
in its own right. This is known as a Bavel spiral, and a Bavel spiral
is when you join up the midpoints of ever
decreasing polygons. In our case, a set of squares. We're going to be using it
to draw our compass star.
5. Constructing the Pattern 2: To make the demonstration
a little clearer, I'm going to be drawing some
of the lines in red pen. You don't need to do
this, it's just to make it easier for you
to follow my steps. So I'm going to make the larger
four points of the star, the North, East, south
and west points. And to do that, I'm
going to highlight my second largest or
second smallest, second smallest square, I think. So not the final one I drew, but the one I drew
just before that. And I'm just going to
highlight that in red just so that you see which
one I'm talking about. And what I'm going to
do is I'm going to join two corners of the square each time to the
compass point position that sits opposite them. So I'm just going to
do this first one as a dotted line so that
you see what I mean. So I'm joining north to the bottom corners or
vertices of this square. But I'm not going to
draw the full line on. I'm actually going to stop the arm of the star
when it reaches one of my two diagonals that run
through my petal tips. I'll show you what I mean. So I'm going to start on the outermost point of
the star and draw my line and stop when I
reach this diagonal, I'm going to do the
same on the other side, lining up with the bottom
corner of the square, but stopping when I
reach my diagonal. I'm now going to do
the same from south, so my southmost
point will join with these two corners at
the top of my square. I'm going to line it up first, but I'm only going
to draw my line on until I reach this diagonal. And the same on the other side, joining south to
corner of square. But stopping at the diagonal. I'm now going to do east
and west in the same way. Stopping at the diagonal. Corner to square to east. Stopping at diagonal. And finally, corners
of square to west. And I've got my four
largest points now. I'm now going to draw my secondary set of points
which are at northeast, southeast, southwest
and northwest. And these will be joined to the corners of
the smallest square, which I'm going to outline in green to make it clear for you. I'll start with the
northeast point. And as I did before, I'll put the dotted
line on first. So north east is going to join to the opposite
corners of the square. So But as before, I actually only want to
draw on a section of it. And it's the section
of these lines that end when they
meet the larger star. So lining my ruler up
along that dotted line, I'm going to draw from
northeast and stop when I hit this outer star that
I drew on previously. So it gives the illusion that this smaller star sits
behind the larger one. And now I'm going to work
my way around clockwise, doing each of the last
remaining three points. And all the lines for my
compass star are now complete. I'm now going to
use a thicker pen to finish the star off, and then in the next lesson, I'm going to show
you how to trace your star if you want to transfer it to a fresh sheet of paper without the underlying
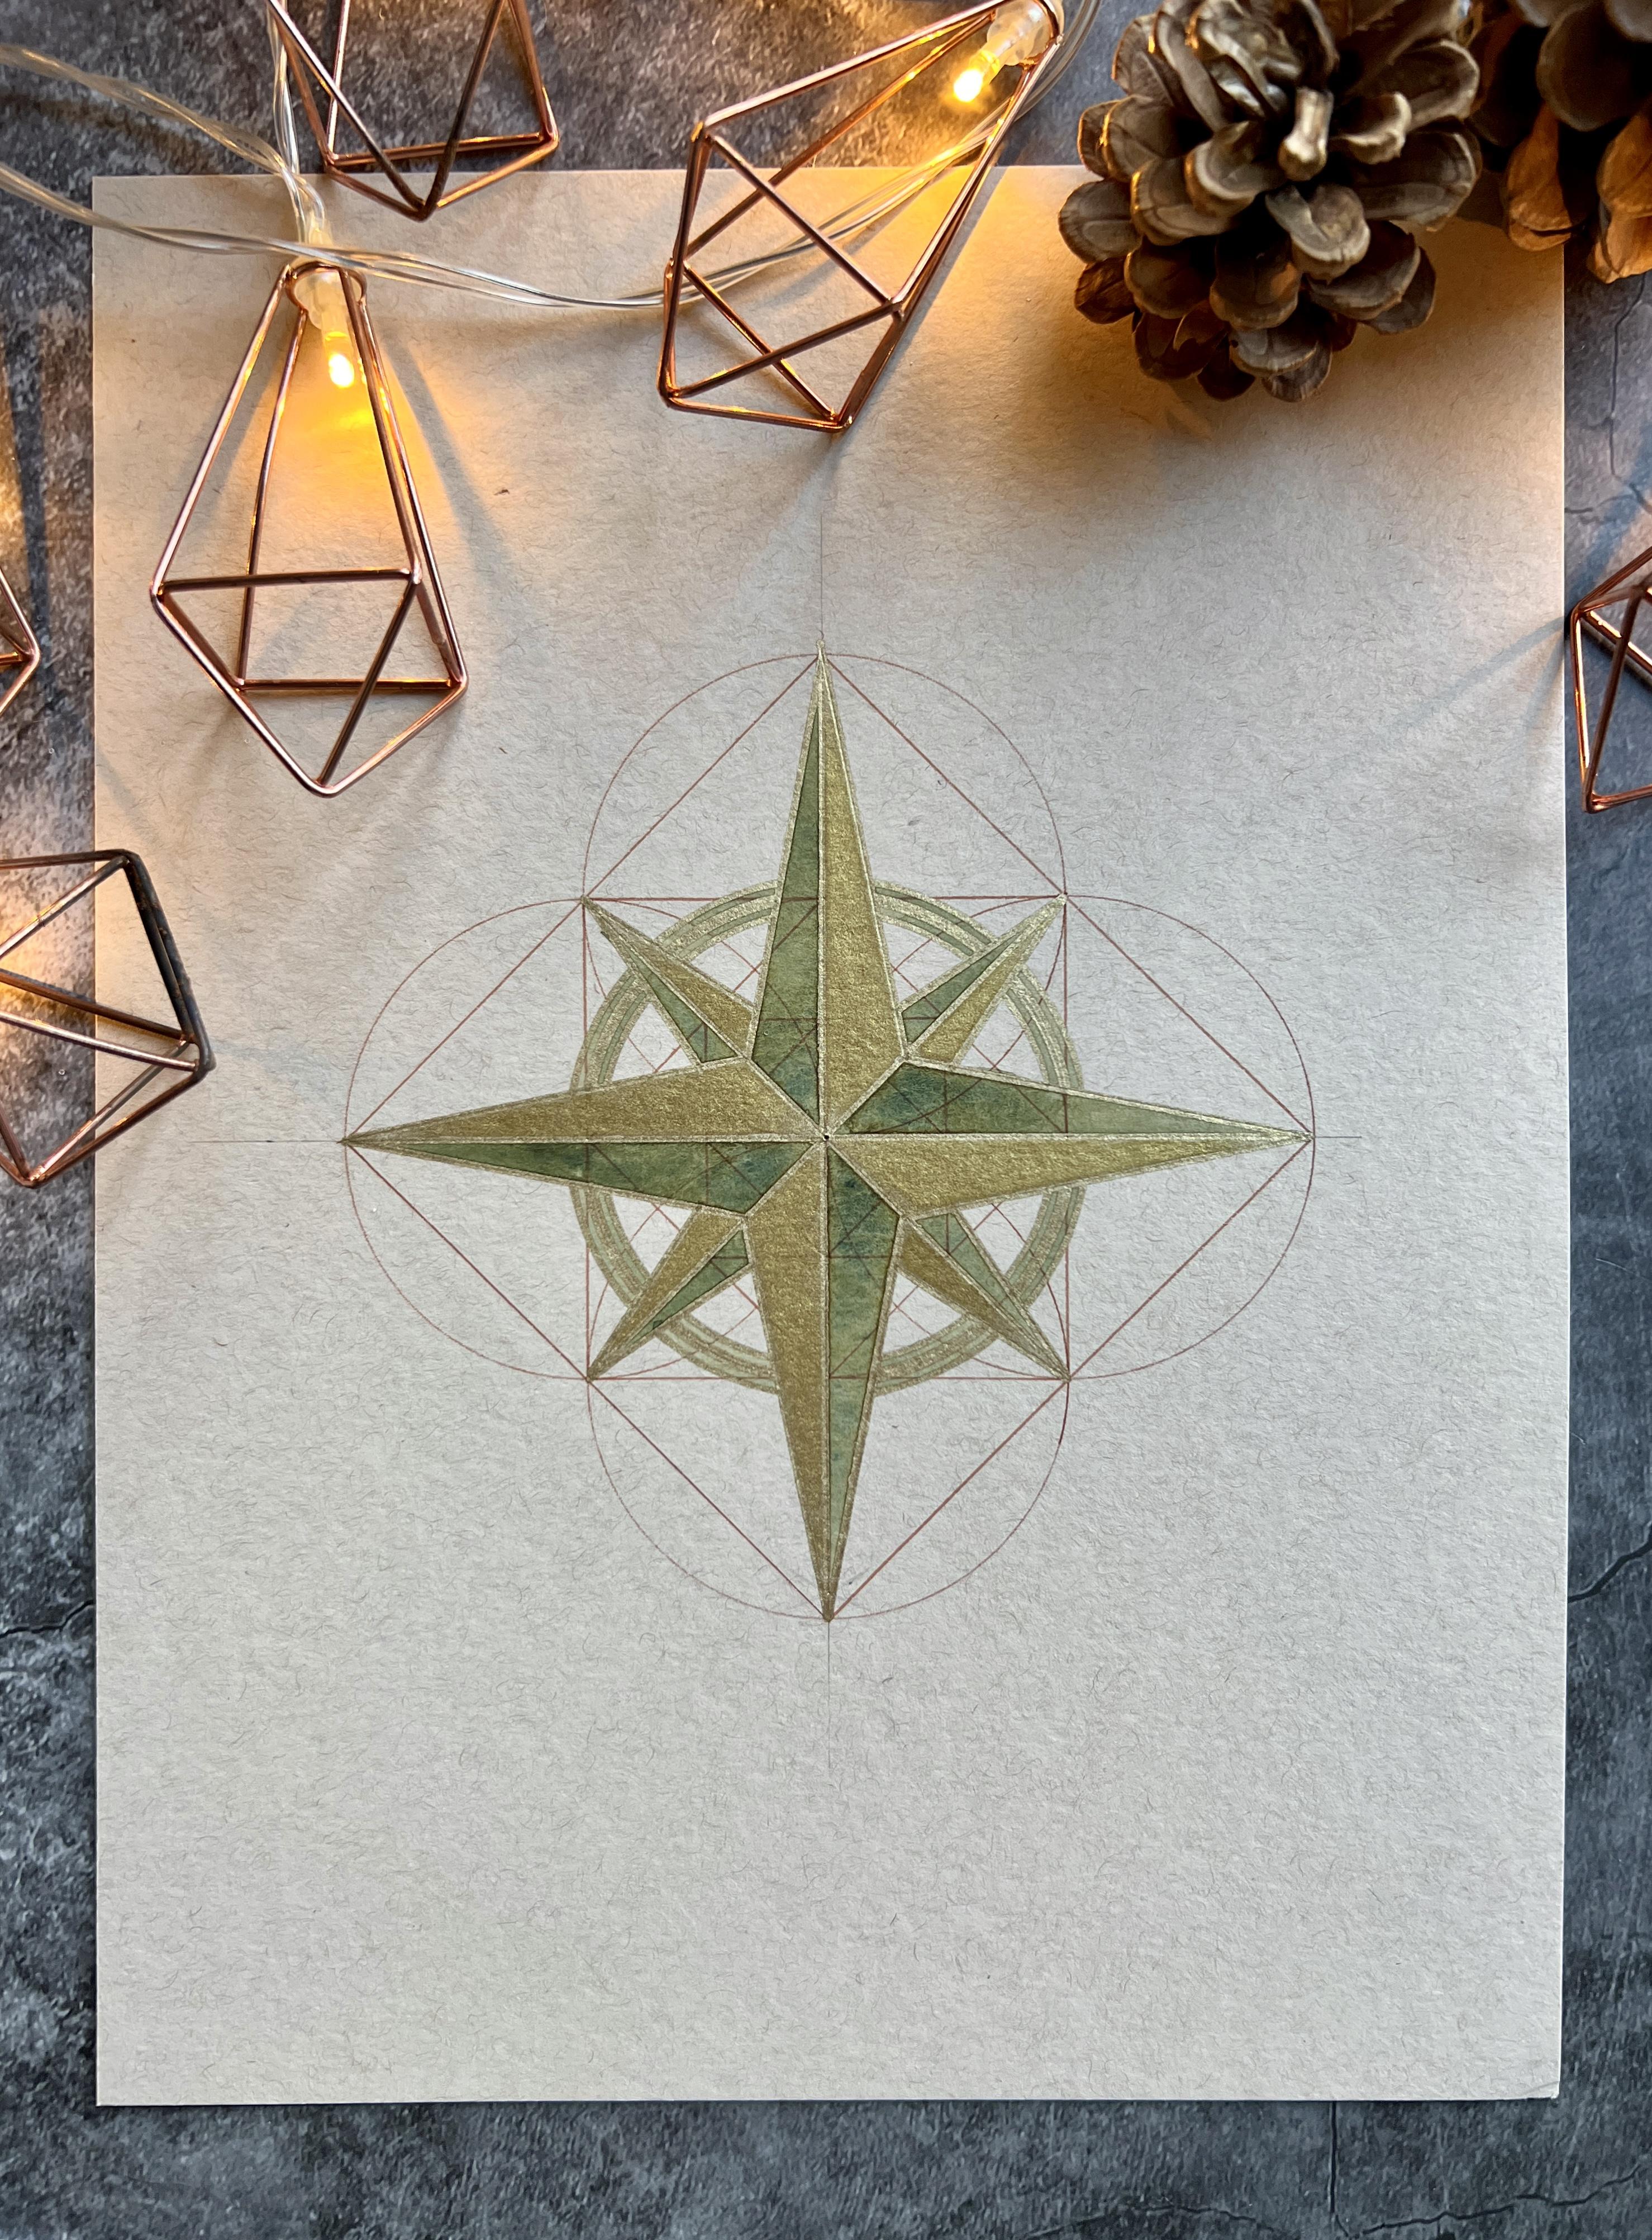
construction lines. I also think the
star looks nice with the central circle outline sitting behind the
points of the star. So I'm going to do that now. I'm just going to remeasure that circle by placing my
compass point at the center in the original hole and then just double checking that my pen is going plumb on top
of that original circle. I'm just going to
add the sections that sit behind the star. That's my compass star complete.
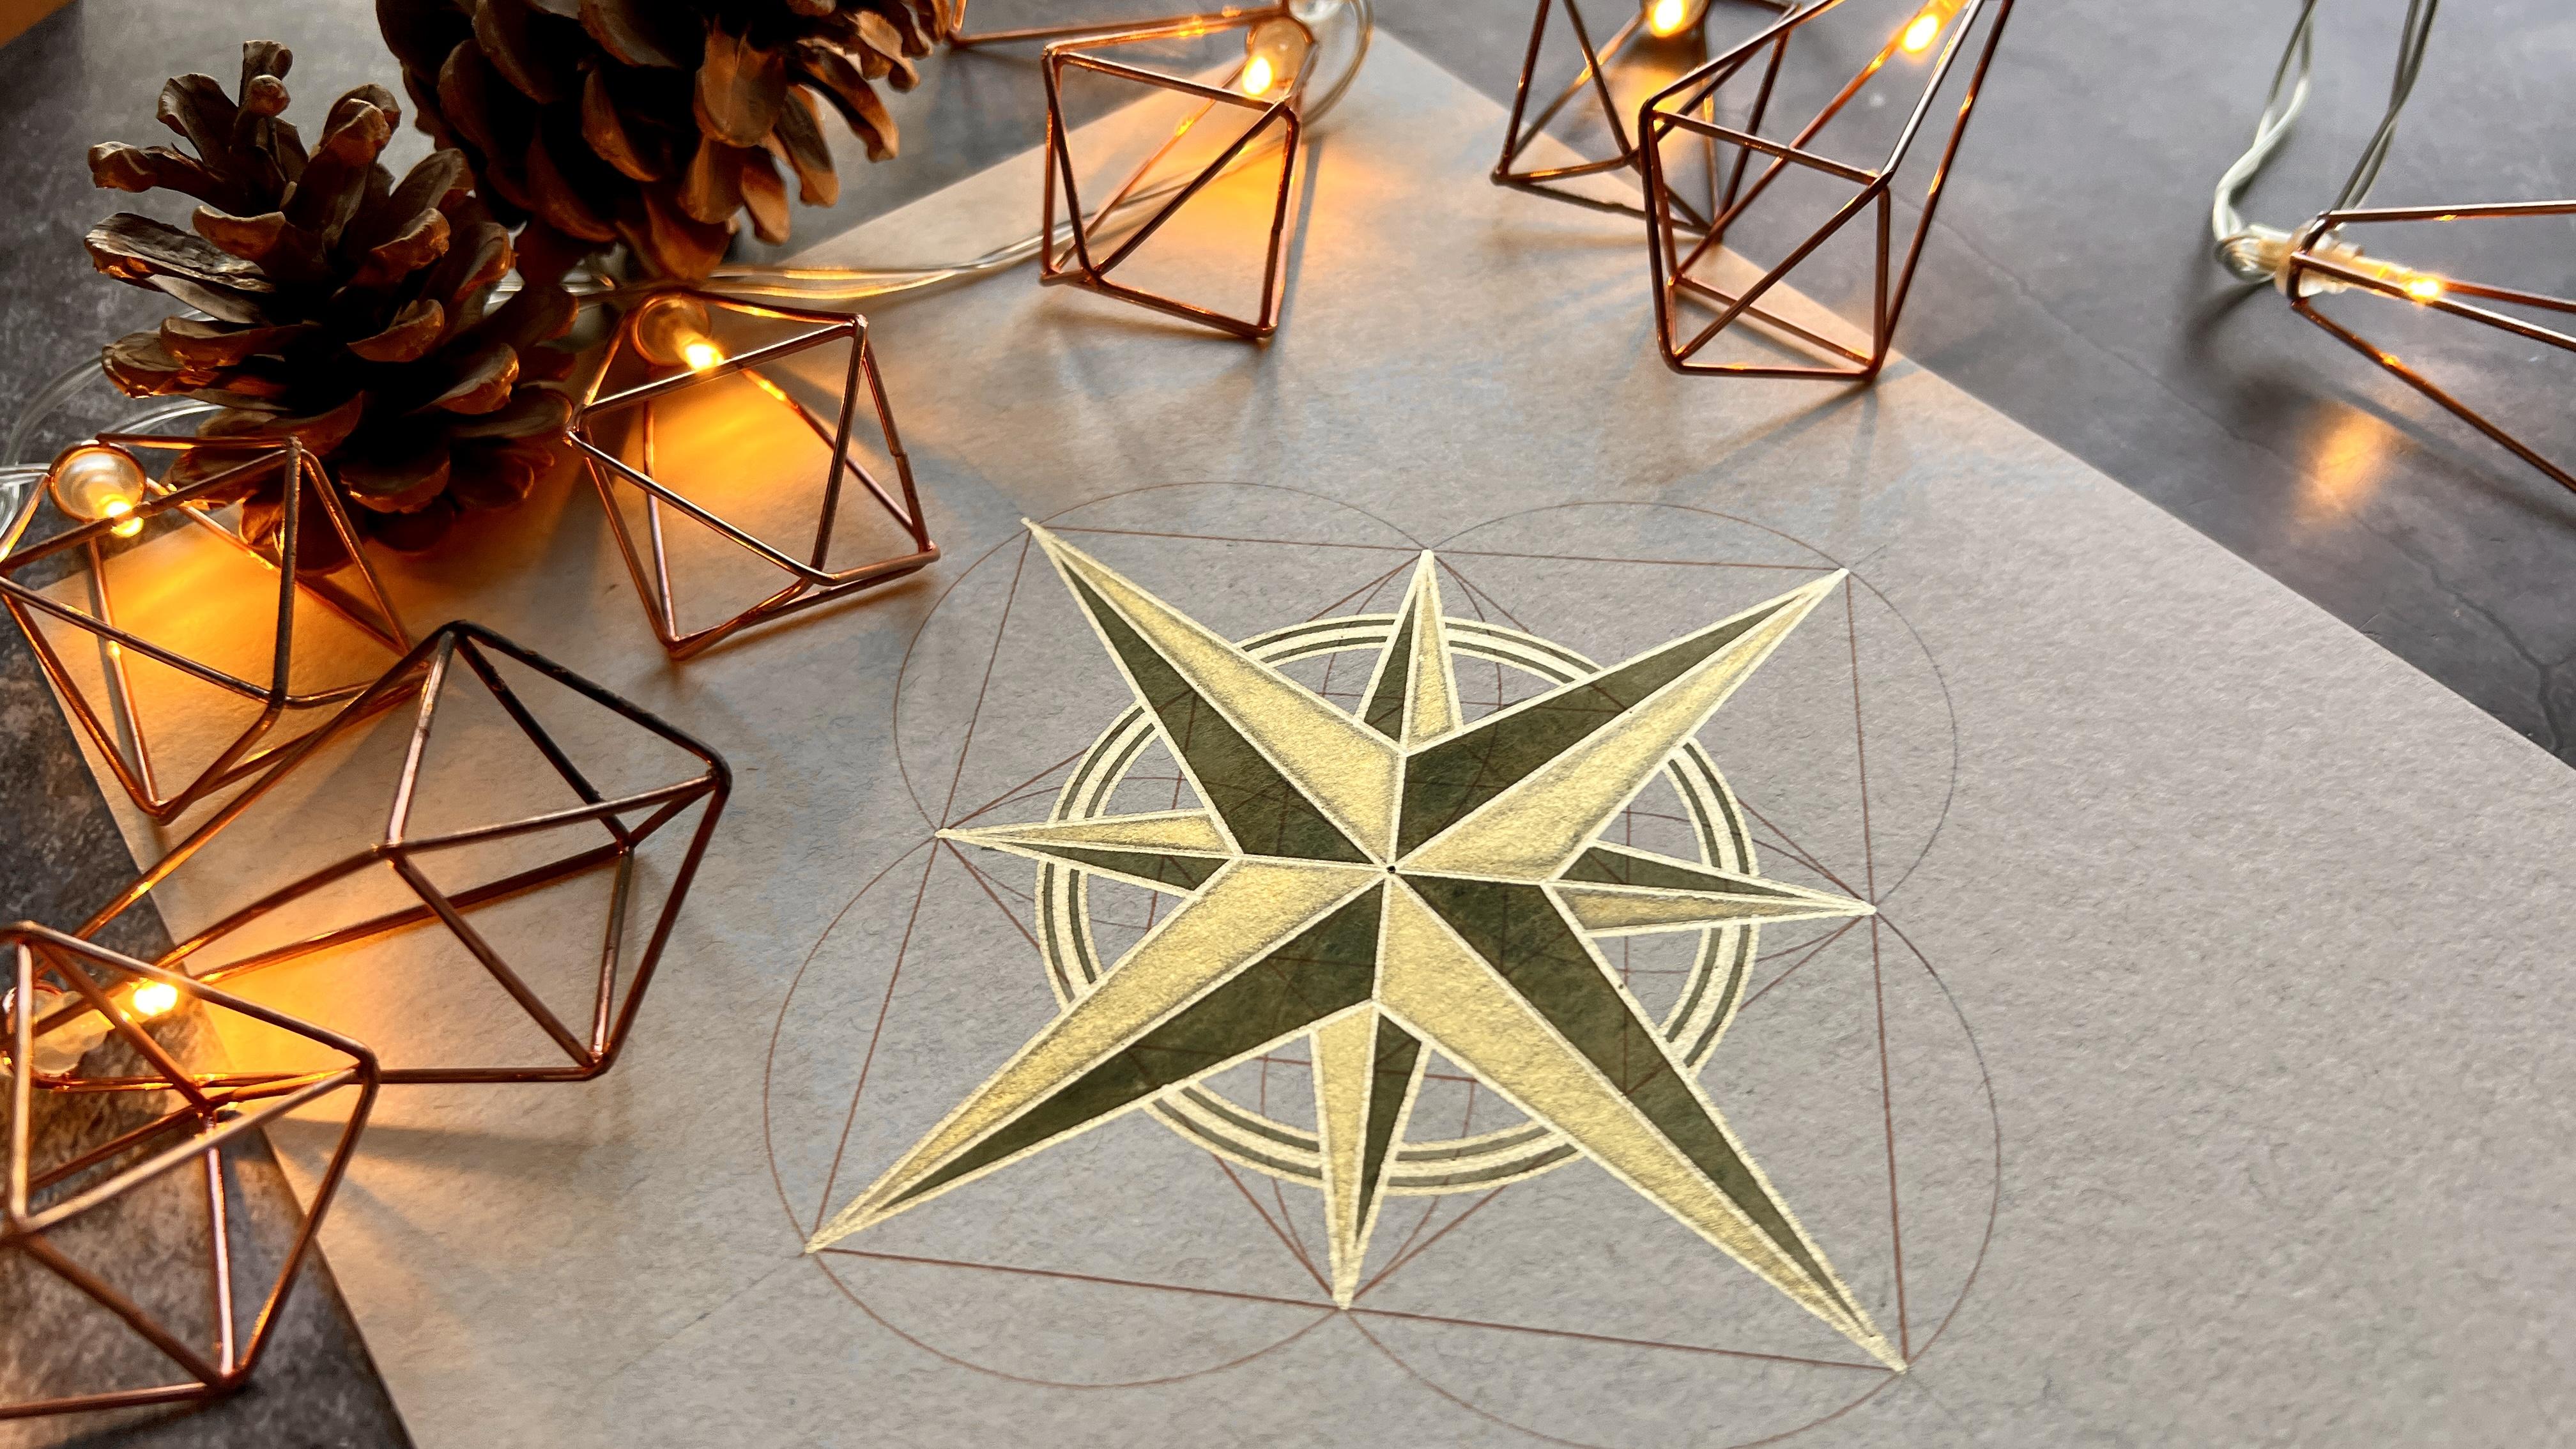
6. Tracing the Pattern: Now, you can just
draw the pattern and leave the
underlying grid on. And I often do that in my work. I always think
it's quite nice to see how the pattern
was constructed. However, if you'd prefer
just to have the star itself without all the
overlapping circles and squares, then it's easy enough to do. We're going to use a
piece of tracing paper and some low tech
tape to trace it, and then I'll show
you how to transfer it onto a fresh sheet of paper. So I'm just going to make sure my tracing paper is
covering my pattern. Use a little bit
of low tech tape. To stick down, probably
top and bottom is best. And then I'm going to
use a softer pencil. So this is a two B. I wouldn't go any
softer than a two B, but a B and an HB
are also suitable. And I'm literally going to re outline the main lines of the pattern onto
my tracing paper, and then I'll be able
to transfer those. So nice sharp pencil. I'm going to go through and outline all my straight lines, and then I'm going
to finish off by re outlining my circle,
which is optional. You don't need to have the
circle in your pattern, but I'm going to show you
how to do that, as well. Actually, I think I'm
going to be systematic, sort of work my way around. Each of the points in turn. And I'm going to try and put a double line of
graphite each time. I'm also going to
put my four axes on the vertical and
horizontal ones. And the two diagonals. And finally, I'm going
to outline my circle. So I'm going to try and locate
the hole that's right at the center of my
original construction through the tracing paper, which is sometimes
easier said than done. If I don't quite find
it, that's okay. And then open up my radius so that I'm sitting on top
of that original circle. And then pressing down into
the pencil so that I get a nice heavy line and going over two or three times
to lay down the graphite. It doesn't matter if I
overshoot one of the lines. I can always tidy
up using my eraser. And there we go. And now my tracing paper
is ready to be removed, and I can transfer
onto a fresh sheet.
7. Transferring the Pattern: So we're going to transfer our pattern from the
tracing paper onto a fresh sheet of paper ready for painting or coloring in
whichever way you like. And this can be a sheet
of watercolor paper. It could be a blank card that you want to put
your pattern onto. It can be a sheet of
mixed media paper, whatever it is that you want
to then go on and decorate. We're going to start by
placing an axis on so that we can line up our pattern nice and square with the paper. And then we're going
to transfer it using a spoon or other similar
smooth, hard object. This is a really fun way
to transfer a pattern, and it's really quick, as well. So I'm going to start
by popping the grid on. And I'm just going to put
a horizontal axis on and mark the center so that
I can line my star up. I want my pattern halfway up, so two small marks,
15 centimeters up. And then because I want to
erase this line afterwards, I'm going to do a
nice light line. Mine will be a little heavier, but yours should be light
as possible, really. And then I'm going to mark the center clearly so that I can see it through
the tracing paper. Okay. Next, I'm going to remove the tape and replace
it on the other side of the paper so that I
can turn the page over and the graphite
is on the underside. Okay. And then I'm
going to line it up with my horizontal
axis and my center. And when I'm happy, just pop the take back down and I've got my spoon at the ready to
transfer the pattern. Now, I'm going to be
using the edge of my spoon and I'm going
to burnish the back of the paper quite vigorously to transfer the graphite
onto the page. Now, because I'm going to be quite vigorous with the spoon, I'm going to make sure
that the tracing paper is really well held down. And for that, I'm
going to use the thumb and forefingers of my
non dominant hand. I'm going to press either side of the section that
I'm working on and I'll move my hand with the spoon as I move
across the pattern. So I'm going to start on
this right hand area here, pressing the tracing paper down firmly and burnishing the
back of the tracing paper. Notice how I move my hand with the spoon so that I'm not risking the
tracing paper moving. And now I'm just going to
check how much is transferred. I don't need a really
heavy transfer. I just need enough to be
able to redraw the pattern. And that's transferred
pretty well. So now I'm just going to erase this extra bit of axis
that I don't need, and my patterns ready to paint or colour in
whichever way I wish.
8. Outlining the Pattern: So I really like to
outline my pieces with an oil based
metallic marker pen. For two reasons, really, I find the oil based markers
to be extra shiny, and also they provide a lovely water repellent barrier around the sections
of your pattern, which makes it really easy to
use water based media with, for example, watercolor paints. So I'm going to be outlining
with my gold marker first and then painting with watercolor
paints afterwards. However, depending on what media you can decide to outline
either before or after. So if I was using
colored pencil or acrylic paint pens or something like that
to color my piece, then I would probably
outline with my marker pen afterwards to make sure all the lines
were nice and crisped up and everything
brought together. Now, it's a good idea to have a little bit of
scrap paper to hand. And because I'm
outlining my circle, I need my compass again. And it's really, really
useful to have a ruler with a beveled edge because I'm going to be turning
my ruler upside down, and the beveled edge
ensures that there's a gap between the
ruler and the page, which means when I
draw my ruler away from the freshly
drawn line of ink, I don't risk smudging it. I'm also going to work pretty systematically so that I can avoid as much as possible placing my ruler onto
freshly drawn ink. So I'm going to work
clockwise around my pattern. Now because I'm demonstrating
under the camera, I won't turn my paper as I go, but it'd probably be more
comfortable for you to just turn the page
as you're working. I'm going to first start
by giving the pen a bit of a shake with the lid
on, very important. And then I'm going to press down just a couple of times with the nib onto my scrap paper
just to get the ink flow. Shaking it up gets
the ink sort of mixed together nicely and
gets it nice and shiny. And then I'm just going to press the nib into the paper just to release some of the air
pressure that may have been built up before I
apply it to my piece, and try and get a nice little bit of ink
flowing out of the nib. I'm then going to make
sure my ruler is upside down so that I have the gap
where the beveled edges. And I'm aligning my
ruler along the line, but leaving a
little bit of a gap because my nib is quite thick. So I want to account for that. And then I'm just
working my way around. I'm just going to leave
this little bit to dry before I place my
ruler on top of it. And I'm lifting my ruler up
as much as I can rather than dragging it as I replace it. Okay. Because I
added the circle, I also want to re outline that. So I'm just going to re ink my nib a bit because
I can feel it running a bit dry.
That's better. But and I'm going to just remeasure that radius. I'm going to put a little
dot of ink down just to make sure I feel like I'm
in the right place. And then carefully
staline sections that I need. F time.
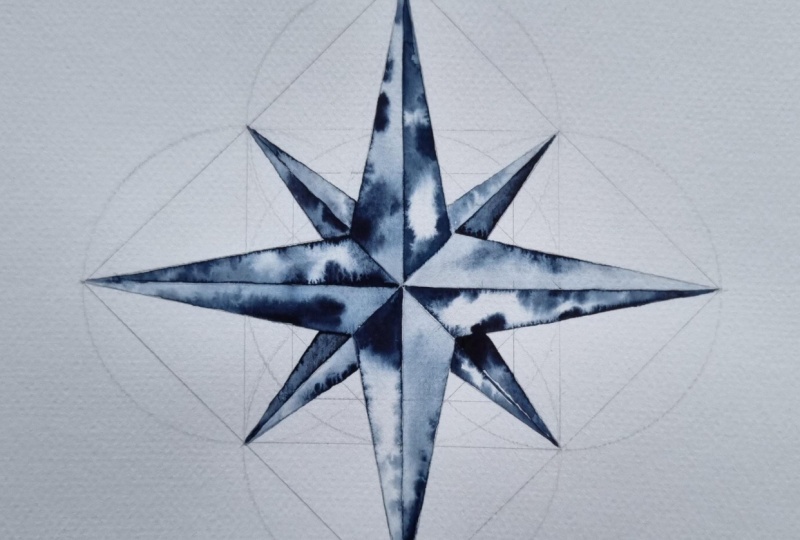
9. Painting the Pattern: So I'm going to finish off by painting just sections
of my pattern. I want to create a sort of three D illusion of
a bevelled star. So what I'm going to
do is I'm going to paint the same side
of each arm of the star as I move around the pattern,
clockwise or anticlockwise. I'm going to pre wet my paint. I'll just use a little capette
couple of drops of water. And give that a
moment to sink in. And it's always a good
idea to have a piece of kitchen towel handy just for blotting any excess water or
mopping up any accidents. And I think I might actually
try a wet on wet technique, although this isn't
watercolor paper, so I can't use too
much water on it. What I'm going to do then is
apply just a layer of water first to the section I'm
working in at the moment. Just this piece here, and I really love working into these sections
that have been pre outlined with oil based ink because it's nice and easy
to stay in the lines. And then I'm going to give
this a little bit of a swirl. I could have some
scrap paper actually, just to test out how
much paint I've got, but I'm not too worried. I'm just going to drop
it in And you can see the satisfaction of having these lines
around the outside. I'm just going to do one
bit too much water on it. I'm just going to do one
little mini section at a time. And just adding the paint sort of flood into the section and drawing it out to the point. And I'm hoping for sort
of a little bit of a mottle defect from
using wet on wet. So painting with a layer of
water first, not too much. Just so there's a nice kind
of shine on the surface. Then dropping the painting, it's really satisfying
to do this. Okay. I feel like I've got a little bit
too much pigment here. I'm going to use a
small cotton bud to remove some of this excess. I think that'll give me a more interesting effect
now when it dries. Okay, so I shall
let that dry now. I could add a secondary color, actually to the other
side of the star, but I won't in this case, and I could also add
a third color into the gaps between the arms
enclosed by the circle.
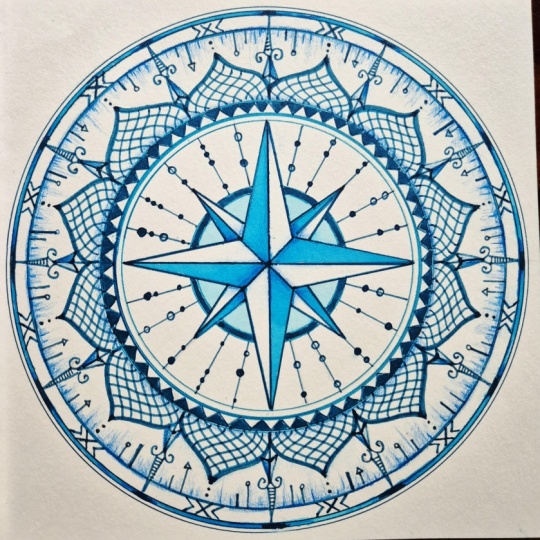
10. More Design Ideas: I thought I'd finish
by showing you some alternative ideas for
decorating your compass stars. So this one here is done in gold pen and alcol ink markers. So I sort of wanted
the star to look gold. So I've used two different
sort of gold colors, and then I wanted to pick out the background in
this lovely sky blue. And I've mounted it
onto a greetings card. This one is very simply done. You can just about see the underlying
construction in pencil. So I didn't trace and
transfer this one. I constructed it onto a small
piece of watercolor paper. And then I punched holes in
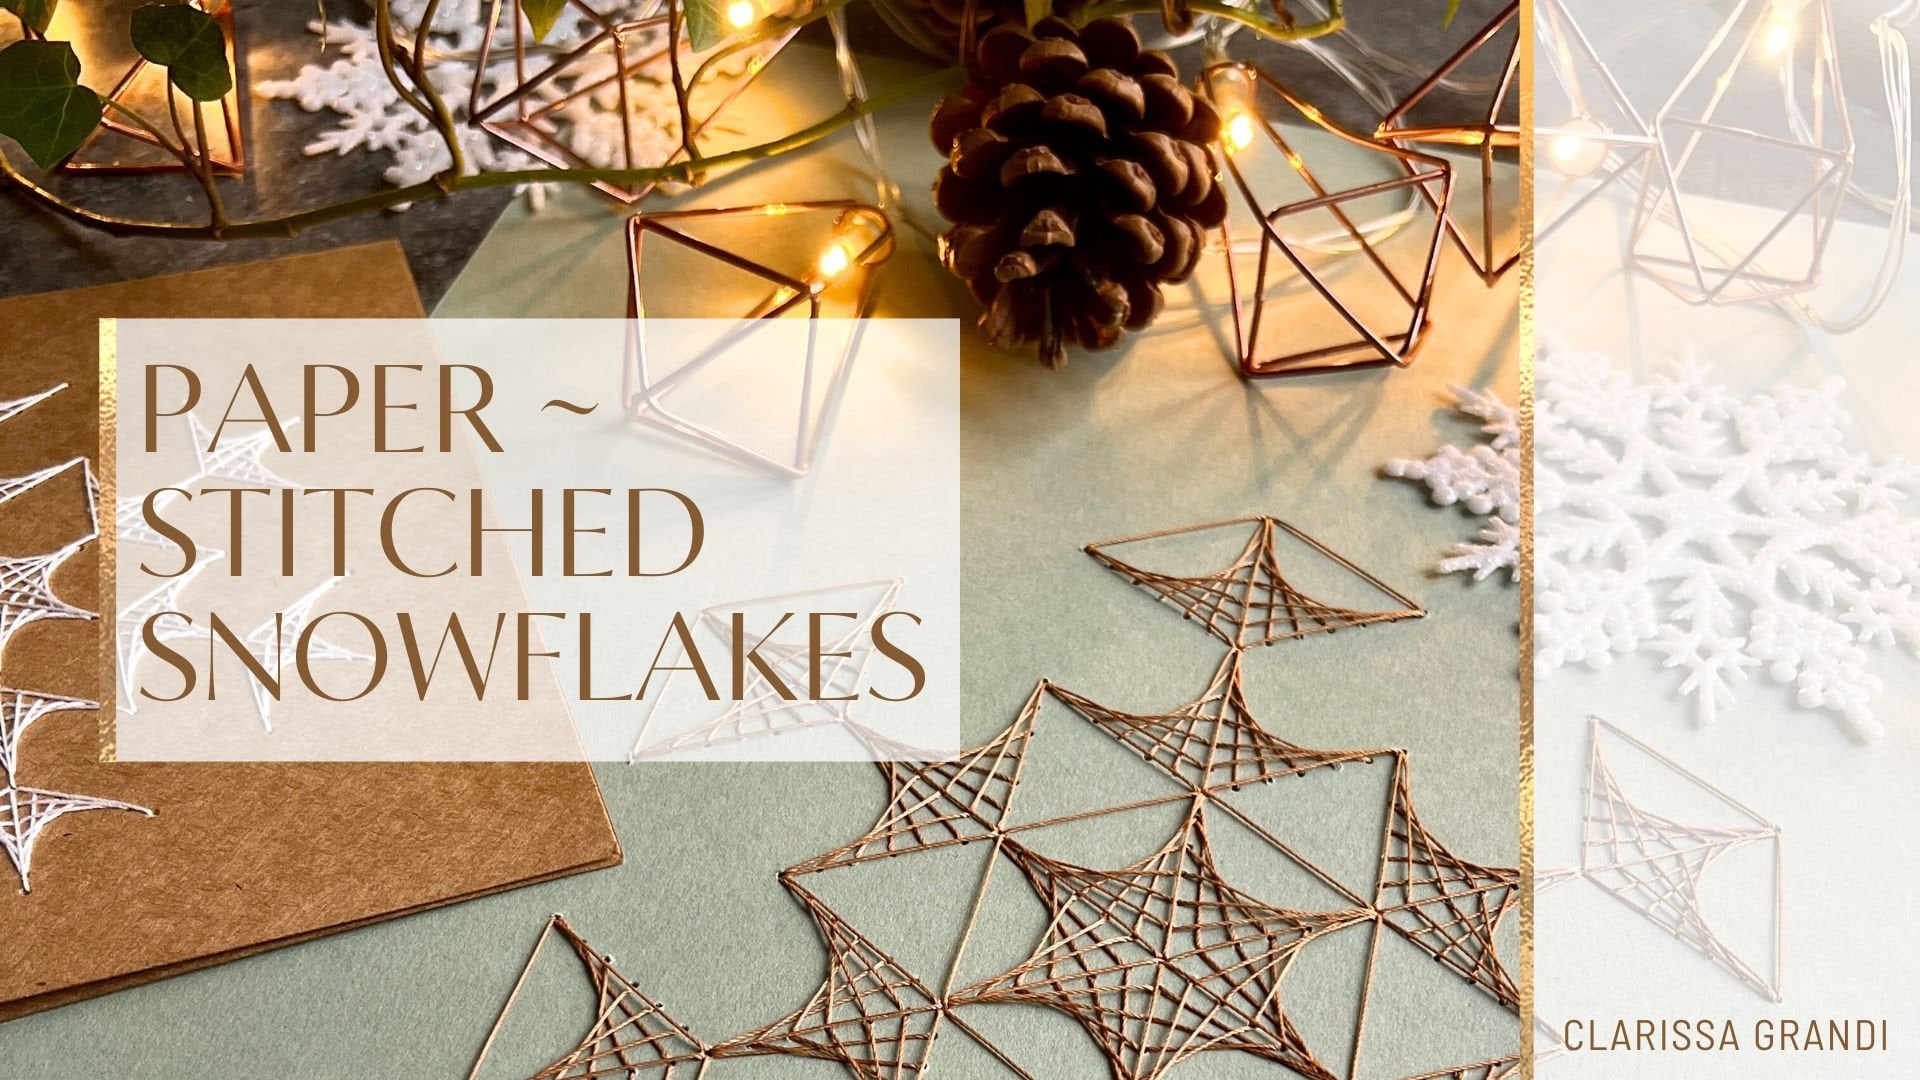
the corners of the pattern, and I've stitched it. And if you're interested in
doing any paper stitching, I've got several classes on how to stitch onto paper
and secure your work. I picked a thread color
that matched with the craft paper card that
I wanted to mount onto, and I'm quite pleased
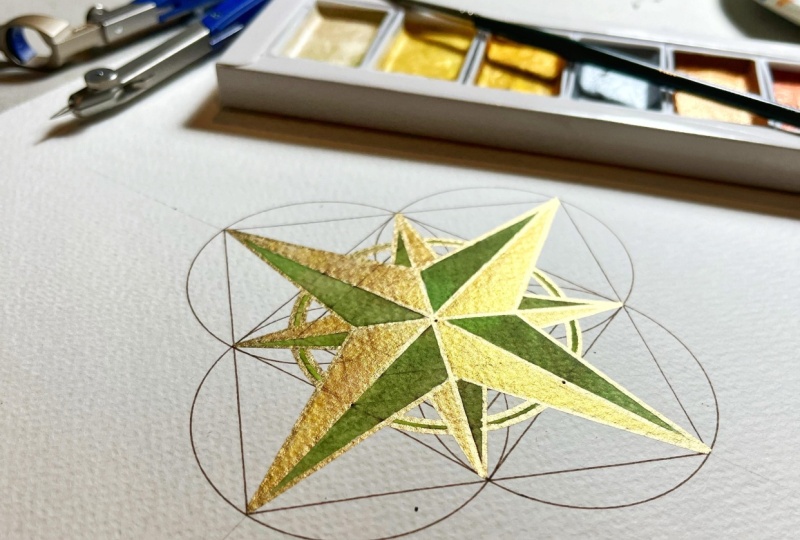
with this one. And then this one here has been outlined in gold pen again, and this one I've painted with gold paint and watercolors. And you can see that I've added a triple ring around
that center circle, which I've then colored in with the green
watercolor paint. And it just looks a little
bit more ornamental. And this is rather lovely. You're not sure what I'm
going to do with it. Might mount this one on a
greetings card as well. So there's a few ideas, but I'm sure you'll
have lots of your own.
11. Conclusion: Thank you so much for joining me for this geometric art class. I do hope you're happy with
your finished compass star. I'd love to see
what you've made. So if you share your
work on Instagram, please use the hashtag
Geometric Compass star and tag me at
Clarissagrandy dot art. And if you've got any questions, please pop them in the
comment section below, and I'll do my best
to answer them. I regularly offer
live online classes covering various geometric art traditions from all
around the world, and I'm also creating a growing collection of on
demand classes on Skillshare. So do check out the links in my bio if you're interested
in learning more. All that's left to say, then is take care and happy holidays.