Transcripts
1. Introduction: Are you an artist,
sewer or crafter, who enjoys using symmetry
and pattern in your work? If so, you might be interested
in learning how to create curved geometric patterns from a simple straight line
grid. Hi everyone. I'm Clarissa and I'm a geometric artist and teacher
from Suffolk in the UK. Welcome to this mini workshop where I'll be
teaching you how to hand stitch parabolic curves
onto watercolor paper. The stunning designs
that you create will be suitable for framing and
displaying in your home. For giving us to loved ones, or for using in card making
for Christmas cards, or cards for all occasions. Join me as I take you through
everything you need to know from the materials you'll need to
complete the project. How to draw the pattern using
the principal templates. How to prepare your paper
or card for stitching. And how to sew both a simple and a more complicated
multi layered pattern. Finally, I'll also
be showing you some more design ideas to
spark your imagination. So let's get started.
2. The Class Project: The project in this class is
to design and hand stitch a parabolic curve pattern onto
watercolor paper or card. We'll begin by looking at the materials needed to
complete the project. I'll then carefully demonstrate
the process of drawing the pattern on paper first so that you're
confident with how it works. Next, I'll show you how
to align the template centrally and how to punch the
holes ready for stitching. Finally, I'll demonstrate the simple parabolic
pinwheel design before showing you how to add further layers to build the
complexity of your design. I'll also be showing you
some alternative designs to spark your imagination. You'll need your printable
templates at the ready. Do download the
class notes below, which come with a
handy materials list, as well as some additional
design ideas to try. When you've finished
your project. Remember to upload
some photographs to the project section. I do so love seeing
your work and it's also great for other students to have a bank of images
to be inspired by. Let's get started on
this project with a closer look at the
materials that you'll need.
3. Materials for the Project: Before you start to stitch, you're going to need to pre
punch the holes in the paper. For this stage, you're
going to need a ruler, a pencil, and an eraser. You'll need to print off your chosen size of
printable template. You can choose from
small, medium, or large. You'll need something to
pierce the paper with. I use this little paper
piercer, You could use a pin. You could use the point
of a drawing compass. Something that's going
to pierce the paper, but not make too
large a hole in it. You'll also need
a soft surface to place under your paper while
you're punching the holes. This old felt laptop cover of mine is really
useful for that. Or a cork table mat, or if you haven't got
either of those things, then a piece of cardboard from some packaging
would be fine. You might find a small
magnifying glass useful, depends on your eyesight. It can be useful just
for precision purposes. And finally, you'll need the paper that you'd like
to stitch your pattern on. I wouldn't go too
large because you're going to be manipulating
the paper quite a lot. You'll be turning it up
and down as you stitch. So anything too
large just gets in the way you could think about a little
postcard size piece. This is a 20 centimeter by
20 centimeter square piece. This is an four
letter sized piece. Watercolor paper is best
round about 300 GSM. The paper needs
to be quite stiff in order to support the
weight of the stitching. For the stitching stage, you're going to need the thread you want to stitch
your pattern in. I like this fine metallic
machine embroidery thread. It adds a lovely decorative
glint to a piece of work. But any sort of thin thread, I wouldn't go too
chunky or thick. For example, two or
three strands of embroidery floss would
probably be perfect. You'll need a needle. A
general purpose sewing needle is fine, nothing too thick. You don't want to make the
hole in your piece of paper too large a pincushions useful. If like me, you're constantly
losing your needles, you'll need a pair of scissors, any old scissors will do. And finally, some masking tape to secure the thread on the
back of the sheet of paper. This I find is the easiest, most convenient way of doing so.
4. Curves From Straight Lines: Before we start, I think
it's a really good idea to have an idea of how
the pattern works. You can use one of the
principle templates for this practice, drawing a few of the parabolas before
you start to stitch. Essentially, the
parabolas are formed between two lines that
make up a V shape. You could have, for example, a parabol going between
these two lines, or these two lines, essentially any pair of
lines that met at a point. There are also wider V
shapes within the pattern. For example, this
is a wider V shape, two lines that met at a point. You can draw a parabola between any pair of lines
that meet at a point. I encourage you to explore various different
ways of doing so. What I'm going to
do is highlight for you one of the V shapes. I'm going to be homing in
on this red V shape here. And the parabola we draw
will span this V shape. Now it's a really good idea when stitching to start one step in, and I'll explain why in a sec. Rather than starting by
joining the outermost point on one arm of the V to the innermost point on
the other arm of the V. I'm going to come one step in. I'm going to start here. That means I'm going to step
one step out on this arm of the V. On one arm of the
V, I'll call number one. We start on the outside, away from that center point, but on the other arm of V, which I'll call number two. We start on the inside, one step away from the
center point of the V, where the two lines meet. Your first stitch
will come up here, emerge onto the
surface of the paper, and you'll stitch across
to this point here. You'll then come out and come up right next door
to save thread. It's a good idea to just take a short a step as possible on
the underside of the paper. You'll come up this
point next door. And this 11 step
out on this line, we'll join up with one
step in on this point. And this point will be where
your next stitch occurs. You will enter the
paper up here. You will then emerge
one step in along this line and stitch to one
step out on line number two. You'll then emerge
on line number 21, Step out and stitch in to one
step in on line number one, you work your way down line
number one, line number two, joining up pairs of
points or holes in that way until you get to the penultimate pair
of points on each line. Stop there, Move onto your next parabola
and only complete, if you like, the
two red stitches, once all your
parabols are drawn. Because if you put this
stitch on straight away, this stitch along
the line of the V, you've then got a piece of
thread running on top of all the little holes that you want to be
stitching in and out of. Next it'll just get in the way. You'll have to keep nudging
it out of the way with your needle in order to enter the hole or
emerge from the hole. These two stitches, or any of the stitches along these axes should be the final
stitches you complete. I'll demonstrate that in the stitching section
of the lesson. Okay, I would have a go at
drawing some more parabola, V shapes, perhaps experimenting
with overlapping. You could, for example, work on this one that
I've done in green. On top of the one done in red, I would start on the outer 0.1 in on this green
arm and join it to the inner point on this green arm and work in
that way, one in one out. Working my way along, I can overlay way one
parabol on top of another, parabola in another V. You can come up with all interesting
combinations, patterns. In this way, you
can see when you have two parabols
overlapping each other, you get a whole new
curvy shape emerge. I'd encourage you to get a feel first for how parabolas work. Perhaps join up a parabola
along a wider V shape as well, just to see that you get a shallower curve
from doing that. Then when you feel confident
for how parabols work, you'll feel confident enough
for the stitching stage.
5. Punching the Holes: Okay, so we're now going
to punch the holes for our chosen pattern onto
our sheet of paper. You'll need a ruler,
a pencil eraser. You'll need your paper
pricker of some sort. You'll need a pair of scissors
to cut out your template. And it's also useful to have
some low Tac tape just to secure the template down on the paper when you're
punching the holes. What you'll notice on the template is that
there is a pair of axes, one running horizontally
and one running vertically, a pale gray line. These are here. So that
we can accurately orient our template at the center
of our piece of paper. The first thing we're
going to do then, is to make in pencil parts of a horizontal and
vertical axis in order to have something to
align our template with. The first thing I'm going
to do then is to draw a horizontal axis
halfway up my page. To do that, I'm going to first measure the height of my page. It's just under 20 centimeters. It's actually I think
19.8 half of 19.8 is 9.9 I'm going to move my ruler into the left hand side of
the piece of paper line, my zero of the ruler up with the base of
the sheet of paper. And measure up, in my
case, 9.9 centimeters. And then I'm going
to do the same on the other side of the paper. I'm just making a small
pencil mark each time. Then line your ruler up with your two
little pencil marks. I'm not going to draw the line all the way
across the sheet of paper. I only need it where it will emerge from both
sides of the template. I'm going to just
put a pencil line in the outer inch or so
of my sheet of paper. Now I've drawn my pencil
lines quite heavy. You will want to keep
yours nice and light. I've only drawn mine quite heavy so that they're
visible under the camera. I'm now going to do
the same vertically. I now need to measure halfway in my sheet of paper is also
19.8 centimeters wide. Half of that is 9.9 in the
top half my sheet of paper. I'm lining my zero up against the outside edge and I'm
making a little mark, 9.9 centimeters in, which
is my halfway point. Them in the bottom
half of the sheet of paper line my ruler up
along those two points. I'm only making my pair of lines on my vertical axis at the top and
bottom of my sheet. Where they'll emerge outside
the edges of the template. I'm going to cut my
template out now. Just around the dotted line, you can choose to orient your
hexagon with the points, the vertices facing along the vertical line or along
the horizontal line. That's completely up to you. I like it in this
orientation best. I'm going to align my hexagon
template this way up. I'm just going to align
one of the axis first. So I'll look at my vertical
and make sure that little gray line is in line with the pieces of
vertical axis I'd put on. And then looking at
my horizontal line, I can see I now need
to bring it down. Just make a few minor
adjustments until it looks like all my pieces of
axis are lined up together. Then I'm going to use a
little piece of low Tac tape masking tapes perfect
for this or washi tape. I might just detach mine
on the back of my hand a couple of times because
I don't want to tear the surface of my paper
when I remove it. I'm going to pop one at the
top and one at the bottom. Okay. The templates
in place now, you have to double check which holes you're going to need to punch to make your
chosen design. Because you don't necessarily
need all the holes on the template for the pattern
I'm going to demonstrate. I do need all the
holes on the template, so I'm going to punch all
the holes that you can see. I'm going to work
systematically just so I can keep track
of what I'm doing. I think I'll do the
three axes first and then work my way round the
outer edge of the hexagon. I'm going to press down
on my sheet of paper with one hand just to keep
it flat against the surface. I'm working on my corkboard. Remember, you should
be pressing on your cardboard or a felt laptop cover,
that sort of thing. Then you just press
nice and firmly and cleanly through
as best you can, the center of each dot. Then you want to
check that you've punched all the
lines that you need. You can run your finger along just to make sure there
are holes everywhere. Or hold your piece
of paper up in front of a window
and check that there are a little pinpricks of light wherever you
need them to be. The last thing we're
going to do before the stitching stage is
remove our template carefully and erase
those alignment that we put on earlier.
6. Stitching the Pattern Part 1: Okay, this is the
exciting stage. Then we get to trace out our
pattern with our thread. Now I'm going to do the
rotating pinwheel design, which means that I'll be
putting one parabola in each of six V shapes as I
move around the pattern. If you remember, I need to
start on one of the V's. If I'm a, let's look
at this V here. This V shape here is
pointing to the right. I need to start on
the outside of one of the arms of the V and then I'm going to stitch to the
inside of the other, the side nearest the V. And then I'm going to come out
next door and stitch back from the inner side
of one of the arms of the V to the outer side of
the other arm of the V, but moving one out each time on this arm and one in
each time on this arm. So the first thing
I'm going to do is to cut a length of thread. And I'm going to cut
myself a length of thread round about
an arm spans with. I wouldn't go any
longer than that. And that's quite long really. But I need a fair old amount because I'm working on
the largest template, so I'll be using up my
thread pretty quickly. If you're working on one
of the smaller templates, you won't need such a
long piece of thread Each time I'm going to
thread a needle, I like this metallic thread. It's nice and easy to
thread your needles with. Then I'm going to draw most of the piece through
which has the effect, or at least half the piece
through that has the effect of considerably shortening the amount of
thread I'm working with, which makes it easier to use. Then I can just
lengthen it as I go. I'm going to
identify my V shape. I'm going to come
one in on one of the edges and I'm going to come up through the
back through that point. I'm going to draw my thread
through until I've got about 2 " two to 3 " remaining. I'm going to use a piece of tape to secure that piece down. I'm just making sure
that it's not lying across any of the holes
that I need to sew through. I've pulled it to the outside. I'm just going to place
a piece of tape down. Press firmly all the way along the thread to make sure it's
been gripped by the tape. And then press firmly
all the edges of the tape so that they don't catch on the
thread as I'm stitching. When I'm happy that that's
nice and flat and secure, I can start stitching. I just need to keep tabs
on where I'm going. I've started one in
from the outside edge of this arm of the
V. That means I'm going to go one in to
the inside edge of this arm of the V.
This hole here, Outer hole on one arm goes to the equivalent inner
hole on the other arm. Then it's a good idea to keep
the thread taut as you go, or just check on it regularly
and give it a little tug just to keep it taut because you don't want to have to fix
that after the event. What I'm going to do now
is I'm going to come up through this next door
hole on this arm of the V. And then I'm just using my finger on
the back of the sheet of paper to clamp that
down, keep it taut. And I'm going to pass through
one hole in on this arm of the V, pulling it nice. And t I'm going to come up
one step forward on this arm. Now one step further in this point gets joined to
this 11 step out on this arm. We're always moving
one step in on one arm and one step
out on the other. I'm at the stage now
where I'm going to pull a little bit
more thread through my needle just to lengthen
the piece I'm working with. I've just gone into this hole. That means I'm going to come out here having a gentle tug just to get all those
threads. Nice. And. Clamp it down with my thumb. While I'm inserting my
needle into the hole, I can see that lovely curve of the parabola
beginning to emerge. For now, I've just got one
more straight line to put in, going from the penultimate
point on this arm to the one that's one step in from the point of the V
on the other arm. For now, I'm going to leave those two final
lines that go along the outside edges of
the V. I'm going to leave them until I've
stitched all my parabolas. And then the last thing
I'm going to do is to put those edges in. I finished one parabola. I now need to think about
where my next is going to be, because I still have a significant
amount of thread left. I'm going to carry on and
start a new parabola. The next I want is
going to be pointing, if you like, another
step around the shape. Because I'm going to always do a V pointing if you
like, to the right. So you could turn
your piece of paper over and get yourself oriented. Again, I've just seen
that I missed a hole. Okay, that's better. So I'm going to emerge
out of this hole here on this arm of the
V. That's one step in from the end and I'm
going to stitch to this hole on this arm of the V. That's one step
in from the point V. Again, a little bit of a tug just to keep this parabola nice. And I'm going to go from
this point to this one. Then I'm going to come
up at this point here, one step out on my way
away from the point of the V and come one
step in on this, one step in to one step out, one step out to one step in, Because I'm keeping one shy of the very end and I've got a
little bit of thread left. So I think what I'll do is
start the next parabola, and then I'll have to
cast off that one, sort of halfway
through the parabola. So we'll have a look
at how to do that. Now, working on a whole new V, I'm going to start one
point in on this arm and join it to one point in for
one point out on this arm. I'm going to stop here. All I'm going to do is turn my sheet of paper over,
remove my needle. I've still got about 6
" or thread left there. And I'm going to get
my piece of tape ready, get a decent piece. You could, of course, cut these pieces of tape
with your scissors, but I'm not too worried
about what the back looks like Then giving
it a gentle tug, Just making sure I've
pulled it nice and taut. I'm going to pull it
away from the holes, secure with my tape. Running my finger
along the tape, along the thread underneath the tape to make sure it's
all stuck down securely. And then along all
the edges just to make sure those are stuck down and won't
catch on my thread. Then I'm going to cut my thread just before it emerges
from the paper. About here, I'd like to leave a little bit of a
length on about 2 " on, just in case at any stage
I need to remove the tape and tug on the thread
to tighten it a little. Having a little piece there
to work with is handy. So I don't ever cut it off
too close to the hole. Okay, So now I've got to pick up midway through my parabola. And the easiest way to
do that is to think, well, where have I emerged? If I was continuing with this piece of thread, where
would it have gone in? Well, I would have
emerged here and then gone in at the
next door point. That's where I'm going to start, as if I'd never broken my
thread in the first place. I ended here. I'm
going to go in at the next door point here. I would have gone
if I'd just been continuing going
to draw my thread through until I've got
about a couple of inches. I'm going to secure that
before I go any further, then I can just carry on. I need to reorient myself. I went through there,
I've come out here, which means that I'm now going to stitch to the
other arm of the V. One step along and then I'm off. Okay, so this is the final
stitch of this parabola, because I'm leaving the
very outermost holes free. For now, I'm going to move
round to the next one, starting one hole in the final parabola. Now on my little
pinwheel pattern, and then I'll have the axes
and outer edges to stitch. I've ended here, I'm going to
pop up in the V next door. Okay? So this is the final stitch of the parabolas before I
put those final lines in.
7. Stitching the Pattern Part 2: To do the final edges, the three axes and the
outer edge of the hexagon, you can just do it in one giant stitch like we've been doing. I might come out here, enter in there, come out here, and work my way round like that. You could actually just stitch
through individual holes. So you could do either
a back stitch that you've stitched through all the individual holes
to make your line, or you could do a
running stitch and then run back on yourself
to fill in the gaps. But I'm just going to
do one large stitch that goes from point,
vertex to vertex. To do that, I'm going to come up now on one of
these outer holes, you can go in either direction. I'm going to come down to here and stitch that outer edge, and it has the effect
of covering up the holes a little
with the piece of thread and finishes it all off. Now I can either come out here
and double back on myself, or I could come out at the
center and put the stitch in. I might come out at the center, actually, I haven't got
very much thread left. I'm going to come out at
the center now and put this stitch in along
this half of the axis. What I've done now, I've
finished off one parabol, it's got its two
outer edges in now, so this one is complete now. I haven't got very much left. I might have enough.
One more axis. What I'm going to
do is I'm going to bring my needle up here and stitch back so that I've covered this
outside edge here. I'm going to go all
the way across here. Just got enough thread. Think yes, now that
outside edge in, I'm going to secure my thread. Okay, I could really start because I'm just
doing these outside edges and these axes, what I might do is
come up at this vertex here and maybe stitch into the center or stitch
this outside edge, then come out at the
center and so on. And just fill in the last
remaining edges as I go. This is probably one of
the easiest patterns to do because I'm not overlaying a parabol on top of a parabola
that's already there. That's when it can get a
little more confusing. What I think I'll do is, although this one's complete, I think I'm going to demonstrate overlaying a parabol in a
different orientation on one of the V' here so that you can
see if you want to tackle a more complicated pattern
where we've got lots of different parabolas rotated
around the same triangle. How to think about it and how to keep yourself
from getting too lost. The main thing is
to keep tabs on, on the V that you're working in. Remember, you'll always
be working in a V shape, whether it's a more
acute angled V shape or a wider V shape, using one of the central
axis or the outside axis, it will always be a V. You'll
always have two arms of it. Just keep in mind which two
arms you're working on. Ignore all the other visual
noise and you should be fine. Remember, you're working down one arm towards the
center of the V, and on the other
arm, you're always working in the other
direction out.
8. Stitching the Pattern Part 3: To demonstrate that. I think
I'll use a different color. I'll use my copper thread, and I'll put on this one. Oh, I think I might do it
going in the other direction. If we have a look at this here, it's pointing up out
in that direction. I'm going to do one
that's going to point in the opposite
direction here. This one from top
left into the center. The one I want will curve from
top right into the center. I'm going to be working along
this arm and this arm of V, which means I need to
start one space in on this arm of the V.
That point here will join to one step
in from the point, or out from the point on
the other arm of the V. I'll work from here to here. Then I'll step one along back, one a back, one along
back and so on. I think if you map it
out in your mind first, that will help you ignore all the other stuff
that's already there. Let's have a go to in that
I'm going to be working here, along here and do here. I think it's always better to
start at the outer edge of the hexagon just because you can keep your tape
along the sides. I'm going to come
in one step in. I was at the end of this arm. Means I need to start
near the point on the other one in from the
point is where I'm going. Then I want to pop up one
along to cross over to one in. When you're passing your
needle through holes that have already got
stitches going through them, just be careful not
to split the thread, the thread that's already there with the needle as
you pass it through. If you feel you have passed your needle through the thread, just withdraw the needle
and have another go. You don't want to
draw your thread up another piece of thread
because it'll fray it. I've emerged out here, now I'm going to cross
over the triangle to a space one in from
where I emerged last time. And then I want to
pop up one next door looking a bit baggy.
So give everything. Ah, now what I've done
here is I've emerged on the outside of this piece of thread that forms the
edge of my hexagon. And that means when I
pull my thread tight, I'm tugging that over. I don't want to do that. I want to come up on the inside of it. So, I'm just going to pop
my needle through that. Actually, I I'm not pulling
on that outer edge. That's why the outer edge
is always the best thing, is always what you
should do last of all, and then you don't risk
catching it as you work. And I'm crossing my
triangle over here. If you want to do overlapping parabolas like I'm doing now, I would do them before you've
put your final etches in. Otherwise, you'll have
this little bit of a hassle trying to
avoid that edge. You can see that if I continued and did one in every triangle, I'd get this nice flower shape. In fact, maybe I will. Yes, I don't want to
leave it half finished. I'm going to continue and finish the pattern with one half
in gold and 12 in copper. One pretty little flower design.
9. More Design Ideas: I'll just finish by showing you some examples of different
ways of stitching, as well as different
types of paper to stitch on and different colors
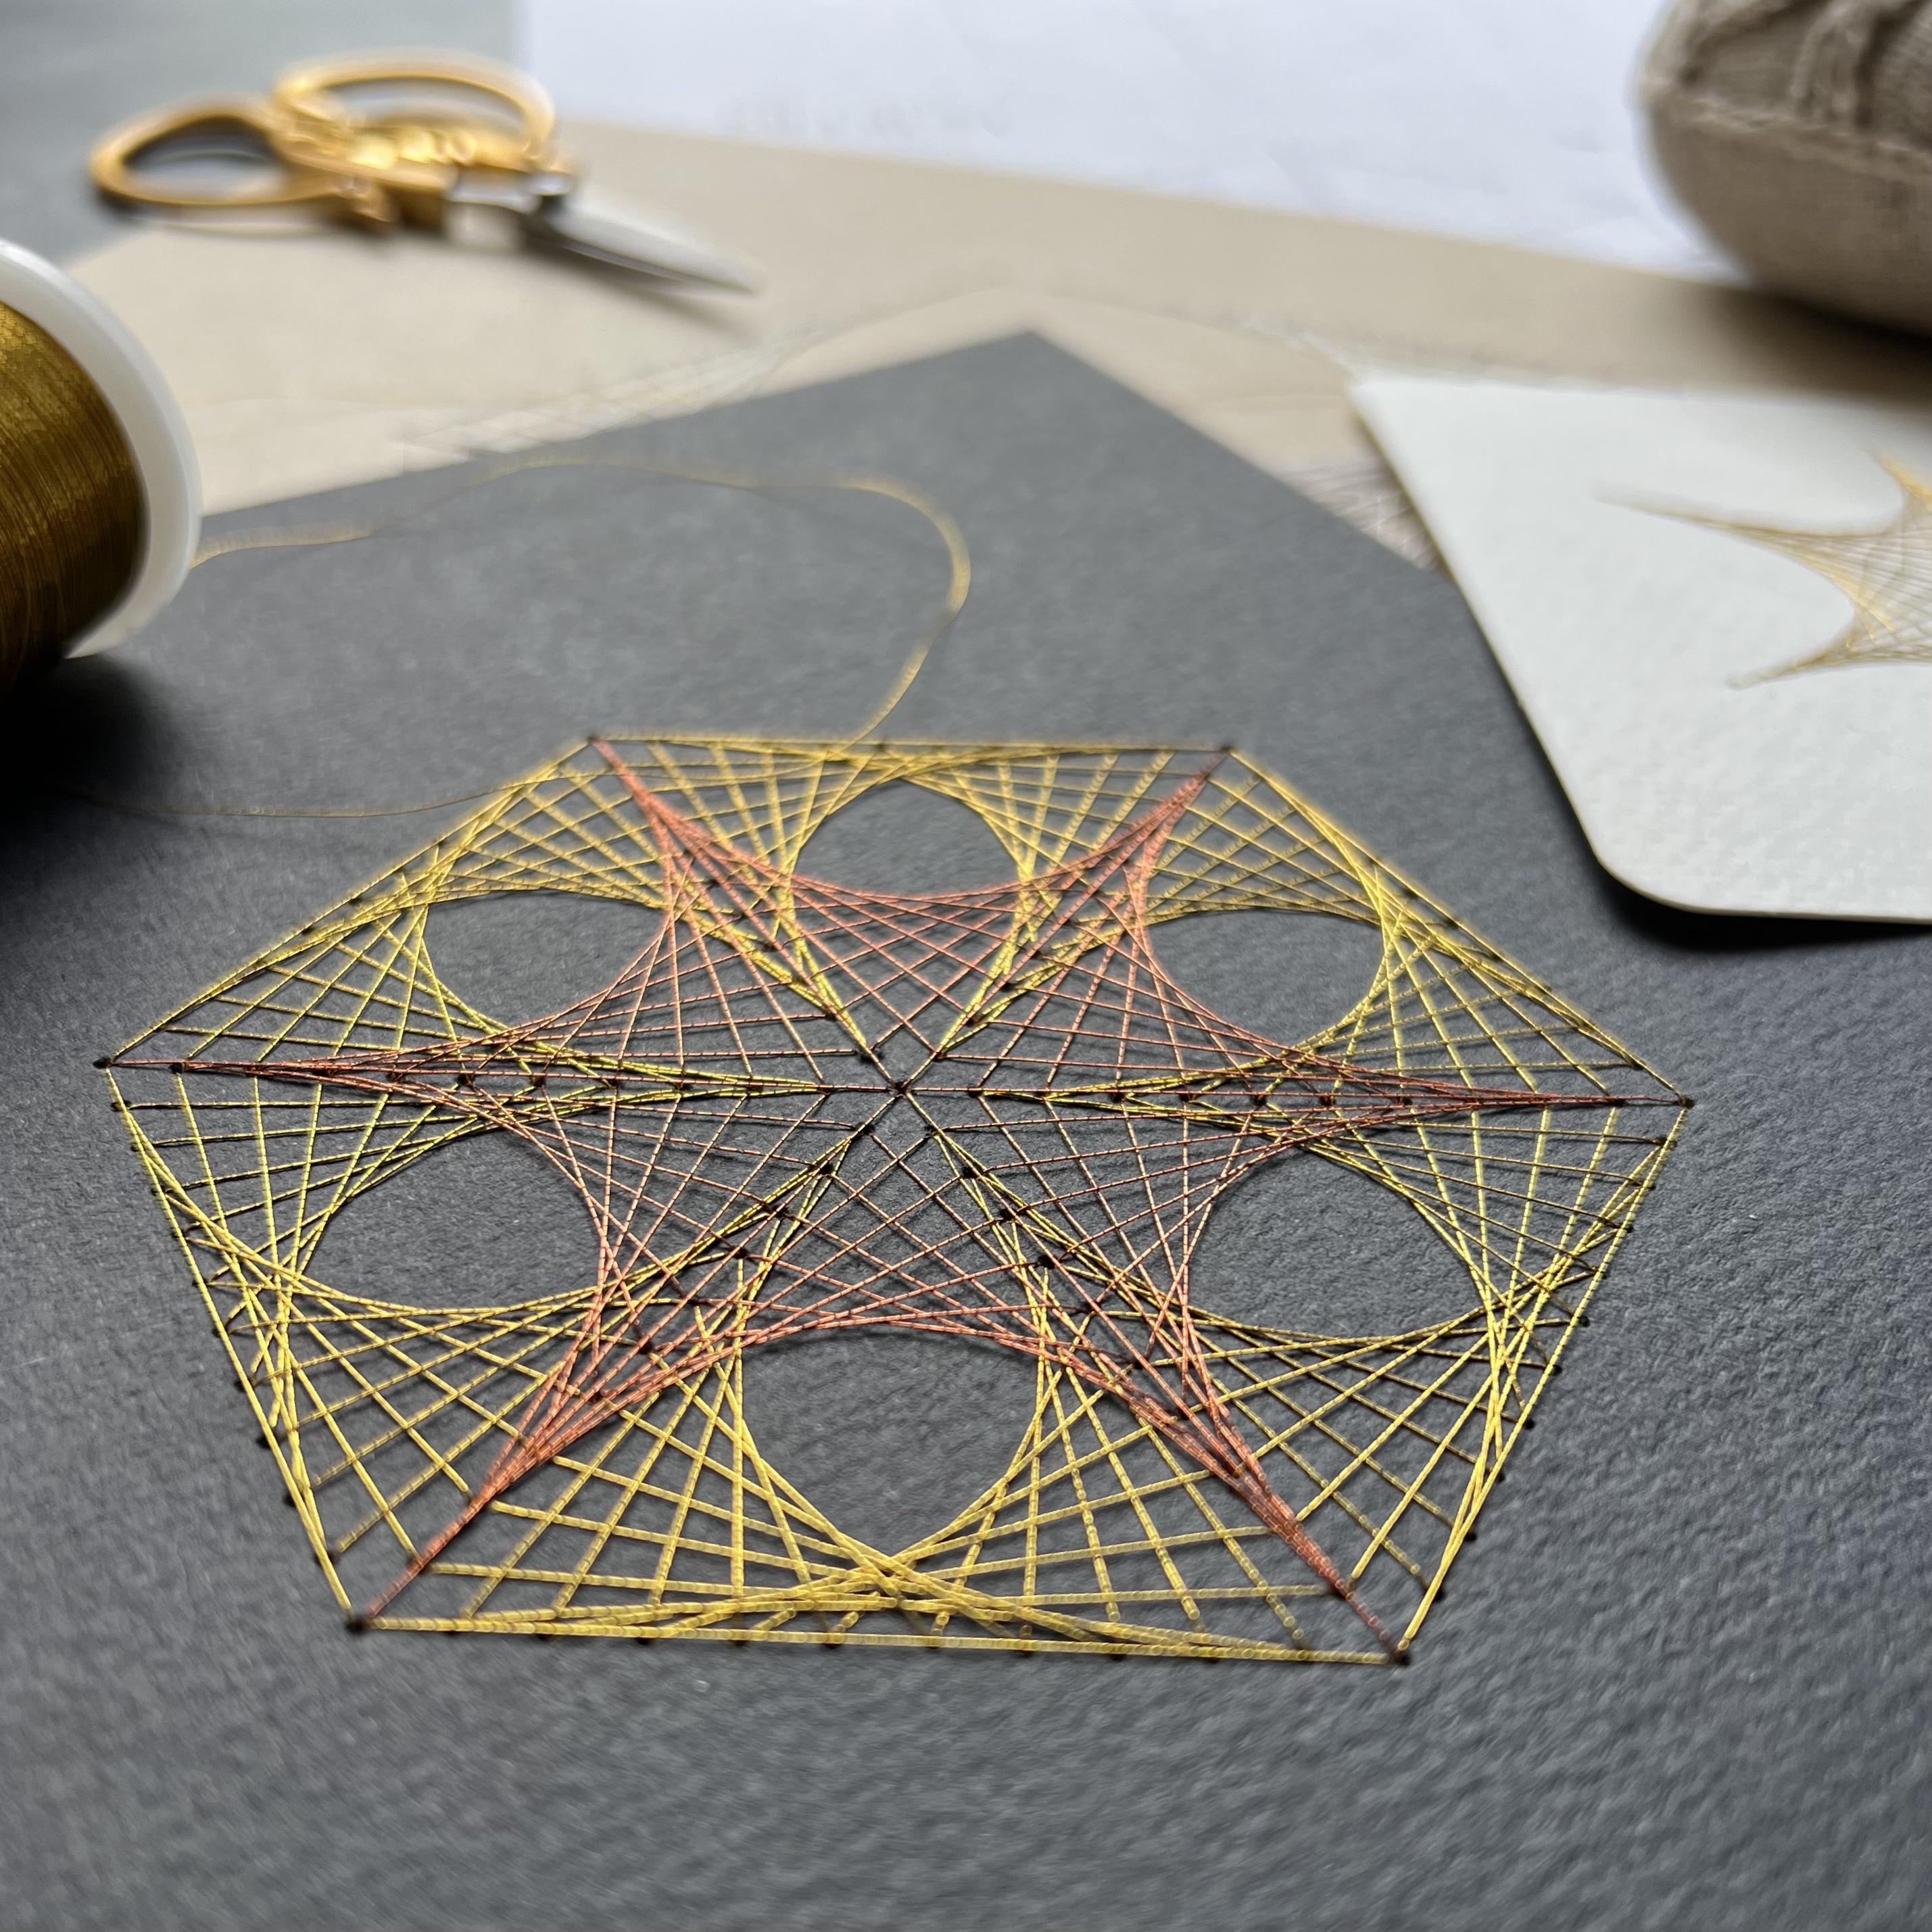
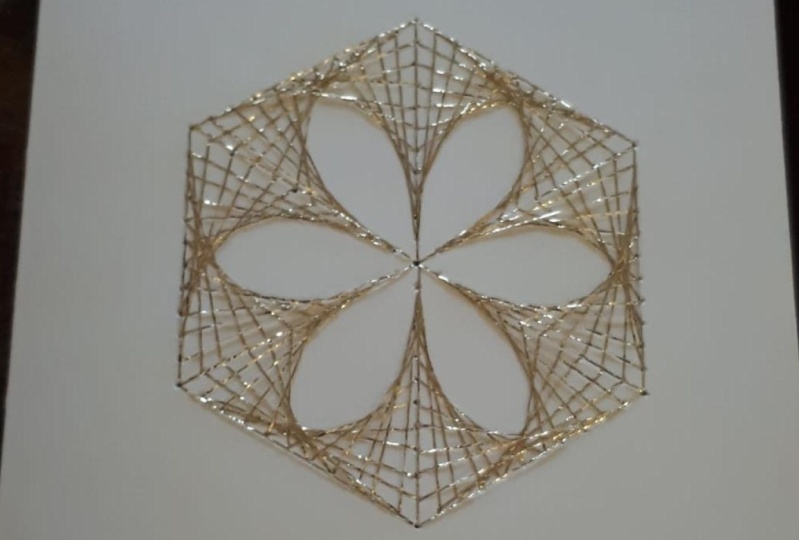
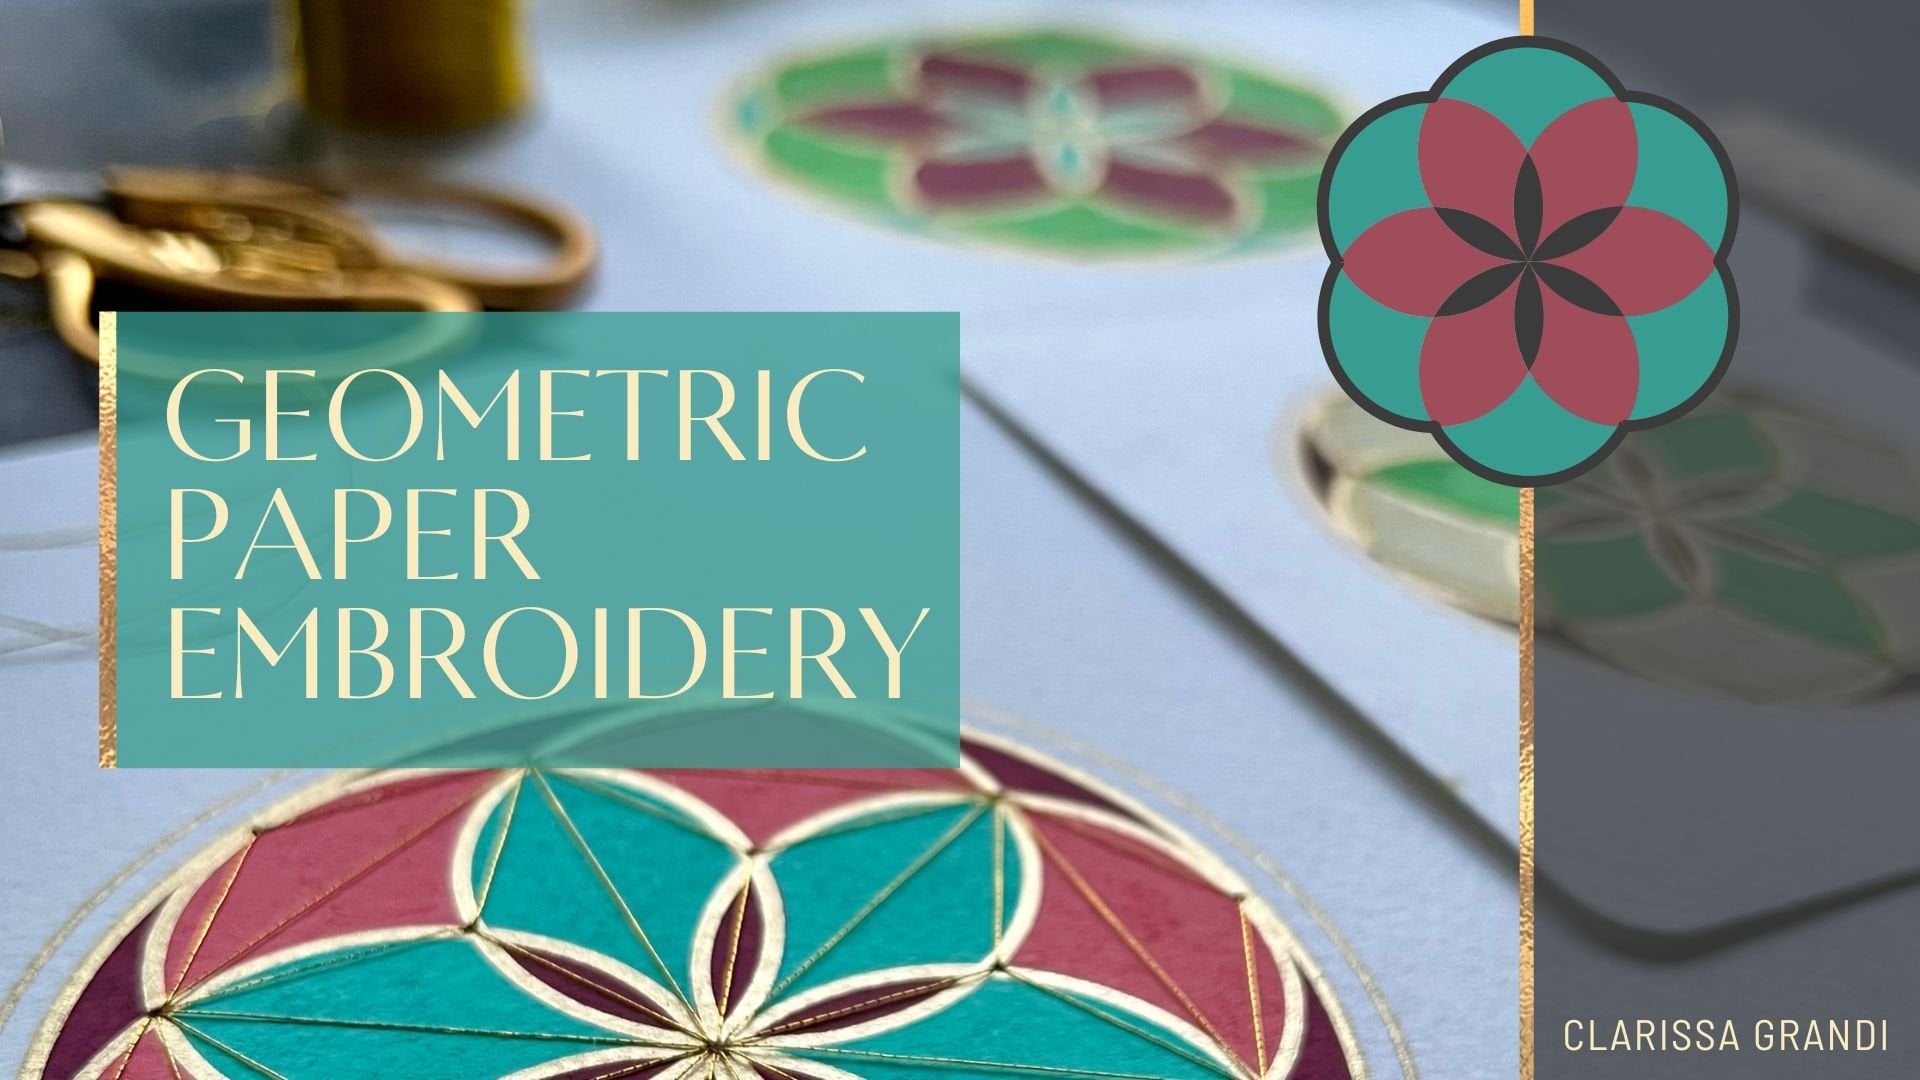
of thread being used. This is the pattern I've
done with you today. It's the flower
shape produced from two overlapping parabola in
each triangle of the hexagon. It's really rather lovely, and I'm really pleased with
it in two colors as well, the gold and the copper. This one would be perfect
to mount on a card, to make your own
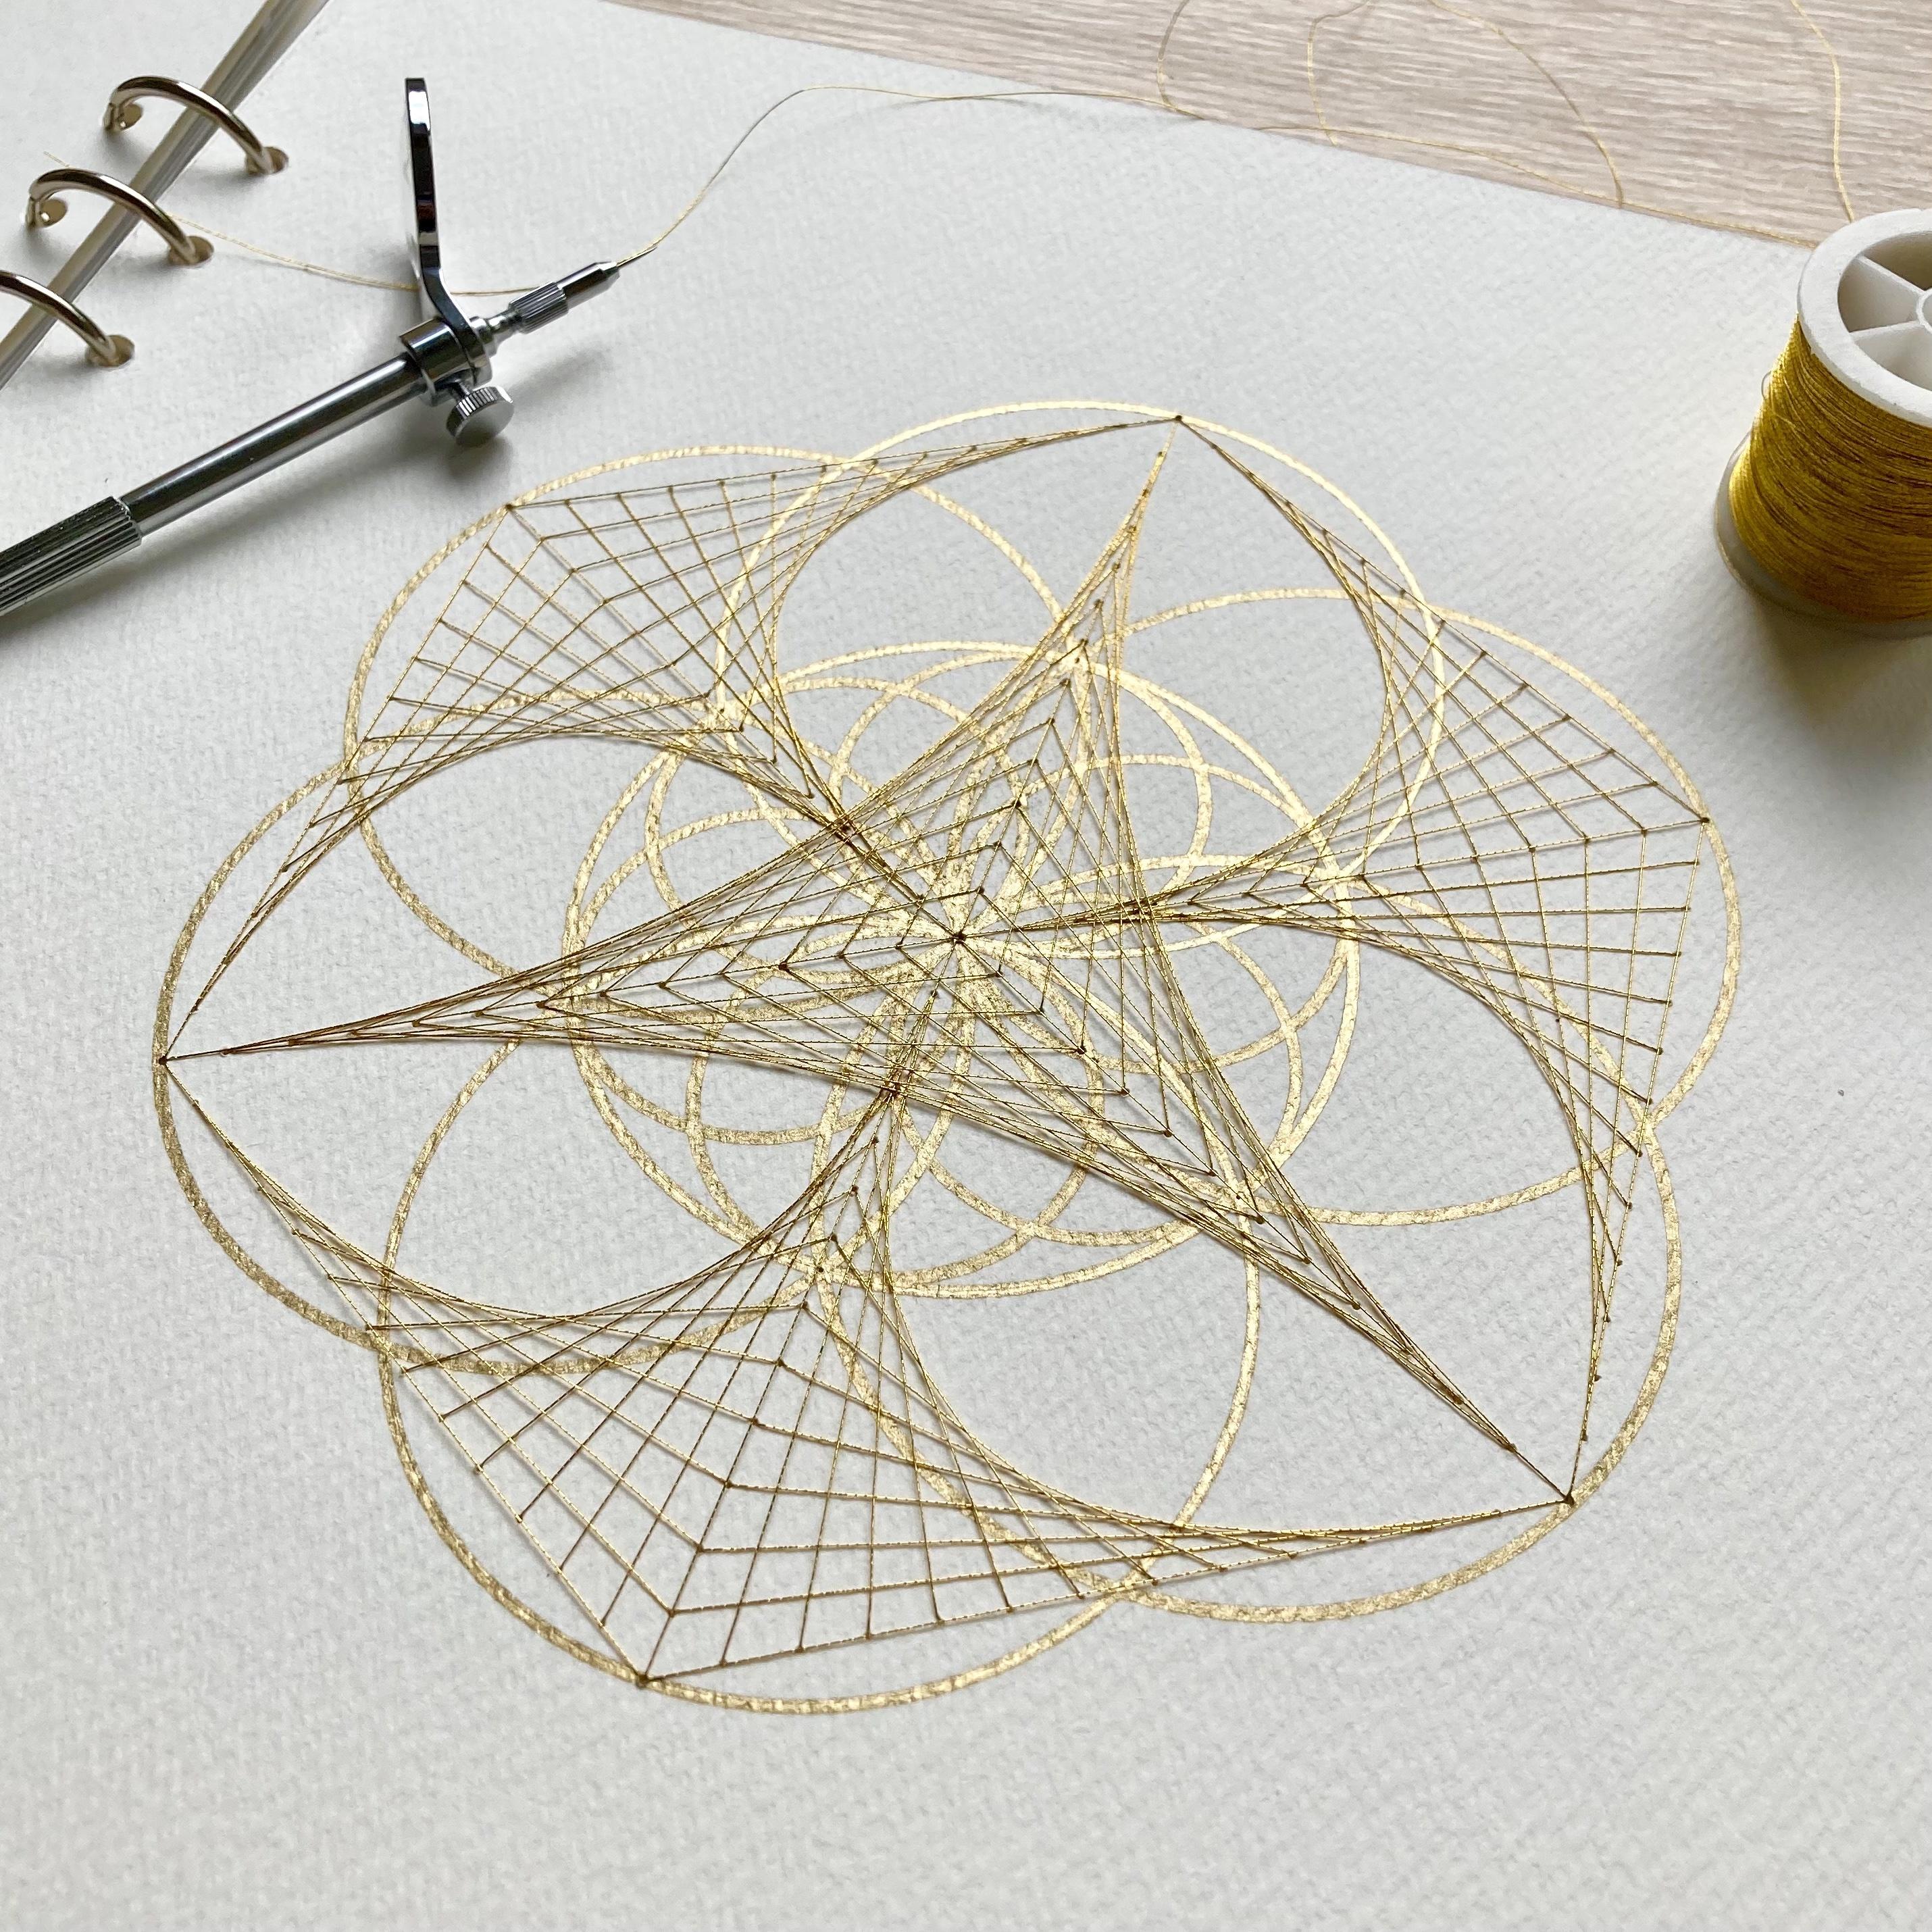
Christmas cards. This is just the central
three axes of the hexagon. The three diameters,
if you like. I didn't punch holes around the outer
edge of the hexagon, I left those and just
punched the three diameters. And then I did one parabola in each V formed by
next door diameters. It's this gorgeous,
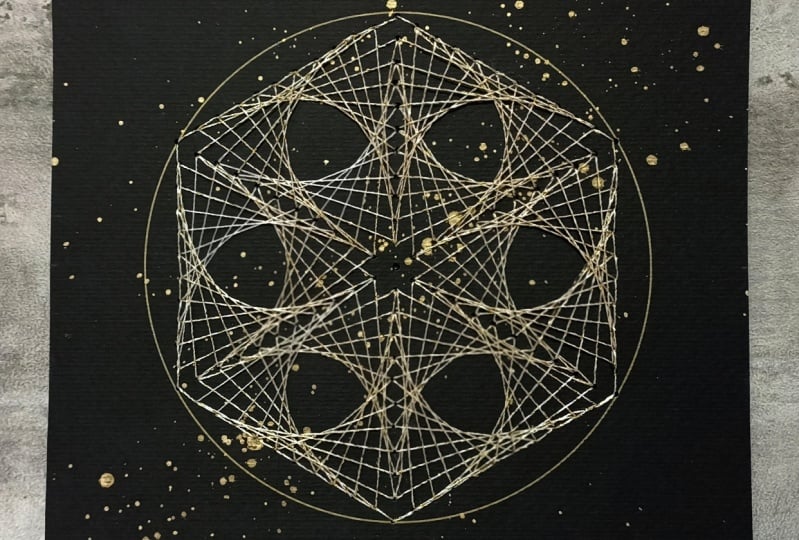
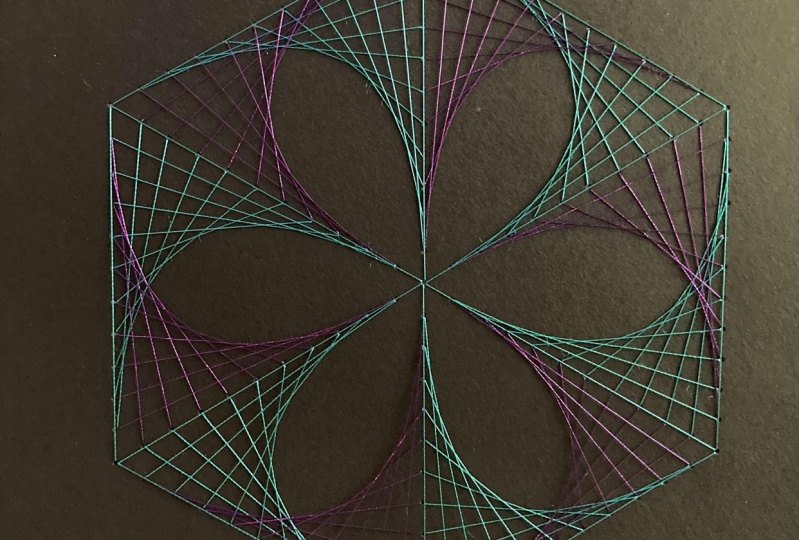
curvy six pointed star. This one here, I chose
to work on black paper, and I've used my copper
and gold thread again. And you can see in copper I have that six
pointed curvy star, which was done using
the central axis, but before I overlaid that copper star
underneath it in gold, there is the flower shape, which is done with two
overlapping parabolas in each of the triangles
around the hexagon. You could either do
this all in one color or you can pick out different elements of the
pattern in different colors. I'm really happy with that one. I think it looks
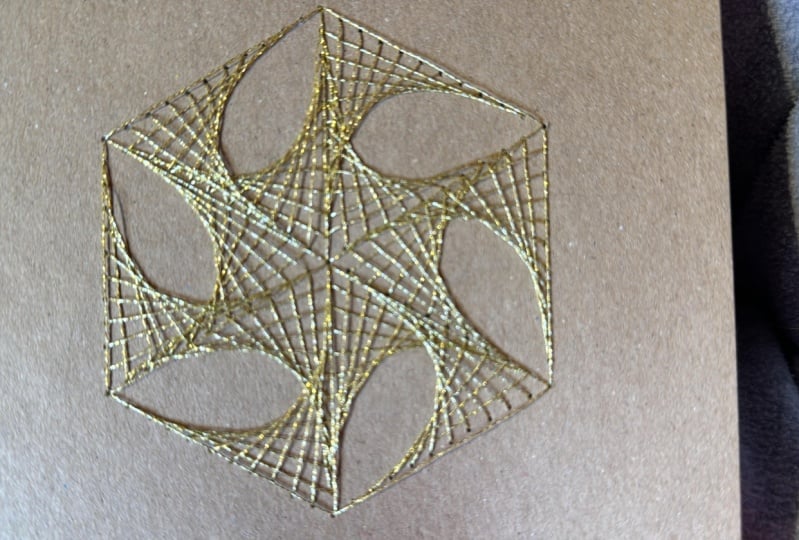
fab on the black. Then this one here is an
example I wanted to show you where I stitched a wider V. And you can see the curvature of the parabol is much
more shallow than it is when you stitch the narrower
V shapes in this one here. Then I punched holes all the way around the
outside of the hexagon. I also did three of
the central axes. I went from the northmost
point down to the center, then out down to the left
and down to the right. And I didn't punch this axis, this axis, or this axis. I did type parabolas in this, this, and this. Then over the top
in white thread, I stitched these wider s
formed by the central axis, and you get this rather elegant, curved triangular
shape sitting on top.
10. Conclusion: Thank you for joining me
for this mini workshop. I do hope you're happy with your little paper
stitched parabolas. I'd really love to
see what you've made. So do share your
work on Instagram. You can use the hashtag
parabolic paper stitching, and you can tag me. I'm Clarissa Grandy Art. If you've got any
questions about techniques or materials
or anything else, then please pop a question in the comments section below and I'll be sure to
get back to you. I regularly offer live
online zoom classes on all things geometric art, and I'm building a
growing collection of on demand video classes
on skillshare too. So if you're interested
in learning more, then do check out the links below to see what's
currently on offer. So all that's left
to say is take care and happy stitching.
 Clarissa Grandi, Artist | Educator | Author