Transcripts
1. Introduction: First of all, thank
you for choosing my class, myself Knit button. And in this class
I'm going to teach you how to make these
amazing mixed up. So this class is divided
into four episodes. Episode one includes
modelling of TEDx talk. Episode two includes
unwrapping of the screen. Episode three includes
material and texturing, and the last episode includes background, lighting
and rendering. Now you can move on to my first episode,
which is modelling.
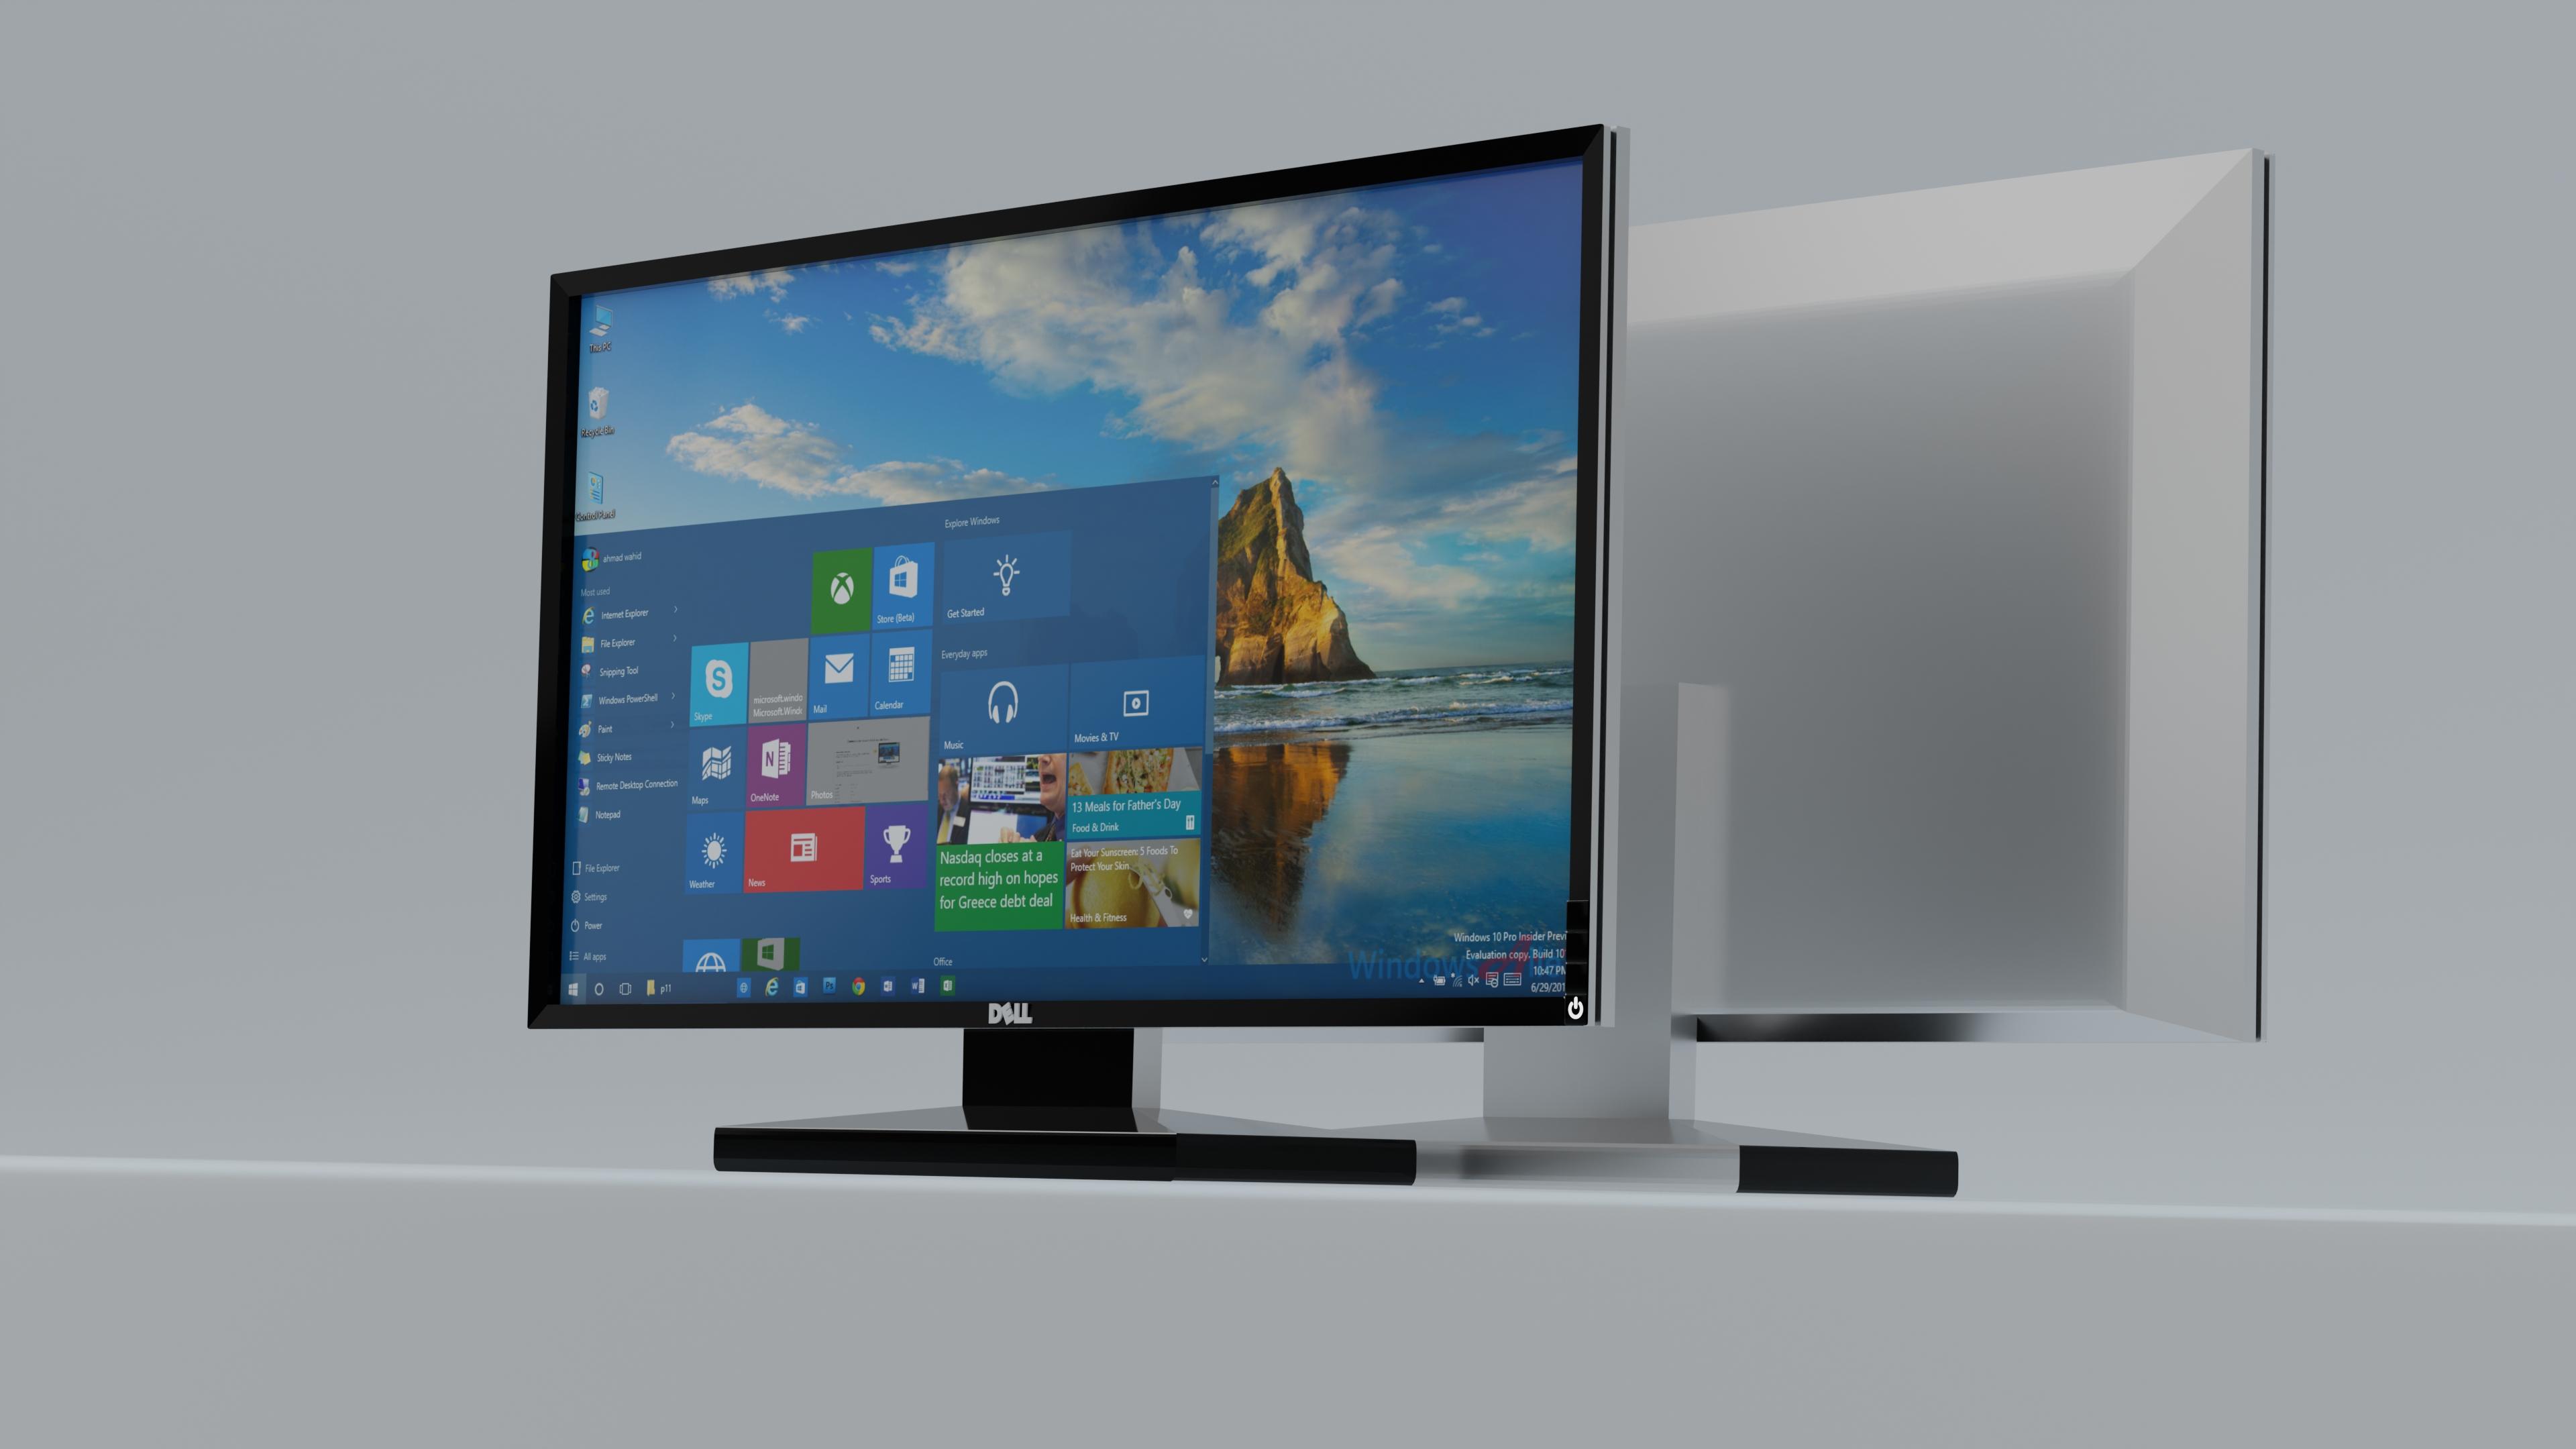
2. EP1 Modeling of Desktop: Hello students, as mentioned
in the introduction video, this video is containing about, uh, modeling of computer. First I open a blender file. Now press a to select all
and press X to delete it. Before I do anything, I just save the file
by pressing Control S. Now I'm adding a cube and tenured statements
and object properties. Now I am changing the
x value into six, y value into
0.14123.20 something. So that Q is look
like computer box. Now I'm going to give a loop cut uncomfortable border so that it looks like it's safe to do so. Collective competence, body
and press Tab to enter. Tech more noblesse controller to add loop inside it like this. Now where it another look good with keeping
a little distance. First electron is, and they also produce
three no object mode, which pressing or double-click to select the middle one phase. No press E to extrude and S
to scale inside a little bit. Now placing again, double-click, select them with the loan fees. But it's controlled
to add a bevel. With the user's mouse wheel. You can have just a sediment. Now we go to editor, big side of computer. Go to the edit mode. Now, press I to insert. This Mondays controlled
by your mouse. Now select the outer
face of computer. Embrace minus x in
viewport to side view. Policing, to grab it and move
a little bit on its head. And press said to selected
part is only move in z-axis and then move downward. Now I'm adding a little
bevel over here. I just select a big part of the body interests
controlled bit too, baby. Now select the front
side of the body. In press I to insert it. This cube is not a square piece, so it does not fit perfectly. For the perfect fit, I will just move
aside two parts. No, selecting their body, press E inside a little bit. Nick go to grab a little bit. No, I am select
the four corners. Letting all four corners. I'm adding a little devil here. Now I am going to make a
photo computer, made a cube. Know but every detail
below 19 really famous and enough to property the y-value into 0.1 level play
in that value into 1. No, I didn't get the VA to. Now go to the object
mode and select the polling mode is nobody's E, S and X and pull like that. Now brings in the body
in the y-direction. Now scale liter to
look more properly. Nobody is T and mu or downward
say e to x to rotate and look to the excellent work. The same way, select the
upper edges and add a bevel to the modeling of
computer screen is ready. When you are satisfied
with your project, you will have to save a
project with Control S. Now, I am wearing the
project on top of XY plane and add a plane. Gender property I
just selected the box is two now we have to create a small
button for a computer. It's a complex part. So what's carefully put
deserts on the screen. And for proper making
open excellent mode. Now the cube and make
the size smaller. And just read a
competent borders. You can go to the tick mark. Press Shift D to duplicate it. One on top of the floor time makes you dissolve because
it is making in object mode. After making this type of boxes. Now to object mode. And make it smaller in size and align with
the computer screen. Now select the boxes D to duplicate it and
put it next to it. No slip the computer body
could be money for sex. Then add a Boolean monitor. Select this button
with the help of eyedropper icon button
and press H to hide it. Now, we have got a
empty box off button. Now, select the button and
put it into empty boxes. Now we give to anyone
would closely linked the other three button and
brig this X to delete it. You, the snip of the button. Add a bevel and
the proper shape. When you ask it
this way, richer. Color mix here, or this persist declared
inside of default. After getting the
job took motor. And the button is almost ready. Hello button is
almost ready for us, but we can now add
a little logo here, warrior from the last button. Now, I circled over here. And Elaine said, Well, do you make this smaller loop and exit and where
to look proper? Making a circle like
this twiddle of t. And it kinda object mode based. Pre-fill it in, press
I to insert it. Now she looked about three
or four phases and deleted. Dig more a to select
all and add a modifier, subdivision level into two. No grave outside a
little more. E to x. To delete. This circle is just silly. Eight vertices and bring them closer to each
other by pressing S. Now I add a cube and do small. But in between this vertical
increase the height. And so the outer part as well as political control, me. Anyway, lingo little
bevel over here. Once the baton ready, select the circle
and cube and press Control J to combining
it together. And produce the right-click. And select this, it's moot. And our button is ready. When you as a display
retail project, pressing the Control S
to save the project. To now add the text and select
the line world to view. Please G to grab in the middle. And by pressing Tab, you're eligible to
write something here. Make this a smaller brigade to middle acuity of object
data property in dogs it into 0.080 for this text. No lubricate. The setting is also
replicate it. And write E. No press R to rotate it
and put it like this. Tech firm believer in, like the board to tape, Control J to doing it. Forget to save your project. The modelling of
tachometer easily. So the next part is
about unwrapping. Hope you liked the
video. Thank you.
3. EP2 Unwrapping Of Screen: Hello students. In the first lecture, we saw how more links? Now today's lesson,
I will show you how to unwrap a
competence being. Now before I do anything, I just select all body parts
one-by-one and rename it. Select the model. And by
pressing double-click the name. The same way, chain name of
all body but this lake me. So now we'll go and
grab a computer screen. Select the body, project, labor, things like the
face mode of the screen. And go to UE, can select smart, give you predict in press. Okay. Now go to the 3D menu.
Object properties. Plus, plus is all over the body. And second place is
the selection part. By placing new open
the screen properties. And by pressing assign
all the changes is done in the screen sex and
not all over the body. Jin, the second material
of name into display. No head image takes a
node loop, one image. Jane to degrade into play. Connect the color of
the mistakes that basic color of principal
focus images appear. What is not perfectly sit on. The solution going
to UV Editing. And we tell, rotate and scale. Hitting a wallpaper
picked on the screen. Venue or to distribute
your own draping. Crusading. Kinda
placed into 0.1 pi. Over on the thing off the
computer screen is done. When you're underpaying is complete, please save the file. Okay, So second lesson
of unwrapping is done. And in the next video, we will see about our
top layer material. So thank you for
watching this video.
4. EP3 Applying Material And Texturing: In this video, I'm
going to teach you about how to apply
materials and textures. So first-year to add
the area light so that we can see or
materials properly. Now just so you can
simply follow my steps. Now I'm increasing my power to 1500 watt so that I can see the shades of
the material properly. I will duplicate this area
light tonight on expeditions. So now we can move on
to or further steps. So first, select
the body part of x dot and apply it
in new material. Now, you have to set
metallic while you do one in specular value to also want to set the roughness
value to 0.275. Now, these two Students in Mali now just go to the edit mode and
interfaces like more. Four feet off the deck. Stop. Now here to assign a new material
through these four phases. And name it as the border. You have to set the
base color to black. Set D metallic value to one, and also change the
specular value to one. You have to set roughness
value to 0.080. So now we're again going
into the edit mode NPC live, nor to again select all the
interfaces posted x dot. And to assign the same
material, namely murder. Now here to select the stent
in the object mode and just go into edit mode here to select this
particular thing. They face select mode. And you can also select the remaining parts
which are unselected. And you again assigned
the same material, but which we'll get to the border like this. Now select this button
section. The object mode. Again, use the same
materials as the border here to select this bar button. And just said D
surface emission. And Jane the strength value 2.5. Now you do again select these interfaces and assign the same material as the border. So over lesson of curing
materials on our deck, stop it or so. See you in the next lesson.
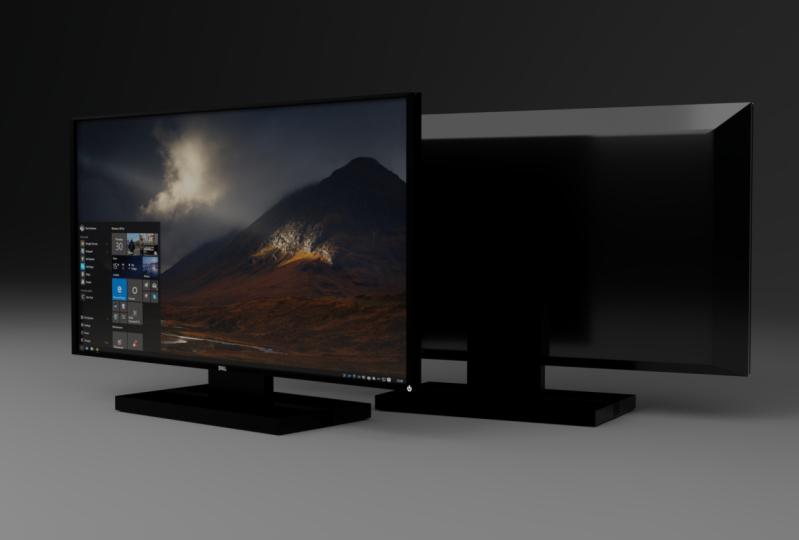
5. EP4 Background Lighting And Rendering: So in this lesson, I'm going to teach
you about how to use some lightings to this desktop. First year to see
that the plane, the object mode, and
scale it a little bit. Now just go to edge, select more and select the edge. And by pressing E, Extrude, extrude it towards
that direction like this. Now select that. And by pressing Control V, add a modifier and add
as much as you want. Now shared it smooth. I'm going to add some lights. The book did extra like this. Scale it a bit the
size of the object, and just follow my steps. So I'm increasing the light
bar to 1 thousand what? Now you can add just
delighting from the top view by pressing
the numbered seven. You can duplicate this
sliding by pressing Shift B. You can adjust your
lighting as per your wish. I'm doing like this. So again, I'm duplicating this slide and moving it towards the right direction to rotate it like this so that it
falls on the object. You are glad another area light you the shape of the
light, blue rectangle. So now lighting is done. So I'm adding a camera. So by grabbing the
camera towards certain direction like this, to curb it again towards divided action and increase
the size of the camera. So that object
perfectly fits on it. So by pressing the
numbered 0 button, you can simply jump
into cameras view. Now we're going to adjust it. Buddy or wish you could I bring it towards
all the directions. Now I'm going to
do a render view. No, just simply follow my steps. I am adjusting all the powers of delighting and some
smaller testament of displacement of delight. So forth. Go to select all
the objects of the next stop. And by pressing Shift
D to duplicate it, you can place somehow like this. I'm rotating. Did it stopped towards 180 degree
in this direction? Like this? You're going to bleed
or labor anything odd. And type one A2DP. So to align the camera
here to go to view, outline view alone,
active camera view. So now we are to
rotate the camera in the right
direction, like this. And by pressing numbered 0, you can see the cameras view. I am rotating a little bit like this so that it perfectly
fits in the camera. I'm changing the focal
lens of the camera. Eighty-five MM. You can do the simple
adjustments of the Gemara by grabbing
it towards to x, y, and z directions. That's Buddy automation. So now I'm going into
the rendered view. Now to change the
background here, to just select the plane. Now go to a material. You over to Jane, the
emission, we value 0.250. I'm selecting my
base color as light. You can get any color in the
background as per your wish. So in the Render
Settings here to set the render
engine two cycles, to set the maximum
samples of viewport to 200 and maximum samples of 200. To switch on the de-noising
option for both. Now in resolution, we are setting the camera resolution
to fork a quality. So you have to set the x
coordinate of the resolution 23840 and y coordinate
of the resolution. Good. 2160 does go to Render and render image. So here is my final result. I hope you like my glass.
 Nityam Patel