Transcripts
1. Introduction: Hey everyone, thank you
for choosing my glass. This glass, I'm going
to teach you how to make this wonderful
hex one on Bender 3D. So this class is divided
into three episodes, which includes modeling
of the iWatch, applying some material
and textures. And then the last, adding
some background and lighting. If you like my glass
comment down below. I hope you liked it. You can move on to my first
episode, which is modelling.
2. EP1 Modeling Of The Headphone: First year to delete all
the items like this, you have to add a
mesh of cylinder. Now you'll go to the side, we'll take this and just
rotate it like this. Now here to rotate it. The angle of 60 degrees. I'll select the object. And blessings that button, you can go into edit mode. Now, swept piecework, do these vertices in this direction. Select all by pressing
it and scale it a bit. Just select these vertices. Scale a little bit.
This exploded. I'm scaling it again. Because it was no, you cannot get an
excluded like this. Again into X group. To scale it. I'm grabbing it
towards desert direction. Now what I'm going to
do is adding some blue, but just follow me. I'm adding the same process here at the bottom. Now you have to fill out
board and just scale it by pressing control loop on this and scale it. Now we'll just go
into face mode. Select these fees
which I am selecting. But as I brewing step. First, I'm scaling
it a little bit and then doing chip like this. Exclude that fees can
be noticed like this. More towards the
downwards direction of bowl-like structure. Now in the ETC. Luck mode, deselect this word disease by pressing E to exclude deduction. This again, you screwed it. They look like this. Drift either. Now you're good to go. The architectural object,
a subdivision modifier, gene D level,
viewport to render, to select the object and shoot it smooth like this. Now your door again
go to the edit mode. But I think that button, for some finishing touches, I'm adding some Lukert. You can just simply
follow my steps. Select the circle,
press S, scale, it. Again go into the Edit
mode, Sudoku circle. Face detection, deselected what pieces
along the direction. Going into face. Select
all these phases. Just exclude it. You can add a loop by
pressing Control R of t hat. Just grab it. Like this. You can bend easily. The x-variable, like
all these phases. Just scale it towards
the x direction. Now what you have
to do is select these were diseases shown. Just spin modifier, selected x-direction. It like this. What I'm doing is just
selecting all this, scaling it up a little bit more. That looks a little bit a huge. Along the y direction. From d to do is modify the track. Modify the object x
cubed, y direction. Hopefully you get the object
along the y direction. Now what I'm going to do is
just going to take more to be done on the exit board. And India to look
more like this edge and just excluded it. You're going to reference. Now you can just height cubed. Now for some finishing, I'm just accepting it. Maybe they think I like this. Now to make group lamps of
the headphone you open, just go into edit mode and
then down on the X-ray mode. Do is. It will form like a
rectangular structure. You have to exclude
it along the normal. To do is I click Exclude phase. This will exclude uniformly this queue, some finishing. That is, you have to
select the edge of our clamp to select the
top and the bottom edge. And Rio to increase
decrease of the edges. By pressing Shift E. You can increase the
grease off the edges. In Greece as per your wish. I'm increasing it. You can just simply
follow my steps. Gonna do is go to the Edit mode. Select particular area
where I'm selecting. After selecting the particular
area, to separate it. 30 meter at the object. And so by pressing B and
selecting the selection option, it will separate a whole
mesh between our mood. Can seem pretty
test done on this. It will look more smarter. Look at phone mode
picker to add is already fair market value
and offset value. I'm setting my thickness
value to find DO meter. You're recruiting
the offset value to one and you can
change it IF less. Yara offense, I'm setting
it to 0.2 meters. It will look more thicker. I'm making and logo
up there in front. So just go to Mesh
Selectric to review. Now, get this spleen aside by grabbing it towards
the right direction. We can easily focus on it. Now I'm decreasing the size
of the Cleon by scaling it. This against scaling it
towards the lie detection. Now by pressing Tab button mode, by pressing Control R. To look like this. Now just go to the
ED, select more, select these bottom edge and excluded CSAC
detection like this. By again pressing Control
audio graded loop could middle part of
the spleen like this. Now again select this
left side edge and excluded along the y
direction like this. Now we're to select
these vertical edges. Just grab it towards
divided action. I'd just all tires and
cough, deep Lean expert, you address the x, y, and z. Now, just press Control or be adjusted as reference. A real tree. Now you're good. Okay. I deny under anybody
angle, just Gaillard. Know what you want to do
is just get a bit long the headphone and
just add a modifier, which will work as it will attach directly
to the headphone. Perfectly. Just simply follow my steps and add a
shrink wrap modifier. What do you have to do? Selected strong cylinder. You do it easily
attached our local. Give us some finishing touches. Include just simply
follow my steps. This video is completed. You can move on to the
next video in which we are giving some
material and texture. Had fun. I hope you liked it.
3. EP 2 Applying Materials And Texturing: Illustrator. In this video, I'm going
to show you how to apply a material on headphone.
Sitting menu. You hope to just
select outer body of third phone and
place on New button. The color you like
through the basic color, I'm giving a black color. Increase the roughness
value 0.64 or five by clicking shift and
place it between VSTS and muddy yellow in earlier wit nor connected
with the thick of mixing. Now again, the blend value of layered way to
0.90 or something. No add another node, we disclose the BSD. Bsd API is connected to. Lastly, meaningful, say that you have to
read appellate review of being supported
VSB for alternate, it is the roughness value of rupees. Go, make it go perfect. Nearer to mean verdict. In the same way, we'll
view the material of the body. The body. Embrace new dog
playing the material. I use the revert to
its basic colors. The 0.4 value of the darkness, and also change the
value of the 0.3. The metal protests
to the main model. We just selected. Metal part, saying the material. By producing the
double-clicking, just select the top
and the bottom part. And also select the faces
in the exiting motor. Just liked it. Beings looked at new material. Again, a mix shader. Really not for now. When our clicked on nothing more than a little more detail. After clicking on,
we will see how we can change the
middle value into one. Now, the connection,
I'll close it PSVF to the metallic silver, knew the roughness
value into 0.4230. Lastly, the next video in completing the pillar
of them are little. Favorite job market
is hearing the pilot, the torque is here to help. It will also connect
to the main body. Like metal also has to be selected as a metal
material has to be assigned. I just looked at this
because indexing anymore clearly in order to participate in place vehicle. Increase a little
bit value to 0. Something. The BTK killer Exit coordinate mixed layer. After adding these three nodes. No object of the texture
coordinates are connected to the rector of nice
texture and color. Mixing. Rgb, color of noise index that is connected to the colored one of mixed. Just like me. Now we're missing. And the color of mixer
give me connecting to the in the North. It goes more than duplicating. The mapping is connecting
with the naked eye. Now I just simply do the
connection wasn't enough post-war night excel to the vector of
second-order Dexter. Another NORC with the second color of the color ramp is connected
with the basic color of printing in this video. In this video of me, 67 years or something. You can follow my lead. When you are satisfied.
Return what? To work together. I have two Q symbol
of the material. What you're saying,
the material of metal. Just finish the video material. Then we will see about the background and
lighting in the next part.
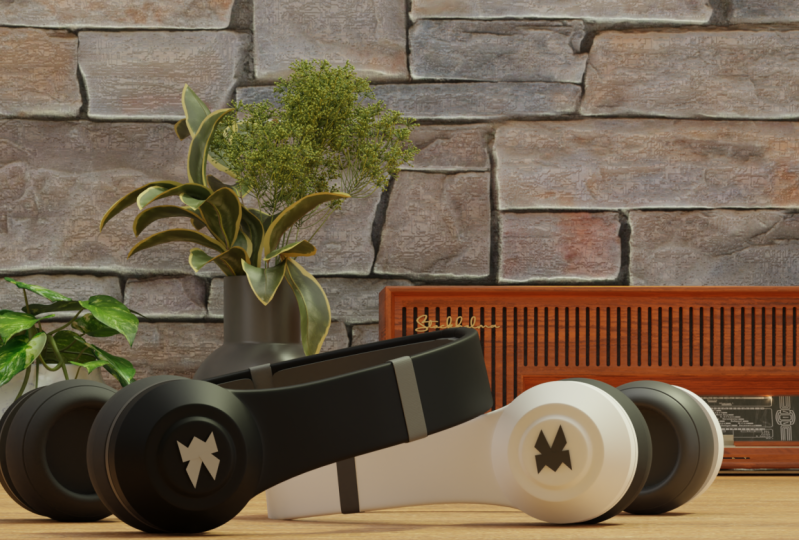
4. EP 3 Adding Background And Lighting: Now I'm going to give you some megaphone and
had headphone. You can apply this to modifiers. To also apply the
remaining modifiers. We did it break a record
collection scenario to add a camera. Doesn't target to take a minute, just go to View and active camera. Could have it. Not seeing my art classes. I said an amazing Creek, how to set camera and
just few easy steps. Using Shift F key. You can just watch it. You can just grab
it. Set to camera. So far do better angle
for the camera view. I'm setting my headphone. Kids had deduction
and the x-direction. Just for your reference. Now for the background
from the mesh, just go through and add a bleed. Go to align and view. You can easily see. Had it been going
on you're doing is cool in somewhere on the x-axis. Now just scale it. Now we are adding
some lightings. This quarter light and add. Now you have to grab it
in descent directions. Just press Shift X
and by reduction, increase the size and set up
our S for your reference, I'm setting the thousand walk. By pressing Shift. You can duplicate it. In short, the lighting
depends on yours. You can do whatever you want. You can just follow my steps. All of us to find towards their trunk door sneakers. More realistic. Setting my
assembles and report to 600. You're going to
start on the DIC. So far in both classes. We can just follow me.
 Nityam Patel