Transcripts
1. INTRODUCTION: Hello and welcome
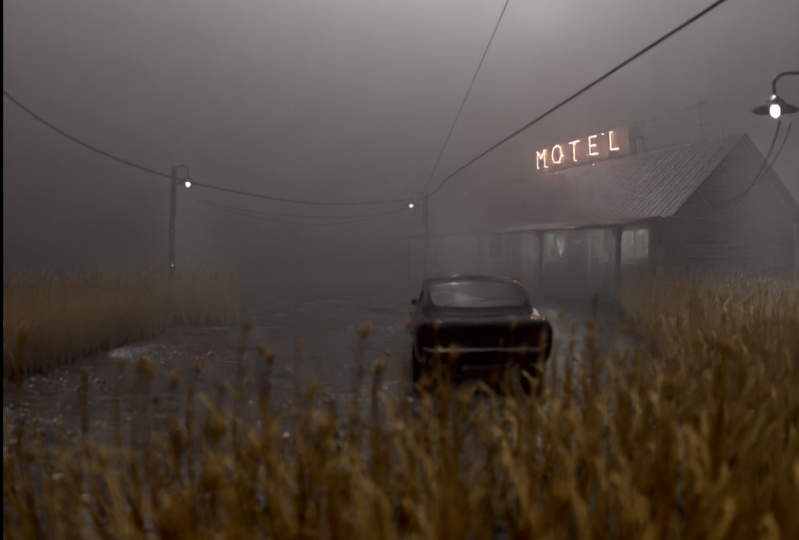
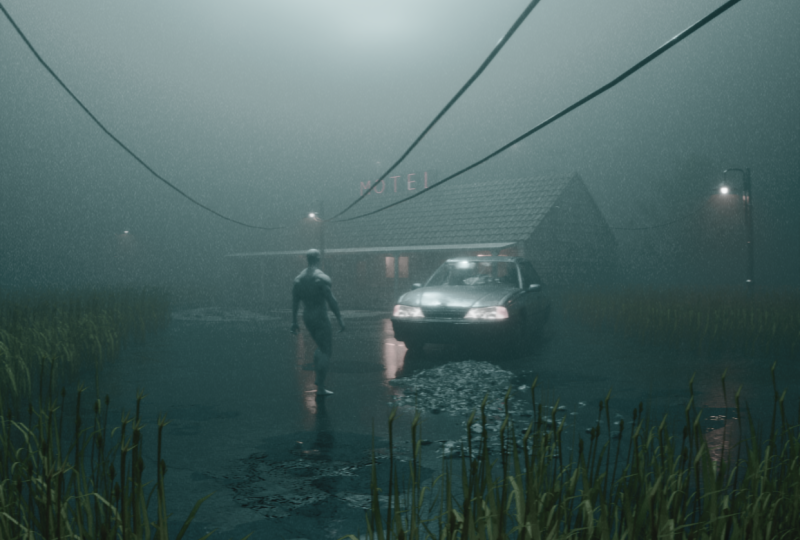
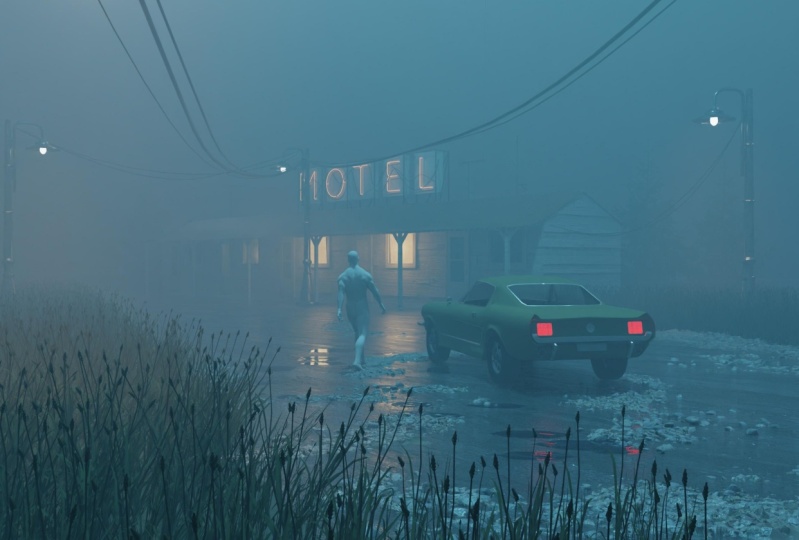
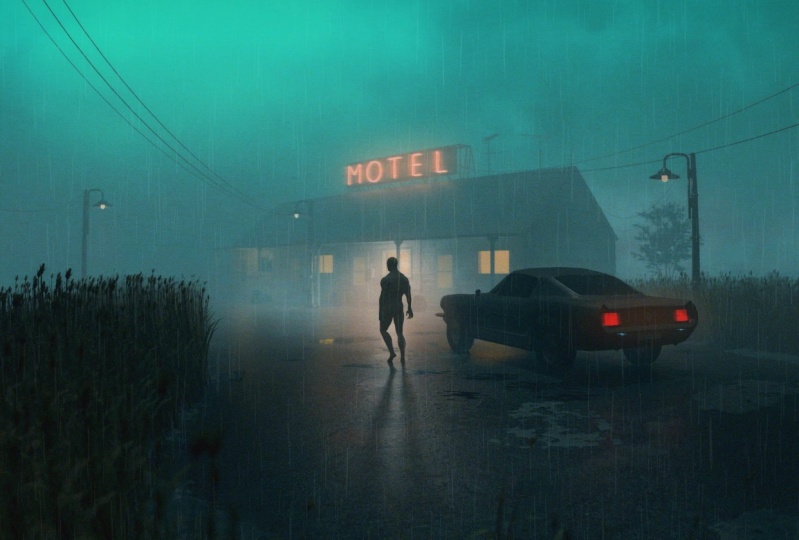
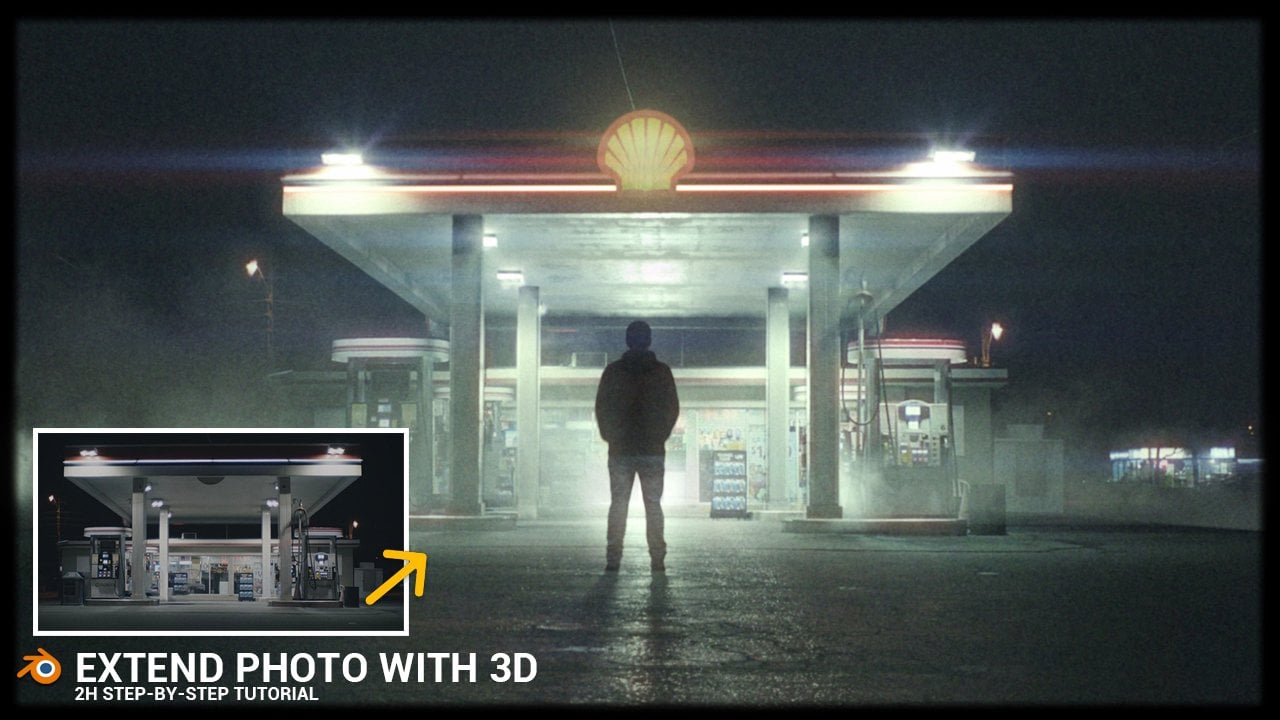
to annual tutorial. Searching Instagram, I found several popular profiles on the topic of cinematic
photography. And I noticed that
the composition of most of them
is quite similar. Most of these artworks
are nice scenes. Lot of fog and rain, reflective close with
the main character in car in shadow, surrounded by lights to create a silhouette and most open
in our teal and orange. Another thing that
connects this works is that almost all of them
that created in Blender. So I decided to try use my brand that experience to see how close I could get to
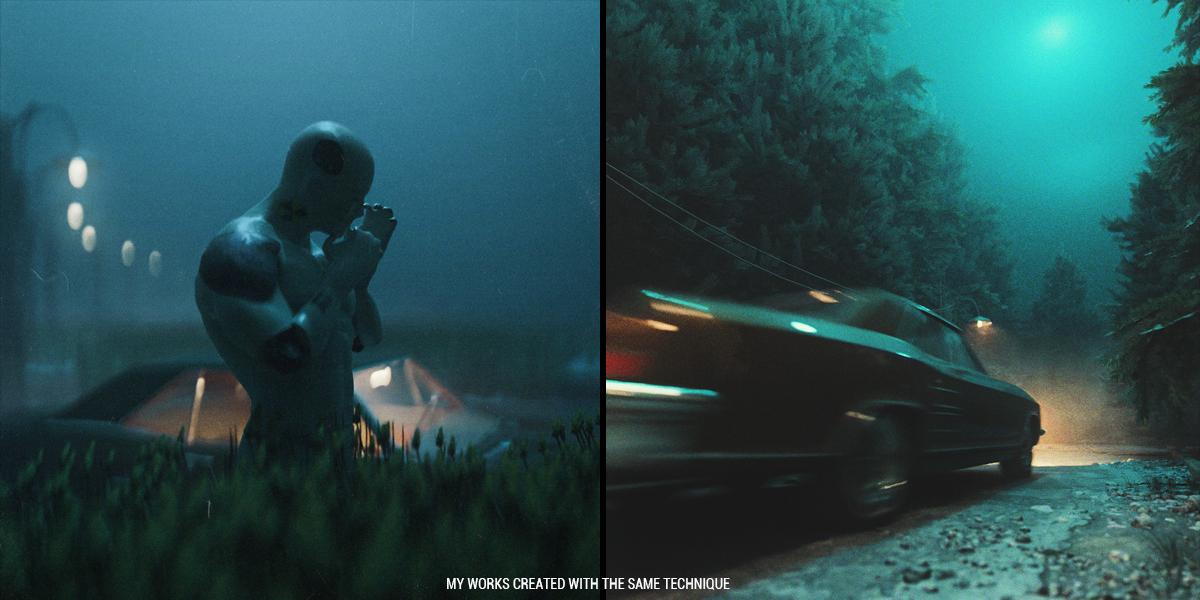
this popular articles. In the pie hour-long tutorial, we will create this see, I recorded every step. So the tutorial is also
intended for beginners. After finishing the tutorial, you will be able to create
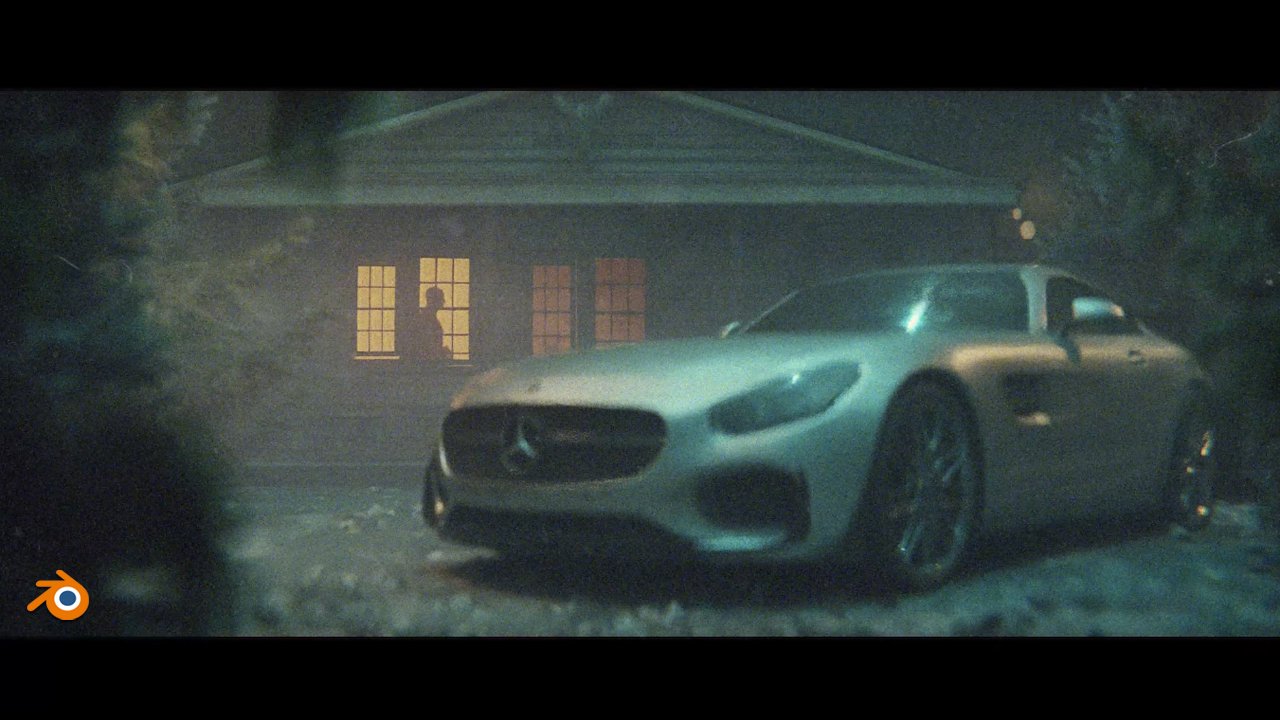
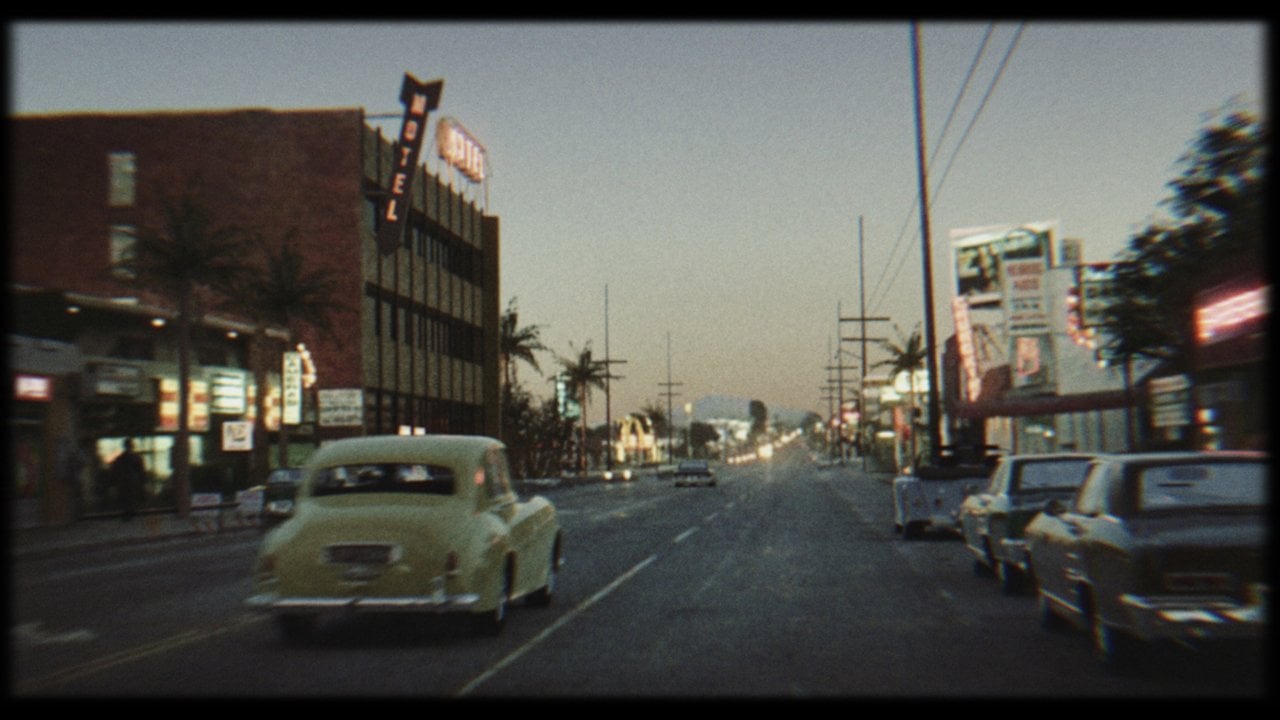
any of these artworks. A few examples I created
using the same techniques.
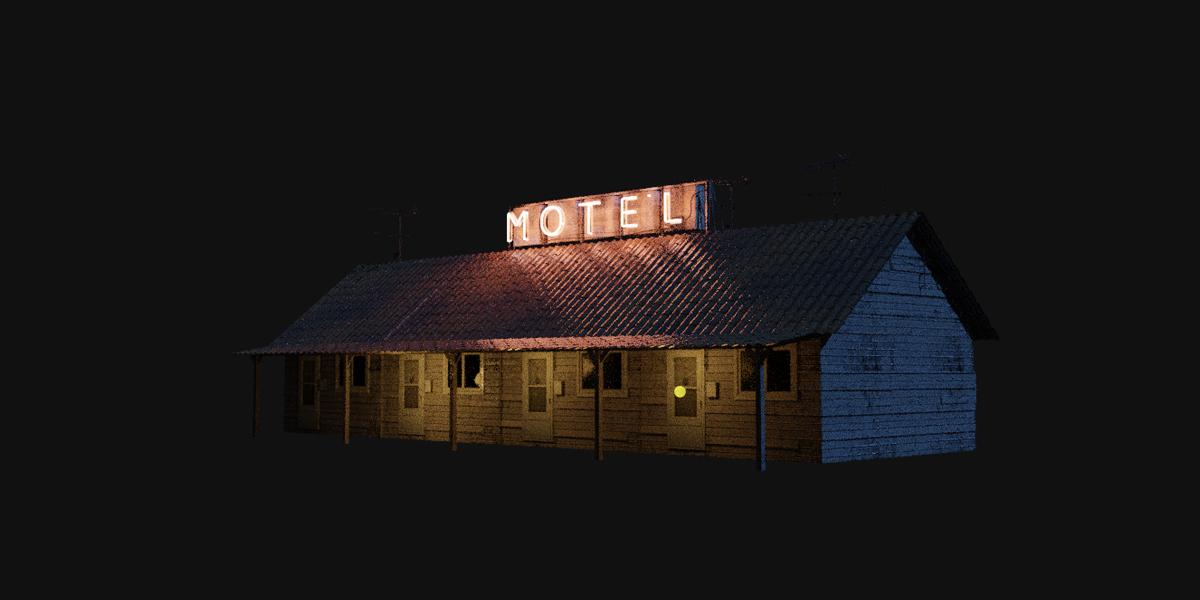
2. CAMERA AND RENDER SETTINGS: Let's start creating scene. First. My recommendation is to create folder where you want
to save all these files. For example, you can call this
motel scene or something, but I already have folder. I will delete this and I will copy address, so this folder. And now we can
start with Blender. And first thing I
will do in Blender, I will love it file, Save As, and I will call
this motel scene. Next I want do here is
create a silhouette or base shape of this motel and place camera in C. They can use this default cube to
create motel silhouette. But if you delete this, you can always go with Shift a and you can create new queue. And now I will press N
to open this step here. Now we can enter
dimensions of our motel. Last time I use these dimensions
so you can just copy. I go with 18 m or x-axis, 6 m on y-axis. And by meters on z-axis. I will go with numpad one
to front orthographic view. Or if you don't have numpad, you can go view,
Viewport and front. And I will bring this
on zero on x-axis. So this, you can
see this red line. You don't need to be
completely precise. But if you want to
can type here 2.5, because we have 5 m. So z-axis and origin is in the middle. To create base shape of motel, we can just go to Edit mode. And we can select this
edge select here. And we can add with control
R1 on x-axis and y-axis. Now we can read holding Shift, select this edge
here and this one. And now we can move
this on Z axis. You can select this move
tool or you can just go with G to grab and Z for Z-axis. Now we can set camera. I will go to object mode
and I will select camera. And now you can press number zero to switch to camera view. Or you can go view cameras. No viewport and camera. But in this case, I liked
split this window here. So when you see this gross, you can move on right. Now we have to
same windows here. So this is 3D view port. I will now place mouse
on left and I will on left press zero to
switch to camera view, and I will press N
to remove this tab. And now we can see what we do on left and we can
work on right. Event change, resolution of or aspect ratio or this camera. Because I want create
something for Instagram, I will go with this
vertical aspect ratio and I will click here
to output properties. And I will send this
to 1280, 1,500. If you want to can always change aspect ratio and make
this more vertical or maybe something more
horizontal and cinematic. But for now I will go with 1010. Now we can set camera and
I will put mouse on right, and I will go with number seven
to top orthographic view. I will place this
camera to about here. But one thing I want to do here, I want make this camera Lovasz. So I will bring this value down. First. I will set this
x-axis to 90 degrees. And now I can bring this down. And last time I go with
value of 1.4 to five. Now I will go to
camera property step, and I will now set this
focal length to 26 mm. So this is basically Zoom. If you go up, resume this motel and if we
go down the zoom this out and I will go with very
low for calling because I want catch more area. We see this motel
and all this around. And I've unsaid these two
panoramic because we will get this nice distortion on edges
with this panoramic lens. And if you set these two
panoramic and if you don't see this fisheye
and another options, that means that you are in EV. So I will set this to cycles and let's back now
to camera settings. And now we need make
this lens to 26. And if you now press
F 124 first render, or if you go to render, render image, we
have first render. But you can see
that this is very slow for this very simple scene. And reason for this is because we have some
default settings here and we need to change this. First thing I will do here. I will set this to GPU
because this is much faster and I will send these
samples to maybe 100. And also these
render settings 100. So this is viewport. Viewport is when we click here, we have here viewport render and you can
see if we move this, this render go to 100. This is render previous. This is when we press
F2 for final render. You can see how
much is this faster now and next week have
viewport the noise here, if you want to use this denoise, my recommendation
is to use optics because optics is much
faster in Newport. But I don't have problem
with noise in New Paltz, so I will just uncheck this. But for I'll denoise, I will use this open
image denoising because I think it's
a little better than optics because I don't
have strong computer. You can see my system here. So I have expenses 60
with 16 gb of RAM. So I need to care about
optimization scene. And I think this is
good for this tutorial. And I still can render
this scene with volumetric send with lots of particles in maybe one or 2 min. So you don't need very strong computer to
make a scene like this.
3. MODELING MOTEL BASE SHAPE: And now we can continue
with modelling these motel. So first I will join
this area here. So right-click here
and join area and click on left to
close this here. Last time I made this
one part of this motel. You can see here. I just duplicate this four times and that's we will do now. So first I will go
with lamps and one, and I will go with
Shift a and with Q. And now you can copy
these dimensions here. So I will go 4.5 m on x-axis and 2.4 on Z and Y axis. Now we have one
part of this mode, because we will now work some time on modelling this part. I don't want share space with this big motel and this point lamp and camera because if you're rotating this, you can stick to some
of these objects. So I want isolated this object. And you can do this
with numpad slash key. Or you can go with Vue local
view and toggle Local V0. And if you click this again, you're back to our scene. So I will isolate for now this object and we can
start modelling this part. Because I know that this
motel will not be so visible. If you look this render, you can see that this is basically just
silhouette with Windows. And if you put just
this base object, it will not be big difference. Because I want maybe use
this next time and I use this motel in this scene,
various more visible. I want for this practice, make this width
little more details, but not too much. So I want also keep
this low poly. And I also have tutorial similar with the
modelling this cabin. And we put little more
details on these cabin. And if you want to look
for these tutorial, now we will make similar but little less
detail than here. This is better
example and you can see all these
details here planks and this is better example and you can see all these
details we made last time. But today we will make something more simple
and much faster. This is reference image we
will use for this motel. You can see that this
is very low poly, but it will help a lot to make this modeling
process easier. So now I will make to Blender and I will create
new material here. I will call this model. And now I will go
to shape the tab. And you can see that we have
both of these objects here. So just press again
numpad to slash key to bring this object here. Now I will bring this
image to Blender. So just drag this
here and you can bring this to Blender
or can always go with Shift a and search
for image texture. And you can select this, find this image and select. But now I will just
block this base color. Now we need to unwrap this. So you can go to UV
Editing tab and you can again mapper slash
key and change these. You can select this
material preview here and you can unwrap this here. But because I don't want all-time jump
between these steps, I can just bring this UV
Editing here, UV editor. So you can just select
this UV editor. And when you go to Edit Mode, you will see this on left. Because I don't need
this image here. I have one here. I will just join this
area to make this simple. Before I unwrap this, I want check scale
because scale is very important when you
unwrapping objects. So I will press N and you can
see that scale is not one. So Control a and applies
K. Now this is one. And if we now go to Edit
Mode than if you press you for unwrap and go
with Q projection, you can see that this
is unwrap, correct. Now I will select only
this face we need, which is visible and
I will now and left. If this is not selected, you can go with a
to select this. And now you can press
S to scale this. You can also grab this
with G and you can move this maybe on z-axis leak. Because I don't want this
window stick to this ceiling. You can see that this
is not straight, but you can fix this
if you want here. But I will not do this now because I will
not get too much And I will now start
modelling this window here. Okay, Let's modelling
these scene layout tab. So just bring this material here and now we can
start with model, and I will press N
to close this tab. Now, I will go to Edit Mode. Then I will start modelling
this window here. So I will go with Control
R. And I will add one loop cut here and Control R and one about here
and on here and one here. And now we can select this
face select and we can go with E to extrude and Y. For Y axis, you can just press E and it will
be stick on y-axis. And now I will go with it again. And instead one face here. And let's now external
decent y-axis but inside. So NY. Let's press it again about here. And let's also move
this extra this on via. Now we have a basic
shape of this window. And I will go with Control R and advanced loop
cut in the middle. And I will now move with
control V to split this. If you have more Lucas here, just scroll mouse loan and
make one loop cut here. And now I will also
extra the sun y-axis. And now I will make
two shaders tab because we will use UV editor
and we have UV editor here. And we can now fix this. Later. You remap, so it's
selected this object, this face I will go with S. You can go with high-stakes
to scale this on x-axis and just place
this on white color. I will also select this, and I will move this little
G and X when X axis. So you can just scale this
and place about here. And you can also maybe
select these two vertices and just move this with GI side. And to fix this parts here, you can select these objects and holding shift, this face. And we can just go with you, unwrap or UQ projection. Now I will go with S and place these two white
color and this one, you can select this face
with this loose parts with L. And now we can go with the nitric to rotate this
z-axis by 90 degrees. And this one also
so L and the night
4. GLASS MATERIAL: Let's now create glass material. So we can go to material properties tab and we
can add new material. And I will call this glass. And I will go to Edit Mode. With Face Selection
and holding shift. I will select these two faces. So let's first fix also
this unwrap weekly. So I will also,
this one is good. Just move this on white and
we need project this. Again. You can deselect face with holding Control and just
click, drag and click. And I will again go with shift. And let's just quickly fix all this part with
Ukiyo-e projection and just project
this on white color, so it is in it and in it again
and L to select this part. And now I will just bring
this here with the G. Just move this on
this whiteboard. Okay, now we can continue
with glass material. So I will select
these two faces. And I will assign this
glass material here. You can see that we
change material. Glass material. I will
delete this principle, be SDF and I be worried. She, if they in glass. And I will mix. If you put this here, we have just glass, but I want to transparent glass, so I will mix this
with transparent. And if you don't have enabled
this node regular add-on, you just need to go to Edit
Preferences and add-ons and search for node and
enable this Node Wrangler. And now if you
hold Control Shift and drag right mouse click, you can just connect
these two shaders. Or if these don't work for
you can always go with mux shaders and just plug
one here and another here. Now we can improve
this glass material with some roughness variation. And for this I usually
use concrete texture. And I found this concrete
texture on Pixabay. So this is, I will share
this link with you. This is this link. And you can just
download this for, but usually I found this my concrete texture
on textures.com. You can just type
clear concrete. You can find lots of concrete texture here
on textures.com. And you can use any
of these texture, or you can use this
from pixabay.com. Racism, I now go with pigs. Amazing because you don't need
profile to download this. And for textures.com
you need just make three profile and then you
can download every day. 15 these images. Last time when I
suggest textures.com, few people send me that this
texture is not available. But if you cannot find something
I use in this tutorial, you can always find
something similar. So if you use any texture
similar like this, you will get very
similar dissolved. So if for some reason
this links don't work, you can download any
similar texture. And you can also use NBS
CG to find free textures. So you can type here concrete. You can download
this also without registration any
of this texture. When we have concrete texture, I will bring this, this here and I think I can
program with my mouse. So you can again always go to Image Texture and you can
import this image here. And I will now plug
this to roughness. And if you go with Control
Shift and click on this node, we can just isolate
only this texture here. And if you want to can go to
Edit Mode and you can scale this image here or another
method is Control Shift. Select this node and
control shift and T. Control T. You can also
change this scale. For example, two, I will back this again to one and I will
play with this in UV editor. Okay, and now when we
see how this look, we can plug this roughness. So I will make this node with Control
Shift and click here. And you can see that we get
variation in roughness. And to control this, I will go with Shift
a and color ramp. And now if we plug this here, we can make more contrast here. The one thing you need to
know that this black color means value of zero and Y
Carlos means the value of one. So white Carlos means so white collars now
means roughness. All to one. So what colors mean completely rough end glycolosis
means completely shy. So I want to make
this window shining, not too much roof. So I will bring more
blood, Carlos here. And I will also bring this white color to black
to make this less intense. And we can also add some
bump information here. So I will, for this movie, gribble texture and
this procedural texture is similar like waves. So if you go with Control,
Shift and click here, you can see how this look and
you can change scale if you want. Something like this. And I will now
move with the mom. And I will plug these two
height and now this to normal. And this material with
Control Shift and click here and you'll get this effect. And I will bring, bring this all down to make
this effect less intense. But we have also some
distortion in glass. And we can also back to
this motel material. And I will go with image texture here and I will select
this concrete texture. And let's plug
also this to color them and to roughness to
add some details also here. I don't want the
shiny parts here, so I will bring this down and I will add more roughness here. Okay, so we get some
details also here
5. DOOR AND PLANKS MATERIAL: And let's add some
bevels here so we can always select
this middle part. And with controlled
non pet plus, we can expand selection. And if it's Control B, we can add some berries here. And I don't want, if you scroll mouse up, you add more vertices here, but I want keep this low poly so I will just add one level here. Okay? Now this is
little more visible. And we can now back
to Layout and we can continue modeling
this door here. And if you go to solid mux, can see how this loop. And we have some geometry here. And let's now back to edit
mode and to material preview. We can again with select
this object and go with Control R. And we can start
adding loop cuts here. And let's select these
two faces and press. So I will now back
to its control plus to select all this and I
forget text through this. So E, right, talk
through this on y-axis. And now we can, I will add
one loop cut here down. So I want this stance,
make this distance. So I will go Control
R to about here. And now if you select this
and I will bring this up. I have one problem. I stretch also this UV and
if you go with double-tap G, you will now not
stretching this. But you can also enable
this in edit mode. You can enable this
correct phase attributes, and now you will not
stretch this UV. And we can place this in meter. Now I will select these
two faces and if, and I'll press I,
you get to this, but if you go with it twice. So I, instead these on
individual origins, just bring this down
and this one up. And we can also fix this too. I will fix this
problem with just K. So if you press K and if you go with vertex select and with K, we can just connect
this part here. So K stick to this vertex
and just press Enter. And now we can extrude
this in with E and why? We can also extrude
this out if you want. Why? And I think we need
also external this out. If you select one face
and hold Control, Blender will select or
connected parts here. So control. So if you hold Shift, you will just select one phase, but with controlled, lender
will connect all these part. So I will now hold
Control and click here to select all this. And now we can go with Y, or we can extrude this out. Let's see how this look. And now we can make to
shade in temp and we can fix this UV if you need. So let's feel, don't see these tools here. You can middle mouse button and you can now move this one, select this edge, select here and just hit the G. Move this. Okay, I think this
looks pretty good. Let's make now this
glass material, but I also want keep this white color and
this details here. So I will go with new material and I will now
select this glass material. And I will click here to make
a duplicate of this object. And I will call this glass And now I will assign
this material here. I want make this color
information here. So I will go with image texture. And I will select this
motel material and I will delete this and I will
plug these two color. You can see this
texture from before, but I want also make this white. I want to mix this image
texture with this shaders. But if you mix
these two texture, you will get this problem. So this is just color
and this is shader. So we cannot mix color shader. And we need to convert
this also TO shader. I will make this. I will go with the
fuels VS. the F, and I would just
plug this to color and I will use also this roughness
information for before. And now, if we go with Control
Shift and right-click, you can miss this to shaders. And you can see what we get. If we go to left, we get only this shader. And if we go, All right, we get this shader here. And I will go maybe in middle to get some white
color in this texture. And maybe we can increase this massive group bump
to get more details. More distortion here. And I will also scale this
up to get more tiny details. I don't like this green planks. So I download this image from textures.com and I will
share this link to. But again, you can download
this texture or you can just search here, right? Planks. Or you can also search on
Google or maybe on Pixabay. And you can download
any of these. So this is one use. Now, let's make to Blender and I will now create another material and I
will call this, right. Let's also bring this. Let's now move it
to this address and we can go with Shift a
and self for image texture. And pay this other
scared and just bring this and plug these
two base color. And nothing happened
because we need apply this material
to this object. I will now go to Layout tab. And we can go to Edit mode and we can select
faces where we want. Apply these techniques. You can go with
holding Shift and you can select this part here, but you can also go with C. And you will get
this brush here. So you can scale
this up or down. And now you can start
selecting these faces, which we want to, if you want to rotate
to decide you need to go with escape to
remove this brush. And now you can mood
this to about here. And now we can go again with C and we can select
all these face. And wanting, I like to do here. So I will go with escape. When I have selected this part. If I press something, I will use this selection and I can make this with Control Z. But later I will
not be able to make the selection if you
want to can save this. So if we go to Object
Data Properties, you can add new vertex group and you can call
this white links. And you can now assign this. And if you want for
some reason, click. Now we don't need select
all these spaces again, we can just click, select this right planks
and click Select. And we can save it
this vertex group. And now we can make
the shading tab. And we can now assign
this new material here. And we get to this problem
here you can see that this scale of
displaying keys bigger. So I will go again with you, your projection to
unwrap this again. And now we can select this texture here and we
can press S to scale this Okay, and we can
make to object mode. And we can now play
with this texture. So I will go again
with the image texture and I will bring this concrete texture we used before to bake this
roughness details. So color ramp and plug these
two roughness so we get this roughness information here and I want more rough
parts than shiny. So I will bring
this more to white. And we can again use this mole
support color information. And I will go with
another color ramp. Let's plug this huge. Let's check scale on this. So I can move it Control D. And maybe I can make
this smaller, so 0.5. And you can move this
on y-axis, maybe 0.7. Okay? And now we can make these All
Shift and click here and we can mixing these two texture with Control Shift
and right-click. We get this mixed node. And if we go all to one, we get this concrete texture. If we go all to zero, we get this plain texts. But I want multiply these
two texture so we will take only dark part
of this texture. So I will set this to one. And I will choose this multiply. So now we take only black colors from
this color ramp, keith. This is tense.
Putting this on left. And let's play with
this y-axis here if you can choose how much
dirtiness you want here, I don't want too much. So I will bring
this to about here is just to get some details. And you can use this link state should
to get some bunk detail. Bump. Let's go again. Let's
plug these two height, two color ramp and this to
hide these two, not much. Now we get this bump details here and I
would try inverted this gay and I will bring
this 2.1 and this old now. But if you go to solid preview, you can see that we don't
get no details here. So we will also create
some real planks. He first I will add a bump also, not bump bevel also
on these doors. So I will select
these two faces. Or we can just select
few of these edges here. And we can label this. With holding control.
We can select this, connect parts and hold. Now we need hold Shift
to skip to this part. And again, with control. Or if you're not sure
with these control, you can always select
this with Control. You can always go just
with shipped shift. And you can select one by one. This is enough. And let's go with
Control V to bevel this, this loop little better now
6. MODELING DETAILS: We can now add some
real planks here. But I don't want too much because I want keep
this slow, pull it. So we can go to Edit Mode and
you can add with Control R. We can follow these lines here. And now, if you
select these faces, we can go with E, Y to extrude this on y-axis and X to rotate this on x-axis. And we can, for example, only this slide here. So V control V. And you can see how the slope
we get this plane here. And if you want
to can remove it, select this edge
here, for example, and go with Control V and scroll mouse to
add one loop cut. And now with control
numpad minus, we can subtract selection. So we have selected
only this part. What do you can always go
manually with shift and we can just move this to
get this cut here. And we can add few
more. Control. Are you here? And let's select this
and go with E, Y. And you can rotate
also this on y-axis. So why? To make some variation
here? This is too much. And there, you can see
that when we go with Lx, we get V result
because we rotate this from this
middle point here. And if we now go to
individual origins, will now place in origin
or in any of these part. So if an hour with X can see
that now this works correct. And let's go with Control
V to Adwan bevel. And you can see how this slope. And let's some details
sorts of here. So E and in this case
X for X axis and Y. Another method we can use
here we can just go with pay selection and we can
select one of these blank. And we can go with Shift
D and P selection. And now this is
separate objects, but we need to set origin
to center of geometry here. And now you can go
with a to select all 0s to extrude them. Next, to extrude this
sum x-axis and why? You press L, you will select this plane here
and you can always go with Shift D and move this may be
here and X to rotate this. You can go with the heart
to look class here and maybe we can now
duplicate only this face. She, Li and falsy for Z-axis
and extrude on x-axis. Rotate just to make
some variation. Okay? Because this will be
visible from this distance. I don't want to create
a lot of geometry here. Maybe just a few
on this part here. So I will make to edit mode and Let's explore
this on y-axis. And let's add one loop cut here. So you can always also go with, if we go with control, our book cut through all these
motel and I will now go, it turns us with K to
add one plane here. Now we don't have this, a lot of geometry here, just this part and let's go E, Y and X and Control V Let's extrude this, this one, and let's bring this, maybe this edge here. And let's explore
these two parts. So E, Y, X in control. And now because we
don't use modifiers, we can easy enjoying
this in one objects, because now we
have objects here. We can just select all this
and we can go with Control J. And now this is again
only one called I like this may books and numbers
from original reference image. And I will allow us, if we will call the
Shift and right-click, you can place origin here. And now I will go with Shift a. Let's copy this address. Shift they image
images as played. I will paste this here and
let's select this image. And let's now go with Z. And I know I will go with the minus ninth
day this, in this direction. Let's bring this here and
let's press S to scale this. Now, I will go to Edit Mode
and I will just get a knife, cut this mailbox and
also these numbers here. So K in just cut this part. And we can also use
this SAS nice detail. So just select these faces. We don't need delete basis. Let's now go to edit more than press L over this
part and the selection. And now we have two objects. This is one and another
one which same origin. So objects set origin to geometry and objects
set origin to geometry. And now I will just make
this more three-dimensional. I will press a to select all. And let's move this here. And E Dwight For y-axis. And I think this is
because we can fix this. Select this in material preview. View ports. That face, I think. Yes. And now we can you
cannot add a loop cut. Yes, we can add loop
cut with Control R. But if you cannot add, you can always go it
took knife and one here. And now we can, Let's bevel
this, it's Control B. Now we can move this part to
make dislike mailing books. Let's take this here. We can rotate this more
next to line up this. And I will now again go with Control J to make
this one option. I think this is enough details and information and
is still low poly. So if we go to Edit Mode, we don't have too
much vertices here. And I can now go with
D to duplicate this, make instance of this objects. So all D and X and
move this about here. Now, I will go with
Shift R twice. So we shift our, we just repeat this step
and we get this motel here. Because we use all
the instance Shift D. If we make changes here, we will make changes
on all these parts. But if you want to make
changes only for this object, you can go with the and now
you can do what to want. For example, we can make changes scene
material or in mesh. But I will be told because I don't have planed to
make any variation. And let's just quickly see how this look in render preview. So I will go to render preview
and views cycles in Iran. Make this work. Here. We're properties more Blake, completely night and weekend Will it shift a and
light? Maybe point lame. Let's see how this looks. So I will increase this
flight maybe to one fronted. And I will go with shift, the hex and maybe we can
put here only maybe 50. And I will bring maybe
color to some reddish. And you can see that
this looks pretty good from this class K. And if you put one, which is D, We can put one light
inside this motel so we can see how this
look like on inside. Let's go with number seven
to talk orthographic. And you can see how this loop
when we have light inside. And if you want to remove
this visible light here, you can bring this radius down. You can just click this. Check this multiple importance. But I like this details, so I will just bring this radius like this detail
here so we don't need keep these
perfectly connected. So we will be to GY and
let's move this here. Maybe we can need to
Gy this little out. So we get this
nice details here. Let's continue modelling this. So I will back to
Viewport Shading, and I will now go
with numpad slash key to back to our scene. So let's select this because
we will same object data. You can always go with
select linked object data and new will select
all these objects. So this one, I use shift, the render will not select this. So let's write this manually
and let's move to about HIV. If will go to material preview, we can see that we
miss this part here. So let's just select all these phases and
go with Shift D. And why? I will scan this on y-axis, it is not so important. So we get also this part here
7. ROOF TILES AND PORCH: Let's continue with modeling. So I will now add roof tiles. So I will isolate
only this object. And let's now create
one roof tile. Let's see how this look. So we need one part of this. And I will go with, maybe, I will go with Shift and click here to bring this origin here. And I will go with mesh plane. And I will now press N. And I think on x-axis I want maybe 15 cm centimeters and
maybe on y-axis, 40 cm. I think this is about
this dimension here. And now, let's isotonic
this object again, double-tap number slash key. And now we have only
this object here. And I will go with
control a applies scale. And now we can go with Control R to add
one loop cut here. We can bring this up. And now weed control
be maybe two or three. Look, cuts to make one. Well, let's bring this
little more rough and let's now go weed control V. And let's now unwrap this. So I will go with
a new projection and later will be
easier to unwrap this. And now I will go
with E, Z to X, draw this on z-axis to
add some thickness key. And now I will go
with Shade Smooth, right-click Shade
Smooth, but we get this weird shadows here. So I will enable this
outer spooky to fix this. Okay? And now I will go
with numpad one. And I will go with Shift D, X. And I will now go with why 108. Rotate this on y-axis by 180. And let's take this here. And let's add another one
with Shift X to about here. And we need one more. Okay, Let's now create
new material for this. So I will call this type. And before we go to shaders tab, just select all this. So we can easily pick number
slash key. Bring this here. Let's try create a weekly
this material here. So I will go with color ramp. I will add reddish color here. So let's first go
with the image text. And I will again use
these concrete texture. And let's see how this is
project that this object. Let's check scale with
Control D, maybe 2.5. Okay, this looks pretty good. And now I will plug these two color ramp and
these two base color. And now we can play with color. So I will keep this dark color, but I will add few
colors more here. I will add maybe reddish
or yellowish color here. And I think this white
color is also nice. So if you want more black, you can always move this. And you can play with
these colors here. And we can also use this to add some roughness and normal
information. So color ramp. Let's plug these two roughness. One thing I forgot
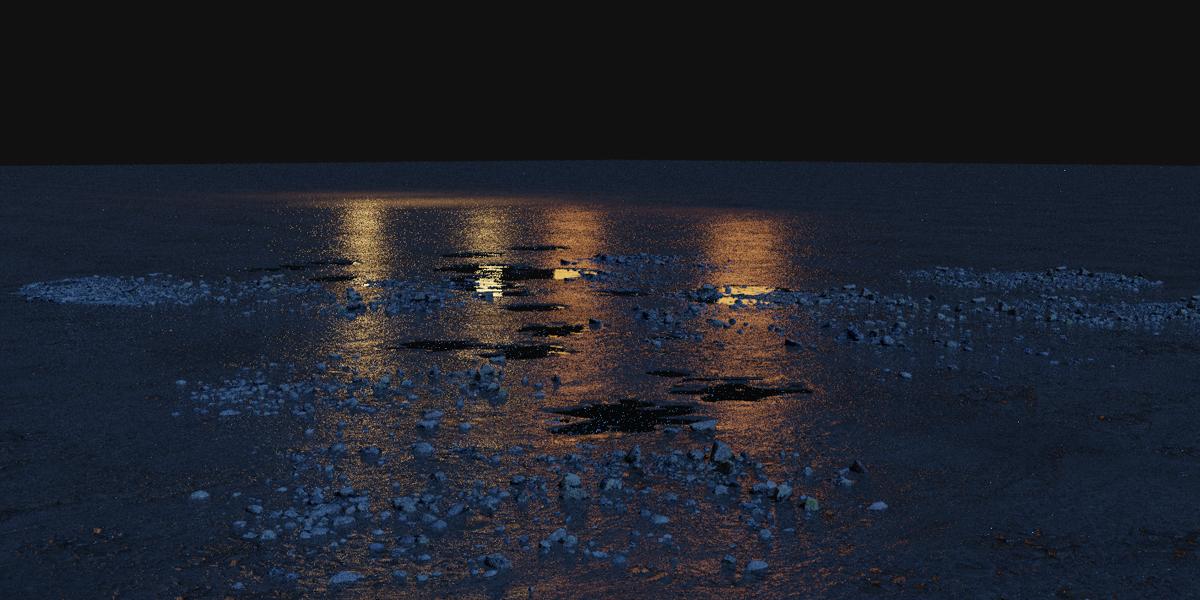
to mention here is, is that I want make
rainy atmosphere here. So that's mean that we need more glossy parts
here because of rain. So I, I don't want
to shiny parts, but I want lot of more
black color scheme. And let's add the also bump They're scared. So plug these two
height and to normal. And let's see how this looks. So bring this to
21 and this down. Okay, and let's now go with select all
these three objects. And last selected object, this one, I will go with
Control L to link materials. And now this objects
will be same material. But if you don't
work for you can always just drag and drop. Bring this material. Let's now make some
variation in UV editor so we can just press a human
scale this down. And you can also rotate
this if you want. Let's say, and
let's rotate this. Select all, I'm left with a
and let's scale this also. And let's rotate this
to make some variation. Now, I will make to
layout and I will go select all these objects
and I will go with Control J to make
this one object. Now I will get NumPy slash
key back to our scene. And I will say this
object and I will go with X to rotate this to try and line up
these wheat to this object. Now, if you try move
this, this still work, but better solution
for this is if you go to normal orientation. So now we can move
this easily on this. If you want more this up, you can always use this y-axis on normal
orientation or X or Z. So if you use this
global orientation, you'll get these problems here. Okay, Let's make
this to normal end. Let's now bring this up and
let's now add a modifier. So I will place
this to about here and let's increase this prompt. I want make this bigger
than this roof here. So let's bring this
to about here. And let's now add
another array modifier, but not on the x-axis. I will set one on y-axis. So we can use this column
to array this on y-axis. One thing we need to do, we need to go to object
mode, to edit mode. And if we rotate this on x-axis, now we use this
normal annotation. Let's select the global
interests now, right? No. And let's rotate
this to about here. And let's break back to normal. And let's scale this
later on y-axis. And we get this roof tile. Here. Let's duplicate that. Let's
back to global orientation, and let's duplicate this
with the mod is on y-axis. And now I will just change
this rotation two plus. So I'll just delete this minus. We get this one
opposite the direction. And numpad three we can go to right orthographic
and we can place this because this is not visible and we have
all of geometry here. I will just bring
discount, not in this one. Just bring, this may be to do. Now if you go to
material preview, we have a lot of
repeated texture here and let's try
break this allele. So if you go to
Shading, temp and We can now go with
noise texture. If you go with Control
Shift and glue here, we can see how this looks. So I want bring this value
down or maybe to 0.1 to see how the slope now and we need more contrast here to
see this little better. And I will, I'll just take this. And you can see how this looks. So we can now use this aspect of I will not will it mix RGB? Let's plug the one here
and let's use this aspect. Let's go with Control
Shift and click here. And you can see what
we get solving. It might color varies, this light color here, but I don't want white color, so I will use this, ever been this to black. I will also multiply here. I want make darker
variation of this. So I will plug again these
two vector and I will now go, I will plug this here. And to make this part darker, I will go with hue saturation. And let's bring this down. Maybe 2.1. If we want
to can make this, you can desaturate this part. You can see that we
have darker parts here. And if it tweak the settings
here, this color ramp, we can choose how much
we want in this dark, can part of this light? If you want more details here, you can type here 0.05
or 0.2, for example. And we get more of this
variation here, or 0.3. I think this is too much. And you can choose how much
contrast you want here. I will bring this black color to white to make this less visible. What do you can just
bring this value here? We can now back to lay out. And let's see how this loop. Let's now switch to render
preview to see how this look. Okay, let's, we still
have this main cube here, so I will delete this. And let's make to
render previously. We can see disliking side. And let's add one point
lame here on top. Let's increase
this to maybe 300. Okay, I think this roof heel is too shiny so we can
reclaim back to shade tab. And this go to roughness. So bring this more to white. And this one works. Okay, Now this is little
less shiny, but two, because we want our
drain in this scene. I think this is pretty good. And we need to fix
this empty part here. I will go to numpad, three to side mux. And then let's duplicate all these basis Shift D and move this from
z-axis to about here. Let's try cut this
with knife tool. So I will go to x-ray
mode in wireframe mode, and I will now go
with K. And let's just make one cut here. So click here and enter. And again with K. And let's try cut
this part here. So I think when we press, keep work night, when you
press C to cut through. So key and see. And let's see. Now. If you press now
see in edit mode, we get this brush. So we can, Let's now back to
the North, this x-ray mode. And let's see if we
can select this. Let's go to Face
Selection and see. And let's see if we can
select this part here. Escape and it control
disliked this part. You don't need escape control to deselect this and
let's delete these faces. It is not perfect, but we can exist. Let's delete this vertices and this carbon because
we're not in X-Ray mode, so we cannot select
what is behind. So delete vertices,
this vertices, and let's again try
with this part. Delete vertices and Okay, and let's turn off
this x-ray mode. Let's see, we can select this right side,
this face selection. Let's see. Okay, this worked pretty good. Now, delete basis. And let's knife got this part. And let's delete these vertices. Okay, I think this
is pretty good. It's not. Importantly, we can
just be sure to, maybe we can scale this part of to avoid these problems here. We are now in individual origin, just go to bake, just make these two bounding box and bullets get
is a little hint. I think this is pretty good. Okay, this is refilled. Now this part here, and let's now again
go to render preview. And let's add little more
lights to see this better. So she'll DX. And I don't want too
much lights here, maybe one more here. And you can see that this looks pretty good from a distance. And let's just put
desktop one son-in-law. So because this is
night I run Todd really slight to
imitate moonlight. Okay. And you can
see how this look. Okay, before we start
with nouns, sign here, I want taught this porch here. So let's get back to Viewport Display and let's
add the Shift right-click. Okay, I don't know if this overlays with Shift
and right-click, we can add what did you hear? And I will go with sheep day. Maybe cube and scale
this on z-axis. And let's scale this also on
y-axis and also on x-axis. So as Z Sx. If you want to rotate
this little more next, SY to scale this little more. And let's back to
material preview. And we can add same this right planks
textures if you want. And let's, let's apply scalar
control, a applies scale. And now we can go with
you queue projection. And we can go to UV editor. And with an ampere slash key, we can bring this object here
and let's give this a lot. Okay, Let's come back to Layout. And we can now go with again, shift day and cube. Scale this down. With numpad seven, go to
top orthographic view. And let's place one
would part here. So I was scared this again down. And you can go to Edit Mode
then with pay selection, we can just extrude this down I think this is big, so
I will press S to scale. And now I will again bring
this down to about here. And we can bring same
material to this object. So apply scalar control a, a to select all you
killed projection. And let's rotate this with a
select all N Nike to rotate this Z axis by 90 degrees. Scale this. If you want, we can go with Shift D
and I will rotate this. I will escape this all down. S to scale this z-axis. And SY to scale this on y-axis. And now we can go with 45, 45. No error, right? 45 to rotate this on y-axis by 45 degrees. And we can make this
nice piece here. And now, if we, let's unwrap this again, do you Projection? And because we
didn't apply scale, you can see how this looks. So just control a applies scale. And now you will use projection and just scale this
and rotate the axis. Let's now go with Shift D. Move this on x-axis and
just rotate this on minus, just add here minus. Select these three objects
and we can go with Control J to make one object. And now we can hold Alt D X. And let's place one here. And we can now go with Shift
R to repeat this process. And now we have this
nice details here. Okay, I think I don't like
this white part here. So let's see if we can use this roof tiles or so for this. So I will go with shield the Y. And let's just bring this array, maybe 24, and I
will go with Y, X. And let's place this here. We can select both of these and X to rotate this little more on x-axis
and bring this down. And we can also bring this down. Let's see how this look now
in render and required. Now this slide here. So we can bring this down. And let's duplicate
this light here. So I will bring this
also in this room. So the X. This week, this is
what we care for now. And later we will add
neon sign on this roof.
8. NEON SIGN: Let's now make now sign. I will go to solid preview and I will shift and right-click
place origin about here. And now I will go with Shift
a and I will go with text. And if we go now to edit mode, we can type mode. Now, I will go with X9
it to line up this. And now we can press S to scale. Now because this is text object, we have heat text properties, then we can change, for example, font
here if you want. But I think I will
keep this default one. And if we go to Edit Mode, you can see that
this is still text. So we need convert this to mesh. So I will go to right-click
and convert this to mesh. And now if we go to Edit Mode, we can see this mesh here. And I will try
limited this mesh. So I will press a and delete. And I will select
here limited desal. And now we simplify this mesh. And now we can, this
is just for example, so you don't need
follow this step. So I will duplicate this
with Shift D and right. And if you want to make
this double line neon sign, you can, we can
make this easily, but now I want to
make this single. So I will show how we can
make this double and later we will make this a single line. Here. We can go to object mode and we can go right-click
convert this to curve. Now, if you want to, can just go to geometry and
here under bevel, we can add depth to this object and we add
depth to this curve. Now, we can easily add
here and mission material, but, but I will now delete
this and we can start again. Now I will duplicate this with Shift D and move this on y-axis. And let's go to, let's isolate this object
with NOPAT slash key, and let's delete this
out edges here. I will. If we select these vertices
and press delete vertices, we will delete all
this out edges. So I will select this holding control
and delete vertices. We can delete also
this vertices. And I will add one club
cut with Control R here. And let's delete this work, the system, this one. And we can now press F three
and search for marriage. Marriage in merged in Santa. And let's lose same with this
so of 3D merge and center. And let's delete
this vertices here. This one end. And let's bring this down. Let's now back to our scene
with number slash key. Let's now move with numpad one to front orthographic view. And I want to put
this in middle. So I will first start
go to Edit Mode, and I will press
P by loose parts. So now we have step, we separate all these objects. And I will now go
with objects set origin to geometric to put origin in middle of this object. Now, if we press S to scale, we can scale this
and place in center. So objects set
origin to geometry. And let's scale this about here. Okay, I don't see this T here. I will go to Edit mode and now I'm not sure why he's here, but let's continue with E. So set origin to geometry, S to scale, and let's
place about here. And Next I want do here, I want bevel this, let's isolate one, this object, if we will, with
Control Shift B here. We have problem because
we have vertices, they are too close, one to each other. So we need removed. This is by distance, so I will select this object. And if we go to Edit Mode
and press a to select all, we can press F3 and search
for managed by distance. And now you can see here that Blender
remove zero vertices. That's because we need
moved this distance. So now it's one millimeters. Let's set to 1 cm. And then they're still
remove zero vertices. So let's go to ten
centimeter here. And you can see that Blender
remove two vertices, but we still have this
one you don't need. So let's go even more. And you can see that we now join all vertices there
are closer to 10 cm. Okay? Let's now. So we need, we don't need to touch this. Oh, we can now skip to tie. Can select D E. And we can now isolate
this object and we can go to Edit Mode to
see how this look. I think this looks pretty good, so we don't have
doubled over here. If you want to come. Let's search for merger right? Distance. And we
remove three vertices, so we have close vertices here from but I think now is okay. And now we can
make to our scene. Now we can select button not to this 0 because
we don't need bevel this 0. And we can go to Edit mode and we can go with
Control Shift to be. So Control B is to bevel edges and Control Shift
B is to bevel or thesis. So Control Shift B. And we can move
this up and we can add one or two loop
cuts if you want. And because we have
this mesh here, I will again go wheat and delete and limited dissolve to
remove these edges here. And now we can
select also this 0. And then we select
all these letters. We can go right-click
convert this to curb. And now when we correct these
two corner we have here curb properties and
we can add that here. Okay, first thing
I will do here, I will join with Control J
to make this one object. And now we can add that to
all these letters here. And before I do this, I will. I think this can
be more sensitive. We connect these two, this part. So I'm going to go
to extrude this. So E and white
bull y-axis, so E. So E, right? So a lie
and connect to this. Okay? And now we can add that
here in under bump. So if you want mood
this value slightly, you can just hold shift. And now you can move this slide. We have overlapping mesh here. So we can try fix this. But I think this from this
stance will not be visible. But I think you can. We can again convert
this to mesh. And if we go to Edit Mode, we can now move. We have three and
merge Art Center. And let's also F3
marriage center. And let's bring this one here and now let's
try with a and Let's try again managing by distance and just
bring this to 0.01. Okay? And we have problems here. So let's merge my metal center. And let's also merge
these two and this one. Okay, so now we have
much cleaner mesh. And if you now convert
these to, again, the current we can add level here and we don't
care this problem. But I think you don't need to fix this because
this is not visible. And I think this will
look pretty good. Let's now create a mission
material for this. So I will go to
material property step and I will type here. Now. Sign and I will go
to Shading tab and with an armpit slash key, I will bring this object here. And to remove this tab. And let's switch
to render preview. Now I will delete
this principle, be SDF and I will go with me. Sure. Let's plug these two surveys. And let's increase this may
be too difficult to layout. Let's see in render
preview how this look. So we have white
emission material. I think this is
maybe too intense. Let's bring this, maybe. I want convert this to orange color so you can just
pick orange color here. But in Blender we have one node which is
called lichen body. And this node will create color based on
kelvin temperature. So if you search on internet, you can see that these
go 1000-12 thousand. And if you go lower number, you will get reddish color. And this will go to blue. I will go. If you plug these two color, you can see that we get
this orange red color here. I think this is too intense, so I will go to about 2000 and we get more whitish
color but still orange. You can see how these look. Maybe it's this
still too intense, so I will now go with phi. Let's try improve this
material a little. So if you look this reference, you can see that this now sign have less lights on these edges. So we can try create
this in Blender. There is one node which
is called Layer weight, and we have one option
which is called facing. So if you click here
with Control Shift, you can see how this. So we can now treat this with, again with color ramp. And you can see that
this is on edges. We have right follow around these edges and like color sign, we can now use this aspect also. I will duplicate
this with Shift D. And let's go with
Control Shift and right-click to mix this shader. And now we can use
this aspect or N. Let's now plug this here. And nothing happened because
we have same values here. And I will now try
and move it to maybe this lower
number to about 5,000. And this create white color. And you can see that we have more white color on these edges and we can also decrease
this emission value. I think this will not
be visible distance, but maybe you can
use this next time. So let's now back to Layout
and let's see how this look. I think I will make
this more reddish, so I will bring this to 11,000. Now this is much more visible. So you can see this orange inside and this
white color outside. And let's make this
part metallics. So I will go with numpad
slash key to bring this no, go to Save tab and MOW number slash key to
bring this object here. And let's go to material
review AND gate just met. So for this, I will again use image texture and
concrete texture. Let's plug this base color to see how this look and
we need to unwrap this. So I will, I will go
to Edit Mode and I will go with you your projects. And we can go again
with Control T. We can scale this, maybe 23. And let's now bring
this metallic or to one to make
this object metal. And let's again go
into color ramp. And let's plug
this to roughness. I don't want this
may to shiny because if it will reflect
too much light here. So I will bring this
white color here and I will go with bump, plug to high end to normal and just bring these
values all down. And let's see how this look now. Okay?
9. MOTEL SIGN DETAILS: I found this reference image
and I like these cubes. So we can try make this, but I didn't make
this last time. So you can choose if
you want these detail. So let's to Blender. And I will now select these objects and I
will go with numpad slash key. So we can work only
with this objects. And I will go with numpad one. And I will go with shift cube and scale this
SY to scale this on y-axis. And let's place this about here. And I will go with
Control a and applies K. And let's go to Shading tab and let's make this just right. Maybe a little dirt material. So I will call this Y plus. And I will, I will add
the bevel modifier here. So we will get this
nice level edges here, just type here maybe to center. Now we have nice level here. So we can continue
with material. And I will go with
Shift, a image texture, and I will go select this
concrete texture again. And let's see how this look. Projection. And I think this is pretty good. Maybe we can with
Control T scale this. Maybe 1.5. Let's now plug
this to call an input. We'll call them. I will just bring more
white color here. And we can also apply
in these two roughness. And let's now take our material unless you call this slope. No, I think we need more space, so I will go with
numpad one and every go with Shift D and
X to about here. And I will go with Shift R
and repeat this three times. Now we need to split
these letters also. So I will select this object and I will go with B by rows parts. And now we can go same
with this object. So edit mode a, B bar. Okay? And now we need to
convert this to mesh. So convert this right-click
over these two mesh. And now we can select all. And I think this now sign
have to match vertices. So we can go with mesh cleanup. That's image geometry and
repeat type here, 0.5. We will delete this, but this is too much. So mesh cleanup that image
geometry and back these 2.8. I'm not sure why we
lose this T. So I will, I will select only
this objects without. And now we can go
with mesh cleanup. Let's emit geometry
and maybe 0.6. So we delete some
of these vertices and now we can go to Edit Mode plus a to select all
and B, bye lost parts. And now all of these
objects are separate. So let's now go with
numpad one again. And I will go with texts
remote to be sure to select all these
parts in every go with number one and I will just drag it with box select and select this L with holding control this
selected this object. And now we can go with
objects set origin to geometry and just
move this L here. And those same with this E.
And we select the slide, but this is not important. So we can move this here
and now will be same with D. So Control
and deselect this. And, oh, and deselect this
with control in place. This here Let's see how these look now. I'm not sure about
these boxes here, but let's keep this for now
and we will decide later. So I will, I think we need
decrease these slides here. So I think I will set this
to maybe 20 and here. And let's see how these look. Now. Let's try make these boxes more dark and I will bring this white
color to about gray. Okay, I think these slides
here is problematic. So if we move the slides here, I think this is
little more visible. And we have also run here. And I think this loop
now much better. So I will, I will make
this white color. Again. Let's give this for now. I found also this
reference and let's create this
construction mesh here. We can create this very easy. I will now go to solid preview and
disabled this x-ray mode. So we can go with Shift D and we can scale this on x-axis
to cover all this. And S to scale this one z-axis. And let's remove this bevel
modifier. And that's why. First, let's apply scale. And if we now create some
mesh here, for example, with Control R and
we loop cuts here. Let's add one more. Okay, Let's go with this. Let's now move this
example, this down. And we can also
move this Ritalin. With holding control, we
can select all this line. We can go with Kanai K
and we can just connect these parts here
to get more mesh. So I will go again
here with tonight. I will connect some
of these parts. And if, and I'll go
with for a modifier. You can find it here. We get this mesh here. We can increase the
thickness here if you want. And we get a lot of
details very easy. So we can bring this
may be background. And we can scale this
on y-axis if you want. And we can also add this metal material
come to this object. Let's see how this look. I think this is here, here we have too much mesh. So let's try it and delete these vertices and see how
this look relate to vertices. And let's see how this book now, I think this is much better. And let's also create
these cables here. And we can also play
this easy with modifier. So Shift and right-click to
place origin here and we can go with Shift
a, Bezier curve. So now we can move
this on y-axis, and we can rotate
these on x-axis. And now we can extrude this and create
another curve here. So I will now go with Z. And they will place this here. S. You can scale this down and you can
rotate the source so Let's extrude this
two more times. And we can also
intersect with this. I think this is not problem. So E to extrude and let's
place this run behind. And E again. Let's delete these vertices. And now we can, if we
wanted to go with Shift V, and you can copy this. So it can move this with the
GI, maybe a little down. And just keep this
close to this objects. Okay, and now I will go
here to color properties, and I will bring this
resolution to three. And this may be too, because I don't want
high density mesh here. And I will add Bevel here. So I will be holding shift. I will move this slightly. If you want more resolution, you can make these to four. But I think this is enough
and let's add that also here. Okay, I think this
will make a mess here. So I will bring this down. And if you want more
geometric and select the two vertices and you can go with right-click
sub-divide. Then you get one point here. And you can move
this to about here. Let's create black material. So I will call this lake and
I will just choose here. Let's see how this look
in render preview. This one also need
black material and this is not so visible, so I will increase
this depth here. Notice that intense. Okay, I think this looks
pretty nice from far. Maybe we can just
bring this down. Okay, let's see how this
loop without these boxes. So we can select link to
material. Let's now delete. Let's take for this
loop. Without this, I think I will
keep this for now, but we will decide
10. ANTENAS: We're almost done
with this motel, but I forget one thing
which is visible. So this antennas here
and let's create this. Now. We can model this. This is not hard to model, but I think we don't need
do this because we can try find this on CG trader
or any similar site. So we can search here for. Now we can click
these three category. I think I liked this one, so let's try download this. So you need make free profile. You just need to login
with your Gmail or Facebook and you can
download this for free. So let's click
this free download and I will also share
this link with you. So I will paste this link here. You can find this
link in this file. Let's now download this. So you need wait, 20 s here. And now we can download
any of these objects, kid and I will go with the
OBJ or you can go with VX. So I will show me
the OBJ for now. Let's now copy this. And let's paste this here. So I will rename
these two antenna. And let's right-click
and extract files. Now we can delete this
and let's now just copy this address and
we can back to Blender. And let's go to solid view. Now we can try import
this file, import OBJ. And we have this antenna here. You can see that this too big, so we can just press
S to scale this down. Let's isolate this object
with a bump at slash key. So you can see that we have no, you need the select this object. And now you can see that
we have one material here, but if we go to shading, we don't have anything
plugged in this materials. So let's again go with number slash key to
bring this object here. But we get this
map with textures. So let's copy
address of this and let's now make this materials. I will select this
principle be SDF, and I will now go with Control
Shift and Control Shift T. And now we can navigate to this folder and we can
select all these maps. And now I will click
here principal textures, setup, and Blender will automatically connect
this to base color, roughness and to normal. And we also have one map here
which is ambient occlusion. And when you have this
ambient occlusion map, you can multiply this with
color information to get more, to get the ambient
occlusion in color input. So we just need to
go with I will put this diffuse on top and
ambient occlusion down. And now we can go with Control
Shift and right-click. And now we can
multiply this to get only dark colors of
this ambient occlusion. You can see this
dark color here. So it will go now, we
multiply blending mode. We can add more
ambient occlusion. Here. You can see some
more details here. This is not so important, but you can use this because this antenna
is not so visible here. I don't want to bag
textures keeps this. These folders have 8 mb, which is not too much. But if you have big textures, you can always the Jews
size of this texture. Let's try to copy this address
here and let's go with 11 Let's import this here. And now we can go
with the image, resize and I will now hear maybe thousands, maybe
thousands Blender. Ok, and now we make this
textures even smaller. You can repeat this
process if you want. So again, select both of these
textures with just a lot. Left-click and drag down. So thousands, four. And now we reduce these images maybe
tonally to maybe 2 mb, not in this folder,
but inside Blender. I also want to check
the mesh here. So I will go to Edit mode and we have a lot of vertices here. So I will go to Mesh, clean up that image geometry
and type here maybe point to make this low folder. And I think this is
now pretty good. So we can with empire slash
key back to our scene. Let's now place
this on this motel so we can scale this and duplicate with the altar D. Let's rotate this
one, mood z-axis. And we can go again
with all to the, Hey, send place one here. And let's go to edit
more than we can grab only one part of
this, maybe this one. We just put mouse over
this part and just press L to select
this loose parts. Let's now go with shape D, X, and I will now go
with P selection. Now we can separate object here and maybe set origin to geometry and rotate this on
y-axis and maybe we can place one here. This will be more
visible later when we add another lighting here. So you can see this
silhouette here.
11. PARENT MOTEL: Last thing I will do
with these motel, I will set these
two parent object. So if you want move this motel, we need select all this button, then we select the slides. So we need unselect this
and maybe we forget. Select something. And it will be very hard later when we add a
lot of details on ground, it will be hard to
select only this motel. You will always miss
something here. And the best solution for this is to set this to parent object. You may think that you
can join these 21 object, but if you go with Control J, you can also do this because
we have few modifiers here. We have bevel modifier here
and more deprived here. And I don't want apply these modifiers to join
this in one object. And I will allow, set this to one parent objects so we can easily control this. Let's first hide
this point lamps because this is just for test and I don't want
parent this to my motel. And let's now just
with holding Shift, select all these
in glimpse here. And this one, I will now press
M. And I will call this, set this to light, likes, folder or collection. And now if we will
just close this, now we can see we have this, all these slides in lights
collection and I think we have few more
inside this motel. So let's also
selling this one and press M and set this
to this collection. And also this one here. Now we come back
to solid preview. And now we can just disabled this viewport with
this button here. And now we have only
motel in this scene. And we can easily
select all this to be sure that you select
all these behind, you can just go to x-ray mode and now you can select all this. And now I will also add these two collection
with pressing M. And let's go with new
collection and call this motel. Now we have all these objects in motel collection and we can also disable this viewport if
you want or in render. Let's now add empty cubed. So Shift a and empty. You can use any of this object, but I will use cube
because it will cover all these motel and I
will go with empty cube. And let's now go with numbered one to two
front orthographic view. And let's scale this to
cover this motel and SAX. And it number three, you can
see how this book from side. So S Y, and z21. Okay, and now we can go to x-ray mode and
select all these. And you can see that
this yellow line here is this empty object. So this means that this
is last selected object. If this is not your case, you can always with
Shift click here. And now we can go with Control
P and set parent object. And now all this object will be connected to this empty cube. And now if we move this cube, we can easily move this motel. So now we don't need select all these objects
inside collection. We just need select this empty cube and we
can move this with a G, G, Y or Y axis, or x-axis. And we can rotate this with
their receipt for Z-axis. And we can do all these things with
just this parent object
12. HUMAN MODEL: Next thing we need to
hear is this human soul, because this human here is, I download this on
blender.com and is CC zero. I will share this with you. And I would like to
explain you how I made this human walking pose. But if you want to can watch
my Mixamo part of tutorial, but if you don't want, you can
just go here in this file. I'll we share with you. So let's open this.
So this is fine. I'll share with you,
and I will also share this red here and this
human and Islam for, but we will talk about
this and Islam later end. For now you can just copy this human and this
armature here. And now you can go
with objects and you can just go to our scene and we can just paste
this object here. And if you look, if you
go to camera perspective, you can see this human here. And if you want to rotate this, you can go with Z. And just be sure to select this armature here, not objects. If you go with objects
to get this settings, these are mature and you can
move this with G. G, right? You can also mood change, both of these because
this is animated. Can see empty feel
like maybe this pose you can do with LZ and
you can place this. Because I talk about make some animation in my
previous tutorial. I will not do all this again, but I will share this part
of my previous tutorial V2. So you can find this
maybe YouTube link or all these little file
resources folder depends on platform where
you watch this tutorial. And you can now just
open this part, mixing them apart and you can
start watching this part of tutorial where I talk how
to animate this download, then animate this guy with
mixing this list, the 8 min. So you can, if you didn't watch, you can open this
window or you can just skip this if you know
how to animate with mixing. And now we can go to Animation
tab and we can search for type of animation,
for example, walking. And you can select
animation you like. And then then you can
just go here to download. And for Blender, I
download this big 7.4. And just in Blender Render
download this file. You can just, let's
download this for now to show you how this work. And now we have this five here. So I will just copy address
to this folder and we can go back to Blender
and file import MDX. And again, important
this object. And let's see. So this
is here in middle, so we can just move this
character here and we can also grab this
ball and rotate this. But I will now delete this because I don't want
this object here. Okay, I think I need to select
all this and press Delete. I don't like any of
these characters, so I found this human base
mesh from blend step. So you just need I shared
this object with two, but you just need to make
pre profile and then you can download this CC zero
objects for free. Or if you want to can always try find models on CG trader. Let's see what we have here. And you can search
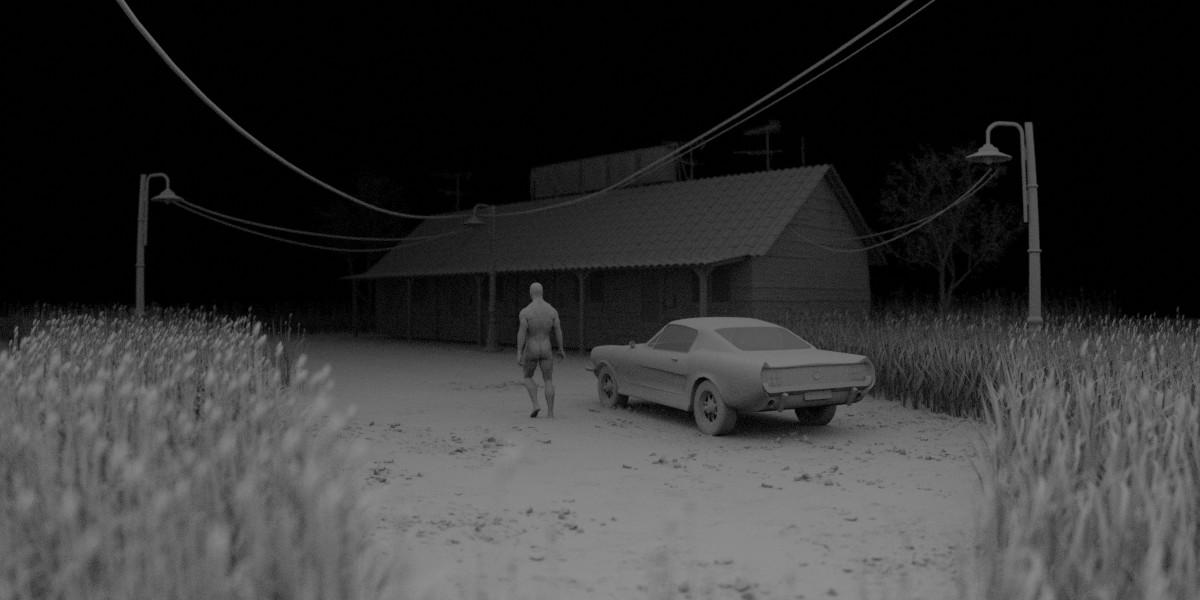
for free objects. And if you like any of these, you can download also this for, Let's place this human in place, where I place this last time. So I know this is 10
m from this camera because I activate
this depth of field. And if we move this, we can see here value. So this is about
10 m from camera, and let's do same here. So I will move with
bump and zero. And I will now
select the camera. And let's go to camera
property step, depth of field. And now you don't see this limits because we need
activate this viewport. So set this to limits. And now we have here by
default 10 m. So I will select this guy and I will
move this to about here. And I will allow disabled this field because we will talk about this later. Now you have this guy in same position that
I put this much. You can change this if you want.
13. CAR: Next is car. And I'm not sure where I
found this car because I made this scene few months ago and I didn't find this
on CG trader now, but maybe you can find, but last time for
last tutorial videos, this most tongue car, it is pretty low poly, but look good from distance. And I think this
fits this ambiance. And I also talk about how to import then edit this
card in my last tutorial. So just again as before, open this window
file or this link. And you can learn how
to import this car, how to change
texture in this car. And because this
object is not CC zero, I cannot share this
Blender file with two. So you need to download this and then you open this
video and you just need to change few textures and we can continue
with tutorial. Okay, Here is my scene with car. So I just want make one
adjustment from last tutorial. So I will go to
Shading tab and I put this car in white
color because I want, may discard more visible, but we will see later maybe
we will change color. One thing I want to do, you can see that I turned
on these slides here and we get nice reflection
on this ground. And let's try make
same bit less car. So I go to Shading tab and if I go to Edit Mode than
with Face Selection, select this part here. Render, we'll navigate
to this material. Let's try the non dislikes. So we have only base color here. And I will now turn on
this render preview. And row is dark. And to lies to this material will need to
plug these two emission. And you can see that we
already have lights, but I want make this rate. So I will go with RGB and I
will mix this with red color. And I will now set
this to Multiply. And if we go to one, we get this red color here. And now to control how
much light's we want, we can go, we know. So I will go with Shift
a and type heat here. And I will now plug these two first value and
I will go with multiply. And I will plug these
two emission straight. Now, if we increase this value, we should get more slides here. Okay, this is maybe too intense. But we will see later
when we add ground. And we can strike
make test render bit. Okay, I think this car
is not in good position. Let's try place this about here. End. We can open and let I'll let split this
window and go with numpad zero to camera view. And I think I want
move also this guy, shift, this guy and car. Maybe later on. Let's see, render something like this. And let's now glow this on left
14. GROUND QUIXEL BRIDGE: Next we will create
here is this ground. And I will first go with
Shift a and it played. And I will set this repressing can all to zero and Z axis. And now I will type here 100 m. And let's now go
with NumPy slash key. And let's work only
with this object. I will go with number zero
to switch to camera view. And in this example, I use Quixel Bridge round. So I will talk about
QUIXEL bridge today. So if you click
this on surfaces, you can find this asphalt and a lot of high-quality
asphalt texture. But if you have problem
with this Quixel Bridge, I think you don't need to have problem because it's very easy. Feel free to use
any similar size. Like for example, I'm NBN CG, and you can type here
asphalt and you can also find nice one texture. And you can download
this for three without registration and we can
apply in this easy. Let's create one test material. So this is just for
tests you don't think follow this example. Let's download these
two K texture. And let's now copy this maybe on my desktop and extract files. Okay, let's now
copy this address. And so this is just for tests
you don't need follow this. And if you go to Shading tab
and bring this object here, we can just go with Control T, base this address here. And now we have color NBN. So this is displacement. But because we have
here normal maps, I will just use one. This term will mop
and roughness. So we need only
these three texture. Let's try also our displacement
to see before and after. And now we have
nice texture here. But because this, Let's see, we have scale of this. Now we don't care
scale information, but I think this is
maybe two-by-two. So we need brings scale. But because we use
this 100 m dimensions, we need scale this 50 times. So type here 50. And if you go with number
zero and get this, but I think we can problem
with this displacement. So we can use maybe
just 0.02 or three. Let's unplug this displacement because we already have
no more mark here. And let's just quickly
see how this look of it. So light point limb
this to maybe 1,000. Okay, I think this is not bad, but I think we can find better
textures on Quixel Bridge. And let's now remove
this material. Let's go to Quixel Bridge. Quixel Bridge is
not just a website. This also, they also
have this program and plug-in for Blender
installed Quixel Bridge, you need go to this quixel.com. And now you will need to
click here, download bridge. And then you need
follow-up steps to install this program. And I think in these steps, you will also, they will also ask you which
software you use. And when you said Blender, you will automatically
install Blender add-on, which you can find here
in Edit Preferences. Don't send. If you
search for omega stance, you can find this and
activate this Blender here. And one important
thing when you install this Quixel Bridge is to download this and login
with Epic Games account. So I will go here with sign in. And so just give
this step and sime it with Epic Games and
then you get all these I'll set of three. And another thing which
is important here, venue in process
of installation, this program, Quixel, we've asked you where you want to
save this file to download. So for this, I create this Quixel Bridge
mega scan's folder. So this is on a Google
Drive because I don't have too much
storage on my computer. But you can just,
if you want to, can create, for example, omegas can solve Quixel
folder on your desktop and then you select this
file and Quixel a, we'll download late that all these assets you
download in this folder. So this is my pixel folder
and this is my surfaces here. So all these subfolders will
create Excel automatically. This is assets I
download from before. In process of installation
Quixel Bridge, you will also installed
Blender add-on. But if you For some reason
don't install this add-on, you can always go to Edit plugins and you can download
this Blender plugin here. I already download this
and you just need to go to Edit Preferences. Don't send. You can install and select this add-on and install add-ons. But because we will use
this surfaces today, if you have problem with
this omega scan, said don't, this is not big problem
because you can always add this manually, this texture
manually in Blender. And I will show you later how. Okay, let's now start
with QUIXEL bridge. When you install
all these settings, we just need to go here and I go to this surfaces and asphalt. And Let's download few of these. I think I lost time. I use this image asphalt. Now let's start with
this damage rope. But you can use any
of these you like. And let's try this. And you can select here texturally if you want to can
go with four K resolution. But I think to K
resolution is pretty good. And now you just
need click Download. And when you click here, download, I already
clicked this. And we excel will
download this on your computer, on file selected. You can see how this look. And I think this is
this one, textures. And let's now back to
blender to Quixel Bridge. First time we go to Blender, and you can see that we
have this plane here. And let's now back
to Quixel Bridge. So when we download
this surface here, we just need to click Export. And Quixel will connect
with the blender. This Blender installed. And this should download this self-paced to
our Blender scene. I'll just click here. And we can see here
exporting to Blender. And let's now go to
materials and let's try find this texture here. And you can see that we have
the image and road here. Let's go to material preview. We have this texture here. And let's go to Shading tab. We need change UV 50 times. So I will select this object and I will now just
go to UV editor. And let's select
this texture here. Okay, if you now go to UV editor and if
you press on let a, we need pressed now S
to scale and type 50. Okay? And if we now go to number zero, you can see that we
can write scale here. Because we have light here. Let's go to render
preview, to preview this. Okay, let's back to material
and select this object. You can see that Quixel automatically connect all
these maps in right place. And we have only
one problem here. We also have this
ambient occlusion class. If you want increase
this ambient occlusion, you can bring this one. We have one problem with
this Quixel Bridge. We just need this. For example, move
this roughness. You can see that
nothing happened. Let's back this here and
that's because specular is set to zero. I don't know why, but we
need to take this to 0.5. Now if we go with color ramp, we can now change roughness because this scene is on rain. I want more shiny parts here. You can see that we need
to be taught these color of black color to add
more. Blake's here. And you can see in preview that we get more
glossy ground now
15. MIXING SHEDERS: We have problem with
this texture here, because we can see that we
have repetitive texture. Here. We have this
two-by-two meter tiles. Repeat all these
times, 50 times. And let's try this with
another Quixel Bridge texture. I think I will now a mix this
with this damage asphalt, but to can use any of these. And you can again
go heel down road. But I will not now
go with export. I will show you how
you can manually this. Important if you have
problem with this plugin. So I will now go
to this surfaces and I think this is this one. And let's, let's now copy this address and let's
make to Blender. And now I will go with Shift right-click to bring
this origin about here. And I will just add 4 s, another object to apply this
new texture on this object. And I will now
create new material and call this asphalt to, let's call this two and
let's call this Asphalt. Okay, let's back to
this object and let's now select these
principally be SDF. And let's go again with Control Shift P and
navigate to this address. And let's now. So this albedo is color, and we also have
ambient occlusion. And I will skip this
displacement and I will just select Normal and roughness
with holding Control. And now click principal
textures setup. And we should get some
this material here. And let's first
fix this textures. So I will again bring this ambient occlusion down
and this, I'll be the up. And we can go with Control
Shift and mix this with a multiply blending mode to add more ambient
occlusion if you want. And if can see
specularities on 0.5, which is good and
I think we don't need change anything here. I will just delete these frames here because we will add
another one in this texture. Okay, and how we can
mix these two textures. So I will now go with box, select it left mouse and
select all this without to this material
output and tie will go hit right-click and copy. And I will now select this
material, has got one. I will now go with right-click paste and
before I click anywhere, just press the G to grab. Now we can move this down. And now I will delete
this plane here because I don't think this
anymore and select this one. Now to make this
little more organized, I will go with Shift a, and I will go with
layout and frame. And let's scale this frame. Let's now just bring this inside this frame to give this little more organized. Okay, let's, let's
again select all this and just bring it
inside this frame. And if you want, if
you press N to can rename these to one. So you get to this name here. And I will, maybe we can
duplicate this frame here, and Let's place
this nodes inside. Now we can move this here and we can rename
this to well too. Okay. I think we should we
should put also this inside. If we now go with Control
Shift and right-click, again, we can mix these two shaders and we get this mix shader here. Let's bring this here and go on. Let me get this asphalt one. And if we go All right, we get asphalt to but I don't want asphalt
one or two avant, some areas with
different textures here. And this I will go with Shift a and I will search
for noise texture. And I will now go with Control Shift and click
here to see how this look. So we need more contrast here. So I will go with coral
them again and just tweak this to make more contrast and
I want more details keeps. So I will bring this
for maybe to 100 to get this details here. And now we can now plug these to factor
everything which is black will be this asphalt one and everything which is white
will be this second texture. So let's plug this
vector and let's go with Control Shift and click
here to back this material. And you can see what we get. So now we have area with asphalt one and area
with asphalt to, and we can control this easy
with this nice texture. So if you move more or
less than we add more, white collar, be, get more. This second texture.
You can this, repeat it the tiles here, but I want add more this first texture
and do get this loop. So you can choose
loop you like here, but this is much better
than just one text. Let's increase a little roughness
in this second texture. So I want make this more
wheat or more shiny. So I will go with color them
in this roughness input. And let's add more black
color to add more, more shiny parts here. Let's preview this with
Control Shift and click here. Okay, here I started getting
lots of bright colors and Let's look like
this material. Again. I will, I don't want
completely shiny parts, so let's bring this down. This little. I think
this is good for now, but we can always look here and see what we can change late. Let's back now to lay out and we can also lead number slash
key back to our scene. Let's press F to
see how this look. One thing I forget is to
remove this test-like, so this test light here. So that's reason why
this is too bright. So just delete this and let's
make another test render. Okay, I see that something
wrong with this texture. There is no bump
information, it is to flood. And I found various program. So always apply scale. You can see that we
have scaled this here times more on
X and Y then Z. So just go with Control
a and apply scale. Now, if we go with 12, you can see how much
is this better. So we get, hold this
bump information now. This is before and after
16. WATER PUDDLES: Let's continue with tutorial. So let's now ADH water puddles, you can see here. And for this, I
will go with Chem, select this discourse of here on just with
Shift and click here. You can place course of here
and I will go with plane. I will type here, then
meters ten by ten. And let's apply scale. So we don't have
problems as before, and this will be our water. And you can see that this now
intersect with this ground and let's water material. We can in-group or displaying change
color here to bluish. So we now know that this is
water and this is our spot. Now because these two
textures intersecting, I will just slightly
move this little down. So if you go with a G and
Z and it holding Shift, we can just remove
this written down. So you can see that this is now under this asphalt
but not too much, maybe just 1 mm. You can see here this white. And let's now isolate
only this water. So I will go to
Shading tab and type. We'll go with NumPy
slash slash key here. So we bring this water here. Now we can draw three water
material. And let's go with
17. WHEAT MODELING: Let's continue with
tutorial and next is these graphs are wheat. And I prepared this few pieces of width in this Blender file, I will share with you. So you can just open
this in Blender. And you can select
these two pieces of wheat and you can just
go with right-click. And you can paste this
in our Blender part. I will move this out of our scene and I will
select this again, and I will press M to make a new collection and
I will call this week. And now we have wheat
in our collection. And I don't want model
this from beginning because it will take a
lot of time, maybe 1 h. And I don't want
too long tutorial. I will just quickly
show you how I made this into can now, just watch and if you
want to can try it, make wheat from beginning. But before we continue
with modelling, if you see this white background and this is strange for you. That's because last time, for last project, I
change this team. So I will go now to
Edit Preferences. And here on the other teams, I will just said this before. And I will say preferences. And now we can try model this just to show
you how I made this. So I'm going to go with
an unfair slash key and with numbered one. And I will try model
this from beginning, but I made this for few months and I will try remember
how I made this. So I start to make
this piece here. I start with cylinder. And because I want keep
this very low poly, I will go maybe with
six vertices here. Let's see how cylinder here. So I will just scale this down. I will go with Z to
scale this z-axis. And now I will go to Edit
Mode and to x-ray mode. And I will scale this, select this top edge
to edge select. And I will scale this down. And you can get control or odd, we looked cuts here and now you can make some variation here. And now you can go with
Control V to bevel this, to smooth this. If you want. You can go with right view. You can see that now this is perfect in right orthographic. So you can also make
some variation here. Now because we have
lot of Lucas here, you can use
proportional editing. You can go to G, like you can scroll your mouse down and
you can move this. Okay, This little too much. Now if you want to grab
some of these edges here, and let's try, make
one leaf here. So I will go to Extrude. And now we can go with S to scale this without
proportional editing. So you can scale this. And you can rotate
this to line up little and again and again. And you can scale this
down if you want to be. Okay, and you can make
a few more leaves here, but I will try now
making this part here. So I will select, again, this is in x-ray mode and I will now go to E and
Z to X tilde on z-axis. And there's to scale. And again, the Z, scale this down in. You can add class here. And withholding
all to can select all this loop cut and
you can scale this down. I will add two more here. And let's select maybe this one, I'm holding Shift and
this one and this one. And we can now press S to scale. But I will scale this
in individual origins. So helplessness. That's how I made this far. And let's also make
this two leaves here. I will select this edge here and every other
with holding shift. This one. And this one. Now we can extrude S to scale. So let's now back to
bounding box and S to scale and extrude
again and S to scale. Okay, I need to line
up from this a little. And maybe I can go with
maybe Control plus. And I can move this G. No, I don't think proportional
editing having just moved this and X. And let's move this here. This is very bad example. I forget line up these before, but I think I can select
this with holding court. And if I press S Z zero, I can line up this on
the z-axis, so on. And they can move this here. This is not so
important for now, and let's scale this down. And this will look
good for distance. I think this is too small, so you can always go
with x-ray mode and you can scale this up and maybe rotate this a little and bevel this. And we can make one leaf. So for live, I just
go with plane, a plane, and I will go with
X9 to rotate, know X9. And they told some z-axis. And let's scale this all down. And we can now grab
just this top edge. And, and we can go with
D to extrude and scale this like this and extrude
again, scale this down. And again scale this down and maybe one loop cut
here and escape this up. And now we can go with
maybe number three. And now we can know this is number three and we can
move it not that one. Okay, various foreign in this task. So I will just bring
this to about here. So we can now go numpad one. And let's move to about here. And we cannot see anything
because he's completely lineup with front
orthographic view. And if we go to Edit Mode, we can grab some of these
edges here. The X-ray mode. So I grab this edge here
and now I will go with Z2. Then we rotate this,
we can see this. So now it's much easier
to work and I will move this to about here
and I will go with Z. Let's get this down. And let's rotate. This may be on x-axis salad. And we can make some distortion
on right orthographic. And you can also level DCT want, and let's rotate this a little. And maybe we can
barrel this Control D. But my recommendation is to go to Google and
find some nice references. And it will be much
easier to model and with some references
18. PARTICLE SYSTEM1: So we will use particle system and for this we need a plane. And I will go with Shift and right-click to make
one plane here. And I will go the
Shift a and plane. And let's just quickly add wheat material just
to see better, where is this plane? And we can just a
viewport display colon, just select any color and
G and Z and holding Shift, I'll just bring this up. So Jay-Z shift and and I will
go with an unpaired seven. And let's now scale this. On x-axis may be end,
rotate on z-axis. And let's now separate
this window here. So we can own left-side go with the number zero
to camera view. We tend to remove
this step so we can see how this look on left. And I will scale this again. So now it's little
harder to scale this on y-axis because Y-axis
is in global orientation. But if you set this to local, you can easily scale this one, Y axis or x-axis. And let's make something
like this for start. So this part is not
visible in camera, so I will bring this to about. And this will be this part here. Okay? And now we can add
first particle system here. So I will go here and particle properties and I
will click here two plus. And you can see that
we have particles, but this is not our wheat. And I will now go to hate. So this is now by
default, emitter end. We need Haidt here, and I will click
here to advance. So we get oxygen here, right? Rotation. But for now I need a render and I will render
this collection. And for collection I will
use this wheat collection. I will select this wheat. And you can see that we have our wheat here in this plane. And you can see that this is
rotated in wrong direction. And I will click
here to rotation, and I will set this to global Z. Okay, this don't work. So I will try, yes,
Global X work. Now. So I will let us increase the value
of this particle. So I will set this to 2000. And now we need, Let's first apply
scalable for this plane. This is good and we also named
apply scale of this wheat. So I will select this
cylinder here and let's Control a and apply scale. Okay, this doesn't help. So we can now go to this render tab and we
can increase scale. I will hold Shift to move this slightly so we can
be more precise. And I think about 0.5 is number we need here. And you can add here
scalar randomness. So if we will move this all up, will are a lot of
randomness here. So I will go to maybe 10
point to something like this. And this is mostly all we need. So if you want scale this, you can scale this here, but you can for example, scale this width here. This will affect also
these particles here. And I will, under basic step
are the little brown neon. And this will add
some variation also. Okay, and let's try another
render to see how this look This is too much. So let's bring this
maybe to 1,500. And I think this interpolator
is not visible in viewport. So we can see that we don't
care too much particle here, but when we press F to L, we get a lot more particles. I think this is problem. So we have here display, so this is probably
your display. So if you said this to ten and this value here,
this is render. And let's set this
maybe to five. And now this should be like
in our render. So maybe file. And let's press. Okay, now this is
like in our render. And let's try. Let's try in a viewport
render preview. Maybe we can handle this. So I think I will send
this may be to seven. And I think I will
increase scale of this. And let's see, render preview. Okay, I think this
look pretty good. Let's now add also
this on another side. So I will go with
conflict seven. Let's now move it, shift
D and Y or Y axis. Let's move this here. Let's go with Z. So if your computer is
slow, you can always, under this intercalated
mood in viewport, you can set this to zero
and it will be much faster. So let's now play with this and I will try place
this to about here. But because this part here
is not visible in camera, I will go to Edit mode, and let's play with
this plane here. So I would have moved this here. And now we have much
more these particles because we have same number of particles, one smaller area. So we will get more
density on this area here. And I will move this on x-axis. Let's see how I made
this last time. So maybe we can
rotate this or we can just grab this point here and
let's place to about here. And let's move this vertex here. And I will
intercalated to seven. So I can see this
in us in render. Now, what is important here, if you maybe this low density and I want
scale this amount down. If you set this may be 200. Also change number of
this rate here because we share the same particle
system and I will go with Control Z, this to 510. To separate this from this one, we just need to click here. So we can call this particle. Right? Then we can select this, and now we can duplicate this particular settings
and we can call this left. And now we can change this value without affecting this part. So I will say this maybe 23. Okay, and let's
continue with particle. So I will now move it, shift D and Y for Y axis. And I want out also this
wheat in background. And I will separate this, so I will call this
for the ground. And now I can scale this up. And now I have 500 part. These particles multiply with this seven in all
these big areas. So I think this is maybe too much because this is only
visible in background. So maybe I will just
bring this to 200 And now we can, I
will just bring this little output because this is barely visible embed ground. So it can go with G
and Z to bring this up to make this more visible. Okay, and this part here
is not visible in camera, so I will move this here. And if you want to
scale this little up to make these little bigger and more visible in the ground. So this part is also
not visible in camera. Okay, and I will duplicate
this extremely wide, and let's place one
here. So let's go. Let's just grab this
point and move this out. And this one. Let's see how this look. So this part is not
visible in camera. And let's bring this about here. Okay? I will just bring this down because I see
this plane here. So let's bring this Z. But I will increase also
value of this scale. I think we need more
particles here, so I will go with the X and
let's rotate this with Z. To get this coordinate here. I will separate this and I
will send this maybe 200. And let's bring this corner because it is not
visible camera. And the last thing, I
need fuel particle in front of camera to make
vignetting effect here. So I will duplicate
maybe this one, D X, and I will separate this, and I will send this
maybe 50 of particles. And let's scale this. Now. This is too much, so I will send this
mainly to ten. Let's rotate this one z-axis. And I will go with Jay
Z to bring this down. Okay? And I will bring this scalar randomness down
to make this more clean. So I will bring also this
randomness almost to zero. And let's see how this looks. So I will bring this down. So Jay-Z, to move this z-axis. And I want also bring this down because we see this right plane here is visible in camera. So I want to bring
this down immigrant. So I will go with G and Z. And also this three objects
or Z and bring this down. This is the result I get. And I think I will share
this file with two. And if you have problem
with this particular, you can just copy this objects and you can
paste in your scene, and this should work. And this width here
is not so perfect. This is not so good model, but I think this will
not be visible later when we add this
black color here, and then we add that field. But if you want to can always
search for on internet for better wheat grass model and you can find
similar models online
19. GROUND PHOTOSCANS: Let's now continue
adding details. And next is this ground. So you can see maybe little
more details on this ground. And that's because
last time I use ground PHOTOSCANS and I will
share this file with you. So you can, under references, under resources, you can
open this links here and you can find this link and
you can download this spec. So I will now open
this in Blender. This is what to get and you can play with any
of this PHOTOSCANS. This is PHOTOSCANS I
made in my neighborhood. So I just, I use Reality Capture for
this PHOTOSCANS send. You can find more about this
in mind one of my tutorials. But let's now set this to
solid view and let's try. Let's try with maybe this one. I will now just go
right-click and copy objects. And you can see that
this is pretty low poly. If we go to Edit Mode, if you have problem
with your Blender pilot can always go with a and you can go
with mesh cleanup. And that's in my geometry. And you can type here, maybe going to school. And you can reduce
number of polygons here. So you can see how
this loop now. But I think I can handle this. So I will go to Control Z. And I will copy this object. And let's back to our scene
and let's now click paste. And we can see that we
have our object here. And I will set this
to collection. So I will press M and
call this PHOTOSCANS. Okay, and now we
can play with this. So let's see. You can see in render
preview that this is, this look too bright
for this ground kids. So I will now select these
two objects, templates. Let's go to check the
depth and let's see shaded the number slash key to bring
these two objects here. And now I will try to match
color of this ground here. So I will select this object. And you can see that we already
have set material here. Very simple, but
I will now move. It shakes day and I was
searched for killed saturation. I want make this more dark
and so I will bring this down to try match this with
this ground here. Maybe 0.4. And you can also
play with saturation may be if you hold down, we basically get
black and white. So I will go maybe 0.8. Okay, and now we can
make to lay out, we can accomplish slash key, we can make to house. Now we can start
playing with this. So I will press S to scale and I will go with the gene Z and
hold with holding Shift, we can move this down. Let's now just to
duplicate this two times so we can go with
all the and why? No, I will make these two
glow bar orientation. And let's now move
this on y-axis and Z. And let's place
this to about here. And you can also press
S to scale if you want them to rotate this. So let's go with oldy and you can also press Z and
scale this one z-axis. And I will now
rotate this X and Y. Let's place fuel in
this puddles here. So you can also go to Quixel Bridge and you can search here under 3D assets, for example, for ground, you can find our top
43 and nice models. So for example, if
you click here, you can find similar
assets here. I think this one
look pretty good. So you can just sign up for
Epic Games account as before, and you can download also
this models for free. You can play with
this in Blender
20. TREES AND STREET LAMPS: This is how my scene looked like after few minutes of
playing with this. And next is trees. And you can see one
tree here and I think I put another in this transcend. Last time, I use one nice free model
from 3D shape can.com. But you can find trees in place on internet so you
can maybe find better model. And let's try search
key for three. Okay, I think there is no
trees in QUIXEL bridge. But let's now back to 3D shaker. So if you click here to
Library and free collection, you can download this
nice trees for three. I think last time
I use this one. So you can download this 13
or green from blender market. And let's see, let's
see name of this. Cherry's. So I will sell
it's on my computer. Because I download
this last time. And I think here is older, so I will this is what to get. So I will open this in Blender. I see that I already
decimate this objects, so you will get
high poly object, but you need to go to Edit mode. Let's a to select all. And now you would
need to go to Mesh, clean up this image
geometry and just type here 0.1 or something to reduce
this thing ten times. And I will also check materials. So we have a lot
of materials here. Let's go to Shading tab
just to check this. Yes, we have a lot of image textures here and
I will make to layout. And I think we don't need
out of materials here, so I will keep maybe
just one leaf material. Now I will just keep this
three materials because this is only silhouette and we don't need a lot of big textures here, which can slow down
our render time. And so I would just keep
these two materials. We have one materials
for leaf and one for these branches here. I will not go with Kopi
right-click copy objects. And let's back to how scene. Let's paste this
here in our scene. So I will press S
to scale these, SRI and let's place
maybe one here. In the lesson you
all to D and X. And let's place one
helium background. Next is street lamps. And for last tutorial, I more than one street lamp
and I record that this part. So I think I will share
this part of tutorial, last tutorial with you. So you can see how I made
this and if you want, you can watch these 16 min part, remodel this street lamps. But for now I also saved
this file with you. So can you can find this rate human blend back and you can open
this in Blender. And now you just need to select this area lamp here
and this lamp. And you can go
with copy objects. And you can back to our scene and you
can paste this here. And I will not press M and new collection and I will
call this street lamps. And let's now place this. So last time I
place this one here and one in middle
and another here. So let's, let's try make
something that's like last time. So I will go with that Z. Now, I will go with D and
X to move this on x-axis. And let's place one she event. Let's go with Z to rotate this z-axis and all the D again. And why For y-axis? And place one here. Okay? And you can see that we
have too much lights here. I will bring this arm here and I will set now
these two spot lamp. I think this is still too much. And I will bring this maybe. I don't know, maybe because I don't want this
to destructive objects, too much lights and
this side areas. I have, so I will bring
this all down maybe to 50. 50 is too low. So last time my goal
with 500, I check. And I think this is
pretty good value here. If you want to can play with
this radius, this spot size
21. CABLES: I think last thing we need model here is this cables here. I also use this
as guiding lines. In. The guiding lines is one
of composition rules. So we can basically
put more focus on this main character
with these lines. To create this, I will
go with the shift a curve and Bezier curve. So now I will go with number seven to see where
is this curve. And I will bring this up. I will go with Z to take
this on z-axis, S to scale. Let's now go to Edit mode, and we can select this
point here and we can rotate this one z-axis and
also lead to this one. This one looked pretty good. So I will bring this and I will connect this
maybe to this motel. If an hour with holding Shift, select both of these points here we can go with
right-click and sub-divide. Now we get one point here. So we can bring this down
and we can press S to scale. Let's also rotate. Let's press S to scale, also this point here. Okay, I think I
will apply scale. And let's now go. I will go now. Why to rotate this and y-axis to make this
shape more natural? So I think this now have
more sense than before. Okay, and we have
not one Kimball. And now because this is kind
of Rick handled properties, we have this bevel and that, and we can with
the holding shift slightly heart and depth here. So maybe 0.04, so this
is 4 cm, or maybe 0.03. And I will also
create, let's check. We have already black material, so this is jobs like color. And let's add this
black material here. And if you want to can go with Shift D to duplicate this and
move little on the y-axis. And let's make
another variation. Let's make this
maybe to sentiment. And I will also bring this up. Okay, and we have
one cable here. Now we can duplicate one of this and let's go with
shield the right. And let's place one. Let's press S to scale this place one point
here in this lamb. And I will now move it X to rotate this on x-axis and maybe I will
place one in hearing. So let's see how this look. I want to make from this side, one end, another from this side. So I think I will be Z to
rotate this on z-axis. And I will place one
in this coordinate. I will now move it
shifted the right. And let's rotate this and
other in this direction. Okay, and we can go to
Edit mode and we can bring this little more up or down. I think this has more sense
if we move this down. And let's also play
with this point here. So as the scale. And I think this, we need to bring this thickness
down, so maybe 0.01. Okay, Let's duplicate
this with a shaded mode, this later on y-axis. And let's rotate
this salad and let's add one with three
cent centimeters. Okay, let's connect one. Here. I will go with
duplicate both of these cables and number seven, and retrieve the right. Move this here and let's
rotate this and z-axis. And let's place one here. Okay, let's see how this
looking render preview. This look pretty good, but I think we need to
bring this point little down and this one
is barely visible, so we can maybe add
more depth here. So let's add maybe 4 cm. And let's bring this
point little dark. Okay, and also this one, I will line up little
this on the x-axis, X. But we can always back later if we see that
something is not good. So I think this is
pretty good for now
22. LIGHTING: Let's now talk about lighting. Now, we will use
volumetric for lighting, and this will change
completely local. This scene. And volumetric is nice, but also have few problems. For example, it will slow
down your render time. And we need to put
a lot of effort in post-processing to get
volume metrics to look mood. So if you like this, look here, you can maybe make finish
result with this style. Maybe you can add
haze GRI it with sky and something
and you can get a nice result with this
lighting similar like this. But let's now start
with volumetric. To create volumetric effects
limit cube and we need what? The school bus volumetric cube. So I will go with Shift a
and I will go with cube, and I will press S to
scale this z-axis, maybe 2 m. I just need cover all these
scene with this group. I will now tell Z to rotate this in this direction
and I will now move it. Let's set this to
local entities Who's on x-axis to cover all this. And that's why we're y-axis. Okay? I just want to be sure
to cover all these scene. Now, I will go with
Control a to apply scale. I will go to Shading tab. And now I will create
this cube selected. I will create, create new material and I will
call this will make. I will now delete these principle-based the
F and I will go with Shift a and search
for principal volume. I will choose
completely white color and I will set this
density to 0.1. It's 2.1, which is very high
density for volumetric. And I will plug these two. You can see that we have
a lot of volumetric here. But first I will
select this object and object properties
under view-port display, I will send these two bonds. So we can now do foresee
inside this cube. We have another problem here. You can see that we don't see whole cube here
because we need in, under camera settings in itself this increase this
value of clipping. So I will add here 10, so this will be 1,000. And now we cover
all seen this cube. Now we can cube volume metrics, but you can see
that we don't have enough flights to see too
much inside this cube. So I will not go
with the numpad, want to front orthographic
view and I will go with Shift a and I will point limb here in. I will bring this point
limb above this cube. And maybe I will put
this above this car. And now I will go with all to D X and I will place
another about here, and I will add one more X, and I will place one here. We have three point lamps here. And because we use old D, then we change this value. We change this value
for all three lights. Okay, and now we need increase this value until we are
happy with the result. So last time I go with value or 150,000 time this value here
if you want same result. And I also change
this color to color. And now we get this result. This is what we have for now, and I think these
don't look so good, but I think we can
fix this later. So this three point lamps
with very strong power Should imitate something
like more or sky going. Light's going through
volumetric cube. So I think this is
something similar, like in three more. I don't like this. Green wheat and this
should be yellow, but this is yellow. So if you select this object, you can see that in material
privilege we have yellow. Because yellow with
combination of blue, we get this green. But I will try to
duplicate this planks. So if we add more lights here, so Shift D and why? They should get more
yellowish color here. So you can say that the now this starts to become yellowish. But I think we will also fix this later in post-processing. And we will mostly
make this black, so this will not be
so visible light. You can see when we
add lights here that we get yellowish wheat. And, but I will keep
this slide for now and we will see later
what we will do it. This one thing Taiwan to do, we need to remove these
three lamps views before just for test. So we can see here three lamps. So let's remove this. And I think we disable
this in Newport. Disliked are still
here in render, so I will delete this. So this is first 1, s one, and third one. The next thing to
increase this later, this reflection on ground. I also want that area
alarmed to these windows. So you can see that
these two windows are light with light on. So let's increase this value. Also swaddle go to x-ray mode. And let's increase this, maybe 200, maybe being clear. And this one, okay, This one is inside. So let's select this one. And I will bring
this also maybe 200. And let's now go
with the shift day. I will go with Shift and right-click to this
window and I will shift a light and I will set
one area lamps here. So we need rotate
these on x-axis. So I will bring this little down and I will rotate this little
more on ground. So I will treat lethal to get more reflection on
this ground here. Now I will say orange, reddish color here and
I will set maybe one. I think I will remove
this light from inside, from this window to this one. So let's bring this one and let's move this
to this window here. And also with, Let's get this little I'm x-axis
and now Alton D X. To move this to this last
one, think about lighting. I want more light in
front of this guide. So I want give this
guy in silhouette. But I also need
to make this zero at more visible light
in front of this guy. So I will go with this
slide here and let's see. I will go with shaved
the X and I will move this in front of this
guy, something like here. This should be like
something like light bulb in under this porch. Okay. Maybe little on
x-axis and let's see. That is disliked. Okay, Let's now make
another render. This is what we have for now and I will change
just few things. I want increase this
lights here because you can see that we get some
nice reflection here. But this barely visible. We can later in post-processing
increase this reflection. But to make this more
visible for now, I will select this
car and I will select this far material and I will increase this value to
and to get more reflection, I will select this ground. I will go to Shading them to
materials mixing together. I will increase this
black color here. To get to more
reflection in roughness, I will just move
this little here to add more blacks and
more reflection. And I will also bring
this closer to black. And let's do same with this one. So Control Shift and click
here to preview this here. And let's add more
reflection here. Okay? Now, don't forget this material with Control Shift
and click here
23. RENDERING: And now we can render this. And I decide to not
make animation. I just want to make
one still image. So this is advantage. We don't need spent a lot of time to render because we will, for post-processing
use few passes. I will go here under
Properties and I will enable this mist past glossy direction and ambient occlusion pass. Direction and ambient occlusion
we will work correctly, but for mist pass, we need to set some value. And I will now go to
material preview. You can go here and you
can find mist pass key. So now we preview
only mist past. And I need change
distance from this, from start, mist pass, start and where mist past. And so you can see this
distance value here. And if we go to or properties have this nice
past properties here. And I will set mist, start mist from 1 m. I will set and to about 100 m because
our scene is very long, so I need better range
for this mist past skew. Now we can bake
here to combine and when we are happy
with this mist past. So I will go here to combine it. And now we can go to render
settings and you can choose what the resolution
and central C1. And I think I will go
with this value of 150, and this will multiply
this by 50 per cent. Even we can go with maybe 2000s. So this will be numbered
resolution about three K. And I will set these samples maybe to fight for final result. And now I can press F2 to render or you can
go to render the image. Now when render is done, we need to save this render
in all these passes. And my recommendation is
to open render folder. And this is this too. So I will copy this address and HIV and save these files here. I will go with image service. Basically this address here, and I will call this mean. This will be main
render and for format, I will use PNG because we
get more quality with PNG. And also I will set this
to 16 bits color, depth. And let's save this now. And to save other passes, it back to our scene. And we need to go
to compositing. And I will click now use notes. I will now plug this
mist past here. And if you press F 11, we should get this under
random result dismissed past. So I will save this as mist. Now, same with the
velocity direction. I will say this as
glossy direction, this GL or glossy direction. And I forget for
mist, set this to 16. And I think for mist is most
important to get 16 bits. So I will again back to mist
and let's go Image Service. Let's go with velocity, direction, glossy
direction as this, and I will call this G, I don't work. And last one is
ambient occlusion. I will say also this, and I will call this a. And now we have all
these passes here. And I see that this size of
these images are too big. About 15 mb. We can, if you want to, can
go with the JPEG with these three images. But for mist past, we need PNG because we need more details
for this mist past. We will use this Alex later. And we're done with
Blender for now. We will also later
re-render this, I think few times. Because when we
see how this look in After post-processing,
we will, we will want to change
some settings here or remiss one light here. Let's see what is this? Yes, we have one point
limb from before. So I will now just delete this
and I will save this file. So later when I re-render this, I will also fix this
small, small problem here
24. ABOUT COMPOSITION: Before we continue
with post-processing, I want talk little about
composition and similar stuff. And I think we need
to know what we want to do with our vendors. And I also make your roles
here you want to achieve. And I get inspiration from this Instagram links and I will share this
links with you. So you can open this
clockwise and you can see similar style images here. So this is nari, that Avante. I'm not sure how to
read this and this. Hey run Siobhan. And I like this profile so you can find a lot of
inspiration here. And you can note
that all of them use the same lighting and
composition techniques. I write here. Nodes. I see that most of
this profile use. And let's talk about this. So first is still
an orange loop. So this is basically
opposite color techniques. And if you go to this
link here on what.com, you can search for opposite
color or color wheel. And you can see, if you
move this slider here, you can see what
is opposite color. So basically this is, most of them use this teal
and orange techniques. So combination of
bluish and cyan color, red or orange color,
always look good. And you can see
that this profile here use a lot of
these techniques. So you can see a lot of this cyan color or
combination of red. I see most, mostly of this technique in this
guy, what Shabbat link. So you can see a lot of contrast between this reddish orange
color and blue color. So you can see orange color here and boorish in the ground. And you can note this role in all these images
here and also here in this last time, I also use this and you can see this cyan color in background
and orange color here. Because I like this cyan
color from this profile. More than this blue color. You can see a lot
of this sand color or combination of
this orange color. Okay, this is first row
we want and another is main character in shadow
surrounded by lights. High contrast and
see what you can see also this rule is in
all these profiles, we can see mostly in shadow. The main character in with
strong rights in megawatt. You can see all in all this
renders same techniques. And you can also note that
this in other profiles. So you can also see here hike, main character in shadow
when high contrast between them and they ground.
And also here. So we basically
want make this guy. And also same techniques,
all these renders. And I also want to make high contrast between these
motel and this background. So if you look our render here, we can see that we
basically don't give any contrast between this guy embed ground and this motel here and
this way ground. So we need do this in
post-processing plate. Next rule here is tonight
mist volumetric, rained. And you can note that
most on this renders are in this style
because these are the, a nice cinematic feel. And so you can see all
of them here volumetric. And most of them can have rain and and all of them are
render light conditions. And next one is a
dark foreground. So you don't want put a lot of bright colors in foreground
because you will get this. You can see that
our eyes go first. So in this bright for ground. So we need to make
this foreground dark to put focus on
this, right? Ms. Motel. Next is wheat reflective floor, and you can also note this
in all these renders. So this guy get a
nice reflection and the nice color
on this ground here. And you can know this techniques
in all these ProQuest. So you can see this
reflection here. Also in most of this renters. And last one rule is saturated
sky with a lot of details. And I think this
details on clouds. And this is mostly
technique from this nut in mind that
bundy you can see, I will write this saturated
sky without of course, and lots of clouds here. You can find this in
oldest renters details and lots of clouds. And I think this is maybe not physically accurate
because when we have a lot of mist in our scenery cannot
see clouds in Skype, but this is advantage of render. We can do what we want. And I really liked
this details so we can include this
in our render. If we go to other profiles, we can also see these
clouds textures here. Now we will start with post-processing and I
will use After Effects, because I use After Effects
more than other programs. But because we will not do
animation, still image, you can use any graphics
program you like. So you can use, for example, photoshop or Premier Pro and DaVinci Resolve or any
graphics program here use, because we will use
only simple things. I think you will not have
problem to follow this tutorial
25. POST PROCESSING: Okay, Let's open After Effects and let's now start with
new composition footage. And I will navigate to this folder and I will
select this main. And let's create just render folders to
keep this organized. And that will place this
Blender inside here. I will also select ambient occlusion is called the controlled glossy direction. And we still as brig
this inside this folder. So we have all
this passage here. And let's save this file. So file save and I
will go in this mode. I will start with color
correction to try get a little better
color from this. And let's set this to 100. And let's go now, we right-click here and new adjustment layer. And I will rename this to see
like for color correction, I use lumetri color. And I will go to Effects
Controls panel here, and I will bring this. You can bring this to this image or with color correction, I mostly use this
basic correction and I just go with
plus one example, plus 50 and -50. And then I have
what I like more. So I think I will go
with now get plus. But because I didn't
go with plus 35. And because file because I don't this color CORECTION last time you can just
copy my value scale. So I will go with minus. Well, because I want more
greenish slogan than magenta. So if you go plus to get
more of this magenta look, I will go minus an exposure. I will bring this to 0.5. With highlights, I will go with 20 shadows plus tempt whites plus 60, 60. And Blake's minus six. Okay, So this is
before and after. You can find all these values
in any graphics program. Next time we'll do here, I want dark foreground. So we have one rule here, which is called dark foreground. And I want make this effect. So this is this is our render and this is
after post-processing. And you can see this, this is one that I made last
time before few months. In average, I get similar
results like this. And you can see that we have
a lot of bright areas here. And I want make all this
area blank, mostly black. So I will go with
Control C and Control V. And I will duplicate
this main image here, and I will rename
this to mean dark. Now I will go with Lumetri Color and I will go under
Basic Correction, and I will set this
exposure to minus six. And we basically
get this effect. But I don't want make
black all this area. I just want to make
this foreground black. For this, we will
use this mist path. Let's bring this mist pass
key aspect or in, in Blender. This is vector in After Effects. This is called luma
made in Photoshop. This is called mask. So it will use this as mask. And I want delta After Effects
to put this where to put this dark image and where
to put this main image. So in After Effects,
this is simple. We just need disabled this form, render preview here, and we
need to set this to luma. Let's explain this
in Blender Render we have noise texture with color
ramp to get more conscious. And if you use this aspect or this will tell
Blender where to put. Color one, which is red and
color two which is blue. And now if we move this, we can basically choose
how much we will. Avant value of one
and value of two And same is in After Effects. So we have color, one color to, and if we said mist
on top of this color, so this will be similar, like same light
vector in Blender. If he said this to luma mate, it will take this nice past. And now we can use
levels which is similar, like color ramp in Blender. And now we can, let's just isolate
this mist pass here. If you click here, you can preview this
mist only dismiss past. So I want make this
area more black. So I will just move
this about here. There. I'm happy with this. Let's see if we disable
this, how this look. But we get opposite effect. You can see that we, you get this dark background and white, this bright render
in foreground. So we just need to go to
mist past and we need in very similar like in Blender. Here. We just basically invert
these colors here. And now we can play with this
color ramp or these levels. Again. Let's preview this look. I don't want affect
too much motel, so I will bring this back
scholar to about here. And let's see how this loop now. So you can ignore this
right part because this is from these lights here. We put, I think this
is too intense, so I will bring
this maybe to 100. Okay, I didn't use all
the Soviet can bring this to 1100 and
we can save this, or even we can save
this for render. And let's back to After Effects. Let's see how this looks. Okay, I want more
dark color here, so I don't want to
this dark affect this. So I bring this, maybe I want to affect this guy here because
I want put him in black. And let's see how this looks. So if you now click here, we can, this means right there and you can
see before end up. So this is before, this is up. Okay, let's put this
guy more in black. And we can always back to this settings later so
we can continue with. Let's now add horizontal glow
on these black bars here. I will duplicate this
Control C, control V. I will name this
horizontal glow. Now I want this image here
and I will go with level. I will take this until
I see only lights here. So I want isolate
only the slides here. So let's bring this to
here and Let's see. So I want Blake area. I will ignore this part so
we can mask this later. For now, I just want
see these lights here. Okay, and now I will go
with Garcia Ambrose. And I will set this
to horizontal. And I will set this
value to, to empty. So we can blow this
on horizontal line. If you want to Greece this, but I will make this 20. And if now set this to
screen blending mode, so Will ignore all these blacks and P poly, this white parts. Okay, and we need
this to our scene. So we remove this
one, this part. And you can see
afraid to forehand. So this is before and I will now use mask
to remove this part. So just take this pen tool
and just mosque do the same. Okay, so we remove all this. We keep on this part here. This is before and if you want to express
T and link capacity, maybe 70% to reduce this. To keep this, sorry, I forget. Make one very important thing in Blender and this depth of field. So you can see that we have
daily sharp details here. So I will back to
Blender to all scene. And I will now select camera. And I will go to render
properties to camera properties. And I will enable
this depth of field. And for focus objects, I will select this guy here. And in material preview
and also in solid preview, if you enable this data field, you can preview this depth
than we'll ever go all down. Maybe to 0.6 or seven. So we get a lot of
depth and fill here. And I will now say this. We can make embed
ground. Another lender. So I will press up 12 and
we can render this again. Because we fixed few things. Now. Let's now back
to After Effects. And now I will play with
glossy direction here. So I will bring this glossy
direction, P&G here, end. Under this color correction. I want keep this top. I will now set this
to screen blend mode. So you can see before and after. I will now set opacity, maybe one to temp, to keep this really soft, glossy direction, this
weird smooth part. And I'm not sure why I get this, but maybe this is because I
use 16 bits for from Blender. And I will, because I
just read render this. I will say this, and I will overwrite
these files, and I will now use eight
bits for ambient occlusion. Let's make again to Blender. And I will now plug this glossy direction
and let's see how this, this look in eight bits. So let's see what the, by changing these 16. Okay, Let's now save
it to eight bits. Let's now save this file again. And I think I need 16 bits
for this, for dismissed boss. And I will now save
hold so the image file or this, combine it. So file save as and I
will also again go with eight and just write this file. And let's make to After Effects. Now, this should update here. Let's see now this
glossy direction. I think this malfeasance,
this problem. Okay, so just use eight
bits for this end. This mist parts, you can use 60. I will say this to
one temporal sent. You can see that we
get this field here. So we get small value of
this gloss interaction. I will bring this even
two-ply because I don't want too much lights on
this black part. But I will now duplicate
this direction again. And I will now set this, maybe this opacity with tea, maybe to 30% in Iran. Because I want a lot of
reflection on this area. I will now just take mask. And I will mask this area here. And if and now twice M, we'll bring this
Mass Properties. And I will set this
feather to maybe 200 to smooth transition. So this is before,
this is after. Let's now this is
before and after. And let's now play
with this mask. So I don't want this
bright parts here. So let's bring this to about. You can see how much we increase this reflection and let's, let's try cover all. So this car
26. ADDING SMOKE IN POST: The next we will add
here is smoke or dust. And for this unit, download this from Pixabay, smoke without texture, you can use just image texture
or widow texture. There is no difference and
this is one I found for free. You can also find the similar
image textures like this. And I will now import
this in After Effects. So I will bring this here. And if you want to can make another folder
and call this overlays. Let's place this here. I will now bring this smoke. After this color
correction and Debussy, this message just press
Caps Lock to refresh this. You can see that we have
only black color here. That's because this
little texture start from this dark color and
appeared later. So we just need to move
this to about here. Now, we need to set this to screen blend mode
to ignore breaks. And you can see that we
have this small here, but maybe we can use
our door lighting. Okay, I think I will
use screen and let's now place this in 3D space. So I want plays this after
this line here and police. I can again use mist
as a little my mate. So it is very important
to set this over the smoke and then you
can send this slow mommy. And now we can go to mist
plus here and we can again, we can isolate only this past
to see how this look end. We can go to mist, to Effects Control and we
can go with the learners. Let's now isolate this guy from because we want put this mist for smoke
after this life. So I'm going to bring
this leg spoiler here. And when I isolate this guy, I will see how this book. I also want make this here
and I also want to make more bright color here because we have a lot of
opacity with this gray color. So I will bring this
wholesome and left. And let's see how
this is visible. I think I've said this to light, and I think also this color correction effect to this smoke. So I wouldn't bring this down. And I will bring this to timeline where this
smoke is more visible. So you can see called the slope. Let's press S, scale this. Maybe to, to cover
this part here. And let's now press T to
bring opacity, maybe 50%. So we have this
smoke effect here. But if you want, you can
place this also here. You can also scale this may
be down to make this smaller. But then we have this
problem here and we can, for this, to fix this, we can also use mask. So I'll press again MM, just M to bring
this mask here and divulge whether
these two maybe 300, too small to this edge here. Now I will duplicate this again. So Control C and Control
V. So you can see that After Effects
make this wrong order. So just bring this up here
and now we can make another, I will press, press M to remove this and
delete this mask. And I will press
S to scale this. So we can make bigger
scale clouds here. And you can also
make little offset If you move this on left, you can see that we make
offset of this video texture. And we can also put
this to another area. So if we now isolate
this mask here, we can place this more in this
task maybe to about here. And let's see how this look. This is before and after. And you can see that we put another mist in front
of this motor here. Okay, and let's duplicate this. Control C Control V again
and change order on this. And we have third one. I will put, maybe this
one varies this car here. And let's again
see how this look. So we can tweak
these settings here. So we can put this right here. And every press S to
make this maybe smaller. And let's place one smoke here. You can see this smoke effects. Okay, So this is before
and this is after. And now I want make
this more contrast between these motel
and this background. So I will again go
with smoke control C control V. Let's change order of this and let's now make this mist past
cover all these motel. So I want black area
all to this motel here. So I will just bring
this back scholar here and isolate this part here. So I want more white colors
to make this more visible. I will bring this on that. Okay, I think this is a pretty
good and we can now place this smoke behind
this motel here. Let's try scale this up. And let's also change this timeline so we can
get another details here. Okay, This part is visible here. So I will keep this part here. And I don't like this
bright part here, this skill, this conscious. So I will, I will try me
move this maybe down to this week's or I will just put over this car so we get nice silhouette of this car. This smoke effect. This is
before and this softer. This is this one. So you can see how we get nice silhouette with this
smoke window texture. Okay, this is what we have for now and now it's too late and I think I will continue
recording in more
27. SKY AND CLOUDS1: Let's continue with tutorial and I think we need some green here. So I will right-click and new adjustment layer and
I will call this grain. And I will search
for grain effect. And let's set this
to final output. And I will choose
this codec 800 reset. And we can reduce this. Maybe to point a. Let's now create sky and clouds. And I will use this as
reference so we can find a lot of nice sky here and mostly in cyan color with
lots of clouds. So let's try create
something like this. I will start with solid
color. So a new solid. And I paste this hex
code here so you can, if you want a similar color
like or same color like me, you can just paste this
cyan color hex code here. So you can choose this color, and now we have this color here, but if you want, change this color later, you can choose thin. So for example, if you
decide for bluish color, you can always pick
here and change this to group two bluish color. And for now, I'm delete this. I don't need this. Now we need set the sun
color only on Skype. So I will again go with this PNG and I will
use this as luma. And now we need levels. And we need now isolette sky. So I will just bring this mist pass here so
we can see what we do. Okay, I put letters
in wrong layer, so we need levels here in mist. And I will now tweak this
until I isolate one sky. It is little hard
to isolate this because this range
is not so good. But I think is not problem. Put some sand color
on this area. You can see also the type
fade this motel here. So I think this is, we
can get nice effect if we put some gray areas here. But I want to move
this more on that. I think we can also try
enter some numbers. So let's try this one.
Let's see what we get. Okay, and if you now remove
this from visibility, we can see what we get. We get this and
color only on Scott. But we have one problem. We have very hard
transition here. And I want smooth this. And I think we need gradient from this for this area here. So we can add this
new composition. So right-click and break. And I would call this sky. Now if we double-click here, we are open on this mask. And I think we need
gotten this from here. And I will paste the
least mouth here. And now I will go with a new adjustment layer and
I will call this gradient. And now I will search
for Gradient Ramp. And if we set this
blending mode to Multiply, we will take only black
scholars from this area, so I will set this to multiply. So we have dismissed P&G here and gradient
from top to down. So we need opposite direction. So I will set this to
white color and this You can see that we
have gradient here, but we need to tweak
these settings. So I will try move this point. I think we can move this. Okay, this is the top points, so we can move
this, maybe don't, and this one from down to, up to make more
gradient on this area. And you can see
Effects we get here. So let's try move this down. And let's now try how this look. Okay, I think we need to
more play more with this. So I will be this point up
and also with this one here. Okay, this works but, but we have this sand
color is very similar, like Oh, original color. So I think we need Greece, this white here because we
have lots of gray color scale. And we bring opacity down
with this gray color. So having strike, play with this while you're here to get
more white colors here. Now this should be
little more visible. And you can see
this gradient here. Let's try. Let's add
more gradient here. So I will bring
this point more up. Okay, I think this
is good for now. Let's now add some clouds here. So I was just for test,
try another color. So you can see that this works. So I will go with, let's
try color this red color. So you can see this
gradient here. We can change this to
any color later if you want this tint effect. So let's try out
bluish color here. And maybe this gradient is too intense so you can always play, play with this gradient also. Okay? I will now
clearly distinct. Let's now add the clouds here. I will share this link v2. Okay, here is
linked to Unsplash, so can copy this link
and if you want, use gloves texture I use, you can download this image and you can download
from this link. So you can use this to K or for K. But you can also
search for clouds here. Maybe you can find
better texture. But for now I will use this one. So I try this and I think
this, this one works. So I will bring this
to After Effects. Let's open this
project here and let's bring this After Effects. And let's set this
in this folder. Now I will set this on top. I will not press S
to scale this down. We can bring this
down to about here. Evan lot will change the
blending mode to overlay. And you can see that
we have clouds here, but we have also this
road here and stop. We don't need to remove this. We just need to
copy this sky mask. It's Control C and Control V and set over this texture end, we need to set this to mommy. You can see them this work. If you want to make
this more intense, we can go to Effects Control
and we can search for lumetri color and we can increase maybe this
consciousness to Foundry. So we get more details here. But you can also play with all these values and maybe
you can get better results. Now, of course, you can
always choose opacity. Maybe you can set this to 70% Okay, I want to
keep this intense, but you can also play with
different blending mode. Let's see, call this look. Okay, this vivid light
is more intense. If you want to can
choose this one and maybe bring opacity down. And let's try to more. So we can choose between
multiply, overlay. I think I will go around, keep overlays so
we can quantity. Let's try play with
these values here. Maybe we can get
something interesting. So I will try and go
to 100 and minus one. So I think I like first,
we'll get plus 50. We get more greenish tint
here and distinct I can try also want to download. So if we go from minus T, we get to this greenish tint. And let's try bringing exposure
maybe to five minus five. I think I will go to
plus maybe only one. With highlights. I
think I want to go maybe, maybe down 50. And with shadows,
Let's try go to class, but I think I will go to
minus to make more conscious. So let's try -100. Okay, we have more conscious
heat and more details. Maybe doing ten
-50 and I think I will try go to plus but I think minus kept more
sense. Maybe -50. And with blacks, maybe also mine. So this is before
and this is up. And you can choose look like
28. RED GLOW AND HORIZONTAL BLUR: Let's now try create
this red glow effect. So we can go again
with new solid. And I will now choose red color, but I think I will choose more orange color here,
then completely red. Okay, and let's now set this
to screen blending mode. Now we can mask area where we
want to put this red glow. So I think we need put
over this motel sign. And I will now choose
this ellipse mask. Okay, and I think we need now play with this
mask to mention this. Now sign here. So let's move this down
and move this here. And we can also rotate this. The next I will add
mask feather here. So if we open this tab here, we can add whether drive
it to 100 or maybe 200. Okay, Maybe 150. And now we can also bring
opacity maybe to 50%. Okay, So this is
before, and this is, let's duplicate this with
Control C and Control V. So I will rename
this to neon sign. And this will be man. Because I want put this mask after this man here, this guy. So I will bring this here, and I will now change this
shape of this mask here. Okay? And I want put to this
after this guy here. So we need again Mr. PNG and
we need use this to my mate. And now I will
again with levels. Let's isolated this
to see what we do. And I will want
isolated this guy. So I want to paint
them in black. So various black area. We will not to get any
of this solid color. So let's, let's now
see how this loop, this is before and after. But I think we need more
white color in this area, so this will be more visible. And I will move this left. And now this should
be more visible. So we have this red
glow effect here. And if you want to can also
do this on this car lights. So I will walk in and copy this. And I will call this car. So we can place this mask here. And I will just bring
opacity maybe to 30%. So this is before and this is you cannot this
horizontal blur effect here. And let's try create this now. So I will create new
adjustment layer, and I recall this
horizontal glow. And let's go with
the Gaussian road. And if now set this, maybe two. And this to horizontal, we get to this horizontal,
horizontal rule. And I will click
this repeat edge to remove these edges here. After Effects is a
little slow so you can bring this preview
resolution maybe to help. I think this will be
little faster now, but you will lose some quality
and in viewports here. And I didn't want
this horizontal glow only after this guy because I want to put him
keep him in focus. So we can again go
with mist mask here. And I will set again
these two Little Mermaid. And let's again play
with this mask here. So let's again isolette,
this man here. And let's see how this look. So now we have this glow
effect only on this motel, but I will for taste increase this may be off to, to fund it. So you can see this effect here. So this is before. And, and I think this is nice, I forgot, but I will give
this sort of maybe one fifth
29. OTHER EFFECTS: This black skied
off too intense. So you can see on this reference that we don't have
to strong blacks. And I usually take
S-curve effect here. So I will rename
this to risk curve. And again with the
Lumetri Color. And we have here
curves settings and I will just add three points here. And now we can bring these legs up to find that this mux here. So this before. And you can also
bring whites down. And you can create a
little more contrast. It mid tones. I think we have too much
focus on this bright area, so maybe we can create
the gradient from talk. So I will call the name
these two gradient. So we can again go
with a gradient ramp. If he said, now these two
multiply to keep only blacks. And we get this gradient here, but we need play with this. So let's bring
this value all up. So you can drag this with
the left mouse click. And I want bring this up. Maybe I want to just a
small gradient here. And let's also bring
this point here also. Okay, So this is
before and talked in the beginning here
also odd vignette. So we can rename these two
gradient from top bend in it. And I will go with
Lumetri color. I will not this vignette, maybe two minus one to get
this dark coordinates here. This isn't, if we
go more to minute, maybe minus five, we get
a lot of blacks here. But I will go maybe minus one or maybe even less minus the zero. Let's now try put more
focus on this area so we can increase brightness
only on this part. I will call this focus. And if you now go with
Lumetri color here, and if we increase this
exposure maybe to one. And now I want use mosque
only to this area. And let's see how this look. I think I cannot
play with this mask, but if we will now to
transform and anchor point, we can now play with
this mask here. Let's now add the
200 or three comedy. So let's see before and after. So you can see that we
add more lights here and you basically put
focus on this area. Let's try also
increase contrast. So if you said this
may be confounded, this is too intense, maybe 50. So let's see before and after. I think I will keep this subtle, maybe just 20 per cent
and this may be 0.5. So this is before. But I think better
way to put this in focuses with this smoke effect. And let's one more. So I will try make
more contrast between these motel here and
this background. So let's copy this, smoke enemies and bring this And let's see how this look. Okay, we can isolate
only this mist past and let's make more
conscious here. So I want to isolate
this motel here. Okay? And we can now use
this this smoke and we can easily put these
smoke after this motel. So let's, let's see if we have mask in
terms, have mask here. So we can put this on this. And I will now bring
the opacity to 100 to see better what I do. You can see this mist here. And if you move
this on timeline, because this is not
just still image, this is 3D animation. You can see that we get different result
when we move this. We get in the smoke effect here. We can also press S
and scale this up. But I will keep most
of these subtle, maybe just 50 per cent. So this is before and after. So I want this more in
silhouette in this mode. And let's try place
one here on this area. I will go again with
control C and Control V. Let's bring this up. Okay, I think we
can put one here on this and bring opacity down maybe to set. We have this ambient
occlusion path here. So let's see what we
can do with this. Usually I put this on
soft light blend mode. And this is before and after. So let's try. So I will go with levels to
try make more conscious heat. Okay, and because we have
black colors in this sky, maybe we can use this
as Musk because I want to remove this ambient
occlusion from this sky. I will also duplicate this and I will set this Asilomar make. Let's see what we get. This is before and after
we remove this, this mask, use this as mask to remove this me too close
up from this guy. Because we have a lot
of black scholars here. And I think I need to add more white
colors to affect this. Gaping holes. They smoke. Okay, I want more
whites color here. And Blake, Blake
scholars on this guy. So this is before and after. And we get a little
more details on this roof here if
you look better. But I think I don't like
this ambient occlusion pass on this area in
foreground horse. So I think I will just use mosque in every dry
paint on this area. Okay. Let's now add M to this
mask. In every ago maybe Hundred too small to this. And let's simplify this mask with deleting these points here. Okay, and let's see before. And so we basically get more contrast on this area
and on this area here. And we get also more details
on this car and this motel. But I think this is
now too intense. So let's go with T
to bring opacity. And I will set this maybe
just to 50 per cent. So this is before and after. One thing I miss a
lot in this render. If I compare with this one is
this reflection on ground. And I'm not sure why I cannot
get nice reflection here. I think this is because
of this volumetric. Because if I, for example, select this ground here
and few of these lights. If I go with number slash
key and isotonic this, I can see a lot of
this nice reflection. But if I bring this, if I back to my scene and
this volumetric cube, this kill all this reflection. So if we, for
example, delete this, this volumetric cube
and this lights here. We use these slides
for volumetric. So if we delete this, we can see that we have
this, all this reflection. And wanting we can do here. We can just render this without this volumetric and without
these lights for volumetric. So for now I to
delete these slides, but I will not save this file. I will now just make
another vendor. And after rendering, I save another glossy
direction pass. This is last one with this volume metrics
and these lights. This is without this volumetric and you can see that we
get much better results. So what I will do now, I will try import this
in After Effects, this another direction paths. I will set this may
be here on top. And if, and I'll
set this to screen. We should get more
reflection on this graph. So this is before and after, and this is obviously
too intense. But I want keep this glossy direction only on this ground and
maybe on this roof. So you can see that we
get nice details here. So I will now just make
another mask here. Okay, and let's
simplify this mask. And let's now move
with them to open this mask properties and
increase this feather. Maybe all 300, too
small to this. Okay, So this is
before and after. And you can see how
much details we get. Let's play with this mask. So I want hide this part here. Okay, and now I will go
with T to bring opacity, maybe 50 per cent. Maybe this is also to match. And this is before and after. We bake this nice
reflection here. I think this is
too intense here, so I will bring this old to 20, and I will now go
with Control C, Control V. And I will
duplicate this mask, but without this motor here. So I will bring this Mosque down. And I will
keep on this part. So we have 20 per cent of mask, this mask and also 20 per
cent on, only on this area. So in this area we
have 40 per cent. So this is without glossy
direction and this is wheat. And we can also increase, this may be given to 50 to
get a lot reflection here. Maybe too intense, so maybe 30. Okay, and let's see before
and after all these effects. So this is from Blender and this is after post-processing. Maybe this guy texture
is too intense. So let's find this here. Let's also bring this
opacity to 70% or eight. Maybe we can increase
this red glow here. So let's see. So this is car, this is now sign
and this is men. If you look this my last render, you can see that I put a little
reddish color are also on this guy to match this
with this background. So we can do this easy if we now had the little white
color to this mask here. So let's bring this maybe left. Okay, We put little
reddish color here. And let's see. Let's
check opacity. So we can break this maybe to 70 per cent to get more
reddish color on this. A, maybe it's too
much maybe scene. And we can bring
this mask heroes. And maybe last thing here, if you want to can
add rain effect here. So let's add another
adjustment layer and I will call this rain. And in After Effects we
have real effect, I think. So CC, rainfall. And if you bring this
here, we get rain. And I will bring this
down to maybe to merge this better
with this Effects. And now we can increase maybe
opacity if you want to 50. To make this more visible. You can also add more. This drops and played
with all this value. So if it's being this side, so let's see how this look. But if you liked this effect,
you can play with this. And if you don't
have After Effects, you can always
maybe go to Google. And you can search for Zane. And you just need find a nice and high-quality texture and we just need sent
this to blending mode. Okay, I didn't find high
resolution texture, but let's try with
this low resolution so it can bring this here. And you just need to scale
these to match this. And now we need just set this
to screen blending mode. You can get nice
magnetic dipoles. I think this RE-AIM is nice, but I want keep this clean. So I will remove
this maybe for now, and maybe I will add this later. And let's now render this. I think we are done
with After Effects. So I will go to composition
and say frame as file. And I will change from Photoshop
to JPEG. And now I will Save this on this render folder, and I will call this render. And we can just
click here render. And now we have our render here. And if we compare my last
render be to this one, you can see that there are
similar but not the same. And that's because I
played also in Photoshop with color CORECTION tool
and I will show you how. And we also have same or
similar in After Effects, but This little too slow. In Photoshop, we have more
option and it's real time. And that's I,
that's the reason I play with this in Photoshop. But you can also write in After Effects with
selective colors here. So I will add another
adjustment layer here, and I will call this selected. We can search for
saving effects here. So you can see that this is
very slow and we don't have too much oxygen scale
like in Photoshop. But for example, if you
set these two reds, you can change only the colors. So if we change
this maybe to 100, we should see changes here. Maybe you can see. And let's now try -100 to
see what is better end. We increase this reddish color, but this is too slow and
let's try with yellows. Happy we can affect this. Wheat here. So let's
try this to 100. Okay, I think we
affect this area here and what if we go with -100? Okay, I think I want plus here, and let's try also with science. So I think we should affect
this area that desire. So let's go to plus 100. You can see reason why I don't want use this in After Effects. And I think we can try
this in Photoshop. And one thing I also miss here, I see here also wheat in
this area and we don't, we have here only empty parts. So I also add one of
this area here so we can try the reason that this
with this wheat here. And you can see that all
this process of creating Art is just a lot of
tweaking settings. So we can tweak this all day. But I think we need finish
with this tutorial and I think you can play with
all these settings and layers and maybe you can
get much better result. And you also need to
jump from blender to After Effects on any
post-processing software. And you just need to put more time to get
the result you like. Okay, I read render
this and let's now try write all these files. So this is main. And I will go to compositing
and I will save dismissed. Glossy direction and
ambient to prove. Let's see what we get. Okay, maybe this is too intense, but let's keep like this. So I will again rerender
this same frame as file, and I will choose this JPEG. And let's save this
render finished to
30. COLOR CORECTION AND FILM TEXT OVERLAYS: Let's now open
this in Photoshop. But you can find
similar tools in any graphics editing program. Let's now move with
control C and Control V to duplicate this image here. So they can compare later, before and after
and just drive it. Balanced squeak effect here. So if we go hold all, we can just stick these two, this first layer,
not too second one. And let's try and move this. So you can see that we get
more reddish color here. I really creates this
reddish color and also maybe little
green don't end. And maybe in the ceilings
and just delete. This is this is before and main tool for color correction is
in Photoshop is here, I think, in camera raw filter. So we can all options
in this step skills. So some of this is
like in After Effects. So we can try maybe
this values here. I think I really increased
temperatures are lethal and so control smoke you like. And you can play
with these sliders and let's see how this loop, I will not touch this exposure. I think they've really been
gluteal conscious down. We can look likes here. So I will bring this, maybe. We can increase the highlights. If you want to, can
add more texture so you will get more details. If he treats this texture. I will just add a
little and clarity. Okay, I will increase
also this clarity. And if you want more haze, you can add the case. Or if you want to remove case, you can move to right. I think every
volatile let vibrance and saturation is for color. So Want more polar or you
can add more saturation. But I will not touch this. In the next is saturation. So if you want to
add saturation to this reddish color or
you will go on left. If we want this saturate
this you will go and left. And if we want more
color, civil go, alright. I think I will desaturate
a little less. This is orange part here with adversely affect this sky. So if you want more color, you can bring this. Alright, I will keep like this. And now we affect bluish color and
we have a lot of bluish color on this motel. So I think I will
desaturate this. So I don't want too
much bluish color here, so I will go Khalid. Okay. And we don't have
purples and magentas. And let's now play
with luminance. So if you want more
reddish color, you will go alright. I think I've gone into left
and with orange color. I will keep like this. Okay. I want more darkness
on this bluish color So I will go on. Let, if we go, alright, we match, merge this
little more of it. This guy, I don't want this, I want high contrast here. So I will move this. Okay? So this is before, this is before and
this is out there. And let's now disabled this color balance
and C before end up. Let's see how we can
get to this poster. Look. So I just put some
text overlays here. And let's say this is
this drive is short beam. I put on my YouTube channel. If you want to can
search for them. And this is the reason
I type here dry. And let's again
type here. Dr. end. For this. I think
I use this font. I paste this name
of phones here. So you can go to use
this, the website.com. And you can search here
for these categories, for example, this time. And you can find a
lot of free fonts. You can download any of
these, mostly for free. And just double-click here
and install this font. And then you can find, you should find this
font in Photoshop. And over any program. I will select this font sharp, so I will sharp. Okay, and I have
only 50 pixels here, so maybe type 200,
300, maybe four. Okay, and I just pick some
yellowish color here. And you can see that
this is too sharp, so you can, let's increase
this maybe to 450. And now we can just go to Filter Noise and we
can add noise here. But this will convert this
text to smart object, so it cannot edit
these texts anymore. But we can add grain to this text here to make
this less perfect. And how I get these icons here. So I searched for, I think I've searched for and
I found on some of these. Yes, you can see
this title here, so I just download this
image and maybe you can find better resolution
of this similar image. But I will share this photo V2. So you can bring this in
Photoshop or any program, so I will do it photoshop. And now we can unlock this and Control C and Control
V. Copy this here. But you can see that this is
very low resolution image, but I will Control
T scale this up. I want these texts
convert to white. So I will go here. I think I go with this levels. Okay? And I want it for
the old Taiwan. They picked only this,
this image here. So I really cool old
and I will click here. We can now affect
only this image here. And now we have white text here. And now I will set this
to screen blending mode. No, I will select this
layer here and I will send this to screen blending
mode to ignore blacks, but we don't have too much. This is mostly gray and I would try playing
this while loop here. I think we can do
better this width. Let's try with the
curves effect. And let's also just stick
this to this layer here. So if we now make
more contrast here, we should isolate
this black scholar. Okay. Let's now this can
easily control T. And that's how I get this
nice icons here. And that's basically
all this text here. You can take anything you
want any form to one, then I think we're done
with the least tutorial. I hope you learned something
new and see you next time.
 šime Bugarija