Transcripts
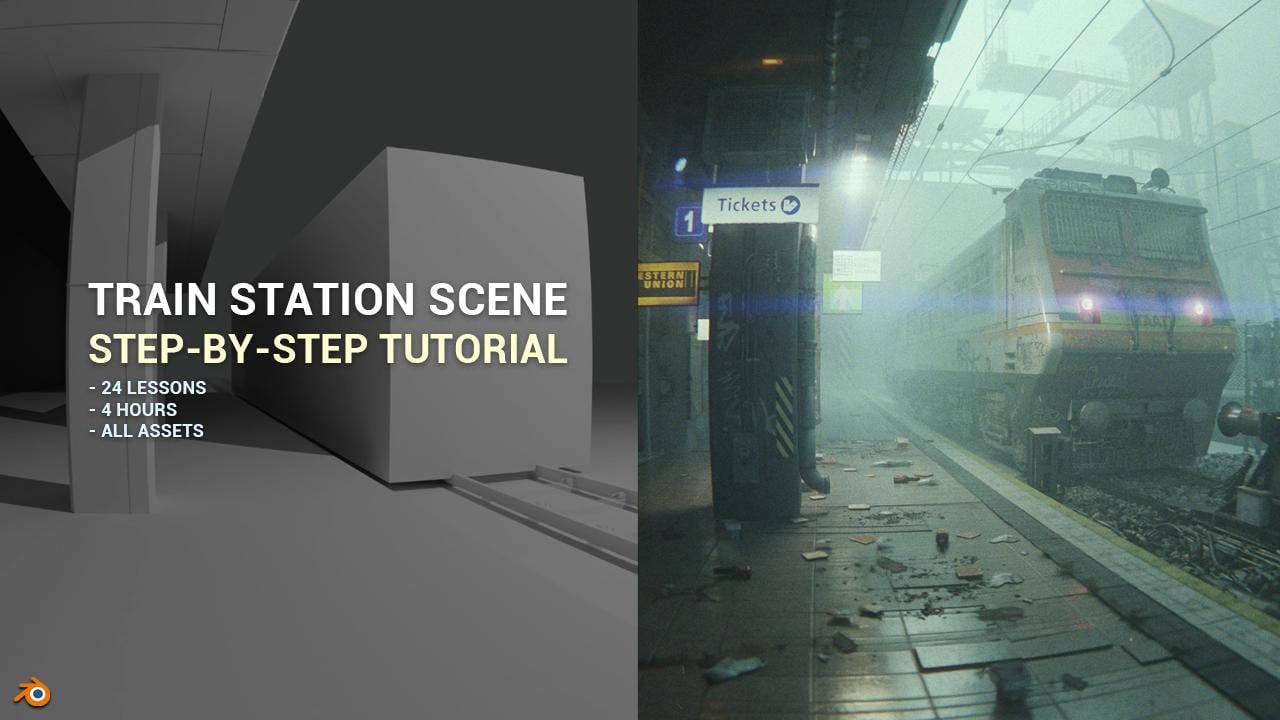
1. 00 - Introduction: Last month, I recorded a step-by-step
tutorial in which we create train out of your
watched the tutorial. And I got a lot of requests for a tutorial where we create the
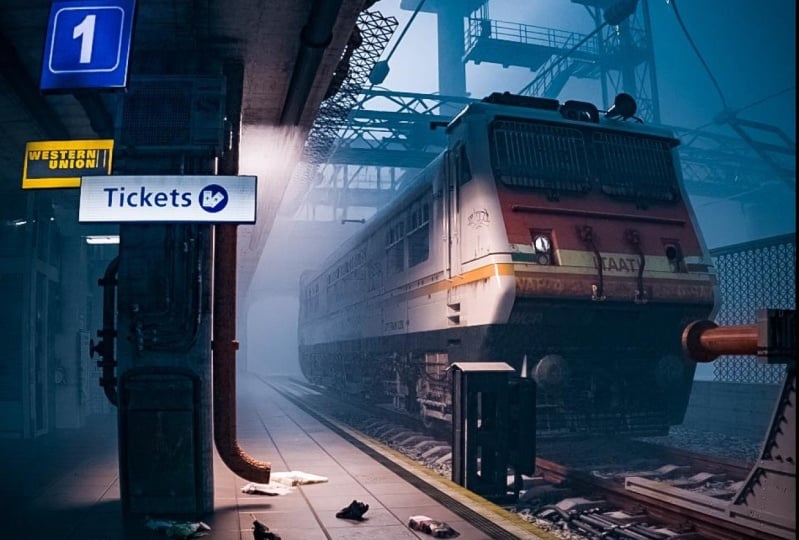
entire tray station scene. Since I created to scene, in meantime, the second
one get more votes. So I decided to recreate this scene and record
the whole process. The entire process of creating
scene is record that. So that's tutorial is easy to
follow even for beginners. If we'll talk about
lighting and how to achieve the misty
cinematic look in blender, which is the most important
part of this scene. We'll also talk about
modeling, texturing, unwrapping, compositing,
post-processing and more. In this scene, all models and
assets were created by me. So we will not use any
model from the internet, except for a few image textures
in addition to the model. So you can see in the scene, I created a lot more models and divided them into packages. So I will share with you
100 Betty models and six Blender files which you
can use in future projects. I'll draw, we will look
model every object in the scene because it
will take a lot of time. We will talk a lot
about modeling, can create some
object from scratch. That's tutorial is separated
into 25 parts with an average duration or 10 min to make it
easier to follow. Also, since we are using the train from the last
tutorial in the same, I decided to include
the tutorial where we keep the train in the
package or support. All resources and
links are included in this tutorial and subtitles with shortcuts are
also available
2. 01 - Basic shapes: Before we start, first
recommendation is to create a folder where you
want to save all these files. And I create this some way tutorial folder
under project file. So but this is more train
station than Subway. So you can create your folder
and call how you want. Of course, I will share all
resources and files with you. This is some of resources
and also links, but I would add also more resources and
links in this folder. Right? Now we can open Blender, and I will use last stable
version which is 3.6. And you can just go to
blender.org and download Blender. And I will click here
and I will go with file. Now first I will copy this
address of this folder and hit Control C. And
I will go it file, Save As and basically
address here. And I will call
this train station. First thing when
you start getting scene is to find the reference. And I will show later what
reference I use for this work. But for now this will
be our reference. And the second thing you
want do when you find the reference is to create
basic shapes and objects. And also in this process
we will set Camera. Okay, so let's now
start with this train and this ground and all
these structure here. We need this cube in our scene, but if you delete this cube, you can create new one bit, shift a, shift a and Q. In this tutorial, we will
not model this chain here. Because if you follow my
work, you already know that. Record. Full
step-by-step tutorial, how I made this shrank. He and I will share with you this train model and
also a train tutorial. So you can watch this late. But we will import
this model later. For now, we just need basic cube that will represent
this chain model here. And I hear dimensions
of this train. This will be on x-axis 20 m. So first you need press N, and N will open this step here. And under item type huge
20 m and on y-axis is 2.5 m and all z-axis is about 3
m. And this is our train. And I just want doing
this with numpad one. I will go to front orthographic
or with number three, I will go to right orthographic. You can also, if we don't
give a lamp and you can go Viewport Front or
your viewport, right? I just want bring this on
Y axis or x-axis here. So I will just type here
1.5 m because this cube, Big 3 m and origin
is in the middle. Next thing I want create here is this round and this wall here. I will start to shift a plane. And now we have plane
here and I will press S, scale this. I will go to edit
more than we select. So you can skip
between this vertex, edge and paste
select if you press 12 or three on your keyboard. So for this minute
to in edit mode, I will just bring
this to about here. Okay, so we need this edge here. So I will select this part
here and I will go with numpad seven or new viewport
top to bottom up at seven. And I will just bring
this to about here, about maybe one or half a
metre from this string. So this increments here is 1 m, and I will go to about here, less than 1 m from shapes. Now I want create this step
here, which goes down. And I want gave this
to about maybe 20 cm. Now, I will just go here and every press E extrude and I will press now
Z to stick on z-axis. And how we can know
that this is 20 cm, so we have here. But I think this is
not correct value because if you go
to object mode, we can see that scale is six. So I want applies scale to one. So I will go with Control
a and apply escape. And now this is one. And if we now press
delete vertices, we can delete this and we
can start with this again. In the and Z. We can stick to z-axis and I
think this is now correct. So we can go maybe 22 cm here. And another method, we can
note that this is 20 cm. If we relate these vertices, we can press E for Extrude, Z for Z-axis and
point to this now, go to opposite
direction we want. So I will go with Control
Z and I will press Z. N -0.2 is the N minus point to. If this is too hard
for you can just move this down and you
can watch this number. Okay? And we can now press
Y to move this on y-axis
3. 02 - Camera settings: Let's now start with
Camera settings. And I will back to object mode. So you can back to object mode if you press Tab
on your keyboard. So now we skipped between
object and edit mode with them. You can just select
here object mode. And I will now
select the camera. But first I want to set
Aspect Ratio or resolution. I go with this
vertical aspect ratio because I haven't shaved
this on Instagram. You can choose aspect ratio one. And I go last time
with these dimensions here, 950 by 1,200. And I will be here
to render settings. And I will set these
two cycles and GPU. And these samples bring to
about maybe five or ten. And this render
settings may be ten. And racism, I want to go very
low with this value here. Maybe we can go ten because we will use this in
real time a lot. So you can just, let's
bring this again here. So when you see this gross, you can just move this. Alright? And I will
now turn left side, press number zero to
switch two Camera View. If we now select these and
move this to viewport render. So if you move this, we can middle mouse
button and you can move this tab here and now
go to render preview. And I will press N
to remove this step. And every time we
make changes here, you can see when
we, for example, move these train, Blender will start rendering
this in viewport. And if we, for example, careful here, 1,000 samples. And if we move this, you can see that your
computer every time start counting to
this number here. This is not the problem for now when we have very simple scene, but when you have
more complex scene, you don't want to render
all these samples just for treatment because
this can be very hard for your computer
later in the, so this is the reason I always keep this value,
might be just to ten. If you want that this is my
computer system settings. So you can see
that I don't care, very strong computer, but
I think this is good, these tutorial because I need to keep care about optimization. And we can now set our camera. And to make your position
of your camera realistic, you want usually
keep these two about human eyes to about
1.7 m from ground. But to create this illusion
of this perspective, I will hold to 1 m from ground. So you can see that we
are very close to ground. And I will type
here one weakness. X-axis rotation. I usually go to 90 degrees, or maybe in some cases
may be 90 to 93. If I want to go look up, what I will now
move to 90 degrees. Y-axis is always zero, and we can now place
this camera here. So if you want copy
exactly this camera angle, I will go here to on the z-axis to 77
degrees. Now this is 77. And we can now start
placing Camera here. But to find good position
of Camera first-time new, set, this focal length here. And I will go to
panoramic camera here, and I will set this to 27. So this is basically Zoom. If you go down, you zoom this out or if you want zoom
this scene, you go up. In the last time I will. Usually when I create this
panoramic type of renders, I go along with this value, so maybe from 22 maximum. And if you want create
full fisheye effect, you can go down
maybe to 18 or 16. But for this vendor
I be worried 27. When we look this reference, you just want keep
this train here in C. So this is about this distance. And also even make space for
this train station here. But if you want
exactly this cookie, exactly this value
scale of Camera, I also right these values. So you can shift and right-click place
origin to about here. I will go with Shift a and
cube just for measure. And I will go now, I will type these
dimensions gifts. So 5.5 on x-axis and
2.21 Y and Z axis. So you can just, so z-axis is not important here, but if you want, you
can select both of these values with
left mouse and drunk. And I will type here to point. Ok. Now, if I place this one, this coordinate, All Camera should be two about
this corner here. And now we can
delete this cube and we have same dimensions. Are us on this photo here? Maybe we can move just a liter. This is just if you want
exactly this angle of view. But of course you can play
with this and you can place your camera
here or about here. You can also move this. But we need also space for
this train station here. I will go to Z to
back out gamma here
4. 03 - Continuation with basic shapes: Okay, so next, we will
take this column here and I will place origin with Shift and right-click
to about here. And I will shift
a mesh and cubed. We can now type here 0.6. And also on y-axis
0.6 and on z-axis 3 m. So this is dimensions
of this cube by I. So maybe 16 cm on X and
Y and 3 m. So z-axis. I will now place
this on this ground. So again, you can type
here 1.5 because this is half of 3 m. And I will
place this to about here. But we have one
problem in viewport. We kept this edge here, which is not visible when
we go to orthographic view, because this is now
perfectly on 90 degrees. And we can fix this
if we go here, click here in Newport and
enable this candidate. But we still don't see
anything here because we need change this
from screen to now. You can see various
disliked here. Okay, and templates
this, so here's train. You can place maybe little
more on x-axis and y-axis. Something about this camera. And I also have another one. Maybe it's not visible
in Background, but we can be. And will this on
x-axis, one here. And now I will create
this, this more here. I will select this object
and W can skip mode. You can select the Save select, and we can now move
to about here. Maybe three or three
or four dimensions of this column here. So 1234, something about here. And now I will go with E, extrude them Z or Z. We can move this up. Okay? And we can also
extrude this part on x-axis, but to be sure to
select all this line, you can go to number seven. If we go with if Select. And if you do this with
just left mouse a drug, you will not select
all these slides because it talk to you. You are not able to
see this part here, this edge here because
it's completely on 90 degrees and
also this one here. So just to be sure to
always go with x-ray mode. And now you can select this
and you can move this out. And we can also move this
little more out to be sold. To move this
completely on y-axis, you can use the Move
tool and these arrows. But you can also, if you don't have
selected this move tool, you can go with G or grab
and why for the y-axis. But I will make
this move towards. And let's disable
this x-ray mode. For now. Let's now
create this ceiling key. Select this object and I
will go Shift D and Z to move this one z-axis and just press Z to
scale this Sunday. And I will bring this motif. And now we can go to
edit more than we can. Move this to about here and
this phase to this wall here. And this base amount here. I want to see this age. You can see in this, my last
render is one edge here, not so visible, but this here. And I will move this
on x-axis all down. And to make this more
interesting, guy, just select this face. And I go with E and
Z plus Z up here. And we can now select
this shift for now. And we can select
all these parts. Now we can press all the and extrude along normalcy and just move this up to scale. And we get nice edge here. But I think you'll need
care about these scales. So I would go with
Control Z for now, and I will first apply scaling. And let's come back
to edit more than, let's hold the extrude along
5. 04 - Tunnel: And next is this tunnel here. Maybe is not visible, but it is there in Background because it
is not so visible. We can make this very simple. And for this, we can move
it shift right-click and we can place origin here
and we can go with cube. And I will scale this. So I want maybe 10 m on z-axis. I will press S, and I
will now plus SY squared, this one Y axis Sx to
scale this to about here. And let's bring this me here. And let's go with Control
a and apply scale. Okay, So to create this
hole where train go, I will select this train and
I will go Shift V and X. Move this on x-axis. And let's now select
this object also. And I will now
press numpad slash key to isolate only
these two objects. So we can work without these
objects we don't need. And you can also find this
option here if you go to view, local view and
toggle local view. Okay, or just numpad slash key. And we can isolate
these two objects. Now, I want scale this cube because I want this hole bigger
than this train. So I will just press
S to scale this. We can press Z to
scan this one z-axis. Maybe to about. I will now
apply scale Control a. And we can now go to Edit Mode and select
with holding shift. So shift out selection
and we can select this two edges here and we can
press Control V to babble. Okay? And now if we select this object and if we
go to Modify tab here, we can add Boolean object. And for Boolean, for cat object, we can select this object here. And you can see that
we make GOT here. But now I will select this object and I will
set this scene view port. So in object properties, I will find viewport display and I will set these two bonds. So this object is
still here in render. You can see this object here, but in real part is just displaying us bounce and we can now see
how this look. And I will press maybe as Y, scale this on y-axis. Okay, let's see how this loop. And we can now select these
two objects and local view. And I think this is pretty good. So I will just now
back to Modifiers tab, and I will apply this Boolean
and we can delete this. Maybe we should add
more geometry here. But I think this
is not important because you can see that
this will not be reasonable. But still maybe we can
add with controller. For example, we
will look cats and move this to smooth this. But as I said, this is not important. And I will now add little more details even
if this is not so visible. And if we go to Edit more
than with Face Select, we can select all
this space here. And if you now press I, we can insert this. And I will now just
connect these edges here. If you press K, we can go
with enable this tool. So K and I will click to
stick to this point here, and I will not press
Z to stick on z-axis. And when we stick to this
edge here, just press. But this is also
not so important. I just want to show you
how I do this last time. So K, Z for Z-axis, Let's take this here. And we can also do same
with this edge here. So this is not y-axis. If you are not sure
which axis is this, you can always look on this
gizmo here. You can see this. Here is y-axis, so K, Y or Y axis and
stick this field. And we can now select first part here and
withholding control, we can select all
this slide here. This is shortest line, this part and just holding
Control and clicking, you can select all
this and you can press E X to move this on x-axis. And if you want
add more details, you can always go with it twice. So when you press I, you insert all this AS one part. But if you, let's go
again with the X. But if you press it
twice, you can go with, you can sell these
as individual face. So I can add these
Small nice detail here. You can now go with a guarantee
X and extra on x-axis. But if you want to cannot
do loop cuts here. So you can see this angle here. You can fix this
if you press Z, Z. Let's add one here so as zero. And we can now go to
control our zero. With space selection.
And control, we can just press now
I and II X4, x-axis. And you can move this out. And if you press control
V and also bevel this. But I just scroll your mouse
down because you don't want too much vertices here, because we want keep
this slope board. Okay, and we can see
some details here. But later when we are
missed in our scene, we will not be able
to see anything. But I just want to show how you can quickly add some details. And maybe we can also extrude
this part here with E X. And you can note one thing. So when we select
this object here, you can see that this is not, the selection is not same as on left because I left we
are in render preview. And to fix this, you need select this
perspective camera and set the same focal
length we use in panorama. So I will set these 227 and
we can now back to panoramic. And then we select this object. You can see that now is
selection, the selection match
6. 05 - Rails: Next is Rails, and
we will outdo. Look Rails with a
little more details then you see on this image, because I prepare
reference image also. And I will not share this
reference image with you, but I will share links with you. So you can, if you want to
can download this image. But for now, I will just
copy otherness of this. And I will import
this here in Blender. I think you don't need to
do this because you can watch this tutorial and
you can see what I do. Nice way to important reference
in Blender is to go here. And we tried click
horizontal split. And now you can open
image editor here. And you can press hope and I
will go here to reference, enabling for this reference. Here we can see
dimensionless of this Rails. So 13 cm on x-axis
and 14 0 Z axis. To create this, you
can start with you. But I think it is easier if we start
with just with plain, I will go with sheep,
take and play. And I will press F X, Y. And I will now type
here on the y-axis. So this is my axis starting
centimeters and on z-axis. So not z-axis. This is now x-axis. I will type here.
Fourth incentive. I will go with my backslash key. And we can now go with
Control a and apply scale. If we now go with number three, we get right orthographic view. Okay, so now we can start
modelling this shape here. First, I will select
this top edge and I will press S to scale this on
y-axis to about here. So this is this top edge here. And I will now with Control
R and odd one loop cut here. And I will go with Control
R again and hard one. So this will be this part here, and I will press S, Y, scale this on y-axis. And the next is about here. So I want make this part here. So if you're selling
this edge here, you can press Y zero to
line up this perfectly. If you don't line
up this perfectly, you can just move
this out about here. If this also K. And the next, the loop guard type
a lot about HIV. And they will press
S, scale this on my axis to about here. And let's add one also
here and scale on this. And also select these two. And here's why. Again. Again,
this is not so visible, but we can just make
something similar like this. I just want now with
holding Shift selection. And I want this
bigger levels here. So if you go with
Control B, okay? So for level of vertices, you need to go with
Control Shift B. Now we can bevel this and if you go with rolling mouse up, you add more vertices here. But I will want
keep this low poly, so maybe just two or
three. It's okay. We can select now these two
and also these two here. And we can go Control V and I will add only one loop cut here. This part here will be
completely in ground. So I will not thought
new vertices here, but I will press a to select all and delete limit
at the disorder. So this will delete
this vertices inside this object and
make this object scene. And now you need to go with E for Extrude and X for X axis. And we can just move this kit. Let's say dimension. So this, this is now z-axis, but we can move with control a and apply or transformation. And now this is x-axis and we can type
here maybe just 2 m. This is now 2 m big and we can go to Object
Set Origin two units. And you can make this bigger, but I think it will be much
easier to unwrap this effect, keep this small like
2 m. Now we can go to modify this and we
can go with a modifier. We can lay this on this x-axis. So just type here, maybe. Then can now move this. You can back with
number slash key and we can move
this to about here. So I think I need more of this. Haven't voted. Let's
bring this up. So to move this up, press G to grab Z for Z-axis
and shift to move this. It's like OK. And now I will go with D to make
instance of this object. So Alton D. Let's move one reason I want make
keystones of this object. So later when we add material to this one and unwrap this part, this will also affect this part here because if you
go to Edit Mode, if you now, this
one will suffice. This one, which is a good. I also Google this tunnel
between these two Rails is 1.4 m. So I will add one cube for measure and I
will type here once point for this second one
should be about here. It is a very important
to use real world scale
7. 06 - Rails, concrete part: Let's now continue with this. Another reference here. We have also this concrete part. And we can add this easy. So I will go again with
numbers slash key. And we can present to
remove this tab here. And I will important
than other reference, you can also download this from, from Unsplash link for you can just continue
watching this tutorial. So I will again start with, Let's place origin here, cube. And I will bless them. And I will type here 0.2. I think this is about point P, Q and maybe on the axis. And I now need glue with numpad one because
we bring this down. And next is numbered seven. Place this in the middle and
SY to scan this on y-axis. So you can see all these
rapid and visible. Little out, maybe 30 or 40 cm. Something about this. Okay. I will now control
a and apply scheme. Now, I want to bring
this down to here. And let's model this. Because this is
symmetrical on both sides. So we have one part and left
and same part to write, I will go with control. More than control are odd. One loop cutting middle, click here and press Enter. Now I will delete
the right side. So delete vertices. So this will delete
this right side. And now I will go to modify, modify, and middle
this on y-axis. And just be sure to
enable this clipping to join this limit. And an hour everything we do. Let me also do one, right? Okay? And we can now select it Control R.
You can see this, this part is fixed here. I want make this controller
here and one controller here. Now we can just move this down. Let's see, call the scope. I will add the while
loop cut here. We have this transition here. So let's select this edge here and this one here
and just move this down. This little too hard transition. So we can move this before. We can bring this little up. Now we can make this
metal part here. And I will go to
Edit Mode selection and Shift D to
duplicate this space. And now I replace P selection. And now we can separate
this part and I will go right-click set
origin to geometric. Because by default, this takes same origin
as the subjects. And let's break
these two geometric. Now I will press S to
scale this on y-axis, and also to scale
this on x-axis. Now let's bring just little up. Because now this intersecting. But just be sure to for now
remove this mirror modifier because we copy from this object which can be smeared or we also coping this
mirror modifier hit. Okay, and let's see this look. So we can just add random
similar object like this. And it will look good from this. And I will now go to Edit mode. And let's go with E, Z, X through this on z-axis. I think I see one part go
up so we can go with E, Y, move this on y-axis and
maybe move this up, and maybe we can
rotate this next one. Let's now duplicate this. Press I to insert this. And we can move this maybe on y-axis and let's
six to this again. E and Z and control are here, maybe and x2, this
part on z-axis. And we can now go
with new object. And we can go with Shift, a place origin here it with Shift and
right-click and sheep, they may be ceiling that in just before
you click anywhere, just open this tab here. Now I will type here. Let's scale this down Suzy scale this one z-axis. We can now go with this top face only
controlled beat, one bevel. Now we get this edge here
and this one z-axis, maybe Control B again. And maybe we can plus
L. With L in edit mode, you can select loose parts. And because this
is another object, this is also loose parts. So you can press
L shield the why. Let's place one here. Maybe we can scale
this up. Okay? And I will now select all
these objects and Control J. So now this is only one
object to join this, we can be L plus this
part down and we can go with Control V to add
one Bevan to smooth this. And this look pretty
good distance. But this is not so important. I will scale this little annex
like this and apply scale. And now I will go
with shaved me. Why this on y-axis
and our Z 108, rotate this and z-axis
buying 180 degrees. Or you can also move, use this rotate tool. So if you are Beginner, this can be easier
for you to can just enable this and move this
on z-axis like this. I will now select these two objects and
move it Control J again. Now I will go again. Enable this move toward
shave the right. Move this on my axis about here, and I remove this, G, Y and more. Okay, and now select these three objects and
Control J to make this one. But first, what I
want to do here, I want, before I do this, I want apply this
mirror modifier. So let's apply this and let's now select these three
objects and Control J. And now I also want that
to this object here. Maybe you can think
that we have bevel because we have this edge. This is because this is
just scene viewport, because we have this cavity. You can see from top, this is not reciprocal. We have this very sharp edges here and I will
make this cavity. I will go to Edit Mode, and I will press L over this
part and let's now move it. Okay, for some reason I see
that this overlapping face, I see that I kept
doubling objects here. I will go with G, move this here and
just delete vertices. Just be sure to check this. And I will not press
L over this object. And I will go with control. Be an odd one. Barrack too small to this. Okay? And to make sure that you don't have double faces
or double vertices, you can go to Edit mode, press a to select all and F3. You can search for
marriage by distance. And if you now preheat, you can see that I removed
zero vertices store. I don't have double
vertices anymore. Okay, now when we have
this object here, we can go to our a modifier. Let's now just holding
Shift and left mouse drag. We can make space between
these two objects. Let's see on our references, maybe a little more than this distance about this
value and dialogue. Just count. Let's move this field to make sure
that this is visible. Okay? We don't need more on this because now
is not visible in this. Let's now go with number
slash key back to our scene and now select
these two objects. And also this train it
shift and let's go with G, Z for Z axis and shift
to move this slider. And move this to about here. But later, really odd Photoscan, so this ground here, so we will mostly
cover this part. If you want to make
preview of this render, you can press F 12 to
make a first render. And you can see how this look scene that this part
little floating here. So I will select this
object and go to Edit Mode. And I will go with L to
select this loose parts here. Zhe, Xie, move this. Now. Let's save this now
8. 07 - Train stopper: Next is this Train stopper, and we will now do something
different than this. I do last time because I found this nice reference image here. And I also shared
this link with you, so can download this image. But I will now important this. First I will click here
to deselect this object. And let's place this object, the origin here, which
shift right-click. And I will go with, I see that these
dimensions is about 9.6. So I will type here 0.6. And now I will go
with numpad slash key to bring this object here. And I will press S,
scale this y-axis. And let's scale this to be this dimension and
control a and apply skin. And now, because we
care, same side, right? I will go with
meat or modifying. Again. When we add
mirror modifier, we need to first go on y-axis. And nothing happened
here because both of this subject
same origin. And to move origin. Alright, you can go
under Options and you can just move this, right? And when we move this origin, this basically move this
right part on site. And now I will go
with numpad one. For now, I will disable this in a viewport so we
don't need this object here. So I will go with
number one to front orthographic and I will go to edit more than because
this is not just playing, you need to be
careful because if, for example, select
these part here. We select only this site here. And I talk about this before. So we need always go
cubed been X-Ray mode. And now I will select this bar, and I will press S to
scale this on x-axis. And I will move this
right because I see this edge here is
bigger than this one. And I think I will also
select this edge here, and let's move this
to about here. We'll go with Control R. Again. If you select this face here, we can press S zero to line up perfectly on
x-axis. And let's move it. To make this part here. I will now move with
control are an odd one loop cut here and one on top. And I will select
this edge here. And let's move this to get
in this type of shape here. And the to select all
these slides you can hold Alt and you can now select
this part and move this up. But now we stretch
this part, right? So I will go again and select this edge and
move this to about here. If our enable this
middle modifier, you can see that we get
same on this right side. And let's move this
little more here. And this edge. Also keep this type of shapes. The next thing I will do, I
will select this face here. And then we've already E X
more disconnect success. And mercury can do
now we can read E, Y and X tilde and
this part here. And also just be sure to
enable this clipping. And now we can go with D
Y and we can stick this. And I will now go
to edge select. And let's see what we
can do this parts here. So I will text to this also on the opposite to
get this edge here, Z. And let's bring this up. And how we can select these
faces and go with Shift D. And now we can press S Y, so we can scale on this part. And now we can place all
so as to scale this down. I will now go with
E, X this out. I will now go with I
to insert this. Here. You can also add, can
see this bevel here. So you can also, if you want. But this is not visible
in this case. But If you want to can add
this level with Control V. And I log back and
select this face. And now we need this
rounded part here. We can do this easy if
you enable one had done. So I will go to Edit
Preferences and under Add-ons, just unable, we stand on add-on which can be
Blender, so Loop tool. And now we can, when we
go with right-click, we can convert these to circle. But nothing happened now because we need mesh
to create circles. So I will go with right-click sub-divide this
three times maybe. And now we can go with
right-click circle. We can now scale this little. And I will now press Delete, limit that the soul to delete
this unnecessary mesh. Now we have only circle. Let's scale this little
down and now mod. So next, I want this edge, nice edge here so we can
press I to sell to this. Ecs, move this on x-axis, maybe press S to
scale this little. And now we can go again with
more this to about here. Now, I will go again with E and S to scale
this to about here. And we can go again and
make this part here. And now I will press control
V to add Wonderwall here. With edge select that. We can select all this light
here and Control B to beta this and smooth all torso here. Let's learn also this part. And also this part. I will go only with one cut here because I think
is not visible. If you go with number zero, we can see where is this object and just be sure to
remove these origins now. And now we have normal
Move tool here. So we can move this
to about here. Okay? This should be about here, but we will play
with this later. Let's now who would come
up especially again, let's play with this. I will increase thickness here. So let's select these
faces with holding Shift, and let's move this.
In this reference. We don't have this
extra edges here, but we can create this because
this always look nice. Okay? So if you press, I, insert this as one object. But I will go with it twice. So I now we can insert
these as individual basis and we can go all the fixed
toothpaste along normals. We can now extrude this insight. Then we get lots of
nice. The text here. They will place now L to
select all these most part. And then we'll go with
control, be loud one. Now we can add
these schools here, which is very nice details. So I can go with
Shift right-click and again go with cylinder
and just bring this to six. Scale this down. Makes it rotate this 90 degrees. Scale this down more. And SY, to scale
this on my axis. Let's see how big is this. So you can remove this
overlay equal to here. So you can see this clearly. This is overlaid button here. Maybe a little bigger. Now, I will again go with the select this face
here after all, be. And maybe it's through
this part out. And now I can go
with the numpad, one different orthographic DZ. Maybe. If you go with shift
or we just repeat this last process and we
can go with shifted the X. And now we can make two bounding box
because we don't want to rotate this by
individual origin. We can rotate this by middle
of this three objects, which is this part here. So bounding box and why? Today this maybe
you can see again. Here. I will go share
the results place. If you want to can go into dX and one here and shift down, you can repeat the last process. And to add even more details, you can maybe go hit Control R. And for some reason I have enabled this
proportional editing just, if you have this enabled, just remove this and you can now with this X zero
line up this edge here. And if you want to can
hold Control V and maybe add one edge inside. So control me. Maybe we can
also extrude this part. So EY can maybe be OK. And let's enable this. Another site here. And we can also
add more details. If we select this face and place I D extrude along normal. Maybe also this part here. We have also this
part in the middle. So we can create this easy if
you select this face here. And now shift D in the front, I'll press S. We
just came this one, scan this on z-axis. And if I press S, Z is not
working because we have this word z-axis and I want
to skip this to normal. And now we can see that this
is not a Z, this is y-axis. But if we press S, why we scale this on this, not on my y-axis. Okay, normally sake, and now I will place
their sex to scan. Next. Can just E. Now this is z-axis on
normal orientation. So E, Z. Okay? I run this
more, much bigger. So let's again go with Control
Z because I now duplicate this S Y as X to scale
this to about here. And let's move this
inside the circle. Let's now the Z, Y, X, and Z. And now we can take this and we also have
this more one here. So we can, again. So she the SY to
scale this on y-axis. Let's go with E, Z, and let's connect
these two edges. Okay? I think this looks
pretty good for now. And when you are keep you can
apply this mirror modifier. So now we can make
variations here. What example I can just bring this down and move
with control Big. So X-Ray mode and let's do this and we can now select
this edge here. You can burn on this,
make some variations. But I'm not sure if this is visible and Kim writing
it is not visible. Here. If I see that this, this part here is too small. And how we can scale this. I can select this face here. Okay? We applied this
mirror modifier. I think we should
not apply this, but we can now select
both of this and with control plus on an armpit, we can expand selection. And I will now move it. Let's make these two global sex. To make this smaller end, we can now press to
make this bigger. But on individual origins, not done on bonding
books on scale, this one individual and let's
make this a little bigger. I think this part look
pretty good for now. Let's now bring this
render preview here. Let's back to our thing. And I see that this
is, this is too small. I'm not sure why. But let's press S to scale
this, make this bigger. You can scale this on y-axis. Then we dissolve this
perfect rounded part. So I will go into Control Z
and I will just bring this and z-axis because this
part is not visible. This is not on this ray. Only things which are visible
even that is important. So I will not care
about this part here. Let's see. Let's move
this little here. Gz and place. Okay. One thing I forget
to do. Control Z. I forget join all these
screws with this object. And now it's little hard, but we can go with
the book select. So just left mouse
and move to HIV. And now we just need to hold
control to deselect parts. We don't control, remove this,
controlled, remove this. And now we have only
this part selected. Now Control J. And we can now move this GZ. Maybe to scale this
little more. Place this. Okay, Let's reset. Well to see how this, we have this nice part
9. 08 - Wires: Next is this Wires here, which is important part of this. Randall. And I also have
one reference for this. And you can download this image from links I shared with you. Just need the reference
for this part here. So we can important
to this here. I have about my last
render, 1234567. It, okay? I will start
shifting a cylinder, and I will bring this to
maybe eight vertices. And now I will go with Y night. I will type here one. Maybe. This is about maybe one centimeters
in one sentence. And now we have
this part here and then we'll go with
number slash key. So we can bring
this object here. Just press S to scale the salad, maybe 1.1 point to 1.3. Now we can press S to
scale this non x-axis. Let's make to our
scene and let's place this first one, maybe. With the number one
we can not battery. We can see where is this? I will place one may be in
height of this part here. And maybe he'd only, you can see that there is this. And I will not go with S, S X again to scale this on
x-axis until we cover holds. Okay? We can now go with
Control a and applies key. Now to create this part here, I will go with Shift D. And
now we duplicate this object, but it is on same position. Where is this one? So I
will place number slash key to bring this
new object here. And I will skip this one, SX squared, this on x-axis. So you can type here,
maybe go centrally. We have this part here. And I will go again with six
and press S to make this much big. Next again. And now we have only this part. Now from this part here we can try create something
similar like this. And I think I will
go to Edit Mode, Control R to add one loop, cut the middle and
press S to scale this. And they will also,
I can sell this and maybe move this inside in again, pull this out and just
repeat this few times. Get this shape. Let's now
I will just again to this and let's now just
duplicate this times. So press L and I
will go with ship the smoothies on x-axis. And if you press Shift R, you can repeat this process
maybe four times. This one. I will just go with E, X and maybe scale this down. And maybe we can just
randomly next to this z-axis and scale
these to make SY, to add more details here. So this will be just in
distance and very small and we don't need too much
mesh for this object. Let's now with numbers, Let's get back to our scene. Let's see how big is this
and how these look inventor, I will break one object here. Let's see, we will
call this book. Okay, I think maybe
a little too big so we can scale this down
and maybe scale the x-axis. Tragedies. Apply scale and I will again Dx duplicate this. And let's see how the school I think this is
a pretty good for now. When I'm happy with this, I will select this all three
objects and Control J. Now, just make this
as one object. And we can now non-fed seven
and select this cable here. I will go with Shift D. Why? I will put one above this train. Just move this on x-axis to
make this little more random. And I will go with shoe divide, place another bubble,
this train or so. So we get this to achieve. And now we can use also alter the
instead of shift D because we will not make
changes on this object. So alter D Y and
let's place to here. And I will be again. And to move this one z-axis, Let's just move this. I'll have to make
some randomness here. Okay? I think this
needs little more up. And if you want to
can always go to Edit Mode, wireframe mode, we can select this edge here
and we can move this out. And we have also
these cables which connects these parts here. So we can do create this EC50, go to lump at seven. And I will now try Shift
right-click place origin to this edge and that'll shift
the mesh curve, Bezier curve. And now we can go to Edit mode and we can select
this smooth tool. And let's place one
part here and one here and just rotate
this or why not as busy? There are Z and rotate
this and try lineup this red line with this part. Okay? And now when we have this, this kind of object, we can go under properties. Let's bring this down. And now we can go to geometry. We can just bring this
up with holding Shift. You can just scroll left mouse button
and bring these two. So this is now value, then millimeters or
1.2 cm, which is good. And we can now, if you want to can
bring resolution up, maybe we can go with 14 here. And now I will, when I'm happy with this, I can convert this to mesh. And now we have just
mesh this object. Okay, I will go
with control Z. I think this is thinner here, so this little more
down so we can compare. Then we go to numpad
seven. Now let's see. Let me bring this here where
it's visible, how this look. We can now go with number seven, Shift D X and we
can Sx minus one. So we can scale this
on x-axis and we can add another in
opposite direction. Ok? And now we can also
duplicate this with shielded. And we can also place
one the ground, but this is not
on same location, so we can bring this down. We can see this if you go with now petri to write
orthographic view. So let's place this
here. Number seven. Just check from
talk orthographic and bring this reference
here also some z-axis. And I also had you here. And we can create this easily. We just place origin
here, shift pay cylinder. So this is eight
vertices, which is okay, let's bring this
whole down Z scale. This one's the axis. So a number three to go to
our eye towards orthographic. And we can just connect this, this, this one is visible here, so you can bring this
to make this visit. And she would be for
all the violent. Let's one here. Okay. One thing I want to do to make this little
more organized, we can make a collection
of this Wires. So we can just move with your left mouse and select all these objects here
and holding shift, we can add selection so we
can continue selecting this. And now when we have
selected all this Wires, we can press M and
we can call this. Okay? And now we have this collection and we can
close this collection, so we don't need this for now. And if you want, for example, you can disable this in Newport or second-order
in Blender. If you disable this cylinder, it will not be visibly rendered. And I will make these for now. And wanting, which is good. We can later just right-click
select objects and all object is
selected and we can add same material to
all these objects.
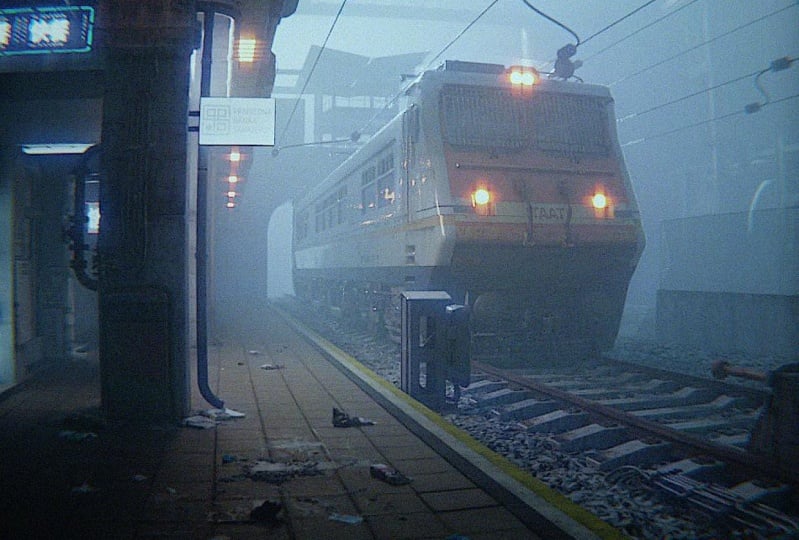
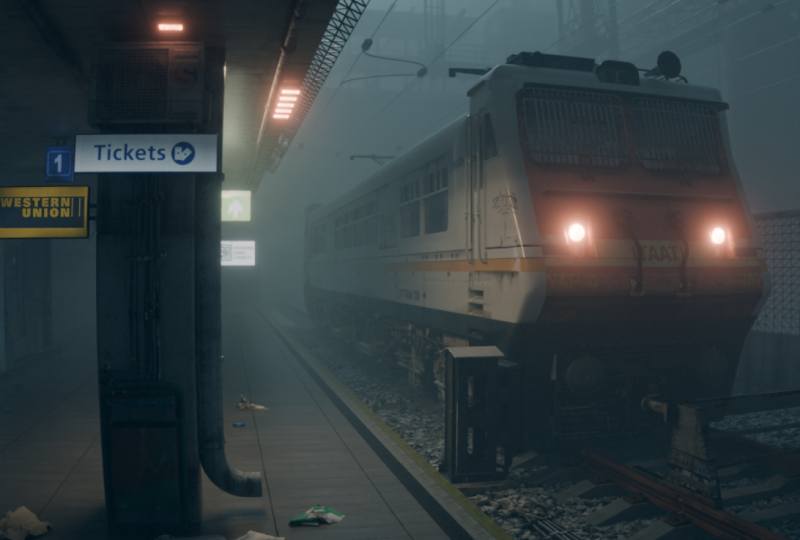
10. 09 - Lighting: Before we continue
with texturing, I want create lighting so we can better preview our textures. I talk about reference
image I found for this, and you can see that
this is pretty similar. So this is basically not
my composition and idea. And this is reference. I create. This render. Most
important thing I like from this image
is this type of writing. And I just want to recreate
this Lighting in myelin. I will share this link with you. And you can see on
both of this renders, the most important part is
dismissed or muscular here. And I will show you how I try copy this or recreate
this render here. Which settings I used to
get this atmospheric look. They come back to Blender and to create this atmosphere,
I started few. And I need this cube to
cover all this scene. And I will go now with Sx. So just be sure to
cover complete scene. Let's now apply scale. And now I will go again to Object Properties
tab and I will. So these two bonds, okay? And I will bring this up. You can see one problem here. We have this clipping here. So we need select Camera, so you can go to Lambda zero
and select this plane here. So this is Camera. And now we can set
this clip and two, 1,000 ft. Now we
fix this program. If you think about missed in
real-world, how missed work? We basically have
volumetric water particles which are placed on ground. And we have very strong
glides which come from x1 and go through these
particles and make this visible. So son, or maybe
it is night mode. But we can now try
to recreate this in this example. I will. Now, I don't need this timeline here because we will
not make animation. So I will join these
areas and click down. I will open Keith shader
brush to remove this text. Now, I will go here and I will knew material with
selected this object. We apply this material here. And I will call this monument. And now I will delete
principle be SDF and I will start principle volume here. And I will plug
these two volume. And we have completely
black color here because they have very strong
density here, which is one. And I will bring
this to 0.0 set. So this is value I get
with lots of tests. And all of these values I get
with just a lot of testing. And so basically you can just press F2 well and
make one Blender. And now you can just go
to slot two and we can just type here maybe 0.02
and see if I will this look. With pressing G on keyboard, you can skip between 12. And I basically made maybe 20 or 30 or 50 tests and
I see which result I like. But in this tutorial you
can just copy this value. So angle 0.0, 0.07, and I bring this Anisotropy
up to about 0.04. So we get basically
more misty. Look here. This was before and
we can see after J, you can see that
we get more missed here with this anisotropy. But we cannot preview this
correct because we can only this one like
the by default, which can be Blender. And we need sun or
moon lights here. And this is place origin here and go
with point lamp again. So light point lamp. And I go with the
value of 1.2 millions. So if maybe 1.2 M, WE, we get 1.2 million. So we can just type here Okay, So this is
basically volume. I try, you can maybe
try here 3 million, but this is too bright. So you can try values you want. But I think I go last
time we this value, so we don't need
to make a lot of tests and we can just
copy this value. One thing which is important
in this reference, I don't want light,
this warm front. So if we move this slide here, they basically get this effect. In this render here we can
see that this part here, we have Lighting Background and this part here is
little more dark. We have only these bright
parts on these slides here. So this is also important thing, just bring this in Background. And one thing which
is also important, this scale of this object here. So this radius here depends how hard will be these shadows here. And you don't want
on this reference, you don't see these
hard shadows here. And we want basically scale this radius up to get
this very soft shadows. Okay, so you can bring
this to about maybe ten. But I still want to
see some shadows here, but not so sharp. And also position on this
slide on y-axis is important. I think I want some
lights on this area here, so we can now place
this slide here. You also need little
more light on this part which is
less than Background. So I duplicate basically
this light. She'll DX. I scale this down maybe to about 2 m and I go with 150,000. Okay? Just don't add space here. When you add space,
you get error. If you now bring this to zero, you can see before
and after this slide, don't add too much, but okay, we can make one render with less light and another
just while you're zero. So be disabled this slide so you can see before and after. And we can now be to
JC before and after. So we basically add
little more light and a little more shadow Sweetly
is another light here. Okay, so now we get
lots of lights, embed code this train. And just one important thing
is to not add lights on front because then we get this effect and we're
not done with Lighting. I change this color to bluish, so we get this bluish
atmosphere here. I think this is too intense, so I will bring saturation down. Just a small value,
bluish color. And we're not done. So basically this is, I think daily scene with just a lot of haze
or volumetric. And we can bring this to daily scene if we
just bring this ambition. So if we add here 0.01,
this is too intense. So last time I go 0.04. And because we get a lot
of white color here, maybe I didn't do
this last time, but maybe we cannot. So bluish color here. You can increase saturation here to add more bluish color, but this is, this
depends on you. You can do what you like. So this is Lighting. We have for now. I think we have lots
of bluish color here, so I bring saturation down. And also one thing you
need to know, now, this render is much slower because of this volumetric.
And this depends. So for hardware, you have another thing I
do for lighting here, you can see that we have
orange light on this ground. And this is this
volumetric group. This is all for lighting. If we accept this. Now signs here and
this slide here. So we can create
this slide here. And I basically put this
between these two columns. So I go with Shift,
right-click here, and I go with light and Avialae. And basically scale this on y-axis and scale this on x-axis. And I go here with value of, I. Just put this here,
orange color. And you can see that
we get nice light on this string here and on
this ground, which I liked. But there is one
thing I don't like, we have a lot of lights
on this background area, which I don't like. How I fix this. I basically placed one plane
here and I go with night. Let's now scale this on X and Z. What I do now, I go material and I
create new material. I will call this MOSFET. So if we add color here and
if you bring specular down, this will not reflect
any light here. So we can just depends how
big or create display. We control this slide here. So I don't want completely
remove the slide, but I will just show
you before and after. So we can go to Scott
for this is after and I will now delete per
second this and this is before. So you can see before we
have too much light scene Background and we put a lot
of focus in this background. I don't want put focusing
this background. So I control this
with this plane here. And we will add later this
small emission cubes here. And you think that these slides, all these slides come
from the school, but this is not so strong
to create any lights. So this is reason. I create
this emission light here. I think I will scale is on y-axis and make
this maybe smaller
11. 10 - Concrete material: We can now continue
with materials. And I think I will just increase little image here to 0.005. Most part of this scene
is concrete texture. So we have concrete texture
on this column here, on these walls here and
in Tunnel in Background. And the first I will go from a solid due
to material preview. So we can see how this
look in material preview. And I prepare this concrete
texture map for you. So I will share this file. And now we can
back to our scene. I will select this
object and I will create new material and I
will call this concrete. Now we can bring this
concrete texture in Blender. So this is one way you can
just drag and drop this here, or you can shift the image textures into
can open and file. Find this file on your computer. And now we can plug
these two base color. Now I want select all objects. I want apply this material. So I will with holding Shift
select this column here, this part here, and
also this part. And if we now with
Shift-click here, we get this yellow line here. So that's mean that this
is last selected object. And we can just with
Control L link materials. So now we get, we apply material from this object to all
these objects here. And also this one. Another method is if
I go with control Z, I can just select
this object and just drag and move
this material here. Or I can just from this list, select concrete texture here. And we can preview concrete texture on
left and also here. Alright, but I will, for now just disabled
this volume metrics. And now we need unwrapping this. I will select all
these objects again. And I will go first. I will check the scale
of these objects. So here is one. Just be sure that all
these objects scale one and you can see that
this column don't care. So this is reason why
this is a stretch here. And then we'll go with
Control a and apply scale. And also here. And also
for this Tunnel here. Okay, Now, when I
showed that all one, I will select again
all these objects. And I can go, go to
Edit Mode and press a to select all these objects
and you few projects. And now we need to try and match escape with the real-world. So I will go here
and open UV editor, and now I will press
a on left hand. I see that this
details are too small, so I will press S
and scale this down. So I don't want
repeated texture here, so I will try scale
this up little. I think this is about
real-world scale. Now we can play with each of these objects separately
so I can press L and I can move this here. Maybe we can try
with everything it to rotate this in
opposite direction. I think this have no sense. So this leaking need to go down. And I will just go with G, M, bring this leaking
to this edge here. And maybe scale this down
to our and this part. Okay? And we have decided this part. So we can just manually
select maybe this two places. Let's go with GM. Bring this here. Okay, I
will put this in the middle so we can later on maybe
while loop cut here to highlight that this
details here, this slide Let's now select this part here. And with G, Let's
maybe move this here. And we can scale this
slit along Z axis if we want, get more details. Okay, I think this
looks pretty good. And rest of this scene
is not so important, so this is not so visible. This ground, we will
change later to another material and this in
Background is not visible. Okay, let's now back here
to run that preview. So 3D view port. And we can also plus F2. See how this make
this maybe to 50. And let's now this set. Well, so this is before and I disabled this
model matrix here. So you can see this
without volumetric, but I will now break this here. So I just searched for volumetric and I will
now remove this. And if you select this object, you can also press
full stop key on. Now, I will just add more
details on this structure here. So I will go with
number slash key. And we cannot do
weather satellites to make this little button. So we can go to Edit Mode, select, we can with
holding Shift. We can select this part
here and we can go with Control V and maybe
add one barrel. And now I will go
again control be, to add one small bevel
on these lines here. Here I will just add
one small level, console Control B
and which shifts. You can control this and with scrolling mouse
you can add one. Look at more. And also
it in this column here. So you can just press a to
select all and it's Control B. You can add Bevel. I will just add one loop cut
here when I see this line. And I will also bevel
this with Control B. And now I have one
middle loop cut and I will go with control numbered minus to subtract selection. And now I can press S
to scale this side. And now Control plus to expand selection and control be
taught one bevel here. I will also add, maybe
we will look at spheres, so control our, so control R on this part down. And let's move to here. And let's go with control me. I will scroll mouse
down so I can go all the flux
through a log-normal. The more distant site. Okay. And controlled plus again and controlling
bit to bevel this part. So just hold, shift
and move dislike. Let's now improve this material. So we will just add some roughness variation
from this map. So colorRamp and plug
this collector and let's hit Control Shift and click on this node
preview how this look. But for this unit, activate node with English. So just go to Edit Preferences
and onset type here node. And enable this add-on. Because the black parts
will be shiny parts. I don't want too
much shiny parts, so I will bring this down. Let's make this material
and we can preview this in material preview. So if you plug these
two roughness, we basically get this
highlights various black parts. So we have black parts here
and we get this highlights. I will bring this little down. And if you want to can increase contrast to
make this more visible. Okay, So these
parts are still too bright and I will bring
more white color scale. And we can also use
this for bumps. So I will go to shift the bomb
and plug these two height and this to normal life and
bring this distance 2.1. So I have more control
with this slider and now I will just bring
this home also down. Okay, so I will just
bring this duplicate instance Shift D because I don't want high contrast on this map for bump because we get
this flat area here. So I will bring this all to
left and this all right, let's now apply this to
white. Now it's much better. This is a before
and this is after. We get lots of bumps here and
a lot of this reflection, and I think this is maybe
a little too intense. So I will bring just a
little on left hand. Also this black
color in roughness
12. 11 - Floor tiles: For this Floor tiles material, I use one free material
from polygon and Don. And I will show you
later how I do this. But if you don't want use
this add-on or this material, you can find a lot of similar materials on
many other sources. For example, you can do same as we do with
these concrete texture. So you can go to textures.com and search for
theists or something. And you can use
this PBR materials. So just image texture, which are now you can go to NBS cgi.com and find a whole PBR materials
with all these textures. So can search for
theists lot concrete, and choose texture in your life. Or if you have quicksand bleach, you can hear a lot of texture. So I will go here under
self-pace and you can search lot of free and
high-quality textures. Key. I talk about pixel breach in some of
my previous tutorial. So you can, if you
don't have profile, you can make free profile, the Epic Game account, and then you can download all of these
materials for three. But let's now talk
about polygon add-on. And I will show you that I
found exactly this material. To activate polygon add-on you just named go to this link. I will share this link, the two. So you can just click here
and download this add-on. And then you need to go
to Edit Preferences. And under Add-ons, just
click here installed. You'll need to find your head on value download
on your computer. So I will show how this look, I can pull that here or this. Just to select this end on end. Click here in stock. And after that you just need some support polygon and just enable
this add-on here. And then you get this tab here. And I think only settings
unit set for this add-on is, if you click here, you just need set
for that very one. When you click here
to download This, objects are material will
download in this folder here. So we just need set
for the very one, download all this assets. Here you can set
resolution by default. When you click here, this, the default resolution
will be download. And I think one case
for most of this thing. So I put this to one K. Okay? I will not go with number
slash key to buy 12 scene. And this is my old blender file. And this is name of
this material I found. So we can maybe copy this and
try find this material now. So if you just search
here for three, you will get all
these free assets. And under these three
assets must be one of this. One material we need for this. So this Concrete Blocks people. But I will now search
for free concrete. Reason why I cannot
find this material because I already download this. So I need, I think on
the show my assets. And here's my material I want. And after you download
this material, you just need to click. You will get this link Apply. So I will now go to Edit Mode and I will
select this face here. And I will now click Apply. And you can see that we get this material
on this graph here. Reason I use this
material from polygon in is because this material is little more complex
than just one froms recites and the one we do
with these concrete texture. And this material
is more in focus. I want something more quality. And to be sure that this
is wrapped correctly, I will just select this
face and I will go with you your projection again
with this material. And I will now open UV editor and let's
just scale this up. And last time I rotate
this 90 degrees. So just to rotate these
two opposite direction If you want copies scale, I do last time. So you can just come to this. So to this column we
have 1234 or five times. So you can just move it to scale and maybe to
get these types key. Okay, so we have here 12345. Now, if in back to this material preview That's
shaping shader editor, you can see that we have lot
of things we can change. For example, we
can change scale, aspect ratio, hue, saturation and hold this
rightness and all these things. And you can see if you move
this slider that you get. But you affect this material and you'll get something different. And you can play with
this value scale and maybe you can
get a better result. But for this tutorial, I will share this
settings I use last time. So we can just copy and
let's see what I change. So I go with
separation two -7.8. So I didn't just type
here minus eight. And with color value, I go to minus one. Brightness 2.12, 0.1, 0.2 pi -0.1, displacement to 0.5. Okay? I realized that we
need to bring roughness closer to zero to remove
this shiny parts. So -0.01. And now we have less
this reflection, or maybe close, closer to zero. For now I will just
set this to zero or maybe, let's see which one. We don't have any
reflection here. So I will just make
this to zero for now. Next I want do here is that real geometry here and
all these imperfection. And to do this, I
will first go with control arm and I will
add long loop cut here. And left to consider
is visible this in our render to about here. And later, I will know that
I need focus to about this. Next, I will separate
this material. So I will say these two
faces and P by selection. And now we can easy with number slash key
isoelectronic this object. And we can now work
in this area here. And I will press N to
remove this tab here. And I will also make
more space here. And one thing I will
also do because I will not add imperfection
in this area. Now left, which are
not so visible. I will just again go
with V selection. So it wouldn't be much easier to navigate without
this object here. So we can press the NumPy
slash key twice to bring just this object and
set origin to do no. Okay? And now we can follow these lines here and
add you look cuts. So when you go with Control R, you will not stretch texture. But if you know, for example, move this, you will stretch texture. To avoid this, you can
go with double-tap G. And now you can move this
without stretching texture. You can just enable this
correct base attributes option so you don't need
use double tap G. You can just move this now without
stretching any texture. Okay, let's add the for
loop here on y-axis. So with holding Shift,
you can move this slightly and be more precise. Now we can make some
extrusion here. So I will select view
on this example, these two and I
will now move with E and Z to bring this on z-axis. But just be sure to not
overkill with this. So unjust for this
very slightly. So I was on this board here So G Z and move this spiking up. And now we can, for example, if P set these two
individual origins, we can press L to
rotate the salad. Maybe your Y on Y or X axis. So just be sure to move this very slightly because
this will be, this will be visible light. So I will not go with
Control D to add Bevel here. I can now maybe x-tilde
this z-axis little down. So there may be why and
Control V to bevel this. But I mostly want
to extrude this out and not in because these
have no sense to go down. And let's now select
these three. So easy. Let's now maybe here X to rotate this salad and
Control V to bevel this. So let's hot while
loop cut maybe here. Okay, so you can see that
this is very sensitive. You can see all these tastes. I think I went back to
summer roughness here. So I will go to -0.05. Okay. I think this okay for now, but we will check also
again this later. I think I little
overkill release. So let's try how
we can fix this. Let's see in a solid
preview, you can see better. This I think this one is too
intense and also this one, this too hard, too intense. Maybe I can just select this and Let's see what time
do I want, bring this up. So GZ and maybe, and maybe why? To back this little
more to position. This is reason, I said
before that this is very sensitive and you'll
need be careful with this
13. 12 - TacTile: Next thing we will add here
is this TacTile texture. And if you go to NBS cgi.com without
registration or anything, you can just search
here for Pipes. And I download this,
this 003 texture. So you can think I will
share this link with you, but you can just click here
and download these texture. And after extracting files, you get basically this. So now when you save this on your computer, you
get this folder. I will just copy this address here and I will make to blend. Now we can back to our
same numbered slash key. And before I continue
with materials, I just want, but the viewport display
color to this ground. So we select this
polygon material. We can go under, down under view-port display and we cannot yellowish color
here or any other color. And now we can just little
better in viewport, Tatas tend which material is, and I will not go with
Shift a and plane. And under item here, I will type on y-axis 0.1. So this is 10 cm. Okay? And I will scale this
on x-axis store, so SX. And let's move this to about this dimensional here.
Maybe a little more. And I will love, will
lead to edit mode and select this object
and object and go with E, Z and move this one
z-axis slightly. And now we can go with
control B2 and small level. Thus normal lung to add one. And now we can
create new material. So I will select this
object ten to heat. This time. I will call this also yellow. And we copy this address here. And we can now just go here. And with the Node
Wrangler enabled, select this node and press
Control Shift and T. Now we can import this
material so I need base color, displacement, normal
and roughness. Okay, in Blender will automatically connect all
these two right place. Let's just material preview. See how this and we now need
to unwrap this. Select. All right, hey,
just check scale. Control eight, Apply Scale. And now you kill projects. I will for now just
open the editor. And let's now press a and scale this and cover one
or one this time. Okay? And now we can
make two shader editor. And I want this displacement. Hold down this loop too intense, so maybe 0.1 or even less. Let's also bring
this more lungs. So G, Zn bring this. Okay? And you can note that I have
three variation of this. One is yellow, another
is white and black. And I will do this now also, but before I do this, I will go with a modifier here. And I will go Shiva
two minus one. You can go with it, one
to go to this direction, just move this here and now
you can increase this comp. So Gx to move this down,
we need maybe six. So now we can go Shift
D Y and move it, hold it, shift, move this. Here. We can just
select this object. And if you click here, you can make another
variation of this material. And I will go and
call this white. And to change this
material to white, just need to go with
hue saturation. And you can just
bring this saturation all down and this
will become white. And maybe we can
increase value to, point to and again
shift the white. And to make this black, just again duplicate this
material and call this blank. Now just decrease this value. Hold down maybe 0.1. And I think this yellow
color is too intense, so we can also leak some
duration down, maybe 0.8. And let's see how this look. So this is before, and I
think this looks pretty good, but we can make little
more variation. So I will bring this GZ and
bring this little more down. Just like the end swipe to scale this maybe strange
district along y-axis. I think this is black, so I will bring
this value 2.3 main
14. 13 - Metal texture: The next texture we
need here is Metal. So we have this Rails here
and this object here, and also this part here. So I will select this object assembling these
numbers slash key. And I will now click here, and I will create new material
and I will call this map. With this, we will create same like we do with
concrete texture. So I will share
this file with you. We have here few variation of Metal texture and you can choose which one
you want to use. But I will now bring
this two Blender and let's now apply
this to base color. Okay, So we apply only
to this object and we can again select on
these three objects and this one last selected Control L
link materials. Okay? Now we need UV editor here. And just search here
for Metal texture. Okay, and let's now
go to Edit Mode. I will select this Rails
or start go to Edit Mode. And you can see that we can edit only this part here because we use for this rest part
views on a modified. I will go here. Just be sure to scale
is one projection. And now we can reject this object here on
this texture on that. So I think for this I will use this rusty metal parts so we can make the project this here. Okay, I think this
looks pretty good. I want to avoid this part here, so just move this here and
this now look pretty good. Okay, next part is this one. So we can this circle
object project on different parts so you
kill projection may be also this last part. So we have also
here the last part. So you can select this with just left mouse and drag or just press B
for book selection. Now you can press
the G and move this maybe before book selection
and just make this here. Or you can just press L
to select a loose parts, but we have few
rules parts here, and it will be hard to select this or just
a boxer left hand. Smoke this here with G.
And this structure here. I will go with Control Z to undo this because I
select all these parts. So I just want select
this part here. So your Q projection, and let's again unwrap this. And we get nice details
here on this part. I think these look
pretty good for now. And this object here, we need to material. So one is Concrete. I will click here on plus N, like this concrete texture. And now in edit mode, we need press L over these concrete part and assign
these concrete texture, but just unwrap this
with Q projection. And let's see how this look. Okay. Now for this metal part, I will go with L here and
try select this loose parts. Can. Now select Metal texture and assign this and
you do projection. And the null project
also this on this last thing, Metal part. Okay, so just select this new can go with them
or just select them, just bring this key. And we have lots of
repetitive texture. But if you want change this, you need apply this. Okay, we can now apply
this array modifier and we can now
select these parts The project somewhere to avoid this repeated texture here, we need brings saturation
to this metal part. And we also need our
roughness and bump map. So I will go with this tool factor and
these two roughness. And let's see. I see one problem here. So we have very high contrast
between this part and this. I think for roughness is better
to use concrete texture. So I will go with image texture and I will search Steve pour concrete
texture we used before. Let's now reproject this and this look much
better for roughness. We can now go follow them. Let's just bring this
shiny parts more to white. Can plug these two roughness. Let's see how this
book for bump. And basically we can use combination of
these two texture. So if we will, right click the Control Shift
and right-click, we can make these two textures. And I will now go
to multiply here. So we can take only dark parts, black parcel, this
texture dumps. So if you go with Control
Shift and click on this node, we can preview this look. If we move, alright, we take dark parts of
this texture here. Let's also now do this for mom. So she, if they bump and plug these
two height and this two norm, Let's now bring this
2.1 and all this down. And I will now move
it to hue saturation, bring some duration
to maybe 0.5. So this is before and this is, I think now it's much better. And we can also for these
wipes out this Metal texture. So if you know, we have collection of Wires, I will select all objects send. One problem is that we, we add this to
Wires collections. So I will just select
these three objects. This happened because the I have selected
this object when I create new one and when I
create these parts here. So I will now just press M and remove these two
scene collections. So now this is not part of this collection and let's
now select the objects. And I also make same mistake
with this volumetric. So this scene collection, this part and this. And let's now check
select objects, and now it's only
selected this Wires. And I also make same mistake
with this point lamps here. So just make these
two scene collection. So you need to be careful
when you add new objects. Always just select
this collection and we will add new objects. So this scene collection, and you will not make a mistake. So let's select this object here and let's see if we can add all these to say material to
all these objects. And I will, I think we
cannot add this too easy. So I will first select
this object and I will select this metal material. And let's, let's
now and just change viewport color for
this metal material. I will add bluish color here. So we can know that this is Metal material and
also this object. Now I will go with
right-click select objects. And last selected
object is this one. If this is not case with you can always go with
Shift and click here. And now Control
League materials. Now all these wide-scale
same material. And let's now just try. Select all objects and
let's try and wrap this up. You'll projection. And we
can go with tabs in it. I think this only this
part is important, so we can maybe reproject
this to this black color, but this will not be visible. We can also read project
this two objects here. But we have problem. This is still kind of object. So we can go, we can
convert this to mesh, and we can now
unwrapping the seal, your projection and let's project leads to
this black color. Now this is black
and same program. So convert this to curve. Let's select on this
subject and your projects. Now this is still current. So convert this to mesh before covert this
to Carol again. And now we can go
through projection. And now this is pretty good
15. 14 - Pipes and mesh: Next part is
decorating this scene. And you can see that we
have a lot of details from this Garbage to
this big structure to Small greebles like this far, this condition, this Pipes. Good news is that I
prepared some asset peg for you and I model all these
details we need for this scene. I will share this V2 and
we will later go through this asset pegs and we
will import in this scene. But I also want,
in this tutorial, I'll show you how I model
some of these things. For now, we can model this Pipes very easy and
also this mesh here, you can see and
maybe this stage. Okay, so let's start with Pipes and I will it shift right-click
and let's add one here. So I will go, let's bring
this to render preview. So Shift a and I will
go with cylinder. I will bring this to maybe. Let's scale this
down to about here. And now I will go with
number slash key. I will for now just turn here solid preview
because I don't want my computer to render all time because we can see this
pipe also in solid grip. So I will go with
the SEC to scale this one z-axis about here. And let's little more. Okay? Now I will go with
Control a and apply scale. And we can create
this rounded part here with spin two.
We have in Blender. For this, I will
go with numbered one or with an arbitrary. It is not so important. For this, we need this pin tool. One most important
thing is this origin. So we will basically spin
this from this origin point. And I now want to place
origin to about here. So Shift and right-click
and place strategy here. And now we can select
this pin tool. And you can see
that now we have, we can spin this on z-axis. So I want x-axis. Now, we can, okay. We have selected
all these parts. I will just select. We just see if I make duplicate. We now need to select
only this part down. So this we need
go to x-ray mode, select this edge downwind, and now we can spin this. Okay, so I want, may be able to jump
to about here. Even more. I think I need to
rule on the left. Or maybe here, okay? About here and now I can
basically spin this. And now when I go tonight
in about 90 degrees, I can just go with E, Y. Let's throw this
solid if you want. Now we have nice pipe
and we can just bring this to about here. And I will now go
with metal shader. And I will pull
here to UV editor. Let's check scale. So scale is good and you cube projection should
work nice for this. So this is Metal and
he met them texture. And I will now press the night to rotate this on the axis. And now we can just
choose Metella. We like maybe this rusty here. I think I will choose
this last part. So now we can just
fix this part here. So just move this
layer and move this to this texture also.
Could fix this. Okay? And now we can add
more details with this. If we go with
control and control be we can know or we can go with just
controlled, be here. Now we can go with
this along normal. And we can go with all tend, select this line here and shift, we can skip to another part. And again we told select another line here and
we can go with control B2, but we can also add one here. So Control V to bevel. All the extrude along normals And you can now go with
Control V and bevel all these, but I don't want that
all these parts inside. So I will go again with alt. Click here to select this
loop and shift to skip to another part called the altar
again and Control D again. Okay, let's now Blender
this to see how this look. Okay, I'm not happy with this because this part is too big. So we can fix this remote
and delete this part. So now it's little better, but I think I make big angle here and
maybe I'll kicks later. I think it is important just
to know how this tool work. And I think I don't
like this texture, so I will mainly
project this sheet. Okay, this is a little better. And we can also create a
few simple Pipes here. So she, if they cylinder and why Nike scale this all down here. And now Sx, this on
x-axis to about here. Maybe we can again create
this Smith's pin tool. So if you go to Edit Mode, if we select this
part in X-Ray mode, we can go with spin
tool set origin here, and let's see, not
on z-axis, y-axis. So let's place origin here. And okay, This look
for now, pretty good. So I will go to 90
degrees here and E, Z to extrude this. And we have another pipe. And let's now just
add details more. So I will go with Control V, and I was almost three times, so we get three levels here
and now Control V to bevel this Arts scroll models down to remove this
loop cut in the middle. Now we can go with
control be all tie to extrude along normals
and Control V to bevels. And now select this metal part. And let's go with you. Just check scale and
your projection. The project this on
this part of texture. I think these two printable. And we can now
back to our scene. And let's rotate this
z-axis by 180, 118. And we can place this pipe. Here. Again, we can go with
Shift D, Vitamin maybe, place one key and the Y. And we can, with
this one we carry project to another
place on texture. So maybe we can make one this
week, this texture here. So that's how I get this Pipes. And let's now create
this wire mesh here. We can get a lot of details very quickly
with this method. So I will show you
how I can do this. And let's now make like
something like more heat. So let's see where is this? So as X, Y, Z to scale to about here applies scale and let's go
with Concrete material here. You pupil objection to unwrap this and now
what I will do, I will do duplicate this
space with Shipley, move this on z-axis. And let's place to about here. And let's also bring this up. Now I will select this
face and selection. So separate these by selection. Let's set origin to geometry. And now I will go with more
than with edge select. I will add to look class here Now I will press a and
right-click sub-divide this few times and one more time. And now I will go with Facebook. And now again face to quads. And now we get to
this squats here. We can just use VAR model
to get what from this. Okay? So you can increase
this thickness with holding Shift and move
this left to right. You can enable this boundary
to get this edge here. This is too big, so I will
maybe leaving this part here. So delete vertices and maybe
let's go with numpad one. Maybe we can leave
this part here. And also I will move
into Metal texture here. And you can see
nice details here. And I also place one
nice piece here. So what I do, I basically just
duplicate this shape, the Z and we can now number slash key and I
just need small part of this. So I will go to Edit Mode. Delete all these parts. Set origin to geometry. And let's now go My, to rotate this 90 degrees. And let's place
this may be here. We can move this train little, expect to see this one
more, little more. And let's now create
this, stays here. So basically, I again use the modified just place
origin about heat plane. Sx2 scale this one X axis, Z to scale on z-axis. Applies scale. Now, why
to rotate this on y-axis? And basically what I do, I just go to Edit Mode
bureaucrats here. And now we can add again
why for a modifier. And let's apply scale
and with this thickness. And now we can right-click
and convert these to mesh. And if you go to Edit Mode, we can extrude this
on x-axis way EX. Okay. Let's add the
metal shader here. Go to material
preview and you'll cue projection and
just the project is. And now we can this
stage in breakdown. I think this is too
close to camera, so maybe we can
move this box here.
16. 15 - Big structures: Next we will do here is this big structure in
Background or greebles. You can see also in this reference image or this
big structure in the ground. But we will not model this. We will import our setback I create just for this tutorial. Reason why we will not
model this is very simple. I spent about three days
to make this asset PEC. So here we have about
20 friend assets. And it is very time
consuming to make all this. So if we make this in this
tutorial, this tutorial, we'll lease maybe ten or 20 h, just making this greebles. Another reason is very simple. Using asset-backed like this or any asset pick
you can download on Ethernet is just
a normal process of creating complex
scene like this one. This speed the working
process salad. So imagine that we
now need the create, this, the train from scratch. And if you look my
tutorial, this tutorial, we're just creating this
train is about 3 h. And I spend even more times to create
all this asset peg here. And we don't need use all these, but I make bigger. So you can use this next
time in your next project. All these objects here
are just one object. So I joined all these parts. So it will be easy to
add in asset browser. And if you look
my last tutorial, I talk about asset browser. But if you don't look, you can find on YouTube lot
of asset browser tutorials. So you can also this
in your asset browser. And I think when I
shared this file, I will already renamed this and I will already
Martin this assets. So it can just go to
current file and you can find this under unassign. And you can also add this
in your asset browser. But if you don't want, are these in your asset browser, you can just copy few of
these objects and you can, you like, and you can
just paste this in scene. So just right-click
four objects, and here is our blender file. And you can just go with right-click and
paste these objects. I will now move this on y-axis and let's place this
here so we can see this. And this is not the only one. Asset pick I prepare
for this tutorial. I also prepared Neon
sign asset pick, and I will share
this as a take with you so you can use all
of these Neon sign. And I also prepared Small
greebles assets pack. So you can see this Pipes
and this small things here. And also I made the few cables, but I will talk about
this ad set back later and also make
this ground photos can. So this is not my asset, but I will go and I will try
capture and make Photoscan. I can share with you. And also I will share one small shop or you
can see in Background. And of course I will share
also these train with you. I think I'm not sure for now, but I will share six
blender file with you. And I also forget this Garbage Photoscan
I also made for you. So Garbage is one train is to this Small greebles is three. This big structure is four, and this small shop piece
five, and neuroscientists six. So let's just take a look. Let along this asset
pick. I prepare for you. So I spent about
three days every day, about maybe 5 h to
make this asset pick. It is not very hard
to model these, but you can see that we
have a lot of details here. And also if you go to it more, you can see that is
still pretty low poly, so you choose on here, you can see that
this low quality but also low resolution, I use a low-resolution image. If you go with F 11, you can see that this image is, I think three K, but I use only one image
for like five models. If you click here, you can see that these two
objects share same material. And I made from this one Image here, I made
about five models. I also want share with you
where I found this texture. So I go to Google Maps. I know one industrial
area in my neighborhood. I just go to Google Maps and
I will just try found this. I think it's about here. So what I do, I basically, I was lazy to go here and they take photo
of this textures. So what I do, I basically brings
screen and I just take copied this parts I like, and I paste this in
Photoshop and this is how I made this scholarship. So this is a very nice Metal you can use to create
all these greebles. And if you look
this variable here, you can note that
this is dysfunction. Nice thing about Google
Maps is that you can go around this object and you can see this
from more angles. So you can see the
stapes from few angles. And you can also go here. And what example if you
like this texture here, you can just go with print
screen and you can take this texture and then you
can paste in this collage, so this part here, and you can then very
easily project this. Okay, let's look at
this object here. So basically I found this nice small house here and I just take
a screenshot of this. You can see that this is
very low resolution image. I take this screenshot, but this then I
just reproject this on cube and I just start
cutting and adding details. Following this. You can
see how this look in via remote very low poly but still Luca very
good from distance. And I found reference from
this for this structure. So basically make
about ten or greebles just from this area here. And if you want found this area, you can just copy
this address key. Okay, so I found this reference
in this structure here. And if you wonder
these two objects are, I add little more detail. So I spend little more times on modelling just
these two objects. You can see that this is
pretty complex objects, but still pretty low. Okay? This object is not
good from this side, so just take care about this. So if you want to just use the site of objects
various visible in Canada. And also this model here you can see we have all these details, even this small cables,
all these structures. Let's now back to our scene. So you can copy any of
these objects you like. And we can now start. I will also copy this one. And we can back to our scene
and you can now adjust. Here. I'll let render preview. And we can start placing
this assets in Background. But the first I will just select all these objects and I
will press M and I will add this in your collection and
I will call this structure. Okay? Now, you just need to take some time and start placing this in your scene and until you
get the result you like. And I think I will speed up
this process because this can take some time and you
will not learn anything new. So basically you can
just visible in Camera, I can look reference, I need something
here and this part. So we can just made
me rotate this. And you can also, if you want stretch
of this or scale, it will not be visible
because you can see that we can
lot of myths here. So if you want to can
press Z to scale this X, it will not be broken. This is before and
this is often. So after few minutes
of playing with this, I get this result. And if you know that this
slow down your render time, you can go to this objects
which are not so visible. You can go to Edit Mode, then you can even reduce
this mesh if you go with a to select all and
you can go to mesh cleanup, and that's image geometry, and it will type here 0.5. You will basically delete
half of this work desist, but this will still look
good in Background. For example, we can
do with this one, so a and mesh cleanup and that's image geometry and now is
these values still here? So we reduce this mesh to have
17. 16 - Small greebles: Okay, so let's now continue
with Small greebles. So this is greebles and big structure and this
is Small greebles. This big structure
is pretty done. So I think I will not
add more variables here, but I think I will
continue work on this Small greebles spec so
you can see how this look. This greebles are more for close-up camera because I add more details
to the cerebral. So if you go to render preview, we can see how this looks. So this here, our photo
scans from before, and this is Modeller. So I'm all done all
this greebles key. You can audit. They
are pretty connected with train and similar stuff. So all this is from
one train station. And we can also
feel Pipes here and one condition because
I use this last time, so you can place one
here if you want. Okay, I will now start
with this cable. Even this object is
may be forced object. I error made it look very good when I put
this in my scene. So if we go to Edit Mode, you can see that we can just Small cables
with this stuff. But if you go to render preview, this look pretty
good in Blender. And if you know, in my last render I use different
assets, not this one. I place one here and I
will do same now. I will. Let's go to solid Cleveland. I will copy this object. And I will back to our scene. And I will paste this here. And let's just again
click New Folder. And we can call this Small greebles enabled place one here where I put to
these cables last time. But for now we miss this ground Photoscan
you can see here. So it will not look
so good before we add this ground water. We can try all to
the right and we can rotate this on my
axis by 90 degrees. And now, so at night, the night, no Z minus nine. Maybe we can try place
one smaller piece of this here on the structure. So every press S
to scale this and let's move to about here and we can see later
how this look in R1. Okay, and what I want avant place also one
here on this wall. So all to D Y. And let's go now. Nine. Now, just press S to scale this in place one here. You can go with the G,
X and holding Shift, you can move this
slide about here. Okay, Let's now go slow
three and make one test. And I, we bring this down for now because I will
place a condition here, so G, Z, and let's bring this. Let's before render just
also copy this condition. And if you now see, we can select this small
structure collection. And when we paste, this conditional will
be in this collection. So now I will again go
with Y and Z night ten. Let's place this
a condition here. This is before and
this is after. You can see this
nice detail and also This sale condition
and this gate. Let's now continue. So you can
use any of these you like. Let's try copy this one. Also, this option key. So I will right-click copy and we can now
back to how scene and I will just select this Small greebles Collection
and let's paste this. Now it's the middle
of this train. So I will place
this object here. Maybe I will rotate
this on the y-axis. And let's see how
this look here. This is before and this is Art. Be also this pipe. So I will all lead to the store. And let's pick two all scene. So Small greebles
and paste this here. In the last renders. I also
thought this greebles here, so we can just find
something similar. One thing you can also
do, I like this part, but I think it's maybe
too big for what I need. So you can always go, for example, I remove it. Just L to select loose parts. And I will copy few
of these pieces here. Now, I can go with
Shift D X press. Let's also take some
of these cables. And maybe this part here. So we can select
this loose parts. And then we'll go
with shaved the X. And I will now let's
move this here. And with x-ray more
than box select, we can just place this here, maybe turn up at one we can go to from total
roughly can we can just, it takes lay mode,
select all these parts. And let's place this here. I will select all this and I
will move it be selection. Now this is separate
objects from this one. So we can select this one. And we can just go with
set origin to geometry. And now we have small piece
of this and let's copy this. And last time I put
similar object here. So you can see these
objects look pretty good. And we can now try
similar paste object. And let's try phase
this object here. And I will go with night
and day two opposite side. And let's paste this here. You can go with all the
X and maybe placemark. This is before and
this is after. We get a lot of
this details here. And this is without any
greebles and this is week we will send you can
see how much metal is now
18. 17 - Garbage: Next assets pack is Garbage. This is Photoscan sime
made a long time ago, but it is still good. So you can see how this loop we can now just randomly
copy some of these assets. So right-click and copy all you can add this
scene castle browser. And I will now and just
make to all scene. And I will paste this
here and just press, Let's now move this
here, what is visible? Let's now press M and, and call this Garbage. And now we can select again all this object but not
in this volumetric use. So weed control and let mouse, you can remove this selection. And let's now paste this, start placing this here. So basically, you can just
watch on left and you can move this and
place in your scene. But I will now press S because I think most of
these are two big. You can also grab this
and you can go with all except just Background. This is before and this is out. And you can see also
these tiny details here. So this is basically same
Photoscan of this ground. Just the scale a lot. And we will add also these late. One thing I forgot to do
before is that I feel, so we want putting
focus this train, not in this part in foreground. We can get this easy. This I will go with Shift and right-click train here and
that would go with sheep. They in hard, empty
and play it out. Now we can just
select Camera and we can that the field here and we can select this
empty as focus object. Now, if we go all
down, for example, 2.1, we get a lot talk, a lot of depth of field. But I will go, let's select
the camera and I will go to 1.2 or maybe 1.3 or four. So you can see that
now this part, these Garbage is not
too much in focus, which is much better
and this is before, and let's now run that. So this is before and if
I press J, this is after. So basically remove
focus on this part here
19. 18 - Background shop: Next asset type repair value
is this app protect shop. And you can see that
in Background here we have something happened here. So you can see some
store or shop here. And I also working on on asset-backed
which we'll call shops. So I want also make about
five or ten Small shops. And for now I will just
share with you this one. And you can see how this look. If you wonder how I made these two can watch my last tutorial, which is called
Small shop tutorial. And I made one building
similar like this. But with this we have
nice emission material inside and I think this will fit pretty
good in our scene. So we can now go
to solid preview and we can go with try
click and copy one object. I will back to our scene and let's also go to solid preview. And now I will
place this object. And I will just remove
these two scene collection. Okay? Now, I want to make
space for this shop, so I will go to Edit mode
and let's now go with Control R. You can
see this line here. So I want place this amount, this, and I will go
Control R again. And now we can just
add one on top Control R. And we can now just select this
face and go with E, Y and extrude this on y-axis. So basically now we make
space for this shop. Let's now take this
one z-axis been my 180, so 100, Katie. And I will just check
mesh density of this. So you can see that this
is pretty low poly, poly thinking can do is
maybe delete this part. We don't need, so
delete vertices, but just go to x-ray mode and let's now leave parentheses. And now we can place this scene. We can just isolate
one, these two objects. So now it's much
easier to work with. I think this object is too big. So we can scale this down
and place about here. If you want to, can
move this node. And these particles. I think I will move
also this more on left. So this is before
and this is after. So we can see that you
should have this shop here. I'm not so happy
with this for now. But we can isolate
this object and let's see how we can add more lights here and
maybe Small visit. If we now go here
to shader editor. We can see material of this. So this is, we have
this emissive material. I'm not sure. Maybe this, this part can be a missing
and also this part here. So when you go to Edit mode and it's based
selection, select this part. You can see that
Blender Basic and navigate to this material. And I also add option
to make this me see, if we add here,
now this is zero, so it's not a missing, but if we decrease this to two, we can make this MEC. And you can see that we
get a lot more light here. And I will for now
tried it five. And I will also go
inside this store. And if you go to Edit Mode
and select one of this space, we navigate to this
material here. If we find node which
is plugged to emission, we can see that we have one more Multiply here
and we can increase this may be two if we now
add much more light here. And let's now see how
this loop in new renters. So I will back here
to render result, and this is slot seven. And let's now go to a So this is before and
this is out there. So it basically add a lot, a lot more light here
and now much better, but I think it is
little too intense. So what I will do, I
will basically just move this little insight
to make this less visible and maybe
bring this when T. And if we go to Edit
Mode and select this, me, see, this red is
missing material. We can now bring this, maybe 23. Now this look pretty good, so we have sunrise here, but not too much. One thing I forget to tell you, so you can see
these lights here, so it share five or
six these slides. This is my old Blender scene and would hear five
of these slides. And I also have, we'll also share
this small light here in this Small
greebles asset. So if we go to render preview, you can note something
very small here. And if you go to Edit Mode, you can see that this is very Basic mesh with
projected this image here. So I project on
this part of image here and we did this node setup. So very simple setup. We get this slide which will
look good in Background. So I will copy this object. I will back to our scene. And let's paste this here. I will press M and move
these two Small greebles. Okay? Now we can just
paste this here. Where is this area land? Okay. I will now go with, Let's move this to about here. And now we can go
with altered D and X, move to about here and now shift our to repeat this last
process and five time. And I also last time
on one key foreground. So I will go all the X
and let's move one here. But one time, one thing I know that this here
is too intense. So I will just know
to change this slide, we need to shift this. So I will now select
this object and go to Shift D and move
this one y-axis. And now we can delete
this one because we all TV will affect
all these slides. Now we can click here and
just rename this to life. Let's now we may duplicate of this
material and I will now, here's maybe just ten or fine. So this is before
and this is often, but this will look better later. Then we add some globe
and glare effect. I think I want splitting
this little, maybe
20. 19 - Neon signs: Next is Neon signs. And you can see
here few of this. And I will share
this file be two. So this is asset-backed. I made last time. You can just basically
copy assets you want. And you can also find all
these assets in the spec. But I will not do this because I saved this in us and browser. So I can just close this
now and I will just, I will go here with horizontal
split and I will solve for here for us and browser
and I will affect my, my assets and neuroscience. And now I can just start
putting this in my scene. So last time I use
these tickets, so I will search, give can also use this search
and high bound is assets and adjusting it, rotate this one Y axis or
to -90 degrees. Okay? And now G, X, and let's this here. Okay? So you can
see how this look. And next time it was
this Western Union. And I can also search
this well less than, and let's place this here. Y minus mighty. Let's see how this book, so we can take this
to this poll. Okay? And I also use this one. I'm not sure how I call this. Just look for number
one, locates here. And we can place this here. For now. I will update
this Lighting degrees. So this is before
and this is up. I think this one is called leak, so we can always scale this. And let's put this one more
21. 20 - Importing a train into the scene: Next object we will import
here is this train. So this is from train
tutorial and you can, I will also share
this BEC with you. Now. This is by to
get when you open. And I will now read all these objects is inside
this Train collection. And if you right-click and select objects, if you press G, you can see that all it
is inside and we can now go with copy objects. And now I will
make to our scene. And let's paste this object here and let's go
now, move this. And I will, I'm not sure
which collection is this, so I will press M and I
will call this. Okay? Now, this shouldn't be all in shrink collection.
You can see here. But because this, all
this is parallel to this big empty cube, we can just select this
cube and now we can, with NOPAT seven,
just move this cube. And so we can now easily control these train and longbow with it. Let's now just replace
two position of this. So I will delete
this cube for now. Let's just place this here. And I will go with
Jay-Z and move this down GY and move
this one y-axis. So this is before, and this is after. And I think one thing I need the fixed here
is this lights here. So this is basically focus
object dislikes here. And I kept problem with
this slide. So let's see. If you select this object,
then isolate this. You can go to render preview
and see various program. So I think I will copy
just disliked here. So if we select this object, we can see that we have this
light material and I will cook this name and now we
can just replace this. I will just go to
this material here. So to say the editor. And now I will search for
this flight material here. They will basically just copy. And now I will make
this head light lights, and I will just delete this
and paste this material. And I think we need
UV editor now, so horizontal split
and go to UV editor. And now Let's copy
this material so big, I want to reproject
this to heart and basically select this
middle part of this. And I will go with control
NAD plus to expand selection. And to be sure I will just
assign this material. And now we can go with
you your projects. And now I will just select this mesh here and I
will reproject this. So you can see that
now we get lights. Before we didn't get any light because this has
projected on black color. And let's now select this part and just reproject
to this part here. And now we basically
get these slides here. And I think maybe we can go more bit reddish
color with these rights. And of course you can increase
this value to make seven. So this is before
and this is Art
22. 21 - Asphalt cracks: One thing I also do last time, so if you go to textures.com and search for Asphalt cracks, you can find this
nice PNG images. And I download few of this and I will show you what
you can do with this. So basically, I will place, Let's now back to solid preview. I will now play origin here, and I will go with Shift T
image, images as planes. So you need after you I
decide on other add-ons, you just need search for images as plain and
activate this set on. And then when you
go with Shift a, and when you go to Image, Image Size plane, you can basically import
this image here. And because this is a PNG image, so with the Alpha value, you don't need anything more. You can just re-project
this on grounds. So if I go the air, why Nike Air Y minus fight? Because if you go to
face orientation now, you can see that this
is correct site. We can just place this
here and you can see that we get this nice details here. So you can save
these cracks here. But now we have two problems. One, this is too big, and another one is that
this great shadow. So you can see this
double line here, because another one is shed off. And we can fix this easy if we go select this object and go to Object Properties and you can in visibility in
just disable shadow. Now you can see that
this shadow disappear. And now we can just
press S to scale. This will make this smaller. And you can go with D X and maybe rotate this scale
and place one here. And maybe place another here. Okay, so maybe it's
not so visible but it is there so you
can see these cracks. And when we are the
more samples later, so now it's just 35 samples. But when we add here maybe 300, it will be much more visible. I also do same with
this graffiti. You can see on this
train heat map for this, I use just shrink wrap modifier. If you cannot find the
graffiti with alpha value, you can just plug the, you can basically do this. So if the select this
object, this material, we can just plug
these two color, this color input to colorRamp. And you can isolate this if we plug these
two alpha value. And I talk about this in
my previous tutorial. And the right colon means value of one,
which means transparent. And basically you
can be this method, isolate them, get
the alpha white. But I talk about in this train tutorial
scene, train tutorial. And now I will just plug
these two alpha value here
23. 22 - Blender compositing: We are almost done the blender. And one thing we miss here
is this ground water scans. So can I made this Photoscan? I will record the part of
tutorial where I would this in this place and maybe
I remember something more. But let's for now make a test
render with more samples. And then we can do some
compositing in Blender. I will go here, maybe it's
300 and let's now press F 12. So we can render this take less than 1 min on my computer and now we can go
to compositing. And now I don't need this timeline here so
we can close this. And I will place
you to use notes and check this mesial
to check this backdrop. And now I will go
with Control Shift and click on this node
and now we get this view, and so we get this
in Background. And I will press V to
zoom this outdoor. If you want, zoom this scene. You go with all three. Now we can just add some chromatic aberration,
lens distortion. So if you want to
distort this image model can maybe when 05
and if you press M, you can see before and after. But because we already used this fisheye panoramic camera, I will bring this to
zero and I will just add little romantic
operationally, maybe 0.03. So with them, you
can see before. And so we basically get this blue around
these edges here. And in Blender, I will just
add some Anglo English. So if you search for glare, we can start with For glow. And this is, so if
you go with height, we get less than,
if you go with low, we'll get more globe. Let's go with meeting. And I will now just duplicate this one more time and time. We will go here
with maybe streaks or stars can go
with these streaks. Now. This a lot, so we don't want to
match this here. Okay, we can control
how much we want this glare and glory to
God, one mixed node. And now first input
will be picked out this glaring globe and
second will be with. So. Now if you go all to one, we get all of this
glaring globe. More difficult to left. We get to tau,
this glaring globe and we can control how
much we want this. Let's see on our
reference image. I think this is okay. And if not, we'll be deaf 11. Render result is
this composite node. But we need search
for you overlay here. Then this is if you
like this result, we can plug these
two Blender result. So this is Final Render. And if now go with that 11 and
search for ran the result. We also get the same here. So I think we need just
replace these three random. Not sure why these
don't work now, but I'm sure when you
re-render this later, this will, this should work because all this is
plug to composite. Now, let's talk about this
anamorphic lens flare. So you can see this
bluish lens flare here. And I get this with
a paid add-on. So you can do this, maybe is Post-processing, maybe we will talk about this later. How we can do this for
free in After Effects. But this flash flood
result add-on is not free. I talked about this
in my last tutorial and they said on it cost $25. And if you buy this in
next month in August will be summer sale,
maybe about $18. So you can get 20%
or 30 discount. If you are just called, you don't need spend money. You can try get
everything for free. This is not affiliate link because I don't have any
contact with this creator. I just, like we said
on, and this is reason. I use this and I will show
how you can use this setup. So to be able to use the
sudden you need light. This work on light. So I will add here point lamp, but I don't want
the islam to create the analyte and I will
just set this to zero. Now I will go to Lens Flare add-on and I will
click here two plus. I will load these
anamorphic light here. We go here to general settings. We can bring you
tested it to 0.1. Nice thing about these
add-ons that we can also control every aspect
of this slide here. So if, for example, remove this globe, we can basically get just
these streaks. If we disable this week, get only this **** man. Or you can also, if you will select this,
you can also bring it density of this glow. For example, just if
you bring these 2.1. Now, here is intensity. If you bring this 2.1, we
can keep this butt low while you can control these
streaks if we bring these. Okay. And if you
want, duplicate this. So you can play with
all these settings and all these splits reset. So you'll have a lot
of these presets. But if you want duplicate this slide to this another side, you need to go to shift the why. And you can see that
nothing happened now because now when
you select this slide, you need here and go to
duplicate to select that object. This slide here is select an
object and now we just need the duplicate all these
settings to select that object. And now click Okay, and you can see that we
get another light here. So this is obviously
going to dance. And I use very low one of
these anamorphic lens here. And I also add very small
value or on these slides here. But you can also get this in any graphic editor program in Photoshop or After Effects
or any program you use. If you just search for an amorphic overlays
or something similar. And you can just download
something similar like this. And he could just set this to screen mode to ignore black
so you can get similar result
24. 23 - Final details in the blender: Few days later I make my promise and I make ground Photoscan. And this is area where
I take this ground. So basic Lego with my
mobile phone and I take maybe 20 or 30 photos
of this ground here. This ground here
is connected with the train station,
which is great. And then I use Reality Capture. So you can download
this program for free and you pay
only when you want. Download your object
for this object here. So this is what I get
when I download this from reality capture
and I'd pay only $0.20. I talk about reality
capture in this tutorial. So you can look for
these tutorial, I think I call this
as other city gate. And all these assets
here are photos gains, and also all these assets here and part of
this structure here. I think only this part on top because we model this part here. So this is what I get
from reality capture. And you can see that
I get big mess here. So you can see that this
is not on same level. And I take a lot of
time to fix this. So I clear, basically, if you go to Edit Mode, you can see that we get very high density mesh and you can see that Blender
is very slow. So I go with mesh cleanup. Let's image geometry and
that's Muddy's wanted to 0.1. So we delete basically
90% of this mesh. Let's open Final ground assets. So I will share
this file with you. And this is final result. So basically I make
this low poly. And also when you download
from Reality Capture, you'll get very big texture, eight K PNG, which
is about 100 mb. And I reduce this to one K JPEG, so this is maybe one or 2 mb. So you need to be
very careful when you use program like
Reality Capture. You get very high
poly mesh and you'll get very big texture
and it is not useful in C. Nothing
which is also important. This is to check
this edges here. It must. Steve congruent. So I'd see this area is not. So let's first go with G, Z and bring this down. Okay, I think this is, now,
this looks pretty good. But basically you get, when you get this mesh is to go what example like this up, rotate this down, and
stick also this n-gram. And then you do this in
all these edges to can now go and just with the accent. You can intersect this. And you will not see
these problems on edges. But you don't need know
anything about this because I will share
this file with you. So you can basically just
right-click and copy objects. And now we can back to our scene and we can just paste this here. This object is here. So I think I paste
this two times. So I will just go with Z, Y to move this here, and let's place this here. So I will go with Jay-Z and let's just bring
this two position. So Jay-Z and with shipped
to can move this slide. We can just duplicate these
few times it old, the old D, and also the index. And you can rotate
this whole scale, but we will not see any
repetitive texture here. And let's go now also Dx
and maybe we can rotate this from the axis
and place one here. So this is before
and this is after. And I think this
looks pretty good. Maybe we can add one more. So all the X and move this here. Scale and maybe we can
scale this a little. Again. I don't really
test and scale this. Okay, So this is final result we get from Blender and
wanting. I will show More. So if we
duplicate this with all the and why and
go with the GZ. So Jay Z for Z-axis and
now scared is hold down. And we can get all these tiny
details with these photos. Cancer. I recorded all
DX and let's place this. Okay. And you can see
all these tiny details. And last time, I also get these tiny details with
this grand scheme. In next and last
part of tutorial, we will do post-processing
in after effects on Photoshop because this
is just still image. But you can use any, you'd have to get it
all program you want. But last thing I will
show you in Blender. If you don't want to
use any other program, you can also do color
correction in Blender if you use any of these
effects on the color. So let's try with this
color correction. I think this is too complicated, but you can use color
or color balance. You can basically
change color of shadow, highlights and midtones. So you can just play with these values here and until
you get Look you like. So if you want the
greenish tone, you can add this in mid tones. I think this is, this here is shut off. So basically we get
bluish shadows. And I usually want reddish
color in highlights. But I think this or you
can also try bluish tone, but I think I will
go with reddish and these green effect
here in newtons and ruin. Okay, if you press releases
before and this is, but for now, I will
remove this node. And because we will do this in Post-processing
in, after xlab. And wanting to can also do, you can real-time use this
color management tool here. So if you go here
under image editor, you can float,
achieve the result. And you can try here with. So I think medium medial
quadriceps is this default. And if we change this
to high partials, we get basically
hypogynous here. And you can also play with
this exposure or gamma value. What more? Brightness here. And now we can render this. I get this problem here. So you can see that
this transparent part is not visible, it is black. And if you get this problem Art in anytime,
you can fix this. I think if we increase
this transparency here, and now we fix this problem, but we can set all
this maybe to 12. So this will little
slow down Blender time, but we will get a little
more light in our scene. And I do this because
we will not make any animation and I don't
need care about Randall time. And now we can run that these
four Post-processing we will need more than
just combine at random. And I will now go under
render layers I will miss. I will also go with
velocity, direction. So we will need these
three passes, four, Post-processing like you
can control this mist if you go here under
material preview, you can see how this past Look. If you go here and
select Ms. past, but you can also check
all these paths is huge, so this is emission and also
we need the mission parcel. I will move it to miss
direction and also emission. Emission. So this is
how Amazon parcel can hear you can select also miss passed
in by default is Ms path starts from
5 m and end to 25. And you can change
this if we go here. Under world, I think, and under missed
passive can see here. So if you change this to zero, we start from zero, but I think these default
values are good for us. You can also increase this value Let's go quite funky. And I will not break
his to combine it. And for final render, I will go maybe 300 samples. I think this is now we can just press 12 or
you can go with vendor. Now, when render is done, I will now go to
output properties and I will set these
two J peg because I think you don't need the P&G. P&g is too big. And we can now go
to compositing. And so now we can
plug this image. So this is basically
combine it and I will create the render folder. And we can copy address
of this folder and we can rule here and I will
move it image service. And I will call this main. Now I will make two Blender
and I will go with Miss past. So if you go with Control Shift and click on this random less, you can preview process here. So this is Smith's glossy
direction and me show. I will now break these two. Control Shift and click
on this last node. And now I will plug missed. Here. We can go with F 11 and
we can now save this as me. So now I will go with loss
direction F 11 again. And let's save this as
G. L. Last is Amish. And we will do post-processing
in After Effects. But because we will
not use any complex, you can use any graphic
editing program you use. So for example, you
can use Photoshop Bu, Da Vinci resolve or
any similar program. I think we will be able
to copy what I do. But because some
of you don't use any graphic editing program, I will show you how we can use miss passed here in Blender. Let's first, second, remove these compositing tag
because we will just be confused with this
and we need this only when we are
happy with results. Now, I will go with
the color around. With color ramp. We can control. Well, nice to start. So I plug this here. And if you go with Control
Shift and click on this node, we can see how this look. But because this lens
distortion distort our image, we need also plug this here. So I will go with Shift D and I will plug this
here. So you can see. So this is before you can see
that this lens distortion, we basically move
little this image here. This is the reason
why we need this. Now I will go with Control
Shift and click here to make our image and
I will not mix. Now if we go left, we get input one. If we go All right, we get this white color here. But I will not use this slider. I will use this aspect. Now. Very black color. So if we preview here
varies black color, we get this and
various white column, we get this white color here. And now we can control
whether we want our me with this
white color here. We control how much
we want dismissed. So if we go all to black, we get zero. This white color. If we move this up, we get more and more
this second input here. And now we can plug
here what we want. And if we change this two
yellow which we get yellowish missed basically and
looking also bluish missed, but I will go with maybe little yellowish or
completely white color. But usually we see
missed us brooch. So how we can add groove
here in this input, we can go with Shift
a and we can start. I will go with this Gaussian
blur and I will plug this combined input to image and you can
see how this look if we preview this and we again need this lens distortion. Here, we go with Control Shift and click
here to preview this. And I will add here
value of maybe 300, 100. Okay, we can try with 100. And basically now we get this image here and we can
plug these two second input. And let's see if it's Control
Shift and click this loop. Now. You can see that
we now get blown in Background and we can see this better if we increase
this white color. So you can see this
blue background. But if you want to can also add delete the white color here. If you go again with
mics and how we mix. Basically, if you go all to let via yet all these blower
and it can create this. We get basically whitish blue. So we can go more to left, but we can also keep
this white color. Okay, and now we can just
choose dismiss start. So if we go to left, we get more of this
scene, all scene. But I will more than
missed from this area. So we can basically keep in focus this part of train and
remove this background here. This offset scene Background
does not visible. And I will now choose Opacity
with this slider here. And we can see before. So this is before, and this is after. And now we can plug
this when we are happy to composite node and
we can go with 11. Just check. You will note, okay, this is now
same, so this is good. And now I will run
the result and we can just overwrite this
may class here. And now we can jump
to after effects
25. 24 - Post-processing: Now we have all these passes
here and open After Effects. And let's copy this. Now I will go with new
composition from footage, and let's now select
this main here. So we can import this. And I will also import all these paths is so if you
go with Double-click here, we can just important
emission Los Angeles. And I will send this to 100. So with Miss past, basically we can do same. If we set this here and if we set this to screen blend mode, then we can now go mic levels. But you can skip these because
we add this in Blender. And you can basically just
choose very one to dismiss. And you can again go
in after effects, we have the effect so you
can choose, for example, yellowish color or
basically all we get, all we do in Blender, we can do same here,
we dismiss past. Or we can go Gaussian Blur. We can add here 12 or
100 as we do before. And we basically get the
same we do in Blender. But I think I will
skip this part. Let's see, before and after. I will keep this one. Only if you press T, we can choose Opacity. And I was good, maybe
just 20 per cent of this. So this is basically
not so visible, but we can keep this. And I will now hear to
project and let's now go. Maybe me. And I will
now go with curves. Curves and levels are
basically very similar, like color ramp in Blender. But let's now move into curves. So I want isolette the only this bright parts
from this background here. And we can do here, we can just bring
these legs to here. And also I will just bring this
Blake's two eyes on a totally this
glowing parts here. Now we can just add glow effect. We have in After Effects. Use on this right parts. So I will go with
this threshold, this glow radius to maybe 200. And you can play also with this intensity and all
these settings here. And let's now try and go
with the Screen blend mode. So we want to remove this by callers and keep
point this globe. So I will go with screen and
let's see before and after. And I don't like this part here, so let's now just mask
this part tie line. Now we remove this
globe from this part. So let's see before and Dr.
and they also need further. So we see this edge here. And I will go with mask. And let's feather.
Maybe too complex, too small to this.
Okay, Let's see. The more we move this part also. We can now go with thee and
bring opacity, make it all. So this is before, basically
we put more focus, this Neon signs here. Let's now go back to
project and I will go with glossy direction paths. With this, we'll also go
with screen blending mode. And I will bring
opacity or down. So it's D plus D. We can bring the opacity
mainly just to 20%. And let's see, before and after. And I don't want this
glossiness store, this scene. I will just try putting
focus this train. I will press M twice to open this mask properties and I
will increase this better 200. So let's see, before and after. So we basically are the more, little more details
on this train. I think this is still intense. Maybe just amphotericin. Let's now go with
color correction. So I will go and try glue
here and no adjustment layer. And I will name this CC Color correction and we
can go with Lumetri color, which is made color selection
tool in After Effects. And if you see this message was asked press Caps
Lock to refresh. And you can just copy this value so it is different
for every image. You just need to play
with this value. So for example, I usually
go to plus 50 -50. And then I see what Look, I like more end last time I will read this value so you can
just copy these values. So I will go with
temperature to zero and pi over two -15. So we basically add
Greenstone key. We can add little
more exposure here, but not too much. Maybe 0.2. With contrast, I go with four. So two plus and shadow,
sidewall minus sign. And with whites, I
go to minus ten. And Blake's two minus. So this is before this
effect and this is out. And you can find all
these sorption in any graphic editing program. But I will for now save this. So I will navigate
to my older station. Last time, I add little
reddish color here. So I want to make
this end. But I do. I basically go here with a new solid color and I pick
this red color from here. Now I said this to screen. And now I just to make a
mask with this ellipse tool. If you go all tend, scroll most, you can zoom this. So I add one mask here. And now we can go with this
mask properties and I will be this mask feather to
maybe when I'm not sure. Let's try. Let's take
this to 100, few. So let's see before and after. Okay. Now we can choose up with T. You can bring
opacity, maybe just 50%. Let's see before. Okay, so we can bring this
maybe to center 2%. And I will try to go with
Control C and Control V. And let's just bring this one. If you follow my tutorial, I usually aren't correlation, so this is basically red
glow around this highlights. So I will go with
new adjustment layer and I will station, and I will now go
with five edges. So we basically find these
edges and now I will go with thin color these two red. So I will go to
read coulomb want, but I like little more
this orange tones. So now I want the width this, so I won't read colon on this. Now I will go with two levels. So we can control
how much we want to do is I don't want too much. Now we can go with blue. Now, I will go this maybe ten. And now we can also again
go with curves, levels. And we can increase this
to make this more visible. And if you now go to
Screen blend mode, and let's just find this repeat edge pixel to
remove these edges here. And you can see this dilation
effect on these edges. So I think I will remove this. Just keeps more volume
of this and maybe we can move down. Okay. This is too intense, so we don't want this thrombin. But I will go with D and bring the opacity
to kick percent. So this is before and after. If you zoom this, you can see this
effect on these files. I think this is still
too intense or maybe just let's now add more
missed in this scene Go, do this. If we go again, I click and go here and new adjustment layer and
I will call this move. Now I will go with blue. I will place this time 200. So basically this
scene and I will now still can set of positive
maybe to 20 per cent. So this is before and after. So we basically add more atmosphere to this
scene and make this more. And I will set this
maybe to ten per cent. So I don't want
overfilled with this. Not we can do, we can duplicate this Control C and
Control V and VP. Change this to
screen blend mode. We will basically
add want lights. And we can also use
this mask tool and we can just add this
training focus. So we will remove this
rule from this area. So I've been having
for now increase this sense. So you can see this. But let's now play
with this mask. And now I will go with them. And the mask properties, I will increase this to two
families, too small to this. So this is before and this is, I think we can
right-click and transform hunker point so we can
now move these ones here. Okay, so before,
before and after. And I will bring this D, maybe just can say this is
before to blow the effects and how quickly here we can
see our random from Blender. And this is all, after
all, this affects. Let's now add the grain. So right-click New Adjustment
Layer and I will call this. We have, I'll be writing
in After Effects and we can basically set this
to find an old butanoic. Can. I usually go with this Codec 800 T and
we can add green here. So this is too intense, and I will bring this maybe 2.5. Let's try out more
sharpening here. So this look pretty blurry. And I will go with New
Adjustment Layer. And let's try. You've named these
two shop. And we can find sharp perfect
under Lumetri Color. Okay, here. So we can try
doing this all to 100. But we can give this very
subtle and maybe just 50, this is still too much. So maybe just ten. Last time I use one paint adult for color correction also. And they said on is called Film. So you can search for
this if you want. But I will show you three alternative all
this in later analysts. Now, I will start
this convert now. I will show what
I used last time. But you can choose if you want. By the sudden, it is not cheap, it is about $100. So basically with
this sudden we get this Cinematic presets here. And I like this add-on because we get this
whole cinematic feel. And I think last time I use
this Codec portrait 400. So this is before and after, but I use only
maybe 30% of this. So this is before and after. But I think you don't
need to pay too much for descend on just to get this, maybe five per cent on
this color correction. And maybe you can find the sum lots under
adult plots here. So I will go again with
the new adjustments. I will call these slots. And we can search again
for the multipolar Blender, Basic Correction. I think you have some
of these are the blood. And I think under gravity we
have even more these slots. So we can all this list here. And you can try you on these
slots and if you like, any of these two can
just drink opacity. So if you press T, we can bring this maybe 50%. I think this is still too much. Let's try play more with this. I think this is pretty good, but maybe you can
find even better. We have a lot of these places. But you can invest more time in this and
you can find one line. I think this one is pretty nice. So you can just bring opacity, make 20 per cent, and we can also keep the spine. And we're done with
After Effects. And now we can just
go to composite, same name as file. And now we can just change
this from Photoshop to J peg. And I will click here to resize to this original
resolution here and, okay, and now we can say this lender and I
will call this Final. And now just click here. This is my final render. And before I do,
before these tutorial. And you can see that he's
not saying because I made Final touch in Photoshop and I will show you what
time do in Photoshop. And I'm not happy with
these lights here. In this tutorial,
I just showed you how I use this result, the add-on, and I didn't invest some time to
make this Metal. And I get too much lights here. Basically, only
difference between these two and nurses that I can much more time to
invest in this scene. Alright? And if I invest, for example, 30 min, just waking these slaves, result settings, this tutorial, we'll take too long. But basically all process on these two since are
similar or say, I just have more
time to invest on this scene when I
don't record tutorial. And for final touch, I just open this to Photoshop. Because in Photoshop we have, we have this Camera Raw Filter, which is very nice and tight. So I go with Control C and
Control V to duplicate this. So we can see later,
before and after. Now I go to flip that
and Camera Raw Filter. Now we can just
weakly move this on left and right and see
what we like more. So basically what I do, I just play with all these
settings, these sliders here. But you can find this scene any graphic editing program
you don't need use Photoshop. So basically, I
want here exposure. I don't want too much contrast, so I will bring this
left to make this more misty and I think
highlights are too intense. Also add more texture
if you like this and if you want to
make more misty, we can add this case let door. If you want removed, dismissed. You cannot move this. Right. And if you
want add more color, you can bring this, but I think I want,
but not too much. And here we have this
color mix them so they can impact on any color here. So if you don't like
this red color here, we can try play with
this red, orange. But for this process, you just need to invest more
time and you can Unit play a lot of 3D settings and you need compare
before and after. But this is not
obviously would result. And I just want surely what they do last
time. In Photoshop. We also have same lots possibly
do in After Effects. So I think here under color hookup, we can choose any of
these slots here. And we can again play
with this opacity. So, but this is not
a good example. And of course you
can also open this. That's fine. This render. We can, for example, go with this glossy direction. And if you now copy this
and this over this scene, we can go with the
Screen blend mode. If we now add black mask here. So we are now mask
and I will place, now I know Control I to
invert this to black. So now this is
basically not visible. Now we can go with B for brush. And now we can make
this brush bigger. With holding Alt and
right-click, we can, we can choose scale
on this brush and we now have
white color here. If you don't have black, you can press X to
invert this color. Basically, we can now paint, so we have here
opacity of just 12%. Let's increase this. And you can now
train to be this. You basically add this
lawsuit direction. This layer here. We're example. If you want, put
this more in focus, we can add more glossy
direction here. So this is before and after. And I will go here maybe just to plenty
croissant on this. But we basically do
same in After Effects. So I will remove this or I will keep this maybe just to 10%. Let's now back to
After Effects and I forget one thing I do all time. I have one folder on my
computer where I collect overlays and I have
this, for example, folk. And I found this on
YouTube channel. You can search for this name and I think I will
share this link. Well, you can download this, for example, for over lists. Let's try, for example,
this one here. Okay, So if we set this on top, we can basically, I will press S to scale this down
because this is too big. Can now go with
screen blending mode. You can basically put
this smoke effect here and you can see
that this is very nice. Now we can use
dismissed passed here. So basically when I said these
two luma made this villa, This fled on there. So you basically, we
can now go with levels. We can basically use this
aspect or to affect this. So if we click here
to preview this, Ms possibly can see
how this looks. So basically varies white color, this layer will be visible. Let's now remove this. So from these abilities
you can see that now affect this left undone. So basically I want this
after this column here. So let's see how this look. So we can isolate score. And let's now see how this. So you can see that we removed this fog from this part here. Let's maybe bring
this list here. So this is before
and this is up. But this is too intense. So I will go with thee
and bring opacity, maybe 50 per cent. You can any of this overlay. All you can find any
similar backbone internet. So let's try this scene. Either being this
key, if I will, again will be Control
C and Control V. And said this over this book. And now I will send
this again tomorrow. Okay. Let's now plus
S to scale this down. So this is before and after. This is little too intense. So we can bring this facility
maybe to 50%. Again. I have this also as I
think I will share, this means that you can
basically out of this on camera. I will set this on top. And I will not again press
S to scale this down. If an oxide, this screen, we get to this effect
and I will place the stone maybe 20%. And I think this is
still too intense, so maybe just ten per cent. So before and after, and I don't want this over
this train on the edges here, so we can make simple mask. And I now need to invert this. So just invert this mask
feather might be to conduct. Okay, So this before and
after and we get this, rain drops it, this
color correction, you can go to many
different direction. I think is important to save your renders and to
compare before and after. And you can see when I do this, a train that I make a lot of forbade renders before
I get to final result. So just save your renders and
compare before and after. Then. Just tweak your settings until you are happy
with your final result. This is all for this tutorial. I hope you learned something
new and see you next time.
 šime Bugarija