Transcripts
1. Introduction: If you've ever felt stuck in a creative wrap or you just want to grab your iPad
and draw something, but you don't know
where to start, then this class is for you. I'm Rebecca Flaherty,
an artist and digital content creator
from the United Kingdom. We all want to get
ourselves into that habit of just picking
up our iPad and drawing, but the obstacle of having to think of something
to draw can often be enough to stop us
before we even get started. The good thing is that
the creative exercises in this class don't actually require you to do any drawing apart from
one little circle, something entirely manageable, even at the lowest point
in the ebb and flow in our creative cycles because spoiler alert creativity
is meant to wax and wane. We have to take time to rest and recharge ready for the
next cycle of creating. But all too often we put
that rest off and think we can or should keep
endlessly creating, which inevitably leads
to creative burnout. Happened to me
earlier this year. So instead of trying to
make myself go back to illustrating more collections
in my usual style, I decided to do something completely different and work on recreating some
classic geometric patterns in Procreate instead. Not at all my usual aesthetic, but working my way
through these patterns was just what I needed to
get me thinking outside the box and wake up that creative little spark in my head and get it
wanting to play again. The more new techniques
I figured out, the more I was asking, What if I tried this or this or this? Because isn't that what
creativity really is? Asking yourself, what if and then trying it out and coming
up with something new. It doesn't matter if geometric patterns aren't
your usual style. They aren't mine either. The patterns and
products that they ultimately inspired me to create aren't even
geometric patterns. It was the process
which mattered. Think of it like a footballer
spending time in the gym. Then a footballer,
not a weight lifter, but lifting those weights makes
them a better footballer. I'm not a geometric artist. I like drawing flowers, but learning these geometric
techniques makes me a better artist and has given me new ideas for floor
pattern layouts. That said, though,
if you do love geometric patterns and
they are your style, you can totally just use this
class as a how to class and pick up a ton of
new techniques for making geometric
patterns in prorocreate. This class is designed
to be tackled over seven days because baby steps are the best way to
build a habit, right? Feel free to go at
your own pace, though, as long as you work through
the lessons in order as each lesson builds on skills
learned in previous days. By the end of this
class, you'll have a whole new skill set for
making geometric repeats, a stack of really cool
digital pattern papers to use in your illustrations
or social media posts, and hopefully a head busting
with lots of ideas for new patterns and illustrations in your own signature style. I can't wait to
see what you make.
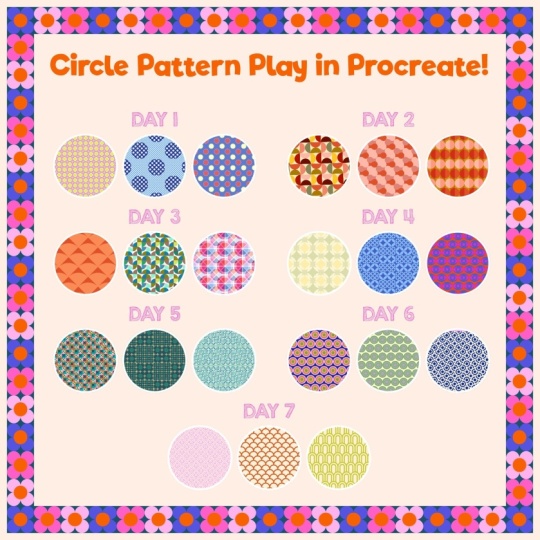
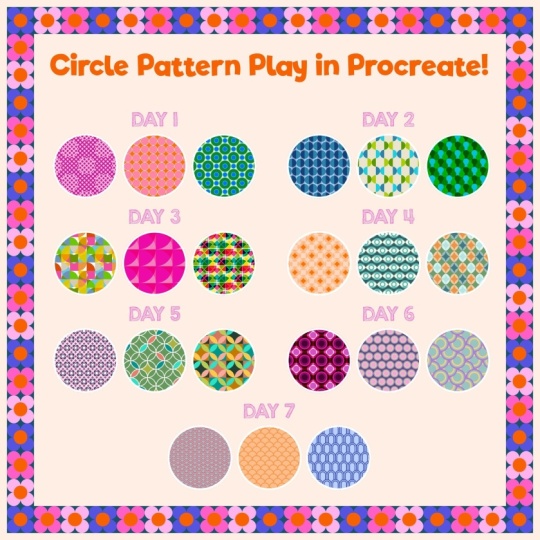
2. Class Project: Your class project
is going to be to work through all the
different exercises in the class and add your favorites from each
day to this worksheet. You can find it in the
class resources along with the color palette that I use to make all the patterns
for this class. Here's how to add your
patterns to the template. So import the worksheet
into your gallery. And when you open it, you'll see it's made of these two layers, both of which are locked. And we're going to
import everything above this layer and clip
it to this layer. So let's come back
out into the gallery and find the first pattern
that we want to bring in. Tap on this one here, swipe down with three
fingers and copy all. Then we're going to go
back out into the gallery, open up the worksheet again, tap on this bottom layer
with the pink circles, and then we're going to
swipe down again with three fingers, and
we're going to paste. Down here, make sure
you've got snapping and magnetics off for this part because it's going to be
easier with those off. And then we're going
to resize this to about the right size to
fit over this circle. And then we're going to
come up to our layers, tap on this layer, and we're going to make
it a clipping mask. And that's going to clip it
down over that circle there. Then we're going to come back
down to this pink layer, and we can go and grab
the next one to paste in. So come out to the gallery, find your next pattern
that you want to use, swipe down with three
fingers and copy all again. Back out into the gallery,
open up our worksheet, making sure we're on
this bottom layer here, swipe down again with
three fingers and paste. This one is going to get automatically clipped
in between those. Tnw we can tap transform
and resize this to fit. If you want to have the scale
bigger on this pattern, which means it's then going to overlap with the
circles next to it, you can tap select on this layer up here next
to the transform tool, and then just draw
around your circle here. Tap on the transform arrow, swipe down with three fingers
and choose cut and paste. Then in your layers
panel, you can just delete the one that
you've cut it out from. Let's do one more of
these for day one. So come back out to the gallery, choose the last pattern
that we want to use. Swipe down with three fingers, copy all, back out into the gallery, open
up our worksheet, and then making sure we're
on this bottom layer here, swipe down again with
three fingers and paste, and then we can just resize that one and place it there
above this circle. Once you've got
all your patterns filled out, we're
ready to explore this. So come up here to your actions, and we're going to choose Share. And we're going to
share it as a JPEG, and I'm just going to save
the image to my camera roll. So this will be for
the actual project. I'm also going to go out
into the gallery and pick my favorite pattern to save
to use as a project cover. So I'm going to tap select up the top here,
choose this one, and come up here to the top and choose Share and
share it as a JPEG, as well, and save that
one to the camera roll. So now we can come out of
Procreate. Open up Safari. And if you navigate to the projects and resources
section on the website, this one's from a
previous class, but we can still use this
to demonstrate uploading. We can click Submit
project over here. First of all, we need to
pick our cover image, so we can upload from
the photo library and choose this pattern. And that one will be the
cover image for the project. Then you can give
your project a title, and then tap down here on image, we can add the
worksheet in there. And then if you want to add some text down
there at the bottom and say what you've used your patterns for, you
can do that as well. And then up at the top here, you can click Publish
and you're done. Feel free to add your copies
of the patterns we make, but I'd especially love
to see any variations or new designs you're inspired
to create along the way.
3. Troubleshooting: As I was making this class, there are a couple of problems I encountered along the way, which I thought would be good to cover in advance and have them here in one place so you can refer back to
this if you need to. I thought it was better to
have them at the beginning, even though it might
not make sense yet because we haven't actually
started any of the lessons. But when you do come
across these issues, you'll already know
how to fix them. So problem one is perfect circles not being perfect circles for some reason, and I was never able
to figure out why. Sometimes when you
draw a circle, use the quick shape and
then tap transform, it just isn't a perfect circle. I found it was more
likely to happen if I'd had the same canvas
open for quite a while. So I don't know if
it's related to, like, cache or memory issues, but force closing and starting a new canvas
sometimes helped. I also found that using the circle option
up here seemed to be better than using the tap method for snapping
to a perfect circle. Also, it's possibly down
to how much it has to manipulate your initial rough
circle into a perfect one. So if that's an issue
you're experiencing, you can try any of those steps, and you will eventually
get that perfect circle. Number two is you transform
to a certain size, tap done, and then
tap back on it, and the numbers are different to what you put in
they're like a pixel. Again, I'm not sure
why this happens sometimes and not others,
but occasionally, I'll type in something like
900 pixels for a circle, and then the next
time I look at it, it's changed to 901 pixels. I found that this happened
more with bicubic, so it's possibly down to extra pixels being added during the
interpolation process. Again, force closing and using a fresh canvas
seem to help, and you could also try using bilinear instead of bicubic if you're happy
with the results. So those are just two annoying little bugs as I was filming, so I thought I'd
put them here so that if they happen to
you as you're working, you can come back to this
lesson and see how to fix them.
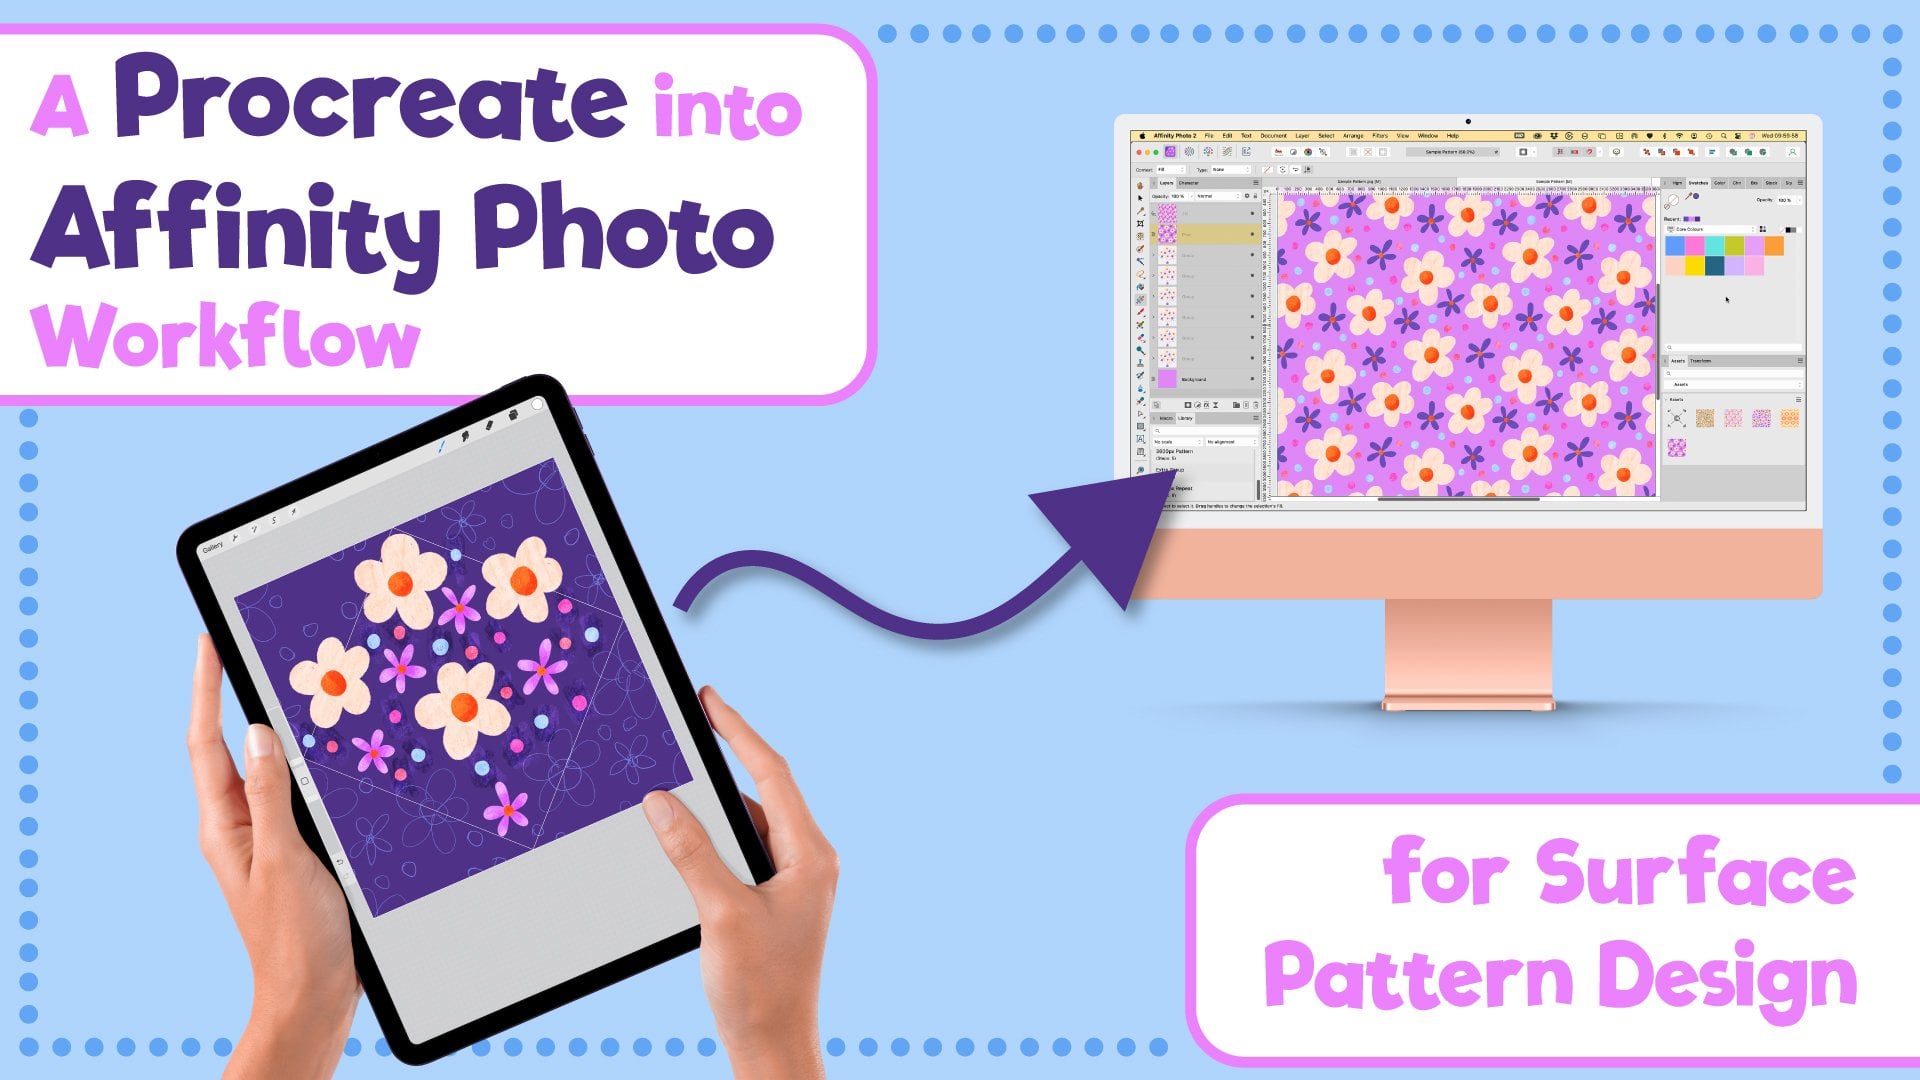
4. Day 1 The Actual Basics: The In this lesson, we're going to start
by making the most basic of circle
patterns, the poker dot. If you've never ever made a
pattern in Procreate before, then this is a great place to start because it's perfect for explaining and visualizing how a repeating patentile works. Let's start by creating
a canvas to work in. Nearly all of these patterns we'll be making
here will be on a 3,600 pixel square
canvas at 300 DPI. So let's go ahead
and create that now. So we're going to tap
up here on this little plus and we're going to
create a new canvas. So we want to set the width at 3,600 pixels and do the
same for the height. And we want it 300 DPI. Down here, you'll see
the maximum amount of layers that that will
give you to work in, and that will vary depending on what kind of iPad you have, but hopefully you'll have
enough there to work with. For color profile, I'm going
to be working in SRGB, so we get some nice
bright colors. And once we've done that,
we can give it a title, and I'm going to call
mine Pattern Canvas. And then to help me
spot it, I'm going to put a little MOG
on there as well. And you can click Create. And then every time
we want to create a new 3,600 pixel Canvas, we can press Plus, and it will be down here. If you want to reorder
these, you can drag them up to the top
of your canvas, and you can bring them up there so that they're
near the top. You see I've already got
one like that, which I use. So I'm going to
delete that one now, and we'll just go
back into this one. So 3,600 pixels at
300 DPI is 12 ". And although talking in inches
can seem like it's easier, I'm going to stick
to using pixels for my unit of choice
in this class, because it's actually
going to make it easier when we use
smaller measurements, and it's going to make the
maths a lot easier, too. So all of these
patterns that we make today are going to start
off with a circle. And the only brush
I'm going to be using is the hard airbrush
in Procreate, which we can find in
the airbrushing section down here and the hard airbrush. We're going to be using
this one because it has nice smooth, untextured edges. But there is one thing I
want to go in and change. So I'm going to tap
on this corner here. If it's a procreate brush, it won't have this
little squiggle. So these ones here
don't have that. If it's one you've
edited, it will. So tap where that would be
if it was one you'd made. And what I'm going
to do is go into the Apple pencil settings, and I'm going to
turn down the flow to zero so that you can see there what
difference it made. If I draw here slowly, if I turn the flow down, you can see we get a hard edge
right from the beginning, and that's because I
don't want any semi transparent bits
while we're drawing. So turn the flow down to zero. If you want to put this
brush back how it was later, you can just go about this
brush and reset all settings, and then you'll have your
semi transparency back again. So just go and turn that back
down again and tap done. This is the brush
that we're going to be using throughout the class. So we're going to be
drawing a circle and then resizing it to
specific dimensions. And one rule with pixel art
is that when you resize, you should only go
smaller and never bigger. So always draw your circle
bigger than you need it to be. So I'll just get rid of that. So here we go. The only drawing we need to do for
this whole class. So let's create our
circle shape now. So I'm going to
draw a rough circle going all the way to the
edges of the canvas, and then hold, tap up here, and snap it to a circle. Now, this bit here is actually filmed later
on in the class. I've already filmed
four lessons, and I realized that
as I was going along, the previous method that I was
using of drawing a circle, holding, and then tapping
to get a perfect circle. When I was then tapping
transform on there, it wasn't always coming
up as a perfect circle. Sometimes it might
say 1997 by 1996. So that's my normal
method that I use. But for the rest of this class, we're going to be using
the method of drawing and then tapping to
get a circle because this way was making
perfect circles each time. The other way was making
it one pixel out. So now that this
little part has been inserted into the first lesson, I will leave you carry on
with the rest of that lesson. So now we can fill this circle by dragging
in from the color drop, and you'll be able to
adjust the threshold here by sliding left and right. Sliding to the left is going
to bring the threshold down. And if we zoom in, I don't
know if you'll be able to see it so much with
this brush because it is quite a smooth brush. But sometimes you
get a little gap there, maybe if I undo that. And go do it again and then bring this down even lower. You might
be able to see it. So if we have the
threshold at naught, you can see there's a gap there. So what we want to
do is make sure we have the threshold
high enough, and I might have to do
this in two goes now. Do it again, and then we
can drag it up to 100, but not all the way, so it
spills out over the edge. So we'll set it at 100 and
then we've got no gap there. So we've got a nice solid
circle shape there. Now, if you only want to have to draw one circle for
the entire class, you could come out to the
gallery at this point and then duplicate this one and just duplicate the canvas every time you want to start new ones, then you'll have 3,600 pixel canvas with a circle
already drawing in it. Otherwise, you can stay in the canvas we've
already got open, and now we're going to
resize this circle. So let's tap on
the transform tool up here, this little arrow. And on the bottom here, you want to make sure
your interpolation method is set to bicubic for this. That won't be the case for
the whole class as each of these three methods has its
strengths and its weaknesses. There's a reason there's
a choice of three here, and it's because there
is always a best one for the job depending on
what job you're doing. We're resizing a circle, and we want to keep this
a nice smooth line. So bicubic is going to be
the best one for that. So once you've got
your interpolation method selected down here, tap on this little
blue node here. You can tap on any of them, actually. I doesn't
have to be this one. And that will bring up the
dimensions for the circle. We want it to stay as a circle. We don't want to squish it so it becomes an oval. We want
it to stay as circle. So make sure you
keep this box up here blue and not unchecked. So this canvas is 3,600 pixels, and I want to make this circle, half of that width and height. So I'm going to change
this to 1,800 pixels. And because I've got
these two checked, it's going to change the height as well
as the width for me. You can use any size circle
for this poker design. It doesn't have to be
a multiple of 3,600. The smaller you make the circle, the more spaced out and sparse
your poker dots will be. 1,800 pixels is
just a nice size to start off with
because it gives you a nice balance
between the motif, this dot, and then
the negative space, which is the background
or space in between them. So now we need to center
our circle on the canvas. And this is going to
be your intro into snapping and magnetics
and Procreate, if you've never
used them before. They're kind of a
big deal if you want to make patterns
in Procreate. In fact, we wouldn't be able
to do this class without them or even make patterns
in Procreate without them. So let's have a look
at how they work. For making patterns, I always have both of
these turned on, snapping and magnetics, and distance and velocity
turned all the way up. Without them on, I can move this anywhere I
like on the canvas, and it moves around
really smoothly. But as soon as I turn them on, it's going to do things like snapping to the
middle of the canvas, snapping to the
edges, the corners, and also these halfway
points can snap, as well. It's not just the
edges of the shape. And if you've got objects on
other layers, for example, if I duplicate this, we can also snap to objects
on other layers. So as well as snapping to
the edge of the canvas, I can snap to the edge of this circle on a
different layer. So snapping is the thing
that helps you do that. If I turn magnetics off, we can still do this snapping. And then what magnetics does is that helps you move things
in a straight line. So this is going
to help me stick to moving it up and down
in a straight line. I put it snap it to
the bottom here, and then we turn snapping off. We can move it along the bottom line of
that canvas there. But I find for patterns, neither of these is especially useful
without the other one. So I have them both on, and then it's a lot easier. Distance and velocity affect how sensitive the snapping
and magnetics are. So if we turn these
all the way down, we do have a little
bit more control, and it's not going to snap into that corner quite so quickly. It will eventually snap in
there, but it's quite tricky. So for pattern work, we want
to have both of these on. And both of these turned
all the way up to the top. I should say Max now. So as you may have
noticed, there's two colors that your
guidelines will be. There we go. Blue and orange. So an orange line will signify
that you're snapping to the center of the canvas
or the edge of the canvas. And then if I
duplicate this one, a blue line is going
to signify that you're snapping to something
else on the canvas. So an object on another layer, in this case, is that circle. And it's not just the edges of other objects that
you can snap to. You can snap to any of the places where a
blue node would be. So we can see on this circle these little dots
around the edges. We're calling them nodes, and we've got one in
the middle here, as well as one on the edge. So we can snap this node on this circle to where
there would be a node on that circle, too. This is a crucial
concept which we'll be really leaning into for
a lot of these patterns. But don't worry if you're
a bit unclear just now, as it will definitely
be easier to understand when we see
it in action later. So let's get rid of
this layer here. And this circle here, let's
center it on the canvas. There we go. You can see
we've got orange lines going top to bottom and left to
right, and you can just tap. On your layers when you're done. So now with this
circle in the middle, this canvas would now
be ready to use as a patentile if we wanted a
dot grid repeat like this. So let's have a look at
how we're going to be testing patterns in
Procreate in this class. Swipe down with three fingers to bring up your copy
and paste menu. So here I've got my
copy and paste menu, and we can do all sorts
of things like cut, copy, copy all, duplicate, cut and paste and paste. Copy all is going to be
a really useful one. And what S's going to do
is just copy everything that we can see right now
on the screen as we see it. So I'm going to tap copy all. We can swipe down again with
three fingers and tap paste. And that has now pasted in a flattened copy of
everything we had there. If nothing happens when
you swipe down with three fingers or if
something else happens, what you can do is you can go into your Canvas preferences. So tap up here on
this little spanner, go to your preferences, tap on gesture controls and find your copy
and paste menu here. I have mine set to a
three finger swipe, which I think is the default, but you can also choose
any of these options here. So I want to leave mine
as three finger swipe, so I can tap done,
and we can carry on. So this layer here is what we're going to be using
to tile our canvas. Tap to select this layer. And this blue node down here, we're going to drag up and snap that to the
middle of the canvas. And it should snap
into the middle. You'll have orange lines
crossing top and bottom. And in this canvas, it's going
to say 1,800 pixels there, which is exactly half of
our width and height. Once that's in place, you
can just either tap there or tap the layers to set
that transformation. I'm going to pause here for a moment and talk
about accuracy. Being accurate is really important for these
patterns to work perfectly. There were probably loads
of times as we're working through this class
that you're going to look at your
canvas and think, hang on, that doesn't
match up or like, there's a weird
line or gap there. It is very easily done, and it happens to me
all the time when I'm working on new layouts,
so don't worry. We'll be working in a
non destructive way, which means you'll be able
to undo a few steps and fix things without having to start all the way from
the beginning again. So do pay attention
to the accuracy of your snapping because it is what this whole
process hinges around. However, it is not something
worth stressing over if you're just making
these patterns for fun and just for the process, especially if it's the
first time you make them. Don't forget that I've practiced these more than a few
times before filming them. So be kind to yourself and don't worry if it goes wrong
the first few times you try. You're still learning and
spending time being creative, and that is always a win. You can always come back
to a pattern layer to make a more accurate version if you need it for
something important. So let's go back to our layers, and now we're going to duplicate this layer. Tap transform again. And we're going to snap it over here to this corner
in the canvas, and we can check that
it's in the right place. We've got orange lines
around the edges there to show we're snapping it to
the edges of the canvas. We've got orange lines
crossing in the middle to show that this is also
centered in the canvas there. And now we've got
this cute little face there, we're going
to turn that off, and I'm going to turn
the background color to a really dark color. And we can zoom into
the middle here. And show and hide this one. And we shouldn't have
any kind of gap there. I'm going to go back a few steps and show you what it would look like if we had gone wrong there. So let's go back to this square. So I've got my pasted
in image there, and I'm going to resize this
so that it is slightly off. I might need to turn
snapping off for this. So let's have it at 1795
pixels, for example. Then I'll turn these off and make the
background color dark. So then, if I duplicate this, and I'll put snapping back on, I'll snap it over
here into the corner. You can see we've got a gap running down there because
when we resize this, we weren't quite accurate
with the snapping. Sometimes it might be a
thinner gap than that. It might be just one
or two pixels off. You can see here there's a
semi transparent bit there. So sometimes it can be that what you have looks
something more like that. So if you end up with that,
just go back a few steps and repeat the process being really careful
with your snapping. So let's get rid of these two. I've still the flattened
copy in my clipboard. So I'll just making sure that I'm snapping
this all into place, 1,800 pixels, duplicate, we'll
put that into this corner, zoom in and check
that that looks okay. Then we can pinch
those two together, duplicate, tap transform again, and then we're going to
snap this to the bottom. And then we can zoom in and make sure that there's no line
running across there. So the second thing we look out for when testing a patentle like this is also that all your motifs along
these seams match up. We don't have any motifs
on the edges with this. We've just got this one
circle in the middle, so we're automatically good on that score for this pattern. So once you've checked
those two things, no gap in the seams and the
edge motifs are lining up, you can merge these
together onto one layer. So now you can see
how this dot is going to be repeated
in this grid pattern. If we make this smaller again, I can drag this up here and I'll just whiz through
those steps again. You can see a bit
more clearly how it repeats in this grid pattern. And that's the thing you
can do as many times as you like to make the pattern
smaller and smaller each time. Until you get it to a
scale that you'd like. So that's how we'll
be making each of these pattern fills
for this class, making our patentile and
then repeating it across the canvas like this to
create these in most cases, 3,600 pixels or 12
inch patent fills. You could use them
in other projects like digital pattern papers. For example, this doc grid here, you could keep making this
smaller and smaller and use it as a background for some digital bullet journaling, for example. So now that we've covered the
basics, in the next lesson, we'll look at how to
turn this initial circle into a proper poker dot
patentile like this.
5. Day 1 The Polka Dot: Uh, so let's go back to
our initial circle here. To recap, this one
is 1,800 pixels in width and height and is already centered
on the canvas. We know that having this here
in the middle is going to make it repeat in a
grid pattern like this. We want to make it more like
a traditional poker dot and have that diagonal repeat. You can see on this diagram that each square is our pattern
tile with the.in the middle. And there's also one now
on the corner of the tile, cut off, so it's just a
quarter of the circle. And then when all
those corners meet, the quarters fit
together and make that extra circle
on the diagonal. So let's have a look at how
to do that on our tile here. We're going to
duplicate this circle. Then we're going to
tap transform and then making sure that you've got magnetics and snapping on, and we're going to stick
with bicubic for now. And we're going to
snap this point and this point here to the edges of the canvas at the top, so we can drag it up
and across there, and it's going to
snap into place in the corner of the canvas. These two nodes are going
to snap to the edges, and we've got a perfect
quarter circle there. Then we can duplicate
this layer again, tap transform and snap it down into this corner
of the canvas here. Check them we've got
those orange lines there. Then do the same up
into the top corner. Making sure we've got
those orange lines. And again, down here checking
for those orange lines. So now we can test
out this patentile. So we're going to swipe
down with three fingers, copy all, come up to
the top layer here, swipe down again and tap paste. So we've got a
flattened copy there. Let's hide all of these and make the background
color something dark. Then we're going to
transform this layer and snap the middle
of it up there, 1,800 pixels, and we've got
orange lines crossing over. Then we can duplicate this, snap it over to this edge, and then we can zoom
in and first of all, make sure that we don't have any kind of gap or
blue line down there. And we also want
to make sure that where these motifs
on the edge meet. So we've got this little
corner circle down here, meeting up with
this one down here. You want to make sure that those meet up properly, which they do. And then you can check
the one at the top as well, and that's looking okay. So then you can pinch,
merge those two together, duplicate, and then snap this. Oops, snap it down
to the bottom there. Orange lines all around,
so we know we're good. And then we can zoom in, check our edge motifs, and no blue line there. So that is all nicely
tiling properly. So then you can pinch
those together, and then you can keep making this repeat smaller again and do that as many
times as you want until you have it at
a scale you like. And each time I transform
that I'm being really careful and checking for the
snap in each time to make sure I'm being accurate. So that is our second
digital pattern made. We've got the dot grid that we made earlier and now we've
got this poker dot one. Let's have a quick
look at how you can switch up colors on
this if you wanted to. If we hide this and go
back to our main tile, these four that we have here, we can pinch those together, and we could make these a different
color if we wanted to. So let's try making those pink. So they are already
alpha locked. So I'm going to tap fill layer. Then we can copy all.
That's the top here again. Paste, and then we
can put this into repeat the same as we did
with the previous tile. And then you can see by changing the four quarter
circles on the outside, we get the two colors
alternating in there. We could even do something really crazy with
a clipping mask and put this layer here to work right away as a
digital pattern paper. If I hide the background, I'm going to swipe down with through fingers and copy all. Then I'm going to swipe
down again and paste. I hide these. What I have now
is this all on one layer, but with no background on it. So put the background color in. I'm going to turn
this on, tap on the layer and make
it a clipping mask. And then that has clipped
the pattern to these dots. And because this
tile is seamless, we know that the pattern is already going to match up
on the edges of these. So let's swipe down now with
three fingers, copy all. Come up to here,
swipe down and paste. And then we can put this
into repeat and see how cool this looks. There you go. And if we zoom into
the middle there, that's all looking good where they all meet on
that tile there. And now I've seen
this, I'm thinking, What if we also had the Poker dot pattern in the background, but with the colors
ran the other way? And this is exactly
what I mean about how these really simple exercises
can get the creative part of your brain firing because isn't creativity all
about wondering what if? So, now I want to see
what it looks like. So I'm going to go back whiz through changing some
of those colors, and then we'll see
how this looks with the colors flipped
for the background. I think that looks so cool. It's kind of like some weird
optical illusion going on. And yet, the point
isn't necessarily making and using this
as a pattern tile, but the point is allowing your
brain to wander and think, what if and just turning
on that really curious, creative part of your brain
that will get you back into the creative flow and help inspire you in
other areas if you work. So as you're working through
these exercises each day, let the curiosity in and let
yourself wonder what if? If you come up with some
weird and wonderful ideas, please add them to your final worksheet and share
them with us. In the next lesson,
we're going to develop this pattern
a little further and learn a method for adding exactly sized outlines
to our circles.
6. Day 1 Exact Outlines: Now, I know what you're
probably thinking. Didn't we already start by drawing an outline
and then fill it? And yes, we can certainly
draw a circle in one color and then fill it with a different color to
get an outline circle. And we can even have the
outline on a different layer. So if I hide this one, we could have an
outline on this layer, add a layer underneath. We can choose a different color. Make this one a reference. And then underneath, we can use this to fill
it so that we've got an outline and a circle
on two different layers, which gives us more options for recoloring than if we've
done it on the same layer. But for some of our patterns
we're going to be making these outlines need to be
really specific widths. And if we just use the
brush to draw them, we don't know what the actual
width of that is and we can't be intentional about
how many pixels wide is. So in this lesson, we'll
be looking at how we're going to add outlines to
our shapes for this class. And here's a quick side note on why outlines can be
great for some of these patterns and for
surface pattern design and illustration in general. You know how sometimes you have two colors that look
great together, but somehow they don't look as good literally right
next to each other, like this color palette here. I love it, but when I take
away the white borders, it just doesn't look as punchy, and the colors just feel like they're competing
with each other. That white border and separation was the thing that was making
them look good together. So this pattern here
without outlines, looks kind of okay, but look how much more
the colors pop with the white outline to give
it a bit of separation. So if you're working
with some colors which look great
together in a palette, but you can't
actually get them to work when you try and
use them in a pattern, try using some white
in between them. So let's get rid of these and go back to our 1,800
pixel circle here. This is the same
3,600 pixel Canvas, and this is an 1,800 pixel
circle in the middle. I'm going to duplicate it. The layer is already
alpha locked. I'm going to fill this top
one with a different color. Then I'm going to use
the transform tool and tap on the node. And let's say I want 100 pixel
wide outline on my circle. I'm going to make this
top circle on top, 100 pixels smaller on each side, so it sits on top of this one, and the circle on the bottom
then acts as an outline. So 100 pixels smaller on each side means
that I need to make these dimensions 200
pixels smaller because I'm taking 100 pixels off
the top and the bottom, and then 100 pixels
off the two edges. So we'll change this
to 1,600 pixels. Then we can center this
on the canvas there. And now we've got
this circle with an outline which we
know is 100 pixels. By making outlines this way and having it be a solid
shape at the back. When we come to make some more complicated designs later on, you will be able to snap
things to this edge, as well as the outside, which is going to open
up a whole load of new possibilities compared
if we had them either on the same layer or if this outline was hollow
and not a filled circle. So now we can group
these two days together, and we can move the whole thing around by selecting the
group and moving it. And it's as if it
was one solid shape. You can then duplicate this whole group and
transform the whole group and snap that into
the corners like we did in the previous
lesson with the poker dots. But here is where you have
to be a lot more careful with your snapping because
you can see in the corners, it's also trying to snap to this and the edge
of this circle. So I can line this up with
the edge of that one, but I can also move it
along a little bit, and I can the edge of this circle with the
inside of that one. So on the one hand, it does make the snapping a
little bit harder, but because we have all those
other things to snap to, it opens up a lot
more possibilities later on when we want to make
some more complex patterns. So for now, we'll repeat this and snap this into
the corners like this. Making sure it's these nodes that we're snapping to the edge. If you're having a hard time keeping track of what
is snapping where, you can always hide everything except for the layers
that you're working with, and that will reduce
the amount of things that your layer will
be able to snap to. In this instance here, we
don't actually need to use these outlines for
snapping in this pattern. So for this one, once you have your colours sorted and you're
happy with them, you could I get rid of these. You could duplicate
this middle one, hide and keep this one because it has the
layers in there. You could then flatten this one, and then we could do this
snapping a lot more easier. But that's only if you know that you're not
going to need to go back and you don't need
the edges for snapping, which we don't in this pattern. So we can work with the
flattened copy on this one, if it's a bit easier
to get used to it. There we go. So let's have a look at how this one
is looking in repeat. So we're going to swipe
down with three fingers, copy all, come up to the top, swipe down, and paste, bring it up to the
middle, 1,800 pixels, duplicate it, and then check
in for snapping each time, snap it into the corners, and I can add a
layer underneath, rather than hiding
all these each time. It might be easier to
just add a white layer. And then we'd see that white showing through if there
was any gaps in there. So now that we've got this
in repeat, now I'm thinking, what if I change the colors on this so that these ones here
were a different color, and we had a different color for each outline
and each circle. So I can hide these, hide those. We can go back to this one.
I'm going to duplicate this. And for this one, I'm
going to change the color to this green color here. And then this one here we
could make the cream color. I can flatten this
one for this pattern, and I'm just going to ops. And then I can duplicate this and put this one
into the corners, and we can see how this one's looking in repeat in a second. So this last one, I
don't need to duplicate. I can just move
this one down here. And then through putting
this into repeat. There we go. So we've got this really
simple poker dot pattern, which we've developed and taken a little bit
further each time. So we've got this really cool, multi colored pattern
version of it now. So now we know how to add outlines in precise
sizes to our patterns. In the next lesson, we'll
learn how to rotate a pattern.
7. Day 1 Rotating a Pattern Tile: H for this pattern, we're going to start with the
same tile and same canvas that we used for
the last design. I've just grouped
everything apart from these two layers here in the bottom so that
they're out of the way. We're going to also repeat
this circle here, too. So I'll change the
background to orange. I'm going to make
this cream color, and I'm going to make
this in the middle pink. So again, working off this 1,800 pixel circle
in the middle, and this one is 1,600 pixels. We're going to duplicate this, and we're going to
snap it up into the corners just like we
did for the last pattern. I And then for this pattern, we're also going to repeat it
in the middle of the edges. So we've repeated this
poker dot diagonally. We're also going to repeat it vertically and horizontally. So let's duplicate
this bottom group again, tap transform, and we're going to snap it
to the edge here and be careful that you snap the node
to the edge of the canvas, not have these overlapping
there like that. So we're going to snap it so
we've got an orange line in the middle and you'll
have a blue line. This part should
be orange, though, and then you know that
that's exactly in place. So then we're going to
do that to the right hand edge of the canvas as well. And then these two edges
of the circles will meet and form the repeat
as we work along that way. And then we can do the
same top and bottom. So we've really filled in all the negative space in there. Now we've got this really
full pattern tile, and it's creating these
really nice starburst shapes there in the negative space, and we'll definitely
be looking at that shape some more
later in the class. So let's put this
tile into repeat now. So now we've got this
pattern paper where all the circles are repeating
in a nice grid pattern. They're all just touching each
other at the edges there, and it's repeating
in a nice grid. Now I'm going to show
you how to repeat it so that they repeat in
this kind of formation. So let's hide this. I'll group all of these together just so that things
don't get too out of hand. I can hide all those, and I should be able to paste back in my pattern tile again. So select this whole layer
with your transform tool, and you want bicubic as
your interpolation method, and we're going to rotate it 45 degrees and tap
fit to canvas. So now we've got this
rotated tile in the middle. If you've watched
any of my classes on making patterns with
a diamond repeat, you might realize what
we're going to do now. So I'm going to duplicate
this layer, tap transform, and I'm going to snap it down here into the corner like this, making sure I've got
those orange lines there. And then we can do that
again with this bottom tile, just repeating it to fill each of these
corners like this. Being really careful each time that you've got
those orange lines there. Unlike magic, the
pattern now repeats at this 45 degree angle,
except it's not magic. It's mass, but it does feel like some kind of wizardry the
first time you do it. So now we can merge these
four layers together. Now, there is one issue with
rotating patterns like this, and it's that you get a gap down here where the edge of
the diamond tile goes. And that's down to the image being interpolated
as it's rotated, and the pixels on
the very edge get feathered and become
semi transparent. Unfortunately, there's
nothing we can do to stop that happening,
but don't panic. We don't have to
live with this gap. It's very easy to fix. All you have to do,
keep an eye on this gap as I do this is
duplicate this layer. You can pinch those three
together and duplicate. Again, all those semi transparent
pixels stack up on top of each other and bring the overall opacity
back up to 100%, and the gap, as it were, is now filled when we've
pinched all those together. So now we have this very
cool rotated patentile. We can put this into repeat
in just the same way. We drag it up into
the middle there. Duplicate zoom in and make sure that these are lining up properly,
which they are. Duplicate. And again, just
check these ones as well. To me. And that is how this one Oops, can't
pinch those together. This one somehow looks so different like that compared
to this one like that, but it is in fact the
same pattern tile. And this way of
rotating a pattern will work for any pattern
like this in Procreate, as long as it's one that makes sense to rotate, of course. In fact, it's the
easiest way to make a diagonal stripe
pattern in procreate. Just make a striped
tile going across horizontally and then
rotate it at 45 degrees. So now you have this method
of rotating a pattern. I hope that it gives you
lots of what if questions. You can use it to give a
plain pattern like stripes a really different look
and use it to give a whole new twist to some of your simple blender patterns. The last of our Poker
dot patterns for day one will consolidate some
of the basic skills we've learned so far and learn one last transforming hack
for making this pattern here.
8. Day 1 Moving by Exact Amounts: So in this next
lesson for today, I want to show you how
you can move an object by an exact number of
pixels in Procreate. This is obviously very easy in other software like
Photoshop or Affinity, where you can just
type the distance you want it to move in
your transform box. We don't have that in Procreate, so we need to hack
the snapping instead. So we already know
that we can snap to the edge of other objects, and we also know that we
can resize an object to a specific size like we did
when we resized our circle. So if we want to move something by a specific
number of pixels, say, this circle here, we want to move it 250
pixels in that direction. What we need is an object we
have resized to 250 pixels. And then we line that up
with the edge of our shape. Then we can duplicate this one, and we can move a copy of it exactly 250 pixels to the right, using this to snap it to. So let's put that into practice and learn how to do it now. So I'm going to delete
these, and I am working off these circles that we made for
the last pattern, and I've got these all in separate layers
there at the bottom. What I want to do is to add a smaller circle into
each of these gaps here. I'm not sure exactly what
size that needs to be, so I'm just going to
draw a rough circle. The resize that manually just to get an idea of what sort
of size it needs to be. So I've got sapping
off for this, and I'm just putting it
roughly into position there, and then I can tap on
there and see it needs to be a little bit less
than 900 pixels. We'll use 900 because
it's a nice easy number, and that will fit
nicely in there. So let's get rid of
that one and draw a proper one now. I'm
going to add a layer. Use this light color here. Then I'm going to
draw a fresh circle on this one. Make that circle. Then I'm going to
fill. Tap transform, and we'll make this 1900 pixels. Then we can turn snapping on and center
this on the canvas. I can get a bit fiddly. There we go. I want this
one to be outlined as well, so we'll duplicate it. Alpha lock, change the
color on this one, and we'll make this
200 pixel smaller, so it's 700 pixel circle then we can snap this one to the middle of
the canvas there. Then we can group
those together. And that is the other reason you want to do
outlines this way. You can use the exact same outlines throughout
your pattern. If we just resize this
circle with the outline, the outline would also
shrink with the circle. So by doing it this
way, you get to keep the same thickness of outlines throughout
the whole pattern. So I'm going to duplicate this. And I'm going to repeat this on the inside of all of
those circles there. That's going to be very easy to do because we're
still snapping it to the edges and the
middles of these circles. And although I'm going
quite fast here, I am being super careful
and checking that I've got those orange lines for snapping every time
I move this around. There we go. So that's how we get those in place in these. But if I duplicate this,
you'll see there's not really an obvious place to snap
it in between there. So let's have a
look at how to get a guide in there so that we
can use that for snapping. Up at the top here,
I'm going to add a new layer and I'm going to fill it with this
contrasting color. Then I'm going to
tap transform and snap it halfway
across the canvas. So this was 3,600 pixels. Now I've snapped
it to this edge. It's half of the canvas width, 1,800 pixels, and I'm going to transform it again and
cut it off at the bottom. And now this square is exactly a quarter of the
width of the canvas. So then we can center
this on the canvas. So we have the
orange lines there. And now, because we've got a node in this exact
center spot here, we can center this circle
on where that node is. So if I go back
down to this one, I'll bring this up to the top here above that so we can see. I can snap this to the parts of this box and snap it onto
that exact corner there. Then we can duplicate it and do that on all four
of these corners. And this concept of putting a shape in place
to be able to snap to where you don't
already have a guide on the canvas is going to be
key later on in the class. Once you're done with
that, you can hide that. And now we've got these squares perfectly nestled in those
in between spots there. So now we can copy all and we'll put this
canvas into repeat, and I'll just whiz through
doing that on the time laps. So that's how this looks in
repeat. It looks really cool. And I love this kind of these retro coolors and the
retro feel that this has. And if we want to put that
into a diagonal repeat, we could go over
that one more time to help the process stick. So we'll hide this, and I can go back and paste in what
I copied originally. So if you remember, we
rotate it 45 degrees, and then we tap fit to canvas. Then we can duplicate this and snap it into each
of the corners here. Then we can merge all
of those together. And remember, we end up with this faint semi
transparent line there, but we can easily sort that by duplicating this several times. Binch those, duplicate
one more time. We've actually got
kind of six levels, and that's brought the
opacity on that backup. So then we can
just put that into repeat as we just
did a moment ago. There we go. And then, again, we've got the same
pattern repeated, two different ways, and you get a really
different look there. Now that you have all the techniques for
creating shapes and exact dimensions,
adding exact outlines, moving by exact amounts, and cutting shapes in half, you have all the
basic skills that you need to work through
the rest of this class. The rest of the lessons will
be a lot shorter as I won't go over these basics in quite
so much detail each time. Do refer back to
these initial lessons if you need to revise anything. One thing I will say, though, is that as you get quicker at making these geometric patterns, don't skip over the
accuracy checks. As a technique starts to
become muscle memory, it's really easy to
let your accuracy slip if you don't stop to
check for those snapping lines and also zooming in
and checking that your seams match up every time
you put a tile and repeat. That said, though, if
you're just working through these exercises purely for fun and as a warm up
for something else, you could argue
that you don't need to get too hung up
on the accuracy, but if you do want to use
them in other patterns, then you do need to be accurate. So that is day one complete, or we could call it Section one if you're going
at a different pace. Either way, now's a good
time to go take a break, have something to drink, and
maybe get some fresh air. Don't forget to pick some of
your favourite patterns from today and add them to your worksheet before you
put the kettle on there.
9. Day 2 Semicircles Hourglasses: Welcome back. I hope
you're feeling refreshed and excited to create
some more pattern magic. Today, we're going
to be making all of our patterns from semicircles. In order to make a perfect
semicircle and procreate, we start right back
at the beginning with our perfect circle.
Let's draw one now. I'm in a 3,600 pixel canvas at 300 DPI like
we made yesterday. And I'm going to grab
the hard airbrush that we were using yesterday. So I'm going to start by drawing a nice big circle here
with a big overlap, tap on this and then
make it a circle. Then we're going to
fill it. Make sure the threshold is nearly
at 198% will do. Then tap here and
we're going to change this to 1,800 pixels. And I've got my interpolation
method as by cubic here. The reason that I'm choosing
1,800 pixels is that, again, this is a
3,600 pixel canvas, and so by making
it 1,800 pixels, I can fit two of
these semicircles across the canvas width. So we'll keep a copy of this one to use for all our starting
points for these other ones, so we'll duplicate this and
just hide that one there. So once you have your
1,800 pixel circle, we're going to tap to transform. We're going to put snapping
and magnetics back on and distance and velocity
all the way to the top, and we are going to snap this to the top of the canvas there until we have that orange
liner grow across the middle. Then we can tap off that.
And now we should have this semicircle exactly
1,800 pixels by 900 pixels. So for this pattern,
we're going to have these semicircles arranged
like hour glasses. So let's snap this one up
here into this corner, checking out for
the snapping there. Then we're going
to duplicate it, tap transform, flip
it vertically, and snap it here. So this corner of it is this corner of it here is snapped into the
middle of the canvas there. Then I'm going to alfa lock this 1.5 lock that one as well. This bottom one, I'm going to change the
color on this one. And I'm going to use this
palette here for this one, so I'll make the top one this
different shade of green. Now we can group these, swipe right on both
of them, and group. So then we're going to duplicate this group, tap transform. We're going to rotate
it 45 degrees ties, so rotating at 90 degrees. And I hope you're noticing how cool that curve looks there, and they're thinking
how you might be able to use that in other
designs as well. So let's just snap this
one over here for now, and we'll snap this
one into the middle, check it out for all
these orange lines going up and around it there. Then we want to repeat
this down here. So let's duplicate this one. Snap that one down
into this corner here, making sure you have orange
lines going all around that. And then this one we'll
repeat down here. So it's this one here. There we go. So that's our
initial tile built out, and now you can have a
play with the colors before we put it into repeat. Sometimes I can
end up spending so long to get the right balance
and mix of colors here, but that's a fun
exercise all in itself. You'll probably find that
you'll want to come back and redo the colors anyway after
you've seen it in repeat. When I was making test patterns for this class, it
took me a while, and it only looks
like I'm getting it right first time here
because I already spent ages last week picking all the color combinations
for these patterns. It was a fun day. So once you think you have
a good layout, you can test it using the copy all and paste method
we've been using. One thing you might want to do when we get to
this point though, is that you can rotate
this tile if you want to. You don't have to have each one of these four B in
the same place. You can rotate these
by 90 degrees, or you can flip them
vertically and horizontally, just to switch up the placement
of the pattern in these. Where a pattern tile has no overlapping elements on
the edges like this one, you can have it round a
different way if you want. Just be sure you don't end up getting a mirror repeat going on anywhere because
that can make an otherwise good
repeat look bad. So let's put this
like that, I think. O there we go. That's our first semicircle
digital pattern paper. You can take a look at the colors here and
then go back and swap some of them around in these individual layers
here if you want. If you think you've
got parts where it doesn't look quite
random enough, or you might find
yourself thinking, What if I arrange the colors so they
aren't random at all? You might think these ones here, where we've got two
of those same colors. What if you arranged
the colors so you had these working in windmills? So if we go back to our
original patent tile here, you might want to put
these four in the middle, make them all the
same color and then have these alternate
ones on the outside a separate color and
see how that looks with having these little windmill
motifs working around. So let your imagination
travel around the pattern and see where the
creative spark takes you. In the next lesson,
we'll learn how to incorporate a blend mode
to make this pattern here.
10. Day 2 Semicircles Crinkle Cuts: Okay, so I'm calling
this pattern crinkle cut because it kind of reminds me of the waves on the surface of a
crinkle cut oven chip, so that's why where this
one got its name from. So we're going to start in
our 3,600 pixel canvas again, and we're gonna draw a rough circle as always to start off with. And then we're
gonna fill it. And this one we're
going to transform to 900 pixels with
bicubic interpllation. So 900 means we can
have four repeats of these across the canvas and
four repeats top to bottom. One of the reasons I like
to use a 3,600 pixel canvas is that it divides evenly between a lot
of whole numbers. Okay, math's trigger warning, and you can ignore
this next part. If you just want to
have fun following along with the exact
measurements and have no interest in
adapting these patterns to other canvas sizes,
that is totally fine. So once you have the hang of all the different
patterns in this class, you'll be able to use
other sizes of canvas and choose different sizes
for the shapes that you use. You just need to make sure
that the sizes you choose for the shapes divide evenly
by the size of the canvas. So for example, on a 2000
pixel square canvas, if you wanted something
to repeat eight times across and four
times top to bottom, you'd divide 2000 by eight to get the
width of your shape, 250 pixels, and then 2000 by four to get the height
of the shape, 500 pixels. So although this pattern looks like it's made with semicircles, we can actually make most
of it with a solid circle. So start by snapping
this down to the bottom of the canvas
here into the corner. And then we're
going to duplicate this in a row going across, and we should get four
repeats of this going across. I'm going to alpha
lock these and change the color of these
to this peach color. And I'm going to
change my background color to that green
that we just had. So then we're going to
duplicate another one of these. This one, I'm going
to make orange. And I'm going to snap this
one so that this middle point on the node is going
to snap to where the corners of
this one would be. So we can snap it
like halfway between there and you should have
something that looks like that. It will be orange where it's snapping to the middle
of the canvas here, and then these two nodes are going to be snapping to the
middle points of those two, and the middle of this one is snapping to the corner
points of these two. So then you can duplicate this one across
like we just did, checking your snapping
each time as you go. And then when we
get to the edges, we're going to cut it
in half, so over here, check that that's snapping
down the middle there, and then on this edge,
checking for the same. So then we can group
all of this together. Duplicate it and you can flatten this copy here if you've got all of this
lined up properly. Then we can transform this and snap this up
to the top there, making sure we've
got orange lines going along the top and
down the middle there. So that's all our
circles laid out, but they still
look like circles. They don't look like
semicircles yet. To get the shadow effect, we're going to use a blend
mode over this tile. So we're going to
add a new layer. Tap on your colors here and you want the
color disc on view. Double tap here to
get a 50% gray. Then we're going to fill
this whole layer with it, tap transform and change your interpolation method
to nearest neighbor. The reason we want
to use nearest neighbor for this is because it is a square or rectangular
shape with right angles. We don't want smooth edges here. Nearest neighbor looks at the smallest sample size and
gives crisp, clean edges. So use bicubic for curves and nearest neighbor
for straight lines. We want to resize this, so it stays the same height
as the canvas, so we want to keep the
height at 3,600 pixels. But I want to change the width, so it's half of the width
of one of those circles. So they were 900 pixels wide, so we're going to
change the width to 450 and then make sure that is then snapped to the edge of the canvas there. Now we can tap on this N
here and we're going to change the blend
mode to color buurn. And then you can
see here you get this really cool twotne
effect and it kind of cuts these off down
the middle like that. So you can play with the opacity on this to get an intensity, like if you make
it lower opacity, you're going to get a
less intense effect, and higher, you're going to
get a really crazy effect. I normally like to go
with about 40% when I'm using this 50% gray as a
color burn blend mode. You could also experiment
with color dodge to lighten. So color burn will darken and
color dodge will lighten. You can also experiment with
any of these other ones. I like color burn and
color dodge because they don't kind of blend
gray onto it too much. So let's take this back
to color burn and 40%. So now we can duplicate
this, tap transform. And although this group
up here is flattened, this layer up here,
we've still got these individual circles in here that we can snap this to. So we tap transform. We can move this
along two spots, and we can snap it to these
circles on the bottom layer. Oops. There we go, and then duplicate again and
snap it over to this one. So you should be
checking out that these nodes are snapping to the middle with that
orange line there. You'll have blue lines where it's snapping to the circles, and there'll also be an orange line at the top and bottom. And then I'm going to group
all of those together there. And then we can see how
this is looking in repeat. So that's how we use those
filled shapes in gray and a blend mode to get that
repeating shadow effect. At this point, some good what if questions to
ask yourself are, what happens if I use a different color to the
gray for this color burn or what happens if I rotate the stripes and have them
going horizontally instead, or even duplicate
that layer and have them going horizontally
and vertically. I won't spoil it for you by
showing you how that looks. I'll leave that magic for you
to discover for yourself, but maybe I'll show it in
the last lesson at the end. If you do have a go at these, share the results of your
experiments in your worksheet. Next, we'll be making this
pattern and then looking at a few different ways to take it in completely
different directions.
11. Day 2 Semicircles Stacked Semicircles: So for this pattern, we're
going to be aligning the vertical lines
of the semicircles to create a vertical stripe. And whilst that
might not seem like a particularly
interesting pattern, another type of pattern might
begin to jump out at you as we make this like it did for me when I was playing
around with this one. So if you still have your 450 by 900 pixel semicircle from
the previous pattern, the ones on the edges, you could duplicate that canvas rather
than starting from scratch. Otherwise, this is a
3,600 pixel canvas, and I'm going to draw my
starting circle here. And then I'm going to
transform this to 900 pixels. And then fill the shape and
cut it off at the edge, so it's then a 450 by
900 pixels semicircle. Let's just bring this
into the middle for now. So for this, we're going
to align this node here on the binding box to
the center of the canvas. So let's bring it down there. So we've got this blue node is aligned with the
middle of the canvas. Then we can duplicate
this, tap transform. I'm going to flip it
horizontally and snap this one over there so that this node lines up with the
bottom of that one. Now, Alpha lock that,
change the color on this. Then we can duplicate again, snap this one up to the
middle of the canvas there, and we'll make this one orange. And then we can duplicate again, snap this one up to the top, check in for your lines there, flip it horizontally, and
we can snap it over there. And I'm going to
make this one pink. There we go. Then we can
group all of these together, and I'm going to
duplicate that one. We can hide this one
in case you want to come back and change
the colors later, and I will flatten this one. And we can check here that
this says 900 by 3,600 pixels. So I'm going to tap
transform on this, and I'm going to line
this up the edge of this with the middle
of the canvas like that. So instead of having the
whole thing centered, I'm going to snap it to the middle of the
canvas like this. Then I'm going to
duplicate this, tap transform, bring another
one around this way. I'm going to flip this
one horizontally. So that these two touch
each other there. And you could either keep the colors going the
same across the canvas. So we have a row of these
orange semicircles here. Or what we could do
is snap this down to the middle like that so that we kind of offset
those a little bit, and then duplicate
this one again, bring it over there, and then snap that part up there and
flip that horizontally. So we've got this kind of
change in the colors there. So then you can pinch
those together, and then this one will
duplicate and bring over there. And then this one we duplicate
and bring over to there. So that's one look if
you wanted this kind of mixed match through the
canvas, if I hide those, and we go back to this one here, you could have it like this, so you duplicate it. I mean, you could also
repeat it this way, so we've got stripes
going that way. And you could have
that like that with these shapes joining and
mixing up with each other. I go to go back to this one, and we'll see how this
one's looking to repeat. I'm going to change my
background color to blue, and we'll put this
into repeat now. And then I'm going
to go back and put the other version in
repeat to compare them. There we go. We've got
two different looks there just by flipping and
moving the colors around. Now, as you look at
this pattern here, do you see another classic type of pattern that
actually emerges here? This shape that the
semicircles are making here is called an Oji, and trust me, I have Googled the pronunciation
of this word. There are some places
that say it should be pronounced Ogi and some that say it should be OG there was slightly more saying it
should be pronounced OG. So that's the one
I'm going with. Plus, it just sounds fun
like you're saying, OG. Anyway, I'm going with OG, but like I said, there are also people
that pronounce it Ogi and I don't know
which is which that don't shout at me, and
I won't shout at you. Okay? So yeah, this is a really popular type of pattern in surface
pattern design, and this was a really
fun surprise when it jumped out at me when I was playing around
with this pattern, and I had to recolor it to
make this proper OG pattern. So in the next lesson, we'll do that and make
this pattern here.
12. Day 2 Semicircles Ode to the Ogee: So we're going to
start this OG pattern by working off the last one we made and using these same four initial semicircles here, which just to remind you,
this is a 3,600 pixel canvas. And these semicircles were
made from a 900 pixel circle, which we cut in half, so
they are 450 pixels by 900. And we're going to
start by making these two facing this way, one color, and these two facing this way a
different color. I'm going to go with orange
and peach because I think that will have good
contrast on camera. It looks cool with
pink and orange, but they don't look so good
a contrast on the camera. So I'm going to fill this one and the green
one with peach. And then the two curving
this way will make orange. That one's
already orange. So this one here. So this is going
to be what makes the curve of our OG shape. So each one of these
little semicircles needs a box in the contrasting
color to go behind it. So we're going to make
a contrasting fill by filling this layer with the
orange, tapping transform. And those semicircles
were 450 pixels by 900. You want nearest neighbor on here because we're working
with straight lines, uncheck that, and we'll
make it 450 by 900. So that's going to
make a rectangle exactly the right size
to go behind that. So let's bring that
to the bottom there. So that's all lined up with it. We're going to duplicate that and snap it behind
this one, as well. And then we want to change
the color to peach to go behind these two semicircles.
So we'll duplicate that. Alpha lock it and
grab the peach color. And then put that
behind this one, making sure that it's all
snapping into place there. Duplicate and then
bring that up there. And then this here
is going to be the middle of this
orange OG shape. We've got half of it
coming around here. So this box here
needs to be orange. So where you've got a
semicircle flat edge, that needs to have box the
same color next to it. So let's duplicate one of
the orange boxes and use it to fill that space and
this one down here. And then these two here
are going to be peach. And then we can group all
of these layers together. And then I'm going to
duplicate this group and flatten this top one and hide the one at the
bottom to go back to. This one, I'm going to snap
over to the edge here. I'm going to duplicate it, transform, and I'm going to move it across to
the edge of this one. Again, this kind of looks like
a cool pattern in itself. That would make a really
cool geometric design, but we're going to
flip it horizontally to get that classic
OG shape in there. Then we can duplicate
this one again. Bring it over there to match up. And then this one. Here we can duplicate and
snap that over there, and then we'll take a look and see how this is
looking in repeat. And then we go made
that classic OG pattern just from semicircles. So having made this pattern,
what are your what ifs? My first thought was
to see what it looked like rotated at 45 degrees, so I'll show you what
that looks like now. So it looks pretty cool
rotated at 45 degrees. And then I was thinking, Okay, what if I duplicate this
and flip it the other way? So it rotates 45 degrees
in the other direction. But then what if I change the blend mode on this and what happens with
how that works? So if you go through all these different
blend modes here, you can see you get these
really cool effects where different
parts of the shapes are combined or cut off to make different shapes and
different colors as well. This is a really
good way to play around and find color
palettes to use. And you can also,
with this top layer, tap on it and invert the colors, and then you come up
with some really, really weird color combinations. And they kind of they're
like vase shapes. Like, these are really
cool. I love these colors. So if you come up with
something like this that you think looks good
as a color palette, save it as a color palette to use in your
regular art practice. So add a new palette, long press on these, and just add them as a color palette to use
again another day. And then keep scrolling
through all of these. Like, that one's a
really cool one, which I added earlier in there as I was playing
around with this. So that's day two complete. And I think today
is an especially good example of
how you can start with a really simple shape
like that semicircle, and then end up with something weird and wonderful
like this if you allow yourself time to play and
explore with what you can do just by changing one
little thing at a time. Time to get another drink and
some fresh air again now. And then in the next set
of patterns tomorrow, we'll be cutting this
little shape in half again and working
with quarter circles. Oh
13. Day 3 Quarter Circles Bauhaus Style: If I say Bah, you probably picture a geometric
pattern made of various square and circle shapes all fitting together
in a random jumble, and that's what we're going
to go at making today. So we'll start with
an 1,800 pixel circle on our 3,600
pixel Canvas. So we got bicubic as our
interpolation method, and we'll cut it
off halfway there. Snapping it to the
bottom of the canvas, then we can snap it over here. So we end up with a quarter
circle 900 by 900 pixels. You can bring that up into the middle of the
canvas there and snap it so that this point here lines up with the
middle of the canvas. So that's our initial quarter circle that we're
going to be starting with. And then you basically
get to have fun flipping and rotating this little guy all the way around the canvas. The way I do it is to get
four up here, group them, and then repeat those four into the corners and just change the colors around a little bit. So let's duplicate this. We'll alpha lock it. I'll
fill this one with purple. We can bring this one up here. Then we can duplicate
this one again, snap it over to this side, and let's rotate this one. Make sure it's snapped
into the corner, can fill this one
with this color. Then duplicate again. Then let's make this one pink. So once you've got those four
in place in that quadrant, group those together, and this group should be
1,800 pixels square. We're looking good. So then you can duplicate
this whole group, snap it over here, and then just have a play around
with the colors and position over
on this side now. I like where these
two are meeting here, but I think I want
that different color to the pink one there. So let's make this one orange. And then this one
by Alpha locket, we can make this one purple. And I quite like that little
shape that we've made there, so I'm actually going to
leave both of those purple, and then I'll make this
one a different color. Let's make this one pink. Maybe have it going. It's
hard to decide that way. I think I might change the
color of this one now, so it's not a
repeat of that one. So let's have this purple
one be a different color. Let's swap these around so that this one's purple
and this one's blue. Then we can duplicate either of these and
bring them around here. You can even just rotate
the whole group like that. That's a nice way
of getting some of these variations in shapes. Just make these
different colors. I can play around with creating
lots of different shapes. And where I'm getting this
shape coming in here, it's kind of U shaped
with these there. I'm thinking, Okay, I could try another pattern where I
make all of these the same color and have four quadrants with this shape in them, and
what would that look like? So as you're rotating and
changing the colors on these, lots of other
different shapes and possibilities should hopefully
be jumping out at you. Let me duplicate this one again. So where I've got this here, I need to keep in mind that I
also have a pink one there. So once this repeats,
I would have, like, three quarters of
a pink circle there, so I definitely want to
change the color on this one unless that's something that you intentionally want to do. So let's stick with that and put this into repeat and see how this is
looking at the moment. This is another design where when you're making
your digital papers, you can add some
extra variation. You don't have to have a
grid of the same thing. You can move these around and add some
extra rotation in these. You can also flip them around. One thing I would say, as with the other one is just try not to have it so that you end up
with mirrored patterns unless, again, that is something
you want to have, whatever you do, do it
intentionally is what I'm saying. So you can see how cool this
looks on a big scale and also just the different shapes that you can
spot repeating in here. You could even, you know, make a whole pattern
out of that there, like what if that was your pattern tile
or what if you had a whole pattern where
you had this kind of curved shape and just made
a whole pattern of those. There's lots of
different patterns that will jump out at you, and it's really good inspiration for finding new patterns. And don't forget another cool way you can
play with this and get inspired is to duplicate
one of your pattern papers. Transform, try rotating
at 45 degrees, and then change the
blend mode on this one and see what effects you
get coming up on this. You get some really cool
color waves coming up. Net forget you can
reduce the intensity if you want it to
not be so intense. This one here has got some really interesting
color palettes. And also, don't forget we
can invert the colors on this as another quick way of getting some
different color looks. These, especially,
I really love. So if you find something
that you like, again, create a new palette. And just put the colors that you find into your
new color palette. So this Bo house pattern
is a really cool way of coming up with lots of
new color palette ideas. And also, you get these
really cool teardrop shapes, which will be looking at a lot more detail
later in the class. And don't forget that these
are totally seamless. So if you came up with
one of these combinations that you actually wanted
to use as a pattern tile, you can copy all M
to the top here, paste this in, and this could be used as a pattern
tile on its own. So don't forget
to make a note of any new color palettes that
you spot along the way, and don't forget
to add the results of your favorite experiments
to the worksheet. Next, we'll look at
how you can arrange these quarter circles in a more uniform way to
get a scale pattern.
14. Day 3 Quarter Circles Goldfish Scales: So we're going to start
by grabbing one of the quarter circles
from our last pattern, and you can either duplicate the canvas
and start again in that one or just paste it into
a new 3,600 pixel canvas. Then we're going to snap it
up into the corner here, and this one is a super
quick and easy pattern. We're just going to
duplicate it and repeat it horizontally and vertically
across the whole canvas. Okay then I'm going to change the background
color to this, and I don't know how well
that shows up on the camera, but it's kind of like
goldfish scales. So I'm going to swipe and copy all going to swipe
down again and paste. Then we're going
to tap transform, and we're going to rotate
this one at 45 degrees. You could repeat it
in a grid like this, but I really like how this one looks rotated at 45 degrees. So we've got bicubic gone, and I'm going to
rotate it all the way around until these darker ones
are pointing up that way, then I'm going to
tap fit to canvas. And then we're going to put
it into a 45 degree repeat like we've practiced
in the other lessons. Don't forget to duplicate those layers to knock
out that transparency. And then we end up
with this really cool goldfish scale
like pattern. This would make a really cool digital pattern paper to use in a pattern where you've drawn
maybe some goldfish shapes, and then you could
apply this over the top with a
clipping mask or maybe use blend modes to use this as a pattern texture
within a pattern. And talking of blend modes, don't forget to
experiment with this, having a go with duplicating
it, flipping it vertically, and scrolling through some of the different effects you get with different
blend modes on there. I'll leave those for you to
have a play around with. In the next exercise,
we're going to add some separation
between our quarter circles with some outlines.
15. Day 3 Quarter Circles Gridded Quarters: For this pattern, we're
actually going to break tradition and we're going to start with a square
for this one. So I'm going to turn off
the background color. I want a white background. So if I fill with white
and move white around, you're not actually going
to be able to see it. So we'll turn off the
background color, and I'm going to tap and
fill this layer with white. Then I want to transform this
to a 900 pixels square box. So tap transform. You want nearest
neighbor on for this, and we're going to
tap up here and we'll make this 900 pixels. And we're going to center
this on the canvas. So this box is going to be what creates the grid behind
the quarter circles, and this is 900 pixels wide. I want my grid lines
to be 200 pixels wide, and that 200 pixels is
going to be made up of 2100 pixel outlines butted
up against each other. So it would take 100
pixels from the edge of this box and 100 pixels of
the box we make next to it. I need my quarter circle, which is going to be
centered inside this box to be 800 pixels by 800 pixels, which means my initial circle
needs to be 1,600 pixels. So again, if you would
rather ignore the mass, you just need a 900 pixel box
and a 1,600 pixel circle, which I will go ahead and draw now in a contrasting color. And then we can cut this
off at the corner to make an 800 pixel
quarter circle. Which we can then center on the canvas and
in this box there. So this quarter circle is
centered on the canvas and also on that box because the box is centered
on the canvas. So let's group
these together now. That's the hard
part done. Now we can snap this up
into the corner. So I'll zoom in for this bit, and we can put a grid on to help us make sure we're snapping
it to the right place. So let's go up to
our Canvas actions, turn on the drawing guide, and let's edit the
drawing guide, and let's change the
grid size to 900 pixels. Here we go. And then we can make sure we're definitely snapping these into the right places. Because when we
duplicate this one, it could snap to the
edge of the circle, and you'd notice there that
it's not going to that line. So this will help us
make sure that we're snapping white box to white box, not white box to blue
circle. There we go. And then we're going to
duplicate that one again, snap it down there, duplicate
again and snap it there. And then we're going
to rotate these round, so we've got a quarter
circle going that way, that way, and then that way. And I've just spotted
as I was doing these that I still have
nearest neighbor on. So you'll get to
see what a circle looks like now if you transform
it with nearest neighbor. This one, you can
see, it's got a little bit more
of a jagged edge. It's not quite as smooth as ones we've transformed
using by Kubic. It doesn't matter
for this pattern. If I wanted this to look
super best and fancy, I would go back and
redraw that circle. But still going to work. It's not going to mess
with the geometry. This is still going to
snap perfectly into place, so I'm not worried about it
from that point of view. And yet, this is meant to
be a creative exercise. If we were doing this
with paints like watercolors and having like a creativity session
with watercolor, I wouldn't be telling you
to use a ruler with it. This kind of exercise is just about kind
of experimenting. So if you want something that
is going to be best work, then by all means,
you should go back and change that
interpolation method. But if you are doing this just for the creativity and the fun, don't worry too much about little mistakes you
make along the way. I'm going to stick with
this, but I just wanted to point out that mistakes happen and you can choose how
you deal with them. But also, I wanted to point
out that I did it wrong. And if you're copying
what I'm doing on screen, then you should use bicubic for circle, not
nearest neighbor. Anyway, back to the pattern. We can now group all
four of these together. And I'm going to go through and change the colors for each one. So Alpha lock these
blue circles, and I want each one to
be a different color. But you could also keep them the same color
if you wanted to, and I'll show you later how that can look really nicely on to make a sort of a
tone on tone effect. But I'm going to change the
color on these for now. And then we can
duplicate this group, and I'm going to
flatten this one just to keep the layers from
getting two out of hand. And then we've got this one
which we can go back to. So I'll duplicate this,
put one over here. You can keep these
exactly as they are, or you can flip and rotate them to get different kind
of layouts for the colors. I'm going to put this one
like have that one like that, then duplicate again.
Bring this one down here. There we go. And
I'm going to turn the drawing guide off now
because we don't need that. And you can see
we've got this white that makes the background now. So then we can put
this into repeat. Says, one option
for repeating this. We could also repeat
this at 45 degrees. So there's option number two for rotating this at 45 degrees. And also, don't forget
you can do things like if I grab this one, we
can duplicate this. Let's rotate at 45 degrees and see what effects we get
with the blend mode there. And if you want to take
things even crazier, another thing you could do
is turn this rotated one on and play with a blend mode on this and even see what things
you come up with. I mean, like how cool does that look where we've got this one, 45 degree one blending down
on the one underneath. I think that makes a really
cool tile all on itself. So if you spot something like
this and you want to keep that as a patentile swipe
down with three fingers, copy all, come up
to the top here, and then tap paste. And then that is your
repeating patenti which you can then for him to
repeat like this. I think this type of digital
paper could look really cool as if we go
back to this one, hide this craziness
for a second. This could look really
cool as like wall tiles. If you were illustrating a
cute kitchen scene and you wanted to put some kind of texture for the tiles. You
could use something like this. Another little what if I want to quickly show you before
we're done for today is, if we go back to this
one here and I'm going to change the color
of all of these to gray. So I'm going to double tap here and I'm going to fill
all of these with gray. Then I'm going to duplicate
that group, flatten, and then I'm going to
repeat this around the canvas like we did
with the other one, and then I'll pinch and
merge all of those together. Let's hide everything
apart from this tile, and let's set the background
color to this green color. And then on this
one, I'm going to change the blender
mode to color burn. And then this is really good for getting a two toone effect. If you have a layer
with white on it and you use color buurn, white has no effect on
anything underneath. So it's just the gray
that's applied to this. And then where we've
got the white, the pure background
color will show through. So you can choose all kinds of different background
colors for this here. You can have a play around with all sorts of different
background colors, and you can also
change the opacity. So if you find it's too dark,
you can bring that down, and you can also experiment with different blend modes and even
try inverting the colors, which will make the
white bits black, and then you could try color dodge to get
lighter colors on there. So there's all kinds of, like, cool effect
you could get on. So once you find
something you like, don't forget you can copy all
to capture that as a tile. Come up to the top here, paste, and then you can put that
into repeat either at 45 degrees or in a
regular grid repeat. So as we look through
these, we've got all of these different patterns just from that initial
quarter circle there. And it's so cool just all
the different things you can do to get all these different
patterns working together. So that is our last quarter
circle pattern today, although I hope you have lots of ideas for some of
your own to try out. Add your favorites from today to the worksheet, and I
will see you tomorrow.
16. Day 4 Overlapping & Intersecting Starbursts: I hope you're feeling good
and warmed up now because today we're going to be doing quite a bit of experimenting, and we have quite a few patterns to make, so let's get started. So we're going a
3,600 pixel canvas, and we're going to start
with a circle as always. Gonna make it 1,800 pixels, and we're going to
center it on the canvas. We're going to duplicate
it and snap it onto all the edges and into the
corners of the canvas, too. This should all be fairly
familiar to you by now. So we'll go through these parts quite quickly if it's something I've covered a few times
before in previous lessons. But if you need a
quick refresher, you can always go back to
the previous data for that. Then this one that's on its own, we're going to duplicate that, and I'm going to pinch
all of the rest together. I'm going to alpha lock those. And then this one I'm going
to bring it up to the top. I'm going to alpha lock it and fill it with 50% gray,
which if you remember, we double tap in this
area to get So this one, I'm going to snap
into the corner, but I'm going to snap the whole of the circle into the corner, not just this corner of the circle into the
corner as it were. So we'll move it
up and over there, snapping it into the corner. Then we're going to duplicate it again and snap this one over here and then do that twice more into these
two corners as well. Then just so we have one
spare to go back to, I'm going to duplicate that one. We'll hide that and we can
put that at the bottom. Then these four, I'm
going to pinch together, and then I'm going to change the blend mode on this
to something else, and then you'll see
the magic capping. So once we start to change
the blend mode on this, you'll see we get all of these
different kind of effects. And we get this nice shape here where the two
circles overlap. I think the screen blend mode on this one is probably
my favorite. We can alpha lock
this, and then you can experiment with different
colors on this as well, either by using color drop
and filling the layer there, or you can go onto Hu saturation and you can play around with
the colors this way. And because we've got that
gray blending down onto it, this color is always
automatically going to match the
color of the circles. Another thing you
could do if you want even more color combinations is you could set a
blend mode on this. At the moment, I've got
a neutral background, so whatever's on here
is likely going to go with these two colors. But if we change
the blend mode on this one to color burn, maybe and then change this
one to color burn also. And then we can change
the background color to various different things. With darker colors, you'll
find it's like too dark, but with these lighter colors, you get this more subtle effect. And you could also experiment
by color dodge instead of color burn and maybe change
the opacity to 50% ish. And then you'll be able to
use darker colors on this. If you want to use these darker colors
for the background, you'd need to use color dodge for the blunder modes here.
I really like these colors. And again, if you find a
color palette that you like, come up to your palettes here. Add a new palette, scroll
the way to the top for it, and then you can stick these in a color palette to use later. So we'll go with this
as our first paten tile and put this into repeat
and see how it's looking. And then we can
also put this into repeat on a diagonal, as well. So that's how this looks
repeating on diagonal, and then that's straight on. You can even do crazy
things like, obviously, test the blend modes on this and see these cool
shapes you get. I mean, that is pretty
cool all in itself. Like, I really like that
as a pattern paper. And again, there's even more of a variation in colors there, so you could add
some more colours to this color palette up here. Some of these extra colors
that we've got going in there. The pattern papers
really remind me of, like, vintage Christmas designs, and I think these
would look really good used as like overlays for gift wrapping in
festive illustrations or patterns if you were making, like, a pattern that had
gift wrapped presents. You could clip this over
the presents and have some interesting patterns within your patterns. Yeah,
I really like this. It's like mid century
Christmas vibes to me. So in the next pattern, we'll learn how to flip these base layers
around and create a two tone version of this pattern with a
variation in scale.
17. Day 4 Overlapping & Intersecting Scale Variations: So picking up from where we
left off in the last lesson, let's flip these two layers
so that they're the other way around and change the blend mode for this to normal for a second. And we'll clip this
one down over there. And then this layer on
top will fill with gray. And if you want to have a dark background,
choose color dodge. If you want to have a light background to
choose color band. So I'll go for color dodge, and I'm going to make the background color
this blue color. Choose blue again
and fill this one, and then you get a
two tone effect. So the color dodge is
applied to these parts, and then the circles and
the background match. So this really kind of
accentuates the circle shape and these little trellisy
like X shapes. So this one is a good layer
structure to use if you want a two tone pattern and you want to get these cool
shapes on their own. Let's try it with a light background to show
you how that works. So we change that one and then change the
color of this one. And then you need to change
the blend mode on this to something like
color burn instead. Or you could use color dodge
and just reduce the opacity. But blending that at 100% down onto an already light color is just going to
lighten it to white. So different things to
play with and try there. Just undo that I quite
like that blue color. So I'll put this into repeat
and see how this looks, but I'm going to switch
up the scale on this one, so I'm going to copy
all and then paste. I'm only going to repeat it into this corner and this one here. Then I'm going to take
this as my patentile, so copy all, paste again. And then we can put
this into repeat. And we get this nice
variation in scale. So you could have it repeat
these on the diagonal like that or let's try
it again, paste. You could rotate these round. So on this one,
although I said try and avoid symmetrical repeats, if you really lean
into it and just make the whole thing
symmetrical, that works, or you could go for something like this where you
would then end up with, like, two of these, two
down there, two up there. Let's put this into repeat
again and see how that looks. These can look really
cool, like, a ted pattern. So yeah, loads are
different options for changing up the scale. If you've got
something that fits exactly into its little square, you can put different scales of each thing into
the repeat for your pattern paper
and get loads of different effects from
just the same pattern. So now you have another
technique you can use to add interest when you're putting these pattern papers together, and repeating motifs
at different scales is a good way to add interest to your
patterns in general.
18. Day 4 Overlapping & Intersecting Rolling Circles: I couldn't think of the
right word to describe this pattern other
than rolling circles, but this is one of my favorite
patterns from this class. It has a really fun
retro feel to it, but I'm sure if you use
more neutral colors and added more graduations in
the number of circles, it could also look quite
calming for a wallpaper. So this one starts
off as always, 3,600 pixel canvas, and we'll start with
an 1,800 pixel circle. And we'll just center
this one for the moment. Then we're going to duplicate
it three times, so one, two, three, and we'll
alpha lock all of these. Do the bottom one anyway even though we're
going to change it, and then we're going to fill each of these with
a different color. So use pink for this one. Use this garish clashing red, and then light
pink for this one. And then I'm going
to resize these. So this first one,
a tap transform, although we can't see it
because it's underneath. Actually maybe I'll
do them from the top. We'll work from the top down, so we'll start with this one. So I'm going to make
this 1600 pixels. Then this one, we'll make 1,000. And then this one
will make 1,400. So each one of these is 400 pixels bigger than
the one next to it. And then I'm going to center
these on this circle. I want to center it, so
it's on the middle and so this node is snapping to the
edge of that circle there. If it's easier, you could turn the others
off while you do that. How cool does that look? You can zoom in
there just to make sure that that's all
lined up nicely. And then this is going to be the motif that we flip
around the canvas. So we can group all
these together. And you can keep
them all in groups, or you could just
duplicate this and flatten one and use that,
which was what we'll do. So we'll hide this one,
and we'll use this one. So I'm going to snap this one
up into the corner there. Then I'm going to duplicate it, bring it over here and
rotate it 45 degrees twice. So 90 in total. Then duplicate, tap transform, and we'll rotate it
90 degrees again, and then duplicate,
snap it over here. I want to have that one,
so it's going that way. Then I'm going to change
the background color to this dark blue color. I absolutely love this color
palette. It's so cool. And then when you put
this pattern into repeat, you can experiment
with repeating it at 45 degrees or varying the scale like we did
in the last pattern. I was having trouble
snapping that, so I hid all the other layers, and now this is snapping
a lot more easily.
19. Day 4 Overlapping & Intersecting The Vesica Piscis: Don't let the title of
this lesson put you off. The Vicapiscs is the
technical term for the shape created when
two identical circles intersect in such a
way that the middle of each one is aligned with the outside of the one
next to it like this. This shape here is
called the Vica piscis, but we can just call it a
sharp ended oval, if you want. What I will tell you
before we move on, though, because it's too weird
not to is that Vicapiscs literally means bladder of a fish in Latin.
How weird is that? And apparently, it looks like the conjoined dual air bladders that you find in
most fish. Who knew? Just when you thought we were done with the random facts about the shape you probably never even heard about until today, the name of the shape in Italian is Mandla, meaning almond, and it was a key shape in early medieval art often used surrounding
figures of Christ. So I think we should probably crack on and make some
patterns with it. To make this pattern, as always, we're going to start in
a 3,600 pixel Canvas, and with your
interpolation method set to bilinear for this one, make an 1,800 pixel
circle, and center it. Then you want to
duplicate it and align it so that it
snaps like this. So you've got the
edge of this circle snapped to the
middle of the canvas and the middle of this circle, and the middle of this circle will also be lined
up with that one. We could swipe both these two and just enter those for now. So then tap on the top layer, tap select, invert
your selection. And then I'm going to hide this top one now so that
you can see what happens. Tap on this one underneath, tap transform, and just take this off the
edge of the canvas. And we're left with
this shape here, which is this almond
or pointy oval shape. If I tap on this, you'll
see the dimensions of this. The width is 900, but the height isn't going to be some kind of useful
specific number here. Now, my daughter and her
boyfriend are both really lovably nerdy final year
A level math students, and I could probably have asked them the exact size to make my starting circle so
that I'm left with this shape in the exact
size I want it to be, which is 900 by 1,200 pixels. However, I did not do that, so we will have to
resize that instead. And that double resizing
from the circle. And then, again, here is the
reason I've used bilinear, the interpolation method
for this pattern. Bicubic was just creating a little bit too much fuzz on the edges after two
transformations, and nearest neighbor
was too jagged, so bilinear seems like
a good compromise. So I'm going to make this
by unchecking the ratio 900 by 1200 pixels. And I just want to mention
again here that, yes, there is a vector software
out there that is the correct place to
make geometric patterns. But this class is an exercise
in fun, exploration, new techniques,
and kickstart and new creativity using the
app we all love to draw in. The goal isn't necessarily
a finished pattern. The goal is to reignite
your creative spark and get you wanting to pick up your
iPad and create and have fun. And if you do want
to use these as digital pattern papers
in your illustrations, by the time we've
reduced the scale on these patterns to
be small enough to use in our other artwork, going to end up a little bit rough around the edges anyway, so don't worry about it too much and just enjoy the process. So we've changed the size
of this to 900 by 1,200. Like I said, just
about an hour ago before I went off on a tangent. We've centered this
on the canvas, or at least we can now. So then I'm going to duplicate
this two more times. And I'm going to tap
transform on this one, and check this. I'm going to make the
width of this 1300. And then I do the
same on this one, and make the width of this 600. So we've got three, six and 900. So then when we center
these on each other, I'll change the
colors first, though. We get this really
cool shape here. Then I'm going to group these. I'll just bring this
one to the bottom. I'm going to duplicate and flatten this one
and hide the rest, and then we'll just
work off this one. So I'm going to just
start by putting this in a basic grid repeat
across the canvas. So that's Pattern one there, and we can see how that
looks in repeat. This one is a really
fun one to rotate 45 degrees and then flip
and play with the bmboes. I'm going to go back
to this layer here. These shapes kind of look like an eye if you turn
them around this way. So how about in the next lesson, we go back to this layered
one at the bottom and make it really look like an eye and see what kind of creepy eye
pattern we can make with
20. Day 4 Overlapping & Intersecting Creepy Eyes: So let's go back to this group we made in the last lesson. I think if we rotate it 90 degrees and maybe if we
take out the top one here, let's bring this circle back in, and I'm going to resize it. We know that the width
on this little shape here was 600 pixels. So if I tap transform on this, I make this 600 pixels as well, let's bring it to the top. And then we center this you get this lovely
creepy eye shape, and we could duplicate this one more time and make a
little pupil in the middle. So let's try making it 400 and see what
sauce size that is. Maybe you go a bit smaller. Let's try 300. There we go. I'll make this the same colour as this photo one there. There we go. So that's our creepy eye. I'm going to change the
background color to this garish orange color because I'm loving these
bright colors here. And then we will duplicate this, flatten our copy,
can hide that one, and let's put this into repeat. Got a few different options
for how we could do this. We could just repeat
it in a grid. So there's our
basic grid repeat. I'm going to show you
how to shift these along slightly so we can have it repeat in a little bit
more of a brick style. So just hide those
or put this on, duplicate it and
flatten it again. This is why we keep
these to go back to. So let's put this one. There. That one there.
Leave those up there. Then we'll put this one down here and repeat it across there. Then we can bring
this whole thing, group and bring it to the top, duplicate and bring that
down to the bottom there. And like this, you
get these lines. They're really accentuated. And I love all the sort of individual shapes that are made with the negative space on this. So let's just flatten
those two together. And we'll see what
this looks like in repeat. So there we go. One motif repeated
two different ways. And it gives such
a different look. You could take
things even further by like alternating the color, so you could have
this one like blue, pink, blue, whereas
this one next to it, you could have pink,
blue, pink and see what other combinations
you can come up with. And now that I've put this
one in this brick repeat, it's made me wonder if
I go back to this one, what this one could look like
if we put this in, like, a vertical brick repeat, so we had one going in there. But I'll go back to
that and do that in my own time and leave you to experiment with that as well. Forget to add your favorite of these patterns to the worksheet, and keep this group again, ready for the next lesson where we'll see what
happens if we overlap these shapes to try and
get that starburst design we made earlier
with the circles.
21. Day 4 Overlapping & Intersecting Almond Starbursts: So let's go back to this
special little shape here. I'm going to get rid of
these two for this one. We'll alpha lock this one. It doesn't need
to be in a group, so we'll drag it out there
and delete that for now. I'm going to snap this one up into the top of the canvas here. I'm just going to make
a row of these along the top and alternate
the colors on them. Then I'm going to
group these together, duplicate and snap
this one down here, and I'm going to mix up
the colors on this a bit. Make sure you're being careful with the snapping
when you do this. Then duplicate this again, bring this one down
here, and again, just mix up the
colors a little bit. Then I'm not going
to flatten these yet because I might want to
come back to these later, so I'm just going to
group all of those, and I'm going to turn
the background off and copy all and then just
paste this in up there. Put the background
back on again now. And then I'm going
to duplicate this. Alpha lock it and make it gray. And then I'm going to clip
this down over the top to get that kind of almond
overlap shape. So we need to offset
it and we can use these individual shapes at the
bottom to help us do that. So we'll duplicate this. I'm going to snap
half of it there, and that's snapping to
these layers underneath. And then this one, we
can line up there, pinch those two together. Then duplicate this again. I'm going to snap this down
to halfway, like that. And then this one
can snap up there. So I'll just show
you that one more time because that
was quite quick. So duplicate this one.
Alpha lock, fill layer. So then we duplicate it. And again, you need to
make sure that you've got all of these individual
layers turned on for this. Tap transform and snap it so that it goes
in between those. And then the other one you
just bring to meet up with it there. Pinch those together. Then you can duplicate it again
and just bring that down, so it's snapping to halfway
down this gray one. And then the other one, you
just bring up to meet it there like that.
Pinch those together. Go with this top
one, and then you can change the blend mode on
this to anything you like. If I remember rightly, I
think screen was pretty cool. And I'm going to
make the background color this dark color. And then clip this one down, and then it won't apply to the background
color. There we go. And then you get these cool
overlapping star bus shapes with these pointy
oval ones as well. When you're playing around with different colors
and blemo to it, if you spot a color
palette you like, don't forget to make an oven
and add it to a new palette. Then you can copy all, paste, and put this into repeat and
add it to your worksheet. Don't forget to spend
some time looking at these finish pans and letting
your mind wander around what other directions you
could take the finish pan in what if you wanted to add
something to the pattern? For example, if you wanted
to put a little circle or a star or a heart motif into the middle of any of these. You've got your group
layers in here, so you could always center something on one of these
if you wanted to add some little dots to the white space or the negative
space or these in there. You could add a
little row of dots or diamonds or any
other shape you like. Let your imagination run wild and see what you
can come up with. That's it for today, but it
has been quite a busy one. So I think the key
takeaway from today is how you can use two
overlapping shapes to cut sections out from shape to make a new geometric shape
that you wouldn't be able to make perfectly and procreate just by drawing it. It's a technique
we'll be looking into a little further
tomorrow when we explore even more overlapping circles and trellis patterns.
22. Day 5 Trellised Circles Geoflorals: Welcome to Day five. By now, you should be feeling
quite familiar with the techniques and
skills we've been using. I've been saving the
more complicated techniques for the
last few days, and today is where it starts
to get a bit more tricky. So to warm ourselves up, we'll start with a nice
easy floral pattern. The basic floral shape
is really easy to make, and then you have lots
of directions you can take it in by
mixing up the scale, changing whether you
repeat it in a grid or a brick repeat and
changing the angle. The basic shape is made
in a 3,600 pixel canvas, and we're using 900 pixel
circles for these today. So I'm going to center
this on the canvas. Duplicate this four times. I'm going to alpha
lock each one of these and make these
a different color. Then I'm going to snap these to this circle like this so that the top and side nodes of this bonding box snap to the
center guides on the canvas. And then I'm going to do
that with these as well. So these will snap
to each other, and these will snap to the
center guides as well. And then you can see this cute flower shape start
to emerge there. Then you can group
those together. And that's our basic
flower motif that we can repeat in lots of different
ways around the canvas. This group just check, this
should be 1,800 pixels. So we can repeat this in a basic grid around
the canvas like this. So that's one option, and that will look like this in repeat. Let's get rid of those. We could also repeat this in
a brick type repeat. So if we center this one here
on the canvas like that, and then snap this one like that and then put
this one over here. That one is going to look
like this in repeat. And if I undo all this, go back to this, copy all. We can see how it
looks at 45 degrees. So then that one will
look like this in repeat. You can also pull
on other techniques that we've used
on previous days. Remember, in one
of the patterns, we had a smaller repeat
of the square here. So you could put this
in repeat by having alternating small and
large flowers like this. That looks really
cute like that. You could then change the
colors of the ones behind. So if we find these, we could change the
color on these. Basically, there are just loads of different options for this, and you can even try if
I turn this one on here, if I put these up there
and get this back again. You could try and see what
this looks like blended down over the other one as well and see what shapes
you get in there. So these are just some
of the ideas that I had while I was playing
around with these flowers, and I know you'll come up
with some really cool ones of your own, which
I'm excited to see. Share your favorite geo floral pattern with us
on the worksheet. Keep one of these groups
ready for the next lesson, we'll use this to give
ourselves a refresher on making outlines before we get to the more complicated
trellis designs.
23. Day 5 Trellised Circles Outlined Flowers: So let's start again
from our basic flower here that we made
in the last lesson. I'm going to duplicate
this whole group because we'll need a second version
of all those circles. These bottom ones, I'm going
to make all of these white, remember, we use a solid shape
behind to make outlines. Then all of these,
we're going to make 200 pixels smaller because
I want a 100 pixel gap. So let's tap transform
on this one, and we'll make this 1700 pixels. I've got bicubic for my
interpolation method. So we'll put that there,
and then we just need to bring this one up to
go underneath it. And then all of these, we make 700 pixels as well. And although this isn't
what I plan to do, I actually meant to just have
the solid outline there. It's just struck me my
what if question, I guess, for this moment right now, is what if I kept it like this? So we've got this
different shaped outline. So what I'm going to do, I'll
carry on making this one, and then we'll come
back to that and have a go with this one as well. So we'll snap these into the middle and then
we'll come back and explore that
what if in a minute. That one's not quite centered. There we go. So once
you've got all of these, the circles centered on
the ones underneath, you can group that together, duplicate, and flatten or hide that one because we'll come back to that
one in a minute. And then you can put
these in repeat. I'm just going to do
this as a basic grid. But that's your quick
refresher on how to do the outlines, and then
we'll have a look. See what other things we
can do with these shapes. So comparing this one to the previous pattern
we made, first of all, these flower shapes,
have a look at these and kind of explore which one
you like the look of best. Do you prefer shapes with
outlines or without outlines? And how does it make the
colors interact differently? Like the difference
between these two is really accentuated,
whereas with these ones, they kind of they almost
like vibe off each other because they don't have that separation in there.
So have a think about that. Which one do you
prefer? And is it a technique you could introduce into your current art style? Let's go back to this
one, first of all. So we could center all of these on the middle
of the canvas there. And see how this looks. And as I'm doing this, I'm also thinking with those
rolling circles we made, you can make even more
of these circles. So we could take this
and duplicate it and make it smaller
again by 200 pixels. So we could make this 500. The sizing has gone
a bit off there with resizing it so many
times, but never mind. And if we fill this with that, you can see you get a
different look again. We can duplicate this. Up there, we'll have to bring all
these to the top low. I'm not sure I've
snapped that one quite correctly though. There we go. An unplanned extra idea
for you to try out there. I really hope as
you're watching this, you're coming up
with lots of ideas of your own to try out as well. In the next lesson,
we'll start the first of our more complicated
trellis designs.
24. Day 5 Trellised Circles An Outlined Trellis: For this pattern, we're starting
in a 3,600 pixel canvas, but advance warning that we will be making it a
little smaller later on. So I'm going to change
the background color to something not white. I'm going to change
my color to white, and I'm going to
draw an 1,800 well, I'm going to draw
a big circle and then change it to 1,800 pixels. And we'll center
that. Duplicate it. I'm just going to invert
the color on this one, tap transform, and we'll make this 1,600 pixels and
then center that. So there we've got
our 1,800 pixel circle with a 100 pixel border. Previously, when we've been
working with outlines, we've just left the whole flat white shape behind on the base. But with this design, we want the trellis to be see through, so you can just change
the background color, and we're going to have this
white line work on top. So we're going to use this
shape to cut out of that one, but we're just not going to
delete the bit behind it yet. So we're going to select
this layer, the black one. It's going to look like it
disappears there for a second. Don't worry. It's just because
it inverts the colors. So select that one.
Tap on this layer, swipe down with three fingers
and tap, cut and paste. So now we can hide these two, and we've got this circle down there with the cut
out middle on it. But the overall size of
this is still 1,800 pixels. So then we can group
all of this together, and I'm going to duplicate, and I'm going to
snap it over here, and I don't want to snap it so that they're touching
each other like that. I want to snap it so that
it snaps to the middle and this snaps to the
edge of the black circle. And then I'm going to do
the same on this side. So these overlap there. And then I'm going to
do the same on the top. And then, again, down
there at the bottom. And maybe now you can
see why we'll have to crop this canvas down
a little because we've moved this motif
100 pixels inwards from where it was snapped to the edge there so that it
overlapped there. The repeat of the
pattern is now 200 pixels shorter because
we've moved it in 100 pixels on each side. So we need the pattern to
repeat from effectively, if I draw a line on top. So we need the pattern
to kind of repeat from somewhere like
there to there. These really wonky lines, but the nodes middle nodes of these circles would
have been there. So we need the pattern to actually repeat from
there to there. And the same is going to be true with these top and bottom ones. Let's put this into
repeat quickly now, and then you'll see exactly what I mean before we crop it down. So let's copy it all, clamps the top here, paste, and let's just put
this into repeat. So you can see
here as I do this, these now aren't repeating properly because we've
moved the repeat inwards. So that's why we need to change the size of the canvas now. So I'm going to tap up
here on my canvas actions, tap on canvas and go
on crop and resize. I'm going to tap on
settings, turn snapping on. And we want this to be 200
pixel smaller on each side, so we'll make it
three, 400 by 3400. Keep the DPI at 300. Don't need to
resample the canvas, tap done, down here, and then you can center the canvas like this until you have those whoops,
orange lines there. And you can tap done there.
And that's going to crop it. And now, if we put this
into repeat, there we go. You can see that that is
now repeating properly. So let's get rid of those and
go back to this full one, and we need to put
this into the corners. And this time, we
can snap it properly into the corner because we've
cropped the canvas down. So let's duplicate
this bottom one and snap this into the
corner of the canvas there, and you'll see those
already going nicely there. And the white edges
are overlapping. Hopefully, you have enough
layers to be able to do this. If you don't, you can always use a smaller canvas to play
around with these patterns. You don't have to
use 3600 pixels. So now we can go in and hide
all of these black ones. There we go. And now, if we turn the background color off and we spike down with three fingers,
we can copy everything. I'm going to put all of
these in a group so that I can just collapse all the
whole thing down at once. That's probably the easiest way to get these out of the way. There we go. Turn that back on, hide that, and let's paste. And then I'm going to
paste another one in. And then what we
want to do is kind of shift this down
so these overlap. So we're going to need to
make a marker to do that. So I'm just going
to fill this layer, tap transform, make a box, quarter of the size
of the canvas, center this on the canvas, and then we can use this
for snapping this too. So we'll bring that up
there. Duplicate this one, and I'm going to snap this node here to the corner of that box. And then you can
see we get those core intersecting shapes there. Duplicate this one
again and then use that to snap this
corner to that box. Then we're going to snap this
corner to that box there, and then do the
same with this one, just making that last
one in the corner there. Then you can pinch those
top ones together, delete that copy,
and delete that. You can pinch those
two together. And now you've got that
transparent framework of trellis, which you can have any
background color behind, or you could make it
black with white behind, black and white,
all sorts of ideas. When you put this
one into repeat, rather than copying
the whole canvas, it's better if you just
duplicate this and put this layer only into repeat because this has the
transparency in it. If you copy all,
you're going to lose the transparent background and then the ability to
easily change the color. So duplicate this one,
keep that one as a copy, and then we can repeat
this around like this, and then you can easily switch
out the background color. And talking of playing with colors because we've kept
this background transparent, if you want to change
the individual colors of these things in here, you can make this
a reference layer, add a layer underneath, and then you can just
use color drop to fill in other colors into
this pattern like this. Just make sure that
when you color at the edges, they
match up as well. Dragging and dropping
colors like this is a whole fun
activity in itself. Just playing and making
patterns just in the same way that
sitting and coloring in a coloring book is fun. So yeah, get as
lost as you'd like to in recoloring these patterns. And now you know how
to make these designs with overlapping outlines. I'm sure you'll think of lots of ways to use that to create some really interesting
geometric linework patterns. You don't have to
stick to circles. You could use squares,
diamonds, all sorts of things. Add your favorite designs
from today to the worksheet, and then in the next lesson, we're going to make
a trellis pattern similar to this out
of cutout shapes.
25. Day 5 Trellised Circles A Cut Out Trellis: We're going to start
this pattern off in a 3,600 canvas with bilinear interpolation and
21800 pick or circles. We're going to
duplicate this, and I'll invert the
color on this one, and I'm going to
snap it down here so that this node here snaps
to the middle of the canvas. Then I'm going to tap this
top layer, tap Select. I'm going to invert tap
on the layer below. We can hide this one and drag
this off there like that. Now we have this little
diagonal almond shape, which we can use to
build a trellis pattern. It should be 900 pixels by 900 pixels if we've done
everything accurately so far, and then you can duplicate
and rotate it to make a trellis pattern
where you've got complete control
of all the colors. So let's duplicate this one. Snap this one over here,
flip it horizontally. Put that one over there. Designs can look calming
as a monochrome design or really fun and playful if you use lots of
different colors. You can experiment with being
random with the colors, or you can use colors in specific places to highlight different shapes in the design. You could create
different colored squares to place in different
parts of the canvas, fill a new layer with color, change the size to
1,800 pixel square, and snap it into the corners. You can also mix up the scale as you're repeating the tile. You could add some smaller
circles like we did yesterday. You could even add that geo
floral motif from yesterday. I I copy this one here, and then we come out here,
you could even paste other motifs into the middle of these, now we've
put squares in. You could do things
like adding these in the middle like that and have a look and see what
that looks like in repeat. So many different options and
places you could take this. And I'm super excited to see all the
variations on this one. Add your favorite designs
from today to the worksheet, and then tomorrow,
we'll be making patterns with
concentric circles.
26. Day 6 Concentric Circles Target Practice: Today, we're looking
at concentric circles, and we're going to take it easy today because yesterday
was quite full on because today is really just to warm up for some more
complicated patterns tomorrow. We're back in our
3,600 pixel Canvas, and I'm going to start with
an 1,800 pixel circle. And I've got bilinear as
my interpllation method. I'm going to make
this 1,800 pixels. So duplicate three times. Oops Alpha Lock.
What's going on? Duplicate this three times. There we go. And I'm going to make these
a different color. So make this one orange, green light green anyway, and then a darker green. And then working
from this one up, I'm going to make these
smaller by 400 pixels. So let's tap on this one, and this one is going
to be 1,400 pixels. And center that one
roughly on there for now. I'll center these on
the canvas in a minute. Actually, let's center this pink one and then center the orange
one on it. There we go. Then we can turn this one on, tap transform, and we can
make this 11000 pixels. Then center this.
Turn this one on, and this one will be 600 pixels. And then we're going to
group those together. And that's our concentric
circle like our target, and we'll repeat this
around the canvas. I think I'm going to do this
one in a brick pattern. So the way we do
that, duplicate, I'll flatten this one, and
we'll put one over here. Duplicate again and put one
there. Go to hide those. Then I'm going to move
those up to the top here, snapping that into place. Duplicate this one and snap it down into the
corner of the canvas there. Change the background color. I'm going to put this
into repeat now. Once you have the idea for concentric circles, you
could ask yourself, What if I use this circle instead to make any of the
patterns we've made so far? So you could make concentric
circle flower patterns, which we kind of dived into a little bit
with this one here, like these quarter circles. What if we went into
here, hide this one? And we cut this off
there. What if you use that to make your
Bohai style patterns, what different looks
could you get with that? And you can also change some of these to the
background color. So if I change this orange
one to the background color, And then this one to
the background color, you can get even more
different effects by having some of the colors the same as
the background color. So they look like stripes
rather than a solid circle. Loads of different
ways you can take this concentric circles idea. As I said, swap
these out for any of the designs we've made and see what kind of effects
you come up with. I just wanted to
show you one more messy jumble of a
way you can use these concentric circles to make a really fun textured pattern in the last lesson for today.
27. Day 6 Concentric Circles A Tangle of Circles: So for this pattern,
we're sticking with the same beginning group that we made in the previous lesson. And I was thinking
this would look really cool in just two colors,
like I showed you, as well. So I'm going to change
the outside circle to the cream color. And then these other two, I will change to the same
color as the background. There we go, so that's going
to be our basic circle. I'm going to duplicate this and flatten it, and we
can hide that one. Black and white would
also look really striking for this pattern here, but I'm going to stick to
the colors from my palette. And then I'm basically
going to repeat this everywhere on the canvas and
see what we come up with. So I'm going to repeat it,
snapping it to the sides, top and bottom and the corners, and then also this
spot in the middle. So let's start by doing
it in a basic grid first. And as I make these, I'm going to change
up the layer order so that we get kind of like a
messy tangle and try and work it so that there's no one piece in
particular left on top so that everything is tucked underneath something else somewhere along the line. So as we move this
into corners there, this is kind of like our
first layer done. Whoops. So don't merge anything
because you want to be able to tuck layers in and out and
underneath each other. So let's go and take
this one up to the top. Duplicate and we'll
move this one in there, but put it somewhere. Actually, let's not take
this up to the top. Let's move this down to there, so it's tucked
underneath those two. We can duplicate this one
Put that one up there, and maybe let's put that right down underneath
the bottom one. Duplicate this again. Put this one into the corner, and that one can
stay where that is. And then one down
into this corner, and maybe we'll bring that up, see where that looks like there. Let's maybe even bring
that up a bit higher. And then you can just experiment with the layer order on these, kind of changing where
you put each one. Let's maybe move this
corner one. Down a bit. And then the trick to
not having any one piece on top is that where you've
got these edge pieces here, at the moment, these
are both on top. They're gonna match
up and you'll have one single
solid piece on top, so we need to take
one of these down, which would be either
of these two here. So let's tuck one of
those in between, which means that one's
now above something, so we need to tuck that
below something else. You down there. This is
trickier than it looks. Oh And then we just need these two
to sort out now. So you can spend a
while having some fun with the layer all
around this until you've got it in a way that you
think is going to work. And then the only way to find
out is to put it in repeat. So let's tidy these up
first by grouping them. I'm going to duplicate
and flatten, but you could do copy
all as well for this. And let's see how
this is looking and repeat. There we go. I think we just about
managed to not have any one piece on top and everything is tucked under
something else there. So, this one ends up like
a really messy jumble, but this actually could make a really interesting
background texture, either in really
subtle colors or a much smaller scale if you used it at the back
of another pattern. For example, you could use it at the back of a floral
design like this. And a question to
ask yourself now, if you haven't already is, what if I use the
liquefied tool on this? If you're using these
digital pattern papers as non repeating tiles, once you have them at a
scale you'd like them to be, you can take things even further and mess around with
the liquefied tool. If you've never used the
liquefied tool before, tap up here on your adjustments
and tap on the liquefy. You need to make
sure you don't have your alpha locked first, though. And you can use any
of these things here to just really play around with the layer like that to get even more of
a messed effect on there. So if you don't need it to be a repeating tile, this is fine. But if you want this to repeat, then I wouldn't use the
liquefied tool because it can mess up the edge pixels
unless you're careful. Yeah, you can play around
with any of these things. And if you want to put
it back how it was, you can just go to reset and magic that will
go back to normal. So that's just another
little direction you could take this off in if you wanted to do even more playing
around with this. So now we have the hang of concentric circles and repeating
them in different ways. One really cool way to repeat these concentric circles is
to make a scallop repeat. It's a trend that
you'll see everywhere because I don't ever
think it goes away. So tomorrow is a day you
definitely don't want to skip.
28. Day 7 Concentric Circles Basic Scallops: But Scallop patterns are
so much fun to make. And once you get the hang
of the way they work, you can make lots
of variations to come up with some really
interesting designs. We'll start with a simple
one, which builds on the concentric circles we
learned to make yesterday. This is a 3,600 pixel Canvas, and I'm going to
make my first circle 900 pixels with bicubic as
my interpllation method. And let's center
that on the canvas, and then I'm going to alpha lock this and duplicate
it three times. These alternating ones, I'm going to make
a different color. And let's hide them and
start with this one here. I'm going to make each one
smaller by 200 pixels. So let's make this 1700.
And then center that one. Make this 1500. And then this one, 300. Then we can group
these together, and that's our initial circle that we're going
to be working with. So let's duplicate that and flatten it and
then hide this one. The first row is easy. We just duplicate this
across the canvas. Always being careful
that you're snapping. I haven't mentioned
it for a while, but do check your
snapping every time. Then we can group
these together. And I'm not going to
flatten that group yet because we're going to need
this edge there to snap to. So if I duplicate this
group, select it. I'm going to turn
snapping off for now. When we move this down, we want it to repeat like that. And this point here needs
to be snapping to something a quarter of the way down
this back row of circles. But we don't have
anything that is a quarter of the way down
to be able to snap to. So we're going to make
ourselves some guides that we can use to make
this a bit easier. Just drag that one off there. Get rid of that, hide that, and we're going to
make some guides. So this circle is 900 pixels. A quarter of that is 225. It would be quite
fiddly to repeat loads of 225 squares down here. But because we can snap
to halfway points, I can make it 450 pixels, which is half of the circle. We don't have to have quite
so many lines going down. So let's add a layer, fill it with a dark color and tap transform nearest
neighbor for this, tap on the node here
check the ratio, and you want to make
this 450 pixels high. Then I'm going to
duplicate that, invert the colors so we can see which is which put snapping back on and snap to the
bottom of that one. I'll just make
sure that this one is snapped to the
top of the canvas. Yep. There we go. Then we can group these, then duplicate the group, and then just line these
up down the canvas. We'll be deleting these later. We're not going to
be stuck with these. Let's collapse all
of those. Group them together to make them easier
to turn on and off later. Let's bring this one to the top, and let's move it to the top. The thing I'm also
going to do now is to turn my Canvas guidelines on. So turn on your drawing
guide, edit drawing guide. Can make the grid
size 450 pixels. And I'm going to turn this up nice and thick so
you can see it. And this is going to help
us make sure we've got these in line when we move
them down the canvas. So let's open up
our group again, duplicate one of
these full circles, and we can now snap to the halfway point on
this blue box, see? And then we can bring
it and also snap it to the halfway point
between these two circles. So then we can repeat this
one across the canvas. Let's bring these to the bottom, so they are actually
at the bottom. And then one over here. So now we should be able
to duplicate this group, flatten it, and then repeat
this down the canvas. So I'm going to duplicate this and snap it to that line there. It's not actually the grid
lines I'm snapping it to. It's the squares behind it. Sorry, the rectangles behind it. But these just give
you a visual so that we can make sure that
these are all lining up. It would be nice if we
could make grid lines and then snap to them and
procreate, but we can't. There we go. So just
duplicate these down. It looks a mess at the moment with all
the grid lines on there, but once we turn these
off, it will look lovely. So make sure you are relying
on the boxes and not kind of trying to use the grid lines to snap to
because it won't snap to those. You need to make sure you are snapping to the box
and not doing it, so it just sort of looks like it's in the right place
based off the grid lines. So then when you have your
last own place in the bottom, we need to make sure it matches
up with what at the top. So if you are still using
the group for that one, like me, I forgot to duplicate
and flatten that one. Duplicate your group
and flatten that one. Turn the group off. Duplicate that one,
tap on the bottom one, and then you want to
bring that up like that. So the bottom of the group is snaps to the middle
of this row there. Then, hopefully, when we turn the guide off, it
will look right. Looking good so far.
The test is to put this into repeat and make sure that
it's all working properly. So let's group all these. Swipe down with three fingers, copy all, swipe down
again and paste. Turn everything else off and
see if this works in repeat. One thing I have
just realized is that I have nearest neighbor on, and I did use that when
I was doing the circles, so I'm expecting this to be a little rope when I zoom in because I use nearest
neighbor, but never mind. If you use BKubic, it
will look a lot better. But the point is,
there's no gap there, and they are lining up as well as any of the other
ones are lining up. So let's bench those together. So yeah, as always, if
you're doing this for best and for perfect,
use B Kubic. But if you are just playing
around and messing around, just like you would with paint, you wouldn't care
about painting inside the lines or not spilling
any paint anywhere. The point is to have fun and
just do it for the process. So, yeah, don't worry if you use the wrong interpolation
method somewhere along the line. It
happens to all of us. I've just done it, but it's
okay 'cause we're playing. You can come back another time
and do a proper version of it with the proper
interpolation method. So let's just check that these ones match up because
this is the tricky bit, the top and bottom same on this. So just can I make
sure that's okay? It's looking right. So that is this cute little scallop
pattern in repeat. And like I said,
with these things, once you've zoomed out
and you've got in repeat, you aren't going to notice that the circle curve
isn't perfect there anyway if you did want
to use this as it was as a smaller scale design
in a bigger pattern. So that's the basic
scallops done. Don't forget to do some
experimenting with this, try rotating it at 45 degrees, or even flipping it the other way and having some roof tiles. Next, we'll look at some
ways of changing up the way that you repeat
the individual scallops.
29. Day 7 Concentric Circles Not So Basic Scallops: These scallops are going to be slightly different in that we're going to overlap the outlines like we did with the trellis. So instead of there being
a gap at the bottom here, we have these outlines
meeting in the middle. So we're starting in a
3,600 pixel canvas here, and I'm using the same starting circles as for the last pattern. So that's a 900 pixel
circle here at the bottom, and then a 700 pixel
one at the top. So we've got 100
pixel outline here. I've grouped these together, so now I'm going to
duplicate the group, tap transform, and I've got bilinear as my
interpolation method here. I've got snapping and
magnetics on as always, and we're going
to snap this over here so that these
two outlines overlap. Then duplicate again and snap it over here so that
they're overlapping. Then we do that one more
time over to each side, and you'll notice the
halfway points of these circles don't
match up with the edge, so we're going to crop this
canvas down in a moment. So we've got one, two, three, four overlaps
of 100 pixels. So we've lost 400
pixels off the width. So we can go to Canvas, crop and resize settings, turn snapping on and take
400 pixels off this, which is going to make it
3,200 pixels tap done, and then we can center
the canvas again. So now this repeats
perfectly side to side. So let's collapse
all these groups. And as long as you
keep a copy of one, just in case you need to go back to that or hide that one, you can pinch all
of those together. So now we've got this one
row there that's flattened. I'm going to duplicate
this for a moment. Tap transform, and we want
it to repeat so that it comes halfway down
this set of circles. So this bit can
snap to the middle of the canvas. That's okay. But we need this node here,
or any of the nodes, really, like this one to snap to a halfway point between
these two lines. Like here. So we know that this is 100 pixel gap either
side of this circle, and we want it to snap halfway. So we've got 50 pixels in
from the edge of the circle. So 700 plus 50
plus 50 makes 800. So let's just get rid of that. Let's un alpha lock
there and fill the layer and make
a guideline that is 800 pixels wide
and 900 pixels high. Then let's center this
on the canvas there. So this is if I just invert
it so we can see it. So this is the same
height as our row, and it comes to
halfway between those. So we can use this for all of the snapping and getting
this in position now. So let's duplicate
this, tap transform, and let's snap this
one halfway down, and snap the middle of this to the edge
of that box there. And then we've got
that nice outline of the scallops there meeting together on the
top of this curve. And we can duplicate that
again, join this part up. And then we can pinch and
merge those together. Then you can
duplicate that again, bring this down there and snap it to the bottom
of the canvas there, and that's going to
line up properly. Duplicate again and
this bottom one, drag that up and snap that
to the middle of the canvas. I'm going to bring this to the top because
we're going to use this to snap the other
pieces in place now. So let's line this one up with the top of
the canvas there. Duplicate this bottom one, and the very bottom one, we're going to drag and snap it to the bottom
of this box there. And then if we zoom in,
you should see we've just got the tops of those
outlines coming down there. Let's nicen up this
to the bottom. And this top one here
will duplicate and just snap that to the
middle of this box there. Then we can hide the box and check if this
is tiling properly. Hopefully, we have no gaps. Let's change the back covering
color to something dark. Let's copy all, then swipe
down again and paste. And because we change
the size on this, is not going to be
1,800 for the width, it's going to be 1,600 for the width and 1,800
for the height. And then we can just
repeat this around the canvas as we're
used to doing. Let's hide all of these. Zoom in, and we've got
no suspicious gaps, and that's all looking
like it's lined up nicely. This is one of my favorite
types of scallop repeats. It's so pretty, and
this pattern paper would definitely be useful for clipping over fish or even mermaid shapes as part
of a bigger pattern. Next, we're going
to build on this, and I'm going to show you how
to make those really cool, tall scallops, which I bet you didn't think were even
possible and procreate.
30. Day 7 Concentric Circles Tall Scallops: So for this final scallop pan, we are starting in a
3,600 pixel canvas. We've got a 900 pixel circle, then a seven, then a
five, and then a three. So these are all 200
pixels smaller each time. They're grouped and
they're centered on the middle of the canvas. I'm going to
duplicate this group, hide this one as a backup copy, and then this one,
I'm going to crop at the bottom of the canvas
into a semicircle like that. Then I'm going to
bring it up and snap the bottom of it to
the middle of the canvas. So what we want is these
droopy little rainbow legs to carry on a perfect
straight line down there. So if we make a rectangle, 900 pixels wide and
maybe 900 pixels tall. So a square, actually, not a
rectangle to go under there, we're going to get those
extending down there perfectly. So let's add a layer and fill
it with this green color. Tap transform, we'll make
this 900 pixels square. So then if we center
that underneath, we're going to get
those legs just carrying on down
perfectly there. Then I'm going to add a layer and fill it with
the light color, tap transform, and
check the ratio. I'm going to make this
1700 pixels wide. I'm going to leave the
height as it is just because it saves having to line
up the top and bottom, and then we can
clip it, and it's one less thing to have to
worry about lining up, making sure you've got those
exactly in the right place. So then we can add
another layer, make this one green,
tap transform, and this one will
be 500 pixels wide. But Center that. Clip that one, and then finally a
light colored one. And this one's going
to be 300 pixels wide. And there we go. That
is our basic motif that we're going to be
using for this pattern. So let's group all of
this together now. So I've got all of
this in one group, and I'm going to duplicate that and repeat it across the canvas, and we're going to have
the legs overlapping here like we did in the
last scallop pattern. There we go. If you keep a copy
of the middle one, you can hide this one
and flatten those now. Now, because we've
got these overlapped, we need to crop the canvas. We've got one, two, three, four overlaps of 100 pixels, so we need to take
400 off the width. So let's crop this
down to 3,200. And re center that. And then we can use this to repeat up and
down the canvas. Now remember, in
the last pattern, we had to make a 800
pixel wide strip here to get this to center
to the middle of those. We're going to have to do that again with this one as well. So let's fill a layer, invert the color so we
can see what we're doing, and let's make this
800 pixels wide. I'm going to bring down
the opacity on that so we can see how
it's being used. So let's duplicate
this one and bring it to the bottom of the canvas and then snap it to the
edge of this one here. And then do that with this one and snap to
the edge of that one. Zoom in and make sure that's
all looking okay there. Then those can be
pinched together, and duplicate those,
grab the bottom one. And snap the bottom of that
to the middle of the canvas. And then we need to put
an extra o in here. So if we make a marker, I think it should be 450 pixels. It kind of needs to be half
of this distance here. So let's try and see if
I've guessed this right. So let's fill this layer and
make it 450 pixels tall. Let's reduce the
opacity on that. Then if we duplicate this, tap transform and
snap that down there, I think that should
be the right place. Let's find out when we
put this into repeat. Swipe down with three fingers, copy all, glance the
top here and paste. And then let's repeat
this around the canvas. We know it's repeating
side to side properly. And it looks like it's repeating top to
bottom perfectly, as well. Like all these look
the right height. So that is your tall
repeating scallop pattern. These kind of designs are really popular at the moment,
especially on Spoonflower. They look great as
retro wallpaper, so you could use that if you're doing a room illustration, you could use part of this to be wallpaper in the background. You could even have
a go at changing the size of these so
that you have maybe like seven circles stacked on
top of each other with a transparent bit in
the middle and have a go at making a rainbow pattern that would
look really cute. I would love to see
some rainbow versions of this in the project gallery. An experiment with
different heights for the legs of the
scallops, as well. And that is almost it
for this class now. I've got one more
bonus video for you, which I'm just going to do it as a time lapse rather than re
explain everything again, where we're going to take the
principle of adding legs to the end of a curve and extending it to make a
retro stripe pattern.
31. Bonus Retro Waves: [No Speech]
32. Final Thoughts + Next Steps: Welcome to the final lesson, as much as I hope you're now feeling energized
and ready to create. I want to circle
back to something I said right at the beginning
in the introduction. So if you only remember one single thing from
this whole class, it should be that our creative
flow comes in cycles, and that's important to rest and recharge before the
Bernie ever comes. We shouldn't constantly
be churning out work 365 days a year. We should set aside
time just to rest and expect to not create
anything for a short while. In my experience,
these dormant phases will happen whether
I plan them or not. They will either sneak up
on me as creative block, which then comes with
all that anxiety of, like, why can't I draw? Why can't I think
of anything? Am I ever going to be
able to draw again? Or I can anticipate them, and I can call it rest. Being kind to ourselves
and calling it rest can sometimes circumvent
that fear and anxiety that comes with
creative block and make it a little easier to get back into the flow when we're ready. The second biggest takeaway is that switching things
up with something new can help you get excited
about your art practice again if you're finding
it hard to get back into a routine after
some time off. In this case, we've used
geometric patterns as the twist, but it can be anything
new like art supplies, new procreate brushes, new Apple pencil
grip or iPad cover, or just some new color palettes. Sprinkling bit of novelty into your workflow is a great way to keep it fresh and exciting. And then last of all, we come to the actual patterns and
techniques we've learned. I hope you filled
have lots of ideas for using them in your
regular art practice. You could try combining these
patterns with some hand drawn textures to make some interesting
wallpaper designs. You could incorporate them into the backgrounds of
floral patterns, or you could add
illustrations to the shapes to create some
classic floral pattern layouts. The pattern papers themselves can be used in lots of ways, some of which I've mentioned
throughout the class, such as using them as texture
overlays in other patterns. You could use them as
graphics for your website or social media post or as clipping masks in
other illustrations. You could even use
them to make some pattern brushes and procreate. Don't forget to share your patterns in the
project gallery, as well as any other
ideas you have for ways to use these
digital pattern papers. If you have any questions, start up a conversation
in the discussions tab. I do my best to check in
there every other week or so, and I will always
get back to you. If you've enjoyed this class and you have a few
spare moments, I would love it if you could
leave me a quick review. I find the feedback really
helpful in motivating me to get on and get the next
class planned and filmed. If you want to see
more from me online, I have a YouTube channel where I share Pan tutorials every week. There's a mix of
geometric patterns like this and floor pants, so there's something
there for everyone. I share free assets to accompany tutorials over on my website in the Pattern Makers Toolkit. It's a bit like a patron
group, except it's all free. I send out one and
only one email per month with a freebie in there to help you on your
pattern making journey, as well as early access
links to some of my YouTube tutorials and full access to all the assets
in the resource library. Starting in 2025, the monthly email will also have a set of prompts each month for helping you plan and
illustrate in advance for the key shopping
dates in your print on demand stores
like Spoon flower. You can find all the links
on the resource sheet or on my website,
rebecaflahad.com. Don't forget to follow me
here on Skillshare to make sure that you're the
first to know whenever I publish a new class, and thank you to those of
you who do that already. Have fun, stay creative, and I will see you next time.
33. Blooper: This shape here is actually
called and I need to look up how to say it. Ob. OG. How was he? Who's she.
 Rebecca Flaherty, Surface Pattern Artist & Content Creator