Transcripts
1. Trailer: Building your patentiles
in Procreate can feel, well, a bit fiddly sometimes. You think everything's lined up, but then you zoom in and whoops, a little gap or
overlap sneaks in. What if you could build
out your entire patentile with one click perfectly
every single time? That's exactly what we're
gonna do in this class. I'm Rebecca Flaherty. I'm a
Surface pattern designer, YouTuber and creator of
the pattern Makers Tokit. I've taught thousands
of students just like you how to create seamless
patterns in Procreate, and now I'm excited to
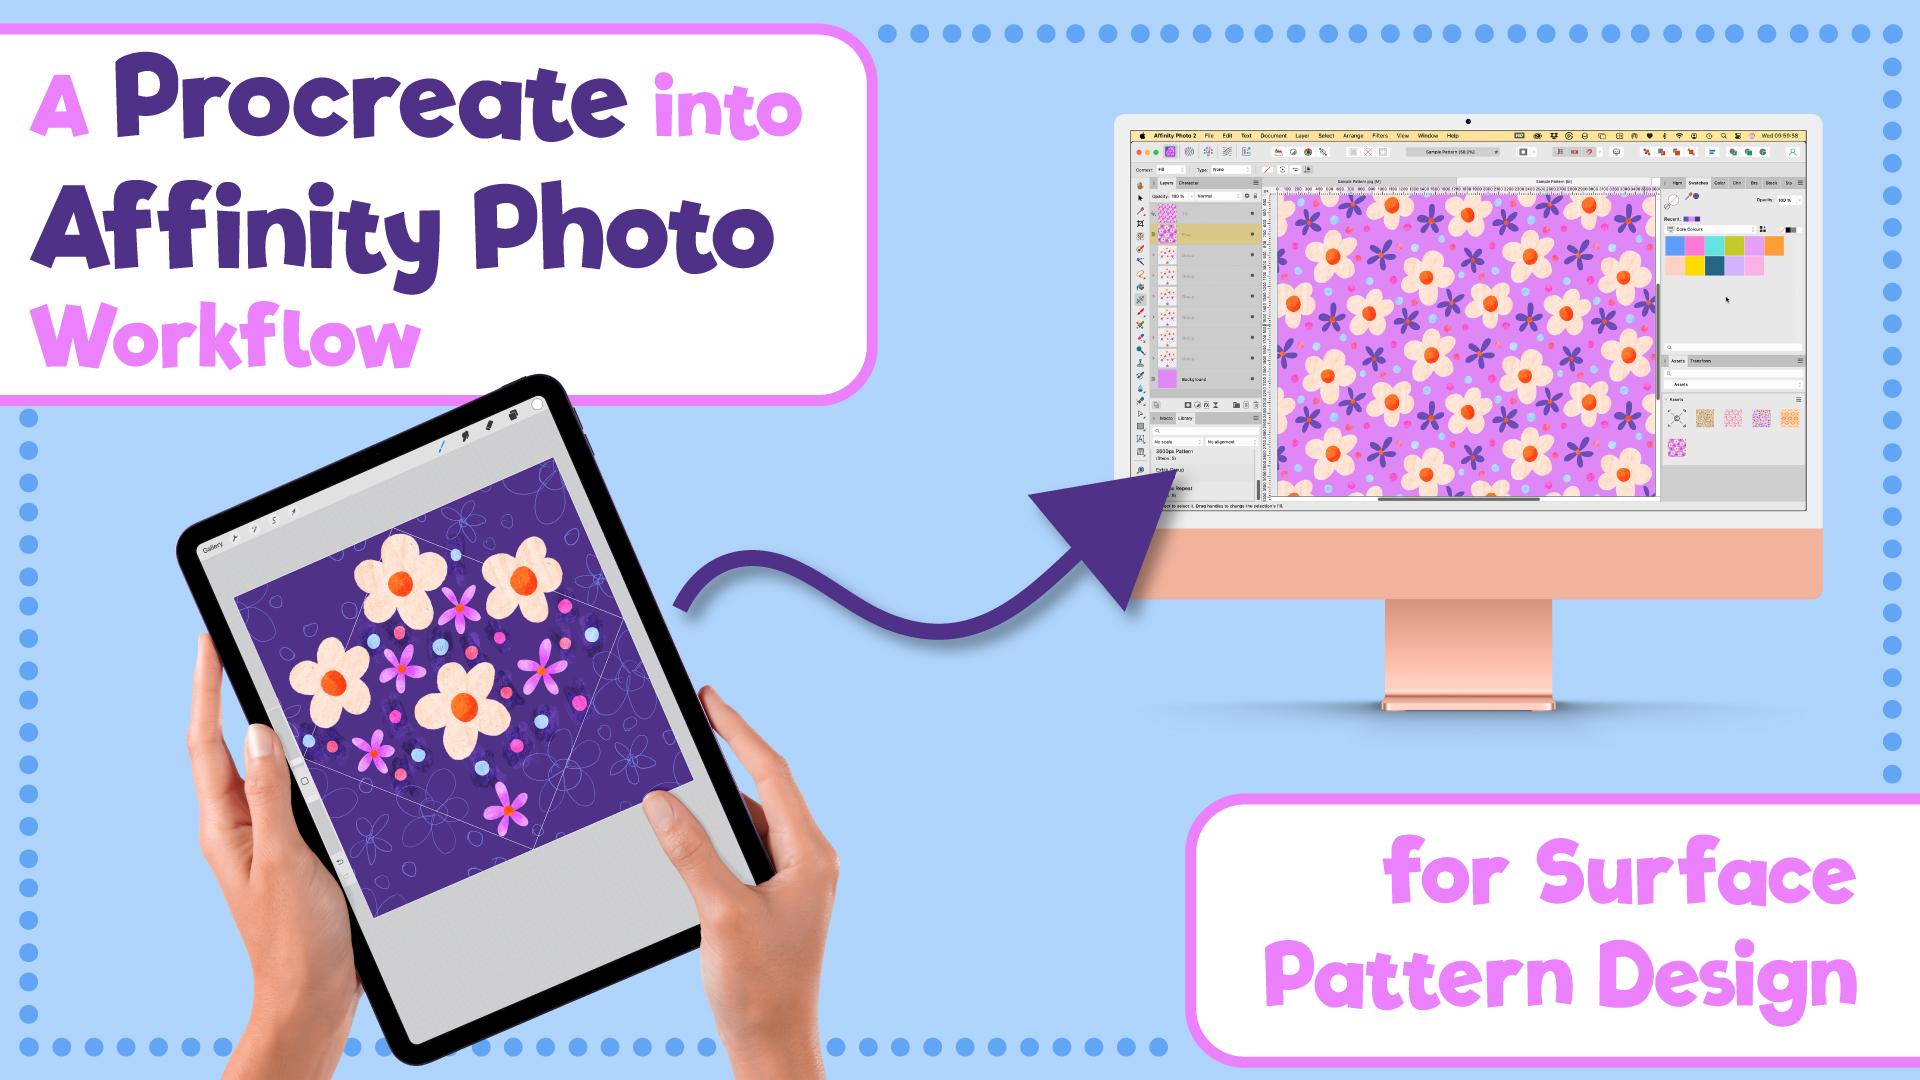
show you how to take those patterns into Affinity
Photo for a smoother, faster and more
professional workflow. Affinity Photo is amazing
because it lets us automate the parts of pattern making process that usually
trip people up, like building out
tiles accurately. No more second guessing,
no more snapping errors, and no more wasted time. Plus, it's a one time purchase, just like Procreate,
so no ongoing costs. Learning this workflow means
you'll save hours of work, keep all of your
Procreate layers intact, and open up tons of new
options for recoloring, exporting, and
applying your designs. This class is designed for Surface pattern designers
who already know how to make repeating
patterns in Procreate using the
diamond method. If you've taken my class on
Easy Half Drops in Procreate, this is the perfect next step. And don't worry. You don't need any prior experience
in Affinity Photo. I'm going to guide you through
every part of the process. We'll start by
bringing your finished Procreate patentile
into Affinity Photo. Then use automations to build out your repeat
with a single click. After that, we'll explore how to easily recolor your design, save it and export it
for different uses, and add it as a pattern fill so you can see your
artwork in action. I'm even providing you with two sample patterns to work
alongside Media in the class, so you can just focus on
learning the process. Once you try this workflow, you'll never want to go
back to snapping again. Ready to see how powerful One Click can be,
let's get started.
2. Overview & Class Project: Before we dive into the lessons, let's talk about
your class project. By the end of this
class, you'll have a fully put together
layered pattern that you started in Procreate, brought into Affinity Photo and built out with automations
that you've recorded. Ideally, this class should
be taken as a follow on from my Easy Peasy half drops
in Procreate class. So if you have the
project from that class, you can use that to carry
on with in this class. But if not, I've got a copy
of the pattern that I made in that class for you to pick up with. Because here's the thing. I really want this project
to be about learning the process without overthinking
the finished design. This is why I'm sharing these two half finished sample
patterns for you to use. I highly recommend
starting with those because it will let you
focus on the techniques, steps, and workflow without having to create a pattern
from scratch at the same time. Copying is actually one of the best ways to
learn, trust me. You don't have to stick
with the same colors that I've used in
those patterns. I'll be showing you how to
easily switch up the colors. So don't worry there won't be a project gallery full of patterns that all look the same. You can make it your own by adding your own
color palette to it. That said, if you are
already a pattern making pro and want to use your own design while following along,
then go for it. This project is flexible and the goal is for
you to practice the workflow from start to finish. Here's what
you're going to be doing. Creating or copying a pattern
in Procreate, your choice, getting the file ready
to export from Procreate and organizing your layers
for a smooth workflow. Importing it into
Affinity Photo to set up automations to build out
your seamless repeat tile. Adding your pattern
as an asset so you can use it to fill
layers and shapes and then uploading
your final project to the project gallery so everyone can see your amazing progress. I've included low res
class project templates, which are in an ideal size for sharing to the
Project Gallery. And if you want to use those,
I'll be showing you how to add layer fills and export as
we work through the class. Remember, it's not
about perfection. It's about learning the
steps, building your skills, and gaining confidence using Procreate and Affinity
in your new workflow. So grab your iPad and
let's get started.
3. Picking Up From The Previous Class: Thanks do. Bank. So we're going to pick up almost where we left off in the
previous class, Easy Peasy half drop repeats. You can download this file from the project
resources section, and it's a copy of the file
that I made in that class. In that class, we built
out the pattern by duplicating the file and
then flattening a copy. But in this class, we're
going to skip that step and export straight
into Affinity Photo to build it out
with an automation. So in this file here,
you can see that I haven't deleted the
sketch layers yet. A lot has changed in the art world since I made that class. Whatever your opinions
on AI art are, it is currently here,
whether we like it or not. And because of this, I now
never delete my sketch layers. I want to have proof that my
artwork is 100% human made, and these sketch layers
are my evidence of that. And this isn't just
me being paranoid. I've seen real world
examples of artists being challenged on the entries in things like
spoonflower challenges, which don't allow AI art. They were asked to show their
sketches or rough drafts to prove that they had
made the pattern themselves and hadn't used AI. So this is the first evolution of my workflow since
that original class. Keep your sketch layers
and don't delete them. Just group them together. And then name this group sketch. I and then you can just hide it. It can just sit
there at the bottom minding its own business, and it's there if you
ever want or need it. We're also going to group all of our working layers into another
group, so not that one. All of these remaining layers, we're going to group those, and we're going to rename
this one pattern. This is going to make
things easier for us later when we import
into Affinity Photo. So once you have
your sample file downloaded and you've
organized it like I have here, sketch layers hidden in
the sketch folder down here and your pattern layers all in a pattern
folder up there, we are ready to learn
some editable sketching and shading techniques
in the next lesson.
4. Edit-Proof Shading And Texture: Thanks do. And Okay, so if you've ever seen almost
any pattern I've ever made, you'll know exactly what
I'm talking about here. Texture is my middle name
when it comes to patterns. I love adding it wherever I can. Another of my big loves
is playing around with color and making up new
color ways for my patterns. So any shading or texture I add needs to be fully editable. I'm going to show you how
you can easily transform your flat patterns from this to this and still be able
to recolor without having to redo the shading and texture for every
single color change. All of the colors for this pattern are on
separate layers, and that's step one
when it comes to making editing
easy for yourself. New color, new layer. One of the things
I love most about digital art is
using blend modes. When you have artwork
on different layers, you can choose how they
affect the layers underneath. All of these layers here are just stacked up one
on top of the other, and they aren't having any
effect on what's underneath. The yellow here in these
small flower dots just sits on top of these orange ones here and doesn't have
any effect on it. This is called normal blending. If we click on the layer
here and click on this N, that N stands for normal. And then you've got other
blend modes down here. A quick scroll through all the different blend modes here
will show you that there are a whole range of
ways you can blend this yellow dot onto the
orange flower beneath it. The two that we're
going to use for adding shading, high light, and texture are color
burn and color dodge. Color burn is a blend
mode that makes the colors underneath
look richer and darker. Think of it like turning up the contrast and saturation
at the same time. So if I put a light
color on top, you'll notice it hardly
changes anything underneath. White actually does
nothing at all, but if I use a darker
color like this one, you can see it really
burns into the base layer, making it more intense. And if I go all
the way to black, the base layer turns
completely black. This is a great blend mode to use when you want to add depth, shading or texture without painting in new colors yourself. It's like giving your pattern a little extra drama
with just one layer. Color Dodge, on the other hand, is kind of like the
opposite of color burn. Instead of darkening, it
lightens what's underneath. The colors underneath
look brighter and lighter, almost
like they're glowing. If I put a light color on top, you can see it really brightens and lightens the base layer. White makes it go super bright, almost like a flash of light. But if I use a darker color
on top, not much happens. You'll barely see any change. This blend mode is perfect when you want to add highlights, shiny effects or to give your pattern a
little pop of light. It's like turning a spotlight in just the areas you choose. Color Burn and color dodge are like two sides
of the same coin. So you can think of
them as a little duo. Color Burn will give
you darker, richer, more saturated tones, and color dodge is lighter,
brighter and glowing. Together, they're great for
adding depth and highlights to your pants without
painting new colors by hand. I'll show you what I
mean. I'm going to add some shading over the top of
these yellow flower middles. I always use a 50%
gray for my shading, and by that I mean the
color you get by double tapping in this area
of the color wheel. If we go to value, you'll see that that gives us 50% on the bright this there, and saturation is zero. This gray works just right
as a shader or highlight over all colors when using
color burn and color dodge. If I was going to use anything other than naught
percent saturation, it would also affect the hue
of the color underneath. So that's why I use gray. I'm going to add a layer here
above these flower middles. I'm going to change the
blend mode to color burn. And using the artists crayon, I'm going to put some
darker touches on there. See how it's darkening
the yellow on those? Obviously, we just want to have that effect on this
layer of yellow, not the orange underneath. So what we need to do is tap on this layer and make
it a clipping mask. This gray and the blend
mode will now only be applied to the layer
directly underneath it. Let's tap back onto this yellow layer now and
add another layer above it. You'll see it will automatically
get clipped in between, and I'm going to
change the blend mode on this one to color dodge. And now if I draw on this layer, you'll see we can add some
lighter tones up there. It's pretty intense, isn't it? We can fix that
though by reducing the opacity on these two layers. So if I tap on here and I
can bring the opacity down, I normally find something 40-50% is a good opacity to use. So I'll bring this down to 40 and then this one
bring down to 40 as well. It's a thing you can
experiment with in your own patterns and
artwork depending on the look you want
to go for and what suits your own signature
style and aesthetic. So now we have the shading
set up here for this one. I'm going to show
you how easy it is to change the colors
in your pattern. So if we add another
layer above this, and maybe I want to choose
a lighter yellow for this, I can tap on here
and fill this layer. That's now made all of these dots on here,
the same color. And you can see the shading here is still a perfect match. You can also go to hue
adjustments up here. And change the colors there, and you can see that shading will match with whatever
color we use underneath. Let's finish off the rest of the shading on these
flower middles now. We can carry on
recoloring the rest of this pattern now and add
some shading as we go. I'm going to go to the next
layer, add a layer above, make it a clipping mask,
and then fill it with the colour I want to use
on these flower petals. I'm going to use a slightly
darker cream color. Then add the two color
burnt colour dodge layers over the top up again
and set the opacity to 40% and just scribble
over all the petals again with this artist cre and to add some subtle texture. I'll whizz through
adding the new colours and textures to the
other layers now. As you start adding these
color and texture layers in, your layers are quickly
going to fill up. To keep things organized, you should group each layer and its clipping mask together, and then name the group so you can navigate things a
little more easily. If you know that your iPad has a tight limit on the number of layers you can
use in Procreate, you might want to skip adding the recoloring layer until we take this file onto
the computer later. Also, on a personal level, you might feel that making
color choices feels like a post production job that you would do after
you've made the pattern, and you just might prefer to do that on the computer anyway. Quite often, I'll use placeholder colors whilst
working in Procreate, add my shading over the top, and not make any color choices until I have it open
on the computer. Other times, I'll
find I'm more in a couch doodles mode and want to finish the whole pattern
right here in Procreate. You have options here is
basically what I'm saying. With all of these dots here, I don't want to have to add separate shading layers for
each one of these colors. So what I'm going to do
here is just group all of them together, call it dots, and then just do one
color burn layer and one color dodge layer
for the whole group. You can't clip this to
a group in Procreate, but we can easily fix this
later in affinity photo. So for now, I'm just going
to leave all of this messy and unclipped for
dealing with later. That's all of the shading and recoloring I want to do
now for this button, and it is ready to export and open in affinity photo
in the next lesson.
5. Procreate Export & Affinity Import: So before we export this, let's do a quick
preflight check. You should have all
of your motifs and their shading layers grouped together and labeled like this, and then all of those grouped together in something
like pattern, then your sketch layers also grouped and hidden and
labeled up as sketch. It's definitely easier to do this in Procreate
than on the computer. I don't know why, but as
soon as I take this onto the computer and this goes to whether I'm using
Affinity Photo, soon as it's in there,
it all feels unfamiliar, and I've got no idea what is what if I haven't
labeled it up properly. So do yourself a solid and get into the habit of doing
this before you export. Then you can go up to Actions, tap on Share, and we want
to export as a PSD file. PSD is a layered
Photoshop file format, but you can also open
them in Affinity Photo. It's going to keep
all of your layers here and nothing
will get flattened. Then you can use
your normal method for sending this over
to your computer. If I'm going to open
it up right away, then I'll use AirDrop. But if I'm just sending
it over to open the next time I'm on my
computer doing edits, then I would save it to
either Dropbox or ICloud. If you're feeling
fancy and you've got handoff enabled on your devices, you can even drag it from your
iPad over onto your iMac. Once you've got the
file on your computer, you can right click on it and choose Open In Affinity Photo. Now, I know I always
say this in my classes, and that's because
I have to say it to myself when opening
new software, but don't let this new
software interface overwhelm you if you've
never seen it before. You don't need to know what
everything does right away, and you can ignore everything except the tools we'll be using. This is how your screen should look when opening it
for the first time. You have your document
here in the middle. Tools down here on the left, panels over here on the right, and we can also use this area here for panels to give
us more room to see them. And then you've got your
toolbar menus up at the top. So let's set things up to be a bit more pattern
designer friendly. You can click over here
and get rid of histogram, and we'll put swatches
up here instead. So we'll go up to
Window and find the swatches menu and
put that in there. We can also get rid of color because we
don't need that one. I'm going to drag the layers
panel over here to the left. So that we've got more room for seeing all our layers there. And then over here, I'm also
going to add a panel called macro and also library. These two are what
we're going to use to set up our automations. You can also get rid of
these others down here. I'm going to get
rid of channels. I'm going to get rid
of navigator history. I'm going to leave
Transform down here and I'm going to go up here and
add in the Assets panel. But I will drag that over here. There we go. So we've got
assets and transform there. So this is how your
setup should look, although you're totally free to customize it to suit
your needs, of course. If you already use
Affinity Photo, then you might have
another setup you use. Or if you're switching to Affinity from a
different software, you might want to set it up to mimic your previous layout. If you want to switch
between different setups, you can save this
layout as a preset. Come up to Window,
come down to studio, and select Add preset. So you could save this one
as Surface pattern design. Choose Okay, and then you
can click up here on Window, go to Studio, choose between
your different presets here. I've already got one, which I've labeled up as pattern design, but we'll just carry on
using this one for now. So in the next lesson, we will
get started and build out our patentle using an automation for perfect repeats every time.
6. Automation 1: Building Out The Tile: So you remember from the
first class that we put a diamond method
pattern into repeat by duplicating this middle section and repeating it into
each of the corners. In Procreate, we did
that by flattening, adding marks to the corners
here so that we could move the layer by half a canvas
width in each direction. In Affinity Photo, we can do that without flattening without adding marks and we can use maths to make sure
it's pixel perfect. Let me just very quickly
explain the maths. This canvas is 3,600
pixels square. When we snap it in Procreate
up into this corner, we have moved it halfway
across and halfway up. We've moved it 1,800
pixels horizontally in this direction and 1,800
pixels vertically up here. We use plus and
minus to describe whether we're moving it to the left or right or up or down. For horizontal directions,
left is minus, right is plus, and for
vertical directions, up is minus and down is plus. When we snap this up
into that corner there, we've moved it -1,800 horizontally
and -1,800 vertically. Don't worry at all
if these concepts take a while to
become muscle memory, especially if they don't
feel intuitive to you. For example, I read
left to right, so minus for left and plus
for right makes sense to me. But for someone who uses a writing system that reads
left to right, sorry, right to left, this
will feel backwards, just like up being negative somehow feels
backwards to me. And just to make you feel even better in case it wasn't clear, I am one of those people who has to put their
hands out in front of them to work out whether I mean left or right
every single time. It makes for some
interesting car journeys when I'm on MAP duty,
let me tell you. Anyway, the point is, I'm saying all of this because
these coordinates and directions can feel like the first stumbling
block coin switching from snapping on Procreate to
maths on desktop software. And I don't want you to
think that this has to sink in or even to make sense first time around or for you to feel like you failed if
you feel lost right now. You will only need to type in these numbers once to
set up the automation, and then you can just do it
with one click after that. So let's look at
how to do that now. So with the MO tool selected, and V is the shortcut for that, click on your pattern group, and we're going to press Enter. You'll then see we
get this little move and duplicate box pop up there. And there's spaces in
here for you to tell it how far to move the
group in each direction. And you can choose to
just move it or you can tick this and move
it and duplicate it, which is what we're
going to be doing. I'm going to be going
through this process twice in all once now to
show you how it works, and then again in a second, as we record it to
make an automation. So select duplicate,
and we're going to move it -1,800 horizontally. And minus 1800
vertically as well. Just press tab. And you'll see that's going to move
up there into the corner. We've got duplicate selected, so we can press Okay. There's a copy of it up there, and that first one is nice
snapped up into this corner. I will say here, don't worry about all these smudgy marks. We are going to
sort those later. We're just looking at the
movements of this for now. So we're still on this group. We haven't had to
select another group, so we're going to
press Enter again. And this time, we're
going to move it 1,800 pixels this
way. So that's plus. So we'll turn duplicate on, and we're going to
type in plus 1,800. And then vertically,
we're still going up, so it's still -1,800. Press tab, and then
you can press Enter. So that's the first
two in place. We've snapped, not snapped. We're just moving
it. We've moved one up there and one up here. We're still on this
bottom layer each time, so we can press Enter
again and duplicate. So we're going to move it
down into this corner now, so we're going to move it
1,800 pixels this way. So plus 1,800. Vertically, we're
moving it down, so we want to go plus as well. So plus 1,800. Got duplicate selected, so we can then just press Enter. We're still on this layer here. You'll see it's just going
to keep adding layers above, so we'll always be on this one, so we can press Enter again. And this time, we
want to move it back this way, so that's -1,800. And vertically, we're
going to move it down. So that's plus 1,800. Check, duplicate. And it, okay. So now, this has built out
our pattern tile for us. There's one extra step, which isn't going to
make sense for now, but it will make sense
later in the class. And I think it's
better just to do it this way to start with so that it doesn't come as a
forgotten extra step later. We're going to transform
it one more time. So hit enter. We're still
on this middle one. Press Enter again, and
we're going to move it -3,600 pixels horizontally. So it's going to
put another copy of it kind of over here. So we'll do minus 3600. So one full canvas width, and we want to duplicate it,
and then you can just press. Okay. In this
particular pattern, you won't see anything
on the canvas, but just know that it is
still here off to the edge, which is where we need it in the next type of pattern
we're going to work on later. So these are the steps that
will form our automation. If I just go and delete all of the ones we've
just duplicated, going to press shift and
delete all of those. So we're back with this
one in the middle. Open up my library,
and I've got this one here called Make
3,600 diamond repeat. If we click on our pattern
layer and we click on that you can see that builds that out
with just one click. So that's the automation
we're going to build next. All of those steps will
happen automatically, perfectly every single
time you bring a 3,600 pixel pattern you've
made like this in Procreate into Affinity Photo. No math to remember,
and it doesn't matter if you remember which
direction is plus or minus, which is a huge relief. So let's record that automation now and we can go through
those steps one more time. You click on to Macro here, which is what we're going
to use to record it. And I want to keep this
one in the middle, but everything else, I'm
going to select and delete. So we're going to go
to the macro panel and click on this
red circle there, and we're now recording. It's so silly, but as
soon as I press this, I automatically feel anxious
like I'm being watched. Say, I move that down there, and I didn't mean to do that. You can just stop recording. Click on this little visa arrow, and that's going to scrub everything that you've recorded. So don't worry if you mess
up. I'm going to press undo. So it's important that we're already on our pattern layer. If you're on a different layer, you need to press Stop. So we're on our pattern layer, and now we can press record. So the first thing we
do is press Enter. And the first step is -1,800 horizontally and
-1,800 vertically. We want to duplicate it, and then we can press Enter. Then we press Enter
again because it's left us on this
same bottom one. We're going to move it
plus 1,800 horizontally, -1,800 vertically, duplicate
it and press Enter. Then we can press Enter again. Horizontally, we're
going plus 1,800. Vertically plus 1,800. We're going to duplicate and
press Enter. Enter again. This one is -1,800. Vertically, it's plus 1,800. We want to duplicate it, and then we compress Enter. And then remember I said there's one extra step where we press Enter and we move
this one minus 3600. So one full canvas
width this way. We do want to duplicate it
and we just press Enter. And that is the
automation recorded, so we can press Stop now. And that's finished recording, and that has recorded all
of those steps for us. So all of your steps that
you've made are listed here. It should just have
five lots of duplicate. If you've messed
up at any point, remember you can
click on this arrow and go through that again. Otherwise, you can click on this icon here that looks
sort of like a graph, and if you hover over it,
it'll say at a library. So we're going to
click on that, and then you need to enter
a name for this. I've already got
several named 3,600 Pixel repeat for when I've been going through
this to test it. So I'll just call this 3600. Repeat one, just in case I've
already got one like that, and then you can click Okay. And then if you go
to your library, which should automatically
open after that, you'll be in the
default library, and you might have some other
bits and pieces in here. If you want to get rid of
any other automations, so this one I'll delete. You can right click on
it and delete Macro. This is the one I've just used. So what we can do
is test this now. So I'm going to click on all of these layers that we
duplicated, delete those. And then if we come down here
and it was this one here, 3600 repeat one, if
we click on that, that has then built
the Pat night for us. And just like magic,
your tile is built out. If you've been solely doing this in Procreate
and at the mercy of sometimes finicky snapping to build out your
finished tiles, this is an absolute
game changer. You can know with
complete certainty every time that your tile has been built out
perfectly and will repeat perfectly
all with one click. I'll show you a quick way
to test the repeat now. Come up to your top layer
here and we're going to press Shift Option Command E. And that's going to make a new layer at the top with everything flattened onto one. I'll pop up here in a second. It's not showing in the
preview at the moment, but that's got everything
flattened onto one. If I drag it around,
you can see, we've got that
whole layer there. What we're going to do
is use the move and duplicate to move it halfway this way and
halfway that way. And then we'll see
the edges meet in the middle and we can check
that it's repeating properly. So on this layer, we're
going to press Enter, and we're going to move it
-1,800 pixels, duplicate it. So let's move half over this way and then
press Enter again, and this one will
move plus 1,800. We don't need to
duplicate this one. We can just click
Okay. Just grab the view tool and then we
can zoom into the middle. And obviously, there's
a line here because we haven't sorted these things
out with clipping mask yet. But you can see that repeat is working properly
done the seam there. So I'll just delete
those and we'll test the top and
bottoms. Seems nice. So I'm going to press
Shift Option Command E again to make another
copy in there. Press Enter, and we'll move this one vertically plus 1,800. So that's going to move it
down. We'll duplicate it. And then press Enter again, and this one will move
vertically -1,800. We don't need to
duplicate that one and then grab that one, zoom in. Then you can see if you zoom in, sometimes you might see that
flicker of a line there, but as you zoom
in, it disappears, and that is just a
rendering thing. You can see there's
no gap in there. Apart from this line
here, but again, that's because we haven't got those things clipped into place. So we can delete those,
and that's how you can do a quick test just to see
that everything is lining up. And that is how easy it is to set up that
automation and use it. And in the next
lesson, we can use it to make some speedy color edits.
7. Easy Recolouring: So let's start by
deleting these copies. I'm going to want to keep
this one at the bottom, but everything above it, we can delete. So we're back with this. I'm going to open this
up, and I'm going to hide the two shading layers
for the dots for now, just to make things look a bit simpler while we're looking
at the color changing first. So we can open up this
pattern group here and play around with the colors and also fix our shading in a moment. If you've already set up color
fill layers in Procreate, what you can do is just drill down to the color fill layer, select the gradient tool with G. Pressing G will toggle
between these two over here. You'll get a paint bucket,
which is the bucket fill. And then if you press it
again, you'll get this icon, and that's the gradient fill. So with this layer selected, you can then choose
different colors to click and fill
that layer with. So you can pick
from your swatches. You can fine tune it by
double clicking up here. And if you haven't already added color fill
layers in Procreate, what you can do I'll get
rid of this layer here. So we're on this one here, the dots that are in
their original format. Click on this layer
and add a new layer above it by going
layer new fill layer. With this, what
you want to do is drag it down and over to the right so that
then that kind of gets clipped over this layer. That's how clipping
masks are done in Affinity Photo. I'll
just undo that again. So you've got your layer that you want to add the
color over. Select it. So it's this one here.
Layer, New fill layer, and then you drag it down, not so that it's hovering
over the thumbnail like that, you drag it down
and over that way. Then with your gradient tool, you can choose colors like that. So that's how you can
change the colors in your pattern. Let's
go on this one. And again, I've got the
Procreate fill layer on here, so I can change the
colors like this. But if that wasn't there,
I'll delete that one. And it's this blue one there. We go layer new fill layer. And drag it down onto
the layer like that, and then you can change the
color with these swatches. Let me show you quickly how to import and organize palettes. You can import palettes in either AF palette format
or Adobe's ASE format. If you've got some of
those you want to import, I'll show you how
to do that now. You click on this Hamburger menu there and go to Import palette. You've got three options here. You can have the palette be accessible just
in this document. You can have it be just this
app or the whole system. I always go for system because that then lets
me use it anywhere. This palette will
be accessible if I open it in Affinity
Designer, for example. So I'm going to import
it as a system palette and it's this one here
I'm going to bring in, so I'll click on that
and choose open, and then that's brought
all those colors in. So what I can do now is use that to change some
of the colors in this pattern. Click on that one. Make that one blue.
If you want to bring in a color
palette and it's not in either of those formats, then you're best off either
typing in the hex codes by clicking on this and you can type in
the hex code there, or you can take a screenshot and bring it in and
do color swatching. So you'd use the eyedrop at all. You just go to File Place. Just quickly find a JPEG
that I can bring in. Bring it up to the top, so it's not like clipped
in between stuff. And then you could grab
the eye drop at all with I select a color here. And then if you press on that, it's going to add this current
color to your palette. So that's how you would save stuff to a new palette
if you don't have a palette in AF
Photo or ASE format. Right click on these and delete those because I don't
want these in this one. And we'll get rid of this one. To toggle between your palettes, you just click on this
and any palettes you've brought in will be in that
little section there. What I'm going to do
now is rename all of these color fill
layers, Color fill one. I would go through and do
that for all of these. Then what you can
do is duplicate these layers with Command J, and then you can choose new colourways for your
background and it's an easy way of toggling between two different
colourways. And then you can
name this one color fill two and pick a new
color for each one. So Command J to duplicate, and then pick new colors
for your pattern that way. And it's an easy way of toggling between your two colourways. Going to hide, get
rid of these cars. I don't actually want
a second colorway. But when I'm making a
pattern with two colourways, that's how I kind of
organize the file. I just stack the different
color options on and label them Color fill one or Color way one
and color way two. And then when I want to
toggle between them, I can just do that
by turning them on and off and also as
a background too. So now what we're going
to do is see about these dots here and
the shading on those. I'm going to close
the group that has the dots in them like that, and with my move tool, I'm going to command
click on the dots group. Then I'm going to select either of these
two shading layers above and choose this
mask layer here. And you'll see
straightaway that has clipped it down over those. It's not really clipped it down. It's just use that
selection to mask it. Can then select the other one, press that again, and now we press Command
D, you can zoom in. All of that shading is clicked over the area in that group, and that's a lot
easier than having to do separate shading
layers for each of those dots when you want a different layer for
each color of dots. I press Command zero. Let's put this into
repeat now that we've got the shading on
the dots sorted out. I'm going to clap down my
pattern group. Click on that. I'm going to click
on my 3,600 repeat. Now that has built that pattern
out and as you can see, all of these dots are fixed now. This process of editing and then rebuilding the
pattern is kind of similar to how I
use smart objects in Photoshop for editing
patterns like this. Affinity Photo doesn't have
a smart object function yet, but I was determined to
come up with a workaround, and I'm pretty happy with it. And actually, I've now switched to using Affinity for building a Mo patterns instead of Photoshop because I actually
prefer doing it this way. In the next lesson,
I'll go through a few options for saving
and exporting your files.
8. Saving & Exporting: At the moment, this
file is still in the PSD format we
exported from Procreate. If we hit Save now, so Command S. It's going to ask us to save it in an
AF Photo format, which is the format that
Affinity Photo uses. Let's save the AF
Photo version first. I'll make a new folder for this. I'll give it a proper name and an SKU number so I can easily
find it on my archive. I'm just going to
use my initials. The last two digits of
the year I made it, and then the last number is just a running tally of how many patterns I've
made this year. So in January, the
first pattern I make will be RF 25 oh oh one, the next one, RF 25
oh oh two, et cetera. It really can be just
as simple as that. Now, you do have the option of exporting this as a
PSD as well if you want the flexibility
of being able to open it in Procreate
again or Photoshop. To save a PSD version, you have to export
rather than save. There's a massive
caveat here, though, when it comes to opening
this in Procreate again. There are now six
times the number of layers in this file. In reality, you
might not be able to open this file in
Procreate after all. Also, as soon as you
open it in Procreate, you would automatically
lose all of the pixels that are
outside the Canvas area. Although you can't see them
in Affinity Photo the way we have the canvas set up at the moment, they
are still there. Photoshop and Affinity both
include an off Canvas area, but in Procreate, they are immediately gone as soon
as you open the file. With this in mind,
I don't recommend also exporting as a PSD if it's solely because
you might want to add some more illustration elements in Procreate at a later date. If you want to do that
and you don't still have the original file in
your Procreate gallery, your best option is to export a JPEG version of
this Canvas here, showing the parts
you want to edit and the elements of the
pattern around them, and then open that
JPEG in Procreate, add your extra motifs
in layers above it, and then export
that back as a PSD, open it in Affinity Photo, and then you could
copy those new layers into this document again. If you wanted to
export it as a PSD because you want to be able
to also open it in Photoshop, the way you would do that
is Shift Option Command S, and that's the Export screen. Up here, you can choose PSD
and then choose Export. Then you could put that one
in there as a PSD as well. Back to exporting
this document now, you can export a
finished patentile like we have on view here as either a JPEG or a PNG the same way as we
did with the PSD file. You press Shift Option
Command S for export. Choose your format up here. I always use PNG just because
it's a loss list format, and then you can
click on Export, and I would keep the same
file name as I've got for my AF Photo file and
then just click Save. With the different colourways, if you've set up two different colourways within this file, you could either just keep
this one set of groups here and turn the color
layers on and off each time. Use your automation and
next bout your tile, or you could save a separate
file for each colorway, or include them all in the same file and have
two sets of groups. I personally just
keep one master file, and I'm happy to have all
of the color layers in here labeled up and just toggle between each
one as I need it. Now that you're familiar
with the process of setting up editable color and
texture layers in Procreate, sending a pattern over to Affinity Photo, building it out, editing and exporting, we're going to go back
into Procreate and learn an advanced technique for drawing into these
spaces here in the corners of your
diamond and filling in gaps that you might have in
your pattern in those areas.
9. Drawing Into A Corner: You might already
be familiar with how I draw off the
edges on a pattern, but if not, I'm going to
walk you through it now. So I got this pattern here, and all these motifs here
are nicely spaced out. But when I build out a little pattern preview and Procreate, you can see there's
kind of a hole there, and it's this area here, which falls right on the
corners of the diamonds. I don't really want
to make a chopped in half motif to go there. So there's a way we can
offset our sketch layers. And I delete this, we can
bring these edges into the middle and be able to draw a full not chopped in
half motif in there. Then when we bring it
into Affinity later, we can put it in place
there on the edge, and it will be able
to continue off the edges of the canvas with nothing getting chopped in half. So let's delete
these for a moment. And in our sketch layer, and you can use sample file two from the resource
section for this. You can duplicate this
bottom layer here. I'm going to turn off
the pattern layers. So I'm on this one, and we want to duplicate this one here, the pink one. Tap transform. Make sure you've got
snapping and magnetics on and snap half of
it over to this edge. I'll see those
orange lines there. Then tap on the other one and snap the other half
over to this edge. Then you can pinch
those together. I'll do the same
with this top one. So we're going to duplicate it, snap half over there. And snap the other
half over there. Then we can pinch
those together. So it's this area here, which is missing an extra motif. I'm going to add a layer
above this pink one. Just grab drawing brush. And a similar sort of
pink to work in here. And you can obviously draw
motifs, however you want. You can draw
something free hand. You can use stamp brushes.
What I'm going to do because these are
all essentially made up on the same one. I'm just going to go on
the layer underneath. Grab the selectal, draw
around this one here, tap transform, swipe
down with three fingers, duplicate and I'm just
going to put a copy of this one in here because all of my motifs are the same. If you were drawing
different kind of flowers, then you could just draw
your extra motif in here, and then once it's drawn, merge it in with the
other pink items. Then we can get rid of, I don't know where
that layer came from, but we can get rid of that. And this one we can
get rid of now, too, because this layer
is not complete, it doesn't match
the one underneath. So we delete that
and duplicate this. In case you can't see it, I do have that diamond on there. It's just a little thin
and not so easy to see. So this one, we're
going to tap transform, put snapping and
magnetics back on, and carefully snap it back
over to this edge there. And then the other one
snap back over there, pinch those together, and then we'll use this to build
out the new offset. So duplicate, tap transform, and we're going to snap it into each of these corners
just like we're used to doing with our Easy Peasy
half drops in Procreate. And then pinch those
top four together, and we'll invert the colors on the top one so we can see
which ones are which. And now we've done
the offset again, you can see this extra one here is now in each of these corners. Cutting things in half in
the sketch layer is fine, but we don't want to do
that with final motifs. So now, I'll turn on these
hidden pattern layers, and you can see I'm
at the stage where I've got these middle
motifs traced over, and it's literally just this
last one that I need to do. So this is how we draw those come up to the top of
your pattern group. Swipe down with three
fingers and copy all. Then I'm going to swipe
down again and paste. What that's done, that's put a flattened get rid of this a flattened copy
of everything in there. I'm going to duplicate this, and I'm going to bring
these edges into the middle just like we
did with the sketch layer. So duplicate, tap transform, and we'll bring one
edge over there, make sure that snaps
into place there. And then this one underneath. Snap that one over
there as well. Can zoom in and see that
that's all in the right place. And then I can pinch
these two together, add a layer above,
and then I can just draw my extra motif
in place now. And I think for this,
I was just using the Procreate drawing brush. Dry ink brush I was using. So I was just using a mix
of very similar colors. I think I'll just grab one of these colors from
those to do this one. And you can do this
on yours as well. Okay and I'll just
grab that color there, add a layer underneath, and then just trace
over these petals. This one's meant to be
quite a messy pattern, so don't worry about keeping in the lines too
much or if you've got gaps where you haven't
quite colored everything in. There we go. So that's that
extra motif drawn in now. Now what we're going
to do is group these three layers together or any other layers that
were required to draw this motif If you
had several layers, you'd group all of
those together, and we're going to group
these and call this one extra And then you should
have three folders here, extra pattern and sketch. And then I have these
all grouped together in one big folder called layers. And that's going to be important later when we come to
build out the pattern with some extra automations that
they're grouped up like this. So you want to have sketch, pattern, extra and layers. And to get this ready for
exporting over to Procreate, I'm going to turn off
the sketch folder. In this extra group,
you can either turn off that inserted image
or you can delete it. I'm going to delete it because
it would be easy enough to turn this off and copy
that again if I needed to. So although this looks
messy right now, this is how we're going to
send it over to Procreate. I've got my extra
group on show at the top with the inserted
bit hidden or deleted. Then pattern in the middle and then sketch
underneath hidden. I'm going to tap on my
actions. I'm going to share. I'm going to show as PSD and
I'm going to send it over to my computer and then we'll put this together
in the next lesson.
10. Automation 2: The Extra Group: So I've got this file opened
in Affinity Photo now. First of all, I'm
going to sort out this extra group and put the motif where
it's meant to be. Back in Procreate, when we snap the edges into the middle, we were moving it
halfway across, which is 1,800 pixels. So now in affinity, we're
going to do the opposite. So I'm going to
open up the layers, and I'm going to select
the extra group. And this has that pasted in layer either
hidden or deleted. So we're just selecting
the extra group. So I'm going to hit Enter, and I'm going to move it
1,800 pixels horizontally. And that's going to be plus. I don't want to
duplicate this one. We don't want to be left
with a copy in the middle. We just want to
move it over here. So I'm going to now press Enter. Tnw you can see this has
shifted over to the edge, and it's going off the edge of the canvas where it's meant
to be in the pattern. But because we are
in affinity photo now and not procreate, it's still there and it hasn't
been cut off or deleted. If I drag this
back in like that, you can see it's still there. Just going to undo that so it goes back in the right place. So let's undo that now. I'm going to press undo
and let's build out an automation to move
that in one step. So make sure that you have
your extra group selected. Then go to your macro panel and we're going to press record. So now we're recording this. So we're just going
to repeat what we did just a moment ago. We're going to press Enter, and we're going to put
plus 1,800 in there. We don't want to duplicate it, so then we can just click Okay. And that's all we need
for this automation. So we can press Stop. Click on this here to
add it to our library, and I will call this
one extra Transform. Here we go. And then you can see that down the bottom there. So let's undo moving that over. We're on the extra
group already, and we'll click on
Extra Transform. Just grab my move tool,
so it works properly. And go, that's over in
the right place now. And now what we can do is
click on layers group here, and we could run
the 3,600 repeat. Now, I'm not sure which one of these was the one I made
in the last lesson. We'll just go for this one here. So you click that, and that then puts
everything in place. And because of that
last step that we put in the 3,600 repeat, where we moved 3,600
pixels this way, and that's this one here, you can now see some of that one, and it's because this
part goes off the edge, so we need to repeat
it over here. What I'm going to do is, let's zoom out so we can actually
see how this looks. I expand the canvas. I'm going to use the
Canvas tool here and I'm just going to
drag this out like that. Press Enter, and then
you can actually see what we've got here. This in the middle
is our background, and then we've got
all the different layers around the edges there. You can see this is the extra one that without the bit
going over the edge, you can't see that there
once the canvas is cropped, but now we've put this
extra group in place there. That's the reason we needed to have this extra one over there. Although it wasn't visible on
the first pattern we made, I felt like it was better
to just put that in the automation and then knowing that it would make
sense later on in the class. As long as you have your
build pattern automation, always set up to include
a copy over here, and you always move your extra group the
same way I showed you, which is where you move
at 1,800 pixels this way, this automation will always work and it will always build
out your pattern perfectly. So there you go. Now you know how to sketch
out and design a pattern in Procreate from the class on easy
peasy half drops. You also now know how to draw off the
corners and then bring the finish pattern
into affinity photo and build it out
with an automation. In the next lesson,
I'm going to show you why you would want
to bring your pattern into affinity photo in
the first place and the advantages you have
over just using Procreate.
11. Creating Pattern Fills: So why would you want to bring your patterns
into a finity photo? What can you do in there that
you can't do in Procreate? And the answer is lots of
useful things, actually. Apart from building out
patterns that work every single time and don't rely on
sometimes finicky snapping, you also have the
ability to load your patterns as
fills and then apply them to all sorts of
templates and play around with the scale your
patterns are displayed at. For example, I've got this
excel sheet template here, and I can click and apply
my pattern fills like this. And I can play around
with the scale in a way that wouldn't really
be possible in Procreate. When you change the scale
of something in Procreate, you lose image quality. But here we can make this scale bigger and smaller as
many times as we like. I can also use it in
this template here, which is for a Duve
cover that I sell on Threadliss which is a
print-on-demand platform. Patent tile for this pattern
is only 3,600 pixel square, which is 12 " at 300 DPI. That's not big enough to use on a Duve cover unless we're talking about
a barbie sized one, but this template is
king sized Duve size. And although you
could certainly make a canvas this big in Procreate, you would have to
keep pasting and lining up copies of
your tile on it, which just isn't really
a feasible option. But we can send our patentile
over to Affinity Photo, add it as a swatch down here, and then click and fill with our pattern and then resize it to the scale
that we'd like it at. I have a Skillshare class
dedicated to this very topic, and that's the next class
you should take after this one to carry on your
pattern making journey. However, I'm going
to show you how to add a pattern as an asset and apply it as a fill in this class before we move
on to the next lesson. Let's go back and open
our patent tile file. You should have your
Assets panel down here from where we added it in the setup
at the beginning. But if you don't, you can go
to Window and choose assets there and add it to whichever
screen you want in. Mine's just down
here. I've already got a category in here from
where I use this normally. So I'll just delete
this category, and we'll start from
fresh like yours. Well, hopefully, look like this. So to add a pattern, first of all going to add
a new category. So let's click up here on the Hamburger menu and
choose Create New category. And I'll just call
this one Patterns. Then we can add our pattern
here to this group of assets. Then you'll see there's
another Hamburger menu there. Click on this one and
choose Add from selection. And by selection, it means the current
active layer or group. So if we click on that, it's going to only add this group that we've
got selected there. You can see down there,
it's transparent. There's none of that
purple background. So what we need to do is flatten all of this
into one layer. Now don't panic. We're not going to flatten finish patterns. We can make a new layer
from what's on show. So we're going to press
Shift Option command, and E. And that's
going to create a new pixel layer on top with everything that
we've got on show. Then with this layer selected, you can click on
this, choose Add from selection, and there we go. We've got our pattern
tile in there now. So just to recap, in order to add a pattern here
to the Assets panel, you need to have it
all on one layer. You need to create
a new layer from visible by pressing Shift, option, command, and E,
and then add it from that. Once you've added a pattern in, if you want to get rid
of it, you can right click and delete it that way. If you've got lots of
patterns here that you want to delete like
I did a moment ago, you can do what I did and just
delete the whole category. Otherwise, you'll have
to click on each one. So you can go up
here and click on Delete and delete
the whole category, and then you could just start a new category like
I did a moment ago. So now that we've got
our pattern in here, we can use it to fill
layers or shapes. Let's fill a layer first. So we're going to click up here at the top where it says layer, and we're going to
choose new fill layer. And then with your gradient
fill tool selected, so G, that's going to toggle between these
two icons here. You've got G, which is
the flood fill tool, and then you've also got G,
which is the gradient tool. The two icons look like this. The flood fill tool is like
a little paint bucket, and the one we want is the gradient fill tool,
and that looks like that. So I'm on this empty fill layer. I've got my gradient
fill tool selected, and I'm going to click
on my pattern here. Annoyingly, it always fills with the super tiny scale first, but you just click
anywhere on the pattern, and I'm clicking and
holding and dragging, and then you can just
drag your pattern out. Hit shift, and
it's going to make it snap to straight
lines for you. So you can just drag it out to any sort of size to start
with and then let it go. So the middle handle here is used for moving
your pattern around. And then these two can be
used for direction and scale. So you can play around with either of those to change
the angle and the scale. And from anywhere on here, you can always press
Shift and get it to snap back to
right angles again. So to straighten things
up, let's drag this into the middle first until it snaps like that into the middle. If you don't have snapping on, you can go up to
view and click on Snapping and then make sure you have enabled snapping
toggled up there. First thing we're
going to do is drag this out, and it should. If we hold down shift, it
will go in a straight line, and then it will also snap to the edges of
the canvas there. And then what you
should find is this is an exact copy of
your pattern tile. It's centered on the canvas, and we've dragged
out the repeat to go from the middle to the edge. So if I hide this fill layer, you won't actually see anything happen because it's
a perfect copy. So what we can do to test the pattern is make sure
this layer is showing, and then just drag
this down slightly, and then I'm going to zoom in. And where it's just
brought the edges down and in a little bit, you can just check
along here that all of your motifs are lining up and you've got nothing
cut off at the edge. And that's a really quick
way of testing your pattern. So that's how to
fill a whole layer. If you want to just fill a
shape, we can do that, too. Let's change this fill layer to just a solid color fill so we can see something over
the top of it now. So if I click on a color, that's going to fill
it with a solid color. Let's just find the
shape tool down here, and I want to use
a rectangle tool. So I'm just going
to click and drag a rectangle and then press G to get the
gradient fill tool, and then we can fill this
with our pattern as well. And then you can adjust the
scale on that and the angle. While we're making shapes, let's make a diamond that we can use in our diamond repeats. Let's delete this layer, go back to our shapes, and I'm going to choose
the diamond tool. So I'm going to press Shift and drag out a diamond like that. So down here in
our transform box, you can set the width
and height to be 3,600. And then we can center
that on the canvas. I'm going to click
up here. And then center that on the canvas. Up here, I'm going to
change the fill to no fill. So I'll just click on this
here to make it transparent. Go to click on the stroke.
We'll leave that as black. Click on here, and
I'm going to change the width to let's
make it eight points, so it's nice and easy to see, and you want to make sure
it's line stroke to center. Then when we zoom in here, if I pan to the edges, you can see we now
have a rather handy 3,600 pixel square
perfect diamond. What I suggest you do is hide
all of your other layers. I'm going to select
this one all the way down to the bottom and then click here to turn
all of those off. Click back onto that one now. What you can do now is
export this as a PNG. So I'm going to press
Shift Option Command S. We've already got
PNG selected up here, and I'm just going
to export this. All this diamond layer. Save this somewhere that you can download it from your iPad, and then you can just
import that layer in Procreate when you want
to start a new pattern. The possibilities for using your Procreate
patterns like this in Affinity Photo are endless. You can apply them to mockups,
social media templates, interest marketing templates,
print-on-demand templates, sale sheets, and so much more. And as I said, there
is a follow on class which will show you how
to do all of these things. I hope you're excited
to get your patterns off your iPad and
into some templates. In the next lesson,
I'm going to show you one more automation for combining all that
we've learnt so far into one single
combined process.
12. Automation 3: One Click Process: I'm going to show
you how to combine the two automations that
we've learned into one. We'll be able to use
one click to put the extra group in place and then also build out the tile. This automation is only a
little bit more complicated, and the only tricky
bit is that it will rely on you
remembering to do that last bit of housekeeping with your file before you
export from Procreate. So the things to remember are when you export
from Procreate, you need to have one
top folder here called layers or something
similar to that that has all of your
subgroups in it. Then you'll have the extra
group as the next group down, and that needs to be
on show and have that pasted in layer either
hidden or deleted. Then underneath that, you'll
have your pattern group, and then underneath
that, you'll have your sketch group
already hidden. You need to remember to always export it from
Procreate like this. Once it's in Affinity Photo, we're going to open
this layers group, and we're going to click
on the extra group. This will be the point
you will be able to run your automation from. So you'd open Affinity, select this extra layer, and then run your automation. This is where we need to
be when we press record. Start your macro recording now. Go to your Macro tab
and press record, what we're going to do
is go to a library and we're going to run
the extra transform. So we can use macros
within macros. So the next thing we're going to do is click on the layers, and it's going to pop up with
a little question for us. It's going to ask
us, which layer do you want me to select every
time you click on this? And the only option that
is available to us, which luckily is
the one we want. We want it to select
the parent layer. And what that means is this group that has these
three subgroups in it, these are child groups, and this one is the parent. So that's why I
wanted you to group it up this way so
that we can select the extra layer to
do the first bit and then select the parent
layer to do the next bit. So select. And now
what we're going to do is run the 3,600
repeat automation. If we go back to
the macro, you'll see the steps we've got so far. We've got the extra transform, set the current
selection and run the 3,600 pix up repeat. What I would like
you to do next, you don't have to do this step, but it's going to just save you doing one
little extra task. Click on your very top layer. If you're using a Canvas that has textures
maybe on the top, you could click on
those textures, whatever the top group
or top layer is, click up there and you want to select one
layer from the top. This is always going
to be clicking on the topmost layer.
Then click Select. And what I'm going
to do now is press Shift Option Command E, which is going to do
that one last shortcut which flattens that
into one layer, which we can then add
to our Assets panel. So the steps we've got in this process are we do
the extra transform. We set the current selection
to choose the layer group. Then we run the 3,600
pix all repeat. Then we select the top layer, and then we choose merge visible to create
a flattened layer. So we can press
stop on that now, save it to our library, and we'll call it one click. Pattern build or something
like that. Click on Okay. And what I'm going to
do now is delete all of these apart from the
one we were working on, and we'll test if this works. So we import from
Oh, no, actually, I need to undo all of those because I need this back in
the middle. There we go. So this is how it
would look when we bring it in from
Procreate. We open this. We click on our Extra group, and then we run this
one click pattern build We've got this
layer up here selected. We can now just go
straight to our assets, click on that and choose
Add from selection. And you can literally
export from Procreate and then
just seconds later, have it in here
and have a pattern fill ready to apply to
all your templates. So now you know how to bring
your patterns over from Procreate and truly build
them out with just one click. No finicky snapping, and the maths only has
to be done once. And as long as you're using
3,600 pixel pattern squares, this is going to work
every single time for you. If you're regularly using
other Canvas sizes, then you can also build out custom automations for
those different sizes, too. In the next lesson, we'll
wrap things up and look at what your next steps after
taking this class might be, and stay tuned after that
for an extra bonus lesson where I'm going to
show you how to make a pixel perfect
diamond in Procreate.
13. Next Steps: Thanks. Congratulations. You've made
it to the end of the class. Let's take a quick moment to
recap what we've covered. You've learned how to take
a fully editable pattern from Procreate using
the diamond method, import it into Affinity Photo, build out your tile,
using automations, recolor your design, export
it in the right formats, and even save it as
a reusable asset. That is a whole professional workflow from start to finish. And these skills are so
useful because they give you a complete system for creating patterns
that are flexible, editable, and totally
ready to use on print-on-demand product
or in your portfolio. No more fiddly snapping and no more flattening layers
and no loss of quality. Just clean professional
patterns that you can use again and again.
So what's next? If you want to keep on building on what you've
learned here today, I've created a follow
on class where we take these finished patterns and turn them into print-on-demand
Templates. That's where you'll
see how to get your designs onto
products like tote bags, notebooks, or even shoes
ready to sell online. And if you'd like to
see more from me, I share new patent tutorials every single week on YouTube. So come join me
over there if you want even more ideas
and inspiration. You can also check out the
Pattern Makers' toolkit, which is full of free resources to help you on your
pattern making journey. Thank you so much for
joining me in this class. I can't wait to see your
projects in the galleries. Don't forget to upload them, and we can all cheer
each other on. And if you've got any questions, let me know in the
discussions tab. Have fun. Say creative, and I
will see you soon.
14. Bonus: Pixel Perfect Diamonds in Procreate!: Okay, so, before I go, we are going to make drumroll, please, a pixel perfect
diamond outline in Procreate. Hey, if you've taken any of my classes on the
diamond method, you already know that
every pattern begins with this magical little transparent diamond in the sketch layers. It's like the unsung
hero of pattern making, quietly keeping everything lined up while we draw flowers, gingerbread men, or whatever
else we're doodling. Usually, you've got options. You can free hand
it super quickly, or you can hop onto desktop software for that
laser perfect accuracy. But of course, I
couldn't leave it there. I thought, What if we could have both the nerdy accuracy and the code convenience
of Procreate. So yes, this is a completely over the top
way to make a diamond. You definitely don't have to do it this way. Free
hand works fine. Affinity Photo works fine. But honestly, I just
couldn't resist. You know me? I love a ridiculous
little procreate hack. So if you're up for a
slightly nerdy challenge, let's make ourselves the
most nerdily perfect diamond you've ever seen all
without leaving Procreate. So we're going to start with a 3,600 pixel Canvas.
G to come up here. I already have a preset for it, but what we want is a 3,600
by 3,600 pixel square canvas. So we're going to
click on that. This is my go to size for a
patentle for a few reasons. It feels big enough to have plenty of space for
all your motifs. It's not so big
that the file size or layer limit gets out of hand. And most importantly, it's
perfect for making high res 300 DPI artwork for print-on-demand that then also scales perfectly
for spoon flour. You upload a 12 inch width
300 DPI file to spoonflower, it automatically gets reduced to 150 DPI and 24 inch width, which is the perfect size
for their wallpaper. This really is a nice one
size fits all option. So to create a perfect diamond, we first of all, need to
create a perfect square. We've already made
the canvas for that. So what I'm going to do I've got pink selected as
my color for this. I recommend you don't
use black and white because of the grid lines we're
going to use in a moment. Any color will do, but maybe
just not black and white. Click on this layer here and I'm going to tap and fill the layer. I'm saying click because I'm using a mouse
to do this bit, so you can see what I'm
tapping or clicking on, but in reality, it's going
to be tap your iPad, but if I say click, that's
why I'm saying click. Then we're going to duplicate this layer and I'm
going to click on it, and I'm going to
invert the color. So now we've got two layers, both 3,600 pixels
by 3,600 pixels. What we're going to do is
resize this top one now. So I'm going to tap transform. I'm going to tap
on this node here. And you'll see at the moment,
we've got a perfect square 3,600 pixels by 3,600 pixels. I'm going to change the
interpolation method down here to nearest neighbor. Click on this again, and
we're going to resize it to 3598 pixels square. Then I'm going to
tap off it up here. So now we've got this
layer on the bottom, 3,600 pixel square, and
we've got this layer on top, which is one pixel
smaller on each side. So if we center
this on the canvas, we will have a one pixel
border around the outside, and then we can use
this layer to cut out of that one. Let me
show you what I mean. So first of all, we
need to center it, and you'll be relieved that I am not going to ask you
to use the snapping to do this because that
would be a nightmare trying to snap to the edge
of this and the canvas. What we're going to do is
turn on the drawing guide, first of all, so come up here. And go on Canvas and turn
on the drawing guide. Then we're going to click
Edit Drawing Guide. Down here on your grid size, click on this bit here and we're going to change the
grid to just one pixel. And yes, it is going to go black because the grids are so grid lines are
so close together. And that's why I told you not to choose black and white
for the canvas colors. So once you've changed the
grid size to one pixel, you can click Done and
click Done up there. And if we then zoom in
to this corner here, you can see we've got those
one pixel grids marked out. And you can see this is two pixels smaller on this
edge and this edge, but it has butted up
like at the top here, we can pan all the
way up to the top. Eventually, you'll
see it's butted up against this edge here and also this one over here. So what we want to do,
in order to center it, what we want to do is move it just diagonally down one pixel. So if we tap transform, and then you just tap down here, that's going to nudge it
diagonally, one pixel that way. And then if I tap off
the transform and then pan up here
into the corner, you can see we've now got this border around there
that's just one pixel wide. I'm going to turn off
the drawing guide now. And then I'm going to hide
this layer, the green one. So we've just got our pink one. But what I'm going
to do is click this layer and select it. So I'm going to select
the green layer, which we can still do
even though it's hidden. Then I'm going to tap
on this layer here. It's still selected,
but I'm going to now move on to
the pink layer. So we've got this area
selected on this layer. Then I'm going to tap transform, and I'm just going to
drag this off the canvas. And now, when I zoom in here, you'll see we've now
got this transparent, perfect diamond that is
just one pixel wide. So I'm going to tap transform on this layer and I'm going
to rotate it 45 degrees, and I'm going to
tap fit to canvas, then just tap off the transform. And if we zoom in,
you'll see we've now got this super skinny pixel
perfect diamond there. We can make it a bit thicker
by duplicating this, and that's going to
bring up the opacity. When you transform things, you get a lower opacity. So if you duplicate
that a few times, that's going to bring
the opacity back up. We can delete this one for now. And that is how to make your pixel perfect
diamond in Procreate. I'm just going to jump
right in and say, I know this is possibly almost invisible on
screen recording, and I am going to make
another one in just a second, which is a bit thicker,
so you can see it better if you prefer to
work with a thicker diamond. But this one can also be
quite useful because it's kind of unobtrusive and it doesn't get in
the way too much. But I know some of you might want to have one that
is easier to see, and I'll show you how
to make one that's easier to see in the
screen recording as well. The really important check you need to do here is to zoom into the corners and just make sure that it goes all the
way to the edges. On all four sides of
the canvas like that. I wanted to show you
this one first because the one pixel line stacks up perfectly when you offset it. This means you can
see right away that everything is
in the right place. So if we come up here and
duplicate this layer, tap transform, and I'll
snap it down here. Then when we zoom in here, you can see if I'll just
invert the colors on this one. When I show and hide it, you can see everything
stacks up perfectly, which is a really good
visual clue to help you see that everything
is in the right place, especially when
you're working in the extra group and you're bringing your edges
into the middle. You can do this with
a thicker line, but you do have to
do a little bit of extra work to get it to stack perfectly or just put up with it not looking as pixel
perfect as this one. I'll show you what I mean.
So let's start again. And we'll fill this layer with the pink again.
I'll delete this one. Duplicate this one,
tap on this one, and invert the colors. I'm going to tap transform
and on this one, I'm going to resize
it to three, five, 94, which is going to give us
a three pixel wide outline. If you want to even thicker, just keep reducing
this number by two pixels each time until you get a thickness
you're happy with. Let's turn the drawing
guide back on again. 3594 means we've taken
six off of 3,600. So when we put the drawing
guide on and zoom in here, you can see there's
now six pixels here. So we want to nudge
it along by three. So one, two, three, and then this is nice centered. We can just zoom
in the top corner there and you can see
three pixel edge on there. Let's turn the
drawing guide off. So let's go over those
cutting out steps again, bring up our layers, hide
this green one, but select. Then move down to
the pink layer, tap transform, and just
drag this off the canvas. And then you can zoom
in there and see we've now got this three pixel
wide border there. Then we can tap
transform on this one. I'm going to change the
interpolation method to bilinear now, and I'm going to
rotate it 45 degrees and fit it to the canvas. Then we can zoom in, and you can see we've
got that border, and it still goes all
the way to the edge. When I do the offset now, I'll just do that quickly, duplicate that transform down there and invert the
colors on this one. You can see that they don't
now line up perfectly. When I do the offset
on this thicker line, you don't get the same
instant visual clue that it's all lined
up correctly. This isn't going to
mean that your pattern is any less accurate, though. And also don't forget
this is the sketch layer. This diamond absolutely won't
be in the final pattern. So it doesn't really
matter how this looks. However, I know that some
of you, myself included, won't like the fact
that this doesn't look quite so pixel
perfect anymore. So we can do a couple more nerdy little steps to fix this, and please feel
free to skip this if you're happy with
your diamond as it is. What we're going to
do is just continue to offset this pink one. So we're going to duplicate
the pink layer again, snap it up here into this top
corner, duplicate it again. And snap it into this corner, duplicate one last time, and snap it into that corner. I'll find this green
one and invert the colors on that again
so that it's all pink now. This is what it
should look like. What we can do is now
pinch all of these, the offset ones and the original
one down onto one layer. I'm going to duplicate
this layer a few times just to bring
up the opacity. Now when we offset this one, you can see that it stacks
the same as the others. So if I duplicate this,
bring it down here. I'll invert the colors on this. And you can see now
this thicker diamond does stack up nicely. So once you're at
the stage where you've got the diamond
that you want to use, whether it's that
thin, one pix or one, the slightly thicker one that
doesn't necessarily line up properly or this pixel
perfect thicker one, whichever one of those
you want to use, I suggest hiding the background and exporting this as a PNG and saving that to your camera
roll or iCloud so that you can import this
layer every time you want to start on a new
pattern in Procreate. So there we go. Your very own mathematically
perfect diamond all inside Procreate. Totally unnecessary. Yep, completely
satisfying. A, yeah. Please remember you absolutely don't need to make your
diamonds this way. I've just included it here
for a bit of extra fun for those of you who are
into this kind of thing. Free hand or Affinity
will still get you there. But if you ever feel like
going full pattern making nod, now you've got this
trick in your toquet. And that really is
all for me now. So all that's left to say is, have fun, stay creative,
and I will see you soon.
 Rebecca Flaherty, Surface Pattern Artist & Content Creator