Transcripts
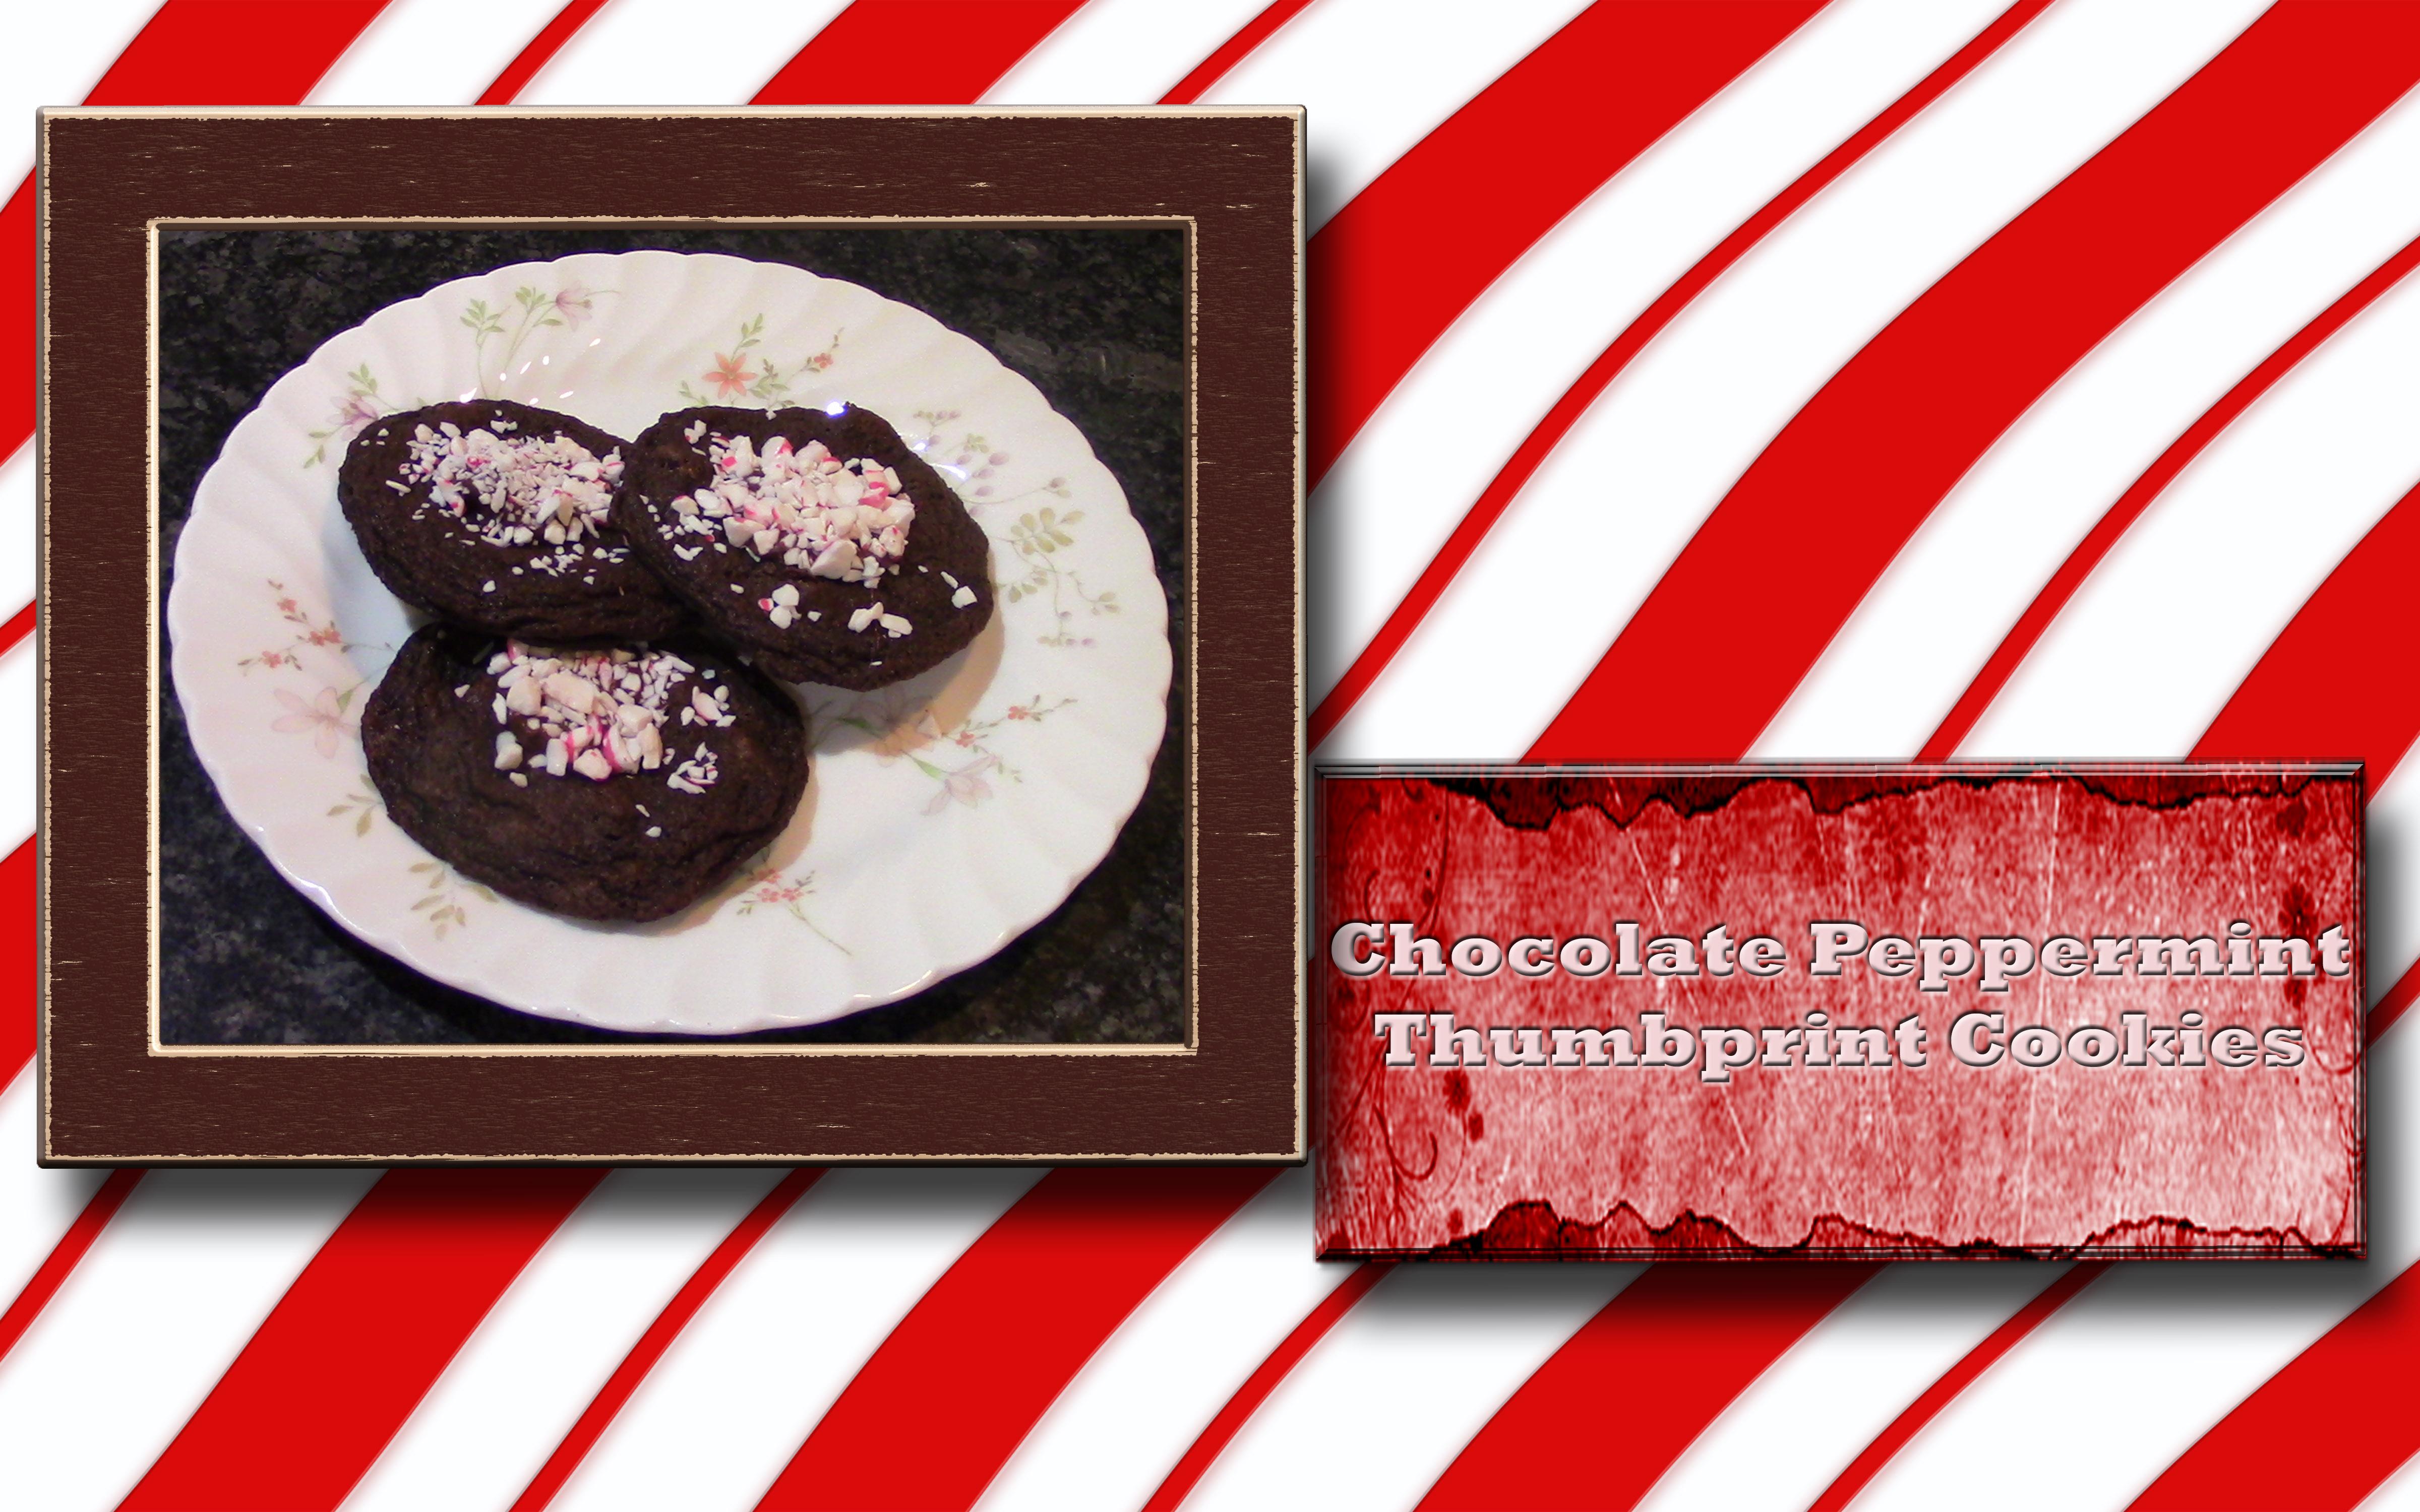
1. 01 Introduction: Thank you for taking this class. This class, we will be making these chocolate Peppermint
thumbprint cookie. First, I will teach you how
to make the cookie dough. Next, I will teach you how to form the cookies
and chill them. Then I will teach you how to
bake and cool the cookies. Next, I will show you how to prepare the chocolate
and peppermint candy. We will finish up by
adding the chocolate and peppermint to the indented
part of the cookie, filling in the thumbprint. As self and taught Baker
and cake decorator. Many years ago, I decided
that I wanted to open up my own home bakery
so that I could make and sell cakes to other
people for special occasion. So I read a lot of quick, watched a lot of videos, took some classes, and of
course did a lot of practice. Until I feel like my cake
decorating skills are up to the level that I could sell
cakes to other people. I opened up my own homepage and I had this business
for several years. Well, having this business, I not only made fancy cakes, but I made other
t-shirts for people. And I make cookies to sell at farmers markets and other
seasonal festivals. I had this business for several years until
my husband got a job offer across the
country in New York City. We felt like this was
a good move for us. So I closed my bakery and we moved across the
country to New York City. Now here in New York City, I do not want to go through the steps to open up
my own home bakery. I still love baking. As retired teacher.
I love teaching. So I've decided to share my skills with you
on Skillshare. This class is aimed at the big two that would like
to make a fun and delicious cookie for
the holiday season. I am excited teaching you
the skills in this class. Let's move on to
lesson number one. Making the cookie dough.
2. 02 Making The Cookie Dough: We're ready to start making
the cookie dough in my bowl. I want to put in one cup
plus one eighth cup. Recipe calls for
two tablespoons. Two tablespoons
is one eighth cup that we want to add one-third
cup of cocoa powder. Next, we're going to
add three fourths, teaspoon of baking soda. And do that, I'm going to
add one-half and one-fourth. Last. I'm going to add
one-half teaspoon of salt. And instead of 50 min, I'm going to use a whisk
and I'm just going to whisk it and that's
going to lighten it up. And it's also going to
combine all the ingredients. With this part done. We're ready to get out the big mixer and finished
making our cookie dough. This mixing bowl. We're going to add butter. And then we're going to
create this on medium high. And it's fluffing about 3 min. First, we're going to
start in them a bit slow to get that better
broken up in the sugar into the butter so that it
doesn't come flying up. Then we're going to turn
this to medium high on this. We'll be back in a minute. As you can see, that is mixed in really well. It was not that great because it was all plastered to the
side of the bowl. So I stopped it so that
I could scrape the bowl. And then we're going to mix
it at least another minute. Now, we're going to add
the egg and our vanilla. We need 1.5 teaspoons, which is what this is. And this we're just going
to mix until it's combined. Although I close that up, I do want to scrape
everything down. So it will combine better. You can see that's
combined really nice. Now I'm going to lift
this up again so that I can add half of
my dry ingredients. Just kinda eyeball it. It looks like half. And this time I want
it to be low speed. And I just wanted to mix
it until it's combined. I'm going to lift it
off script before I add the rest of the flower because I want to make sure it can
get incorporated, really get into this
scrape that off for the scraper to offer
the beater also. So that's all in the bowl. And then I'm going to add that other half of the flower
again just to low speed. Especially in the beginning. We want to make sure
it doesn't fly up. There. We have it all mixed in. I'm going to add the
last ingredient for now, and that is that
the chocolate chip. And this, we just want it, set it on the star setting, which is again the
lowest setting. And we just want to mix
those chocolate chips into. Once the chocolate chips are mixed in, we want
to turn it off. And we're going to the
cookie batter off of that. Because we're going to
take the beater off. The recipe says to
form the cookies at this point and then the cookie
sheets into the fridge. I don't know about you. I don't have that much room
in my fridge for the cookies, once on the cookie sheet. So what I'm going to do instead is I'm going to
take this cookie dough. I'm going to put it in
this smaller bowl that had our flower and cocoa in it. I can fit that bowl
in the fridge. And I know I have
lived for that bowl. I'm going to put my cookie
dough into that bowl. And now I'm going
to stick a lid on this and put this in the
fridge for at least an hour, maybe an hour and a half, 2 h. I don't want to do it too long because I want to get
these done today. So we'll be back after
our dough has chipped.
3. 03 Forming The Cookies And Baking: Cookie dough has sat in the
fridge for about an hour. And I have two
different size groups here because I haven't yet
decided what size cookie. Scoop up each one and decide as a pin on the
parchment, what size I want. I have this size right here. And this size right here. This obviously would make
a much bigger cookie. You should make a
little smoke cookies. Now, I want to pick
the thumbprint in it. It tells you to
do it afterwards. I like to do it beforehand
so that it gets in there. See Now, I'm gonna do the larger one I like how the larger moment appeal
that one back down. Larger one there. I'm hoping to get like a dozen cookies
on each baking sheets. Right now I'm going to
just skip cookie dough. And then I can come back
and pick the thumbprint. Now that I've decided
which size I want, I don't know for sure is how many cookies
l get from this. Because besides you make the cookies really
determines how many you get. I'm hoping to get
two dozen or more. But it's hard to
tell if you put it on there and it's not
as round as you want, you can always make it rounder. We do want them to be about 2 " apart so that there is
room for them to spread. Now I had said that
I thought I would get it cookies on each one. Obviously, I couldn't be more like 16 cookies
on each one. If the SAT much dough, the second one may not have 16 because I may not have
that much cookie dough. To do another 16. With that done, I'm just now
going to put my thumbprint and these are called
thumbprint cookies. The recipe says to do it after. I have to do it again after, but I was dart getting that little bit of a
thumb print in there. Now. I'm doing it for I, plus, I like to miss the
cookies down a little bit. I don't like him
to be total balls. I like to be a
little bit flatter, so the thumb printed
now help me with that. This is now ready to
go into the oven. The oven is still preheating, needs to get to 350. Once a pre-heat, I will
stick this in the oven and we'll kick it just 9 min. And then we'll pull it out. And we'll show you
what we do after that.
4. 04 Making Thumbprint And Cooling: I just checked my
cookies out of the oven. You can see they
spread out a lot and the imprint kind of
disappeared with the spirit. I'm going ahead and put
in a bigger imprint in there so that I will have a place to put the chocolate that we're going to melt
when this course, you can see it breaks up
the cookie a little bit, but that's okay
because we're going to be pouring chocolate there. We want it to print. We can pick the
chocolate in there. This one really probably is not going to
get the chocolate. It's just kind of
spread out all over. With that done, I'm gonna
take my spatula and very carefully stick my cookies on the cooling rack so that
they can cool stuff cooled. I will pour the
chocolate and sprinkle the peppermint on it.
5. 05 Finishing Up The Cookies: The cookies of cold
most of the way. So I'm going to
melt this chocolate that goes in the
center of the cookies. And I'm going to meld it
for 30 s at 50% power. Then I'll stir it. Then I'll melted again until it's totally melted.
And then we'll be back. Cookies. And I've melted the chocolate. Now I'm just going to
take a small amount of the chocolate and put it
in that center where I stuck my thumbprint
before I kept it and where I stuck the spoon after. So it's not going to
have a whole lot. I only want to do about four
at a time because I want to make sure that I can sprinkle this song before
the chatbot set up. And I'm going to
continue to do this. Tell all the cookies hit Done. You continue to do it to yours. And then we'll be back
after it's all done. And they've completely cooled. And centers hardened up.
6. 06 Final Thoughts: Thank you for taking this class. We had fun making chocolate
Peppermint thumbprint. We first learned how to
make the cookie dough. We then formed our cookies
and the cookies cool. We melted the chocolate
candy canes, ready? And we put the chocolate into the thumbprint we had
made in the cookie, and then sprinkled the
crush candy canes on top. I hope your cookies
turned out the way you plan your project for this class is to
make these cookies. Please make sure to
post a picture of your cookies on our project
page and tell us how it went. I look forward to
hearing from you. The recipe for these cookies
is in the project section. From my kitchen to your kitchen. Happy painting.
 Nadine Thomas