Transcripts
1. Introduction to the class: Hello everyone, welcome to
another class on my channel. In today's video, I'm gonna show you how to edit run cycle. If you want to work in gaming industry or generally
do animation stops, this will be highly
requested things. You will do this
on a daily basis. Everyone is just requesting
run cycles or walk cycles. I think this class will be so useful for your early careers. So guys, let's dive in.
2. Watching Motion Capture Data: Hello everyone, Welcome
again on my channel. In today's lesson,
we're going to learn how to do around cycle. As you know, we
are starting with smaller and smaller
files and easier one. So this new class, we will also learn basic stuffs and really easy
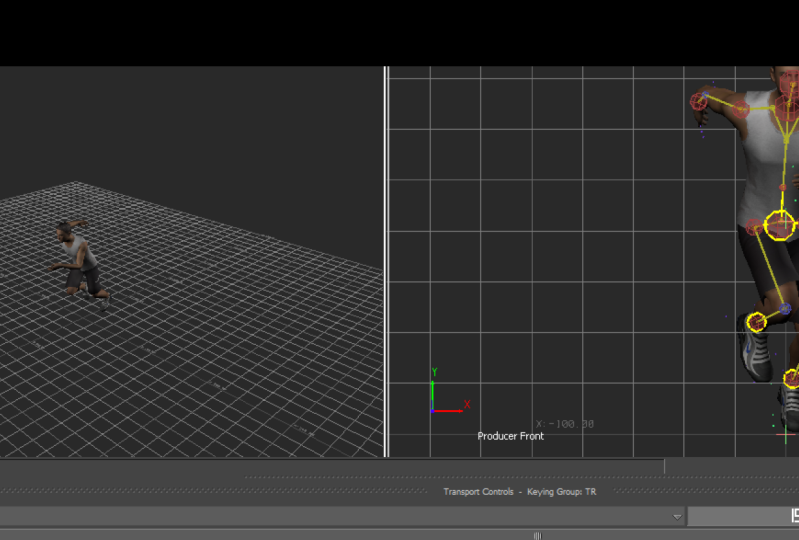
and simple things. I upload it. I actually imported our
motion capture file here. As you can see, this is our scene and
this is our character. You can see he's in some
preparations for Ryan running. Let's see what we
got here. Come on. Okay. This is maybe like this. And he's running, as I said in first-class
and working on one monitor because you can easily see what I'm doing because I'm capturing screen,
capturing my monitor. But if you've got two monitors, Please put everything aside from these tools so your
screen nil will be much, much bigger and it will be
much easier to see everything. I'm actually not used to work on this small amount of space, but we will figure it out. Let's see from, from to you. Okay, this is our thick, Let's see from the side view, someone said to me on previous class that he's
more confused after the class then before because
I didn't I didn't told any shortcuts in the video and they haven't showed you and told you what I'm pressing. So my advice for debt
will be to find, I showed you there, you can change your
shortcuts here. In interaction mode, you are
changing your shortcuts on motion builder on
Meyer shortcuts depending on which
shortcuts you work on that. That's depend I'm always working on motion
Miller shortcuts and it will be bad if
I'm saying what I'm pressing because maybe someone works some minor shortcuts. My advice for debt will
be to find online on Google motion builder shortcuts
and print that shortcuts. And when you need something, just look at that printed
shortcuts or another, you can put it on
another screen also. Just take a look and
then do what you want. And that's the fastest way to
learn how to use shortcuts. Or if you are working
on minor shortcuts, them print out my shortcuts. And every time you enter, you will take a look once, twice, and third
time you will know. Write down shortcuts
mainly used. Write down shortcuts,
print it out, and put on another monitor, and you will, That's the best way to learn
shortcuts or one program, and you won't be confused. When they do something, you
will figure out what I did. So that's the way I learned all the shortcuts
in every program. I use two. And same is with motion builder. Motion builder is maybe the
hardest with shortcuts. So that's my advice for debt
part of the problem you had. And please please please
limit on feedback. I really appreciate
your comments. And also you can always
send me a message on my social media or just if
you want to ask me something, if you need some
advice or anything, just ping me wherever you
can find me or also leave, leave your comments
down on this class.
3. Choosing Run Cycle Range: So, okay, we figure that out and now we can
start working. Let me just check what
we will do first. First thing we will do is decide which which stake we will, which we will cut our take. So let just check. In the gaming industry, you always take one full cycle. So if you start on right leg, you will finish your cycle on the right leg, only one step. And if you choose left leg, you will finish on left leg. That's really doesn't matter. I will plot this character
to control rig his here. Now also we got our controls. Let me show you. If you move, it will move, of course. Ikea's on. So every time I move something, my legs are being so length. Legs or not. If we do this, legs, legs don't go down but arms go with because
they are not paint. But if I pin the arms when I
move hips, sorry, I didn't. I need to open this
icky defined now. Move this arms will stay in the same position
because they are pinned. And I will now
disabled that for now. I don't want my arms paint. Let me see. Where are we going
to cut Arctic? We will go in this right or left camera from side
view, it's much easier. We will go in story mode. As you can know, right-click, Insert
character animation track. Here are now. Now we can choose,
we don't need this. I don't know why
that motion blur always give you this,
but doesn't matter. We got now character
animation track. We choose our actor. You can see our character
is named vector. We will choose a
director and we will go insert current, take. Our whole animation is this V also need to
enable Story Mode. Story Mode must be blue. We are going to do now. Now, we need to
choose WIC stake, which we got date, but we need to decide which
cycle we want to use. My right hand
column is selected, but you can select
whatever you want. It doesn't matter. You can deselect it. Water control. I am choosing this. I am enabling control rig so I can see clearly every bone and control with control a enable
and disable everything. Why am I doing this? Because when I cut, then I'm choosing
which cycle I want. I want to cut it. My, my knees must be ideally
in the same position, but this is also amazing. So my knees, I want to cut somewhere when my knees
are like separated. I want to cut foreign invokes. I want to cut my
knees are together, so let me see. Okay. From front you my
right ankle is down. So I will cut here and I
am switching my cameras. I will really try to
tell you the shortcuts. I was switching cameras with Control F front with
control, air, side view. With control ie. I'm going in perspective mode, so I will go now back on site. Okay, so my first cut is in this position when my
right-hand close down, my knees are together
and that's amazing. So next cut won't be
on the left ankle. It must be on the
right end goal, so I will go. This is right, left,
and right. Again. As I said, my knees
must be to gather, so I will go control. Next, next, go back. And this is the
perfect position. Frame to vote. Sorry. I, as you see, I express this cut and
everything is gone, but I will just go
Control Z and go back. And I will select this
and razor it here. Now we got our take, delete, delete, and
this is our cycle. We want it. We will go now, double-click here and press 0. Case he is now in our animation
will start from 0 frame. And we will select this, go right-click and
frame start and then plot holes seemed to
Current take 60 FPS plot. What we will also do, we will position our
character in center. We will double-click this
and we will just here in clip soft set go 0 and 0. X and z are 0. So our character is
now put in 0 position. That's amazing. We can now move into
editing process, but before we do that, we will flat Holstein
to Current take blot and disabled story mode. So now we can edit.
4. Editing Motion Capture: Okay, We're going now
into editing phase. So we're now moving into
editing motion capture. First thing we're going to
do is create a new layer. As we said in the
previous lessons, we said that every, every, every change we
do on our character, we need to do on the new layer. And after we're done with
everything with new layer, we just plot there
everything to scale it. And skeleton is actually
base layer, base animation. So let's begin how
we're going to do this. We will first make photos and then we will place
that pose at the end. And then we will have a
loop animation for like. Look at now, when
you press this, then you just press once controlled space and you see your character
running all the time. Loop. What we want is to make loop. To make nice loop, as you can see now, 1st and end pose are different. And vigor that glitch at the
end, we got that glitch. So we will make everything
without glitch to go smoothly. So we will go now in
PostController and we will, before we create new pose, of course you must
be on another layer one and on 0 take I want to, I don't like actually this pose. So that's the editing process. We will do this. I will start from the leg. You don't need to
be dead precise, but let's make it
more beautiful. He's on his knees. Just lazy. Innovation, gut, disabled. So let's like this. That's fine. Breaths key just in
case I will be in a whole body mode because I need whole body posts for this. But you don't have to. I also want to
change my position. His neck is broken. It's kind of hard to be precise and this scheme problem. And you can always got
that skin problems, but there's nothing much
you can do about it. Just try to make it
the best you can. And I will do this soap. He's like pointing his eyes
in us not to look down. I will press a key on
my shortcut, keys s, So I will change
a bit position of his hand just to make it a bit like this. Let me be this other
hand like this. Maybe just a bit here. C0, C0, C0. Forget to press kit, and I forgot to save
our file just in case. Don't forget to save because if you if you got something wrong. Always good to have
version of your progress. And don't make same
mistake as I did in my past because who knows
what can happen and you lose your progress. Okay, I'm satisfied
with this first pose. It's much better if
you turn off this, you will see how your
character looked before. If you turn on the
navel, your layer, you will see it's
much better now, if you mute, It's this. If you enable it, it's this. I think it looks much better. So I'll just key again
and I will press Create. And okay, I got some
teams shifts here, sorry. I will rename. I will call it full body pose. And then I will go at the end of our animation and I will enable x and z and press full
body pose and go key. And as you can see, my character is moving. Moving across the x position. You can see his, the first he's here and in
the end his next I will, I will go here and
press this and I will delete this last key that
will disable this X position. And then I will now double-click on this and now press keys. So let's me see It's our
character night now. Okay, home and home. And we still got
some differences. Let me check. I will delete these key and
turn off the air rotation. Let me know, check
key, comb and comment. And it's perfect. Now this, you can see
now in first pose, you can see grid
in second posts, you can't see grid. That's because our character is moving in the front and
that's totally normal. So now he's in perfect position, no rotation, no x
sliding, just z. And that's perfect. Okay, and now let
me see what we got. Okay. As you can see now our legs. I will press, you know, I will now let me check. We will. I'm totally OK. How it's his amazing, but we got that foot going down. So we will, let me
check like this. If I do this 0, no. Select legs. Go into the a body part
and go 0 keys everywhere. You can go 0 here and here. Now it's better, but
it's still not good. So what I will do its
go frame by frame. And just do this. He had done his foot down, go under the grid. That's fine. And other leg. That's amazing. And this one down slightly due this year. Control Z to go back. Here. As you can see, this is like
too many, too much movement. So I will just put it 0 key, I will just move one frame. So it can be more slower, change, not go from this to this in that
short amount of time. So I will prolong that time
between these two keys. It will be more natural. Let me check. Okay, blacks, perfect. Inches back. Now we wanna see. Hence, as you can see, hand is going
through the bodies. So this frame I
will just go into, as you can see, that here, rotation and translation and x. Just a bit so he
doesn't go through his body with his his his hand. Now, don't go to his body
and here, it's fine. And let me check
another can't amazing. Totally satisfied
how this is looking. And don't forget to go. Big plot to scale it down. So our whole animation
is now on, scale it on. It's not anymore on
Animation layer one. That is our Bayesian
base animation. Now, this whole editing phase, it's on our base and
emotional level. We go back to control rig. And if I turn off
now this layer one, nothing will happen
because we plotted our whole animation to
this base animation.
5. Changing Run Speed: So V just finished
our editing process. We created boat pose. We place it on frame start
and then just check, go to perspective mode. First and close. And it's the same. It's perfect, nicely done loop. I want to show you now, if you plan to work
in gaming industry, I want to show you
have you can create your character to run on the
exact same speed you want. Before I started working in this company at notice
where I work now, I work in here for
seven months now. And my test animation was to create around cycle
that is seven meters. That goes seven
meters per second. How can I do that? Because in company now I got a tool where I can just select my hips and press button and see how fast my character
goes in depth frame. But because I didn't
have that tool, I needed for tests
to do that by hand. On some simple. I needed to figure out how I can do that because when
I search it online, like how to measure speed or your character have to change
speed of your character. I couldn't find anything. That's, that's actually secret. Think so. I think it will be
this will be so, so, so helpful for you
in your careers, not only for motion
builder files, but also for keyframe. And you can check this in Maya or motion builder
or wherever you want. So this will be really helpful, helpful for you in your
careers if you want to. Especially if you want to
be in gaming industry, because for developers, it's numbers are
really important. And if they wanted him to
go seven meters per second, you need to do that. So now let's, let's say that our character must go
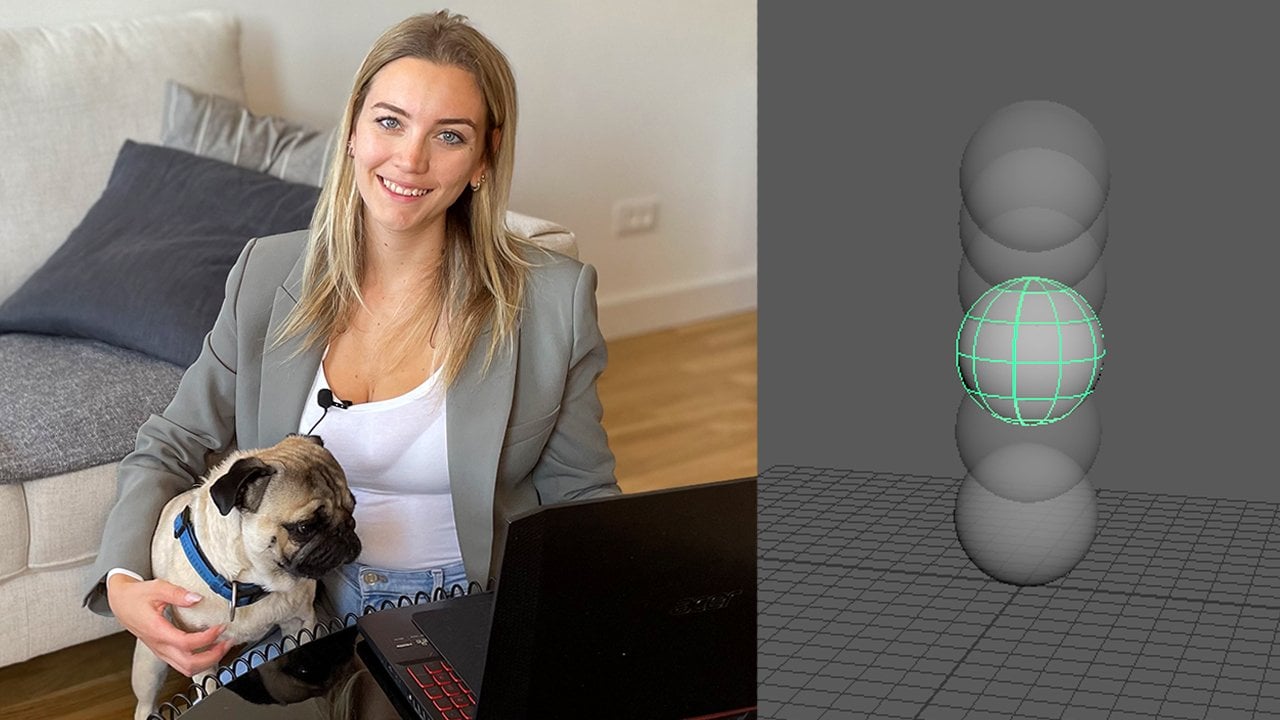
five meters per seconds. How we can check that v
will find where is hips. And I will enable this
character control rig. So I can see that. And I will go here in
the browser and try to find here in elements, I will pick this
smooth and just, just take it and place it here. This is our null. What we're gonna do is place
it here where our hips says, let me just do this. Our hips is here and I
will place more there. Let me check with that position of that node. Here. Let me just find it here. If you go right-click, arrange all horizontal and everything will be
arranged for you. I didn't know what is this? I will this is old
character rig. I forgot to delete before I, when I was preparing this scene, a created character array, but I wanted to delete it so I can create with
you another one, but I forgot to do that. So I now just get our
character and our control rig. And here is our null. If you press Control one, you will have one window. If you've pressed
to, you will do. If you press three, you will have three. Now what I'm gonna do, I will come to, and I will go in somatic
view here and right here. So our newly sphere. And if I look at his Z position, I will need to write it. It's minus 2.98. If I said that I want
him I want him to go five meters per second. I will need to I will
copy that and paste it. I just was like copy paste. Control. C control V. If I want him to
go five meters per second, I will just go here like 500. As you can see on grids, you got 12345 and he's here 500. It's like five
meters per second. As you can see now, it's minus nine minus two. So you can just make it like It's not that
big difference, so I wouldn't do that. But you can add here like 502 if you want to be
exact for its size, but it's not a big deal. Actually, we can do that. We will be precise, so we will do this, but you don't have
to be that precise. Actually his minus, so we will, sorry, it will be 47.20
to sorry about that, but it's totally okay if
you press fifteenths. Not big difference. Because our character
is going in 60 FPS. What we want to do is that
he in 60 FPS reach this. Now here, we are
going to do that. So I will delete the old story that we created and I will
enable Story Mode. I will go insert current ache. I will go with my point here. And I will go copy, paste control V, Control C, Control V. And I will take this now character is
for 60 frames long, but as you can see, he is going from 0 to reach here and he goes back
to 0 in this clip. How we are going to
prolonged him to go there is like go here. We will just choose clips, heaps to previous clip
at that, at that, and we will take his hips and match
clip to previous clip. And we will match time when our previous clip feet is finished at the
end of previous clip, then this clip we'll start in, we will press a case. As you can see now,
he's just moving. And he just goes, He's not coming back
on this clip to 0. Then you just go here. As you can see now,
when I do this, when I play it, he just stops here. Why is that? Because we were in, we need to select
the both clips. Right-click and plot holds, not flow block
called seem to care. We need to press this
frame start tens. So our N frame will
be in 60 frames. So let's try now. Amazing. So frames star tent, plot, whole scene to
current intake plot. What we said now that
we want our hips to reach new in five
meters per second, I will now go in one, right? So you can see better. What we can see from this that our character in
60 frame is much, a little bit more faster than
five meters per seconds. So what we are going
to do here is go into this, not that one. This one, it's like loops, scale clips, scale clips. That's the right
name for this tool because we will
select this and we will scale our clip
what we wanted, because he is faster than
five meters per second. We need to slow him down. How we're going to do that. We will, because we want him
to be in 60 frames here. We will stay with our own, our timetable in 60
frame per second. And we will select both
of these and we'll just put a little bigger bags so
we need to slow him down. And let me check. Can I go one frame here? Be more precise if I
pull him back one frame, he's still a bit far from NEW. If I move him from
one more frame, he is on the exact same
position as I wanted him to be. So his normal is right here. So that's yeah. That's perfect. As you can see. Here is now here and I will just
go frame start. Tent. Plot holds Sin to Current. Take an our car
character now is going five meters per
second in 60 frame. They're amazing. Now if you don't
want him to loop. So we will just, what we're going
to do now is just cut this and print start then. And plot called seem
to current ticks so we don't need anymore
him to be going along. We will cut here where he
is on his right ankle. Our animation is not now 30
alternative frames long. It's 31 frame block because
we slowed him down. So here, please running
five meters per second. And please, please,
please, please. This is really important, especially if you want to
work in gaming industry. You can easily, I've
got this on your test, so that's it for this video, I will show you in X1 how to place your character
to run in one place.
6. Running in Place: Hello guys. And before we finish this class, I want to show you how you can. Because also I told you
on tests that you got like speed and things like that. You also got some times
that you need to place your character in one as one. You need to make your character around
in place or walking in place so not to go
through the grid that then sorry
about my English. I this is first time I'm doing voiceover when I'm working
and not voicing after. I think this is much more
easier for you and me also. So what I wanted to say
is that you will usually that also requesting your desk that your character
must be in place. We're going to do that. As you can see,
he's now going to degrade and he's going
through that oh, that how we are
going to do that, as you can see now he's
moving through the Z position so you want your
character to go in place. You will do it like this. Navigator, I will
go to character. Actually, I had no idea. This is just think
you need to check, but we will find it together. I haven't done this
a long time here. Okay? You are going
to in Navigator find characters and
go on your character. Actually my character
is named actor. Just press it on
actor and go here. I'm sorry. I'm
actually going to do because I will actually do this so I can clearly
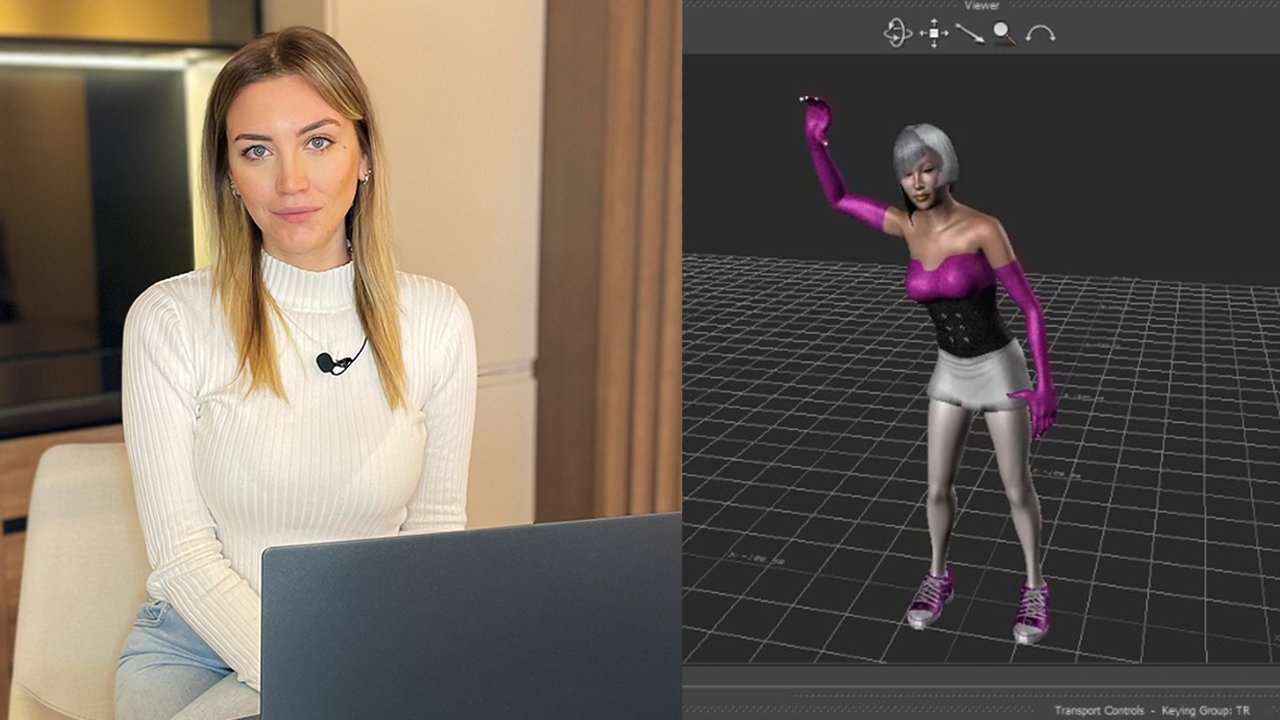
see what is here. He's murdered. Here's my dog. Sorry about that. We will go now in actor. No, it's not there. Maybe modifier. Yeah, cool. I remembered. Yeah. You just go in
Navigator, characters, actor, and in modifiers, and go in these in place. Think. Press here, locker. So sorry about my dog. As I said, Go here in
characters, actor, and go here in modifiers
and this lock set position. And we will just press that and he will immediately go back. I can now pull this down. And he will immediately go
back in zeros, zeros 0 pose. And when we play our animation
and I will turn on loop, he will be in place. And this is highly
requested think so. But also at I want to tell
you that if you want to go back now that he can
go through grid, you can go back. No control z, nothing. When you do this, there's no going back. So please save your, say, save your file before this step. And that's it, guys,
for this video. I hope this lesson
was helpful for you. And I will leave you
this, this, this file. So I want to see
yours runs cycles. You can leave it on the grid. I would love to see it, but you can also
make it in place. So let me show you how
it looks from side, from front, from perspective. Yeah, guys. I think we finished. Please, please please don't
forget that practice. Makes several imperfect
and do your takes please, and just upload it into section and see
you in the next course.
7. Final Thoughts: Thank you everyone for
taking this class. I hope it was really
helpful for you. Don't forget to do
your projects and upload your things into
the project gallery. If you've got any questions, please ping me or
comment down below, or if you have any requests or which class to do
next, please, please, please inform me about
that and I will do my best to film that next. Thank you so much again, see you in the next class.
 Nikolina Peric, Motion Capture Editor and 3D Animator