Transcripts
1. Welcome and Introduction : Hi, everyone, and
welcome to my new class. We have Celestial wheels a seven day ink and
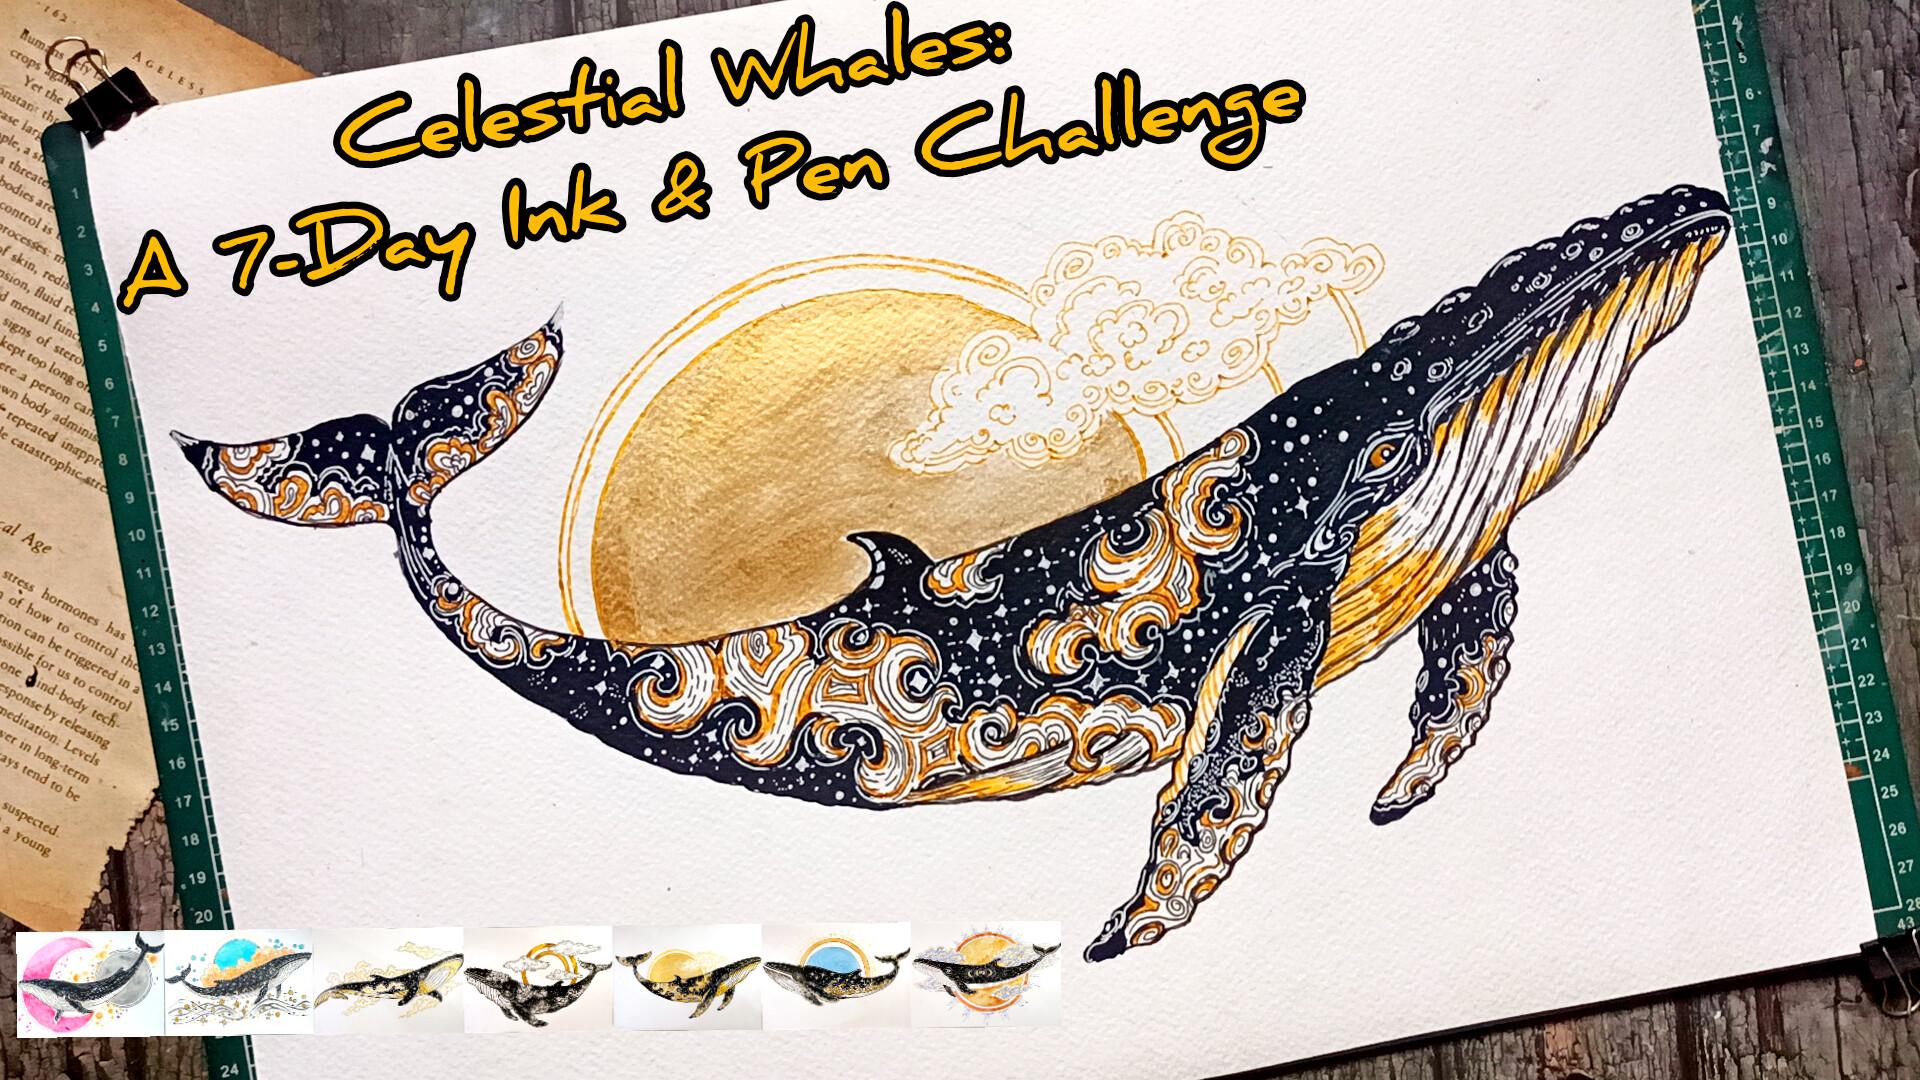
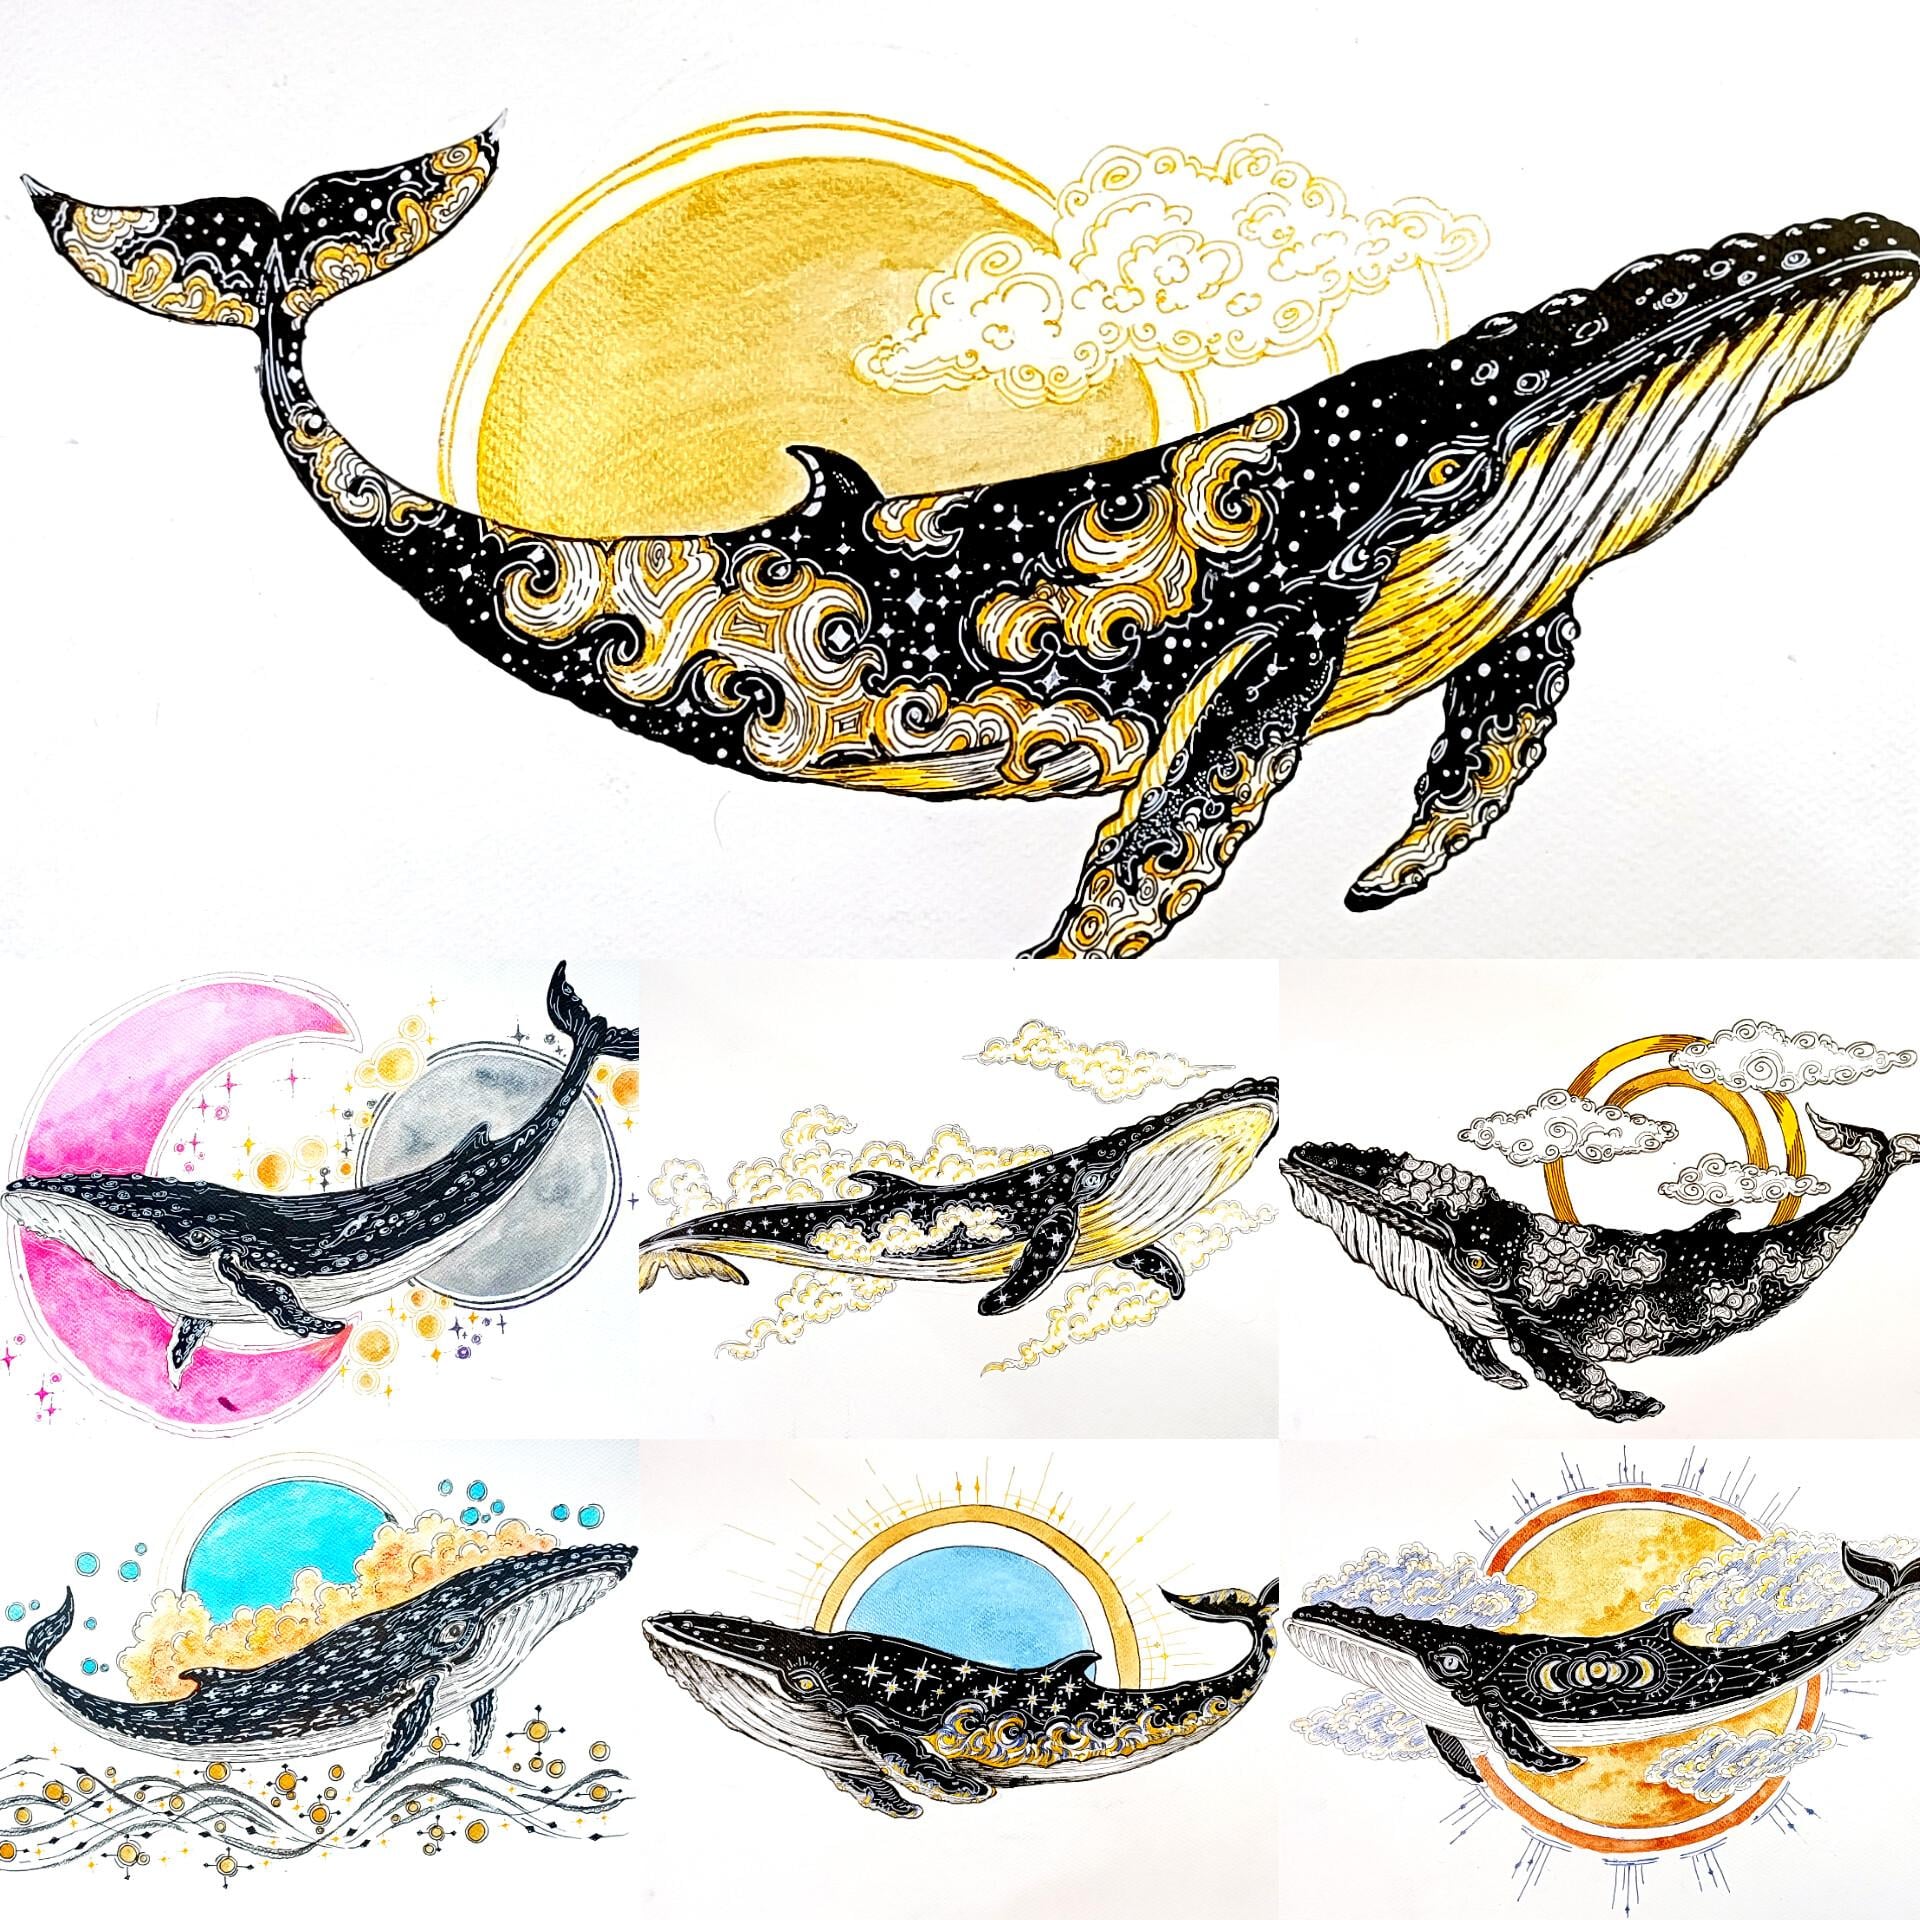
watercolor challenge. In this class, we have
gotten the seven project. Starting with the wheel
beneath the Azure moon, next we have wheel
of the Rose Moon. Here we have got both
sun and the moon. Then we have the
golden Sky Band roll. This is one of my favorite one. Next for the fourth one, we have this Guardian of the
Celestial Rainbow, yet another intricate one. So this is the wheel
of the golden Dreams. Then the last two
in here we have got the wheel of
the midnight moon, a bit simpler one and a little bit more intricate
and detailed one. Here we have got the wheel
of the golden ellipse. We will begin with the basics, where I'll introduce you to
the supplies I use and the demonstrate and demonstrate
essential ink techniques, including hatching,
cross-hatching, et cetera. I'll also show you how to create decorative
elements such as cloud, celestial backgrounds and
circular compositions using simple saves and
how you can easily create the wheels using
very simple saves. Hi, everyone. My
name is Jeb Shale. I'm an artist from India. This is my Skillshare profile. On Skillshare, I teach beginner friendly classes on ink and watercolor
illustrations, oil pistols and food
illustrations related classes. You can find more of my work
on my Instagram and YouTube. In this class, we'll be creating seven intricately detailed and majestic wheels
illustration, each inspired by the
celestial elements, dream skies and imaginative
patterns, as you can see. Each day we'll explore
a new illustration experimenting with ink
technique, watercolor, metallic paints,
sparkle effects, and decorative patterns to bring the celestial creatures to life. Most of the lessons
in this class are recorded in real time, so you can easily
follow along with me. I'll be uploading one
project each day, allowing you to
complete a painting daily as a part of
seven day challenge. This class is suitable for both beginners as well
as intermediate arters. So join me in this class, and we'll explore the
majestic celestial wheels, and let's have fun creating
something beautiful together.
2. Class Project : For your class project,
you can create a single illustration or complete all seven
projects from this class. You can follow my designs or experiment with your
own unique patterns, colors, combinations,
and interpretations. So these are all
the seven projects that I'm going to show
you in this class. Along with your
finished illustration, I encourage you to upload
your practice seats, including hatching and
cross-hatching exercises, supply taste, metallic and sparkle
paint experiment, and the patterns and designs you created during the class. You can also see your
own interpretation of the celestial wheels, incorporating
personal touches and creative details to make
them uniquely yours. And these are all the
seven projects we have Wheel of the Golden Ellipse
Whale of the Midnight Moon, Whale of the Golden Dreams. Guardian of the
Celestial Rainbow, the golden Sky Bandra, Whale of the Rose Moon, and Wheel Beneath
the Azure Moon. I'm excited to see your artwork, creative experiment, and the beautiful celestial
creatures you bring to life. Please upload your project in the project and resources
section of this class. I look forward to
seeing what you create.
3. List of Supplies : For this class, I'm
using pencil and asea to do the psic
pencil sketching. Then I'm using fine liners and the breast pins to do the
outline for all the wheels. I'll be using Sakura
micron fine liner and the Tombos braspin. I've got 0.5 MM and 0.3 M fine liners that I'll be using and two of the Tombos bras pin. In here, I'm using 300 DSM watercolor paper for
all the projects. Apart from that, I am also
using the white chill pin. Instead of it, you can use the white watercolor
acrylic or gauze. I'll also be using sparkle
pins. These are optional. Then I have got this metallic color from the Butone that
I'll be using it. Instead of it, if you
want to use watercolor or other mediums of
the colour through the coloring, you
can use those too. And as for the inking,
I'm going to use the Zikurotakis black ink. I've got two brushes, small and large breast
that I'll be using to do the coloring with
the metallic colors and with the black ink. I also have the whitening. If required, I'll be using
it for some of the sections. Apart from this, I
also put breast pins. I'll be using it for
one of the project, and this is Ms in optional. And to create the circles, I'll be using the compass. And you can also use other
supplies that you have fine liner gel pins or the wallpoint pints
and sketch paints too. These are all the
supplies that I have and I'll be
using in this class.
4. Basics : Hi, and welcome to the basics. In this section, we'll explore seven fundamental ink
techniques that will form the foundation for all the illustrations in this class. In here, I'm starting with
a very basic line spacing. So basically line
spacing is one of the simplest but most important
aspects of ink drawing. In here, by changing the
distance between the lines, we can control how light and
dark the areas will appear. For the first one, I
created uniform distancing. In the second one,
as you can see, it's a little bit
of tight spacing, creating a bit darker value. And in here, I am gradually
reducing the spacing between these lines to create a smooth transition
from light to shadow. In a nut cell, wide spacing
creates lighter value. With tighter spacing, we
can create darker value. And as for this example in which I gradually reduce the
space between the lines, creating a smooth transisen
from light to shadows. And one more thing, consistent spacing can also be used to create green
texture and pattern. Apart from this, to make it
a little bit more dramatic, you can combine both
spacing and sides. In here, as you
can see, I started with the smaller
side, and as I move, I increase the size of the lines as well as
increase the spacing. Now, this is a little
bit different. So in here, I'm starting with a little bit of
consistent spacing. For this region,
the middle region, I have decreased the spacing, this making it a bit lighter. And as I progress, I am once again increasing the spacing to make it
a little bit lighter. So in this way, we can
use this kind of line spacing to add more drama
to our illustrations. And to make it a little
bit more darker, you can just add more
lines in between it, which will be covering
in hatching as well as in the seeding
section of this Basis. I just added more
and more lines in between the lines to make
it a bit more denser, a bit more darker, to give it a little bit
of darker value. So it is easier to
make it darker, but it is a lot harder
to make it lighter. You can make it
comparatively lighter by adding more lines
to the other areas, thus making those section bit more darker and
then comparatively, the other region
will become lighter. So that's all for the spacing.
Next, we have hatching. I'll be using lots of hatching
for some of the project. Hatching is a very
simple technique, which is created by drawing a series of parallel
lines in one direction. It is one of the most
useful technique for creating form to add texture
and to create side off. The hatching also depends upon the spacing in
between the lines and consistent spacing along with the hatching lines will help create cleaner texture and can
be used to create pattern. In the earlier example
for the spacing on use the straight lines
in here for the hatching, you can use lines
in any direction. The main thing is the lines would be parallel to each other. The hatching is similar
to the spacing in between the lines that we just covered. Wide piecing will create lighter value with
the hatching lines, but tighter spicing we
can create darker values. Apart from this kind
of simple lines, you can also use this kind of broken lines to do the hatching. It adds more drama to
your illustrations. For some of the
sections, I'll be using this kind of broken
hatching lines to add more texture and to create a little bit of broken pattern
for some of the sections. And you don't chapter stick
with the same salges you can play with the sages of
the hatching lines too. Apart from this,
you can also use the hatching lines to
the seeding like this. Starting with applying
a bit more pressure with the pain, and as we move, I'm just decreasing the preset to make it a bit
lighter like this. Apart from this, you can
also experiment with a different line direction
and the angles in here, I only created an angle line. You can also play with the
salt and long strokes, thin and thick
strokes by wearing the line weight of the
pain that you are using. Like this piecing, you
can also play with closely and widely spiced
lines for the hatching. Apart from it, I'll
also be using this kind of hatching lines a little
bit similar to seeding, pencil seeding to give
it a little bit of texture for some of the
sections of the illustrations. I'll only be using for
one or two of them. Make it a little bit easier and a little bit more organic, you can do the hatching
lines like this in here, creating a bit darker
to lighter tone. So layers and layers of
hatching to create this. And so as mentioning, you can use the
hatching lines like this to create different
kind of pattern. Simple square like pattern like this using small
hatching lines. You can also use hatching to
follow the sep of an object. For example, curved
hatching can help make a whale's body appear
rounder rather than flat. I'll also be covering
a little bit of curved hatching
lines later on. So curve hatching lines or
you can see curve lines, which we'll be
covering later on. I would recommend you to experiment a little
bit on your own and create different kind of pattern and designs
using hatching lines. Or you can also
incorporate other kind of angled hatching lines to make things a little
bit more interesting. Now, as I was mentioning a little bit of curve
hatching lines. The lines are parallel
to each other and following the curved lines
that I created first. So we can use it to give it a little bit more organic
look to the hatching lines. The lines are parallel
to each other and following the curved
lines that I created. Yeah, that's all for
the hatching lines. One more curve hatching
line like this, a bit of elliptical
sap like this. I'll be using a little
bit of this kind of curved hatching lines
to create patterns for the clouds and a little bit for the circular or elliptical saps that will be lying
behind the wheel's body. And that's all for the hatching. Now moving on to
the cross-hatching. Basically, cross-hatching
takes hatching a step further by layering
lines in different directions. One layer of line can
create a light sado while additional layers make the Evia progressively darker. So starting with a very
simple cross-hatching, starting with the
vertical lines, and overlaying horizontal
lines on top of it. So very simple cross-hatching. In here with the
cross-hatching when can play with the
angle of the lines. Like in here, we have got this kind of cross
sectional lines. Mostly, I'll be
using this kind of cross sectional
cross-hatching lines to do the cross setching. Apart from it, you can use
the combinations like this. So we have got horizontal lines and then angle line like this. And apart from this,
you don't have to only use two layers. You can use multiple layers too. Unlike the hatching
lines in here, you can also use this kind of broken lines to do
the cross-hatching. So this gives a little bit
of different look to it. It becomes a bit lighter and look a little bit
more different from the other hatching lines or the cross-hatching lines that
we have practiced so far. Now, moving on to
using this kind of bit curvel lines to do
the cross-hatching. So this is a little
bit different. You can use this kind of similar lines with
the hatching tool, which I forgot to cover. In here, apart from this
kind of curvy lines, I also use broken lines
to make this cross edging bit different from all the cross edging that we have
covered so far. Now, let's make it a
little bit more darker, starting with the
vertical lines, now overlaying the horizontal
lines on top of it. And this is our third layer, so angle line on top of it. You can stop here or you can add more lines to make
it bit more darker. And as usual, we can use the cross-hatching to
do the seeding too while wearing the line pacing in between the lines like this. And here, I'm going to make the upper section a
little bit darker. The upper left corner in here, I added more lines
to make this section a little bit darker,
comparatively darker. In this way, I
incorporated a little bit of seeding in here with
the cross-hatching. So you have got the rough
idea how and use this kind of cross-hatching to make regions a bit darker or a bit lighter. So far, in this section, we have covered two
direction cross-hatching, multiple layer of
cross-hatching, changing the angle of each
layer to get a little bit of different kind of
cross-hatching next in here, we are going to cover stippling. So stippling basically
uses small or larger dots. Stippling creates value using individual dots
rather than lines. The amount and the
concentration of the dots determine how
dark the area will become. So you're going to start
with the smaller dots like this to do the stippling. This is similar to hatching
in the cross-hatching, like those in here
with sparser dots, we'll be creating lighter value with more concentrated dots, we'll be getting darker value, and with different
kind of dots sizes, we'll get additional
texture and variations. You can also use this
kind of stippling dots to create the seep of
an object like this. In here, all the dots
that I have created were somewhat consistent and
uniform or equidistant. But right now, let's make
it a little bit different. So in here, we have dots of
different seeps in the sizes. Basically, they are circular,
but the sizes are wearing. So are small, others
are quite large. So I'll be using this
kind of stippling dots, a combination smaller
and larger to add texture to some section
of the wheels background. As I was mentioning, using a stippling to create
the CP structure. So we have got a
rectangular in here and I'm going to do a little bit of sading using the stippling dots. As I mentioned with
the spars of dots, we'll get lighter value and
with more concentrated dots, we are going to
get darker value, start with a uniform
consistency of the dots, and we are going to make this left side a little bit darker. Thus I'll be increasing
the dots in here. So the dots will be
a little bit closer to each other to make this
region comparatively darker. Apart from this, you can
also experiment with smaller and larger
dots to create a little bit of seeding using
the stippling techniques. With this stippling technique, we can create more
subtle gradiation in between the different
darker and lighter tones. But the techniques
consume a lot of time, so I'll only be using
a little bit of this kind of stippling technique for some
of the sections. Basically, I'll be
using stippling to create a bit of
softer transition and organic texture that would be difficult to achieve
with regular lines, and I'll only be using
for certain sections. If you want, you can experiment a little bit more
stippling techniques. And with these, we are
done with the stippling. Now moving on to scribbling. Scribbing can be defined as a more spontaneous technique
where overlapping, looping, curved or irregular strokes are used
to build texture. Like this in here, I use
a bit of curved lines. For this one, the lines
are curved once again, but in here, the spacing between the lines are far closer. You don't have to stick
with the curve lines. You can also use this kind of angled straight lines like
this to get the scribbling. Unlike the precise hatching, scribbling does not
need to be perfectly uniform by controlling
the density, direction and
preserve of the mark, we can create anything from a subtle texture to
a very dark area. And as usual, like the
hatching, cross-hatching, and the stippling,
we can also do the seeding using the
stippling technique. Unlike the hatching,
cross-hatching, the stippling, we can also do the seeding using the scribbling
technique in here. As you can see, I made
the right side a bit more darker by doing more
scribbling lines there, and it worked particularly
well for g organic surfaces, shadows, clouds and foliage or to add decorative elements. This is comparatively faster to all the techniques that
we have covered so far. Next in here, we
have got scallops. Scallops are repeated
curved or UIP mark that create pattern of
overlapping arches. They are particularly used for drawing repetitive texture. I'll be using lots of
scallops to create a little bit of different
kind of scaling or you can say texture for some
of the sections of the wheels body or
for the background. And I'll also be
using a little bit of scallops for the clouds. So this is going
to be very useful. First example was of
uniform scallops. In here, we have a little bit of non uniform miscallops
These scallops are not connected to each other. In here, we are going to explore different variations from simple evenly speed scallops to overlapping and
irregular patterns. And this can be adapted
to represent scales, decorative services, sales
or other repeating elements. So this third one in here, the sides of the scallops
are comparatively longer. And as I mentioned, we are going to explore
different variations. So in here, we have got this
kind of angle scallops. I'm not going to use this, but if you want,
you can use it too. And in here, I have got
a little bit different, more different variation of scallops, somewhat armor like. Feel free to experiment
with the scallops. You can come up with
more designs that you can incorporate in
your illustrations. And finally, we have
the curved lines. So we have covered
a little bit of curved lines with the hatching
and the cross-hatching. Now we are going to cover
it a little bit more. So curve lines allow
us to make our mark, follow the form and the
movement of an object. So mostly I'll be using this
kind of curve lines for the clouds and for the outer
shapes of the wheels body. I'll be using a little bit more easier version
of this kind of circular curve lines to create elliptical or bubble shapes
with the curve lines. Theise curve lines are
especially used for following the contours of the organic
objects in our keys, wheels, clouds, water, fins
and other natural forms. With this kind of curve lines, instead of using straight
lines everywhere, we can bend our
stroke to make it feel three dimensional,
more three dimensional. And that's all for the basic, and I'll be seeing you
in the next video.
5. Metallic Colors and Ink: Welcome to this
section. And here, I'll be showing you the metallic colors that I have as well as ink that I'm going to
use and the sparkle pens. In here, I've got a set of 14 metallic colors that
I'm going to use. Mostly, I'll be sticking
with the golden colors and the sky blue and a little
bit of silver colors. In here, I'm just starting with a lighter consistency
of the color. I have diluted it by
adding more water to it, and to make it a little
bit more concentrated, you can just do the
multiple layers or you can add a little bit of
less water to it. First, I started the two
swetches of the golden color. In here, I have got
a bit darker color. Let me show you
another one. So we have got light blue
metallic colour. And for this, I
added less water as compared to all the other
three sweaches that I created. These are the
metallic watercolors that I have got from the Brusto. And if you don't
have this, you can always use the watercolor
to do the coloring. You can get somewhat of similar effect with the watercolor, so you don't have to stick with the metallic colors
to do the coloring. Apart from that,
mostly I'll be using the black in to do the
coloring for the wheels body. And here I have got this
zikurataki dark black ink. So mostly I'm going
to stick with it. Instead of this, if you want, you can also use the
black sketch paints or other black colors
to do the coloring. I also have got this white ink. Mostly, I'll be using the jelly, white jelly pen to the coloring, and I'm going to
use two brushes, one of medium size and one of smaller size too to add the
coloring for the inside of the heel In here, I'm just using the
black colour to create a simple
shape for the fizz. And on top of this, I'm going to show you how I'm going to create the patterns
and designing using the white jelly pen and a
little bit of white ink. Simple sap of the whale's body, a bit larger s. And
the fins in here, we'll wait for it to
dry a little bit. Also use the watercolor brushes to make the lines a
little bit more dynamic. By dynamic, I mean lines
of varied thickness. With it, you can
create very dynamic lines like this and add a little bit more dramatic and organic feels to your painting. For all the outlining
all the elements, you can always use
the watercolor or the blacking directly. You'll have to be a little bit careful with it if
you're going to use it. So you can do a
mistakes like this. In here, I'd smuge the
color a little bit. You can also use it to create
the background elements. But as I mentioned, you'll
have to be extra causes. And here I was going to
create thinner line, but I made it a
little bit thicker. And if you make mistake, you'll have to accordingly sept it. Simple rise, small and large
reas coming out of it, and simple rhomboid like sees
for some of the sections. I would suggest
you to stick with the fine liners and the mis
paints to do the outlining and use the watercolor and the ink to do the coloring
for the larger sections. But if you want to experiment,
feel free to use it. A little bit of detailing for
the insides of the clouds. Curves like this for the secondary outlining for
the insides of the cloud. If you have a blow dryer, you can use it to
fasten this process. Otherwise, you'll
have to wait a little bit till it get drier. You can also use a combination
of ink and pine leaners. With the ink, you can create the broader and larger details. With the fine liner,
you can use it to create smaller and
finer details. And as you can see, we have got more precision accurate with the fine liner over
the brush paints and the watercolor brushes, so feel free to choose
whatever you see fit. Now, it has dried up somewhat, so I'm using the jelly pen to add a detailing
for the fizz body. Insure that it has
properly dried. Sometimes you have to do more
than one layer to make it a little bit more clearly distinct and a little
bit more brighter. But in here, since
it's clearly visible and the contrast that it
is creating is sufficient, I'm not going to do
the multiple layering, but for some of those sections, you'll have to do multiple
layerings of the jelly pen or white ink to make it a little bit more contrasting and
a little bit brighter. Simple scenes like
this for the body. Now, for this large field. In the next section, I'm going to show you how you
can easily create the wheel's body and the
different patterns and designs that we are going
to use in the projects. Curve sweeps like this to create the bancles on top of its head, a little bit more outlining
for some of the sections. And with these we are done with the wheel and this section. I'll be seeing you
in the next section.
6. Simple Whale Sketches : Hi, and welcome to this section. In here, I'll be
showing you how I'll be creating simple
sketches for our veils. So I'll be starting with
a simple straight line. This will be determining the length as well as
the positioning of our v. Then I'll be creating this
kind of bit curved seam. So this will be used to create
the curved body of our ve. You can consider this
curve see similar to this, correction mark like Sam The curve set that we created
in here will be used as the middle portion
of our wheels body. And basically, I'll be using it as the middle
portion of its mouth. And as for the
remaining section, its stomach and the tail, I'll be making a little bit of changes depending upon the
wheels we are creating. In here for this whale, I'm going to divide into
three equal section. The first section will consisting
of its mouth like this. The second section will
be for its stomach and third in the final
section for its tail. And generally for
all the whales, I'll be following
this guideline. So dividing into three sections, somewhat of equal section, one for its mouth, one
for its middle portion, and the last one for its tail. I'll be adding the eyes
just beside its being somewhat elliptical see
like this for the eye. So this is the very
simple Skech for our wheel in our class project. We'll be making it a
little bit more detailed and more defined
and more intricate. But in here, you have got
the rough idea how you can easily create this
kind of simple wheels, just using simple straight
and curved lines. For this example in
here, once again, I started with a
simple straight line divided into three
equal section. And in here, once again, I have a little bit different
curve sheep for its body. The first wheel that we created was facing towards the right. The second wheel in here is
facing towards the left, and the seep of its
curve sexony little bit different as compared
to the first one. So depending upon the wheel,
as I mentioned earlier, we'll be changing the
proportion as well as the bend the curve
sep of its body. In here, its tail is a
little bit different. Now following the
three qual section and creating the detailing
for wheels body, its eyes, the two fins, the other side of the fin will only be visible a
little bit like this. And with these, we are done
with our simple sketch for our second wheel now
for the third one. In here, for this
one, I decided to create a little bit
of different curves, so somewhat of arc like
C for the wheels body. Now, once again, dividing
into three equal sections, somewhat of equal sections. Now using this portion, the middle portion in
here to create its mouth. Now in here just
beside this section, I'm going to create its eye. Now, following the
curve Sue's body and doing the outlining
in this manner. I believe you have
got the rough idea how you can easily create the simple bodies for the
wheel using the simple steps, starting with the straight
line to determine the length as well as the positioning of
the wheel's body. Then dividing into
three equal section, you can play with the
sections portion. You can make some
section bit larger, bit smaller and accordingly
shift its mouth, tail, and middle ports
in the stomach of way and then we have
large eyes for the wheel, two fins, two fins at
the middle section, one smaller fin at
the upper part, and then lastly, we have tail. So this is the general
guideline that I'll be following for all the
seven projects in this class. If required, I'll be making a little bit of minor changes, but the guidelines will
remain the same for all the wheels that
we are going to create in our class project. Now, let's do the outlining. In here, I'm using Sakura micron paint to
do the outlining. The pencil sketch that
you have created, you don't have to stick with it. Feel free to make changes
and adjustment to it. As you will be seeing in here, I'll be making some changes and adjustment to the pencil
sketch that I did. So you don't have to stick
with the pencil ske. Feel free to make changes and adjustment with the outlining that you are doing
with the paint. I'm going to use two pins
to do the outlining. One with the more line weight, other with a lighter
line weight. So by line weight, I'm in
the thickness of the lines. In here for this
demonstration purpose, I'm only going to
use a single pin. But for our main project, I'm going to use two pens
to do the outlining. Human like eyes for
our in in here, for this portion, we are
going to create barnacles. So simple curved saves like this to create multiple barnacles. For the lower portion
of its mouth in here, I'm going to use this kind of broken curved hatching line, a little bit of
curved hatching line, and we are going to feel
the entire section in here, below its mouth and
below its stomach. Insure that the ink
that you have used has dried up and lightly
erase the pencil marks. Now, continuing
on with the lines in here for this portion. It's the stomach for the other
side of its fin in here, once again, using
hatching lines. The other fin on the other side will be a little bit darker. I won't be adding that much
details for that portion. In here for this front fin, I'm going to add barnacles and a little bit of
designing and pattern. For the wheels body,
I'm going to create various kind of patterns and designings that I
have shown you. In here for this one, I'm just keeping it
simple and plain. So cloud like set like
this and inside this, I'm going to fill it
with spiral seeps. Simple spiral seeps like this. This design is very simple. It's for demonstration purpose. For our mean project,
we are going to make it a little
bit more dramatic, more contrasting and
more interesting. So you don't have to create the similar kind of designing
that I'm doing in here. Feel free to experiment and come up with your own
unique creations. Doing the same thing
in here for the tail, and a little bit of more designing in here
for this section. Simple spiral shapes like this. And with these, we are
done with our first pay. Now for the background,
creating celestial elements. So I'll be using compass
to create circular shapes. Two or three concentric circles to make this process
a little bit easier. Now going in with the fine liner once again to do the outlining, make it a little bit more
bolder and more darker. Once again, feel free to
experiment on your own, create your own unique
patterns and designing. In here, I'm going to
keep it plain and simple. Just set of two or three
concentric circles, and I'll be using long straight
lines of various sizes, and on top of it, I'll be
creating simple diamond shapes. In here for these three sections for the upper part of the
circle, I have left a space. And now going in and creating
simple straight lines, two or three straight
lines of various length Let's create one more in here. And as I was mentioning, simple diamond like sap
in here, rhomboid sp. And with this, we are done
with our first example of celestial. Now let's do the
second one in here, I'm going to use ink and make it a little
bit more detail. I here I'm using
Zikuratak breast pain. The main advantage of this kind of breast
pain is that you can create very smooth
dynamic lines. By dynamic lines,
I mean lines of varied thickness by wearing the preser of the breast pain. As you can see in here, I'm getting both thicker
and thinner lines. So accordingly, change the preser and you will get thinner and thicker lines. With lighter pricer,
you will get bit thinner line and with more preser you'll
get thicker lines. The disadvantage
with this kind of dynamic pain is that if
you're not confident with it, the lines will
become a little bit sicky and you won't
get Chrisman outline. So if you're not
that confident with it just don't use it that much. Let's create the eye. Now, creating simple
barnacles using this pain. Simple curve seep like this, semicircular seeep
like this in here, for the barnacles
on top of its head. Now for the bottom section
in here, once again, we are going to use
a little bit of curve hatching lines to
fill the entire section, beside and below its fin and for the front section too,
just below its mouth. I no, let's do the
same thing in here. Instead of using broken lines, you can also use the simple
straight and curved lines in here for this section. I'm going to use curved lines, and these are not broken lines, so simple curved hatching
lines like this. Feel free to experiment
on your own. You can do shading hatching. You can also use
cross-hatching in this section to make it a
little bit more darker. Now on this side,
on the other side, we are going to make
it comparatively darker since it lies
on the other side, so the sado of the wheel body
will make it bit darker. A few more bonicles
here and there. And making the outlines a bit more darker
and more crisper. With this, as you can
see, it is competive more faster as compared to what
we did with the fine liner, but you will have to
have a little bit more fluency and
confident with it. Now in here, let's
feel it entirely with the black and
later on I'll be coming back with
the white ailpin to add the designs or create
the designs on top of it. You can also do
multiple layers in here to make some of the
section bit more darker. In here, I used a little
bit of water with the ink, so its consistency
is not that darker. But for our main project, I'm going to use bit more
darker consistency of the ink to get bit
more darker veils. Now, we'll wait for it
to dry till it dries. Let's do a little bit of
coloring for our vein. Using Zikuratak ink. So colorful ink in here, I have got this golden color. This is golden yellow color, and I did not do the
outlining in here. I'll be doing the
outlining later on. This is just for
demonstration purpose, but for your in project, always ease the pencil marks. Otherwise, it becomes
a little bit harder. If you proceed to erase the pencil marks later on
after doing the inking, some of the inks might get merged up and
we don't want that. So I decided to use yellow and orange to do
the color in here. Now, going in with the orange, once again, in here, I'm using
Zukarataki breast paint. You'll have to be a
bit careful with it to get crisper and
sharper lines. You don't have to use the breast paints
to do the coloring. Instead of it, we want you can also use the watercolors
to do the coloring, or you can always keep it
monochromatic only using blue, or you can also experiment
with ink color using blue, red, greens, a
combination of those. Now, let's do a little bit
of mixing of the colors, mixing the yellows with
orange a little bit. I decided to use a
little bit of orange for the lower portion of the
fin and on the other side, too, mostly using it, mostly filling it with
the orange like this. To make the blending a
little bit more smoother, going back once again
with the yellow, another layer of yellow and
mixing these two colors. Since both are of somewhat
of same consistency, a little bit of blending
has occurred in here now. In here, I'm using tombospres
paint to do the outlining. Is that the ink has dried up properly and then
do the outlining. Otherwise, you'll get
smudging all over the paper. Following the coloring
that I did and doing the outlining for our
third and the final way. For these two colored
version of the whels, I'm not going to create
the background element. But if you want to experiment, you can create your
own unique background for the whales,
celestial elements. I'm also going to use a little bit of broken
lines to give it a little bit of more
organic feel to the whales. So some of the sections,
as you can see, I'm making the lines
a little bit dynamic, wearing the thickness
of the lines and some of the section, the lines will be a
little bit broken off, particularly for the
section of its mouth, a little bit for
its lower portion, the belly of the whale. Now the final portion
just below its mouth. And finally, let's do the
outlining for the fin in here. Cove save to do the
outlining for the fin. We are going to
create simple saves, simple pattern and
designing for it. You can also do the outlining in two or three sections to make it a little
bit more dramatic. Adding curved shape in here for the barnacles, human like eye. So just below and
above the eyes, we are going to add
three or four lines to make it a little
bit more organic. Curved lines following the
elliptical shape of the eyes. Now, as I was
mentioning that I'm going to use two pins
to do the outlining. So with the first pin, the tombosprest pin that I used, it has a bit more line weight. In here, I'm using
the sakura micron pen with bit thinner line weight. So the lines are a bit thinner
comparatively thinner. So this makes it a
little bit more dynamic. If you're satisfied with
only using a single pen, you can use that too, but I
find it a little bit more. But I find just using two paints of
different line weight, it make the whole painting
a little bit more interesting and we get
more contrasting lines. In here for this
portion, as you can see, I'm using curve line
for the upper section, and then following
those curve line, I'm just creating more hatching lines,
broken hatching lines. And as I mentioned earlier, you are free to
use simple lines. You don't have to stick with
the broken hatching lines. You can also experiment
with other lines. You can use scribbling, you can use
cross-hatching and you can also use stippling
to create the lines. Erasing the pencil marks. In here, I did a
little bit of mistake. I did not started
with the paint. So the middle portion in here, the pencil marks
won't be I won't be able to erase it, as
you can see in here. In the ink has dried up, and in my keys, it has
dried up properly, so I'm using the white el pin, sakura el paint, and
creating bancles in here. And I'm also going to create this kind of simple
patterns and designing in here. So these are optional. You don't have to
create the same kind of patterns and designing
I'm doing in here. Feel free to experiment and create your own
patterns and designs. For all our main projects, we are going to make the
lines more intricate, more varied and more fancy. Filling the entire
section with it. You can also use
the white ink or white watercolor or white gauze. That will make the lines a
little bit more thicker and bit more In here, the lower portion of the
tail is not visible, but I also added a little bit of designing like this in
here for the tails. Simple pattern and
designing like this. Now for the two friends in here, once again, the same
pattern and designing. The lower section in here. Fin on the other side, I to create only
a simple pattern, similar pattern like this. And with these, we are done with our second we for
the third wheel. For the third wheel in here, I'm using a sparkling paint, so in here, I've got gray color, and I'm going to create
this kind of cloud seems with multiple
layers for the inside. Creating more curved shapes
for the insides like this, concentric semicircles
like this for the inside. You can also create
patterns like star, moon, and other elements. You can also use various simple sap circle triangle rectangles, squares to make it a little bit more interesting
and more geometric. Last detailing in here. Yeah, with this, we are done with our third
and the final wheel. I decided to increase
the number of Bncles a little bit
in here for this one. A little bit of more detailing
with the linework in here, more lines for some
of the sections. You can always add more lines wherever you think
it's required. So just be cautious. Once you add them, there is
no way you can remove it. So yeah, that's all
for this section. I hope you learn
something new and I'll be seeing you in the next
section. Happy painting.
7. Clouds : Welcome to this
session. In here, I'll be showing you
how you can create clouds for our
background easily. In here, I'll be
showing you a total of four simple demonstrations
for the cloud formation, as well as few simple patterns and designings for
the background. For most of our project, I'll be using this kind of
simple saves for our clouds. Simple curvy saves like this. Generally, I'll be making the middle portion a
little bit thicker, comparatively thicker
with more thickness, or you can say heightwise it will be comparatively larger. And as for the length, as we progress from
the middle section, I'll be decreasing it,
as you can see in here. So very simple sap like
this for our cloud. For all the clouds,
I'm going to use two sets of the pain
to do the outlining. Either I'll be starting
with the pin with the lighter lines or with a
pin with the darker lines. Mostly, I'll be starting
with the darker lines, or you can see pin
with more weight. With these, we are
done with a simple outlining for our cloud. Sorry, I was not able to
make complete sense of it, but what I mean to say that I'll be using two
sets of the pin, one more thickness, and
one with light thickness. With the darker ones, I'll be making the outlining and
with the lighter one, I'll be using it to
do the designing and a little bit of
pattern for the inside. But in here for the
demonstration purpose, I'm only using a single pen. So here I have Sakura
micron fine liner to do the inner outlining, or you can see inner
pattern no designing. This is the simplest pattern
or you can see designing for the clouds that I'll be
using for one of the project. So this set of two outlining for the clouds and inside it, I'll be creating a
few more half clouds, half form clouds
for the insides. Simple curves like
this for the insides. If you want to keep it more simple, you don't
have to add this. Instead of it, you can
do the coloring using the ink or sparkle paints or you can just completely keep
it clean and simple, only white, or you can
also add black in to make it a little bit more contrasting with the
white of the people. So this is our
very simple cloud. Now, in here for
this second one, instead of all the lines
being connected in here, I'm creating them separately. Not the line, but the
curve saves like this. As you can see, just by
not connecting them, it is looking a little bit
different from the first one. Apart from this in
here for this one, I'm going to create shadows
using hatching technique. So I'll be creating lots
of hatching lines later. Same like the first one,
a few more clouds inside, and now another layer of lines for the
insides of the cloud. And as I was mentioning, I'll
be creating a little bit of seeding effect or
you can see sad or created by some
section of the cloud. So using hatching
lines on one side, I'm considering that the light is falling from the
top right side, so the left side will
be a little bit darker. And so that I'm using this
kind of hatching lines. Instead of this, if you want to make it comparatively darker, you can also use
cross-hatching or stippling. Or to make the clouds look a little bit more heavier
and bit more denser. Instead of this, you can
feel it entirely with the cross-hatching
or other techniques stippling to that will make this a little bit more darker, a bit more denser,
and it will look completely different
from all the clouds that we are going to create. So these are the
two simple clouds. Now for the third
one, once again, I'm going to create the same
simple p for the cloud. If you're not that comfortable, you can start with the pencil. Otherwise, the sp
is quite simple, so you can directly start with the pain in here for this
demonstration purpose, I'm only going to
create single cloud, but for our main projects, we are going to create group
of clouds three or four. In here for this
one, I'm going to do the same kind of outlining
that I did for the first one. I'm doing the same
kind of outlining or you can see in lining
as the second one. And for the inside of it, I'm not going to
create multiple one. Instead of it, I'm going to create spiral seeps
for the inside. Simple spiral seeps like this. So for the entire
inside of this cloud, I'm going to fill it
with simple spiral saps. So that's what I was mentioning
about the second one. Instead of using
hatching lines to create the shadows, effect
for the shadow, you can completely
fill it with this kind of spiral designs or
using cross-hatching, or you can also
create a little bit of patterns for the insides. For our main project, when
I'll be using this kind of cloud to make it a little bit more distinct and
a bit more clear, I'm going to use two pens, one with more line weight, and I'll be using it to create a little bit of clear
separation between all the spirals so
that it will look more distinct and bit more
intricate and more defined. And here, since I'm only using a single sakura micron pen, and the spiral sets are
not that well defined, so it looks a
little bit chaotic. But for our main project, we are going to make a
little bit of changes to it. And you don't have to stick with the spiral saves
instead of this, if you want to create
other variations or saves for the insights,
you can do that, too. Feel free to experiment
and come up with your own unique creations
and designs for the clouds. Let's move on to the
fourth and the final one. So in here, cloud, the same of the cloud
will be exactly the same as what we did for
first, second or third. The only difference for this one will be
that I'm going to use sparkle pins to do the
coloring for the inside. So you can say for the inside or the lining of
the cloud details, I'm going to use sparkle
pins instead of the black. In here for this one,
I'm using golden color. Instead of using single
curved lines in here, I'm using combination
of one or two. As you can see, instead
of using single lines, I'm going over the lines twice to make it a
little bit darker. And for some of the section, instead of a single line, I'm
also creating multiple one. By multiple, I mean two lines
to make it a little bit more interesting
and bit different from what we did for the
first and the second one. And apart from that, I'm also adding a few
more curves for the inside that
are not following the outlines that we created
with the sakura micron pen. In here too if you want
to do a little bit of cado creation using the
hatching technique, cross-hatching or stippling,
you can do that, too. You can also do the coloring
for the entire clouds using the sparkle paints that
will be interesting too, or you can always
use the watercolor, the metallic watercolors to
make it more interesting. So that's all for the clouds.
8. Patterns and Designs : Welcome to this
section. In here, I'll be showing you some
of the patterns and the designs that we'll be
doing for our clouds as well as on top of
the wheels body and a little bit for the
background elements. So the first one is simple
wavelike pattern that I'll be using on top of the wheel's body for
some of the project. Very simple seeps like this. In here, I'm just
trying to create a very simple wavelike for
using the simple saves. For most of the patterns and
designing for our projects, I'll be using two
or three outlining, or you can see in lining. First, I'm starting
with the Sakura micron, fine liner it to do the
first layer of outlining. And inside it, I'll be
using sparkle paints to do another layer of outlining
and add colors for it. You don't have to
do the same thing. Feel free to do
experiment and come up with your own unique
patterns and designings. These are just very simple
patterns and designing. For our main project, we are
going to make it a little bit more intricate and a
little bit more designed. So simple outlining like this, ensure that the ink
has properly dried up and lightly release
the pencil marks. For the second
layer of outlining, once again, I'm using the
Sakura micron fine liner. But for our main project, as I mentioned earlier, I'll be using two
seats of the pen, one with more line weight, another with a
lighter line weight. So mostly, I'll be
using the pen with a more line weight to do the outlining and
with the lighter one, I'll be doing the
outlining for the inside. For this two demonstration, I'm just simply going to
use the sparkle paints. In got this metallic blue color. This adding it below
the outline section. If you want, you can
fill the entire insides of the waves with different
color combinations, or you can always use the
metallic colors or watercolor, or you can just
keep it plain and simple sticking with
only the black color. And along with
that, if you want, you can also use the normal wallpoint paint of blue colour, green colors, and white colors to make it a little
bit more interesting. So very simple pattern
like this, pave form. And for this another one, I'm just going to do
exactly the same thing. Instead of starting
with the fine liner for the second outlining, I'm directly starting
with the sparkle pens. I'm also going to use the blue. So a combination of
those two colors to do the coloring
for the inside. So for some of the sections
of the wheel's body, I'm going to create this kind
of wave pattern on top of its middle section mostly and a little bit for its steel or a little bit on top of its fin. I think I have only used
for two of the project. For others, I have used
different patterns in designing a little bit more intricate and better as compared
to these ones. In here, instead of
using Sakura micron fine and to do the outlining, I'm sticking with the
blue colour to do the outlining to make it a
little bit more interesting. So these are the two simple
wavelike form designs that I'll be using for some of the sections of our project. Now for the cosmic elements,
the background elements, I'm going to use the compass
to create perfect circles, so oval saves using the compass. And mostly I'm going to
use concentric circles. So by concentric circle, I mean the circles that
say the same center, circle of different
radius like this. And yeah, we'll be using the as to create some
patterns and designing incorporating elements
of clouds and wave forms along with the
wheelspoty in the center of it. Start with a simple pencil outlining for the
circular shape of it, the circular for the
background element. Now, in end, I'm just
going to stick with the golden color to do the
outlining and detailing. I'm going to create simple arrow like in here, and on one side, I'm going to use a little bit of straight and angle line and create simple
pattern and designing. For some of the project,
I'll be turning this into moons and suns
and for others, I'll be adding clouds
on top of it or wave like fonts on top of it to make it a little
bit interesting. For some of them, I'll only be using single circular
saves for others, I'll be using multiple ones. So you've got lots of
choice to choose from. And let's make this a little bit bolder
and bit more darker by going over the lines to
add more line weight to it. It's all about trying new
things and see what you like. Very simple pattern like this. I'm not used this simple
pattern for any of the product, but this is just for simple
demonstration purpose. And three straight lines
that I was mentioning. And on top of this, I'm
going to add this kind of rhomboid So this is our first simple circular
seeps for the background. If you want to make it a
little bit more intricate, a little bit more defined and
detailed, you can do that. You can also use the micron
paint to do the outlining to make the seeps a little bit more crisper and a bit more detailed. In here for the second one, I'm just going to use this kind
of simple hatching lines. I'm just going to
use this kind of simple hatching lines to
create the simple pattern. And apart from this, I also
forgot to mention it for all the circles and the semicircular see that
I'm going to create. I won't be doing
the outlining for the entire section.
For some of them. I'll only be doing the
outlining for half section or one third of the section to make it a little
bit more interesting. Like in here, I'm just
going to do this section, the upper section of
the first circle, and for this one, I'm going
to do the half of the circle. So for the first one, we did the outlining for one portion, one arc of the circle, but in here, I'm not
going to do that. I'm just going to use this
kind of hatching lines. And as you can see, I change the direction
I reach the middle. So accordingly, set this
direction or if you want to create a
different pattern on designing, you
can do that, too. Now, here's another layer of hatching line to make it a little bit more
darker and denser. A little bit more pattern and designing for the
middle section. So simple arrow like
patterns like as I anon, you don't have to create the
same thing that I'm doing. Feel free to create your
own unique patterns and designings extending this
one a little bit more, and on top of it,
I'm going to create simple circular simple circles, basically to add a little
bit more interest to it. I just came up with this pattern simple designing like this. I have not used this
in any of the project. And this is our
simple second example for the background element. Now, let me show you a few
of the other examples. So a little bit
different kind of wave like somewhat similar
to the cloud. So instead of the Cloud C you can also use this kind of S. It has a little bit more
edge as compared to the curvy CP of the clouds.
Let's do the outlining. And inside this, I'll be filling it with the curved
sieve following the outline sieve
and we completely filling it with more
sets of curved lines. And inside that, I'll also
be using a little bit of sparkle pens to add a little bit more interest
and a little bit of coloring. Right now, I'm just
doing the outlining. And as you can see, I'm not sticking with the outlines
that I have created. So you don't have to
stick with the outlines. Feel free to make
genius an adjustment to it if you are not
satisfied with the outline, and see that the
ink has properly dried up and lightly
erase the pencil marks. Now for the second
layer of retailing. So as I mentioned,
I'll be just following the Sep and filling
the inside with this. I'm also wearing the
siges a little bit. For the smaller
section, the sides are comparatively
smaller and thinner. For the larger
sections like this, this moon like seep in here, I made the side is a little
bit larger and bit thicker. So accordingly,
seep the seeps in the sides as you seep it. And for the insides
of the section, I'm going to fill it with
the sparkle colours. For this demonstration and for the demonstration
of the cloud, I only use the paints. But for our main project, I'll mostly be using the metallic colors a little
bit of sparkle paints. And if you don't have
that, as I mentioned, you can always use the watercolor or you
can only stick with the blacking or you can
use the ballpoint paints. You have got normal ballpoint
paints of green colors, blue colour and red. That will make it a little
bit more interesting if you don't have the metallic
colors or sparkle paints. So with this, we are
done with the insights. Now, as I was mentioning, filling the insights
with sparkle paint. In here, I'm going
with the yellow. Mostly for the sparkle paints, I'll be using a little
bit of silver colour, gray color, and blue colors. And yeah, that's mostly
what I'll be using. If you want to use
other colors, greens, violets, reds, you
can do that, too. Filling the insights carefully. I'm adding it mostly
for the intersection. If you want to add
it alternatively, you can do that, too. That will also make it a
little bit more interesting. And with these, we
are done with it. And and apart from this, if you want to
incorporate scales like seeps in here I'm just showing one of the
simple pattern that I came up with for the
scales like structure, if you want to incorporate in the wheels body or for
the background element, curve elongated scallops
seeps like this, and we are going to use a little bit of golden
color to do the coloring. This is our simple
outlining now, adding layers for the inside. Let's do it for all the
sections. Who the final one? Raising the pencil
mark slightly. And as I was saying designs, the arrowhead like
designs for the inside, Bombid seep Rombus like
seeps for the insides. You don't have to create
the same designs, feel free to create your
own unique patterns and designs for the insides. And in here, I have
just shown you a simple and single scallop
example instead of it, you can create multiple
different patterns and designs for the inside. So scallops, you can play with the length sep and the width of the scallops to make it a
little bit more to make it a little bit more interesting and completely different. NFE filling the colors. So in year two, I'm
also using the yellow. Instead of it, if you want to
use silver color or you can also use the black
fine liner to do the coloring or you can
keep it plain and simple. Apart from it, I also decided
to add a little bit of more detail in the form of
this kind of semicircular arc. We are done with the
simple patterns and the designing that I'll be using for some of the sections, background elements
for our project.
9. Whale beneath the Azure Sky Day 1: Hi, and welcome to this project. We'll be the Azure moon. Now, let's start with a
simple pencil sketching, a simple straight vertical lines in somewhat of the
middle of the people. If you're not that confident, you can always use the
ruler to create the lines. Now, a curve seat for
the wheel's body. For this wheel, I decided to make it a little
bit different. And most of the wheel's
body the upper part of the wheel's body will be
lying above the central line. So this is going to be somewhat of the middle portion
of the wheels bounding. No wheel steel. This is a rough sketch. Don't have to strictly
follow what I'm doing. Feel free to make changes
and adjustment to the SP and the side as well as the placement of
the whale's body. This is going to be
the wheel steel. For this one, I decided to keep the designs a
little bit simpler. So mostly I'm going to using curved lines and
curved hatching lines. And as for the patterns
and designing, I'm just going to
use scribbling and create somewhat
of simple shapes. The curve seat that I used initially that was going
to be the middle section. I decided to make a little
bit of adjustment to it. Instead of using it as
the middle section, I transform it as the
top of the wheel's body. Now, in here, I'm
going to add the fin. If you want to change
the placement, you can do that, too. This is going to be the middle section for the wheel's body. And this is going to
be the wheel's mount. In here, this is going to be the wheel's eye
and just below it. In here, the wheel screen. If you're not that confident in dividing the wheel's body, you can always divide
the wheel's body into three divisions, and then for the first
division, we'll have his eyes. For the second division, the middle section
will have its stomach, and for the third section, we'll be creating
the wheels tail. Extending the new middle
lines that I have created. For this project, most of
the video is in real time, for some of the section that is repetitive or where we
have to add lots of color. I haven't speeded
up the portion, and I'll be mentioning
it when that comes up. I made the wheels mouth
a little bit more curve following its contour,
and as useful, we are going to use
three or four lines for the wheels mouth to make it a little bit more
distinct and separate from the wheels stomach portion. In here for the
background elements, I'm going to use large
clouds as well as a single moon or somewhat
of semi spherical sale. At the bottom, we are
going to experiment with a little bit of dry
breast technique to create wave like form. So this is our rough
pencil sketching, and in here, I'm using Tombos breastpin to
do the outlining. So I did a little bit of
mistakes with the outlining, so I don't have to worry since I'll be covering it
with the black later on. Or you can just convert
the mistakes into designs. And continuing on with the remaining outlining. As I mentioned, you don't have to stick with the outlines. You have created feel free to make changes and
adjustment to it. I decide to make this
middle portion a little bit bulgy and doing the same thing
in here for this portion, the head of the whale's body. And with this pattern
with the upper outlining, now let's do the mouth and
the remaining section. Two or three layers
of the lines to make it clearly distinct
from the stomach. Another line for
the top section, and now extending it. And on top of this,
we'll be creating ices. Small curved lines on
top of it like this. Using a little bit of
broken lines to add a little bit of more
organic feel to it. And once again, following the CP and adding
more lines like this. And in here, instead
of the simple line, I'm using curved lines that
will be utilizing later on to add Barnicles and a little bit of more
detailing for this section. Doing the outlining
for the lower portion, using broken lines like this. Moving on to the wel spin
in here, once again, I'm going to use
the broken lines a little bit more detailing in the form of spiral
shapes like this, encircling the wheel spin,
the point of connection. Now. Once again, utilizing
the broken lines and a little bit of
curved lines like this to do the
outlining for the spin. I'm going to add nnicles
and a little bit of designing using this
kind of curved shape. Doing the same thing
on the other side. Now moving on to the
other fin on this side. Using this kind of
curve shapes to do the outlining for
the entire section. And with these we are
done with both the fins. Now moving on to the
remaining section, the stomach and the
remaining part of the wheel spotting plain and simple lines to do the outlining in here. If you want to use
the broken lines, you can do that, too. And let's create a
rough outlining for the else using elliptical saves to create the wheels
I and inside it, we are going to
add large eyeball and leave a little bit of
white space for the highlight. Filling the insides of the eyeball with the
black while leaving a little bit while leaving a little bit of white
space for the highlight. Adding detail in the form of more lines for above
and below the eyes. Since the details that we
created with the lines on above and below the eyes will be covered with
the black later on, but we'll be using white
chilly pin to add it later on. For now, we are just
continuing on with creating multiple
clouds in here. You don't have to stick
with the outlines that you have created
for the clouds. If you want to make changes
to the seat side as well as placement of the
different parts of the clouds, you
can do that, too. Adding more curved seats
on top of the wheels head. Adding another layer of
clouds insides larger ones. Some of the clouds
in here are not connected to each other
later on if required, we'll be connecting
it, otherwise, we'll be leaving it as it is. Secondary layer of outlining. I'm using the same
rasping to do it. But if you want to make
it a little bit distinct, you can always use
the fine liner to do it and make it a
little bit thinner. So continuing on with adding
it for remaining clouds, another layer of outlining
inside the clouds like this. Adding one more cloud in here. Now, once again, going
back with the compass. I was not satisfied
with the outline of the circle that
I created earlier. So I decided to create another circle
in here that will be our Azure moon inside in case group dried up and lightly erase the pencil marks. I also erased all the outlines for the circles that I created. I'm going to create
another circle a little bit larger one, and I'm only going to create a circle for the upper section. I'm not going to extend it for the lower part
of the wheels body. Now, creating a few
barnacles here and there, particularly just beside the bump saps that
we have created, the curve ship that
we have created. And I'm using spiral
saps like this to create the resemblance
of barnacles. These are somewhat
uniformly placed. But if you want to add it
randomly, you can do that, too. A little bit more detailing
using small hatching lines. Instead of it, if you want, you can add more curved
lines following the sea or you can just
follow along with me and do what I'm doing using small hatching lines like this, doing it on the other
side as well as adding a little bit more
detailing for the insides. Now I'm going to extend
it towards the fin, and I'm going to use this
kind of broken lines. Using curved lines like this
and connecting it to each of the barnacles or the patterns or design that
we have created like this. Let's make it a little
bit more detail. So another layer of
detailing like this. This is optional. If
you are satisfied with your illustration, you
don't have to add it. Apart from this later on, I'll also be using a little bit of fine liner to
do a little bit of seeding just beside the fin and a little bit near
the whel's mouth. For now, I'm not going to add the detailing and the
lines for the stomach, I'll be adding it later on. I'm just using the ink
to add the coloring for the wheels body and later on,
I'll be coming back to it. Carefully filling
the black inside the wheels earlier the
design that I created, I decided to cover it. If you want to keep that design,
you don't have to cover. Carefully filling the
insides with the black. Continuing on with adding
the lacking carefully. One of the main
reason that I did not add the color for
the bottom section, the tomach of the wheels is that I'm going to
create a little bit of rough designing using the
black ink directly in here. So that's why I
did not cover it. And yeah, now, just continue
on adding the colors. And this is the kind
of a little bit of rough designing that
I was talking about. Tandom strokes with a brush while leaving a little bit
of white species in between, using this to create
the separation and the outlining for
the stomach section. This is optional. Instead of it, if you want to create plain
and normal outlining, you can do that too,
or you can just follow along with me
and create the lines. Random strokes with the brush, leaving a little bit
of empty species in between the brush strokes. Adding it carefully
near the fence, a little bit of
black in between. I'm not going to
entirely cover it, but a little bit of black continuing on with the
remaining portion, filling the black for
the entire section. For the upper section, I'm
not going to repeat this. I'm just going to completely
fill it with the black. Carefully filling it in
here for this curved seams. Extending the ink a little bit and filling the
remaining portion. The gap in between the upper and the lower section
of its mouth. I'm also going to
feel the black inside that while leaving a little
bit of spaces in between. And this portion, the detailings for the eyes that we created, I'm
going to cover it. But later on with
the white helpin, we are going to redo it, adding more details in the form of curved lines
on top of the eyes. For this region,
the middle section, we are going to fill
it with a black ink, but not completely,
as you can see, I'm leaving a little bit of
white species in between. Carefully with the brush, create small strokes and leave a little bit of empty species
in between like this. If you're not that confident, you can always use
the micron pen or the breast paint to create
this kind of minute details. Now feeling the black for
the remaining portion of the wheel's head, and with these, we are mostly
done with the whale's body. We'll have to add the
coloring for the whale's fin. Carefully adding it in here. I'm leaving a little
bit of space in between the outlines
and the coloring. I'm also going to
leave a little bit of white species in between
the coloring like this, somewhat similar to what we
did for the stomach section. Do the same thing in here
for this fin on this side, comparatively more species in between the lines like this. I have divided this
project into two sections. This is the first section, and mostly we are going to cover
up to here in this part. I'll be doing a little
bit of detailing in the form of creating the
outline for the moon. But yeah, mostly, that's what I'll be covering in this
part of the project. And in the next section, we are going to
add more coloring, more designs and patterns using compass to create
another circle like this, a little bit larger circle. In here, I'll be using
the blue color later on. On top of it, I'm going to use the golden colour and create
two more concentric circles. Instead of this kind
of pattern designing, if you want to use other,
you can do that, too. I was mentioning using the
golden colour to create another concentric circle
above it like this. This is option. Instead of this, if you want to use other
colors, you can do that, too. Use the same center and create two concentric
circle like this. And that's all for this
section of the video, I'll be seeing you in
the next part of this.
10. Azure Sky part 2: Welcome to the second
part of the wheel. We need the Azooul. Continuing on where we left off. Let's do the coloring
for the clouds. In here, I'm starting
with the golden colors. And for this section,
I've increased the speed a little bit since this is going to take a
little bit of time. Right now I'm using
a little bit of concentrated color and later on, I'm going to spread
it I just adding it for the middle
section of the clouds. Adding this concentrated
golden color, golden metallic color in
here for all the clouds and now using a little bit of water to spread this
color entirely. I'm going to make the
outline section of the clouds a little
bit lighter and mostly focusing the darker seeds near the bottom section or the
middle portions like this. And we have to do the
coloring two layers. This is the first layer. For now, just spread the colors and feel insides of the clouds. Instead of using this
colour to do the coloring, you want to use other
colour or if you want to create patterns or
designings for the cloud. And if you want to keep
it plain and simple, then you don't have to
follow along with me. Otherwise, I'm just going to
spread the color for now. Now, we are going to
make this section. The contact between the wheel and the clouds a
little bit darker, adding color in that region and spreading the colors
evenly somewhat evenly. Now, second layer
of the coloring. So a bit more concentrated
color and then spreading it. I'm also aiming to
get a little bit of textured look, a
bit of grainy look, so I'm not going to spread
the colours evenly, and I'll be using
a little bit of random strokes for some of
the sections to achieve that. In here, I am using
a little bit of different seed of
the metallic colour, metallic golden colour, a bit concentrated
seed and spreading it unevenly like this to get a little bit of grainy
appearance for the clouds. And in my case in here, the wheel I painted has
not properly dried up, so I'm adding the colors
carefully not to smudge the ink. Now, add more colors
wherever you are required, particularly add more
colour on top of the secondary clouds that
we have created on top of it to make the upper section a little bit darker and the lower section a
bit more lighter. And the first outlinings try to keep it a
little bit lighter. So this is going
to be our cloud. And for the moon, I'm going to use this blue metallic color. For this two, I'm going to do
the coloring in two layer. This is the first
layer, somewhat spreading the color for
the entire section, and then to get a little bit
of grainy appearance and a little bit of darker region
for some other section, I'll be adding more concentrated
color later on for now. This is spreading
the color evenly and feeling the entire section
with this metallic color. You will have to be
bit cautious and careful near the
outlines of the cloud. We don't want the
two colors to mix. In here, most of the
colors that I use near the clouds has dried up
somewhat, the golden color, so I'm adding it comfortably but insure that the
color has dried up, otherwise, there is a high
chance that two colors will mix if you make
a small mistake. Carefully surrounding the cloud. Now, just filling the
remaining section with it. So this is our first layer, spreading the color a little
bit wherever it's required. Using a bit concentrated
color and adding it for some of the
sections and spreading. Doing this to get
a little bit of grainy texture for some of the sections as
well as to create a little bit of light and sidos for the moon that we
have created in here, particularly near all the
outlined section of the cloud, add a little bit
more color there. And as we move up, I'm just decreasing the
intensity a little bit, spraining the color and even
to get the grainy texture, a little bit for the
upper sections too. We'll wait for it to dry a
little bit, the two colors, the two layers will mix
on its own because of weight and weight
technique and will get a little bit of blooming effect and a bit of grainy texture. Apart from this, I
also decided to create this small sphere sieves
using the same blue color, large and small bubble
like see like this. This is optional.
Instead of this, if you want to use
the other color, the golden colors,
you can do that too, or you can use the
combination of both. I'll also be using
the golden color, but I'll be adding it
for the bottom section. As you can see, I'm not
even spreading the colors to get a little bit
of grainy texture for this spheres too, I'm adding a little bit more concentrated blue form
insides like this. The color had dried up, and we are going to do the outlining
for the moon like this. For the blue moon,
I'm going to do the two outlining.
This is the first one. Apart from that, I decided to do a little bit more detailing for the insides of the clouds. So you're using
stippling technique like this and extending some of the sections of the cloud and creating a few more
formations like this. Instead of it, if
you want, you can also create the plain
outlines like this, but I'll be using
a little bit of stippling technique to extend some of the clouds and
create a few more. So this is Jobson. If you're satisfied with your cloud,
you don't have to do this. Using stippling technique
to create this kind of rougher texture for the outlines
of the cloud like this, additional clouds
for the inside. A few more clouds
here and there. For some of the sections, I'm making the outlines a
little bit darker if required, otherwise, just using
the stippling technique to create the clouds like this. And the bubbles that we created earlier, the blue bubbles. I'm also going to
use the breast pain to do the outlining for those. A little bit of more
detail in here. Now, moving on to the veil. So using the gilpin white
ailpin and adding white like this for the insides of
the bancles in here, this above its mouth, using
this kind of spiral saves, using the curve lines like this and adding it
like this in here. So for this il two, I'm going
to keep the design simple. Instead of this, if
you want to create other patterns and
designing way to do that. Mostly, I'm going to
use the hatching lines, curved hatching
lines and then use scribbling to create
simple pattern and designing for the inside. A few more banicles like
this using the spiral seeds, and now moving to the eyes, creating details,
using the curved line. We're just going to
surround the eyes, the eleptical sep of
the eyes with lots of curved lines like this to
give it a little bit of weary I I'm also going to use this kind of small
hatching lines to make this region a
little bit more denser, adding it for the
upper section to small hatching lines
of varied like this. I'm going to create this kind of small hatching
lines like this, broken hatching lines
of varied length. And for most of
the whale's body, we are going to cover it
with this kind of save. This kind of small and broken
hatching lines like this. I'm going to use this
scribbling technique like this to create this
kind of simple save. Simple seep like this using
the scribbling technique. Simple cross like
seep like this. Instead of this, if you want to create other seeps,
you can do that, too. But mostly I'm going
to use this kind of simple cross saps using the scribbling technique
for the middle section. I'm trying to keep the
sees a little bit uniform, but if you want to vary the
seeds, you can do that, too. With the scribbling,
you can create this saves quite easily, and it won't take
that much time. For the sections in here, I'm making them a
little bit smaller. For the veil steel, I'm not going to add it. And also for the helpin
I'm not going to add it. I'll keep I'll be creating other designs
using the scribbling. And for the remaining section, as I was mansoni just
broken hatching lines of where it lands like this in between the sieves
that we have created, the cross seps I broken lines, broken hatching lines
of varied length. Try not to oversaturated. We are just encircling the scraw saves that we have created lightly with
the broken lines, broken hatching lines
of varied length. The white species that
we created earlier with black ink also surround them with the broken
hatching lines, moving on to a little bit of detailing for the fin
for the upper section, a few curved lines like this. I decided to make the ice
a little bit more denser, so more lines for this region. Now for the upper section, using the scribbling like
this, simple designs. Now continuing on with
the remaining section, broken hatching lines
like this and encircling the cross seats that we have
created using these lines. And as we progress towards that, I am just decreasing the
number of the lines. Small simple lines like this. This region is a little bit
empty so add more lines. Now add more lines wherever
you think it's required or wherever there is a lot
of empty spaces in between. This region is a
little bit empty, so I decided to add
more lines in here. Now for the fins, using a scribbling technique to create more random seeds like this. In here, if you want
to add cross like seeds on the fin, you
can do that, too. But I'm going to keep it
plain and simple like this. Now moving on to the other
fin, creating more details, the same kind of detailing
using the scribbling, moving back to Mel's body, a little bit more detailing for the outline section and more small broken
hatching lines like this. Finally, moving on
to the wheel steam. In here, I decided to create this kind of simple
designing for the lower part of the wheel
steam using the scribbling. Oh for the remaining
section, once again, using the broken
hatching lines like this and filling In here, the size of the lines are
comparatively smaller. And with these we are
done with white ink. If you want to add a
little bit more details and coloring, you
can do that, too. Now, going with the fine liner to add smaller and
finer details. For this section, the smaller
sections of the pin I'm just adding small dots and a little bit encircling
it like this. This is optional. If you're satisfied, you don't
have to do this. This section was looking
a little bit empty, so I added a little
bit of black in there, doing the same thing on
the other side of the fin, small dots and encircling
it with smaller lines. Doing a little bit of
seeding just beside the fins to make these
sections a little bit darker and doing the same thing for the upper section
of the whale's mouth. A little bit of seeding
using the hatching lines. Now going back with
the breast pain, and we are going to encircle
all the small spheres, the blue spheres that we
have created with it using broken curve lines
like this to do the encircling of all the
spheres that we have created. Instead of this, if you want
to create other patterns or design in the form
of rays coming out from the blue spheres or other small stars encircling it or surrounding it,
you can do that, too. But I'm just going
to encircle it in this manner using
broken curved lines. I'm doing this in two layer. First, I'm encircling it
completely and then using broken lines to encircle
another layer like this. We have got three or
four more continuing on with and for the bottom section, I'm going to use
the golden color to create the same
kind of spheres. But with those, I'm going
to create a little bit of more patterns and designing
the golden spheres, as well as I'm going to use the bras to create
wavelike forms. And with these, we are done with the upper section now using the breast pin and creating
this kind of wavelike form. Mostly using this kind of broken curved hatching lines
to create the wavelike form. I'm included in photo. You can see I
created simple wave like form using
the broken lines. Multiple lines like this
using the breast pain. We have got overlapping
lines like this in here. Now I'm using the breastpin a little bit of
dry breastpin and giving a little bit
of this kind of duher look to the waves
that we have created. If you don't have the breastbin, you can also use the
watercolor brush. Just use less water, a bit dried brush
and using that, you can create this kind
of rougher texture. Rough texture using
the breastpin. And for some of those sections, I'm once again using
the Tombos breast pain, giving it a little bit of
defined look like this. This is all option.
If you want to keep the wheels plain and simple,
you don't have to do this. Apart from this, I
decided to create this kind of rhomboid designs
for some of the section. Simple rama seeps like this, simple roma seeps like this and filling it with
the black like this. Me rhumba seeds here and there. I'm adding it randomly. Now going in with
the golden color, a bit concentrated
golden color and creating numerous small
spheres like this, the same kind of spheres that
we created with the bloom. I'm wearing the
seeds and the sizes as well as the placement
of the spheres. Numerous small and large
spheres with this golden color. If you want to use other
colors, you can do that, too. A sequence. And here
I added lots of spheres randomly for the
entire bottom region. Now I'm going to encircle all the spheres that
we have created. So this is going to take a
little bit of time since we have created lots
of spheres in here. And here I increase the
speed a little bit, since this is a
repetitive process. And as I was mentioning, simple pattern and
designing like this, arrowhead like seats for
some of the spheres. Mostly, I'll be adding it for the larger ones and another layer of
outlining if required. Simple pattern like this
for the larger spheres, not all the spheres, and another layer of
outlining like this. Once again, I increase the speed a little bit since this
repetitive process, doing the same thing for
most of the larger spheres, creating arrow head shapes
like this and doing another layer of outlining
for some of the sections. Simple pattern likeness for the larger spheres,
not all the spheres. With these we are done
with this project.
11. Guardian of the Celestial Rainbow Day 2: Hi, and welcome to the guardian
of the celestial rainbow. This is one of the
intricate one with a lot of designing
on the heels body, but the background elements
are quite easy for this. In here, I've
already started with a straight line in somewhat of the upper
section of the people. I'm going to make
the curve sip of the heel's body a
little bit downward, so that's why I separate the
line a little bit upwards. So this is going to be the
curve sip of the wheels body. And I'm going to make the
wheels piece towards the right. If you want to make changes
to the seep in the side as well as the placement of the
line, you can do that, too. As usual, I'll be going
to divide the line into three sections to make the process a little bit easier. To make the process
a little bit easier, you can always divide the
line into three sections. For the first section, we'll
have the whale's head, then for the middle section, we'll have its stomach and
for the large section, we'll have the whaletail the upper fin in here at
somewhat of middle section. And and then in here, we are going to create the alte. Creating this somewhat
semicircular see or arc like see for the weltil and creating the remaining outlining
for the whale sail. Let's make this region a
little bit more thicker now extending the lines in
here for the wheels stomach, doing the same thing in here. And as I progress from the
right towards the left, I'm going to increase the
thickness a little bit. This region will be a little bit more thicker, the
middle portion. In here for this portion,
the whale steel, I'm going to make a little bit of changes to the shape of it. I'm not satisfied with
it, how it turned out. The middle portion in here, this will be the whale's mouth. And following the semiddlecur, we are going to create
the whales fin, the other fin on this side, and in here just above it, I'll be going to create
the whale's eye later on. This is the simple pencil
sketch for the whale's body. If you want to make
changes in adjustment to the C side of it,
you can do that. For the wheels,
mouth, and the head, I'm going to make this
sports a little bit more defined using a little bit of curve lines so that it
will become a little bit easier for us to create
the Barnicle slit around. Now going in with the
Sakura micron pine liner to do the inicial outlining. You don't have to stick with the outlines that
you have created. Feel free to make changes and
adjustment to the outlines. And here, I'm going to make this a little bit curved like this so that the creation for the bancle later on will
become a little bit easier. Instead of making
it curve like this, if you want to keep it plain and simple, you
can do that, too. Now, from here onwards, I'm going to make it plain and curved a little bit
curved like this. If you want to set
the position of this fin a little bit,
you can do that, too, extending the lines and changing the curve a little bit for the whale steel, as
you can see in here. I also decided to make the whale's mouth a
little bit larger, so I extended it,
and accordingly, I'll be shifting the
wheels a later on for now, just doing the outlining for
the whale spin on this side, the front pen, using mostly this kind of curve line so that it looks a little
bit more organic. Let's increase the
thickness a little bit. And here we'll be adding
cults using the partkle pins. And yeah, with this, we
are done with this fin. Now on this side, once again, I'm going to use a little bit of curve line for the lower
section of the whale's mouth. In here for this project, I made the lower half
of the wheels mouth a little bit more broader as
compared to the upper half. Now the other fin on this side, same kind of outlining.
Curved seep like this. If you want to keep it plain and simple, you
can do that, too. If you want to keep it plain and simple, you can do that, too. Now, a little bit different outlining
for the wheels tail, the bottom of the
wheel tail like this. And now following the
curved seep like this and extending it
towards the wheels fin. This is the initial outlining
using the fine liner. Later on, I'll be using
the breast pen to make the outlines a little bit more crisper, a bit more darker. Now doing the outline for
the heltel at the back. For the steel, I decided to make it a little bit more broader, so I'm going to increase
its thickness like this a little bit comparatively more than what we created
with the pencil sketch. This is our simple
outlining with the fine liner for
the whales body, a little bit of change in here, making it a little
bit curved so that I can add the eyes later on. Using compass to create
the background element. We have got this kind of
simple semicircular sea and few more concentric lines here on me using the
metallic colors to do the coloring for this
background element. For the remaining section
of the whales body, I'm going to use the
sparkle pints and the fine liners and the breast
pins to do the coloring. Feel free to experiment with various shapes and sizes
for the background. Initially, I was going to
create this concentric circle, but I decided to use some of the other examples
that you can play with. So instead of the
concentric circle, you can create this kind
of other variations too. Likely leasing the pencil marks, insure paint his
dried up toperly and then likely release
all the pencil marks. Me once again with the pencil. In here, I'm going to
show you how I'm going to create this kind
of simple curvy seam. How I'm going to use this kind
of simple curvy saves for the patterns and designing inside the veils
body on top of it. So mostly, I'm going to use this kind of
simple curve them, a little bit of
cloud like seeps. A combination of cloud like
seeps and the waves like sep, so I'm going to combine
both the seeps. So this is somewhat
similar to what I saw in a demonstration new, but the sizes of the seeps are a little bit more larger and it's a combination of both the curve seeps as well as
the wave like form. I'm also wearing the seeps
in side accordingly. For the il steel, I made
it a little bit smaller. And then in here for
this middle section, this will be one of the biggest pattern or designing in here
for this project. So using this kind of wavele
form for the entire section, for the entire middle
section like this. I'm also going to
create this kind of simple sieves on
the fin like this. This is just a simple
inicial sketching when I'll be doing the outlining and adding the coloring
for the insides. If required, we'll
be making changes to Now, another larger
patent in here. So these are not connected
with each other, but if you want to connect them all together, you
can do that, too. One more smaller in here
just beside the upper fin. On top of the wheels,
I a smaller one. I'm also going to create a
little bit more smaller one, smaller wave like phone
in here for this win. These are just simple
initial sketching. If required, I'll be
making changes to it. You don't have to particularly stick with the outlines
that you have created. Now, using the file end to do the outlining in
here for the steel, the waves like form is somewhat
similar to the clouds. In here, I have not created the SR edges for the
waves like form. But if you want to include few SR edges, you
can do that too. Now moving on from
this point onwards, I'm going to create
the wave forms more clearly like this. Inside this, we are
going to fill it with concentric broken
hatching lines, and for alternative layers, I'm going to use the alcalpins
to add the coloring. This is quite larger project, so I have divided this
into four sections. This is the first section. And as you can see, I'm not exactly following the
outlines that I created. I made a little bit
of changes to it. Now, the one in here, consider it to make it
a little bit different, giving it a little bit
more edge like this. Sharp edges like this to the end of the waves
that we have created. The other smaller one in
here this beside the fin. I made it comparatively
smaller than what we sketched. Now in here for the fin, creating small circular
seep spiral like seeps for the curved seeps that we
created for the outlining, a total of four or five. Now encircling it and
making it a little bit more broader using the
simple curved lines. I'll be coming back to it to do the outlining
for the wave life. Now, just repeating the same
thing in here for this fin. Simple curved and spiral
shapes like this. I'm not going to
make it more detail, since this lies on
the other side. Now moving back to the
front fin and creating a seam wave like form
comparatively smaller. Doing the same thing
in here for this one, but smaller wave like form. And in here for this portion, I decided to let it remain
simple, plain and simple. I'm not going to do
the wavelike form outlining for the region
just above the else. But if you want to include
that, you can do that. Now, let's make the portion
a little bit detailed. Simple curved hatching
lines like this for the entire region for
the wheel's mouth. Later on, I'll be using
the breast beans to make these outlines a
little bit more darker. And then once again,
we'll be using the fine leenters and
add more finer details. I decided to create this
broken small hatching lines. Later on, as I mentioned, I'll be using the
breastban and make the bigger lines a bit more
bolder, a bit more darker. Making this region
this beside the fins a little bit more denser
by adding more lines, and I'll be doing
the same thing for the upper section of
the wheel's mouth. But for the middle section, we are going to keep
it a little bit less denser so fewer lines. Broken hatching lines of
varied length like this. Instead of it, if you want to include other kind of patterns designing or if you want to use the stippling technique,
you can do that, too. For some of the sections
of this project, I'm going to use
stippling technique too. More broken lines,
broken hatching lines, following the contour of the larger lines that we created. And with these, we are
done with a lower section. Broken hatching lines,
following the contour of the larger lines that we
created. And as you can see, And as you can see, I kept the middle section
with fewer lines. But if you want to
make it more uniform, you can add more lines for
the middle section too. And with these, we are
done with this section. If you want to create the
same kind of spiral set with it for the whales
fin, you can do that, too. Once again, let's erase
the pencil marks. Now, going back with the
fine liner once again and I'm going to create
the spiral network, and I'm going to
follow the seeps inside the weaves and yeah, just simple curved hatching
lines for the entire section. I'm using the combination of both broken and preen lines to create the simple
designs inside. Instead of this kind of
patterns and design if you want to use other variations of
it, you can do that, too. Mostly in here,
I'm going to make the insides of the larger seeps a little
bit more well defined. And as for the
remaining section, I'm just going to use
whatever seep that is left and use that seep to create and fill the
remaining section. In here, we have got a
large seep like this, feeling it entirely
following its sp. And Since this process is a little bit
repetitive and going to take a little bit
of time in here, I'm going to increase
the speed a little bit. If you want to follow
along with me, you can pause the video or
you can reduce the speed. For the smaller section, we have got this kind
of rhomoid same, so completely filling
it with this. In here, I've increased the
speed to 1.5 X, and yeah, let's do the same thing
for the remaining elements using broken curved
hatching lines like this to fill
the entire section. And for the insides of it, put some of the
layers that we have created with this kind of
broken hatching lines. We are going to use the sparkle
paint to fill the color. I'm going to use the golden
color. Instead of that. If you want to use other
colors, you can do that, too. And as for the
remaining designs, I'm going to use
the white gel pen and create small circles using a little bit of
strippling technique and small stars with a little
bit more details to it. For this project, it will be
a little bit trickier to add the coloring since we have a lot of curve saves as
well as wave like form. So we have to be a little
bit cautious while adding the colors for the whale's
body, the black ink. In here, doing the same
thing for the whale teals. The sizes of the curve saves in here are
comparatively smaller. Moving onto the other side,
doing the same thing. Simple curved lines like this. We have got three more section
in here for this tail. Simple curved hatching
lines like this. In here, I only used a few of the broken lines to
do the designing. Now moving on to this section. Once again, since this is
a little bit smaller area, we have to make it a
little bit smaller. And I'm only going to cover up to here in this
part of the video, and in the next video,
we'll be continuing on. And I'm going to feel
the remaining section as I saw you on my own. And in the next
section, we'll be continuing on with
the coloring of it.
12. Using Ink to color the Whale: Welcome to the second part of the gorgin of the
celestial rainbow. So creating the same kind of simple pattern
and design using the broken and curved lines for the inside of this
larger pattern. Now we are moving
on to the wil spin. In here, apart from
the curved line, I'm also using this
kind of spiral form. So simple spiral form like this. These are all optional. Instead of this, if you want to continue on with the
same patterns and design that we did for the rest of the wheel
spoding, you can do that. Or you can just
follow along with me and include
these spiral forms. Now for the remaining section using the same kind
of simple pattern, broken and curved lines
for the entire section, following the random shapes
we have in here and filling the entire section with it. No. Moving on to this one. In here, if you want to include
the spiral forms, you can do that, too. But in here since we have
a bit smaller piece, I'm just going to I'm
just going to fill the entire section with the
same kind of broken lines. Simple and plain curved lines to fill the entire
section mostly. If you want to also include the broken lines,
you can do that. But since in here, we have
comparatively smaller area, so I'm not going to use
that much of broken lines, mostly simple and plain
curved lines like this. And with these, we are done with all the designing
elements in here. Apart from this, I also did a little bit of
hatching lines for the lower suction of the
real stomach down in here. I'm using the
Zikurataki blacking. And yeah, let's fill the
entire section with it. I would recommend
you to start by doing the outlining
pull all the curve first and then put the remaining section add the
colors so that in this way, we'll be avoiding the
smudging of the color. Outlining the curved
saves of the waves like this and then feeling the remaining section for
the e steels like this. Instead of using the black ink, if you want to experiment with other colors, you
can do that, too. You can also keep the veils
yellow, and instead of it, you can use the black color for the insides of the patterns
that we have created. And if you want to cover some of the patterns
that you have ad, you can just simply cover
it with the black ink. Carefully moving from
left towards the right. Choose a direction
either you add color from right to left
or from left to right. In here, I decided to
go from left to right. Carefully moving from the left towards right to avoid
smudging of the ink. Carefully adding the
color in between the waves like this
small triangular s. Now filling the
spiral form in here. Gradually moving
towards the right. This is a little bit trickier. For some of the section
of this wave life form, I'm also going to cover it
a little bit to make it a little bit more sharper and give it a little
bit more edge. Initially, my plan was to
do the outlining once again using the Tombo fine
liner or the breastban, but in here, I decided instead of using the breastbans
this will do the work. So I'm using the black ink to do the outlining, the
secondary outlining. And if required, I'll be going with the breastban for
some of the section. But for now, continue on filling the entire section
with the black ink. Adding it carefully in here. We want to preserve the
sap of the top fin. After doing this,
we'll have to wait a little bit till
it dries up since we have to create
lots of patterns and designing on
top of the black. After that, as Manson, I'm going to use
stippling technique and create large and small dots. Apart from that, I'm also going
to create rhomboid stars, four contin stars, and then we have the sparkle
pints to feel the color. For the background element, I'm going to use the
golden metallic color, and I'm also going to
create a single cloud. For the cloud too, I'm only
going to use the sparkle pin. If you want to use
the black paint to do the outlining,
you can do that, too. But for the entire
background element, I decided to only stick with the metallic colours
and the sparkle pins. Oh With these, we are halfway through
the wheels body. Small brushes strokes to
preserve the curve edges. Now, the upper section
of the wheel's head is comparatively easy
to fill color. But for the fins in here, we'll have to be a little
bit extra courses since the size of the designs
that we have created in here is comparatively
more smaller than the wheels stomach and the
wheel steels that we did. Small brushes strokes to
preserve the curve edges. Small breast strokes in here
with the ink to preserve the edges of the wave like
form that we have created. And with these we are mostly
done with this front fin. Adding the black for
the lower section, this beside the eye,
this under the eye. Now for the whale's
mouth in here. I'm not going to feel it
entirely with the black, as you can see, I left a little bit of small
white specs in between. I decided to cover the entire
section with the black. Later on, I'll be
using white ink or white jail paint
to create the eyes, filling the entire section for the whale's head
with the black. And now a little bit more
coloring for this fin. Moving on to the final fin. I decided to cover some of
the smaller section with the black and now filling
the remaining section. And with the we are done with
the coloring for our vein, I'll be seeing you
in the next section.
13. Creating Designs : Welcome to the third
section of the Garcin of the celestial rainbow,
one of my favorite one. So the ink has
propellal dried up insure that the ink that you
use has properll dried up, and now you're going to proceed. I'm using the white chili pin, and first, I'm going to
create the wheels I. So humanoid I, I'm starting with creating
the upper and the lower section
of the eyelids, and then for the insides, I'm going to use white
to create the eyeball. Layers of white
like this to create the eyeballs and a
little bit of white for the insides for the highlight to make the eyes a little bit more detailed and
more realistic, more curved lines like this for the upper
and the lower part. Now, for this section, to
make it a bit more denser, more lines, broken lines, moving on to the wheel's
mouth to make it a clear distinction in between the mouth and the upper part of the sides, I'm going to use multiple lines, broken lines like
this, following the curve sweep of its head and adding the lines
in that manner. For the lower section, a
little bit more lining, a bit more detailing like this. Now, moving on to the curved and the bump saves
that we have created, a little bit of scribbling
like this in here. Instead of the scribbling, if you want to
create a spiral font or the concentric circles,
you can do that, too. But I decided to go
with the scribbling, a little bit of
smaller scribblings. And for the upper part
of the head like this, small and larger
dots like this to create the appearance
of barnacles. Now, let's have a closer look. Now, let's have a closer look, another line to make it a
little bit more distinct. I'm going to surround all the
circular saps that we have created with broken lines like this to make it a little
bit more interesting. A few small dots and lines to make it a
bit more distinct. I and with these, we are done with the
whale's head for now. Later on, I'll be
adding more details. For now, I'm just going to
encircle all the wave like forms that we have created using broken and curved
lines like this. All the wavelike form in
here that we have created, I'm going to do the same thing using broken and curved
lines like this. Mostly, I'm going to
use only a single line, but instead of it, if you
want to include two lines, that will be interesting too. Or instead of it,
if you want to use the sparkle pens
or metallic pens to do it, you can do that, too. And some of the sections, I did another outlining
and this is what I'm going to repeat for most of the section before doing that, a little bit of detailing for the upper part of
the wheel spin, broken lines and curved lines. Put the curve sections
in here for the fin, spiral forms with a dot at the center and more
curved lines following as bit of patterns and
design creation in here, encircling all the
wavelike forms that we have created
and just above it, we are going to use
stippling later on. I was going to do
the stippling later, but I decided to get to stippling right now
and finish this win. This simple small
dots with the white. And as I move away
from the designs, I'm decreasing the intensity of the dots and making
it a bit lighter. I'm only going to use the stippling in here for
this win for the other fin, I'm not going to use that
much of a stippling. Apart from the smaller dots, I also created a bit larger one. As I was mentioning, I'm going
to use a lot of stippling, large and small dot like this
for the entire wheels body. Making a clear distinction
between the wheels fin and the remaining portion of
its eyes and the body. A little bit of
more detailing and simple pattern
creation like this just beside the wheels fin and
the eye. This is optional. First, I'm going to create multiple dots like this
large and small size. I'm going to keep it somewhat uniform for the entire section, this kind of simple dots. But for some of the
smaller section, I'll use smaller dots
to do the stippling. For instance, the upper fin and a little bit for the wheel stay, I'll be using the same kind of stippling that I did
for the wheels fin. Moving on to the wheels,
fin on the other side, following the curved
sea, using broken lines. Now, a little bit
of stippling and random marks like
this here and there, small and large dots. Instead of it, if
you want to use the same stippling that we did for the first
fin, you can do that. But I decided only the back
part of the finance sivals, so I'm just going to keep it a little bit plain
and bit simpler. Using the stippling dots and small broken lines to create the rectangular seep in here. Encircling the wave forms that we have created
using broken lines. Just follow the simple
saves using broken lines. Instead of it, if you want to
use plain and normal lines, you can always do that, too. Now for the remaining section on seeing small and large dots. This process is going
to take a bit of time to create since
we have to cover a large area and for the wave lifon we'll have to do the outlining
for all of them. Then after creating
the small dots, we'll have to do
a little bit more defined stippling for
some of the section. After that, we have
four corner stars, time consuming process, but
the wheel will turn out. After completing
all this, the wheel will turn out very beautiful. This is one of my favorite
project from this class. Inserting all the wave form, and apart from the small dots, I also created the
four corn star, a simple four corneal
star like this. And with these, we are done with the wheel stall For this curve part of the wheel steel using broken lines like this to give it a little bit of action so that it's in movement. Small dots and four
corners starts like this. Following the curve shape in
here for the smaller design. Adding lines for
the intersections. Now we have only
the two way form. So yeah, doing the outlining, using the broken lines like
we did for the rest of them. What some of the sections. If you want, you can always use two lines to make it a
little bit more bolder. Now for this section, it
starts in a small circle. I'm also going to
do a little bit of stippling for some of
the sections using smaller dots like this.
This is optional. Mostly, I'm going to use the bit larger dots and
the four corners stars. I'll also be adding a
little bit more detailings to the four corners
starts later on. For now, we are done
with this section. Moving on to the middle section. In here for this
section, I decided to add a little bit
of color to create a clear separation in between the wheel's upper part
and the wheels body. So instead of using the blacking
for the smaller section, I decided to go with
the Tombos breast pin, also doing the outlining to make it a little bit more bolder, a bit more crisper for all the sections in here that we outlined with the fine liner. Also for some of the
designing elements like this on the fin, I'm also doing the
outlining using the fine liner to create
a clear distinction and separation between
the barnacle heaps and the wave patterns that
were for the designing. And with these were done
with outlining the fins, outlining the lower part
of the wheel's mouth. For all of the
section in which I use the fine liner
to do the outlining, I'm just going over it
with the breast pin. And if required for
some of the section, I'm also doing the outlining with the breastpin
for the intersection. For this one, creating a
little bit of highlight, using simple rectangular
saves like this, following the curve s for the
upper part of the designs and just repeating
the same thing. Using broken lines to do the outlining for the
remaining section. For the remaining section,
we are just going to fill it with four corners
stars and the circles. Creating small and large dots as well as four corners
starts like this. And filling the insides
with a small dot like this. And with these, we are
done with the largest one. We have got only a single one. For now, creating
stars and dots. As I was mentioning a little bit more detailing for the star in the form of more lines for all the four
corners like this. Moving on to doing the
outturning for the last pattern. For the remaining section, we are just going
to fill it with the four corners stars
and the circles. More corner staff than
small dots in the circles. Creating this kind
of small rumba seep or rhomboid see like this, filling the entire inside. Moving on to creating
small circles, small dots of various seeps covered the area
somewhat uniformly. A little bit more detailing
the small lines like this. This simple small
lines like this makes the stars a little bit more interesting and make it
a bit more distinct. For most of the stars,
I'm going to do this. And for some of the
other empty species, I'm going to add more
stars and more dots. A For the stars in here, for this section,
adding more details in the form of the small lines. And with these, we are done
with the detailed creation. Now, moving back with the tombos brastpin as I was mentioning earlier and going over all the fine liner
marks the curved lines, covering the curved
lines with the bras pin. I'm also making the upper
section a little bit more darker to make the separation
a little bit more distinct. Covering the entire
section with this. For some of the larger section, I'm also using broken
lines like this. Now for the last one. Now
moving on to this section, the lower part of the stomach, also doing the outlining for the wave forms that we
use to create a design. Simply doing the
outlining for this. And with these, we are done with the trombos bras paint for now, going with the fine letter. And that's all I'll be
covering for this section, the third section, and I'll be seeing you in the final
section of this video.
14. Using Metallic Colors: Welcome to the fourth
and the final part of the Guardian of the
Celestial Rainbow. In here, we are going to create the background element as
well as do the coloring. As I was mentioning,
I'm going to create a large cloud in here
using the sparkle pin, so creating a rough
outline for the cloud. And for all the outlines of the circles that I have created, I'm going to use
one of the medium sized one and add the coloring
using the metallic colour. Instead of this, if you
want to incorporate other design elements or add more patterns and
designings to it, add more circles, you
can do that, too. Let's slightly erase
the pencil marks and then we'll be
doing the coloring. I'm starting with the clouds, so I'm using the golden color in here to create the
outlining for the cloud. Instead of this, if you want to use the black brass
paints or fine to create the outlining for the clouds, you
can do that, too. I'm going to only use
the metallic colors in the sparkle paints for
the background elements. And as I showed you in
the demonstration video, I'm just going to use a lots of curve saves
for the inside, and I'm also going to do a secondary layer of outlining for the
intersections of the clown. Apart from the curved lines, I'm also including spiral seeds for the insides of the cloud. Instead of this, if you want
to create other variations and patterns for the insides of the cloud, feel free to do that. You can also include
the hatching line to portray the sas. You can also use stippling technique for some
of the sections. You can also use a little bit of scribbling to make some of the sections of the clouds
a little bit more distinct. And apart from that,
you can also do the coloring for the
insides of the cloud. For the smaller section, creating small curve lines, and I'm not adding the spiral forms for the
insides of the smaller section. Another layer of the
outlining for some of the sections to make
it a little bit more distinct using broken lines to do another layer of the outlining for the outer
section of the cloud. Following the curve and doing the outlining
in this manner. A few more smaller sections
inside the cloud like this. If you want to add more details, more outline, you can do that. Now let's do the coloring
using the metallic colors. Right now, I'm going to
do a flat and then use a little bit of
more concentrated color for some of the section, particularly near
the whale's body, as well as near the clouds to make some of the section
a little bit more darker. Spreading the color and doing the flat was for the
entire section of this. No spherical. We have
a semicircle in here. Instead of this, if you want to use other color, feel
free to do that. Adding it carefully
near the fin. In here, I'm using a
smaller brush since we have to do the outline for the
finer details of the cloud, encircling the cloud and feeling the color for
the remaining section. Printing the color
somewhat evenly. I'm going to make the
upper section just beside the cloud a
little bit more darker. Now, encircling
the lower part of the cloud and doing
the outlining, feeling the remaining section. To make it a little
bit more darker, using a bit more
concentrated color in here. Let's make the outline a little bit more
crisper and darker, using a bit more concentrated
color like this in here. More concentrated color for the outline section
and then spreading it and spreading it thus reducing its intensity a little bit
for the middle section. We'll wait for it to dry a little bit and then
come back to it. Now using the golden
sparkle color and adding the detailing,
starting with the eye. Now moving on to the stain. Now for some of
the curved saves, I'm going to feel
a color like this. You can add the
color alternatively, or you can add the color for
only some of the sections. I'm just going to add the
color for some of the section, not all the curved lines
that we have created. For each of the black
form that I have created, I will be adding color for one of the form or for
the other one. Once again, I would like
to remind you you can use any other color you don't have to stick with what I'm using. Moving on to this section. Only adding a little bit of color for some
of the section, not the entire section for
the larger wave like for. I'm just going to add it
for the outer sections, and for a few of them, I'm also going to add a little
bit for the inner section. I decided to use
the sparkle paint to add the coloring for
the smaller section, as it would be a little
bit difficult for me to use the metallic colour
for the smaller regions. So that's why I decided to
go with this sparkle paint. Now, for this one, I decided to add the coloring for
the insides too. Earlier, my plan was to add the colors for each
alternative layer, then I think then I
thought that it would look a little bit too oversaturated
with the golden color. But instead of this, if
you want to add it for each alternative layer,
you can do that, too. This process is going
to take a little bit of time since we have got
lots of designing in here, and I'm also going to
use a little bit of this for the wheel's mouth. So for the upper and the lower section of
the wheel's mouth, I'm going to use it
to do a little bit of sading adding it for the
lower section like this. To make it a little bit
more bolder and darker, I'm doing two or three layers of it for some of the sections. So just increasing
the line weight a little bit by overlaying two or three layers,
as you can see. Now we have got two section
for the upper part, and then we have two fins. So the last one in here
for the whales body, then we'll be moving
on to the was fin. For some of the white
sections of the whales fin, I'm also going to add the lines. Adding the yellow for
the outlined section near the barnacles that we have created for the fin and a little bit more coloring
for some of the larger seeps. The larger cut seeps
in here for the fins. As I was mentioning that I'll
be using a little bit of this color for the
white sections in here. The simple curve hatching
lines for the entire section. If you want to add a little
bit of this golden color on top of the stars and the
dots, you can do that, too. I'm moving back to this
one just above the fin. You have got four or five
more curve saves in here, then we'll be moving
onto the other fin. After doing this, I'll
be moving back to the background element and create two more
concentric circles just above the
semicircular c and a few more detailings
in the form of more curved lines
just below the cloud. And with these, we are
done with this one. Now moving to the
other fin encircling the curved seam and a little bit of coloring for some of the curved
saves in here. And with this, we are done with the fins and the patterns
and the designing. As I was mentioning, the upper and the lower section
of the whale's mouth, using it and doing a
little bit of seeding. I'm not going to cover the
entire section with it. I'm just going to
make the upper and the lower section comparatively
darker using this color. A little bit for the
underbelly in here. Now, just beside the fins. In here, the sides will be comparatively larger as
compared to the upper part. Simple sading like this for
all the lower sections, extending the lines
like this to do the sadingEtending the lines a little bit
more for this section. If you want to do
a little bit of more sading for the
middle portion, you can do that, too, but I'm satisfied with it,
how it turned out. Now moving back to the
background element and creating another outlining
as I was mentioning, I'm going to create two more
concentric circle encircling this semi spherical
s Another one. And if you want to create rays and other kind of patterns and designing coming out of it that I sold you in the
demonstration video, you can include that
below the cloud, a little bit more detailing just below the clouds.
These are optional. If you are satisfied
with your cloud and the background element,
you don't have to do this. Also using this color
to make the outlines a little bit more crisper
and clear for the sphere. Earlier, my plan
was to add a little bit more coloring
for this background, but I'm satisfied
how it turned out. And with these, we are done with our project Guardian of
the Celestial Rainbow. I hope you enjoyed
painting this.
15. Whale of the Golden Eclipse Day 3: Hi, and welcome to this project Wheel of the golden Eclipse. Let's start with a
simple pencil sketching. Starting with a simple
horizontal line. I'm sketching this
horizontal line a little bit towards the upper
part of the people now. Now the curve for
the whale bonding. So this male is
going to be somewhat horizontal and for the
background element, I'm going to create a
large sun or you can see a large moon and lots of
clouds surrounding this whale. This is going to be another
interesting project, and this is going to
be the wal stain. Creating the outline
for the wing steel, and this is going to
be the middle portion. Sketching out the guidelines
for the wheels mouth, the lower section, the
underbelly of the wheel. And accordingly, we'll have to set the wheel tail a little bit. It's looking quite smaller. So later on, I'll be making a little bit
of changes to it. The upper part of the he's head, this wheel is not going to be that much curve as all the
other wheels we have created. This is going to be
somewhat horizontal. Creating the upper fin, a little bit of changes to
the wheels tail in here, making it a little bit larger. The middle portion of the wheel, this is going to be
the wheel's mouth. And if you're not
that confident, you can always divide
into three equal section and use that to create the
guidelines for the wheels, head, wheels, stomach, and
the wheels D. In here, just above this, I'm going
to create the wheels I. This are going to
be the wheels fin. One on this side, and the other I'll be
creating later on. Continuing on with the outlining for the wheels underbelly. In here, I'll be
creating in here, I'll be creating
human like eyes. This is going to be our
simple pencil sketch. I was not satisfied with it, so I'm going to make a little bit more changes to it later on. I'm going to make
it a little bit more horizontal for now, creating the other
fin on this side, quite smaller compared
to the first one. I decided to make this
fin a little bit larger. And with this we're done with the basic pencil sketch
for the wheel's body. Now going with the
sakura micron fine I need to do the outlining. In here, creating this kind of small bumps using curve lines. In here, I'll be
creating banicles and a little bit more detailing. You don't have to stick with the outlines that
you have created. Feel free to make genus an
adjustment to the sketch. In here, I separate the wheel steel a little
bit towards the left. The whale's mouth in here, extending the sides a little
bit in here just above it, I'll be creating
its eyes later on. For the whale's
mouth, I'm going to make it a little bit distinct to create a clear separation in between its forehead and
the remaining portion, the lower part of
the whale's mouth. So mostly I'll be using two or three lines to make
the separation more distinct. So something like this. And now put the
wheel spin in here. These are somewhat rough
sketches later on if required, I'll be covering it
with the blank ink, the upper part of
the wheels body that can be covered
with the black ink. But for the lower sections, you will have to bit
causes for those section, we are going to
keep it plain and simple with nothing but
the white of the people, doing the outlining
for the wheels fin. In here, once again, I decided to extend the side
a little bit more, doing the outlining
for the second one, making it a little bit larger, only a little bit larger and mostly using curve lines
to do the outlining. Now extending this ports
on the underbelly of the he and we have to make a little bit
of changes in here to adjust the steel and the remaining portion
of the wheel's body. So I decided to make it a
little bit more thicker. The extra line that
I have in here, I'll be covering
it later on with the under value of the pond now, doing the remaining outlining
for the wheel stain. As you can see, this e is comparatively more
horizontal and less curved as compared to all the wheels that we have covered and that
we'll be covering. And yeah, doing the outlining for the remaining portion
of the wheel steel. And with these you are done with the basic outlining
for the wheel's body, for the insights and
for the detailing. Mostly, I'm going to use
fine liner for this one, for some of the sections. If required, I'll be using the breastbin the
Tombos breastbin, but mostly I decided to stick
with only the file liner to create this wheel so that I can show you that only
using the fine liner, you can create the project. Making the outline
a little bit more distinct and separate
using more lines. And this is just to show you. Otherwise, I'll be covering it with the black ink later on. And with this, we are done with most of the
outlining in here. The final details we'll
be adding it later on, see that the ink has group will dried up and lightly
release the pencil marks. Now in here, I'm directly
starting with inking it. So using the
Zikurataki Plack ink, I'm going to cover the
entire upper half of the whale's body
and a little bit of coloring for the whales fin. So this process is going to
take a little bit of time, so I'm going to increase
the speed a little bit. If you want to follow
along with me, you can always pause the video or you can reduce the speed. Be careful while
adding the color near the smaller and
detailed section. Otherwise, just start doing
the initial outlining for the sections and then feel the remaining portion
with the black. For the middle section, you don't have to worry that much, but for the remaining section, the middle portion and
the final detailing, you'll have to be bit
cautious. Spreading the color. Generally, I start with
doing the outlining for the important sections
and then feel the remaining section with
the black or otherwise, I generally add a
lot of color for the middle section
and then spread it for the remaining portion. Add the color in whatever manner you feel more comfortable with extending the colors
in here for this upper fin, and I decided to extend it a little bit more,
making it quite larger. The two outlining that I did for the wheels under Billy,
I decided to cover it. Later on, once again,
I'll be going with the fine lander to
create more detailing. Put the wheels fins in here. I'm creating a little bit of separation in between the upper part and
the fin phone now. If required, I'll
be covering it with the black now filling the
entire section with the black. The other fin on this side. I would suggest you to start from either right or left and move towards the
other direction so as to avoid smudging of the ink. Now, once again, continuing on with the remaining portion, this side, on the right side. As I mentioned, this project
is a little bit larger, so I've divided into
three sections. This is the first
section in here. Mostly, I'll be doing the coloring using the
ink and a little bit more detailing or create
simple guidelines or sketch for the
background element. So the background will have three or four large clouds
surrounding our and a large, a large spherical
s. Mostly in here, I'm going to use sparkle
paints, blue, and golden color. And as for the metallic colors, I'm going to use golden color
and a little bit of orange. I let's create larger
clouds in here. The simple saves like this as I showed you in the
demonstration video, one cloud just above
the wheel's head, one in here, just beside the
wheel's tail and this pin. One I'll be adding it in here. Reading one in here,
just beside the wheels. Under Bili it's not
touching the wheel, but all the remaining three are in contact
with the whale's body. The final one just beside
the mail spin in here. So these are going to be
the four main clouds. If you want to create more
clouds, you can do that, too. These are just for
the rough example. Mostly, I'll only
be sticking with the four clouds that
I sold you initially. These are all optional. Let's do the outlining for the clouds. Once again, I would
like to remind you you don't have to stick with the pencil outlines
that you have created PF to make changes
and adjustment to In here, I'm going to use the fine liner the
golden sparkle paint, as well as blue sparkle paints for the coloring of our clown. Mostly with this fine liner, I have done the
initial outlining. For some of the inner
sections of the cloud, I'll doing the second
layering of the outlining, and then I'll be using golden
sparkle colours to add a little bit of more detail put some of those
sections of the cloud. And finally, with a
blue sparkle color, I'll be using it to
create shadows and feel the entire section of the
cloud with the hatching lines. This is somewhat
similar to what I saw in one of the
demonstration we knew for the cloud in which we use hatching line to
create small shadows. But in here, we'll
be using lots of hatching lines to fiel the entire section of
the clouds with it. As you can see, I've also
created a little bit of shadows using the hatching
lines with the fine liner, which I'll be covering on
later on using the blue color. For now, just
create a little bit of more shadows with
this fine liner. Extending the size of
the cloud and making it a little bit more fluffier
just below the stain. If you want to keep it a
little bit plain and simple, you don't have to create
this much of the clouds. You can decrease the
number of the clouds as well as decrease the
size of the clouds. This is going to take a
little bit of time since we have lots of cloud in
here, three more to go. Mostly, I'm going to cover only the elements in this
section of the project, and in the next two sections, we are going to add
the coloring using the white jelly paint for the wheel's body and for
the background elements, we have got metallic colors and few more patterns
that I'll be creating. As you can see, the ink
has not properly dried up. That's why I'm
keeping my palm from the paper so as to avoid smudging of the
color by my palm. Now we are done with the two
glouds for the upper part, the remaining two
clouds in here, starting with the third
one just beside the fins. So this type of smaller
elements take a lot of time. So instead of it, if you
want to only focus on your wheel and the circles or the moon that you
are going to create, you will see a bunch of times
around ten or 15 minutes. The final cloud, the fourth one, that is not in contact
with the wheels body, but if you want to make it a little bit nearer or
closer to the wheel spot, you can always do that bit of more curved line for the
intersections of the cloud. And with these, we had done with the outlining for
all the clouds. Now I'm going to add a little bit more details in the form of secondary outlining
and a little bit of hatching for some
of the sections. Simple small lines
to do the hatching. And I'm not going to do the hatching for all
the smaller sections. I'm just going to focus
for the larger ones. I'm moving on to the fourth one. Small hatching lines and
secondary outlining if required. So I have not done
secondary outlining for any of them till now. For now just continuing on
with more hatching lines. Small hatching lines like this. Adding a little bit
more detailing for the clouds in here with
small hatching lines, creating few additional smaller
sections for the cloud. Now, I'm going to lightly
erase the pencil marks. Once again, ensure that the
ink is properly dried and avoid touching the eraser with the black ink that
we used earlier. Even if the ink dries up, if you apply erasin
on top of it, some of the intensity of the ink will be decreased and
we don't want that. Carefully and lightly raising
all the pencil marks and the additional clouds that I created to show
you as an example. And that's all for this
section of the video, I'll be seeing you in the
next part of this Whale of the Golden Eclipse. A
16. Creating Tricolor Clouds: Hi, and welcome to
the second part of the wheel of the
golden eclipse, continuing on where we left off. So in here, I'm starting
with a compass to create the background element,
a perfect circle. For most of the project, I
have only created semicircles. But in here for this one, I decided to make something big. So we have got a
large circle in here. Apart from this large circle, I'm also going to create two more concentric
circles later on. But now just create
a large circle. This lies somewhat towards the right side of
the wheel's body, but if you want to center it to the middle, you
can do that, too. This is going to be our
main background element, lightly raising all
the additional marks that I created for the circle. Now I'm going to add the
coloring for the inside. I'm going to use metallic color, golden metallic color, as well
as a little bit of orange. I'm also aiming to create a little bit of grainy
texture for it, completely raising most
of the pencil marks. Now. Let's do the coloring. And here since this process is going to take a
little bit of time, I have increased the
speed a little bit. If you want to follow
along with me, you can either
pause the video or you can reduce the Pemex speed. Starting with the
diluted consistently of the metallic colour, golden metallic
colour first in here, I'm going to do a little
bit of light was spreading the color somewhat evenly
throughout the entire section, and then I'll be using a
bit darker consistency of the color to get a little bit of darker tone forme
of the section, particularly near the clouds
and near the whale's body, as well as I'll
also be aiming for a rough texture or you can see a little bit
of grainy texture. For now just continuing with the light was for
the entire section, carefully doing the outlining
near the clouds and the whale's body and then spreading the colors
somewhat evenly. I so not to mix it with the
ink of the whale's body. We don't want the ink to bleed
with the coloring in here. With this, we are somewhat
done with the light was now. We are going to use a little
bit more concentrated color for certain sections
that I was mentioning. So Light strokes of it. Basically near the clouds
and near the whales body. Bit concentrated color. So I mix a little bit of orange color with it
to get this tone, adding it in here for
this smaller section. If you want to spread the colors and get a subtle blending, you can always use water
and spread the color. The two colors,
the light was and this darker
concentrated color will mix on its own because of the weight and weight technique. So this kind of
random strokes when this trope of will
create a little bit of grainier texture for
our background element, the orange moon. I'm going to call
it orange moon. Now moving on to
the lower section, starting with doing
the outlining. Once again, in here, we are
going to do the same thing, starting with the
initial light was, and then we'll be using
more concentrated color. You'll have to be with
cautious while doing the outlining for the clouds
and near the he body. After doing the light mass, we'll be adding more
concentrated color near the whales spin
and near the clouds. Now for the smaller section, completely filling it
with the light was. Now in here, I'm using a bit
more concentrated color. Mixing a little
bit of orange with a golden colour to get this
consistency of the color, a bit concentrated color, and a random strokes, especially near the wheels underbelly and near the clouds. Carefully encircle
the clouds like this and spreading the color. And a few more strokes in here for the middle
section, random strokes. When these we are done with it, I meet the lower section completively darker as
compared to the upper part. Now another concentric
circle that I was mentioning using the metallic orange
color to create this. I'm just going to follow the circular s of
this orange moon. I'm going to call
it orange moon and just following the C. If you're not that
confident with it, you can always use the
compass and create the outlining and then feel the remaining portion
with the color. In here, I made a
little bit of mistake. The outlines that
I created is not that crisp and clear as
you can see in here. So later on, I'll be covering it with the blue sparkle paint, so I'll be using it to do
the outlining and make the outline bit more
crisper and bit more clear. You don't have to
use the same color, and if you want to
experiment on your own, add more color or create different patterns and
designing, you can do that, too. I'm going to do the
same thing in here. So for the lower portion, another outlining using the
same metallic orange color. I'm also going to do one more outlining using the blue
colour, blue, sparkle paint, and the same kind of simple
designs that I showed you in the demonstration video using small and large lines
and rhomboid sieves. I'll be using those. Carefully adding it
beside the clouds. We don't want the colors
to bleed into the cloud. Using a bit saturated color and continuing on with
the remaining portion. And try to get a light was for
the entire section of somewhat of same consistency. Only a small portion remains, adding it carefully near
the fin and near the cloud. And with these, we
are mostly done with the background element,
the golden moon. I decided to make some
of the sections of the outlines for this orange moon a little
bit more darker, so using it, especially
near the outline sections. It has not dried up properly so that two colors will
blend on its own. And Now, we will wait for it
to dristll it dries. I'm going back once again
with the fine liner, so this is a little bit
thicker fine liner, so it has a little
bit more line weight. I'm going to create a little bit more detailing for
some of the sections as well as create few
more hatching lines as you can see in here. Instead of it, if
you want to use the tomospspin or the same fine liner,
you can do that, too. Another layer of outlining for some of the
sections of the cloud. Once again, this is going to take a little bit
of time since we have got lots of sections for the cloud and lots of cloud, a total of four clouds and numerous smaller
sections inside it. Because it's not to smudge the colors that we
have just added. The hatching lines that I'm
creating with black right now will make the sados of the smaller
section of the cloud, but more darker than we'll be adding the more
blue on top of it. So it depends upon you, whether you want to add more colors and more
detailings to it, or you can just
keep it plain and simple with only this
much of detailing. And with these, we are done
with the largest cloud. With these, we are
done with this one. Now we have got two more clouds. I'm going to do the same thing, create a few more
additional inner clouds, as well as do the
inner outlining, add a little bit of more hatching for some
of the sections. This is the second
part of this project. We love the golden eclipse. And after doing this, we
have to add the blue color, blue metallic color,
blue metallic color, as well as we are going to use the white jellypin and add and create patterns
and designing. For this one, I'm going
with the eclpse them. So I'm going to create
small moons inside it, as well as create
celestial patterns, the constellations like
pattern for the inside, adding more inner outlines
for some of the sections. For this cloud, I forgot to add the inner sections in
or outlining like this, adding more in or out lines
for some of the sections. These are our optional details, adding more in or out lines
for some of the sections. With this, we are
done with it now. Going in with the
golden color and doing the outlining for
some of the sections inner outlining like this. All the tailings in this form. I just use the golden colors to match with the orange moon that we have in the background. This is once again optional. Instead of it, you can
directly jump in the blue, sparkle pin and fill the entire section with
the hatching lines, or you can just follow along
with me and add this I as I was talking
about designs and pattern for the
insides of the wheel, I'm going to create
a set of five moons, starting with a
circular seep and then semicircular seep
followed by an elliptical sep, or you can say ellipse
seeps for the moon. This will be surrounded by
small stars and curved sieves. And for the middle portion
of the wheel's body, as you can see in
here, I'm going to create constellation pattern. So using small dots and star like seep and connecting
them straight lines. Basically, I'm going to
give it a little bit of resemblance to the night sky with the stars in
the constellation. So this will be the
theme for this project. I hope you enjoyed creating this celestial
constellation wheel. For this class, I
decided to make all the wheels that
I'm going to create completely different
from each other and try to give a little bit of thing
to each particular wheel. Let me know which one
is your favorite. And with these, we are done with the golden color now
going with the blue, so metallic blue, sparkle pin, and we are going to fill
the entire section with it. I'm not going to
overlay it on top of the blues and the golden color, but I'm going to cover the small hatching lines that
we created with the black. So this overlaying
this small blue on top of the black will
make those section, the sections near
the smaller sections of the cloud,
particularly darker. I'm not able to convey
what I mean to see, but you will see the
regions where they overlap of the blues and the black will become
comparatively darker. For now, I'm just focusing on creating another
outline just below the yellows as well as creating smaller hatching lines beside
the blacks and the yellows. Later on, I'll be adding
a little bit of more detailing and
overlaying the blues on top of the black now. Just avoid doing that. Once again, this is going to be a little bit time consuming. If you want to
experiment a little bit, you can include a little
bit of cross hatching or strippling or if you want to make this process
a little bit faster, you can always use
the scribbling. So with the scribbling,
you'll have to do a little bit
of seeding too, to create a little
bit of distinction between different sections and different portions on the cloud. Otherwise, it will become
chaotic and completely dark. So we are halfway there
with this first cloud. After doing this, I'm going
to increase the speed for the remaining three
clouds since this is our repetitive process, and this is going to
take a bit of time. If you want to follow
along with me, you can always pause the video or you can reduce the speed. Mostly we are done with
the upper section. We have got three more clouds, so continuing on with a little
bit of increased speed. Same thing for the
remaining three clouds on the small section just
below the hiltee. For this wheel, one more thing
that will be different is the side of the wheel's e. This will be
comparatively larger, as well as a little bit
more different kind of detailing for the wheels eye. The barnacles that I'm
going to create in here will be comparatively smaller
and not that well defined. Only the curved saves
that we have created for the upper part of
the wheel's head will act as the banacle. Otherwise, we'll
somewhat of uniform, small curve seat for
the entire sections. And the stars in here that I'm going to create
will be different. For most of the project we used four corners stars in here, we are going to create
multiple corner ones and eight corner stars. That is also one
of the different things about this project. And with these, we are
done with the second one. We have got two more Just filling the entire section with the simple hatching lines. Adding it carefully just
below the wheel's mouth. We are doing exactly
the same thing, creating more outlining
underneath the yellow, the filling the entire section
with the hatching line. For some of the sections, we are overlaying a little
bit on top of the black hatching
lines that went in earlier to make those
section bit darker. I forgot to add it in here, so adding it just below
the wheel stay in here. That's all for this
section of the video. In the next section,
we are going to use the pie hail pin and add the finer and
final details for it. Fourth in the final cloud, small and large hatching lines for the remaining sections. With these we are done
with this section for the wheel of
the golden eclipse.
17. Coloring the giant Circle : Welcome to the third
and the final part of me of the golden eclipse, continuing on where we left off the ink and the metallic
color has dried up properly. Now, as I was mentioning, I'm going to create another
concentric circles. Here I'm using the
blue sparkle pain and using broken curved
lines like this to create another set of concentric circle following
the seep of our orange moon. This is once again optional. If you want to keep
it plain and simple, only the moon, you
don't have to do this. Now creating ladin
small lines and rhomboid like this to create more patterns
and designings in here. Instead of this kind
of pattern in design, if you want to incorporate other design elements,
you can do that, too. I'm going to repeat the same
thing for the lower section. Simple rhomboids, and this is the last one in here
for the upper part. Now let's repeat the same thing. Now I'll be repeating
the same thing for the lower section, but
before doing that, as I was mentioning,
the outlines that I created with this
metallic orange was not that well defined. So using the blue to make
the outlines a bit more crisper and a little bit
more detailed and defined, doing the same thing
for the golden moon. With these we are done
with the upper section. Now moving on to
the lower section and repeating the same thing, starting with doing
the outlining for this orange metallic color. If you have used the other color to do the outlining or
you have come up with your own unique patents and designing, please
see or your work. Additional concentric
circles following the seep of this orange fin. And yeah, after doing this, we are going to create once
again additional lines, three or four lines with
rhomoid sees for some of them. In here, because
of some regions, my mean was not
working properly. Now, let's create the lines and the rhomboid sees for
the addisonal designs. Lines of varied length and creating rhomboid at the
end for some of them. Basically, I'm just creating
rise like sees in here, as coming out from the
oranges that we have in here. And finally, creating
the rhomboid sees for some of the lines. As you can see, I have not added the rhomboid C for all of them, but if you want to add
rhomboid C for all of them, or if you want to include more designing, you
can do that, too. And with these we are done with design elements for
our orange moon. Now we are going to use the white siltin and add the
detailing for our wheel, as well as use the
black fine liner for the underbelly of our wheel. For now, I'm starting
with a white so in here, let's start with
the whale's mouth, using this kind of
small curve lines as well as straight
lines like this to create a clear
separation between the upper and the lower
section of the whale's mouth. Mostly, I'm going to use two or three lines in
here using the white. And with the black fine liner, I'll be using two
or three lines for the lower section of the
whale's mouth later on. In here for this curve section, I'll be creating the eye later on and using more
curved lines in here to create a clear
separation in between the whales fin and the
remaining portion of its body, creating the human like eyes, a bit larger eyes in here, spherical C for the eyeball. And in here, I decided
to use this kind of C, a little bit of rhomboid
C for the whale eyeball, the inside the pupil of the eye. Making it a little bit
more detailed and defined. So using simple pattern of small dots like this
for the wheel's I, encircling it a
little bit more to draw a little bit more
attention towards the wheels I. Now for the bumps that we have created using scribbling to create simple lines like
this, simple random lines. And now for the
remaining section, instead of creating
the spiral seeps or the circular saps
for the bancles, I'm going to create this kind
of small curved saves for the entire section along with
stars and bit larger dots. Mostly, I'm going to focus the curved saves
for this section just beside its head and beside its eyes and a little bit
near the end of its tail. Now, let's create the moons. The different stages of the moon that I
was talking about. I'm going to create a
total of five moons. We have got the
elliptical seeds. So as I progress
from left to right, I'm going to decrease the size. So we'll have larger
see than bit smaller one and then a smaller circle and then repeating the same
pattern on the right side. In here, I'm going to create
somewhat of half moon see. And as you can see, this
is comparatively smaller than the elliptical seed for
the moon that we created. I to make it a little bit more brighter
and more contrasting, you might have to do two or
three layers with the white. On the right side,
moving on and creating the half moon and the
elliptical moon in here. Repeating the same pattern. I did not create the small
moon, the circular moon, which I'll be adding it later on in between the two half moon, filling the entire
section with the white. So this is going to
be the main pattern for our way Basically, I'm going to encircle
all the sees that I have created in here, the elliptical moons and the half moons on both the
sides of the elliptical moons, I'm going to create
another pattern, something like rays that are coming out from
the elliptical moons. Before doing that, let's
create the middle moon, simple small circular
s and continuing on with encircling the
different seeds of the moon, the half moons and the
pole moons along with the elliptical moons
that we circled earlier. Additional outlining for
some of the sections using broken lines to
do the outlining for the entire five moves
that we have in here. The race pattern that I was
talking about on both sides, I'm going to repeat
the same pattern. I'm decreasing the
size of the line as we move away from the center, doing the same thing
on the right side. And at the end of
it, I'm going to repeat the same thing small dot, small white dot like this. Let's do the same thing in here. Small white dot at
the end of the line. Now we are going to create the celestial pattern somewhat
similar to constellation. So for this, I'm going
to create this kind of random small and large dots and using straight lines to
connect them with each other. The idea behind this is
to create somewhat of a resemblance to that of the constellation present
in the night sky. On this side towards the left, we don't have that much space, but towards the right,
I'm going to extend this constellation a
little bit towards steel. All the dots that I have created in here are not that
perfectly circular, but somewhat of different saves. Now we are just going to continue on with
connecting each other. After doing this, we
are going to create a few more semicircular
shapes as well as few stars. As for the steels, I'm going to keep it plain and simple mostly using
hatching lines. But if you want to
incorporate stars, moons or other additional
designs, you can do that, too. As for the fin, I'm going
to create a small set of constellation and use few
stars and curved seats. Now, creating stars, simple eight cornered stars like this. Eight pointed stars. I'm also wearing the size
of the stars a little bit. Now, in here for this one,
curved lines like this. A bit larger stars for
some of the sections. One more larger one in here. I'm going to do another
set of outlining for the upper and the lower section using the broken
lines like this, doing it for the upper part too. Now moving on to the wheels fin, following the curved sap and
doing secondary outlining. For this fin and here, I'm going to keep it
plain and simple and only using the hatching lines to feel the entire section like this. If you want to include patterns in designing, you
can do that, too. In here, I'm going to use the simple designs of
somewhat of elliptical seeps. And once again, I'm
going to create a small constellation
in here with few stars, larger star connecting
all the dots for the constellation and small stars like
this, only two stars. Let's create one more in
here, a bit smaller one. For the larger empty species, either I'm going to connect
the dots or I'm going to add stars or this
kind of curve saves. And with these, we are
done with the main body, now for the wetail, another set of outlining
following the curved seal. And now I'm just going to use hatching for the outline section in here to feel it completely. For the remaining section
of the middle part, I'm not going to add
any patterns design, but if you want to
include constellations, starts or curved shapes,
you can do that too. Another set of outlining with the broken lines to make it
a little bit more broader. And with these, we are done
with the white food now. I decided to use a little bit of golden color for some of
the section of the moon. This is optional. If you
want to keep it plain and simple with only the white,
you don't have to add this. You can also add a little
bit of this yellow on top of the stars as well as a
little bit for the eyes. It was looking a
little bit vacant, so I decided to add a
few more detailings with the white simple dots and curve seeps for some of the empty
spices here and there. And I also decided to connect
all the points in here, all the straight lines, bit of curve seeps like this and connecting
all of them like this. A little bit of more detailing
for some of the sections, making the outlines
a little bit darker and bit bolder for
some sections, particularly in here for the
h stay here the wheel stay. And with these, I'm
satisfied with this. For the remaining section, the underbelly and the mouth, starting with the
curve section in here. In here, I decided to make
it a little bit different. So I'm going to create completely separate units like this for the entire section. So using this kind of simple
curve lines and creating this kind of separate units for the lower section of
the wheel's mouth. Instead of this, if
you want to repeat what we have done with
the earlier wheles, you can either use
the hatching lines or broken hatching lines or you can use the combination
of fine liner along with the breast pain to create a clear different sections for this Apart from this, I am going to make the upper
section a little bit darker by doing a little bit of hatching there for
the upper part. And for now, just continuing on with creating separate
units like this. And with these, we are
done with this side. Now for the remaining section, the under value of the well, I'm just going to use the broken hatching lines following the curve sea and filling the entire
section with it. One more seat of line in here, extending it a little bit towards the wet towards
the whale's tail. A little bit of hatching for the upper part in here,
for the whale's mouth. A little bit more hatching, making the outline
a little bit more darker with more lines
like this in here. Making the sepreon in
between the fins and the underbelly a little bit
more clear with more lines. And with these, we are done with the wheel of the golden Eclpse. I hope you enjoyed
painting this. This was quite fun, and I had
a lot of fun painting this. I'll be seeing you in the
next project. Happy painting.
18. Whale of the Golden Eclipsed Dream Day 4: Simple straight
horizontal line in here. I'm creating this line somewhat in the upper
section of this seat. And for this way, I'm going to make the curve see the arc see a little bit more
curved as compared to all the projects that
we have covered so far. Arc see with more curve as compared to all the others
that we have created so far. You are always free
to make changes with the C side as well as the
placement of the lines. In here, I decided
to experiment with this kind of arc
seat for this wheel, a little bit more
curved arc see. As compared to all the projects that we have created
for this class, this is going to be
the only wheel that lies so below the
horizontal line. Doing the outline for
the upper section, we have got a little bit of horizontal see like this
for the wheels head. This is going to be the
wheelpin at the top, simple curved line,
simple curved set like this and extending it to
create the wheel stay in here. The wheel still start the
semicircular seep like this. And then we'll be
adding that detailing, extending it in here. So we have got somewhat of semicircular shape in here and
now adding the details for the wheel stay this is going to be our
simple pencil draft. We'll be making
changes to it when we'll be doing the inking
and doing the outlining. Later on, I'll be increasing the thickness of this
while steel a little bit, continue on in here. The remaining section, the remaining parts of
the wheel's body, it's underbelly and then we'll be connecting it
to the wheel steel. This is the simple say
for the wheel's body or you can say the silhouette
for the wheel's body. This is going to be the
front fin of the wheel. Add another one in here. I'll be making the sizes a
little bit softer later on, extending the side of the
head a little bit more. I'm also going to increase the thickness in here
for the middle portion. You don't have to stick with the pencil sketch that
you have created. If required make changes. In here, I'm going to
create the wheel's e, dividing this section into upper and the lower part
for the wheel's mouth. Human like eyes that I'll
be creating later on. A little bit of more adjustment for some of the sections
with the pencil. Most of the video in this
class is in real time, so you can always
follow along with me. For some of the
repetitive section, if I increase the speed,
I'll be mentioning it. Now going in with the pine
liner to do the outlining. Mostly for this wheel,
I'm going to use this kind of curve saves
to do the outlining. Instead of this, if we want
to use the stream line seeps that we have used for most of our in, you can always do that. This is going to be
the mouth of the hs. For all the heels that
we have created so far and the remaining
whales that we are going to create for the mouth to make a clear sepression between the upper and the lower
section of the mouth. I'm mostly going to
use lots of lines. The main goal for the
mouth is to create upper and lower section that are clearly distinct
from each other, and it gives the idea that
the mouth opens and close, that it has two distinct layer. So for those, I'm going to use two or four sets
of the lines later. Here this curve seed
that I had created. I'll be adding the ice later on. Continuing on with
the upper part of the wheels outlining, as I was saying, I increase the
thickness a little bit. Now for the wheels when
making it quite smaller. If you want to
change the sep size, increase the length or decrease it, you can always do that. More curved seeps like
this to do the outlining. The main reason for
using this kind of lot of curve seep
to do the outlining is to make the wheel look
a little bit more organic with more curved seeps. You can always use
the streamlined seeps And instead of using the atomos Basbin to
do the outlining, in here, I started with the Sakura micron fine liner
to do the outlining. The small mistakes if I made with the sakura
micron fine liner, it will be easier to
remove it or to cover it. But with the tomos braspin
it will be a bit harder. But if you want to
proceed with using the tombos brasbin
or other bras pens, you can always do that extending the lines like this
for the under veiling, continuing on with this section. And finally, doing the
outlining for the wheel steel. So with this, we are done with a simple outlining
for the wheels body. As I was mentioning
for the mouth, this is going to be
the lower portion of the whale's mouth,
more curved lines. And for the upper sections too, I'm going to do the same thing, but later on, when I'll
be adding the ink, and then I'll be applying the white jelly pen to
create the clear separation, ensure that the ink
has properly dried up and lightly erase
the pencil marks. Once again, going
back with the pencil to create simple organic
seeps like this. So random seeps like this. So these are the places in
which I'm going to create simple patterns and desding
for the wheel spotty. A combination of curved and a little bit sharp
edges like this. Instead of copying me, create your own patterns and
designing for this section. Give it a little bit more
unique charm to your painting. Just add your own
personal touches and add the designs and make the designs
a little bit more yours, change the placement, change
the seats and sizes of it. A little bit of
smaller design pattern in here for the wheel steel. Now for the pens in here, mostly adding it for the lower
section like this in here, for this pin, only
a small section. And with these, we are done with the pencil now going
with the black ink. This is going to take
a little bit of time since we'll have to do
a lot of outlining. But in here, you don't have
to with that much causes, as you can cover it completely the pencil outlining that you have did and use the ink to create new
outlining for those. As you will be seeing it, what I mean by it for some
of the sections, I'm going to completely change the outlines that
we have created. Just feel the ink as you see
fit in here for this one. As you can see, I have reduced
its side a little bit. For the others to,
I'll be doing the same wearing their
saves in the sides, and for some of them, I'll be completely changing
their shapes if required. What I'm aiming in here
is just to preserve the curved seeds and giving it a little bit
more organic look. By organic look, I means a little bit of curve and
uneven lines like this. In here for this portion
for the eye, if you want, you can leave a little
bit of white of the paper and use it later
on to create the eye. But I completely covered
it with the ink. Later on, I'll be using lots of white jelly pen to
recreate the eyes. They outlining for
this section and now filling the remaining
section with the black ink. I would recommend you to either start from the right
or from the left and then move towards
the other direction so as to avoid
smudging of the color. Generally, I start by doing the outlining for this kind of sections and then feel the ink
for the remaining section. That makes the process
a little bit easier. And for the other wheels, which I have to cover the
entire section with the ink, I generally add lots of ink for the middle
section and then spread it even this making the process a
little bit more faster. Now moving on to this fin,
the fin on this side. We have lots of ink in here
and a very small section like this for the detailing that we'll be covering on later on. And with these, we are
done with this one. Now, continuing on with
this one, the front fin. As you can see, I have reduced the size of both the
fins a little bit. The initial pencil skies that I did has a little bit larger fin, but in here, I made it softer. So try to keep it proportionate
to the body size, the wheels body size. The remaining section in
here for this portion. For project with lots of smaller details or
finer detailing, the inking process takes a little bit more time since we have to do a lot of outlining. Otherwise, the inking
process is one of the fastest process
for all the projects, but because of the kind of smaller detailings
and the outlining, it becomes a little bit
time consuming process. We have mostly done
the outlining, just carefully feeling
the color Still, if you want to use other
colors, you can do that, too. You can keep the half of
the whale's body black, and for the remaining portion, you can use other color
metallic colors or watercolors. As I have shown you in one of the demonstration
video in which we used orange and yellow to create the coloring for
the whale's body. Now we are halfway there. Carefully filling it.
This section is a little bit streamlined the
upper part of the al steel. But the remaining
portion, as you can see, we have got lots of
curves and bumps. Carefully doing the outlining in this area for the patterns
that I'll be creating for the alteel on this side too. Later on for the other sections, the section which we have
outlined with the fine liner, I'll be coming in with the
tombos breastbin and redo the outlining for
the white patches that we have created in here, if you want to add other colors, metallic colors or watercolor,
you can do that, too. That will also make
the wheel interesting, or you can just keep
it plain and simple. And giving a little bit of more streamed save so
streamlined save in here for this section of the wheelstaeEtending its
size a little bit, just a little and with these we are mostly done
with the inking of this he, the wheel of the
golden eclpse now. Once again, going back with the fine liner and we are
going to create spiral shapes. Random spiral saps. Spiral shapes are not
going to be even. Mostly, I'm going to use
curved and a little bit of skewed line like this to create this kind
of simple shapes. I'm going to create
multiple shapes like this. I'm going to create
multiple ones of shape sizes and most of the
lines are going to be uneven, as you can see in here. Instead of it, if
you want to keep it uniform and somewhat similar to what we did in the
demonstration video with the clouds, you
can do that, too. Either you can
create spiral ones or you can create this
kind of uneven ones, or you can also use a
combination of both. So this is the
initial designing. Later on, I'll be going in
with the Tombos Brass pin and make the design element a little bit separate
from each other. So for each individual, I'll be using the Tombobestpin, and redoing the
outlining later on. And with these, we are
done with the first one. In here, my ink has not
completely dried up. That's why I'm keeping my
palm above from the paper. Ensure that the ink has dried up properly
and then proceed. Otherwise, you might smudge
the ink all over the paper. Or you can just keep your
palm a little bit above the paper to avoid smudging
of the ink by your palm. Now, we are going to
repeat the same thing for all the patches of the
white that we have in here even lines like this in the form of
somewhat of a spiral saps. I'm also wearing the
seeps in the sizes a little uneven organic lime like sees for the
remaining sections. This process is going
to take a little bit of time since we have
to create lots of it. In here, if you
want, you can also include the sparkle paints. Instead of using the fine liner, you can always use
the metallic or the sparkle paints to
create this kind of sieves. Or you can use the
sparkle paints later on to feel the inside for some of them or some of the spiral sieves
that we have created. For the smaller
section just create very small ones with two
or three random lines. This is the largest one. We have got lots of flowing
seep in here. One more in here. And with this, we are done with this one. Smaller ones like
this here and there. For this kind of empty
spaces, if you want, you can include smaller ones, but I'm going to keep
it plain and simple. Later on, I'll be
covering it with the tomos breastbin continuing on with the front fin in here, three or four random
spiral seeps uneven lines. So this was the first wheel that I created for this class. It all started with this one, so it's a little bit different
from all the project. So this was the first
so that's why we have a little bit easier and
simpler background elements. In here, I have created
two concentric circles, semicircle or one
fourth of the circles, and two or three
clouds on top of it, quite simple and easy clouds. Now moving on to the il steel. We are going to repeat
the same thing. And this project is
a little bit larger, so I have divided
into three sections. This is the first section. We have two more sections. And that's all for this
section of the video. I'll be seeing you
in the next section.
19. Patterns and Designs with Brush Pens: Hi, and welcome to
the second part of Wheel of the golden eclipse, continuing on where we left off, starting with the
tomos bras pin, and we are going to
do the outlining for individual sections that we have created using this kind of spiral lines and spiral sieves. This is optional, if you
want to keep it like this, you don't have to do this, or
if you want to experiment, you can use metallic colour
to do the outlining, you can use metallic colors or sparkle paints to add the
color for some of the insides. That will also make this a
little bit more interesting. So carefully, doing
the outlining for each individual saves
that we have in here. As I mentioned, I'm also doing the outlining for
the other sections, the sweep of the wheels body
for some of the section. Continuing on with going
over all the outlining. If you want, you can feel
the empty species in between with a black two that
will be interesting too. After doing this,
I'm going to use the white chilly pen to create the patterns
and the resigning. This is the second
part of this project. After this, we have
got one more section. Moving on to the wheel spin, doing the outlining
for the smaller one. This larger one, put some
of the sections in here. I'm going to create a few
barnacles later on with the white hail pin on the
sides of the wheels fin. As for the designing elements,
mostly, as I mentioned, I'm going to use lots of
stippling dots of various sizes, combination of both
small and larger one. For some of the lower section, the underailing sections, I'm going to use smaller
strippling dots. But for the remaining sections, mostly I'll be
using larger dots. I'm also going to use a few of the rhomboid saves to
create four cornered stars. And for this wil,
as you can see, I have not created
the underwil portion. Later on, I'll be using
white chill pin and use lots of hatching line to
create the underwily portion, a little bit underneath
these designs. We have got four
more sections to do. In here for this middle portion, the ink that I used is
not uniformly spread, so I'm going to cover it with lots of design
elements later on. These we are mostly
done with the sections. Let's do the outlining for each individual sections,
the smaller one. Et's do the outlining, going over the Sakura
micron fine liner. And with this, we
are done with this. Finally, moving to the whale
steel doing the outlining, and then let's do
the outlining for each individual sections,
the smaller ones. Most of the videos in real time, so you can always follow along with me for some
of the sections. If I increase the speed, I'll be mentioning and
finally, the last one. And with these, we are done with all the design elements going in with the jelly pen in so that the ink
has properly drin. So for the upper section of the mouth, for some
of the sections, we might have to do two
or three layering to get a clear and sharp line
with more line weight. In here for this bumps like see, I'm going to use large
and small dots to create resemblance of the
banicle present in here. Basically, what I'm doing
is creating a larger and then surrounding it with
few smaller ones like this. For the remaining section,
the middle portions in here, I'm going to create
more dots and use more smaller stippling dots and a little bit of curved
lines to surround them, as you can see in here. I'm not going to
add a lot of it. Four or five will do the work surrounding it
like this in here. Let's create a few
more smaller dots, a little bit of stippling. And with these, we are
done with this section. In here using lots of
stippling for this section. This is going to be the upper portion of the whale's mouth. Later on, I'll be using a
little bit more black for the lower portion and add
more white on top of it. For now, continuing
on with extending the lines more lines in here with a little
bit more line weight. To increase the line weight, you just have to do two or
three layering of the white. And in here, we are
going to create the human like eye for the w, somewhat of elliptical
seep like this. And to make it look a
little bit more realistic, we are going to add
more curved lines for the upper and
the lower section. And let's put the designing. I'm going to use a little bit of a stippling on the right side. Inserting the eyes
with this kind of curved lines with
varied line weight. Now creating the eyeballs with a little bit of black
for the inside. Small stippling dots like this, put a little bit of detailing. We are going to encircle it with a dynamic lines lines
of varied thickness. This kind of things
becomes a little bit easier if you are
using the breast pins. For this kind of pain,
you will have to do two or three layerings of it to get a little bit more
line weight to it. More distributing dots in here. This are optional
patterns and designing. Now for all these design
elements that we have in here, I'm going to encircle it like this using broken curved lines. For most of the bum saves that we have
for the upper part, I'll be adding small
dots and large dots. These are once again optional. In here for this middle portion, I'm just going to cover it with lots of small
and large dots. Instead of it, we want
to include stars or other designs and saps.
You can do that, too. Continuing on doing the
outlining using this kind of curved organic seeps,
broken lines like this. So this process is going to take a little bit of time
since we have to create lots of lines and lots of dots
in here for this portion, as I was mentioning
for the bancles lm using this kind of
scribbling technique and just add this kind of
saves for this portion, to create a clear setson
between the wheel's body and the whels fin more
curved lines like this. In here, I'm just
trying to give it a little bit of movement. That's why I'm using this
kind of curved lines and curved seeps to give it
a little bit of acons. I'm trying to demonstrate
that this is in movement. More outlining like this
with more curved seeps. So we have got two
mancles in here, and for the remaining portion, small dots and few stars,
four corner stars. If you're not that confident, you can always use small
and large dots and few stars to feel the
remaining sections. And if you want to experiment
and add different patterns, designs, feel free to do that. Small and large dots. For the remaining portion, I'll be coming back to it
later on for this one, the fin on this side, a little bit different
kind of designing in here. In here, I decided to create a little bit of feather
like appearance in here, the backside of this fin. If you want to keep
it plain and simple, you can just use the
simple dots that we have used so far or
apart from that, if you want, you can
also feel it with the hatching lines to sew the side of casted
by the wheels. Mostly using the smaller
stippling dots in here. Now, continuing on with
more curved saves. We have to encircle
all this and then use lots of stippling dots
of various sizes, mostly large and small for
some of the lower sections, I'm going to use smaller dots, otherwise, we have got
mostly larger dots. And here you can see a little bit of
difference in the ink. So for this section,
I'm going to cover it with lots of smaller
stippling dots. This is the largest
section of this project. We have got around 20
minutes of content in here. So be patient and just
follow along with me. And if you have
experimented with different seeps
pattern designing or colors, please
here your work. Apart from this,
I'll also be using a little bit of yellow
color for the eyes, which is optional,
moving back to the wheel spin on this
one, the front one. Feel the like seep in
here, smaller section. More curved lines.
For the section which you are not
that conformed, you can just use more spiral and more curved
lines like this. You can always use curved
hatching lines too. And then for the
remaining section, you can just feel it
with the random dots. With these, we are done
with both the fins. I'll be adding a little bit more details for
some of the section, but for now, for now, this continuing on with
this underbelly section. Using lots of hatching lines in here for this
underbelly portion. Now for some of the
remaining sections in here, I'm just going to fill it with the dots stripping technique. A few more dots here and there, just covering the difference
between the two ink. Now moving back to this section, doing the outlining
with the broken lines, curved broken lines. I this additional outlines, this makes the seep a little
bit more interesting. Now for this smaller
fin at the top, small dots following
the curved seep of it and more lines
like this to give it a little bit more dynamic
seep a little bit of movement to If you want, you can also do more outlining like this for
some of the sections. Four continent starts like this, and you don't have to
create the perfect dots. You can also create this kind of smaller elliptical shapes too. Small random sline
do the work too. So random lines with a
little bit of line weight. For this section in here
in between these 21, I'm going to use lots of
smaller stippling dots. For the other sections
too if you want, you can do that, more stripping dots for those
sections, smaller ones. In here, I'm using combination of both
large and smaller ones. Now continuing on with
the remaining section. The wheel steels,
I am not going to use that much of
stippling technique. Mostly, I'm going to
use the hatching lines, broken hatching lines to give it a little bit of
flowing movement. Doing the outlining in
here for this section. And same thing on the
other side, curved lines. Adding more curved lines, curved hatching lines like this. This kind of hatching lines give a little bit more
movement to it and makes the painting a little bit
dynamic using broken lines. Using this kind
of hatching lines to give this tail a
little bit of movement, continuing on with the remaining section for the upper part. And for the remaining portion, we have got the four continent
starts and stippling dots. This is all repetitive process. With this, I am satisfied
for now if required, I'll be coming back
to it later on. Now going in with a
tombosbeast pain. And as I was mentioning, I'm going to add lots
of black in here, put this lower portion
of the whale's mouth, creating a clear separation in between the upper
and the lower part. Another set of
outlining in here. I'm going to do the seeding
from the upper part. And here I'm using
the Zkurataki ink and adding the black in here. Lots of black, but I'm not going to cover the entire
white sections. I'll be leaving a little bit of white increasing the line weight a little bit in here
for this section, a little bit more outlining. With these we're done with the wheels mouth to make the pupil a little bit more darker, a bit more black. For this section, let's make
it a little bit more darker. So redoing the outlining, going over the fine liner. And instead of using streamlined lines to do the outlining, I'm using a bit
of dynamic lines. The dynamic lines portray the movement a
little bit better, and it looks a little bit more organic and adds more
interest to the painting. We are going to do lots of curved hatching using
broken lines to feel the entire section following the curve sip of its
lower part of the mouth. For now, just using this
sakura micron pain. And once again, I'll
be going back with the thrombos breast pain to
redo some of the section. Not some of the section, most
of the section to create a clear separation between different sections of
the under part of this. Follow the sp and
use broken lines. You have also got
the option of using streamlined scene as we have used for other
projects so far. After doing this, we'll be completing this section
of the project. And in the next section, we'll have the three clouds and the background element,
simple background element. If you want, you can add few
more lines here and there, a little bit of smaller dots and smaller hatching lines for
this section, the front part. Just focusing in here
for the front section, making it a little bit darker, comparatively darker with more
hatching lines like this. A little bit more detailing for some of the sections,
more hatching lines. Avoid over saturating it
with the hatching lines, increasing the lines
a little bit more. And with these, we are done
with the fine liner for now, going in with the
tomos breast pain, and we are going to make lots
of line a little bit more darker and use dynamic
lines in here. I'm only going to
do the outlining for some of them entirely. For others, I'm going to
use broken lines like this. So we have got a combination of long curved lines and
other are quite broken. Basically, I'm
creating separation in between different
sections and using it to create different and clearly separate
sections like this. Just by doing this, you can see the difference it has made. The lower portion looks a
little bit more interesting, and it has added another
dimension to it. Carve see with a little
bit more line weight. So that's why I use two pints
to make things interesting. If you are confident,
you can also use the breast paints or
the watercolor brushes. It will make the
process much faster. And with these, we are mostly done with this section
of the project. I hope you enjoyed
painting this way. If you want to keep
it plain and simple, you don't have to add any
details background element. You can just leave it as it is.
20. Final Detailing and Background : Starting with the compass to create the outlining
for the circles, you don't have to
follow along with me if you want to create
other variations or increase or decrease the
z inside of the circle or placement, feel
free to do that. So this is going to
be the main circle, and this inside it, I'm also going to create
another circle, a bit smaller circle, creating the outline so that it will be easier for me
to add the color for the intersection another set of smaller circle that I was mentioning a set of
concentric circle. This is going to be
the one fourth of the size of the first one. And I'm going to
create small clouds, three small clouds,
quite simpler one. In here, for the first circle, I'm going to use the yellow
and for the second one, I'm going to use
the metallic color. Shining for the clouds,
simple seeps for the cloud, the kind of clouds that I showed you in the
demonstration video. If required, I'll
be making changes to the seeps in the
sizes of the cloud. One in here for the upper part. So these clouds are lying on top of the circles
that we have created. Instead of it, if
you want to please the clouds underneath them,
you can do that, too. A Third and the final one,
this is the smallest one. Simple curved saves like
this for the louds. In here, once again, I'm using both the Sakura
micron fine liner for the final and smaller details and using the Tomosbspin
to do the outlining. So this is going to
be the simple pencil sketch for all the
background elements. If you want to make changes
to it, feel free to do that, going in the Tomos bras pin to do the outlining for the clouds. If required, I'll be
making changes to the saves in the size of the
subsections of the cloud. But for now this falling and going over the clouds right now, extending its side a
little bit just like this. And with these, we are done
with the first simple cloud. Now the second one that lies
in here and the upper part. It should be visible now. I've also included
a picture in here. For the insights of the cloud, if you want to repeat the
same kind of pattern that we did for the fields body,
you can do that, too. That will make it
look more identical, but I'll be keeping the
designs a little bit different from the
design elements for the insights of the way. Extending its size
a little bit more. And these are going to
be our three clouds, a little bit more detailing in the form of this kind
of spiral seeps. So for now, just creating the curved seeps
for the inside and then and then I'll be creating this kind of spiral seeps
for some of the larger ones. If you want to add
more of this kind of seeps for the intersections,
you can do that, too. But mostly, I'm going
to use this kind of curved seeps and for the
larger ones, the spiral seeps. I'm also going to change
the direction of some of the spiral saves facing in
opposite directions like this. A few curved sieves like
this for the insides. These are optional. If
you want to keep it plain and simple, you
don't have to add this. And we are going to repeat the same thing for the
remaining two clouds, adding another set
of outlining using the curved seeps and for
some of the larger section. And for some of the
larger section, adding curved spiral
saves like this, another spiral in
opposite direction like this in here too. One more in here. Now for
some of the sections, a bit larger and smaller ones. Lastly, moving to the
third and the final one, curved seeds for
the smaller one and the spiral seeves
for the larger ones. Few more spiral saps
here and there. And with these, we are done
with the Tombosbrspin for the outlining and small seeps
and designing like this. I decided to add few more. Now we are going to
lightly use the pencil mar a little bit more
detailing for some of the sections using
the fine liner. Since the spine liner has
comparatively less line weight, so it will make things a
little bit more interesting. I'm going to encircle some
of the spiral seeps and add a little bit more
curved seeps for some of the sections.
This is optional. Few curved lines and
circling some of the larger spiral saves
that we have in here. That's what I'm going to repeat for the remaining two clouds, few curved saps here
and there as well as inserting some of
the spiral seeps. Instead of using the micron pin, you can also use the
sparkle pins using yellow, red or other colors to do this. You can also use a little bit of hatching to create shadows. If you want to make it a little bit more similar
to the ails but you can also use a little
bit of stippling techniques and create few
stars here and there. Apart from the clouds, you
can also add those stars and stippling dots for
the background elements. And finally, moving in here for the smallest love,
repeating the same thing. A few curved lines and
encircling some of the larger spiral saves
that we have in here. A bit of more
detailing with this. And with these, we are done with both the Tombos breastpin
and the fine lineup for now. I'll be going back with
the Tombos breastpen later on for the
background element. In here, I'm likely reaching the outlines that we
created for the circle. Insure that a small
section remain visible so that it will be easier for us to add the color. Now, going in with the yellow, using the yellow and filling
the entire section with it. So this color is from Zikura. So this breast pain, using this breast pain to fill
the entire section, you don't have to
use the breastpin. You can also use
the watercolor or the metallic colors or other
supplies that you have, you can use sketchpins and
acrylic colors, et cetera. Whatever supplies you have and whatever you are
comfortable with. And if you want to only create the clouds, you don't
have to do this. Going over the outline first and then we'll be feeling
the insides with it, carefully doing the
outlining for the clouds and now extending the color to feel the remaining portion, slowly and gradually
moving towards the right. We are halfway there.
To get ink out of it, I have to squeeze it
repeatedly and yeah, continuing on with the
smaller section in here, doing the outlining
for the clouds and feeling the remaining
section with this yellow. And with this, we are done
with two thirds of the way, also going over the outlines with this yellow for
the smaller one. Making the outlines a little
bit more clearly visible. Later on, I'll be
using other color to add the color inside for now, just going over the outlines. Inside this, if you want to create patterns and
designing using the Tomas bras paint or the file liner or other
colors, you can do that too. With this, we are done with
outlining for this section. Let's add the color carefully. And now extending it downwards. This brain that I'm using it for the finer and
smaller details, but I decided to use
it to feel the color, so it's taking a
little bit more time. Extending the color upwards, adding it just underneath the cloud and feeling the
remaining portion with it. Only a small section
remains in here. And with this, we are done
with the first circle. Add more color wherever
you think it's required. Now, I forgot to add it for
the eye. This is optional. If you are satisfied
with the eyes, you don't have to use this. If you want to add it for the inner section,
you can do that, too. Now for this one, I decided
to use the metallic color. A using this ocher metallic color, concentrated ocher
metallic color and feeling the entire
section with it. Carefully beside
the clouds outlined section underneath
the cloud in here, carefully doing the outlining, sending the color for
the remaining section. Try to maintain the outline
that you have created. Try to feel it inside
the outline section, aim for a flat vase with
these, we are done with this. And with this, we are done with both the circles and the background elements
with the clouds. Later on for this
project, as you can see, I added a little bit
of more detail using the tombos breastbin and
this is how it turned out.
21. Whale of the Midnight Moon Day 5: Welcome to this project
Whale of the Midnight Moon. Let's start with a
simple pencil sketch. Starting with the
simple straight horizontal line in here. This will be determining
the length as well as the placement of the
wheel's body in here. I am making this line a little bit towards
the upper part of the page a curved arclC
for the wheels body. This wheel's body will be a little bit argued near its tail. This wheel will be
facing towards the left. This will be the middle
section of the whale's body. Now let's screen the wheels, sketch the remaining
portion of its body. This will be the upper
part of the wheel's head. In here, the whales fin. Now extending it for
the whales tailed. If you want to
sift the position, make it small or large,
you can do that. Now for the remaining portion, the whale's mouth in here. For this one, I decided to make the lower part a little bit more broader and bit more thicker as compared to the upper part. As you can see, the lower
part has more width. And now extending it
towards the whale tail, making this ports and curve. This is our initial pencil
sketch if required, we'll be making changes to it when we'll be doing
the outlining a little bit of click shape like this in here
for the whale tail. This project is also divided into three sections. This
is the first section. Most of the video
is in real time, so you can always
follow along with me. If for some of the section
or the repetitive elements, I'll be increasing the speed.
I'll be mentioning it. Add a little bit more detailing. I decided to shift
the middle portion a little bit in here. I'll be creating the whales I. If it is easier for you
to use the reference by dividing the whale's body into three section,
you can do that, too. Now extending this in here
to create the whale's fin. A little bit just
below its stomach. The wheels are in
here on this side. So this will be the
wheels under whaling. And yeah, this is
the simple sketch for the wheels entire section. In here for the background, I'm going to create
the midnight move. So semicircular seat. I'll be using compass
to create it. But I'm just showing
you a rough guideline for the background
elements that I'll be using As for the
patterns and designing, I'm going to create lots of wave blight forms using
the sparkle paints, blues and the yellows for now. Let's continue on with doing
the outlining in here. I'm starting with a tombosprspin to do the initial outlining. I created bump like see on top of its side
for the barnacles, which we'll be
creating later on. This is the wel spin on the top. I change the site I change its
set position a little bit. Now doing the outlining
for the hel steel. Apart from the wave
like form and design, I'll also be creating
multiple large stars, eight corners and four stars
and lots of stippling, stippling with large
and small dots, doing the outlining for
this side, the weltem. And now let's do the
remaining section. So this is going to
be the whale's mouth, the middle portion, a little
bit of curve seep in here. On top of this, I'll be
adding the eyes later on, extending it for the whales
fin. Now this portion. I decided to divide
into two sections. This will be the upper part, and then for the lower section, we'll be creating the
wheel's underbelly, extending it from in here, the whales fin and
taking it towards the whalestail extending a little bit more
with curve lines. In here for the whale's mouth. A bit of curved and
organic saves like this for the lower portion, and we are going to extend it towards the
whales fin in here. Now going over the outline
for the other pin. So this is a simple outlining
using the fine liner. I decided to extend the
size a little bit for this fin to make it more longer compared
to the other fin. A little bit of more detailing
for the wheel's mount. So this person, I'm
going to keep it plain and simple with
the white of the people. For upper and the lower
sexon I'll be using seeding and adding the
colors on top of it. For the upper, we have
inking and for the lower, we'll be doing the seeding using a little bit of dry
breast technique, using the tombos breast pin. Now, sure that the
ink is properly dried up and like erase
the pencil mounts. Later on for the outlining, I'll be going with the Tubosbasbin
for the lower section, but for the upper
part, we'll have the blacking that will
do the outlining. Now for the seeps in
the patterns and here, I'm going to create somewhat similar patterns
that I showed you in the demonstration video
using metallic colors. I'm going to create similar
patterns that I showed you in the demonstration
video, wave like patterns. I'll be using the
sparkle paints, golden and the
purple or the blues. This kind of wave like
patterns easily we'll be starting doing the
outlining with a fine enon and then
add the colors inside. Look at now let's
do the outlining. So I'm not going to stick with the outlines that
I have created, if required, I'll be making changes
and adjustment, and I'll be creating this
wavelike form and layers. So a total of two or
three distinct layer, starting with the smaller
one for the lower section. And as we progress, I'll be making the sizes
a little bit. So the middle section will
be a little bit larger. And then for the final
section or the final layer, we'll have comparatively
larger wavelike form. Yeah. Let's continue
with conting this kind of a little bit sharp edges
for the wave like form. Instead of this, if you want to pleat other patterns
or other designs, feel free to include those two. You don't have to exactly
follow what I'm doing. You can also increase,
decrease the seeps and sizes. You can also increase and decrease the number
of the layers. For now, this is just
initial sketching. We'll be making changes
to it later on. So right now I'm just doing the outlining
for the upper part. The second and the first layer, I am not included in here. I'll be doing it later on. So simple outlining
like this for the upper part of
the wavelike forms. Portion of the sections, I'll be doing two or three
outlining like this. For the others, only
single outlining will do the work continuing on in
here for the whale's tail, extending it on this side. As you can see, I created a design simple and
small design in here. For the sections,
we'll be having only a single layer
of the wavelike form, doing it for this section, this side of the whales tail. Now doing a little bit
more outlining and dividing some of the
section into multiple ones. I'll be coming back
to it later on, but for now, let me sew you in here, I'll be
creating the eyes. For now, I'll be covering
it with the black, but later on, I'll be using the whiting to
recreate the eyes. And as for the pens in here, we'll be using lots
of curved line to sew clear separation. And for some of the sections
of the fin in here, we'll be creating
small wavelike form. For the lower sections,
we'll be using hatching techniques and a
little bit of coloring. The same thing in here on this smaller fin fin on the
other side, same wavele form. Is that the ink is
properly dried and then inset that the ink is properly dried and
lightly erase it. And here I erase all
the pencil monks. Now, I'm going to do the
inking and later on, redefine some of the edges of the wavelike form and
add more details to it. Try to preserve the curved
edges that we have created. In here, I'm starting
with the left side, and I'll be proceeding
toward the right. You don't have to
worry that much about this section, the upper part. But for the middle section, we'll have to be bit
causes to preserve the sharp edges of the wave form and the designs
that we have created. Instead of this, if
you want to cover it entirely with the black
and later on come back with a white ink
or white gauze or white chili pin to recreate the wave blifms, you
can do that, too. For now, I'm just
continuing on with spreading the colors from
the left towards the right. Spreading the black
ink evenly in here. As I mentioned, this project is divided into three sections. This is the first
section in here. Mostly, I'll be
covering up to here and a little bit of detailing
for some of the sections. And in the next section,
we'll be focusing on the wave forms and a
little bit of designing. And for the third in
the final section, we'll do their coloring for
the background elements, a little bit of more designing
and adding final details, doing a little bit
of hatching and seeding if required for
some of the sections. Carefully doing the outlining
in here for the sin, preserving the sharp edges of the outlines of the wave life
form that we have created. Now in here, doing the same
thing for this section, just above the whales stomach, spread the colors evenly. One more thing that
you can do to make this process a bit
easier is you can start with the Tamospespin
or the curaakiprespin, if you have and do the outlining for this wavelike
forms and then use ink this making this process
a little bit easier and you will get more SAP and
bit more precise SAP. It is for the waveli
forms that we have created carefully and slowly creating the outlines
like this in here. You don't have to
worry by mistake, if you cover some
of the sections, you can use the ink to
redefine it later on. As for the coloring,
as I mentioned, I'll be using golden color, the blue, and I'll also be using a little
bit of gray color. And as for the background, I'll be using the
metallic blue colour and the golden color for
the midnight moon for the blue moon and for the wreaths that are
coming out of it, I'm going to use the
sparkle pin golden colour. The background element for this one is quite
simple and easy. The most time
consuming process in here will be the wave creation, spreading the colours evenly in here for some of the section, the upper part of its head. We are halfway
there, only the tail and one of the pin remains. Continuing on with carefully
doing the outlining for this and we'll be extending
it towards the right. The whole process
is in real time, so you can easily
follow along with me. This is a simple
version of the wheels. The only time consuming
process will be the wave creation and
adding the color for it. Apart from it, if you want
to include more designs, more pattern for the
background elements, you can do that to make it a
little bit more interesting. You can add your own
personal and unique touches to and finally, we are moving to the whale tail. In here, we have got
more smaller sections, so I field it on my own, and this is how it turned out a little bit more in here with the
end of the wale tail. And the last thing in here, the other fin on this side, carefully preserving
the pages of the wave forms and filling
the entire section with the black using the black to do the outlining. And now we are going to fill the entire section
with the black. I'll only be covering up to here for this section
of the project. We will wait for the ink to
dry a little bit and then proceed with doing and
creating more details for it. For this section for the inside, I decided to add a
little bit of black. And yeah, if you want to add a little bit more black for some of the inside sections of
this, you can do that, too. But I'm satisfied with the
inking and how it turned out. I'll be seeing you in
the next section. I
22. Tricolor wave pattern : Welcome to the second part of the wheel of the midnight moon. We'll be continuing
where we left off. So in here, the ink is
not dried up properly, so I'll be focusing only on the wave form in here
for the lower section. I'm going to divide
into more section. As I was mentioning, I'll be divided into two
or three sections. For the upper
section, we'll have larger waves for
the middle section, but smaller, and for
the final section, we'll have the smallest ones. This divide into
separate sections, using lots of curve
lines to divide this to make the separations
a little bit more clear and distinct. If required, I'll also using
Tombs breast pain later on. If you want to do the
outlining and make it a bit more crisper and a bit more darker with
more line weight, you can always use
the breastpins do it. Here, as you can see, I added
a little bit of mistake. I smerge a little
bit of ink in here. I'll be covering it later on using dried breast technique. But now, continuing on with the remaining portion
of the wave form. For this video around
ten to 12 minutes, we'll only be focusing
on this wave like form. And this is going to be a little bit time consuming process since we'll have lots of
smaller and larger waves. And for most of them, we'll
be using different colors. We have got golden,
sparkle color, then blue and a little bit of and a little bit
of silver, too. So a total of three colour golden blue and gray
or the silver colour. So these are the third one
for the middle sections. As you can see, we
have got fewer one, fewer wave like forms. For the middle section,
I'll be generally creating three or
four or six or seven. These are all for
the first layer. In here for the smaller section, I'll only be creating the
first and the second layer. I'm totally eliminating the third layer for
the smaller sections. Making the outlines a
little bit more broader. You don't have to
worry about it. Later on, we'll be using the breast pans to
make it more darker. Only a single layer of wave
like font for this section, since this is quite
smaller and bit thinner. Simple lines to divide the wavelike form into
different sections. For this section in here, the bend portion of the wheel, I'll be coming back
to it later on. For some of the
sections in here, I decided to add a little bit more details with more lines. Avoid over saturating
it with more lines, then it would become a
little bit difficult for us to add colors later on. Dividing some of the
larger weaves into more sections so that we
can add more colors to it. If you want to keep
it more broader and with less divisions, you
don't have to do this. Now, in here, coming
back to this section, the bend portion of
the wheels tail. Now let me show you how I'll
be adding the coloring, starting with this blue color. For the remaining section, some of the bend sections
as well as for the fins, I'll be adding the
detailing later on. But now I decided to show you how I am going to
proceed with it and also making this process a
little bit easier for me to do the outlining for some of the section using
sparkle paints. So I don't have to redo
using the colors later on. Mostly, I'm going to use the blue color on the
left side of the waves. For the right sides, I'll
be using the yellow and for the middle section
or for some of the waves that are
three or four sections, I'll be using gray in the middle the gray
or the silver color. Two or three lines
like this to increase the line weight a
little bit and to make it a little
bit more sparkling. You don't have to
use the same color. You can try other variations of the color and
other patterns too. Or you can also a bit
plain and simple with only the outlining
using the Tombosbespin, and the fine linon that
will be interesting too. For most of the weaves in here, I'm going to add the blue
for now and then we'll be adding a little bit
more detailings and more colors later on. So larger than the
smaller weaves in here, the middle portion, the upper and the lower portions
to, same thing. Mostly focusing on
one side of it. So blues on the one side with a little bit more
line weight to it. Mostly done with this
section with the blue. Coming back to it for
some of the sections, so add a little
bit of more blue. Now, moving in here for the upper section for
the whale's tail. Since this is quite
a smaller section, we'll have to add the
blue a little bit less as we have to
add other colors too. We have got silver and
the golden color for later on the side of the fin, few smaller strokes
with the blue. And in here for this section, the curved section
of the whale's tail. After adding the blue,
I decided to increase the divisions a little bit
so that the addition of the yellows and the silver will become a little bit more easier and we have a clear
and distinct outline for the different section. That's why I decided to go
back with the fine liner. Earlier, my plan
was to directly use the colour for the
waves, but in here, I found that using the
fine liner will make the process a bit
easier and bit faster. It will also avoid overlapping of colors on top of each other. Apart from it, I'm also creating few more additional smaller
waves in the middle section. This is optional. If you don't want to intude more,
you don't have to. Cover this one. And instead of using the silver color
that I was mentioning, I'm going in with a
gray color for now. Later on, I'll be
adding a little bit of sparkling silver, but for now a
little bit of green to create a little
bit of sados too. So for some of the sections, the middle sections
of the weaves, I'm going to add this gray to sew a little bit of
sados for the wave. Continuing on with the grief for the middle section of
some of the weaves. Now moving on to the hel tail, adding fewer strokes
of gray like this onto the other
side of the heltil. A little bit of more graze for the lower
sections like this. Now going in with
the golden colour. I'll also be overlaying
a little bit of this golden colour
on top of the grease, as well as for the other sides
of the weaves that we have created just beside the blue and in between the
gray and the blues, I'm going to add
this golden colour. This is going to
take a little bit of time since we'll be adding comparatively more yellow as compared to the
blues and the grays. So be patient and yeah, just feel the remaining section
with this golden color. So now it's looking a little bit more vibrant by just adding Generally for the project, I start with a simple
cumal sketches for the wheel or nothing that
I'm trying to create. Then as I go, I make
changes to it in here, my initial plan was a little bit different from what I
have created in here. The blight form that
I am creating in here was a little bit more
intricate and more defined, but since it turned out
a little bit chaotic, so I eliminated
some of the steps. But anyhow it looks pretty good. I did the coloring of some
of the sections on my own, the yellow since it was taking a little bit of too much time, and you can do it on your own. And apart from this, if you want to add a little bit of
pink or red in between, that will be interesting too. I tried a few of the
different wave forms, and for some of them, I also use the other
colors variation, the reds and greens too. So if you want to
include the other colors in between some of them,
you can do that, too. My plan was to also include a little bit of silver
colour in between, but I decided the grey
sketch pin that we use, the bras pin that I
use will do the work. You have got two more sections
the sections of the pens. We are going to
repeat the same thing with grease blues and
the golden color. These are quite
smaller sections, so I'm not going to increase
the line weight that much, and we're just going to create smaller strokes with
sparkle paints. We were done with this section of the pin now for
the other one. Only a little bit
of blue like this. A Now going with the golden color. Since these are
smaller sections, I decided to not
include the gray, but if you want to
include the gray or the silver colours,
you can do that, too. I'm also leaving a little bit of the spaces empty with only
the white of the people, just like what I did
for the larger forms. And for some of the sections
that are not well defined, you can always use the
tomos breastbin or the fine liner to make them a little bit more crisper
and more sharper. Now coming back
with a fine liner. In here, we are going to fill it with lots of curved
hatching lines. And for the sections near the whiles fin on
both the sides, we are going to do a
dry brush technique and make it a little bit darker. Like in here, I did a little bit of shading
using the hatching lines, but I'll be doing
another layer on top of it using the dry
brush technique with the atombs breast pin to make this section
more darker and to cover the mistake that I did with the
smudging of the ink. And on both sides of it, we have got this a little bit of hatching technique and
seeding using the fine liner. Later on, we'll be
covering some of them with the breastpin lightly raising the pencil marks for the
outlines that we created. Let's do a little
bit of coloring. So metallic blue color
for the smaller moon, this is the midnight blue moon. A bit concentrated color. I'm going to make the right side a little bit more darker. But for now, I'm
just using it to do the flatb and
creating the outline for try to avoid
mixing the two colors, the ink and the metallic color. We don't want the ink or the metallic colours to
bleed into each other. We're not just aiming
for a flat was and then we'll be creating a
little bit of gradient and a little bit of lights in the shadows going over the outline near the
wheel's upper part and spreading the
colors somewhat immunly for the second
one, I'll be using the golden color later on
golden metallic colour, crating the color for
the remaining section. Extending it a little bit more. Underneath this
fin. And with this, we are done with this section.
23. Large Star and Moon: Welcome to the third
and the final part of the wheel of
the midnight moon. This is a bit larger section, so I created the
other half moons on my own using the
golden metallic color, and I waited for it to
dry, and it has dried up. And now in here we are proceeding
with a white jelly pen. So for all the bumps
that we have created, I added a little bit of
white for the insides, and now I'm using white
with the broken lines. So white jelly pen with the broken lines to do a little bit more outlining for the inner
sections of the upper part. To create a few more
additional barnacles for this section in here, I'm just going to use this
kind of semicircular seas and then encircle it with
curved lines like this. Apart from this, as you can see, I'm also going to use a
lot of hatching lines, broken hatching lines like this. And in here, I'm just creating a clear separation in
between the whale's mouth, the upper section and
the lower sections. On this curved section, we
are going to create the eyes, a little bit smaller
eye for this way. If you want to make it larger
like the other wheels, you can always do that, filling the insides with the
white while leaving a little bit of black
for the inner part. I'll also be adding color
on top of it later on. For now, let's make the eyes
a little bit more distinct, a bit more defined,
a little bit of designing for it
with curved lines. For some of the section just
to increase the line weight, you'll have to do
two or three lines. In here, I use multiple
lines to create a clear separation between the fins and the upper
part of the wheel's body. Moving back to the wheels head, a little bit more detailing with more curved lines and a
little bit of small dots, a bit more designing on top of the wheels I using this
kind of broken lines. So small wreaths like pattern on top of the
wheels I like this. For the remaining section, we are going to create
multiple large stars and small dots like this. I'm going to create eight
stars and few smaller ones. For now, before doing that, let's create
multiple small dots. In here, just by doing two or three layerings
of the white, I'm making it a little
bit more brighter. I'm also going to do
the outlining for each individual waves that we have created using
broken curved lines. For some of them, I'll be using
two lines for the others, only a single line
will do the work. For all the waves in here, the upper parts,
do the outlining. Continuing on with creating
more dots with the white. I'll be moving back to
the waves later on. For now, I decide to add
a little bit of stars and I'll be overlaying some of the
stars on top of the waves. So that's why I did not continue with creating the outlines. Basically, what I'm going
to do is to use some of the dots and create
this kind of stars. First, create large
vertical and straight lines like this, intersecting lines, and then more small
projections like this triangular s to create
the eight con stars. Instead of this, if you
want, you can also create the four con stars that I
showed you in the other videos. Multiple large and small stars like this for the
entire section, the upper part of
the wheels body. I'm not going to
include this for the wheel tails or
for the hel fin, but only for this
middle section. The dots that are
covered with the stars, you don't have to
worry about that. Later on, we'll be
adding more dots, the same kind of dots,
large and small dots. I'll also be doing a little bit of stippling for the
smaller section, the thinner sections
of the wheels burning. In here for the stars,
you have to increase the line weight a little bit to make it look more brighter. One more star in here
just underneath this fin. More dots here and there. Since this is going to
be a repetitive process, I'm going to increase
the speed a little bit. If you want to follow
along with me, you can always pause the video or you can reduce the speed. I would recommend
you to start with the dots and please
them and please them strategically and then transform those dots into stars. Now, in here, I have
increased the speed. I have increased the speed only a little bit and continuing on with converting the dots that we have created into stars. Still, if you want to
include other patterns and designing in here,
you can do that, too. You can use other
techniques like scribbling a little bit of
hatching, cross-hatching too, and includes smaller patterns, the curve lines and the small
inverted circular sieves that will be interesting too. I think for this section, this much of stars will
do their work. Now for the remaining
section in here, since this section is
a little bit thinner, so the sizes of the stars will
be comparatively smaller. I'm going to create
eight or ten more stars and then we'll be
adding more dots. Now, in here for this pen. Right now, I'm just adding another outlining
using the white, using curved lines, also
doing the same thing in here. For this section,
the am like form. And for the remaining section, I'm just going to add
more curved lines, doing the same thing in here
for this fin, the other fin, outlining it, outlining
the curve wave forms, and now filling the remaining section
with more curved lines. Instead of this kind of simple
pattern using curve line, if you want to include
fused jars or increase the number of the waves using the jelly pen, you
can do that, too. A bit of more detailing
for the inner side of the wheel using
more curved lines. Adding more curve line following the sep of the wheel's body. This will act as
another outlining and it makes the things a
little bit more interesting. Adding it on the alternate side of the wheel
tail like this. A bit of hatching line in here for the curved section
of the wheels tail. For now, I'm going to continue
with adding more dots, large and small dots and for some of the empty
spaces in between, if required, I'll be
adding a few more stars. Only the smaller star
will work right now. Otherwise, it will look too oversaturated with
the large stars. Small and large dots of random sizes at random
places like this. We still have to do the
outlining for the waves, continuing on with the
remaining waves like form, curved broken hatching lines like this to do the outlining. Now, continuing on with
dots, more dots like this. And Once again,
coming back in here, simple curved lines like this to create the designing
in here for this one, multiple curved hatching lines to fill the entire section. Since this lies on the
other side, that's fine. Now in here, doing the
secondary outlining for the under value of the wheel
using the tombs breastpin. In here, we are creating
a clear separation in between the upper
and the lower part. And using this
tombos breastbin and applying light pressure
with it to get somewhat of dry breast technique in here and covering the mistakes
that I did using the seeding outlining the wel spin to using the tomos breastpin. Doing the same thing for
the wail spin on this side, outlining it by overgoing it
on top of the fine liner. The fins were
looking quite thin, so I decided to add a little bit more detailing using
the fine liner, simple curved saves
like this and encircling it with
the broken lines, doing the same thing
in here for this one. And for the remaining
white section in here, I'm using the hatching lines, so completely filling it
with the hatching lines. Now in here, I'm
doing the same thing. Since this finish a
little bit bigger, so I'm also going to leave a
little bit of white pieces, continuing on with the hatching technique using the fine liner, while leaving a little bit
of white spice in between. I'm also going to add a
little bit of yellow for the small saves that we have
created semicircular saves. For now, continuing on in
here for the he's mouth, making the outlines
a little bit more darker by increasing
the line weight, and we are going to
do the same thing we have did for all the whales. So using the prokin
hatching lines and feeling the entire section by dividing
into different sections, I also decided to include more barnacles in here
for this section. So creating this
kind of random seeps random spiral like saves
for barnacles in here. Now, creating the
broken hatching lines, following the curved set, the curved contour of
the wheel's mouth. We are also going
to do the seeding and a little bit
of more hatching. But for now, just dividing into different sections
using broken lines. And here I'm going to use
the broken hatching lines. Instead of it, if
you want to use the stream line line and simple lines, you
can do that, too. This is the last one. Let's do a little
bit of seeding. So using the hatching lines
in here to do the seeding. Mostly, I'm going to do the
seeding on both the sides just near the fin and at the
end of the whale's mouth. So continuing onward, doing more hatching with a fine liner. After doing this, I'll
be going back with the Tombosbsbin and
make the distinction a little bit more
clear by increasing the line weight and thus making the separations
a bit more distinct. I'm not overlaying this on top of the barnacles that
we have created. I'm just surrounding it
and adding it beside it, going in with the Tombos braspin making this section more darker, making the separation
bit more clear, going all the larger lines. So adding this tombos breastin on top of all the larger lines, I'm also making
the lines a little bit dynamic of varied thickness, especially near the part of
its mouth and near the fins. I'll be increasing the
line weight a little bit more two or three layers for those section
and then extending it. For some of the larger ones, I am going to completely
do the outlining, but for the remaining ones, I'm going to do the
broken outlining. Extending it like this. We
have got one or two more. Still I'm not overlaying it on top of the barnacles
that we have created. I'm just surrounding it or just passing over it like this. The last one in here, using
it to do the outlining. Let's increase the line weight
for some of the sections. Now using it to create
a dry bras effect, applying very light
breezer with it and adding it at an angle to get this
kind of seeding effect. Instead of this,
if you want, you can also use the
watercolor breast with less water to get this
kind of dry breast effect. Adding it carefully in here. Avoid adding it on top of
the bancles and with these, we are done with the veil now. I decided to do the outlining
for this. This is optional. The outlining that I did not
turn out the way I hoped. So if you want to keep
it plain and simple, you don't have to do the outline or if
you want to include other patterns and designs
for it, feel free to do that. Outlining the inner section. For this middle section
with the white, if you want to add few
patterns and designing, you can also do Extending the line to complete
the outlining, doing the same thing for
this midnight blue moon. And with these, we are
done with the outlining. Now going in with the
golden sparkle paints and adding it for the
center of all the stars. This is optial if you
want to keep it plain and simple with only the white,
you don't have to add this. Only a single dot like this, two or three layers
of this golden colour to make the dots a little
bit more brighter. Now, using this golden clad to create more designs
on top of it, so I'm going to create
the same kind of designs, rays coming out of it, as well as rhomboid
seep on top of it. So random rays like
this or varied length. If you want to create
other variations of it or other patents or designs,
you can do that, too. Or if you want to just
skip it as it is, you don't have to do this. To make it a little
bit distinct, I decided to do a
few more outlines of broken curved
lines like this. Rhomboid sees for some of them. I'm not going to include
the rhomboid seeps for all of them for
only some of them, around eight or ten of the rhomboid sees for
the entire section. Adding few smaller one in
between the larger ones. Now, the curved see and few
more rhomboid here and there. In here, we have got
lots of ended species, so I'll be adding
more smaller one, smaller straight lines,
broken straight lines in here for these two sections. And with these, we are done with this simple pattern
and designing. If you want to include two
more patterns and designing or increase the number
of rhomboid saps, you can do that, too. And with these we are mostly
done with the project. I'll be adding a little
bit more golden color for the veins a little bit,
which is optional. If you're satisfied, you
don't have to do this. I forgot to add it in
here for this section, the curve part, a little
bit of this golden color. And with these, we are
done with this project, wheel of the midnight moon. And
24. Whale of the Rose Moon Day 6: The veil of the Rosemond. This is one of the simpler one. So as I showed you in the
demonstration I'm starting with the straight line in the middle
somewhat middle section. This will be determining
the length of our in now a curve for
the body of the veil. So as usual, I'm going to divide this into three sections. If you want, you can draw
two simple straight lines in the middle section
of this veil to divide it in three
equal section. Or you can just continue with an approximation that way
the divisions will lie. Most of the video
is in real time. For some of the
repetitive sections, I have increased
the speed a little bit for those section,
I'll menton it. Continuing on with creating
the upper section, the head and the upper part of the wheel's body in
here for this section, make it a little bit
uneven so that when we'll be creating the
barnacles on top of it, it will become a
little bit easier. Extending it for the wheel sail. And The curves of the wheels that I created
in here is a little bit different from what we practice
in the demonstration now. You don't have to strictly
copy what I'm doing. If you want to change it a little bit, you
can do that, too. In here for this portion, I'll be creating the eyes for the wheel the wheel's mouth. In here, make it a little
bit curve for this section. So we are going
from a little bit broader than a bit thinner
than 1 second bit broader. This section, as you can see,
is a little bit thinner. Now, making it a little
bit more broader. Extending it from
the opposite side. So we sting. Now, in here, creating a rough guideline
for the il stating. This is just a
rough pencil skate. If required, we'll be making
changes and adjustment to it while doing the outlining
or while adding the ink. Rough outlining for the
whiles fin in here, making it a little bit longer. And on the other side, the only a small portion of
the whelpin will be visible. You can just have an approximate
gauge of where it will lie using the first
pin as a reference. This is going to be our
simple pencil sketching for our and for the background elements, I'm going to create a large semicircular sp or somewhat of elliptical seeps
or half moon seep on the left side and
on the right side, I'll be creating a circular sea. I was not satisfied
with the el steel, so I'm making a little
bit of adjustment to it. The el steel was looking
a little bit smaller, comparatively smart
to its whole body. That's why I decided to make
it a little bit softer. In here, this will be the
stomach portion of our el. We are almost done with
pencil sketching for the way, a little bit of adjustment
here and there. Let's do the outlining. And here, I'm going
with the tombospeaspin. And as I was mentioning, making it a little bit uneven to create the banicles later on. So for this motion, the front of its head, a little bit uneven outlining. I'm just going over most of the pencil
sketch and if required, I'll be making a little bit of changes for some
of the sections. As for the coloring in
here for the half moon, I'll be using the violet color or a little bit
pinkish violet color. Then for the full circle
or the full moon, I'm going to use
metallic silver. And for the decorative elements, small stars and small spheres, I'm going to use golden
color along with the purple and a little bit of black or gray metallic color. You can use the
metallic colour or you can use the
sparkle paints or you can keep it plain and simple without any background elements. Creating the outlines
for the hel stein. We are done with the upper
part of the els body now, doing the outlining for the remaining section,
the lower section. In here for the portion, this person, the mouth, I'm going to use
three or four lines to make the mouth a little
bit more distinct from the rest of its body to two
or three outlining for mouth, the wheel's mouth later on. Let's do the outlining
for the fin in here. In here, too, I'm
also going to make the fins a little
bit more uneven. I'll be attaching a few
barnacles here and there. But if you want to make
it a little bit more streamlined and with smooth
curves, you can do that, too. The other fin in here, I made a little
bit of changes to its position and I made
it a little bit longer. So I shifted it a little
bit towards the other fin. This is what I mean
that I'll be using two or three lines to make the
mouth a little bit larger. I was not able to
record this section, a small section, but you
have bought the idea. Using fewer phone lines to
create this kind of mouth. Humanoid eye using
elliptical shapes like this and a large
eyeball inside. Feeling the insides
with the black and leaving a little bit
of empty spaces white to sow the little bit of
highlight for the eyes, not to make it a little
bit more realistic, add more lines for the upper
and the lower section. So yeah, we are done with the basic pencil
sketching and so that the ink has properly dried and lightly these
the pencil marks. I also did the
outlining using a bit of broken lines for the remaining
section at the stomach, as you can see, a bit of broken lines to do the
outlining in this section. Always insure the
ink has properly dried and then lightly
these the tensil marks. Otherwise, you will get
smudging all over the people. And here, I'm using the
ink to do the coloring. So I have got this
Gura takis dark ink, and for the entire upper
half of the whale's body, we are going to completely
fill it with the black. Later on, when it dries, either I'll be going with the
white ink or I'll be using the white el paint to add highlights detailed patterns
or designing on top of it. For the we spin in here, I'm not going to
completely fill it. I'll be leaving a little bit of empty spaces on the sides, as you can see like this. If you want to completely cover
it, you can do that, too. And as I mentioned, instead of using black color
to do the coloring, if you want to use color, other metallic color or
other water color or other color mediums,
you can do that, too. Continuing on with
the upper section. Instead of using the
white jelly pins or the white ink, if you want, you can also use the
masking pune and create the design pattern banickels. You can start with
the masking pune and create the
patterns and designing beforehand and then apply the ink and later on,
you can remove that. You will get somewhat
of similar effect. But the main disadvantage
of that will be you won't be able to get
crisper and bit thinner lines. If you want, you can
proceed with that, too. Carefully adding the color here. We are almost done with the
coloring of this section. Only the il sales remain. Carefully adding the color here. Now finally moving
to the al stain. Use concentrated consistency of the ink to do the coloring for
our demonstration purpose, I diluted the ink
with the water. So it was looking a little
bit gray but in here, as you can see, it's looking
completely black and dark. So that's what we
are aiming for. Filling the remaining section, only a small section
of the we stain. And with these we are
done with the inking for our we you have to wait for
the ink to dry a little bit. I'm just going to proceed with creating the lines
for the stomach. Curved simple lines like this or you can say curved
hatching lines, a little bit uneven lines like this for the
entire section. I'm going to use both Sakura
micron and this tombopespin. So this is going to be
the first layer create more finer lines to do a little bit of sading
for some of the section, particularly near the fins of the he For now, just broken lines like this
for the entire section. Going to do the same thing
for the whale's mouth. If you have low dry,
you can just fasten this process by quickly
drawing the ink. Now for the mouth, doing
the same thing using the curved broken lines
and doing this kind of hatching following the seep of the wheels mouth and adding
the lines in that manner. In the front section,
I'll also be creating or you can say adding few baniclesF now just feeling the remaining section with this kind of
simple curved lines. Few bancles here and there, simple curve C and sphere like C. Instead of creating
this broken lines, you can always use the
plain and normal lines. Now connecting all
the lines to give it a little bit more
curved and defined C for the upper section like this. Not to make it a little bit
more denser and darker, I'm going to add few more lines here and there for
the broken section. For some of them, I'll be
adding the lines above, and for the others, I'm going
to add the lines below. This is optional. If you're
satisfied with the line work, you don't have to
add any more lines. A little bit more detailing
in here for this section, making the seat a little
bit more defined. Moving on to this side, adding few smaller
and larger line just below and above
the broken sections of the line work now using the compass to
make the circular C. If you are confident, you can directly create the circular shapes
using your pencil. I'm not that confident
with the circular saps, so I'm using the compass. On this section on this side, the left side, I'm going
to create a half moon. Just few concentric circles. Just using few
concentric circles to create the arc
like C for the moon. By concentric circles,
I mean the circle at C is the same center
with different radius. And in here on this side, on the right side, I'm going
to create a small moon. So small completely circular, small sphere like this in here. And you don't have to create exactly the same
kind of designing the background elements
if you want to experiment and create
other variations, patterns or designs,
feel free to do that. Now, using the arcs
that I created earlier to give it a
little bit more defined C, somewhat of semicircular,
half moon like see. These are not going to
be perfect circles, but this kind of see, half semicircular,
half moon like seams, try to make it as
symmetrical on this section, I'm just going to
cover only up to here. And in the next section, we'll be continuing on
where we left top. We'll wait for the
ink to dry at the metallic coloring for
the moons and the suns, or you can see in both the moons and create more
decorative elements. Just a rough
approximation for this. Try to make it asymmetrical
and circular as it is. In here, as you can see, I
did a little bit of mistake, a little bit of black ink tsuch in here, just below the fin. So try to avoid this I would recommend
you to wait for the ink to rise and
then move forward. Otherwise, you will
do the same mistakes that I did with the
smudging of the ink. Just a rough approximation of
the seep of this half moon. Erasing the extra lines
that I have created, lightly raising all
the extra lines. So I'm going to keep this
outline that I have created, the half moonlight s, and we are going to
do the outlining. For the outlining,
I'm not going to use the fine liner or
the brass pins. I'm just going to
directly color it, and that's all for this section. I'll be seeing you
in the Nick pot. I
25. Rose and Grey Moon: Welcome to the second part of
the Wheel of the Rose Moon, continuing on where we left. I have created
graph outlining for the background
elements, and in here, I'm starting with a bit in here, I'm starting with a
diluted violet color or purple color to
do the coloring. For this entire half moon
seed that I have created, I'm going to completely
fill it with this color. You don't have to use
exactly the same color. If you want to use
other color or if you want to keep the background
element plain and simple, or if you want to
use the black ink to do the coloring,
you can do that, too. Or you can just
follow along with me and do the coloring
in the same manner. In here, I'm using
a small breast, so that's why it's taking
a little bit more time. If you have a bit larger breast, it will make the process
a little bit more faster. I'm going to use two seats of the colour to make it a
little bit more dynamic. I'll be adding a lot of dark seeds of the color
for some of the section, particularly near
the whale's body to make it a little
bit more darker. To sow that a little bit of
cyto cast and why the whales spotting on these moons has made them a little bit darker
for some of the sections. I'll also be adding
more concentrated color on the tips of the moon
on both the sides, slightly using the pencil marks. Later on, I'll also be covering this black smudge that I
have created by mistake. Carefully doing the
outlining in here for the wheels mouth and then
adding the color later on. For now, I left a little
bit of space in between, which I'll be
filling in later on. For now, continuing on
doing the coloring. Later on, I'll also be using the sparkle pink, the
pink colored one, to create double
outlining for the moon using a little bit of curved
lines, curved broken lines. And as for the circular one, I'll be using the black
or the gray coloured to create another set of
outline, two more outlining. This is the first layer of the coloring and carefully surrounding the wheels in here. Creating the outlines. If you have experimented with the other colors,
please share your work. Lightly raising the
remaining pencil marks, and now we are going to feel the remaining section
with this color. I use metallic colors and
the sparkle paints for this project because it add
another dimensions to it, and it looks more amazing as compared to the
plain watercolor. But if you have only
the watercolor, that will do the work too. As you can see, we have got a very light seed of
the color in here. Once again, this process was
going to take a lot of time. So I just added a bit
more concentrated color for some of the
section that I was mentioning continuing
on with adding more concentrated color for some of the sections like this. The entire section has
not dried up properly, the two colors will mix
on its own, wet blending. Extending the colors
a little bit more. Just add the color,
extend it a little bit, add a little bit of water, and the two colors
will mix on its own. Start with a wet
concentrated color. As I mentioned, I added more colours for the
tip of the moons, as well as near the
wheels body to make those sections a little bit
darker, comparatively darker. This process is going to
take a little bit of time, so be patient and just
follow along with me. Also try to create this kind of grainy aperians
add a few strokes of color here and there
and don't blend it. By doing that, you will create this grainy apparians for
some of the sections. We are almost done with it. I'm going to mix the colors a little bit more
and I'm going to add a little bit more colors for the bottom section and then use water to blend
these two colors. It has started to
dry up a little bit, so just a little bit of water to extend the colors a little
bit and do the blending, wet on wet blending. So the two colors,
the first layer and the second layer of
the colors that I'm adding will mix perfectly. A bit of water to
extend the colors, and the blending will
work on its own. Carefully doing the outlining, making it bit crisper
and more sharper, a bit of water to
extend the colors, and the blending will
work on its own. And with this we are mostly
done with arrows moon, add a little bit more color wherever you think
it's required. I decided to add a
bit more concentrated particularly near
the whale's head to make this region
bit more darker. Carefully doing the outlining, making it crisper
and more sharp, using water to extend it and blend it with the
remaining color in here. And with these, we are
done with our rose moon. Now for the grey moon, I'm going to use gray. I have got two
seeds of the grey. In here, I'm also starting with the lighter
side of the green. I'm going to completely peel the entire circular
see of the moon with this lighter side of the
gray first and then I'll add a little bit of darker side of the gray for some
of the sections. And for this, as I mentioned, I'm going to use either gray
color or the black color, parcle paints later on. On top of the wheel's body, I'm going to create
a little bit of simpler designs and pattern, and I'm also going to
create more bubbles or circular sphere like sees using the golden golden
metallic colors, and I'll also be
surrounding them. We are done with the first half. Now let's do the other half. Carefully adding it just
below the wheel's stomach. Doing it on the other side. Try to stick with the outlines
that you have created the circular outline and fill the intersection
with the grey color. Now, using the darker
side of the gray, a little bit of blackish gray and I'm going to
spread it to get a little bit of darker
regions for some of the sections particularly
near the whale's body. And apart from that, I'm also aiming for a little
bit of grainy texture. So for some of the sections, I'm not going to spread
the colours entirely. I'm just going to
spread it a little bit. And by doing that, I'm going
to get this kind of bit grainy texture when
the colour dries off. For the Rose moon, I only did a little bit of that to create
a bit of grainy texture. But for this green moon, I'm going to create
grain texture for more of the sections. You just have to
partially spread the dark seed of the colors
and when this dries off, it will create a bit
of grain texture. Later on when this
rises off if you want, you can also use
the white ink or the white paint to
create highlights. I'm going to add a little bit of white ink on top of the
moon to do a little bit of outlining another layer of
outlining for the wheels when this dries off now, we'll wait for the moon
to dry a little bit. And if required, I'll add a
little bit of more color tell it dries in here, as
I was mentioning, using this golden
metallic colour to create more elements for the background,
sphere like elements. Simple circular shapes
like this, small or large. I'm going to create
ten to 15 of these. Instead of this, if you
want to use other color or if you want to create
other patterns or designing, you
can do that, too. Feel free to experiment and add your own unique
personal touches to it. Apart from this, later on
I'll also be using the Experiment and add more
colors if you want. For the bottom section,
adding a little bit more. In here, too, as you can see, I'm not spreading
the colors evenly. For this small spheres, too, I'm trying to make some
of the sexon a little bit darker and also to create a
little bit of grain texture. If you want to keep it
uniform, you can do that, too. But I find that with this
kind of ununiformity, it gives a little bit more
depth to the painting. Decided to use a little bit
of this golden colour to make the tips of the moon a
little bit more sparkling. This is optional, and we'll wait for it to dry
till it dries in here. I'm using jelly pain and I'm going to create
this kind of small sees somewhat of a
laptic or you can see spherical sees
throughout the heel's body. So this is going to be the
simple designing for our el. Instead of this
kind of designing, if you want to create or use other kind of patterns
designing, you can do that, too. This is our first layer
of the designing. After this, I'm going to use hatching lines as well as a
little bit more patterns, and so that the ink is properly drained and then only proceed. Oh Adding more lines just above and below
the ice to make it look a little bit more organic
or more lifelike. Also for the sections near
the joints of the fin, add more lines
following the sieve of the fin to add a little bit of more
movement to the painting. Another outlining in here for the stomach section,
simple curved lines. Also using the sieves to
create a little bit of appearance for the bonickels
in here for the fin. Creating the same patterns
or design or you can see barnacles in here for the section of the fin
on the other side. Now, let's have a closer look to avoid smudging of
the color by my palm, I'm using a small
paper underneath my palm for the barnacles, the uneven seats that we
have created on here, uneven saves that we have
created on top of the head, simple spiral like
saves like this. I'm going to add multiple
bancles in here, and then I'm going
to surround it and use hatching lines
later on for now. Just simple spherical
seeps like this, spiral like seeps
of varied length. If you on top of the whey. Now, I'm going to fill
the remaining section, mostly using the hatching
lines, curved hatching lines. I'm going to keep
this project a little bit simpler with this
kind of simple designing. But if you want to incorporate more design elements,
you can do that, too. So these two projects
are a little bit simpler and easier
under 45 minutes. The other projects
which are quite longer and has more elements,
more design element, we'll be covering it later on, adding more lines in between
the banicles that we have gradient and using curved
seeps to surround it. Simple semicircular
curved seeps like this to surround the bancles that
we have p for the forehead. Basically, I'm going to surround all the spiral seeps that I have created with
more curved lines. And then for the remaining
section, mostly, I'm going to use
the hatching lines for this large empty section, adding more lines a little bit more detailing
for the in following the curved seep of the blacking that we have added and adding more lines
in here and there, curved seeps and broken
hatching lines like this. If you want to add more
patterns and designings in here for the sections of the
fence, you can do that, too. Now let's do the same thing for the remaining section,
the wheel stain. Added basically
the same thing for this smaller fin on top
of the wheel's body, following the seep and added the curved lines in here
for the wheel steel. For the curved
section, I just added more spiral seeps and for
the remaining section, I'm just going to follow the contour of the wheel
steel and adding more lines. Just try to avoid over
saturating with the lines. Combination of articles and horizontal lines
in this section. A few small simple
designs like this, ravel designs for
some of the sections, I'm not going to oversaturate
with this kind of design. For the middle section, I'm also going to incorporate
a little bit of this kind of pattern or design
for the spheres that we have created using the golden color and encircling it completely encircling
it with this color. Instead of this,
if you want to use other color combinations,
you can do that. I'm going to use two
outlinings like this. For all the sphets that
I have created in here, I'm going to do the scene thing. For some of the spheres in here, I decided not to completely
do the outlining, so I'm using a little
bit of broken outlining. Apart from this, I'm also
creating this kind of starts to add a little bit more decorative elements
for the background, to add a little bit more decorative elements
to the background. Once again, these
are all optional. Instead of this kind of
patterns and design if you want to incorporate other ideas,
you can do that, too. Continuing on with the remaining circles that we have created. And adding more simple stars. Now for the gray and
the pink moon in here, I'm using the black color. I'm going to do double outlining
and for the section in which we have got the
spheres, the golden spheres, I'm going to leave it to make it a little bit more darker and to increase
the line weight, I'll be doing two layerings
or multiple layerings of it. For now, I'm just
encircling the moon. More starts with this color. With this color, I'm creating comparatively smaller
circles, and smaller starts. For the lower sections,
I'm doing the same thing, it's not visible in here, but continuing on with creating more small circles
and stars using this. Now continuing on with the remaining section,
doing the outlining. After doing the outlining
for the gray moon, I made the outlines a
little bit more darker, added more stars and spheres, then proceeded with
the rose moon, use the pink to do the two
layers of the outlining, creating stars and more
spheres using that. And this is how this
project turned out. I hope you enjoyed painting
this wheel of the Rose moon, and I'll see you in
the next project.
26. Golden Sky Wanderer Day 7: Let's start with a
simple pencil sketching, starting with the
horizontal line in here. We have got this
horizontal straight line somewhat in the upper
section of the paper. The wheel that we
are going to create will be facing
towards the right. In here, we have got a
little bit different kind of arc seam, so this kind of little
bit curved arc seam. This is somewhat
similar to angle line. Here, this whale tail is
going to be a little bit different from all the tails
that we have created so far. Extending the line a
little bit more for the undervalue of the veil now extending it
in here like this. The line that we
started with the arc, I'm using it as the
outline section, the part of sketching, and we are going to create another line for
the middle section. Making this section a
little bit more thicker, this is going to
be the upper part. The middle line in here
for the whale's mouth. Is mouth is shifted
a little bit towards the upper part and it's facing
towards upper direction. So that's why the lower portion
in here will be a little bit larger as compared to all the other whales
we have created. In here, we'll have
its fins and the eyes. Now extending the
lines to create a clear distinction for its
stomach and underwlling. Extending its size a
little bit for the eyes. You don't have to strictly
follow what I'm creating. Feel free to make changes
to the side as you see fit. The other fin on this side, As we progress towards the left, I'm making it a
little bit thinner, a little bit different kind
of veil stall in here. So it's facing
downwards like this. For this project, I'm only going to create multiple clouds, larger clouds for the
background elements. And apart from that, I'll
also be adding one cloud on top of its body that is
covering some sections of it. I was not satisfied
with this section, so I am recreating it the eyes
and the hels win in here. This project is going
to be a little bit easier. The whels are in here. The wheels are in here. Creating the curve saves
for the barnacles, making it a little
bit more curved, clear distinction between
separate section of its mouth, upper and the lower mouth, upper and the lower part of the mouth. The wheels in here at the top. All the steps in this
project is going to be somewhat similar to
what we have done so far. So I've skipped some of
the steps like doing the outlining and creating the background elements,
the cloud and inking it. So this is how it turned out. I know you can easily create it. You have the pencil outlines. I just did the outlining
the file liner, added the ink color, and created multiple
clouds like this. Now in here, I'm continuing with the file liner and creating
multiple inner outlines. So for some of the sections,
I'm using two lines. For others, I'm going
to use three lines. And for the insights
of this section, I'm also going to create
few more additional clouds. So of all the projects that
we have covered so far, this project has the
most amount of clouds, larger clouds in here in here, I'm not going to use Amt color, I'm only going to use the
golden sparkle paint. For the designing elements
for the whale's body, I'm only going to use the stars and a little bit of
smaller and larger dots. Now, going in with the
sparkle paint to show you how I'm going to add the patterns and designing
for all the clouds. Underneath the
black point liner, I'm going to add the
yellow like this, the golden yellow, two or
three layers will do the work. So for all the sections, I'm going to create single
lines for the smaller one, I'm going to create
multiple ones if required. And I'm also adding
more line weight to it. So two or three
layerings if required. Some of the sections,
as you can see in here, connected with each other,
others are separate. Same as what we did
with a fine liner. Few additional clouds,
smaller section inside. I'm not going to
oversaturate it. Four or five will do the work. Now, once again, I'll
be going back with the filed for outlining
the sections, the inner clouds
that I have created. Once again, going back
with the file and and creating all the
smaller details, two or three lines like this. The second and third outlining in here for all the
remaining clouds In here, I decided to do all the outlining the inner outlining for the remaining clouds first. And then once again,
we'll be going back with the
golden colored pen. And as I was mentioning, adding another outlining for these clouds just under and
above the golden section, the golden sparkle pins
that we have used. Continuing on with the
remaining clouds in here. In here, I've increased
the speed a little bit, since this is the
repetitive process and going to take a
little bit of time. If you want to follow
along with me, you can always pause the video or you can just
reduce the speed. Y apart from the clouds that
we have created in here, if you want to include
other background elements, you can always do that. You can use the
compass to create multiple moons and the
suns in the background. Or you can also experiment with other variations and
patterns or designs, unique patterns and designs that you can come
up with your own. And with these, we are
done with this one. For now, just continuing
on with doing the secondary and
tertiary outlining for the intersection of the
clouds as well as adding a few more additional clouds for the internet
sections like this. I With these, we are done with the
clouds in here for the middle section
of the whale's body, and we have got two
more clouds in here. Since I have removed some of the sections of this project,
the repetitive sections. So this project has become
a little bit smaller. We only got two sections.
This is the first section. Then after that, we have
one more section and which we'll be adding
the detailing on top of the whale's body as well as use the sparkling golden pints
to add more detailing. And with these we are
done with this one. Now moving on to the last cloud here, repeating the same thing. Now creating few more adsont
cloud for the intersections, repeating the same thing, multiple outlining
for the intersection, moving on to the other side of the pon repeating
the same thing, multiple smaller
cloud outlining and now creating few
more a distint cloud for the intersections like this. And with these, we are
done with all the clouds. Using the fine liner, we'll be using this parking
pin later on. For now, and just
decided to continue with the fine liner in here
for the wheels mouth. Multiple curved
section and curve line like this in here for
the under part of the wheel's mouth
using small lines to do the hatching in here for the underpar in here
for the wheel's mouth, adding this kind of curve chips in here for the barnacles. Adding few more lines and increasing the line weight
in here, the curved part. Adding few more curved lines in here with a little
bit more line weight. Now, we are going to create the multiple large and small lines like this in here for
the remaining section. I'll be increasing the
line weight later on. Also be increasing
the line weight of the different sections a little bit and also be doing
a little bit of hatching, as well as a little bit of
sading for certain sections. For now, just continue
on with creating this kind of broken and
long lines like this. Adding it in here
for the under veil continuing on with more lines, broken lines like this,
broken hatching lines. So be doing the same
thing for the veil tails. For now, just increasing the
line weight a little bit. Instead of using
overline technique, I'm just adding more line beside the main lines like this. Two or three lines. I'll be doing the sing using the
hatching technique just near the fence as well as
for the middle section. Now doing the same thing in
here for the underbelly part, increasing the line
weight a little bit by adding more line addition
to the main lines. Later on, I'll also be
using a little bit of the tombos breast pain and use dry breast
technique to make some of the sexon a little
bit more darker by overlaying on top of this fine liner, the
tomos breast pain. In here, using curve lines to do a little bit of
hatching and doing a little bit of seeding to make this section
a bit darker. And with these, we are done
with the fine liner for now, I'll be using a little bit
more fine liner later on. For now, going back
once again with the sparkling pink,
the golden color. We are going to do
the same thing that we did for the
first cloud that we created two or three lines like this inside the fine liner. So two or three line like this with a little bit
of more line weight. For all the sections of
the remaining cloud, we are going to repeat
the same thing. And once again, I'm going to increase the speed a little bit, since this is your
repetitive process and it's a little
bit time consuming. And before doing
that, as you can see, apart from the addisonal
outlining that I am doing, I'm also creating
standalone clouds for the inner sections
like this without any black fine liners. So for some of the
empty sections, I'll be including or adding this kind of additional
clouds for the inner part. Apart from this, if you want to make it a little bit darker, you can always
create few shadows, additional shadows using the golden sparkle color
paint or you can use the fine leonarO if you can also use the blue
colored sparkle paints. Now moving on to this
cloud, the middle cloud. In here, we don't have any other addisonal
background element. If you want to include
other sun or moon kind of background element,
you can do that. And you can also
use the black ink that will also make
it interesting. Since we have separate clouds of lighter set floating
around the whale's body, and you can use black to create another circular moon
that will be interesting. The remaining two
clouds in here, adding get in here,
the same thing, two or three outlining
for the intersection, as well as creating a
few additional one. And finally, moving on to the last one, repeating
the same thing. This is your repetitive process. A few more additional
one like this inside. And with these, we
are done with this, moving on to the other side. And with these, we are done with all the clouds with this
golden sparkling pane. We are back to normal screen using the same sparking pain, the golden colored
one, and we are going to do a little bit of
seeding as well as hatching. In here, we are doing
a little bit of sding. So I'm applying a little bit of more presser towards
the whale's mouth, and as we are moving
away from it, I'm decreasing the presser. Just flick your arm to get
this kind of lighter sading. And with this, we are
done with this section. I'm moving on to the other side, just near the whales pen
doing the same thing, flicking my arm and getting
this kind of lighter seeding. I was not satisfied
with this section, so doing another layer
of seeding in here. Instead of this, if you
want to use other colour, the gray color or
the blue color, that will be interesting too. Now moving in here
for this side, beside the fin, a
little bit of seeding. Moving on to this side, just
beside the whale's tail, a little bit of more seeding
using the sparkling paint. And with these we are
done with the seeding. If required, I'll be
doing a little bit more. But for now we are
done with this. Now, let's have a closer look in here for the whale's tail. Dividing into different
sections using the fine liner. Now we are going to
do a little bit of seeding in here using
the hatching line, the same kind of thing that we did with this sparking pin, flicking my arm to get this
kind of lighter seeding. This is somewhat similar
to the pencil seeding. Just flick your arm lightly to get this kind of
lighter seeding effect. I'm also making these
sections a little bit larger with a little
bit more line weight. Now, we are going to do
the same thing on here, this side, extending
the size a little bit. And then we'll be
doing the seeding using the simple technique. Let's do the seeding. Very simple seeding technique. Just by flicking
your arm, you can get this with these, we are done with this section. Now for the upper part
two, we are going to do the same following the conto the curve part of the hiltail and adding
it accordingly. Now in here, we are going
to change the direction. Just by flicking your arms lightly we'll get this
kind of lighter sed, adding it for the
remaining section. And with these, we are
almost done with this. I'm also going to add a
little bit of yellow in here. So going in with
this sparking paint and doing the same thing. Seeding in here for both the
upper and the lower part. So mostly we're going
to feel it entirely. I'll be keeping the middle
sections a little bit lighter, otherwise, the upper
and the lower part, as you can see in
here, are completely covered with the
seeding technique using this is sparking paint. If you want to do a little
bit of seeding for some of the suction inside the
clouds, you can do that, too. And that's all for this section of the video for this project, the Golden Sky android.
27. Large stars and Stippling : Let's continue
where we left off. And here we are going to add main detailing for
the whale's body. So using the jelly pen, white jelly pen
and starting with adding a little bit of
detailing in this form. So a little bit of scribbling in here
for the upper part of the barnacle for
the whale's mouth or for the whale's head in here. So for all the curve
saves in here, I just simply added the
following the car part of the whale's mouth
and using this kind of broken lines with a little
bit of line weight like this. Moving on to creating a
few more addonal bancles using simple circular
saves and inserting them, adding a little
bit more detailing using small dots and
small lines like this. Now let's create our
eyes before doing that, creating additional outlining
using the in In here, we are going to create
the human like eye. A little bit smaller eye, eyeball, this is going
to be the eyeball, a little bit of highlight using the white
for the inner part. To make it a little
bit more distinct and a little bit
more interesting, we are going to encircle
it with lots of lines. So curved lines like this. Few more additional baile slides in here just beside the eyes. I'll be coming back to the
eyes later on for now, continuing on with the particles in here for this section
of the wails fin, another outlining
in here with the y. For most of the
sections in here, I'm going to do a little bit more outlining
using the white, and to create a clear
separation between the wails fin and the
remaining portion of its upper part of the body, a few more lines to
sew a little bit of separation in between the
els upper part and this fin. A little bit more
detailing for the eyes, more curved lines like this. For all the clouds that we
have created in here on top of the wheel's body to create
a clear separation in here, I'm just going to do
this kind of outlining. So basically, I'm
going to encircle all the clouds with
two lines like this, and this is how it turned out. Now for the designing,
as I mentioned, I'm just going to
use simple dots and a few stars like this,
a bit larger dots. But if you want to include smaller dots too, you
can do that like this. And I'll be using these dots to transfer them into stars as well as add a little bit more
detailing for some of the dots. I'll be sewing you later on. Now, just continue
on with adding a few large and small dots
throughout the entire section. Adding it for this one,
and now for this one, adding small and
large dots like this. No transforming some
of the dots into star. Eight corners starts like this. So we have got vertical
and horizontal lines, so intersecting lines. So we have got vertical and
horizontal lines in here, then a few more
additional lines on the other four sides like
this to transform into star. Another star in here
on top of this find. Let's create in here
for this one, too. One more in here. You don't have to transform all the larger dots that
you have created. I'm just going to
transform some of them. But if you want to
add more stars, you can always do that. You can also create
smaller stars like this and add white dot on top
of it later on like this, smaller star in here just
beside the wheel steel. On top of this fin. In here, too. A smaller star
in here just beside it. So underneath this fin and I'm not going to saturate it with lots
of designs and pattern. I'm just going to keep it a
little bit plain and simple. Apart from this,
I'm also going to encircle some of the
larger dots like this. I'm not going to encircle it
completely just inserting one or two sides like this
for some of the larger dots. You can do the same thing
with the smaller ones too. And for the empty species, add a few more dots
here and there. If you want to include
more designing and pattern for some of the sections,
you can always do that. Inserting some of the
smaller ones too. Transforming this two into a star Encircling some
of the smaller ones too. A little bit more
detailing for the eyes, more lines to encircle it. Two more dots in
here for the fin, and this is the
additional detailing that I was talking about. Four lines on four
sides of the stars, four lines on four sides
of the dots like this. This makes the dots a little
bit more interesting. The simple small lines like this on all the sides
of the dots like this. For some of the larger one and for some of the smaller ones, I'm going to do this small dots or small line on all the
four sides of the dots. And with these, I am
satisfied with it. If required, I'll be adding
a little bit more detailing. But for now, I'm going in
with the Tombos breast pin. I'm going to use a little bit of dry breast technique to redo the outlining for
some of the sections. So overling top of the
fine liner like this. Now for the underblly. So basically, I'm going
to make the outlines a little bit more darker to make the separation in
between the clouds and the wheel's body a little bit more darker and a
bit more distinct. And since the pain that I'm using has a little
bit of less ink, so I can use it to also
do the dryrse technique. I'm just changing the angle a little bit to get a little
bit of dryrus technique. So for the sections,
I'm going to use a little bit of
drivers technique. Going over all the larger lines that we have created
earlier with the fine liner and adding the breast pin in
here like this. And as you can see
the lines that I'm getting is a little
bit less darker, somewhat similar to the
dry brush technique that you can get with
the atrocl brush. A little bit of mount detailing. And with these, we are done
with this section now in here or under bail
repeating the same thing, a little bit of drustechnique, the same kind of drivers
technique that you will get for the watercolor brushes
with less water on it. And as you can see, I have not covered the entire section, only some of the sections. And with these, we
are done with the Tombos breast pin for now. Going back with the fine to add a little bit of
mount detailing, making some of the
section a little bit more darker by doing a little bit more hatching
using the curve line, particularly for this
section, the middle section. Adding few more line just beside the wails fin to make
it a little bit darker. And with this, we're done
with the last project, I hope you enjoyed
painting this.
28. Conclusion : Thank you so much for
joining me in this seven day Celestial
Whales challenge. I hope you had fun painting these majestic creatures
and exploring ink, watercolor, metallic paints and the intricate patterns in the
designing that we created. I hope this class
help you experiment with new techniques
and encourage you to add your own unique
creative touches to each individual
illustrations. If you enjoy this class, please check out
my other classes on ink and watercolor
illustrations. And if you have completed
any of the projects, don't forget to upload them in the project and
resources section. I'd love to see what
you have created. Thank you, once again
for joining me. Keep creating, keep
experimenting, and I'll see you in my next
class. Happy painting.
 Vishal Munshi