Transcripts
1. Introduction: [MUSIC] I used to be really
shy and introverted as a kid. Presenting my creative work to anyone seemed like a nightmare. But as I developed my
passion for branding, I started building
with confidence in the work that I love to do. I simply shifted my perspective and to seeing it a storytelling. Telling a story seems much less doubting than the
word presenting. Frankly, it's much more compelling to the
person in front of you. Hi, I'm,Khadija but
everyone calls me Dija. I'm a top teacher here
on Skillshare and a freelance graphic designer
based in Cairo, Egypt. I worked at a leading
branding agency for three years and I've been a full-time freelancer for two-and-a-half years now
specializing in branding, packaging, and a little
bit of animation. Being skilled and
a great designer is only half the work, you also need to be a great
communicator and storyteller. Being able to present a client is a crucial
skill in order for your designs to get approved and showcased out there
in the real-world. We'll go over the reason
why we present our work in the first place and
how properly curated, articulated presentation
can greatly impact your design process. We will then dive in a real-world plan
presentation of which I will take you through tips on how to design your template, and how to structure it
like a professional. You'll also learn how to
showcase your sketches, create a buildup to your
logo and brand identity, then finally top it off with
relevant polished mock-ups. Throughout the class and when
we dropping some tips and valuable insights
along the way on how you should
articulate yourself, whether it's an
online presentation, or an in-person one, how to handle and
share feedback and overall how to be the primary
driver of the conversation, building a great
client relationship. Now for this class,
you're going to need a branding
project that you've already created as
material to present. For the presentation
portion of this class, I'm going to be using Keynote. But no worries if you
don't have a Mac, or you don't have Keynote, you're still going to be
benefiting a lot from this class and the
tips I'm going to be sprinkling along the way. They're totally applicable
and transferable to other presentation
software like Google Slides, or Canva, or PowerPoint. This class, believe it
or not, is for everyone, whether you're a
beginning designer, or a working professional, or a students, everyone should be able to learn and polish the skill of presenting their creative work as
part of their journey. By the end of this class, I believe you will not just have the tools to be able
to present your work, but also feel more confident to be able to articulate
your ideas, whether it's to a client, or in a school project, or when presenting
your portfolio and overall increase
your chances of collaborating
with future clients demonstrating yourself
as a confident, approachable, and
skillful designer. I was in your shoes once and I went from being extremely shy of presenting to looking forward to presentations and gladly
stepping up to take the lead. [MUSIC] I'm so glad you're
here I'll be with you in every step of the way and I
can't wait to get started.
2. Why Do We Present?: [MUSIC] Why do we even present our creative work
in the first place? We can just do the work, put it together in a PDF, send it by email and wait
for feedback, right? Wrong. When you're working
on a brand for a client, you want to think
of it as you're building and nurturing
their vision, their years of thinking of an
idea and heavy investment. Your presentation is the meeting their vision for the
very first time. They're also nervous and they probably have a lot at stake. It's your job to
make this process as easy and smooth as possible. Instead of bombarding
them with chunks of work and endless
brainstorming ideas, you want to curate a skillfully
prepared presentation that tells the story
of their brand and articulates your
rationale behind your design decisions so
they can understand it too. Now, building brand
identity is all about offering
solutions to a problem. But presenting your
work is not so much about presenting solutions, but it's about a
collaborative journey. The journey to an end
product may seem obvious to you because you
maybe spent hours, days, maybe even weeks
reaching the final result. But more often than not, your clients are not designers. You need to be able to paint
this picture for them, tell the story and
take them step-by-step on how you reach to
that result at the end. This builds trust and
demonstrates your confidence in your new work and their
confidence in you as a designer, which is great for long-term
client relationships. Remember, when
you're presenting, there is no really right or
wrong outcome in your design. It's more about the what, the why behind it and
how you deliver that. Now, in the coming few lessons, I'm going to be
walking you through a sample real
client presentation of mine so you can
see how I present, how I structure my presentation, what my presentation looks like, and tons of valuable
tips along the way.
3. Presentation Template: [MUSIC] This is what my
template looks like. There is no right or
wrong here you can be as creative as you want
to be with your template, but make it yours. I will just be
dropping some tips and hints here and there on the overall aesthetic feel of what your presentation
should look like. If it's your first time
ever using Keynote and you're just
getting started into making your own template. You can just go up to file here and click on "You" and you're going to be presented
with a bunch of different themes over
here on the left. But I personally just
like to click on the basic one and make
sure your screen ratio is wide so 16 by
nine because that's the presentation size and
just click on "Create". You're just going to
be presented with a basic type of layout, something that looks a
little bit core pretty. I personally like to just select all of this
and delete it. Then you can start here on the right-hand side where it
says format at the very top, to select your background
colors so you can click on here and you can choose
any color from this palette, or you can click on
the "Color wheel" and you'll have a bunch of
different palettes over here. If you want to color, pick a specific color from a
reference that you have, you can just color pick
that like you have on Illustrator and
Photoshop and you can play around with
the colors here. That's for the background. Then if I want to create a text, I'm just going to write hello
and it's just really easy. You just go to texts
here you have a bunch of different fonts, the sizes. You can play around
with texts, colors, spacing, and all
of that fun stuff. You also have the option to
animate your slides here so this is just
really basic you can add certain effects
to your slides. But you're going to find
that in my presentation. I just like to keep it simple. The last thing I want to
show you is that you have on your left-hand side
here your slides. If you want to
duplicate a slides, you just select the
slide that you have. Press on the "Option" or "Alt", keep pressing it and
then just drag it down and it will
automatically duplicate it. Then if you want to
create chapters like the ones I have here
in my presentation, all you need to do is just hold it down and
drag it slightly to the right and then
just drop it and it will create this
chapter for you. This just makes
everything a lot more organized for you and for the viewer that's
about to see the work. Now if I go back to
my presentation, this is what it looks like. The brand I'll be walking
you through today is a skincare brand called Nude. Right from the start
you'll see that I'm using extremely
neutral colors like cream and black for
my header slides and for each chapter over here. I do this because I want the presentation aesthetic
to be as neutral as possible because
my personal opinion, if you over saturate your presentation with
your personal branding, it can sometimes influence the actual design
you're presenting or overshadow it so my advice
is to always keep it simple. The only thing that
I've added here is some flavor to the choice
of type and my titles. I just wanted to have a
little bit of personality in my typography instead of using something like
Helvet [NOISE] ica, for example so it just
doesn't look like a sample presentation
that someone downloaded off the Internet it has a little bit of me into it. Like I showed you before, I organize my presentation
into chapters like this one. Each chapter contains
a section of the presentation
and this is what we'll be going over
in the lessons. Now going back to my
cover page over here, you'll see that I have
like specific format. I always include the brand name as the main title of the slide, and then a subtitle
underneath it of what I'll be
presenting on that day. This can differ from other
phases in the project, whether I'm fine tuning or
presenting feedback changes, then automatically the subtitle
will typically change. I also include the
day, the month, and the year here at the
bottom to keep track of the timeline of the
project and that's it. It's a very simple layout
with no tricks and frills. I do this on purpose
so I can make the actual work I'm
presenting shine. I keep all the attention
and focus solely on that.
4. What Makes Up A Brand?: [MUSIC] This is something I
always like to include in any new presentation
with any new client and it's called what
makes up a brand. Think of it as a mini
crash course for clients, for them to learn about the different factors
that make up a brand. For example, logotypes,
what colors mean, and what their psychological
impact is on brands, typography, imagery style, illustration, and brand
experience and etc. This is really important. They can be educated
and they can be collaborative partners with
you in this presentation, understanding what all of your terminology means
exactly and for them to really understand what makes a really strong brand that
will stand the test of time. Before diving into
what makes up a brand, I like to include an index in the beginning of
my presentation so the client knows beforehand what they can expect to
see in the presentation. I then express my excitement on the work I'm
about to present. I say I'm very excited
to present to you this and this and this today
and at this point, you can kindly ask them
to let you go through the entire presentation and keep feedback until the very end. This is important because questions in the
middle can sometimes cut your thought process and it can throw you
off a little bit. It's totally okay to announce this in the beginning
and it shows that you are the one in control of the piece and the flow
of the conversation. Extra points for confidence. This is just the index of
what I would be typically walking them through so they
just know the steps at hand. Then we move on to
what makes up a brand. I start off by having my
main characters of branding. The brand name,
colors, the logo, the typography, the imagery, and the brand experience. Here I explain how
important it is not to stress on one factor
alone to carry the brand, but instead embrace the
saying, divide and conquer. If we use all
elements in a brand that serves it in the
best way possible, we'll end up with a much
more powerful brand that stands the test of time, than for example, creating a killer logo but
neglecting the rest. I then go through each one. One by one, highlighting
the element I'll be talking about and
graying out the rest. I start with colors and I
demonstrate this color wheel. I just grabbed this
off of Google, and here I like to say
that I never choose colors based on my own
personal preference, but rather than what each
color can psychologically impact their brand by trying to be as objective as possible. I go through what each
color can potentially mean. For the sake of example here, blue here exudes
trustworthiness, calmness, and credibility. You're going to find a
lot of financial brands like banks and fintech
startups leaning towards this palette
to establish credibility with their audience, whereas red is a much more passionate
and stimulating color commonly found in
fast food brands and so on and so forth. This from the get-go
will make the client very interested in your
process and slowly starts to feel more at ease and more confident in
you as a designer. I then move on to the logo. I explained that there
are two different types of logos, of course, there are much more but for the sake of their
time and yours, I just stick with the
two most common ones, which are icons and word marks
or a combination of both. For icon logos, I place three of the
most famous brands to explain what an icon really
is in the first place and I tell them the
meaning behind each icon and how simple and clean the outcome should
be in the end. I do the same for
the wordmark here. Three examples of
three famous brands, and the concept behind
each wordmark and why a wordmark was the better option for that brand specifically. Many clients are
well-versed with these brands and maybe
aspire to be like them, but have no idea why or how their logos were created,
and what they mean. Many of them enjoy learning in this part
of this presentation. Lastly, a combination of
both a wordmark and an icon. Of course, this is the
most realistic route for a new brand coming out because they cannot
just exist with an icon like these
famous brands here, because they have already established huge
brand equity and no one needs to know the name of the brand to
recognize their logo, but if it's a new brand
that ideally you'll need at least a wordmark
and an icon or both, so consumers can recognize this new emerging
brand in the market. Again, in this slide, I'm
explaining the concept behind each logo very briefly and how adding an icon to the
logo here strengthens it and serves the brand
in the best way possible. Moving on to typography, I like to include four
examples of different brands using typography and their
messages in a different way and I try to keep it as diverse as possible so clients can understand how
different fonts can really affect their
tone and voice, when they're talking
to consumers. We have Burger King
here, Apple, Nike, and the Mozart, which is like
a boutique high-end hotel. These are four different
examples that use completely different
types of typography and I explain how different topography choices can really
impact a brand. Then moving onto imagery, I like to describe imagery as anything visual in the brand. This can be photography, illustration, or
graphic visuals. For photography, I've included the imagery style of a brand
that I love called Billie. Here I like to
explain their use of photography and how it's
created a very approachable, relatable, and friendly
perception of the brand, to what may be an
intimidating product. I also like to stress on the color cohesiveness of
the pictures and how they're carrying out their
brand colors within the photography and it's
not just haphazardly done. There's art direction
and photography here, and that plays a huge role in
the perception of a brand. Another example of
imagery is illustration. It depends on where
you are in the world, but where I'm from, sometimes clients
fear illustration because they feel it will make
their brand look childish. I like putting three
different examples of three different brands, a Juice Bar, a mike
marketing platform, and a seafood market. The illustration styles
here are so different yet explain how illustration can humanize your brand and
it can make it feel more approachable and it can
really elevate your brand. Then third type of imagery
is graphic visuals. This is anything visual that's not illustration or photography. They can be basic shapes
you create on illustrator or funky pattern or
an abstract artwork. I like to state that you
don't necessarily need to include all three types
of imagery in your brand. It can just be one or two or all three it depends on what
the brand positioning is, what objective is it's
trying to achieve, and what you as a designer
feel is the best choice for their brand because
your input also matters. Last but not least, is
the brand experience. Here I like to explain
that branding doesn't just stop at logos and
colors these days. It's beyond anything
you just see. It's everything you can hear, taste, smell, and touch too. Examples of this include
restaurants curating a bespoke branded playlist for the restaurant or
a cafe for example. The type of music
can really affect whether customers stay or leave, or love, or hate or place. It has nothing to
do with the logo, but it has everything
to do with the brand. IKEA, for example, is meant to be a
facilitator brand. It makes your life easier with endless solutions
with their products. They created an augmented
reality feature on their app where you can try on their products in your home, see what it looks
like before buying. This makes people's
lives so much easier and it pulls right into
their brand promise. This is considered
a brand experience. How you can apply all the
keywords from brand story and brand vision into a sensory experience
for your consumers. That basically concludes
the little mini-course for clients of what
makes up a brand. That ends our first chapter of the presentation
and by this point, the client is getting a
little bit more comfortable, a little bit more at ease
now that they've understood, this part of the
presentation and it really builds at this point, trust and credibility
between you both. [MUSIC]
5. Brief, Tone & Story: [MUSIC] Next up is the brief. Now I don't go through
the entire brief again because they'd have already seen it before multiple times. But this is just a very brief
recap and a refresher to align on the overall
objective of the project. Recapping the brief here, I just like to go over the
background of the brand, who they are, what they do, what are their products, their target market, and just some basic information here. Then the next slide would
include the objective. There are two objectives
that I hammer on here; the broad objective
for its consumers and my objective as designer
towards this brief. Then I brush upon
the brand tonality. The brand tonality
is just basically the tone and voice of the brand. This consists of a bunch
of keywords that client and I had already aligned
again from the previous phase. I like to stop here for a second and tell the client
that there are a lot of keywords here and some of them are not necessarily
contradicting, but they're quite different. Something like minimal is different than
bold, for example. I tell the client that this is the general umbrella
of your brand's tone. However, each direction will hammer on a set of
selected keywords, while the other direction
will hammer on others, so it's not possible to have one direction that highlights
all the keywords equally. We'll end up with a
confused looking brand. Instead, I like to
take some keywords and divide them across the logo, the identity, the messaging,
the imagery, etc. The second direction will
highlight other keywords. Now both directions
will still be under the same umbrella, but they will lead two
different directions. This is a very
important aspect to explain because you want to announce this from
the beginning, that having two different
directions will help them make better
and faster decision, as opposed to two
directions that are very similar and end up being
hard to choose from, and the horror of
mixing things together. More on that later. After we're done with this, I like to go over
to the brand story. The brand story is
no surprise here, a short story of their
business, why it started, what problem they're solving, and how it's perceived
by their customers. It's meant to be an
emotional based narrative written with emotions
and feelings about how this brand is solving its consumers problem and how it will improve their lives. Having the brand story here
in this particular part of the presentation
is because it helps show the emotional
side of the brand and it helps prime the
next section for me, which are the design directions. I build my concepts based on the brand story because it just has a very
humanized aspect to it, has lot of emotions, and that's a great way to start building your
concepts from. In terms of the structure and the order in
the presentation, having the brand story right before your design directions helps the client relate to those concepts that
they just read here. Of course, this is a slide
that has the most text in it, but I never read this
out loud word by word. You'll want to rehearse a very short recap version of this brand story and explain it to the client with words, but they will read it thoroughly afterwards when they
receive this document. But never read a lot of text out loud or
read text out loud, and read out to
client from a slide because that will just
deter their attention. Just have a nice little
recap here, if you will. In general, you're
going to find in the rest of the presentation that there is as minimal
text as possible. Try to keep your presentation as visual as you can to help keep the person you're
presenting in front of focused as much as
possible and engaged. The first part of building
of the presentation is done. In the next lessons we're
going to be diving in the design portion of this
presentation. [MUSIC]
6. Direction 1: Now, before diving into
the design directions, I just want to pause here
for a second and personally recommend to never present
more than two directions. Because when we present clients with an
array of options, an array of directions, it makes it so much harder
for them to make a decision. What ends up happening
is something that I like to call the confused salad. We don't want a confused salad. Which means basically that they like different elements from different directions
and they end up wanting to mix and match them together. What I personally recommend and what you're going to see
in the coming few lessons is to present two
solid, upstanding, high-quality, fully fledged directions that have their own unique
personality and persona. That way it's going to be
very easy and very clear on which decision to
make, this or that. Of course, there will always
be room for feedback, but it's important to log down one specific direction and then see what tweaks and
changes we want to add or remove from
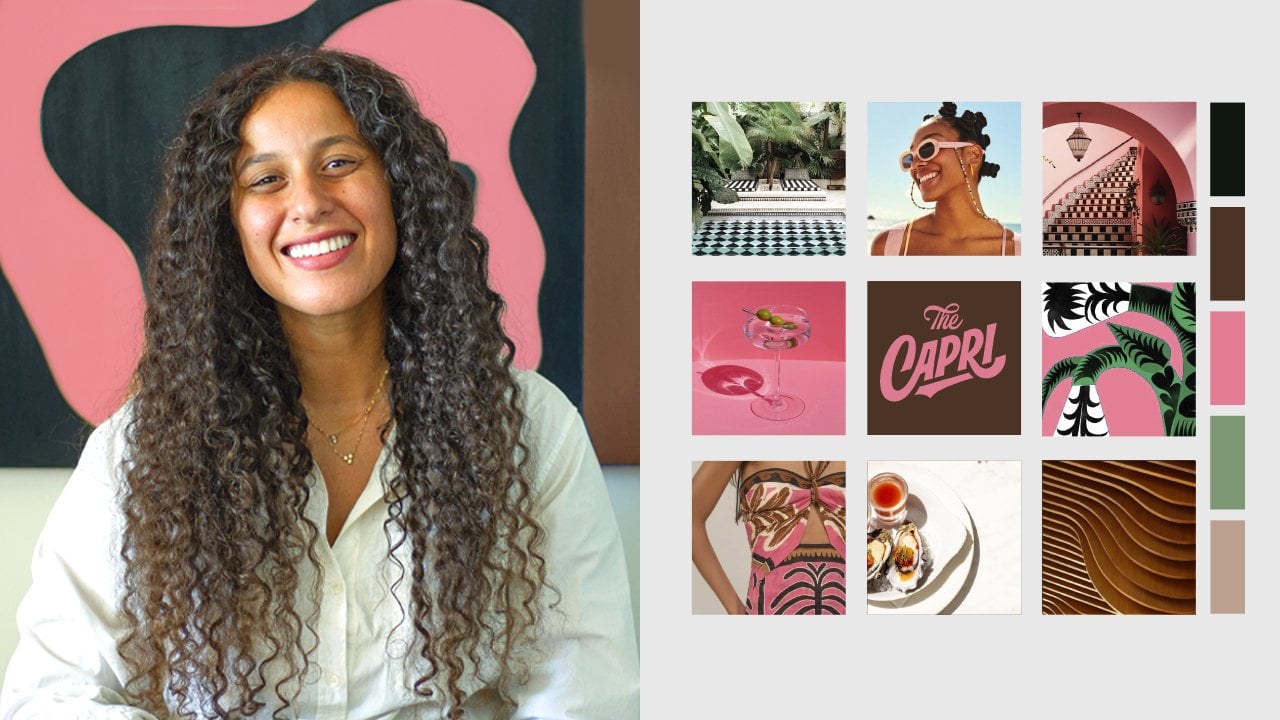
it along the way. Direction 1 starts with
a visual mood board that the client would have
already seen from the beginning and approved
as a potential direction. I include in this mood board
references of packaging or direction photography
and lifestyle images. If you notice, I also
make sure that there's a cohesive color palette here that I build
my mood board upon. It's not just random
pictures chosen. This is what inspires
the color palette for the direction in general, but not directly
color for color. Then I move on to a
slide that briefly describes the concept
of this direction. It's important to have
a clear concept for each direction so that they're easily differentiated
from one another. The concept here is about finding the highest
form of self-care, bringing a spar into your home, and leading a minimalistic, calm, refined design language. The brown tonality here
is quite clear for the direction from the
highlighted keywords. Then I move on to
my color palette. I like to include
the color palette here separately so I can discuss my color decisions without the distraction of other
things in the way. A major tip for you
here is to name your colors with a relevant
names to the brands nature. Customizing your
color palettes gives a much more bespoke field
to the brand you're presenting rather than
just writing green, pink, brown, orange, and white. Because this is a skincare
brand that value self-care, I've named the colors unique
names like sage green, silk cream to reflect the velvety texture
of the products. Pink salt alluding to the bath salts you might
use in a bubble bath. Warm chocolate and
fresh orange are both items that can be relevant to self-care
and feeling good. Another tip is that
I also present my color palette in
percentage blocks. The dominant colors in the
brand will have bigger blocks, like the green, the
pink, and the cream. Whereas the secondary
colors take up smaller blocks so they don't overshadow my primary colors. I also explain this to the
client because they might fear the brown and the orange to be too aggressive for their brand. But I like to take a
second here to explain that they're used in
different percentages across the brand and they need contrasting colors to
have visual balance. If these were all pastel colors, then you'd have no
visual contrast whatsoever and it
will just look flat. In the next lesson, I'm
going to show you how I built up the logo
for this direction.
7. Logo: [MUSIC] Right right the bat, I never ever showcase the logo and the following
slide right away. I always create a buildup. A buildup is a series of
pictures, descriptions, or graphic visuals leading
up to the final logo. This is important
for them to see how you arrived to
the final result. Especially in this
brand, for instance, the logos you're
going to see are very minimal and subtle. In order for me to
explain how I got there, I need to use visual aids. The first step in my buildup is this mood board that reflects the movement and textures of their products when they're
being used on the skin. I'm describing here how I'm inspired by the
movement of the lines, the smoothness, and
the change in texture. I then start to show them how I visually translate
such a concept. I laid over them these
graphic lines that go from thick to thin,
to thick again. Now, the next slide is
something I always recommend and it's to show your
sketches if you have any. If you've done any
sketches for your logo, you should always showcase them. I just took a picture
of this with my phone, so it's nothing fancy. Don't worry about
making your sketches look too clean or polished. They actually want
to be a part of the process and see
your thoughts visually. This is also a
great tip if you're putting together a
portfolio for a project, I highly recommend
putting in your sketches. If you're submitting your
portfolio for a job interview, I can assure you
employers are looking for the raw process more than
a polished final outcome. After showing them my
sketches and discussing my thought process when I
was sketching these logos, I start to take them one by one and build up the
logo in front of them. I start by using these
two parallel lines that have the same movement from the reference images above. Then I slowly start to curve the ends of
each line where you can suddenly start to see the
formation of an n and a u. Then I complete those
lines by two vertical bars where the n and the u are now perfectly symmetrical
upside down. Then I finally
showcase the logo. Then the logo with the brand
descriptor underneath. Then by this point,
I start to roll out the different colors of the logo with different
background variations. I also show them what
their logo could look like with
different lockups. So one logo could have a more detailed descriptor above and below it, like here. Another variation can have a circular descriptor
rotating around it. These can be great for
circular stickers for example. Then I also created
a logo sub-mark. It's not so much of an icon, but it's more of a sub-mark
for the logo so it can collapse and be functional
on smaller spaces. This consists of
the two lines that I started with in
the very beginning, and then I placed them inside an oval shape
like this one. Then I crafted it to have the same design language
as the word mark. Then I just play
around with it and experiment with the sub-mark, and then I played
around here and made it into a brown pattern. Later I'm going to show
you how I explain to them how they can use this
in a relevant context. But it's nice to show
them how the sub-mark can expand into
different functions. Then last but not least, I like to put a general
overview slide of all the different logo
variations like so. We have the logo in its
simplest form as nude skin, then some variations with
different descriptors, some variations with
a sub-mark, and etc. That concludes our logo
section of the presentation.
8. Brand Identity: [MUSIC] Now the brand
identity in general is where you can
go really crazy. I always like to
advise anyone to keep the logo as
simple as possible and imagine their brand identity
as their playground and this is something I
also tell the client. You have so much room
with images, messages, graphic visuals, and
illustrations to really showcase how
far a brand can go. So stemming from the
concept of the direction, the brand identity here
also has a subconcept. The concept I
mentioned before is about the highest
form of self-care. The brand identity concept
takes a deep dive into that and explores the concept of self care through a mirror. The best way to take care
of yourself is to look in the mirror and
visualize a better you. What does that
look like exactly? I also use visual references
here to backup my concept. I got these images
from Unsplash or Pexels to ensure
high-quality photos and get the look and feel I want
to portray then I start showing them how I visually
translate this concept. Using the same design
language and the logo, my mirror here is
a slightly slanted oval-shaped that has
movement in its lines. Then I start to showcase different ways of how
I use this mirror. So I can put messages
in it and I can use it to frame people and
imagery I selected. I also spend a bit of time crafting the messages
and the brand identity. I never write Lorem ipsum or
just write placeholder text. Make it personal, make it
customized to the brand. So the messaging here, mirroring the best
version of yourself reflects the concept
that I'm presenting. Then because this is a
packaging presentation, I'm also responsible for
naming their products. The three products this brand
offers is a shaving cream, body scrub, and a body cream. Instead of just writing
that on the path, I thought it would
be unique to give each product tailored name. I have these three references of three different textures
to inspire the names. The satin fabric,
a group of pearls, and a close-up of sugar
grains and I gave these product names
inspired by these textures. The body cream is meant to
be a hydrating product, leaving your skin smooth, like the feeling
of a satin pillow. Then the shaving cream is mentally via skin
also smooth and free of bumps like the shine and texture of a glass pearl. Lastly, the body scrub has the same texture
of sugar granules, so I named it sugar sand. When I alternate between
these two slides, they understand how I
arrived to this concept. Always use visual aid. Now you can see here I'm
explaining this concept to you I don't actually
write it in text. It's better to use visual
images to convey your concept, and they will already be
listening to you explaining it. Remember, this
process of naming is also a part of your
branding so it goes beyond the colors and the
visuals it's all about the details and the
customized thinking you put in your brand so
that the consumer feels that this product
is made just for them. Then I move on to the
actual packaging. If you've taken my packaging
design class before, you'll know that I always
build some packaging system. It's almost like a
mathematical equation a successful system
helps the client easily expand their product
portfolio later on. Before I jump into
the more clips, I have to walk them
through the system so they know it and
understand it too. Remember, it's all about
a collaborative journey. I start the system
with the shape and an empty surface of
the packaging box. I always do this in gray
scale and introduce color at the very last step so they can slowly focus on the
system I'm building. Then I slowly start to introduce another
element in the system. In this case, it's the
brand sub more cropped around 30 percent of
the bottom of the pack. Then I introduce
the logo placement, and this is where I'd put
the logo at the very top. Then I start placing the
product name in the center here and underneath it
would be the product type. Then I would place
an icon for which skin type this
product is made for, this would go right
in the middle here. Then I would show them
what this all looks like, with their actual logo, their actual product name, and the text all applied
still in gray scale. Then I show them how it will look like when
applied with color. If there's anything that I
need to highlight like this, can type icon for example, I would just magnify
it to the side so they could see what it looks
like on a bigger scale. Then I don't pride
and some mockups. You see what a difference
this has made instead of jumping right into
mockups right away? It's important for you to walk the person
you're presenting to step-by-step through
your process because they have no
idea how we got there. This leaves them with a much better impact and perception of the work and digesting
a big bulk all at once.
9. Mockups: [MUSIC] Now is the fun part. From this point on, you're just cruising through the mockups. You want to present the
best polish mockups to the best of your abilities. I always like to
invest in my mockups from websites like
Envato elements, for example or yellow images
for packaging mock-ups. I first start with
a single product so they can take it all in. Then I move on to showing them all three product types
next to each other. A tip here to keep in
mind is to move slowly. You have seen these backups
one million times and it is their first time seeing
their products come to life, give them time to
take it all in. Don't rush through. I like to take a moment or two between each slide as I'm going through them and just briefly state what they're
seeing in each slide. At this point, they're forming their opinion of the
work on their head, so don't feel the need
to fill in the silence. Sometimes silence is needed after a period of
presenting and explaining. I just began to go through all the mall clubs and you'll
see here that I'm trying to showcase the products from
as many different angles as I can so that they
can visualize it. Sometimes one or two mock-ups
is simply not enough. Being generous with a way
to showcase your work, even if it's a branding project
and not a packaging one. Put as many mock-ups as you
can that have relevance. Again, if your project is
a packaging presentation, I highly recommend that you put a slide of shelf
blocking like this one. Shelf blocking if you
took my class before as the stopping power of grouped product on a
shelf and merchandising. When they're grouped together
on the shelf and there's a specific pattern repeated of some sort of grouping power, it binds them together
on the shelf. That really creates an impact on consumer's decision in a
matter of only three seconds. In this case, the shelf blocking power here is the brand icon, constantly repeated
at the bottom. This creates this convex shape of lines endlessly
looping together. This shows the
client that you are thinking of their product
beyond the pack and how it will behave
on the shelf and strengthen their brand's
image to their consumers. Then I move on to other
products like the body cream and the scrub with the exact
same structure and order. [MUSIC] Then I like to showcase how elements of their branding can be used using
relevant mockups. In this case, I'm not putting
their logo on a t-shirt. What will a skincare brand
do with a t-shirt mockup? Think of relevant mockups that will strengthen
the brand's image. In this case, I
thought of a gift box. You can gift someone skin care. To make it extra special, I use the logo and
the brand pattern you saw earlier as
wrapping paper. Then I created a gift card with the oval-shaped concept and a message and then I use one of the logo variations and
a circular sticker. A mock-up like this shows the client the different uses of the brand and gets them
excited about certain ideas. You can think of different
activation ideas for the project
you're working on and think what would
be something special that you can apply
the branding on. Then through the
rest of the slides, I start showing them how their brand imagery
will look like. Keeping in mind the
color palette and the overall tonality
of this direction. Every image I chose for those brands imagery is
cohesive with the other and I just tried to the
best of my ability to make it look like one holistic brand. [MUSIC] Now another
tip that I want to highlight here is that
the images I find online are not readily customized for the
brand I'm working on. You are a designer. You can customize the pictures
you find and start playing around with them on Photoshop to help strengthen
your presentation. For example this table
here on the left, its original color was beige, but I wanted it to
be the brand sage green color to match the
picture on the right. I customize these images
that I find and I recolor them to fit the overall color palette
of the direction. Don't be afraid
to experiment and really tailor your
presentation material. The key is to find good high-quality
images that are free of clutter to start with, and then you can start
making it your own. Then finally, I like to place all the
product mockups they just saw separately into a full overview of
their portfolio. This makes it easier for them to visualize their entire line. I found this image online on unsplash of these three stands alone and then I started laying all my mockups on
them on Photoshop. I even colored the stands
and the wall behind them to match the brand
color and the products. This would be you are
directing the slide. Last but not least, I like
to include an overview of what their social media
posts could look like. Keep in mind, this is not a
social media presentation. This is just a quick
overview to help them imagine what they just
saw in Instagram format. If I were to focus
solely on social media, that will be a
different submission with more detailed content. That's it for Direction 1. I just want to remind
you here of what I said from the beginning
of only including two directions because I really go all out fully fledged with my directions and I
spend a lot of time on them and this would
not be possible with say, four or five directions. Always go with the same
quality over quantity.
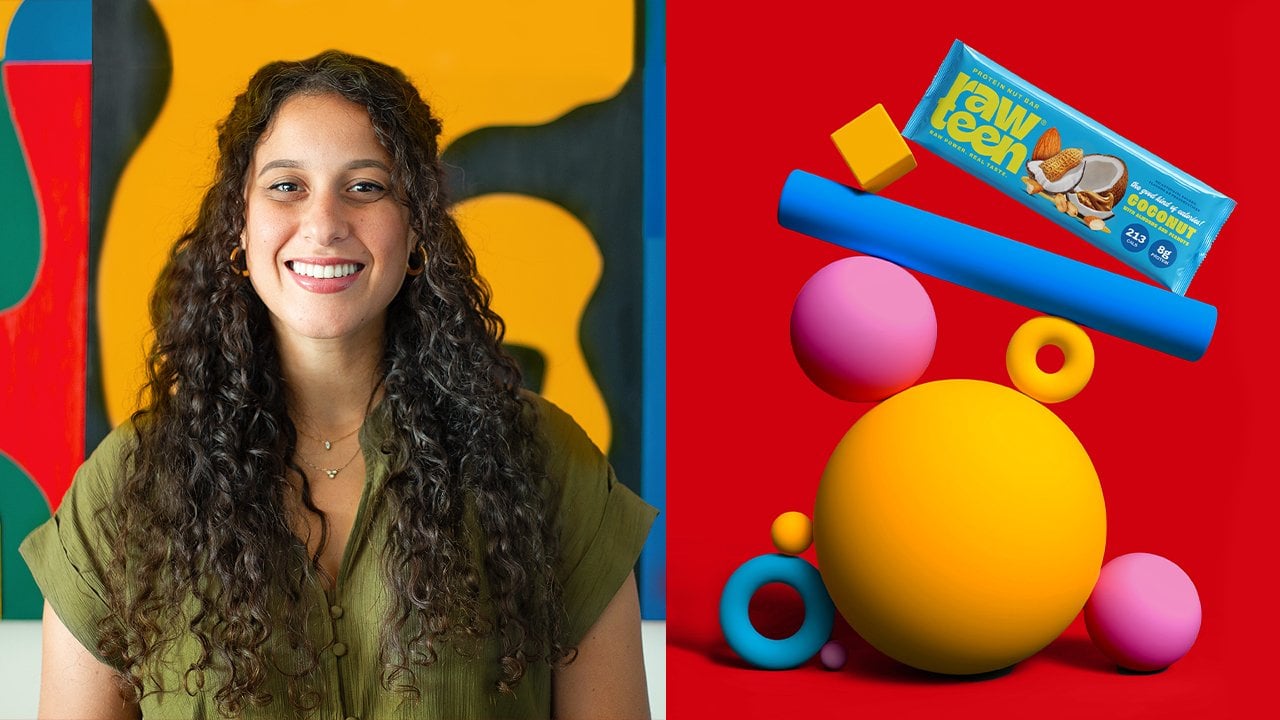
10. Direction 2: [MUSIC] Now for the
second direction, I won't talk you through each slide one by
one as I did before, because I follow the
same exact order, structure, and flow. This keeps everything
organized and fluid. But I do want to show you how different it looks
from the first one. Yet it still has the same tonality that the brand overall seeks to deliver. Again, we have our mood board, brighter, funner,
bolder colors here. Then the direction concept, the name, and customized
color palettes. Then the logo concept. This time there are no sketches in this direction for the logo because it has a
different concept that doesn't need sketches. But I still do the same
grayscale local build-up with little annotations on the side that describe what I'm doing. Then finally the logo. I flipped through the
different colors. Then the logo sub mark
and a fun sticker layout. Then I dump in the
brand identity. As usual, we have the concept first for the brand identity, then visual references that
translate that concept. Then graphic
illustrative references that translate these images. Then the abstract
line art that I did stemming from those references. These references
help me establish what kind of line art
I want to go for. And then this is me applying
it with the brand colors. Following that, we
start to go through the packaging system
just like Direction 1. This time I have a
specific system for the box and the tube inside. I start in grayscale building
it slowly from the ground up until I reach the final result in a
flat vector format. Then I just roll
through the mockups exactly like the
first direction. You will see here as I'm scrolling through
them all clubs, that this is a much
bolder direction with a more fun and
daring personality. It's designed specifically
in this way to challenge the narrative that's typically associated with the
nature of this brand. It's meant to make skincare
a lot more approachable and exciting than it is typically minimal like the
first direction. That concludes Direction 2. I just wanted to show you how to directions can exist
under the same brand, but can completely
differ in color, personality, and overall field. This makes the client's
decision easier with two distinctly different brands. As a final wrap-up, I always like to include
a recap chapter. Then this recap, I just put an overview of each direction. This is a selection of the best images from
each direction. It can be a combination
of mockups, logos, or directed imagery,
messages, and artwork. This is easier to look at and
reminds the client of what the first direction
looks like instead of having to go through
all the slides above. Again, if this were
an existing brand with an existing logo or a
package that I'm redesigning, this would be a good place to put it before and after image so that it's easy for them
to compare at the very end.
11. Way Forward: You're pretty much at the end of your presentation right now. Keep in mind, you could
probably talking for about an hour-and-a-half
or two hours if it's a long presentation. But the person in front
of you or the client has been registering all
this new information, all this visual content, and they've been
digesting it all. Don't be surprised
if they don't have an immediate initial reaction
that's totally normal. But if they do, then
take this time to completely listen and
take in the feedback, maybe jot it down if you can. If the feedback is initially good or if they don't have
any initial feedback, you can go ahead with showing
them the way forward. The way forward is basically the next steps after this
part of the presentation. What you need from them, what's going to happen next, and the step after that
and the step after that. Now, I find this
typically important to put this chapter
in this presentation, because when clients
see the road ahead and the next steps
that they have to do, they typically have
an easier decision to make than to just sit there feeling so overwhelmed with the amounts of information
they've just been registering. Always include the steps
ahead very briefly, and the person in front of
you will feel like they have a solid roadmap
ahead of them. The way forward is just a list of the next steps after
this presentation. I usually always ask my clients for written and
compiled feedback. I advise them to take a
day or two and sleep on it and group all their
feedback in written form, so it's clear for
the both of us. Then after working
on the feedback, they would select one
direction and give a final approval of it
with all that it entails. Then I begin working on final files and I ask them
for a priority delivery list. This differs from
brand to brand, but usually clients
need some time, certain things first as a
higher priority than others. Because I like to take my time
to diligently put together final files for them as this is what is going to be
printed and produced, I like to work in batches. I work on the highest
priority batch first, this could be the logo files
on the colors for example, send this out, then
the next priority, and then the next
until they have all the files they need. This is faster for the both
of us and more efficient. Like I said before,
having this chapter here helps them imagine
the next steps and it makes their decision easier
when they see a clear path ahead with specific
steps lined out. Then finally, your last slides should always be a thank you. Thank them for their time and patients throughout
the presentation. You can include your
personal logo at the end here as you
are finally done, and this is the time to ask them if they have any
initial thoughts or feedback and be prepared to jot down any raw
thoughts they say, as this will help you capture those first impression moments. When you're done and
you're ready to export, you just go to File, Export To, and then you have a bunch
of different options, PDF, you can transfer this as a
PowerPoint presentation, a movie, an animated GIF, images, and so on, so forth. I just pick PDF when I'm
sending this as email. You have here the option
of image quality. Keynote does a pretty good
job of compressing and optimizing the images
without making it pixelated. As an email version, I would say go with good because it exports it as a
low size document, which is good for email. But if you're using this as a presentation
document instead of Keynote and you're just
going to present with a PDF, then I would recommend going
with the best in all cases. But for email purposes, good is just fine. I just keep it as it is
and click on "Next". It will ask you
where you want to save and how you want
to name your document, and then click on "Export". Voila, you're done. That's it, you're
pretty much done with the presentation
portion of this class. However, I've included
a bonus lesson for you and is to
prepare you for a Q&A. Amidst presentation,
sometimes you might experience certain
questions that'll make you feel uncomfortable
or there have been vague, or you don't know how to
answer them and you feel stuck and you feel like
you don't know what to do, so I've included a lesson where I've encountered or
experienced a couple of these questions before and sample answers of how you should be able to
handle that situation. You might or might not get
asked these questions, but it's just important to feel equipped and confident
that you are prepared for any
unpredictable scenarios that may come up your way. Because remember,
it's essentially your role to be able
to successfully communicate as a designer and not just present
the work and leave.
12. Bonus: Q&A: [MUSIC] Okay. One
of the questions I get asked sometimes is, which one would you choose? This is a very typical and
common question because at this point the client or
whoever you're presenting to, does not feel fully confident
or they feel like they have full ownership
over the brands yet, and it's your job
as a designer to instill that confidence
and to instill that ownership and to make
them feel like they're part of the brand just
as much as you are. I never present
directions that I don't full-heartedly love
and really root for. So only present work
and directions that you absolutely love and
encourage equally. This is what I
usually say is that I encourage them equally. But if I feel like as a designer based on the
brief and the strategy that there is a
specific direction that will serve the brand the best, then I will push for that direction and I will
also say why so they can understand the
reason behind it and it's not based on
a personal preference. Always push for the direction
that will really serve the brand best and will
stand the test of time. Now the second common
question I get asked is, I don't like this. Can we change it? This is very common and the initial feedback of a
presentation that I get, they immediately blurt out the first thought that they have in their mind,
which is good. You need this raw
initial feedback but it is your job to be able to really transform that raw feedback into
constructive feedback. Because more often than not, sometimes we expect constructive
feedback to come to us in a very professional and
natural way but actually, most people do not know how to construct their own feedback. They blurt out feelings
and emotions and thoughts that come
to them and you need that raw material to be
able to work it out. When something like
this gets asked to you, you need to break it down. Take them through
it step-by-step. What don't they like
about this certain thing? Why don't they like it? What if they saw it in this way? What if they saw
it in that format? You're going to see that after asking a series of
many questions, you're going to find
that there's more to the feedback than
just, I don't like it. Can we change it?
I always suggest and recommend to
keep asking them many questions as a goal to really get more
constructive feedback out of them and you really understand the root
of why they don't like a certain thing
and they may have to discover that the solution
is really simple in the first place and there was
no reason to changing it. Another tip is, never agree to changing
something on the spot. Always say that you're
going to take some time after the presentation
and after hearing all the compiled
feedback to really assess what needs to be changed and what doesn't
need to be changed. Because you don't want
a box yourself in a specific place of changing something when it doesn't
really need to be changed. Never say yes or no to anything
immediately on the spot. You can always say that
you can assess later after you've both slept on
the presentation basically. Now the next question is a follow-up to the
first direction, and it's, I love
both directions. Is it possible to take an element from here
and put it there? Remember what I talked
about the confused salad, sometimes it happens and this time I want you to stand
your ground a little bit. Being a confident designer
is knowing when to stand your ground and when to give a little leeway and to
agree on certain changes. Here, you're acting as a consultant to the client
basically and you're literally consulting them and advising them not to do this. Because when we mix and match elements into
certain directions, like I said before, you get a very
confused looking brand because you have
elements that were not meant to be there together. Instead of saying no, this cannot be done, you want to offer a
different solution. Different solution
would be is to see what the direction is
lacking essentially and we can start to fill that
gap with other elements or even new elements but not take elements from
the other direction, if that makes sense. Fill the gap in a way that
makes sense for that direction only if they like the majority
of a certain direction. The last question that
I've included here is, I don't like anything at all. Can we start from scratch? Now, I just want
to say that this happens very rarely
and it's not going to happen often if you do all the steps from
the beginning of the process correctly in terms of how the detailed brief, strategy, mood boards, and you're aligned
in all the steps. There's a reason we do
all of these steps in the beginning in order
to reach this part of the design presentation and
get an immediate approval or an approval with
minor feedback but not changing the
entire direction, not liking anything at all. This is why I stress upon really putting a lot of effort and
time into the first phase. However, let's just
say that this happens. Again, you need to understand the root of the problem and
the root of the question. I always like to refer them back to the beginning phase of this project and
we discuss again the mood boards, and the brief, and all the factors, and all the
information details we aligned on from the
beginning and then I see and assess if the problem
is in this area that got affected by
the design or do we need to change the
brief and change the whole mood board and basically start from
scratch from this board. Then the clients would be
informed that this would mean starting a new project
from the beginning. Or scenario B, you
could revisit that part of the project over the brief again and the strategy
and the mood boards, and then the client
would discover, okay, that makes sense. I see why you did this and
this and this and that. But perhaps can we maybe
change this to here and then you flip the question to
not liking anything at all, to liking something
but wanting to change a specific factor after seeing that part of
the presentation. You have several
parts to go about it, you just need to understand
the root of the problem. The final tip I
have for you is to never take anything
too personally. I understand that in design, we pour a lot of ourselves into our work and it is personal
at the end of the day. But when it comes to
presentations and conversations with clients or in a professional
environment in general, don't take things personally because at the end of the day, this is a service, a solution you're
offering to a problem, and it is your job
through discussion and communicating to
solve that problem. It is not a reflection
of you as a person, it's a reflection of the work, of the brief, of the brand, of the process in general. Try to take a breath when
you're talking to a client, speak slowly, speak
calmly, speak confidently, and your tone of voice really matters because then
it will put them at ease and you'll
find that it'll be a very smooth and
fruitful conversation. That's pretty much it. These are just some
sample questions. If you have any more
questions that you got asked or you think
you might get asked, please post them in the
discussion form below. I'd love to chat about
them with you. [MUSIC]
13. Class Project: Now that you've had a
comprehensive walkthrough of what a professional brand
presentation looks like, now it's your turn. I want you to pick any projects you've done before,
any branding project, whether it's a
passion project or something for a real
client or for school, and I want you to structure a professional brand
presentation for it. When you come to upload your
presentations on Skillshare, you have several options here. You can export your
presentations as JPEG images and then upload them in their
respective order. Or you can export your
presentation as a video, upload it to Vimeo or YouTube and copy
paste the link here. Or you can upload a link
from any other source. If you're using Keynote like me, then you can either
export as JPEG images, but because the
presentation is quite long, I would recommend
exporting as a movie. Then you can control here
how many seconds you want it to wait before
you go to the next slide. Then export, then upload your
movie on Vimeo or YouTube, and copy paste that link. If you're using PowerPoint, then you can go
up to share here. Then click on "Copy
Link " and paste that link in the other
link box on Skillshare. Same thing applies to
Google Slides and Canva. Click on "Share", copy
link and copy paste. Don't forget to upload the cover image of your
presentation here. Write the brand name
and the project title and a little description on the brand and any thoughts you had when creating
the presentation. But remember, your class
project doesn't just end here. It's really important
to rehearse and apply the tips by actually
presenting your work, whether it's to a friend, to a family member, or to a real client
in order for you to really reap the benefits
from this class. I'll share with
you the resources a presentation template similar to the one you saw in class so you can keep yourself
on track and a recap of all the tips I've sprinkled
along the lessons, so you have them on hand in
case you need a refresher. Good luck. I'm sure you're
going to absolutely nail it.
14. Thank You: [MUSIC] Thank you so much for taking the time
to take my class. I hope you enjoyed it and you found it helpful in any way. I just want to say that
the more you do this and the more you practice and
the more you present, the more confidence
you'll be and the more that it'll feel like
second nature to you. If you found this class helpful in any way then
I would absolutely love it if you left a review because it helps my
classes so much, and it also gives new students an idea of what to
expect from this class. Thank you, and I'll see you
on the next one. [MUSIC]
 Khadija El Sharawy, Independent Designer & Art Director