Transcripts
1. Course Introduction: Hello, everyone. So
today's class is going to be blue and turquoise
watercolor landscapes, quite loose, practicing
misty trees and diffusion and also water
ripples in a lake. So for these two paintings, our first one is going
to be how to get that lovely misty diffusion in the background with
lots of indigo. We'll also then be
looking at how to add some final details with that
tree in the foreground. Then for our second painting, we will be practicing
water ripples and some little reflections in the lake at the background. So this class is ideal for any level of watercolor artist. But I would just
suggest for a beginner, you have a little
bit of water to control practice before
giving them a go. But ideally, any level
anyone that wants to paint loose
watercolor landscapes using lots of lovely
tones of blue. So I'm Candi Small. I'm a watercolor artist
based here in the UK, and I specialize in loose
landscape paintings. Let's get started
on our materials.
2. Materials : So for the class we're
going to be doing today, you're going to need 25 by seven pieces of
100% cotton paper. I'm using coal
press and sh paper, but you can use any
100% cotton brands, that would be absolutely fine. So I usually buy these pads and then cut them down to size. Then also for the paints, you'll need some indigo blue, some cerulian some
turquoise light, and then also some
white gouache. Now, I'm using
Windsor and Newton here because that's
my preferred brand. But again, you can
use any paint brands that you're comfortable using. And also, they don't need to
necessarily be tube paints, but I find it a
little bit easier to get that rich pigments and get the water flowing and doing those nice bleeds if
you're using tube paint. So for the brushes, I'm
using a number 1 ". This is a Dale Rowdy
synthetic flat brush. And then also, I'm
going to be using a three quarter inch
flat brush as well. And this is a Jackson's art. So both are synthetic. They don't need to be
pure hair of any type. Synthetic will absolutely fine for these type of paintings. I'm going to be using a
number five mop brush. When wet, this goes to
a really nice point. And we're going to be
getting those water ripples in using that nice, large belly of the brush
and then also the tip. I'll be using an Escoda
Automo number six rigger. You don't need this brush. But it does go to a
really nice point when you're painting
and you can get those nice little
expressive movements in those little tiny
little sections of paint using the tip of it. But you could use a liner brush, a rigger brush, or something that's got a really
nice point to it. I'll also be using
a number six round. A number one line of brush to do the lovely tree for
our first painting, going up into the foreground
area of the painting, getting those really nice
wispy branches and trunk. And then finally, you'll also
need a fine detail brush. This is a three slash
zero, and it's a Davinci. You can again use any brand for any of these brushes,
paints or paper. Just try and use 100%
cotton paper, tube paints, if you can, and then also any
brand of brushes is fine. Synthetic work great. So just the final
thing that you'll need in terms of materials
for this course. So I'm using a piece
of acrylic board here. So just a piece of hard plastic, which I will tape down my paper too rather than taping
it to the table. So that's so that I can tilt
it and get some nice bleeds. When I'm doing the misty trees at the background
of our paintings. So you don't have
to use acrylic. You could use a piece
of wooden board. You could use a
watercolor block, something that you
hard that you can tape your paper down to, and then you can
move it around and manipulate it so we can get
some nice bleeds going. And then also you'll
need a couple of water jars and a little
bit of table salt, as well, which will
sprinkle on to get some nice little white
blooms in our two paintings. So let's get started
on our first class.
3. Practice Exercise : The so we're going to do a little practice
exercise before we get started on
our first painting, and that's to do some
misty tree practice. So I've got some indigo
tube paint here, just a scrap piece of paper, and I'm using the three
quarter inch flat brush just to dabble on a fairly straight line of that rich indigo
blue mixture. So it's got a little
bit of water in there, but it's still quite thick. Now I'm taking a clean brush
with lots of water on it, and I'm just touching
the top of that line, and I'm going to
glide it across. So you can do this just on a scrap piece of paper that you have and just use lots of water on one
of your flat brushes, just to try and encourage
that paint up into the water, and you can see it
really start to bleed. So this is to give you an idea of how much water you'll need on your brush when
it comes to doing our first project
in just a moment. I'm just running that
water all the way from the top down to the bottom there so we
don't have any hard lines. And then you can tap in
a little bit more of your indigo into
that bottom section. And you'll see that
that's also just darkening it up and
starting to bleed into it. So clean brush again, a little bit more water, and we can just soften up that edge. So just really gently running it along and it'll
diffuse nicely. So you can keep doing
this a few times, just having a practice, dabbing in some
more of that paint. And then you can tilt it and you can see that
it's starting to move and run up into that water that we have in what
would be a ski area. So, nice and wispy
little bits at the top, really
softly diffusing. See the sheen on the
paints so that you can tell that it's all nice and wet and it's bleeding
through the water. So that's our first
little practice. So feel free to have
a few goes at this, and then we'll get started on our first project with our
misty trees landscape.
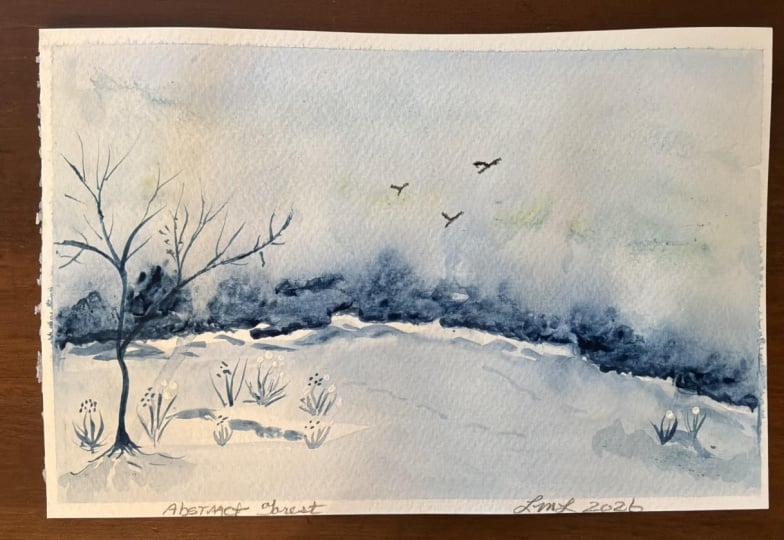
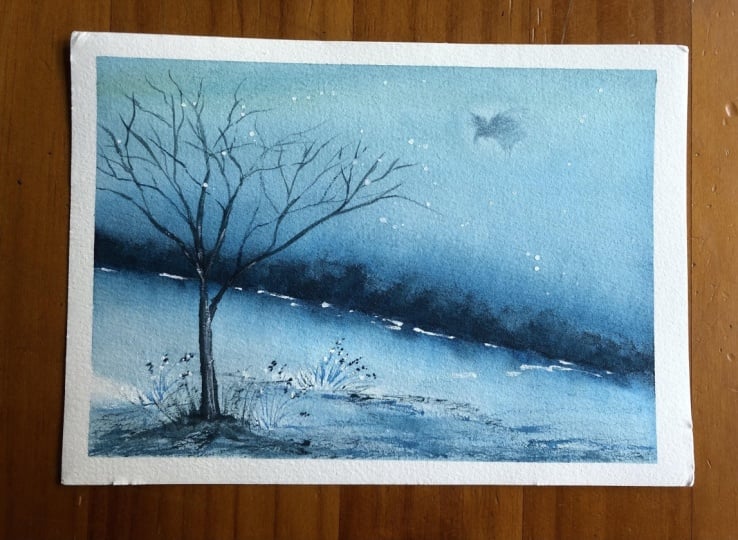
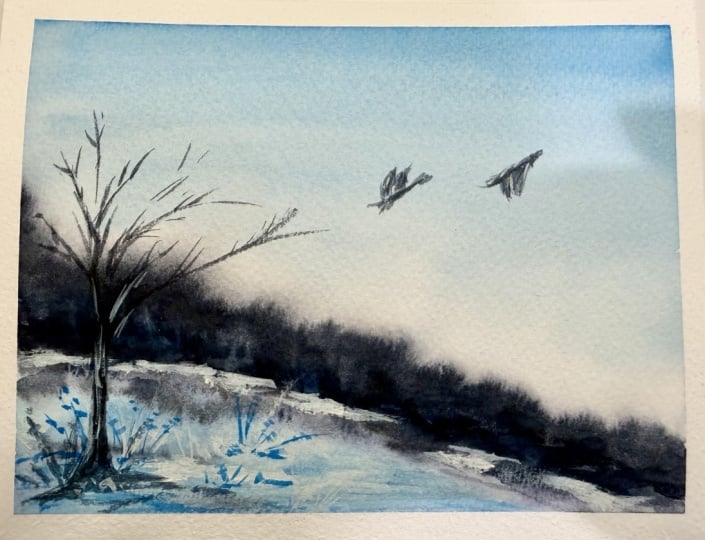
4. Project 1 Misty Trees : So, welcome to the
first project, where we're going to
do our misty trees with our lovely detailed
tree in the foreground. So I've got the 1 " flat brush, and I've put some clean
water in a sloping line, sort of running down towards the bottom right hand
corner of the painting. I'm taking some indigo blue, so put quite a bit
of water into this to loosen it up if
you're using tube paint. And then when you've got
a nice loose consistency, just use the tip of
your brush just to tap it along the bottom of
that wet section of paper. So we're gonna be building up our nice loose background
with our misty trees. And we're gonna have
a little bit of a curve to it just to
add some interest. So just make sure
you keep tapping in that dark indigo paint. And have it as a
little broken line, so you've got some little
white sections underneath. You can tilt your board, so you should have your piece of five by seven paper taped
down to something rigid, so you can see I'm
tilting it and it's bleeding up into
that sky area above. So just keep tilting
your paper on your board so that we've got
some nice movement there. I'm taking a little
bit more paint here, and I'm just starting
to tap it in. I'm just encouraging
that flow of paint so that it diffuses
nice and softly into our sky. Tilting my board a
little bit to the left. And you will get a few bleeds just at the sides
of your painting. But don't worry
about that you can wipe those away with a
bit of clean tissue. There I'm just taking
away a little bit of that bleed on
the left hand side. Now, lay your board so
it's nice and flat again. Take your three quarter
inch flat brush so it's nice and
clean and just run some more clean water
down from the top of your painting and down
along that line of bleeds. So you can see that it
should have softened up that edge so it doesn't
look quite so spindly. Tilting the board again a
little bit so that again, it's running up
into that wet area, and then laying it flat. Just start to tap
in a little bit more of that rich indigo paint, and I've added a touch
of cerulean there. So this is just
to keep darkening up that bottom section
of those trees, tilting the board again. And that should
encourage that thicker, darker paints, just to
stay at the bottom, but just move up very slightly. And I'm just sweeping away a few little rogue
bleeds again there. So this is our base
layer, so don't worry. It doesn't need to be too exact. This is just our background. Taking some of that
lovely cerulean blue and then adding some turquoise, we can do a little
graduated sky. So this is all wet at the top, so that should soften nicely, and then take some
clean water on your brush so that we're blending that down and down
along our misty trees. So it might go a
little bit stripy, but don't worry too much
about that because we're going to go in with some
extra layers as well. Again with the indigo. I've got the board tilted
a little bit here. So in my left hand, I've just got it
tilted up slightly, and you can see I'm using the top of the brush
just to tap up a few little higher sections
as well on the left. We've got a really large bleed
now on the left hand side, but again, don't worry,
we can wipe that away. And I'm just tilting it
to the right hand side this time just to encourage
it in different directions. Again, to the left, and although this takes a
little bit of time, once it's all dried, it should give us a really nice atmospheric background
to our painting. Swiping away that paint
with the clean tissue. And then I'm taking a touch of that turquoise that's got a little bit of
blue in it as well. And I'm just very
carefully adding a little bit more color there where I've wiped it
away with the tissue. So again, going back
in with the indigo, but tapping it right
at the bottom this time and also bring it
down just slightly, so it's in our foreground area. Clean water on my
brush. This is the 1 ". And you can see
I've just touched that dark paint that I've
just added at the bottom, so it's bled down. And then cleaning off
the paint off my brush, so it's just damp, I can start to sweep that
away and soften it. I've got a little
bit of turquoise here with some blue mixed in. And I'm just really randomly putting it into the foreground. So you can do the same, leave a few little sections
of white paper, and then take a brush with
a really nice point to it and start to manipulate
that paint that's there. I'm using the number six rigor, but you can use any brush
that's got a nice point. And I'm just tiding it all up, pulling some of that
dark indigo paint into that foreground,
where it meets. And then I can take a little
bit of indigo just on the tip and start to darken
up that little edge. You can see we've
still got some white there of the paper
that we've left, and that looks quite
nice and bright. And then I'm putting a
little bit of indigo just into that foreground
quite loosely, quite randomly, little
sweeps of that rigor brush. So this is just blending it and adding a little bit of
texture to our foreground. And then if you do
have some little white sections of paper left, you can accentuate these
with a little bit of indigo paint just around
them or underneath. So this is still wet. We
haven't dried this off yet. So I'm now going back in
for a little bit more indigo just at the bottom
of those misty treats. So, again, this does take
a little bit of time, but once it's all dried, it will look really
nice and atmospheric, but we need it to
be very dark so that when it does dry,
it's not too light. So starting now with a little
bit of clean water just at the top and then running it in smooth
horizontal movements, slightly diagonal, bringing
it all the way down again. Sweeping it back
to the other side. And you can see it softened up all of that edge
of the indigo again. It looks a little bit messy. We've got a bit of the
ugly phase at the moment, but don't worry, keep on going. Some more clean water. And that's all nice and soft
and diffused again now. And then taking some of that
turquoise and cerulean blue, you can just run
that into the top of your sky area again where you've lost a little
bit of that color. So I tidied this all
up with a tissue, got rid of all those
bleds of paint, and you can see that it's all softened and diffused
really nicely, and we haven't lost too much of that vibrancy of our
sky with the turquoise. Just a little tidy
with the tissue if you've still got a
bit of paint running, and then we can give this a
dry after we've sprinkled a little bit of table salt just into that foreground
area for some blooms. So nice and dry now. And you can see, even
though it's dry, we've still got a
lot of vibrancy, as in we're very nice and
dark with the indigo, but we've also got
some nice brightness coming through from that
turquoise and cerulean. I'm using the number
six rigor again here, so you can use anything that's got a nice points
that you used before and just take some of
that dark indigo and darken up that section just
as it meets the foreground. Take a little touch of white
gouache with your line of brush. I'm using
a number one. And just start to
randomly put in a little bit of white highlights
into your foreground. So little squiggles. We've got cold pressed
textured paper here, so it should catch nicely on
the texture of the paper. Accentuate those little white
areas that you've got left. If you haven't, then just add a little bit more white gouache to get some more highlights. And just use little diagonal
squiggles with the brush. Give it a little smudge
with your finger. And all we're doing
here is adding a little bit of texture
in a very loose way. So nothing too specific. Little flicks so we
can have some grassies coming up against that
blue of the background. Now, once we've got these
little highlights in, we can then start to add in
some darker paint, as well. A few little highlights just coming in from that
right hand side. And then I can take
some of the indigo. So take some of
your indigo pans, add it into the white gouache
so you've got a light blue. 'cause I don't want to go
too dark yet with all of this foliage and just do a few little sweeps and grassies with your
lighter blue colour. So the idea here is that we've got our lovely loose,
misty backgrounds, but we do want to add
in some details to make it look more like a
recognizable landscape. So we will put in
our lovely tree with our spindy branches
in just a moment. But this is just building up some foreground texture to set the scene for adding a tree. So still using that blue, little tiny bit darker now. Just accentuating
those little areas, and then you can just wiggle it around just to give those
loose little brush marks. So a little tiny flowers using the tip of
the line of brush, still with that same light blue. These don't need to be
details, tiny little dots. And we've got quite a nice
little scene there going, quite a nice little
area of foliage. So going very dark
now with pure indigo, still with the line of brush
and start with your trunk. I'm putting it on the
left hand side just where that little white
patch of paper was left. So to do your trunk,
push your brush down a little bit more onto the paper to make it as wide as possible. And then as you
bring your brush up, just lift it up off the
paper very lightly, and it'll give you your nice light little spindy branches. I'm just darkening
up that trunk, making it a bit thicker. And you can see I'm quite quick as I come to the
end of those branches. So be very light
with your touch. Just tiny little
feathery touches where you're barely
touching the paper. You can darken up some of those branches by
going back over them just so we've got a lot of contrast there against
the background. And I'll speed this up
in just a moment because it does take me quite a
while to paint this tree. But I wanted you to be able
to see and copy how I'm painting the outline of it to get the main
shape in there. So be quite random with
your branch placements. Don't make it too uniform. So I've got a
really large branch coming up across the right
hand side of the paper, which draws the eye across
for our composition. But just make sure that
you've got some really nice thick, dark, rich paints, and that will give you
a really good bit of contrast for the trunk against
those misty trees behind. Tiny little flicks as you come to the end of
those branches. So the same paints. All I'm doing is running it underneath for a little
bit of a shadow there. Few extra little sections of dark paint underneath our tree. So being very random
still with these, this is just texture
for our foreground. A few little grasses, so still using the indigo, so we're finishing with
our darkest color here. And that builds up the scene
quite nicely, I think. It adds a focal points. We've still got our
lovely atmosphere and the misty trees, which took us quite
a while to paint. But I think the detail of the tree gives us
something to focus on. So little taps of white
goashe now with your brush, again, using the tip
of the line of brush. And then you can add
a little highlight to the right hand
side of your trunk. I'm just dabbing
it with my finger. And again, you can put them
along the branches as well, just to give us a little
bit of lightness there. Taking a little bit of
water on the brush, so clean damp brush and just blend those lighter
sections of white paint. So they don't look too staark against the very
darkness of the tree. Just blend it in so you've got a little bit of
lighter sections. Few final little sweeps
of dark indigo paint. And then we can start
with the birds. So I've taken my three
slash zero brush, so take your fine detail
brush and just start by doing just a few little birds with some wings going
up behind them. You don't have to paint
your birds like this. You could do it so that it
was just a little like a little a little V. But I wanted to give a
little bit more detail, so I've made the
neck quite long, and then those wings
going up quite high, just one in front of the other. This bird next to it. I've got the wings coming down. So a little horizontal line, and then the wings coming down underneath with a little sweep. And then, again, just bring
that neck out a little bit. So it looks like we've got
some geese in flight above. Then a little tiny bit of white paints just to put some
highlights on those wings. And the same on
that bird, as well. And feel free to have a
little practice first. If you want to get a
bit of scrap paper and practice your birds
before painting them, then you might find that
useful. Birds can be tricky. They can take a little
bit of practice. But these are fairly simple. So as long as you've got the
wings going in a nice curve. So there's our finished
painting for our first project. I hope you enjoyed the
misty trees for that one, and we'll get started
on our second project.
5. Project 2 Lake Ripples : Welcome to the second painting. So for this project, we're
going to do it in portraits. And all I've done is
put some washy tape, about two thirds of the way down so that we've got
a nice crisp line, which is our separation between our sky and the lake
and the water beneath. So taking your number
five mop brush, just wet all of that sky
area and start to just paddle in some very light
watery cerulean blue. So leave some nice, white, clean sections in the
center of the sky. Make sure this is
nice light paint, and just really randomly
start to drop it in around the outside
of the sky area. Add a little bit of indigo into your erulem and then just start to put
that in over the top. So you want to still have
quite a lot of water, so it's all going to
soften and it's going to diffuse nicely into each other. Just little taps. Use the
side of the mop brush, and then also the
tip as well to get those smaller horizontal
sections just at the bottom. Then I've just cleaned
off my brush completely. It's just damp, and I'm pulling off some of
that paint just so that we've got some nice soft edges around that light in
the center of the sky. And once we finish this lovely, sort of glowy sky, we'll get down to the
water beneath and start adding those
lovely water ripples in. So taking some indigo blue now. So as dark as we're going
to go for this sky area, and I can also start to put
this around the outside. If I start to get too much
water and paint on my brush, so picking up that
water from the paper, I can just dab it off on my tissue that's
in my left hand. See, I'm squeezing out the water from my brush there
after I've cleaned it so that I can use the damp brush just to
soften those little edges, and then add in a tiny
little bit more paints, just coming down towards
the bottom of the painting. So just keep make sure you're reserving that
white in the center, and we're just
getting really nice and dark around the outsides. Again, using the tip, just smaller little sections of paint as we come
down to the horizon, and then a clean
damp brush again, just to swipe out some of that paint and release
some of that light behind. Make sure you don't
have any water on your brush at this point, needs to be very slightly damp. So really nice thick mixture
now of the indigo blue. Just darkening up
those last sections. You can see I'm using
this quite sparingly, putting it in little sections of those clouds so that we don't hide all those other
lighter layers underneath. Switching to a number
six round brush now. So have your number six to hand, add in some turquoise into
that mixture on your palate, and then start to put in
just the suggestion of some little sort of wooded
hills on the left and right, coming down into
that center area. Just little taps, just with
the number six round brush, so nice and small and then get some really rich dark indigo to add in a little
bit further down. So we don't want to hide all of that lovely turquoise and
that lovely color behind. So just use the tip of
the round brush as well, just to make it look almost like we've got
some little trees. So we've got some
little pointy sections as well going up
into that turquoise. Very dry, thick mixture
now of the indigo, so hardly any water. And then we can just darken
up those bottom sections. So we've got just another
layer there, as well. Much thinner. So this
isn't going to be as deep as high as the other sections of paints because we want
to see those behind. And this will give us a nice little backdrop
to the paintings. So the main focus is going to be that light in the
sky that we've left, but it's also going to be
the lovely water ripples that we're going to
put in at the bottom. So remove that washy tape before you dry off
your painting. So you should have a nice
clean line there underneath. So now the paintings
completely dry. The sky's dried quite a bit
lighter, which is nice. And then I've put in another
bit of washi tape and left just a tiny strip of white underneath where those
trees were at the back. So we should have a
nice little white strip there when we pull
this washi tape off. Again, the number
five mop brush, just wet the whole of that
water area underneath. And then we can drop
in some turquoise. So adding that turquoise into the indigo that was in
the center of my palate, Make it nice and vibrant, and you can see that's
really bleeding as we drop it into that wet
water area beneath. So clean off your brush, squeeze out some of
the water from it. And then with the damp brush, start at the top and just sweep that down so
you're removing some of that layer of water and paint because
it was quite heavy. Then dipping into the cerulean, so add that into your turquoise, nice and dry and start to use that mop brush
to do those little sweeps. So using the tip and
the belly of the brush, and we're just doing
little sort of almost like little fishes, little
fish movements. Leave little areas of
the turquoise between them and just vary
those brush strokes. Make them smaller as you're coming up towards the horizon. So just using the tip
as you come further up. You can see here I'm just
doing smaller movements now. And this will make it
appear like the ripples are getting smaller as they're
going back into the distance, a little bit flatter, a
little bit more horizontal, and just sideways sweeps of
the tip of that mock brush. So we will build up
these layers gradually, and we will get some nice
darker colors in here as well. And then bring it all
the way up to the top. And that's our base
layer for our water. So we've got some
nice movement there underneath when we start
to add in the indigo. So very dry indigo here, adding that into that
center section of my palate. Very dry. I haven't added any
extra water to my brush, 'cause we want these
to stay quite steady. We don't want them
moving around too much. So starting at the bottom, these are going to be our
biggest sweeps of the brush. Lifting the brush up to the tip as we come up to the
end of the movement. And just keep varying these. So it leave nice little gaps
between them so you can see the lovely turquoise and
cerulean that's underneath. You can darken them up, as well. So right at the bottom, you can go over
them again just to make them nice and
dark with that indigo. And then in a moment,
we'll soften it all up so it should look a
little bit more natural. Again, using the tip, getting a little bit
more horizontal, not quite so much
movement in these, and then taking some
water on my brush. It's got a little bit of
paint still left on it. And with nice smooth
movements left to right, I can just soften
that whole area. And you can see there it looks a little bit more natural now. And all we're going
to do is take some more of the indigo
and we're going to darken up and add a little bit more contrast
to those ripples. So again, quite a dry brush now. We don't want to be
adding too much water, and we're just going
to put these indigo sections quite spaced out. Nice and dark again
at the bottom, accentuating those
ripples, but we've got the nice softness and the
diffusion behind them, as well. So water can be a bit tricky. Ripples are quite tricky. It's taken me a lot of practice. I'm not going to lie. But if you just keep on
practicing with thicker, richer paints as you
go up your layers, so start off light
and watery and then slowly build up that
thickness of the paint. And then you can take
a clean damp brush. I've got the number
six round here. And I'm just softening up and pulling out a little bit of
paint between those ripples. You can see I've got
the tissue next to me because I want to keep wiping off all of that paint onto my tissue so that I'm not adding it back
into the painting. So I've cleaned my brush, sweeping off some of that paint. And in a moment, it will
be a very dry brush, and I'll release some of the
light underneath as well. So this does take a
little bit of time, but a little bit of patience, and you should have a really
nice ripply water effect at the bottom of your painting. And it does create a real
sort of draw for the eye. It's a nice focal point. Squeezing out the water
from my brush there, you can see I've pulled off
a big section of paint, and I'm going to
keep doing that now so that we've got some
nice light as well. So keep cleaning your brush, keep squeezing it
out on your tissue, and then pull out those
little light sections. Cleaning it again. A little bit of patience with this bit. And I think we're
nearly finished. I didn't want to fiddle with
it too much and overwork it. I liked how soft it all looked after it had all diffused
into each other. So that's how water finished. I'm taking some of our turquoise here and I'm going to
add in some reflections. So underneath where you had your little hilly
sections at the back, dropping some turquoise,
it should still be damp, so you should be able to add quite a bit of water
into your paint and just sort of sweep in the suggestion of those
reflections underneath. And then you can go a
little bit darker, as well. So take some of your cerulean, mix it in with a little bit
of indigo and turquoise. And you can put that in
over the top, as well, just towards where
that washy tape is. So we're mimicking what
was above it, as well. And then we can
go very dark with some really pure indigo
just to finish off. So just making those
just a little bit bigger so they come down into the
water area a little bit more. But just make sure
you're matching the height of what
you did above. So pure indigo now, last little dark
section of paint. And then we can pull
off that washy tape. And we should have a nice
little strip of white left just above where these reflections are and before our little
hills start behind. A, so nice and careful. And you can see that we've got some nice white left there, which gives us a
nice bit of light, which matches the glow
that we've got in the sky. Now I've got a clean
damp brush here, and all I'm doing is softening up just those little
indigo sections, so they're not quite so hard. So just use a very, very slightly damp brush here. Don't add too much
water because you will get some cauliflowers and just very carefully blend and soften those little
strong sections of paint. And that's paw painting
pretty much finished. So I decided to finish off just with a few little
birds in the sky, not as detailed as last time for the first
project that we did. Again, using the
fine detail brush or just wiping off the water
on the brush so you can see. So we don't have any drips. So always make sure
you haven't got any water that's just
about to drop off your brush and then just
do a few simple birds, little Vs, I decided to
keep mine just to one side, and that's our
painting finished. So I hope you found
that useful in terms of painting
some water ripples, getting a bit of a
glow in the sky, and just creating a
simple atmospheric scene with a very simple composition.
6. Course Outro : So these are our two
finished paintings. So I hope you enjoyed painting
these for the course. I mean, I'd love to see
these if you wanted to put them as a
project into the class. It would be great to see
them and see how you got on. But I really enjoyed painting these with just a few colors, lots of blues, quite a bit
of glow left in the sky, but practicing those
water ripples. And then also those
lovely misty trees that we did in the background
for the first painting. So I hope you
enjoyed the course. Thank you very much for
watching and joining me today, and I'll see you very
soon in my next class.
 Candice Small, Watercolourist