Transcripts
1. Course Introduction: Salam molecu Hi, everyone. My name is Mohammad Dumer and
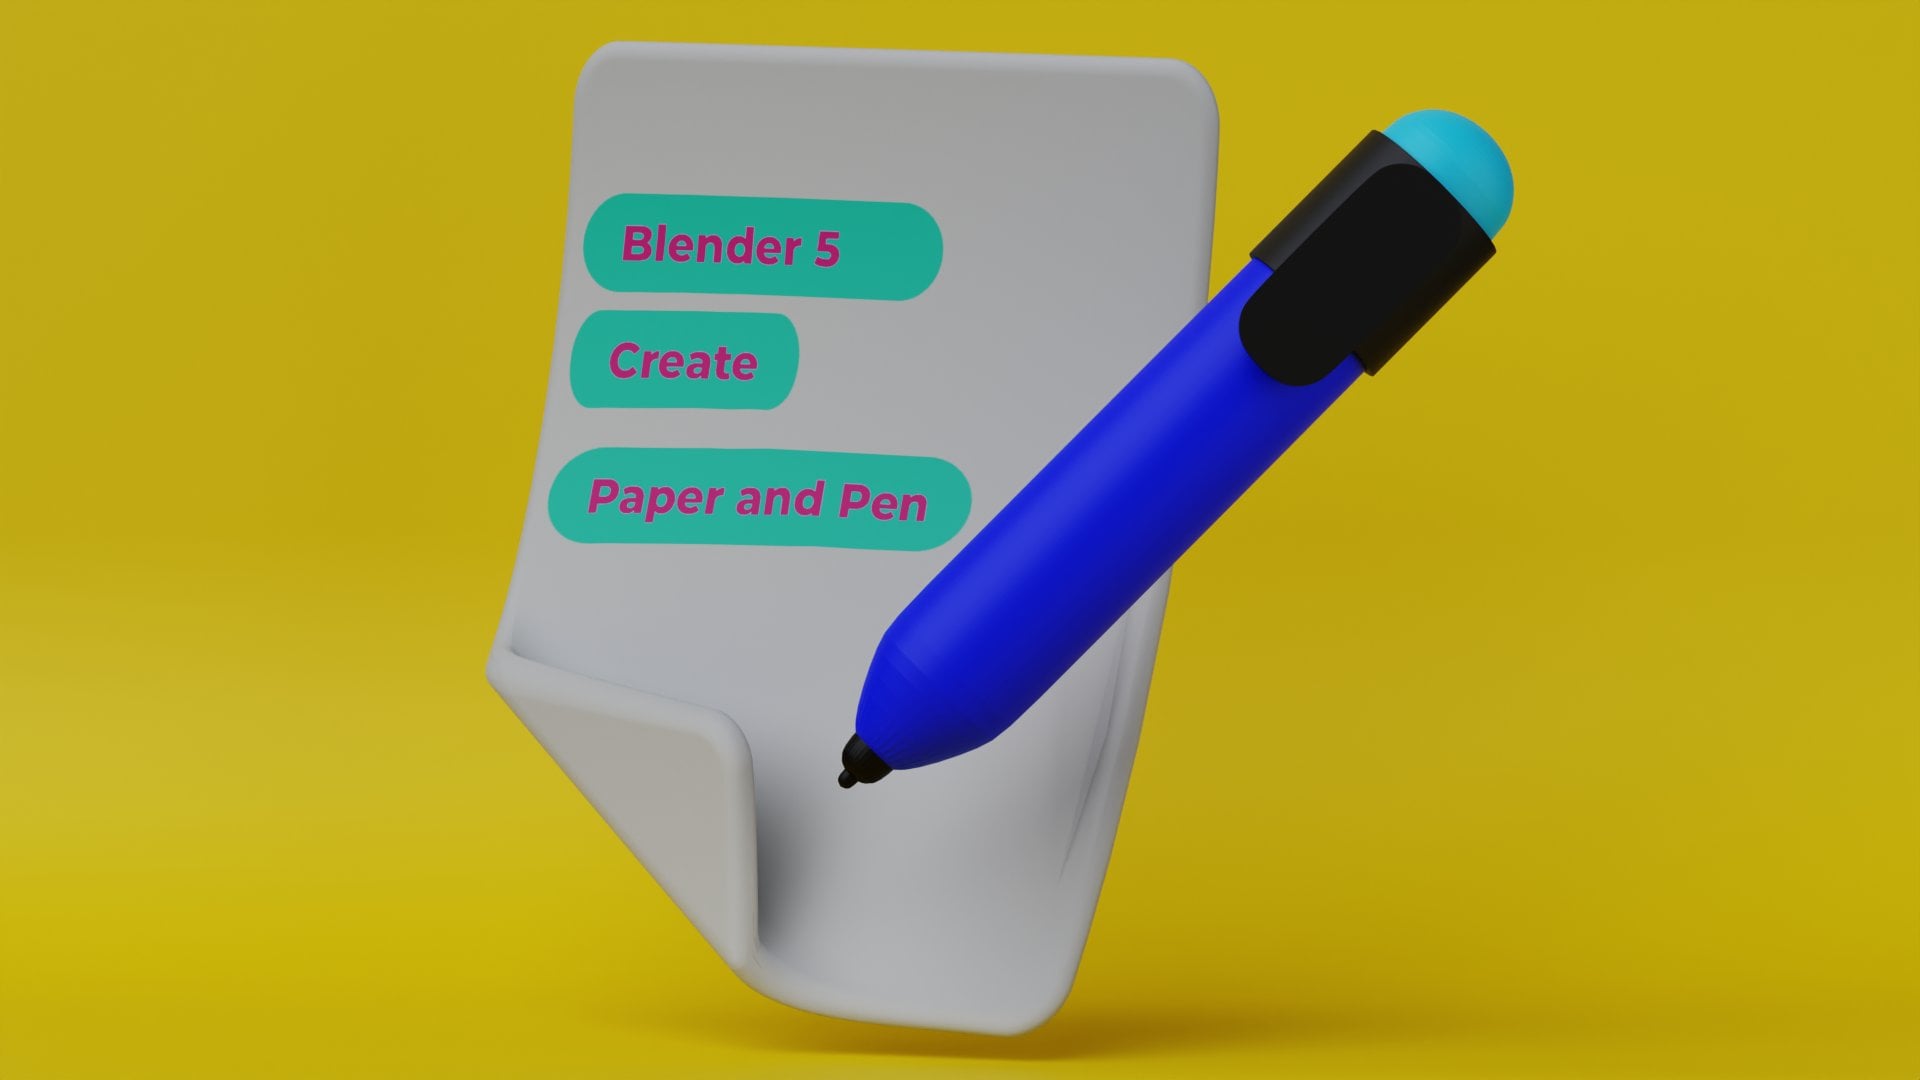
welcome to This Workshop. In this workshop, we
are going to create this cute stylized three D pad inside Blender five
completely from scratch. You will learn how
to download and install Blender five
for the first time. Then we will install
some add ons and how to navigate
in Blender five. Then we will proceed
forward and we will create the basic block
shape of our bad, and then further, we will create the wings with
proper structure, and also we will
create the eyes, nose, for our bad. Then we will move forward
to add appealing materials and then at final we will set up the lightning to
make your caracter form. And finally, we will render a
professional looking image. This workshop is perfect
for beginner and artists who want to start exploring
stylized three D caracter. By the end of this workshop, you will have your
own fully modeled, shaded and rendered
three D character. Ready to share anywhere. So let's jump right in
and start creating. See you in the class.
2. Download and Install Blender: Okay, welcome to
the first lesson. In this lesson, we are going
to download Blender five. So for this first, you have to open your
favorite browser and just go to the address
blender.org ORG. And as you see, just as you launch the website, you can see the
Blender five is here. And just click on the Download, you can download
the Blender five. And before I continue to
download the Blender five, first thing, I want to show you something, click
on the Download. And from here, if you
click on the LTS, let's say if you have low
laptop or low specs system, you can download any previous
version of the Blender. As you can see Blender
4.5 LTS until 2.93 LTS. And if you want to download any previous
version of Blender, just click on the previous
version of Blender, just click on download
any blender version and from here all the way you find the blender
12, Blender five. But as this course is solely
based on Blender five, just click on the
download and from here, click on Download, and it
is ask you for donation. If you want to donate
something, you can go ahead. Otherwise, just click on the Download and just
wait for the finish. And once the download
is complete, we will install the Blender. And then we will
proceed further. Now the blender is downloaded. Now just click on the open
and just install the blender. I suggest to you that you
should have SST hard drive. If you did not have any
dedicated graphic card, then the hard drive will support you in fast
processing of blender. Otherwise, I recommend that
you have at least two GB SST, at least two GB
dedicated graphic card. So just from here, you can click on where you
want to install the blender. So I will leave it default. Just click on next next. And once the setup is finished, we will launch the blender, five in next lecture and just wait for the complete
installation of blender. I hope you have installed
the blender successfully, and now you can also launch
the blender on your own. Otherwise, see you next lecture, and we will continue from there. See you in next lecture.
3. Interface Navigation and Important Add_Ons: Welcome back. I hope you have installed the
blender correctly. Just click on the launch button and as you launch the
blender first time, and if you have used any
previous version of Blender, as I have used previous
version of Blender 4.5. So you can import all the preferences which you have sent in
previous version, you can simply just click on the Import from there to here. Otherwise, if you are just install one version of blender, let's say in our cases
we have install five. You can select here
the language you want, the interface of your
blender English. You can also select the theme. You can select for this, I will use the dark. You can also set the key map. If you want to
industry compatible, Key max like Autodesk Maya, three DSMx or SanmaFt, you can select the
industry compatible. Just for the I also
select the blender. And the most important option, if you want to select you want to select an
object in blender. So what mouse key
you want to use, I just use left and just click on the
save per references. And this is the supply screen. You can also see the
splash screen from here. Just click on the Blender logo and just click on splash screen. And here you will find all the if you want to
create new file general to DNI Mon sculpting and the
feature Blender provided us, you will found it here. You can also found it
from here new to this. Next thing, as we
create our project, our recent project
will appear here. So for this, I just leave it. And from here, just I want
to show you how blender. I assume you have at
least basic knowledge of computer and also the basic knowledge of how to move around in
a three D software. And just for a quick
note, first thing, before we proceed forward, I want you to download
some add ons. So just click on your browser. And the first add on I want you to install in your
blender, loop tools. So just click on the link I have provided
you in description. And you can also download
extension dotblender.org, and from there, you can search loop tools and the loop
tools are up here. Just click on the Get add on and just select hold and ag and just go to Blender
and click live here. It will ask you to
the online access. It's meant that your computer
is connected to Internet, click on Online AXSS and just go system and allow online
access and just close it. Now go to the ag There you go. You can just go to edit and preferences and
just go to add ons. And if I search here loop tools, our loop tools have
been installed. Next thing that I want you
install extra mesh object, just click add on, just drag and install
the extra object. What are these objects? If I go to the ad and from here, if I click the add
and from here, I can see different
mesh objects. But if this add on
is not installed, just go to just I uncheck it. And if I just go
to add from here, you can see the lower
minimum objects. So for this click on
the Extra Object. Okay. Now, how we can move another plugin
which is screen cost, and I just want to install. If you want to install this, it's okay if you did not
want to install this. It is also fine because it is on this plug
in solely for me. So what I ever do
screen cost keys, and from just here, I go to screen cost keys
and just from here, whichever function, whichever
function I perform, it will be appear here. So I just want to
change the color of this just a little bit. I think green is okay. And if I want to
increase the font, so you can also see margin
thickness from here. I think it is okay for now. So any key which I have
pressed will be a PRL. Now, how we can move in Blender or you can pan
around or moving blender. So for this, you have to
understand few things. First thing, as we are
living in our word, so I would call it our word. Word. And this word
have some properties. So I divide these
properties into three. The first one is pan. So pan mean it's mean
changing position. So you can define this
term on your own, but I would call it pan. So as you can see, this is the word and I am moving or rotating
along the word. But if you see, these
are the objects in word, which are placed in a
certain position in word. But if I want to move or rotate around these
objects in Blender, how we can do this opression. For this, you just hold down the middle mouse button
and just rotate around. This is called orbit or rotate. Now if I want to pen in word, let's see this is an
object and another object, just I would say
another object is placed here and data object
is out of our scope. I want to move data object, for this, we have to
use the pen property. So for pen, hold down the middle mouse button
and now press Shift. And just first you have how down the sheat then press
middle mouse button. You can pan around the word. And last thing, if we want to
zoom in zoom out in world, you can use mouse wheel. Perfect. So these are the
properties a word contain Pan, orbit, and the zoom in. Zoom out. Other thing which we have
see that in our word, there are certain objects
are placed, as you can see. If I want to move this object, so again, as the word
contain three properties, the object also contain
three properties. The first one is the position or you can also
say the location. So if I select this and here
you can see different tools, I will go through only
these three tools. I want you just select this tool or you can
also use the shortcut. But for time being I assumed that you did not
have blender knowledge, so you can just
select on this and here you can see three
different arrows. I have I assumed you have a little bit
knowledge of geometry. So this is the X axis, so I can move along the X axis. We will also discover further
go deep dive into this. Just for the time being,
you just understand. If I select the arrow, I can move the object. The position, you can see, the location or position
of our object is changed. You can also go from
here or you can press the shortcut key N
here you can see N, I can hide and hide this and you can see here the location
of an object is changed. Another property
is the rotation. I can also rotate the object. And the third one third thing is I can also increase or
decrease the size of object. So here we have found the
three properties of our word. Also, we We see different properties of our object as object
contain three properties, and also the word also
contain three properties. And just one more thing how this object is made of we will
see this in next lecture. So see you in next lecture.
4. Object Mode Vs Edit Mode: Welcome back. As in
previous lecture, we discussed the pan
orbit zoom in Zoom out, and also we see the position, rotation, and scale
of the object. Now, next thing before we start our sculpting
of our little bit. So just one thing I
want you show that we see this is our word
or three D space, and in three D spade
there are some objects which contain its own
position, rotation or scale, but our word is
also you can see, we can pan rotate and zoom
in zoom out in our word. Now we will see how
our object is made of. This is a simple if we think about ourselves as a
human being, how we made of, we will see ourselves, we made of bones, muscles
and cells, different things. And we also have to see how
this object is made of. So for this AUC, we are in object mode, and in object move it considered as a whole,
single one object. Now, if I go to dit mode
or simply press tab, just press tab, we will
enter the Addit mode. And remember, in Added mode, we only deal with
a single object. We did not select
these objects until and unless these objects
are not connected. So here you can see I press tab there and now press these
are the dots, black dots. You can simply see the dot. And you can also see here. These dot are called vertice. Single is called vertex, and if we select multiple, these are called vertices. And we can also see there
are certain operations, more options for the objects
have been appeared here. But if you see the three, they move rotate and
scale are also there. So these are our t if I select the vertice and press G
or just press this one, I can move the single Vertis. So I just I go to here and press shortcut key
two, just press one. I switch into tes and press two. I switch into edge. So here is an edge. So I can also select the edge. So I think you have got the idea how different infrastructure
you see in blender, how different houses, different architecture visual
animation performing. Blender, you can
now get the idea. And other thing is the face, so you can also
move the pace here. So you can say how
our object is made of our single object is
made of three entities. A single one is vertex. So we can also
change the position, rotation and scale
of our vertex. So the whole principle
of position, rotation scale, whether it
is in animation, in rigging, in, you can see in texturing, these are basically
the coordinates which we shift or change. So when two or more
vertices are combined, it create an edge and we can also change
the position, rotation, and scale of our edge when
three or more edges made, the thing that is made
up is called pace. I think you just as
a beginner if you understand these three
collectively nine properties, of three D space, you can easily create anything you want, and this is a word, and in word, different
objects are placed. The word has three properties
that is called pen, orbit, and zoom in, zoom out. And in word, there are
different objects, and we can change the position, the rotation, and the
scale of our object. And that object is
made up of vertex, different edges, and
different phases. So I hope you have got the idea which I want
you to understand. Now if I want to just go to Object mode and I want to
select all these objects, just press A and
press delete button, you can delete all the objects. You can also go to
from here collection, just delete and
now the real thing which we are going to sculpt our bat is we will
do in next lecture. But before we are
moving to next lecture, I want you to set or
arrange all these thing. This is called if you see this
is called three D cursor. You can also found it here. And now you can Uh, just if you select this, you can place it anywhere you want. And if it is not selected
and you want to place dicer, you have to press shift
now we mouse button. Here, you can see the
right mouse button, and it is you want to place
the three reever you want. And if you want to
place it in origin, so I think you have
studied the geometry, and we will call it XY, Z planar Cartesian product. And if I just want to go, and in your
childhood, you study, this is called the
origin, and at origin, the value of X, Y and Z is zero. And this is called the positive Xxs and this
is called the negative XXs. This is called the
positive Y axis, and this is called
the negative Y axis. And this is called Z and
positive Z and negative Z. So now if I just place an object and if you see the our
three D cursor is here, if I add an object, just cube. So wherever is our
three D cursor, the object is placed there. So I want to place
the object in center. So for this, I have
to press if I want to move the cursor to
region at origin, you see, the value is 00. So for this, you have
to either press Shifts, you can see different option. If you press shifts, you see the different
objects and cursor to select it and
selection to cursor, cursor to grid
cursor to Worldgion. So our cursor is now
in the world region. And if you just use
a simple shortcut, you can press Shift C and it
go to the center to origin. Now just press delete. Now I want to place an object
so here I will not use Add, I use a shortcut key, and that is if I press Shift A and you can see the
different of object, you can add from here
and I want to place a Q. So you can see our. Now here you only find two axis, and in some cases, if we see our original axis, we saw the Y axis is at upward. But in Blender, it
is not the case. It is the Z axis which is the
upward and Y axis is here. And if I go to here, just here, if I just select the Z, and our Z axis is also appear. Now if I go to item here, I can see the different values
of our X axis YXs I move, and if I move along, you can see our values negative, that X is here is X negative and just move to here and similarly for right and Z and
for up and down. So I suggest you just play, move along, and in next lecture, we will start this
sculpting of our bad. Su in next lecture.
5. Sculpting Body and Eyes of BAT: Welcome back. In this lecture, we will start sculpting
the t. So for this, just you make sure that
your cursor is in center, and if it is not,
just press Shift C, and it will be in the origin. Next thing, press Shift A
and just go to mesh object. Make sure your extra
mesh object, go to here. Extra mesh object, add on is on, and just press Shift
A, and just from here, just go to the round cube and place it here and from here, just change the properties
from arc eight to 75. Okay, now you done
the first thing. Now we are going
to in sculpt mode, you just can go to press
the sculpt mode from here, you see the different objects
and are layout again. Either you can also press the Control plus
tab, and from here, if you see the different
pie menu from here, you can select the sculpt
mode or press simply two, so it will convert
into. Sculpt mode. Next thing, here you can
see the user perspective. This is the perspective
camera if I want to go different
camera modes. So for this, if I press
the one numpad numpad, it will go to front
orthographic. If I press three,
it go to right. If I press seven, it go to top, and press nine, it go to bottom. Front. And as you
can see, front, the opposite of front is back
if I want to go to back. So for this, I press
hold down the control, and if I press now one, it'd go to the
back orthographic. So you can understand. If I press three, it go
in right orthographic, and if I hold down
control and press three, it'd go to left orthographic. Now if I go to the
user perspective mode. For this, I have to
press num pad five, and from here, I can see the left perspective and
a little bit reaction. And if I just press
the mouse button, it will move again, change into the
user perspective. Now, if I press one, it is converted into the
front orthographic. From here, will
start the sculpting the face draw the eyes
of our bad so for this, here you can see
the strength and the size of brush and before, as we see a human
or any quadrop, so the nature has made up
of the symmetrical process, as the eyes of the
location of my eyes, if I divide my face in half, so it use a symmetrical process. So for this, I use the symmetry, and here you can see
different different objects. So this is basically center just and from here too,
just a symmetrical. So just go a few step back and just control
and have to more. And from here, just turn on
the symmetry and from here, just select the blob brush and now increase
the size of brush, hold down a press F. You can
change the size of brush. Now from here to just from here. So I want to create Is, and if you use Photoshop, we use the mask system. So for this, I just
press M. If I press M, and here you can see, I am creating the mask.
Press Control Z. And if I just a little bit decrease
the size of our brush, and it's still okay now
I just a little bit zoom and now I want to create
the create Is for my bat. Perfect. So next thing
I am going to do, I want to invert this mask. I want to that this
mask is converted to the whole white area of body and the whole white
body turned into black. But this just press control I and it will invert the mask. Just as we have
selected the bla brush, just click on the blow
brush, and from here, just create the eyes you
see the eyes are created, but I want to invert
this opresion. So for this, just
press Control Z. Now hold down the Control
and just create the Is just as you create the
make a little depth. You can also change the
strength of the brush. So 0.5 is, I think is okay. Just press Control
Z a little bit. Now, just move around
and here you can see. I just press Control
Z a little bit. If you want to smooth this, you can also use a
press Shift, as R, you can also go from just select the smooth brush and just
smooth these things. So you can smooth. This. Perfect. So here you can see the base for the
eyes of our bat is created. Now, just press Control
and tab and press four, go to the object mode. Okay. Now we are going to place the eye
socket for our bed. So for this, I go to press
Shift A and from here, just create an UV sphere. And here you can see
the USphere is placed. Now press tab, go to added mode. Make sure your UV
sphere is selected, not your round cube. If accidentally you deselect it, just select the sphere
and in tab mode. And if you want to
select the as a whole, simply press A, you
can select this. Now I want to decrease the size. So now just press S
to scale the object. As you can see, our object
is within the round cube. So if I want to see that, just go to the Xtrede. So from here you can
see the reode and now press select and now just press it to move it
here and press seven to top view and just bring it to press G
and bring it outward. Press one. Now go to front mode, and if just from here. Now, next thing, I want
to the as you can see, our eyes contain pupils. So I just want to rotate
this now press R and just rotate it to ate it here, just like now press
again R. And if you want to rotate into Z Daxis press
set and here you can see, I just want to rotate
it the outward of Now press one to
see the results. Now press three and just
turn on the extreme mode, little bit bring it
to the backward, now press G, and then
press Y to just sorry, press G, then Y, little bit to the inward. And I think we
made some mistake. No, it's okay. Okay. Perfect. Again,
if you want to move it, I still think it is
in the press G and Y and just now it's okay. Now, again, just press R and Z to bring it
to the outward. You will see what
I want to show. Now press one or go to vertex mode and just
select these vertices. And before we do that, just press Control A, and I want to create a modifier and just go
to modifier and press the mirror modifier here you can see the symmetrical or mirror
is behave as symmetrical. Now just select the vertices. Now press delete. And from here, you can
delete the vertices. So you can see the
inner of the sphere. Now just switch to the faces and if you
want to select the loop, just select a single
vertice and now press, now press left mouse button and the whole loop is selected, and now simply press F, it will fill the gap. Okay, perfect. Now
the eye socket for our just you can
see the bat is created, and the basic phase of
our bat is also created. In next lecture, we will create the nose and
also a little bit sculpting of our nose our bat we will see
in next lecture. So see you in next lecture.
6. Create Nose of BAT: Welcome back. I hope you have correctly performed these steps. If you face any difficulty,
you can ask me. And now in this lecture, we are going to create
the nose for our bat. And before we are
going to do that, just for this, firstly we
have to save these projects. So you can see the Blender
five is not in LT state, so crashes can happen often just press save and save it
where you want to sell. So I would call it little cute bat and just
select save the file. So our file is safe. Just press the. Save it is not safe. I want to save it
into then desktop. So I will call it
little cute, bad. Just save. Now it is saved. Now I want to create just go
to front orthographic mode. I want to create a nose. So again, for this, make
sure you are in object mode, and now press Shift A
and then press create the round cube and just
press a and go to the here, just go to XR mode
and press three and just bring it to the if you press Y to
the little bit outside. Now from here, just go to. And if you want to bring
it little bit here. Okay. Now, just
press Control Tab and to go to the sculpting mode, and from here, press X
to turn on symmetry. And from here, you select the
next brush is elastic grab. And from here, just press one. As you can see, the nose
of bat is from here, just a little bit long from
downside and from here, just drag it to. It looks like just a simple
I think you would enjoy this and you can create
and just select the and you can just a
little bit make it smooth. Now go to Control tab and plus
four into the added mode. And if I just rotate it, you can see the nose
is appear here. So what should I do
just press S to scale, then twicely press the Y, or you can see the nose
is little bit shrink. Now just press R to rotate the nose and just
and now press one, to go the forward. Now you press Y and
you can just Perfect. So the nose for our
bat is created. I hope you follow the process, and also hope you are
enjoying the process. So I wrap it here. So before we are going
to dab this lecture, you can go to this
is the solid mode, and this is the material mode, if I go to here and you
can see in material mode, it is sometimes take times, it is not appearing. Just I think there is some problem for this, if I just create a
just if I create a light, just white light. Sometime it happened, it
is not working correctly. So we will see in the material. So here you can see the
default material object of our bat is white. So in material section,
we will further. But if you want to
change material now, so you can simply go
to the material and select the object and just
from here go to material, just click New and you can see our blender is
going is taking some time. It is often happen. So that is why I said you
that you save the project. If it is crashed, you can. So from here, you can
just change the colors of a time being just
nove it into black. Also, if you want to create
change the color of black, you can also select from here so you can see the eye
socket of our bala ball, but you can also just change
from here the color of. So just play with it and we
will see you in next lecture.
7. Create Ears of BAT: Welcome back. In this lecture, we are going to create
ears for our bat. So for this, just make sure your three D cars
are in at origin, and now press Shift A and just go from here
to create a plane. Now press R for rotate
and X into 90 degree. Now just press G. Make sure your plane is selected and
just move it along here. Okay. Now just press R for rotation and
just to rotate it. Press G to move it here. Now, press for scale. If I press S for scale, you can see our plane is equally decreasing its scale
if you see the values here, I want to cancel this operation, just press right mouse button. Now, press S, then
press X twice. Now I want to decrease
the scale of our plane. Okay, perfect. Now, next thing, just press tab, go to Edit mode, and now press Control
or for loop cut. And here you can see, loop cut tool is selected, and we can place a cut here. Now, just make sure do
not perform dioperation and use the mouse wheel button
and add three loop cut, one, two, three, now
press left nows button, and if I move along, you can see, I can move. But I want to place it equally at just the start
the loop car tool. Now simply press the escape, and you can see
it divide equally the whole plane
into equal parts. Now, just select
the vertice mode and just select this
vertice and this vertice. Now press S and just to the to make you can see the air structure of bad
if you see the bad model, now select this and also this
and press and from here. Now select this one and this one and just press a
little bit make it. Now select this one and select
this one and press skin now it would not inward, just go to the outward. And randomly, just plus G to
move to make it inorganic. Now, select this one. Select this 11. Okay, perfect. Now, what we are going to
go to phase mode. Now, select this phase, this phase, this
phase, and this phase, and go to just Xra mode, make sure the all
phases are selected, and press I to add loop inset. Perfect. Now if I go, press press Control two. I will automatically, if
you go to Object mode, it will automatically add the nub select and
press Control two. It automatically add the
subdivision modifier. So now go to the edit mode. Here you can see,
select the vertices. And from here, you can just move the vertices
to change the shape. So make the shape just like a leaf like structure,
adjust the shape. Okay, perfect this like you
like adjust change. Perfect. Okay. Now, just switch into the just phase mode
and select this one, this and this phase, and just a little bit
here and press E for extrude and just
extrude it like this, just like and then perform the patient and
now press I to the. Perfect. Okay. Next thing, what
we are going to do, I think we made a mistake. Okay. Now just go to modifier and add a modifier
and just modify solidify and select
the even thickness and just change the
thickness into 0.15. And here you can see now change the order
of the modifiers, bring the upward and here. And here you can
see the operation. Now just select this one and
go to the vertices mode. And if I select just
turn on the if I select these vertices and these
vertices and press now just rotate to the left
orthographic control and three and press G, and then Y, little bit
outward side. Perfect. I think if you see that the extrude operation
is not performed well, but it's okay. I
think it's okay. Now select these vertices, all these vertices and press R and then X to rotate
into the further. And similarly to select these vertices and
press R then X. Later. Okay. Perfect. I think it's okay. If you just want to
make more adjustment, you can just like
these vertices and press or the next as you like. And also just like this
and these vertices. And from here, we have
performed G and Y. Just just a little bit. Perfect. Now just go to add mode and just let
the Autosht smooth. And one thing here. Just let the ear and add a modifier that
is called mirror. And here you have C, the mirror modifier is apply, let the eye draper data
just here and just click. Here, the e is a pair. So if you just move along, you can change the and just press and press G and
Z a little bit inside. Perfect. So here you can see the air for our bat is created. So in next lecture, we will start to create
the wings for our bat. See you in next lecture.
8. Create Wings of BAT: Welcome back. In this lecture, we are going to create
the wings for our bat. So for this press Shift A and just go to the curve
and from here, just create a path
and just press G to move the path and just
bring it to near the ear. And now press R for rotation,
and here you can see, rotate it to 45 degree and just press G Okay,
as you can see, the wings are behind
the ear of our bed, but you can also bring those wings after
you complete this process, or either you can simply
bring those to the ball. Now just select the X ray
mode and just press tab, go to edit mode,
and just from here, you can see, make sure the proportional editing is
off and just select this one and adjust the path as
you want, or as you like. It would be more
likely the curve just an arc type
just bring it here, press one, and just bring it
to the here and just adjust it to the and just Okay, perfect. Now, what we are
going to do just select your path NR path and
go to the data properties. And from data, you can
go to the bevel option, just geometry, then bevel, and then go to the depth and just increase the depth zero
point I think one is okay. If I go to the dit
mode object mode, you can see the here. And if you just want to
focus on this object, you can also press the forward slash and
you can select the. And again, this one, too. But I just want to unhide it. Re mode and just make
sure my if you see, it would be inside in the bed. So just okay. Now, just go to edit mode and now make sure
your path is selected. Now press tab, go to edit mode, and select the
proportional editing and select this what is press Alt S, and here if I press
the mouse wheel, you can see the size of the proportional editing circle is increasing a decrease
just like this. And if I move it out
and you can see, and just bring it out just
like this a little bit. Now go to Edit mode, and if you are confusing, you can just select go to and
select this path forward. We can then bring it
out to the outward. And if you think that
the ears are too large, you can also decrease 0.06. I think this is okay. Now press Shift D, duplicate it and just like
this and then rotate this and then move this one. I think it is okay now press
S to scale it in this. And just press this one. Now again, shift D and
then this one is here, press scale, then we
can move it here. Perfect. Don't worry. We can change the orientation
and just press S three. Bring it. Inside. Just select this one and this one, we can. Perfect. Okay, I next lecture, that is for this lecture. In next lecture, we will
create the wing sheet, the sheet between the
wing sheet for our bad. So see you in next
lecture, and before that, you can just select this
and you can just adjust the turn this off and you can just adjust the
position of your wing. So it would like more natural. So you can decide what kind or what type of
wing you want to create. So see you next lecture.
9. Create Wings of BAT Part 2: Welcome back. In this lecture, we are going to create
the wind sheet. I just call it wind sheet, but it is the part of the wing, and you can also call it
frame for this purpose, shift A and just create a plane, press RX and then 90 degree
and just bring this to here, go to the press tab, go to Addit mode and
just bring this vertice here and just this vertice here. And this vertice is here. Don't worry, just go to
and this vertice is here. Okay. Next thing,
what we are going to do just make sure select this
vertice and this vertice, press right click and
select subdivide, and we divide the vertices
into a new vertice. Now select this vertice
and this vertice, and then again, press right
click and press subdivide. Okay. And now
select this vertice and this vertice and
select the subdivide, and just select this
vertice to move it here and just this vertice
to just like here, and this vertice to
here and make sure select these two vertices
and put our vertice here. And select this
vertices to here. Don't worry, where
we are going to create the just a wing. Make sure select this vertice
now press Control Shift B. And you can see we can
bevel the vertices. And if I use mouse wheel, I can add the vertices. So just add vertices to make it more curve
and press Okay, and then press G to
bring it to here. Okay, turn on the X ray mode. Now select this
vertice and again, Control Shift P and
just make it more. Slack this vertice and
just bring it here. And if I just put this
one and this one, and if I press subdivide, and just like this
and just it here. Now, select Control, Chief B, and just and select
this ts to put it T H, and just put it here. If I select this vertice and just select this vertice
and just select subdivide, and I just press Control Shift B and just make sure only select
this Control Shift, B, and or just put one or two vertice as you or
remain it, keep it single. Okay. You can also delete the
vertices as you like, or you can decide how many
vertices you want to keep. It's all up to you and just now select
this Control Shift B, mouse wheel, and
just to make it. Control Z. I think
here would be just I think one or two
is okay, I think. I think it's okay. I think. Perfect. As you can see, if just tighten and go to
the object mode, you can see the wing
for our bat is created. Just select this vertise and
just move it along here. So it would look more natural. Now, next thing, what
we are going to do, you can see the wing is you can just attach this,
move along these. But most probably our
view is in front. You can make adjustment. Okay. So I will leave this lecture here,
and in next lecture, we will only make some tweaks, and then we will further start the material
section of our lecture, see you in next texture.
10. Prepare Model for Material Creation: Welcome back. In this lecture, we are going to wrap up
our modeling section, and in next lecture, we will try to implement our
material and then lightning. Okay, in previous lecture, we leave you can as I have
told you that we will render it into the
front orthographic. So here you can see you
can also snap this vertice to this vertice and this
vertice to this vertice, this verte to this vertice. And for this, you can go to just select this
magnet and from here, you can select the verte
and just select the object and if you press
and if you press G, and it will snap to the
nearest the closest, and you can tweak these. So I will not do this as I just told you before that we will just render it
into the front mode. So for now, just
select this wing and all these objects
and then select the ears of bad and just go to the modifier
and just from here, select the mirror modifier and select this and
copy to select it, and our wing automatically
mirror to the other. And just now select these wings. And I have told you
once these are created, just bring them to
the back. Perfect. You can also adjust
other things. And as I have told you
in previous lecture, you can see the
default material, and I have shown you how you
can create the material. And if you have created the material previously
just like this, and you can also delete
the material from here. And as I have already deleted
the materials from now, we will create the
material from scratch. So make sure you can
just select this one and just go to shading tab. And before going
into shading tab, I recommend you you
should save your project. Just press Save. So in next lecture, we will start implementing
our material, see you in next lecture.
11. Create Material for BAT: Welcome back. In this lecture, we are going to apply
material on our bad. So if you have created
previously any material, you can delete dead material. So make sure you are in shading mode and
also in object mode and just press F one and F one, not F one and num pad one
to in front orthographic. Now, select the head of our
bad and just create our new. And just from here, just change the color of our bat and if you just bring
it make it black. Just a little bit here. Now, next thing, just now select the nose and hold on shift
and then select the win. And then also here. And now what I am going to do, I want to link the material of head to all other
part of our bad body. So for this, just select the parts on which you
want to apply material. First select those, then at end select the head or the
part you want to link. Now press Control L and from
here, press link material. So so easy you can see our material of head is linked with the other
part of the bat. Now just like the nose and
just decreases roughness too. I think 0.2. Zero point
I think 0.25 is. Okay. Now, next, next, what
we are going to do, we are going to apply material
and the eyes of our bat just simply again repeat the
process and just from here, change the color of
eyes of the bat. Now just make sure your eyes
are selected and press tab. And if you remember, we
have created the pupil. And for this, just make sure your face you are in face
tab and select this pupil. And just from here, go to the slot and from here, create a new slot and just
press assign before assigning. Just create a new material. Just create a new material and just assign and you can see the material is
assigned to the eye and just make it the black. Perfect. Now again, just go to the slot one
and just from here, change its roughness
to, I think, 0.15. And now just go to slot
two and just from here. Change its also value 0.15. Perfect. Now just press. Now, make sure you
are in slot one, and now press forward slash, and you can only
focus on the eyes. From here, we are going to add
texture, material texture, color ramp, gradient
texture so we can make eyes more attractive. So for these first of all, just press Shift A and just go to the
color and from here, select the color ramp. And you can also search you can just
like gradient texture, go to taxi tab and from here, go to the gradient
texture and make sure you add on node wrangler node
wrangler is enabled. Node wrangler is unable. Now select this gradient
texture and plus Control T, and it will create the mapping node and texture coordinates. Just like this one. And one thing that I want
to separate XYZ utility. I think it is in utility. Just go to vector,
yes, separate. Every new version of
Blender, when is released, the nodes, the position of these nodes is
continuously changing. So don't worry. You can also
simply press and from here, you can search and
look for the node, you want to search
and just like this. Here you can see,
we know the pupil. The backside of
our eye is black. So I just want to
just make it more natural separate Z two and
from object to vector. And here you can see and just change the gradient
texture to the easing. And if you see if we
change the rotation, you can analyze this thing. So make sure you are just at
a good and just press F one. And just from here, just unlink this node and just
select this color. Now select I think this one
and make sure all nodes are connecting and just make
sure select this one, this and just press
and just control V, and also now select this
one and press control, B, and you can see. Now, just like this one. And if I change the color
so you realize the color of our eye is just to
make it more aggressive, make it I think orange is okay. Now, just. And now
you can change the angle just from here
to see the difference. And just you can see
the eyes of our bat. You just want to make what
kind of eyes, whatever. You have to play these values, and you can also see what these
the more bright you want. I think I want to
make them orange. I think it is perfect. You can also change
this color make it more vibrant and place these values and
these angle you see. And also, if you change the you can Perfect. So that's it for this lecture. And in next lecture, we will try to change the
color of the ear of our bad. So I gave you a task. You can change the color
of the ear of bad. So if you do this, I think the purpose of this
workshop is fulfilled. Otherwise, we will
create next lecture, see you in next lecture.
12. Create Material for BAT Part 2: Welcome back. I hope you have created the color for the ear. Before we are going
to do, we just want to make this color and
just select this one. And from here, just
make it make look like more angry
and just Perfect. Now just again, select the
year and just from here to just create a new slot
and create a new material, and just go to tab and go to pass and make sure you
have selected these faces. And just go to the slot, assign the color
and just from here, change the color to
something, I think purple. Perfect. And from here, go to the diffuse and change the property to
roughness and press tab. Just make sure this
one and this one. Make sure this one
also got the assign. Perfect. So here, the material section
of our bat is created. Now just going to before we are going to
the lightning section, I just slack this one
and delete this light and just create a plane. Just create a plane and
just press as to scale it. I think it is okay. And just like the bad and just D select
this one to plane, hold on control and just press G to bring
the bad and Z to upward. Perfect. Now, select the
plane, and from here, just go to Ta mode,
and from here, just select this
edge, this edge. And press E and then
Z to extrude upward. And now select this edge and press control B and increase the number of
bubbles as you want. Press tab to enter mode and just press right
and shade some mouth. And just change the color of I think something like create a material and just create a little bit color if you
want to bid a little. Perfect. So I think we changed the color, something something more,
I think light or just sky. I think this one is good. Okay. Now, I wrap up this lecture
here and in next lecture, we will create a light for
our bat and then we will start the lightning and camera and finer
render for our bat. So see you in next lecture.
13. Create Lights and Camera for Rendering: Welcome back. In this lecture, we are going to create light
and the camera for our bat. So first thing, just go
here and create and go to the render mode and
make sure your mode is the cycle and just
change the sample to 120. I think it's good and also 120. And if you have GPU, you can select the GPU. Perfect. Next thing, we are
going to create a camera, hold on shift and just go to the camera and just bring
this camera and from here, press Numpad zero and the camera is selected
active and from here, we are just You can also adjust the camera values from here and just press
zero and this 10. And this is 90, I think, and just bring it to the out. And I think just see we are seeing some problems and
make the camera from here, go to make it thousand in
I think thousand is okay. And just bring it to the here. You can also change
the values of your camera by
putting the values. I just put the 45. And I think eight
is, uh, perfect. And you can also
change the shift. Now, next thing, we are
going to add light, press Control A and create an area light and
just from here, go to the front mode and just
bring the light to here. I think that is okay. And then press R to
rotate the light, and that light will pass into
our bat and also from here, go to the top mode
and just press G move the light I think here and then press rotatr and
then move the light here, again switch to front
and just change sorry, just adjust the light
passing again seven and press R to adjust until you did not get
the result. Perfect. Now just make the
value of light, I think f0f3 FF. I think this and color of light. And next thing, make this
one to the 10,000 now, 10,000 is more thousand. And area of light, I would say I think 30 is okay. Ah, yes, 30 is okay. Perfect. You can adjust the
light and you can also change the
color as you like, whatever color you
want you can use. But I use f0f3 FF. Now again, what I'm going to do, I am going to
create a new light, press and just a light, two, and press G to move it here and just press a
little bit move to here. Now press R and rotate
this light, I think, and then press seven top, and then press G to
move I think here, and then press R to rotate. I think that is okay. And then again, press and seven. And again, change the
color of light f0f3 FF, and the area would be 30. And I think the power
would be 3,000 is okay. Just bring it closer a
little bit closer. I think. Yeah, you can see
the eyes of our bat. I just want to adjust
little bit rotate the eyes. So select your cube, your eyes, and now
press if I press R, R, R and just press R and go to here and just
hide the mirror. And if I just press, uh Press then Z, and I can rotate sorry, rotate the a little
bit outward, I think. I rotate into into X. Slack the and on. Now another light
we want to create we are going to create
another light and press Shift A and
just create an light. And now this time we are
going to the right and just bring it bring it to
forward, little bit up. I think now go to the
top top her front. I think I think just here and press rotate
and just from here. I think I am making
some mistake. And just like this one. And now, it's like the
light and the power is 2000 and just like the f0f3 FF. And area is, I think, 50s Okay. Yes. Perfect. Now, just go to your I think render
section and from here, just go to the film
section and from here, just like the transparent, you can see the transparent. But as we have
background behind, and next thing, what
we are going to do, just go to the color
management and from here, just like the filmic and
select the high contras. And you can see our bat
is ready for render. Just press before
pressing the render, press Control S from here and just go to here
and select on this. You can see the image
of our bat is created. Here you can see
the result that we will tweak in our you
can say bonus lecture, and you can also tweak
these are if you did not, then we will see
in next lecture, see you in next lecture.
 Muhammad Umer Najeeb