Transcripts
1. Introduction: [MUSIC] Hi. My name is Harry and I'm a professional 3D artist with over a decade
of experience. I've worked most recently
as a studio director of an award-winning architectural
visualization studio. What you're seeing on screen now are examples of my
professional work. On Skillshare, I
specialize in clear, easy to follow
beginner's classes. We'll go through each
process step-by-step to prevent as much
confusion as possible. In this course, I'll
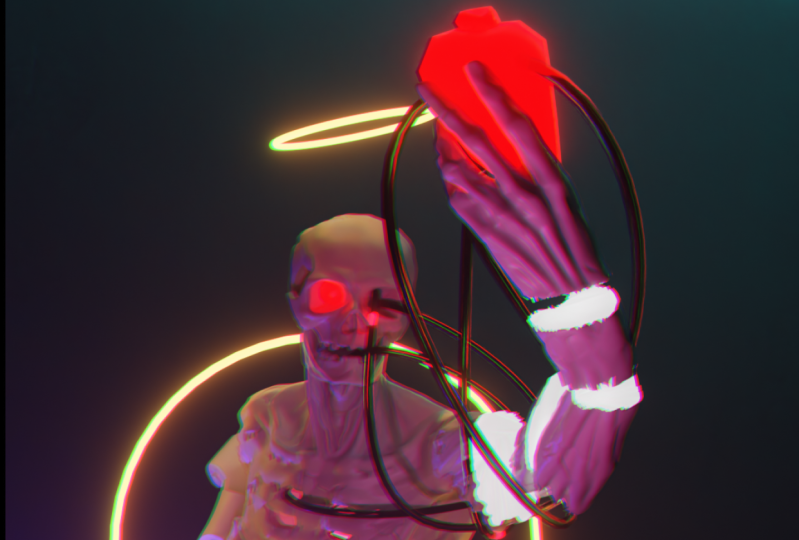
walk you through this simple and beginner
friendly process of creating a vaporwave
style animation. Vaporwave is both a musical
and visual genre of artwork. The visual aesthetic is defined as incorporating early
Internet imagery, late 1990s web
design, glitch art, and cyberpunk tropes,
as well as anime Greco-Roman statues in
3D rendered objects. In this class, we'll
be focusing on the visual aesthetics
of vaporwave to create our animation. We're using Blender
for this tutorial, which is an amazing and
totally free 3D software. The only barrier to entry is having a computer to
run the software on. Creating a heavily
stylized animation loop is a really desirable skill
to have as a 3D artist. However, it doesn't
need to be difficult. Go through the entire process
of creating this animation from a beginner's perspective to avoid as much
confusion as possible. In this class, you can expect to learn the Blender
interface and its tools. We'll be learning about
the many basic tools and interface elements
within Blender while building and
animating our statue. Modeling to achieve our
vaporwave aesthetic, we'll be altering a 3D
scanned Greco-Roman statue. Lighting, we'll be setting up a stylized lighting scheme, including volumetric lighting. Shading, which can give objects the appearance of glowing
neon lights or golden metal. Animating, we'll be creating a subtle animation loop
featuring our vaporwave statue. Lastly, rendering. We'll render our final
animation in Blender so you can share it with
your friends and family on social media. When we're done, you'll have
all the skills you need to create a vaporwave animation
loop of your very own. For our class project,
you'll be doing just that. I'd like you to
choose a new statue from the 3D scans website and create a vaporwave render or animation of your very own. I'll review each project, upload it to the gallery, and give you feedback on
what you've done fantastic, as well as anything that
could use some adjustments. I hope you'll join me
on this fun beginner's journey through Blender by making your very own
vaporwave animation loop. [MUSIC]
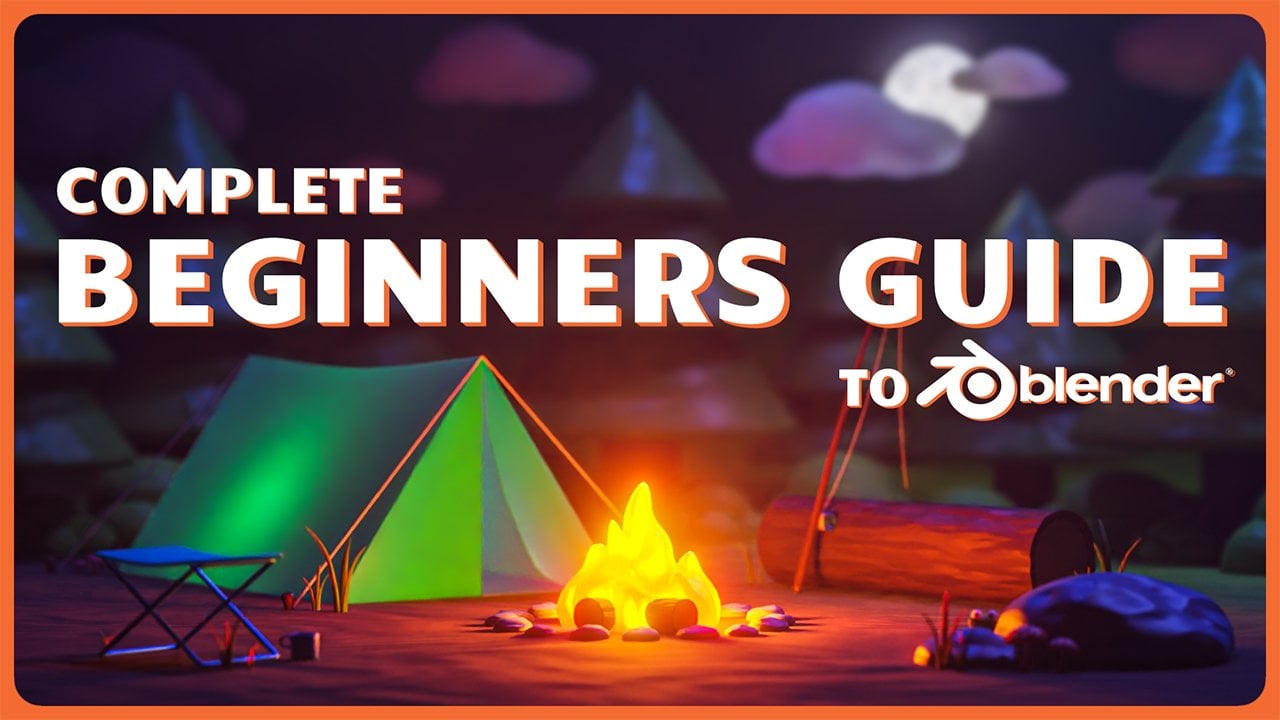
2. Setting Up Our File: If this is your first time
taking a Blender class, I'd highly recommend
you start with my complete beginner's
guide to Blender first, this class was designed for the absolute beginner to
Blender and 3D Art in general, we cover every single
necessary topic in order to get you up to
speed and running in Blender. Accomplish this with short
in-focus lessons that cover each topic from a
beginner's perspective. Utilizing a well-organized
starter file, we end the class within
easy projects where you set up and customize your
very own cozy camp site. With that out of the way, let's continue with the lesson. In this lesson, we'll be
going over some settings to prepare a file for future
animation and rendering. Let's begin this
initial splash screen. Let's start by selecting
the general new file type. Now we're going to go
up to Edit Preferences. And then on the left side here, we're going to look for system. Select that. And then at the top, under
the cycles render devices, you have the option
to check optics. Please highlight
this and then check all the boxes that you see
in this darker area here. So this shows all the
hardware that you have access to to render with cycles. So in my case,
that shows my GPU, which is here, and then
my CPU which is here. So it makes sure you have
all of these boxes checked. You might have more. If
you have, for some reason, if you have two GPUs, you might have two
GPUs plus your CPU. But in most cases you're
just going to have your single CPU and
your single GPU. Check both of those. If, however, you don't
have access to optics, you can instead choose cuda and then just
do the same thing. Check both of these boxes. And again, your readout here will be a little
bit different than what mine says because it's dependent on the hardware
of your actual computer. This is what I have. Yours will be different. I'm gonna switch back to optics because I have the
ability to use optics with those settings done. We're gonna go over here to the animation tab on the left. Then we just need to
double-check down here that your default interpolation
is set to bezier. So by default, I believe
Bezier is the default. But sometimes some, some
settings get changed if you're working on different
projects and it might be set to linear or constant. However, in our case,
we're just going to make sure that
it says Bezier. And if it doesn't,
just click this little drop-down and then
choose Bezier. With both of those
settings changed, we can now close this window. Now we're going to go to the render properties
settings here on the right. So you're gonna want
to select the tab here that looks like, sort of like the backside
of a digital camera. So it should be at
the very top here. Then we're going to change
our render engine from EV. We're going to
instead use cycles. Then we're gonna go down here. We're going to
change our device. So right now it's set
to only use the CPU. However we want it to use both. So we're going to
choose GPU compute. Going further down. We have our viewport
samples here. So we're going to
change this from 1024. We're going to set
this to 100 instead. Then we're going to check
the de-noise button here. We're going to twirl this open so we can see what
the settings are. We're going to change
the D noise or type from automatic to optics. Instead. Optics is just going to
be a faster de-noise or the Open Image T noise
or is higher-quality, but it's a lot slower. So we're going to
use optics instead just for the viewport
because it's, we're more concerned about speed and our de-noising
for the viewport. So we're just going to
choose the faster option. Now we can scroll down here
to the render settings. We're going to set our
noise threshold to 0.03 and then hit Enter. We're going to change
our max samples from 40, 96, all the way down
to 100 as well. Then UNAR denoise settings here, it's already checked on by
default, so that's good. But we just want to make
sure that our D noises or for our render settings. So specifically when we're
making our final render, we wanted to use the
Open Image de-noise or as it's design or
user type instead of the optics because it opened image denoising
or it's going to give us a nicer cleaner image at the cost of a
little bit of speed. So going further down this list, we're going to open
up light pads. It says we can see
here all these numbers are set to different values depending on what
the light paths and bounces are being used for. Now by default, these
values worked pretty fine. However, for our animation, we want to speed this
up as quickly as possible because
we're going to be rendering a lot of
different frames. We're going to actually
just click and drag on the top one and then go down to the bottom so
it highlights all of them. And we're just going to type
in one and then hit Enter. So we're going to
make all of these use only in one single balance. And that's because
we're making a really pretty simple scene. We really don't need all these different calculations
going on is just going to slow down our render speed more
than it needs to be. Really won't affect
our image much because our images so simple
and stylized. In this case here we're
gonna be using one for every one of the values here
under light paths. And then the last thing in the render properties settings, and we're going to scroll all
the way down to the bottom. We're going to go to color
management. Throw that open. Then by default, it's usually set to filmic, but if it's not, switch gears to filmic, then under look, we're going
to choose high contrast. So you won't see
any change here, but this will make a
difference once we're making our renders and actually messing with materials and lighting, it's going to give our
scene just by default, a higher contrast look than what is the typical
starting point. And that's going to
just accentuate some of the details that we're
working with in our scene. With that last render
setting changed, we can now go to our
output properties, which is the next tab
directly below it. It's this little,
sort of looks like a little printer printing
out a little photo. Then we're gonna go
up here to the top. And we're going to
change the resolution of our render from the standard 1920 by ten at
which is just standard HD. We're gonna make this
a square instead. So we're just going
to type in ten at the top value that we, our camera and our output. And you can actually
see here, our camera has changed shot her shape here. It's changed into a square now, so it's attending
it by 1080 square. And then we're going to
switch our frame rate down here from 24, which
is the default. We're going to make
it 30. So that's a little bit smoother
for our animation. Now the very last thing we
need to do is actually saved this file because all
these changes that we've made our
local to this file. So if we just close this down, Blender is not going to remember these settings that
we've changed. So we're going to
save this file. That way we can come back to
it for the future lessons. And we can always work in this file that has all
these changes made to it. So we're gonna go up to File, then Save As, and then utilizing
the drives on the left. Or if you want to save
it in your documents, navigate to a folder or location that you'd
like to save your file. And you wanna make sure that it's a place that you
know where it's at and you can come back to it because you
don't want to lose your file after doing
a bunch of work on it. I've navigated to where
I'd like to save my file. And then on here, I can just
change the name of this. So I'm gonna switch this
to Vaporwave Animation. I'm gonna put underscore
01 at the end of it, just in case I decide to
version this file and branch it into two different
versions of itself. I know that this is the
first version and then O2 would be possibly
my second version. So with this named, I can now just choose Save As. And it will save the
file in that location. With all of these
settings changed, we're ready to proceed
with the project. The next lesson, we'll be downloading and
importing our statue. I'll see you there.
3. Importing the Statue: In this lesson,
we'll be downloading our statue model and scaling
it to the correct size. Let's begin. We're
going to be using a really awesome website
called 3D scans.com. The site features
real 3D scans of classical statues and artifacts
from throughout history. Although the models on
this site are free to download and have no
restriction on commercial use. For this tutorial,
we'll be working with the statue Aphrodite
by practicals. I've included this 3D file
in the project resources. You can download it there
if you'd prefer not to interact with the
3D scans website. Now that we have our
statue downloaded, let's go back to
Blender and important. Before we begin, Don't forget to open up the blender file that we saved with all
of our settings changed from the last lesson. That's the file
will be working in. We'll need to make sure
that we're able to import the file type
for the statue. So let's make sure that we
have the correct add-ons enabled within Blender. First we're going
to go up to Edit, and then down to Preferences. Now we're going to go over to the add-ons tab
here on the left. Then in your search bar, we're going to type in S, T, L. Then we want to enable this
import, export STL format. So we're just going to
make sure that this little checkbox is checked on. If you already had
it turned on by default grade than you
already done with that. Once you have this one checked. Now in the search box, we're going to type in 0 b, j. Then we're going to enable the import export
wavefront OBJ format. So make sure that
that's checked on. Then lastly, we're
going to type in F b x. So then you want to make sure
that FBX format is enabled. With these three file
formats enabled, we shouldn't be able
to import any of the statues we find
on the website. We can now close this box. I'm gonna go up to File Import. Then we're going
to import and STL file because that's what
the Aphrodite file is. We're going to click STL. You'll navigate to where
you saved the Aphrodite dot STL file from the
project resources. This is the file we're
going to be importing. So they've gotten select that file them before you hit Import, we're actually going
to mess with some of these settings over here. Now some of these
things you won't know until you import it, because you don't know that it's wrong until you've imported it. So I've imported this,
figured out what the settings are that are correct for these settings here. And we're just going to type
those in now, by default, this statue is going to
Import really, really huge. So we're actually going to
make this a lot smaller. So in the scale, instead
of leaving at one, we're going to type in 0.014. That's going to make
the statue a much more manageable and realistic size. Then in the forward, so where it says y forward, then they up or it says Z up, we're actually going to
change the z up from z up to negative y up. When you change that,
it's going to change the forward as well because
these are linked. So make sure you have 0.014, so it's X actually
truncating this, it is 0.014 here. It's just cutting
off that last value. As long as you typed
it in correctly, it's still using
the right value. Then under the up value, we're going to change it
from z up to negative y up. Then with these changed, we can now hit Import STL. Now you'll notice
that the statute has been imported after
a small weight, but it's inside the default
cube and it's off center. So let's try to fix that now. So the first thing we're
going to do is select the default cube and then
just hit either delete or x, whichever you prefer,
and delete that cube. Now we can select our statue. We're going to zoom in here so we can see our
statue a bit better. Then up at the top
here, viewport, you're gonna go to object. Then you're gonna
go to set origin. Now you wanna do
geometry to origin. So this is going to
move our geometry to the origin which is
currently off center. So this little orange dot here, it should be in the
center of our model. However, due to the
import process, it's kinda moved off center
and you'll find that a lot with STLs and OBJ files and FBX, a lot of those are created
in other programs and then our imported in as a sort
of a universal format. But it doesn't always
mean that the pivots and the origins
come in correctly. So we're just going to fix
that now by going to Object Set Origin and then
geometry to origin, which will move the geometry
to center it on the origin. And now it's centered
within that statue. Now let's switch
to our move tool. And we're going to move this up so that the bottom
of the statue is roughly with the origin
of the floor here. So we're gonna put
it at roughly zero. We can just switch
into our front view here by either
holding down tilda, which is the sort of like the little squiggly
line next tier one, and it's above your tab key. If you hold that down,
it brings up this, this radial menu here. I'm going to choose Front. Now I'm just going
to zoom in here. Then just drag this
up so that it's kind of sitting
on this red line. We're going to consider that
the floor of the scene. So we want it to sit and
roughly on the floor, it doesn't have to be perfect. Another quick way
you're able to enter that sort of flat
view that we were in. The front view is just clicking on one of these
little dots up here. So in this case we would
click on the negative y. That'll just show
us the same view that we were in before that we can get into using
the tilta key. We just click it. Then we can hover over
view and then click front. This both do the same thing. Then the last thing
we wanna do is just to right-click on this statue. We can see here it
has all these kind of nasty lines all over it. We're gonna be able to smooth
this out just a little bit. So we're going to right-click
and then choose a shade smooth because by default it
imported with shade flat. Now it didn't get
rid of everything, but it did get rid of
a lot of that sort of lines we were seeing
across the forehead. And for our purposes, it really doesn't matter
that the statue has like absolutely perfect
smooth geometry. We're going to be seeing it from a distance with our Render. And we're also going
to be doing a lot of visual distortion to it. Achieve that vapor wave look. It doesn't matter that we have little bits of lines
and stuff here. It's gonna be all
sort of secondary to the animation with
your statue imported. Make sure you don't
forget to save your file. So you can just go
up to File Save or you can hit Control
S on your keyboard. Now that we have our statue
imported and centered, we're ready to proceed
with modeling. In the next lesson, we'll be cutting a slice from the center of the statue to allow for
some interesting lighting. I'll see you there.
4. Slicing the Statue: In this lesson,
we'll be modeling a slice out of the center of our statue to accomplish a typical vapor wave
aesthetic, let's begin. The first thing we need to
do is select our statue. Then we're going to hit
Tab to go into edit mode. Now that we're in read mode, you can hit three
on your keyboard, or you can click
this little icon up here to switch into face mode. Now let's switch
into our front view by holding down the Tilde key, which again is next
to the one key on your keyboard
and above your tab. You can hold that down
to bring up this menu. Or you can just click
this little green dot here and the negative y. And that'll put you
in the front view as well. I'm gonna choose front. I'm in my front view. We currently have the
entire statue selected, so I'm just going to
click off of it to make sure it is not
selected anymore. Then I'm going to hit Alt and z at the same time to
go into X-Ray mode. You don't have to follow
along for this part. I'm just going to explain
exactly what x-ray does. So by default, without x-ray on, when I drag select
across a model, it'll select the faces that
itself from the front. But it doesn't select
the faces on the back. So you can see here it
kinda just scattered the selection based on what
was visible from that view. Now if I switch into X-Ray
mode by hitting Alt and z, the model, the appearance
looks different now, which we're actually
seeing through it. It's a little hard to tell when the density of this model. But down here you can actually
see it relatively well. That's no x-ray. And this is with X-rays. I'm actually seeing through
the model slightly. However, with x-ray
mode turned on. Now when I drag select across
the model by spin around, you can see it actually selects all the way through the model, which is important for
our slice because we want the slice to go
completely through that. So I'm gonna go back
into my front view, hitting Tilda and
then going to front. Now we're going to choose where
our slice is going to go. The slice we make is actually
going to be cut out of right around here throughout
the center of the head. So we're just going to start
by clicking and dragging. And we want to start our
selection somewhere here. And now we have to
start off the edge to make sure that we select all the way through the model. We want to be about
horizontally where this is. So in the middle
of the nose here, and it's just below the eye. We don't want to get any of
the eye and our selection, we want about the bottom
half of the nose. And then we're gonna
go down here and cut the chin in half as well. So we'll just try to
rough it out here quick. And if you go too
high, that's fine. We can adjust this selection
here and I'll start there. And I can tell I went
a little bit too high. I can see as I zoom in, I went into the eye. So the way to adjust that
is to hold down Control. And then drag out
a new selection. And now whatever you
use, drag select over, you're gonna do de-select. So we can see they're
holding down Control and then dragging
selection out again. I'm now able to chip away at the selection and make sure
I only get what I want. I'm going to keep inching
this down just a little bit. I think around there's good. The chin is pretty good. I don't think that
needs to move too much. Just clean that selection
up a little bit. Again, holding down Control
to delete from the selection. Now if we did the opposite
and you selected too little, you can hold down Shift and drag out another selection and that will add to the selection. If you had the
opposite issue where you didn't select quite enough, hold down Shift and then drag out a selection
to add to it. Now that we have
our selection made, we can hit P on our keyboard. Then we're going to
choose separate. And then we're going to
choose selection here. So separate by selection. And then when we hit that,
it'll freeze for a second. But then the modal response. And we can see here
that we've actually broken the model
into two pieces. So what we've done is we've cut out that slice that we made. We've separated it off into a
completely different model. Now if I click this
little eyeball here next to the Aphrodite 0.001, it will actually delete. Well, it doesn't
delete it. It hides the part that we
separated off of it. So now we can see
that we actually have two separate models. I'm going to rotate around here. That's the slice that we
removed from our model. Then here's the slice and
it's added to the model. You can now hit Tab
to exit edit mode. Now that we have
these two pieces, Let's rename them so that
we know what they are. Let's select the original base
statue that we have here. The part that we just
cut the part out of. We're going to double-click
on the name up here. We're going to type
this statue base. So we know that
that's the base of our statue isn't then
we have statue base. And then for the slice, we can just double-click
that and call that statue slice. Then hit Enter. Now that we're done
selecting through the model, we can hit Alt Z to turn
off the X-ray mode. That way it's a little
bit easier to look at With your statue slice
selected the center part. We're actually going
to start offsetting this to kind of play into that vapor wave aesthetic that we've seen in some
of our references. So we're actually going to slide this back with our move tool. So we're going to grab
the y handle, the green. We're going to slide
it back to about here. So basically the
ridge of the nose is following the crease
where the I is. So we have this offset now. Then we're going to spin
around to our front view. We're going to slide
it to the right. That the nose and this I
line up almost like it's a, like a cyclops or something. Now we can see here that
we have this kind of shifted glitchy looking
Central Park to our Statue. One, this adds to that
sort of vapor wave aesthetic that we've seen
in some of our references. But it's also going
to allow us to add some interesting
lighting and emanating from the statue
itself in a further lesson. Now with our slice offset, we'll notice that
we now have a whole exposing the fact that our
statue is actually hollow. We're going to fix that now. So let's start by
selecting the statue base. So the large piece, we're going to hit Tab
to go into edit mode. Now we're going to hit two on our keyboard to switch
into edge mode, which is this button here. Now we're going to select
this edge up here, and we're going to
flatten it and then fill it in with a polygon
so that it looks like the statue is still solid even though we
cut a piece out of it. The first thing we're
gonna do is just zoom in on your statue here. Just find a spot here
where it's easy to differentiate where the edges. So in my case right here, I can see that this
is the edge of the sort of polygons,
the faces here. I'm going to hold down Alt on my keyboard and then
left-click on this. So we can see here
that it's selected a small line or line
of polygons here, what phase are the edges rather the edges
of these polygons. However, it didn't select
around the entire thing. So I'm gonna hold Alt
and click it again. Click that same
exact highlighted area that we had before. Click it a second time,
and now it will select the entire loop of
this border here. Now we can see as
we spin around, this orange line goes all
the way around the bottom. Which is important because
for our next step, we're now going to be
flattening this out, so it's not quite so jagged. Now let's go back
into our front view. Again, we can either use this little green dot up here and by clicking
the negative y bubble. Or we can hold Tilda and
then just choose front view. Now we're going to zoom in here. We're going to switch to our
scale tool here on the left. Now I've switched
to my scale tool. We're gonna be using
the blue handle, so the z handle to
scale this down to the point where
it's basically flat. So we're going to do
this in multiple parts. That will be don't oversell it. But we're just going to start by clicking this little blue handle here and scaling it down. So you can see as we do that
it gets flatter and flatter. I would scale it until
it's just about flat. You can still see a
little bit of the wiggle around the worst part
of the polygons. So scale it to about there. Stops scaling it, and then
go back and scale it again. So now we'll move a lot
slower as you do this. If you do it in smaller steps, you don't have to worry about
over scaling it and having it turn inside out on itself. I'm just going to scale
it a few more times until it looks like
it's pretty much flat. I'd say that's pretty good. To the naked eye here.
That looks pretty flat. It might not be perfect, but it's very close. Okay, so now we
can rotate around. See that our model is nice
and flat here on the bottom. Then the next thing
we're going to do is just hit F on our keyboard. We're going to hit F. Computer
will think about it for a second and then it's
going to fill it in with a nice flat polygon
here on the bottom. Now let me zoom
back a little bit. Now it looks like
our statue just had this like perfect
laser cut through it. But there's still stone and things like that
underneath here. So now it's not hollow. You'll notice areas here
around the edges where the vertex kind of
collapsed in on themselves. If there's some areas
that are really, really bad when your model, now, it'll depend on where
your selection was. There's no real
way for us to have the exact identical
selection because you would have selected a pixel
higher or pixel lower, so your edge might look
better or worse than mine. The only way to fix that, an easy way to fix
that rather would be just to select some
of these vertex here. If it's particularly
bad in one spot, just switched to your Move Tool and then just slide
them left or right. Now you might find that some
move it more than others. Some fixed the shading
a little bit better. But you can see that
was really easy to fix. And this really isn't
necessary on the entire thing. And I wouldn't even say it's necessarily even
on just the front I would only fix this if one, it really bothers you. And two, if it's really bad. If it makes a huge black line or something down the
front of your model, then I would try to just grab these vertex here
and just move them. Try to figure out which
way they're tangled up. So this one here, I could
tell it was tangled up a little bit too far
into the left, so I just moved it to the right. But our model for our final render is going
to have a lot of different like glitchy effects and distortion and
chromatic aberration. And it's going to be moving and the lighting is going
to be contrast the, so these like little tiny
imperfections that we're seeing in isolation when we're just looking at the vertex, That's going to pretty much all melt away for our final render. So I wouldn't suggest spending too much time fixing these
things because they're really going to be
either completely invisible or super
minimized. For the final. I'm going to switch back
to my edge mode now, hitting to numb back in edge and we're just gonna do the same process
here to the bottom. I'm going to zoom in, find
a nice spot to select. Hold down Alt, click one
spot here you can see it selects a few of these
different edges here. And I'm just going to hold
Alt and select it again. And now it'll select
the entire thing. You just have to make sure
when you're selecting it the second time
that you're holding Alt down and you're selecting a part that
was already highlighted. So now that it's
selected all that, I'm gonna go back
into my front view. This time I'll just click
the little bubble up here. Switch to my Scale Tool. Scale it just in the
blue z-direction. Scale almost flat, stop for a second and
then go back to it. And now it'll move a lot slower. I'll just probably do
it three or four times here just to make sure
it's pretty much flat. So it looks pretty flat. And now I can rotate my camera. Hit F on my keyboard to fill. So F will fill this in. Now we can see here
that it filled it in. However, this doesn't look nice and smooth like
the other one did. That is because the shading
here is getting confused. It didn't know that it
should have been flat here. And it's just tried to smooth
it out and make it rounded. But since it's basically flat, that rounding looks
really, really bad. There's an easy way to fix that. Now, luckily, I didn't
have that issue here. But if you did,
this is your chance to fix it on the
top one as well. So we're going to switch
to our face mode by hitting three on our
keyboard or clicking this. And then with this
face selected. So I can see here I
have it highlighted. I'm just going to right-click
and then go to shade flat. When I choose shade flat, it's nice and flat again, just like the top was. Now if your top one also
had the same issue, you would just select this
right-click, Shade flat. Now we have nice flat tops and
bottoms for both of these. Now we can hit tab to exit our edit mode for
the statue base. Then we're going to
select the statue slice, hit tab again to go back into the edit mode
for this model. We're just gonna do that
same process quickly to the cap off the top and
the bottom of this model. So again, tuned to go
into our Edge Mode. Zoom in, hold down Alt, select an edge, hold Alt again, and select the
highlighted edge already. That'll select the rest of it. When I go into my front view. Then scale it down. You can see if I
scale it too far, you see other edge is kind
of like invert themselves. That's what we're
trying to avoid by doing this multiple times. So I would just scale it
down until it's almost flat. And then just a couple
more times quickly, stop once it looks
visually flat, Tia looks pretty good. Hit F to fill this in. Again, this one here did
the same thing where it's not quite sure
that this is flat. I'm going to switch
to my face mode, right-click Shade flat. Now I can go back
to my edge mode, hitting two on the keyboard
or just clicking this icon, trying to show you a couple
of different methods here. So sometimes I click it, sometimes I just hit the
button, but both work. Now we're gonna go down
here to the bottom. Select this edge, hold
Alt to select it. Select the small chain here, Alt to select it again to
select the whole thing. Then we're going
to scale it down. Again. I'm going pretty
fast here because this is at this point the fourth
time we've done this. So just scale that flat. Then zoom out it
F to fill it in. Again, this one wasn't
quite sure it's flat, so we're just going to switch
to the face mode again with three shade flat.
And now we're done. Now at this point, like I said, if you look at your
model here and you see these little sort of
darker shaded areas. It almost looks like the statue was chipped away
at on those edges. I really wouldn't worry about it unless there's like a huge gouge out inside the face somewhere like there's
a huge cut inward. I would try to fix that
because that'll catch shadow. But these little micro imperfections are
seeing on the edge. You're really not going to
notice those in the animation. So I would not waste
your time fixing them because you're not going
to get them perfect anyway, because this geometry
is a little bit messy because it was a scan. So it's gonna be really
difficult to smooth this stuff out
efficiently anyway. And you're just
gonna kinda drive yourself crazy trying to fix it. I would just leave it as it is. Unless, like I said, those are huge gouge
here or you just really want the practice of
trying to smooth that out. Now we can hit tab to
exit the edit mode. And now we have a slice
cut out of the middle of our statue that is completely
free to move on its own. That I can Control Z to put
it back to where it was. Now that we've
altered our statue with a slice through the middle, we're ready to add some
interesting floating elements surrounding it. In
the next lesson. I'll see you there
5. Adding the Rings: This lesson, we'll be adding some interesting floating
elements are under statue to add some life to
the background. Let's begin. Let's start by organizing
Our File a little bit and setting up
our camera position. Drag select over both
parts of your statue. So you can get the statue base as well as the statue
slice selected. Now hit M on your keyboard
for move to collection. And then we're
going to choose new collection for the neon here. We're just going
to type in statue. Then we can hit, Okay. And we can see here that it
moves both of those pieces in their own collection
here called statue. We are going to, once you select this little white box next
to the word statue here, that way any new models we create by default
will be created in the statue layer rather than the collection
that was defaulted. The original collection up here, we're just going to
double-click on. We're going to call this
render scene. Then hit Enter. Now we have two
different collections here, ready for organization. And make sure you have your
little white box next to statue selected and might have defaulted to
render scene again, once you've double-clicked
on its rename, it, just make sure you have statue highlighted here, the
little white box. And then we're ready to proceed. Now we can position
our camera that way. We know when we're placing
these floating elements, whether or not there'll
be in camera view or not. So let's just click
this little icon here. And it looks like a camera to below this little white hand. Right-click that. And that's going to
put us in the view of the camera that we
left in our scene. Now by default, when
you're inside a camera, you aren't able to rotate
your viewer anything. If you rotate, it actually jumps you outside of the camera. So you can see our camera here
remained where it was at. So by, by default, and again, we won't
be using this here. But you'd have to actually
move your camera by hand, then rotate it and try to
align it up to your scene. Now I find that
relatively tedious. So I'm going to Control
Z that instead, when we click this little
camera button here. So we're inside our
camera right now. We can hit N on our keyboard
to bring up the side menu. We're going to go down to View. And we're going to click
this little box here. And that's called
lock camera to view. When we check this. Now when we rotate our camera, it actually leaves us inside. The camera, doesn't jump us out. And now we're actually
changing the position of the camera just by rotating around and moving just like
we're used to one more inside the viewport modelling. Now we can just kinda
position our camera how we'd like our case here. I'm just going to
zoom in a little bit. Kinda centered up. We
want to look straight down the front of the statue. And we're going to
be adjusting the, the values here once
we get it close. Just about centered me
zoom in a little bit. I'm going to go up to
the item tab here. So actually before you
switch the item tab, uncheck this camera view because if we don't
uncheck this, next time we go to move our
camera to rotate around the viewport to change some of the Modeling or adjust the Rings we're going to be Adding. We're going to actually
move our camera. And it's going to
be out of the place that we decided to put it in. So we don't want that to happen. We're going to uncheck this. And now when we rotate it, see it leaves the camera. Whereas ad, just
like it was before, I'm going to jump back
into my camera here. Now, go to the item tab here. And with our cameras selected, we're going to just summon
the rotations here and the locations to make sure that
your camera matches mine. So by default, we're
going to go up here. We're going to go to
the X and we're just going to type in zero. Then we're gonna go to the Y. We're going to type in
negative 2.3 that hit Enter. We are working in meters here. So if you're not
working in meters, your values are gonna be
a little bit different. With a Z, you can type in
0.57 and then hit Enter. Then for our rotation,
we'll type in 90. That way it's rotated nice and vertically and it keep
it nice and flat. And then for both these values, we're just going
to type in zero. So now if you've typed
in these values here, you should have the exact
camera angle that I have. And let me can hit N,
tied this side menu. With our camera positioned. We wanna make sure that we can always see what our cameras sees while we're
placing these elements. So we're going to create
another view port here on the left side
that we're going to dedicate just to seeing
what the cameras sees and then we're gonna
do work in the right side. So to do that, we're
gonna go up here, it's at the top-left, right below the
Blender logo here. And we can see when
we're in this corner or mouse changes into a plus sign, we're going to
click and drag that We have our houses a plus sign. If we drag it out to the right, we drag out a brand new
viewport here on the left. We're going to stop
it about there. If you want to change the
position or the size of this, you can always just
adjusted after the fact by hovering
over this center line, waiting until it turns into
arrows and then moving it. Now that we've done that, we
have two separate viewports. This one, we're going to
make it a little bit bigger. We're going to zoom in so we can see what
our cameras sees. And then on this side here, now we can rotate our camera. So we can see around
here and then we can continue modeling
on the right side, we'll still seeing
what the cameras sees here on the left. Now with this done, we
don't really want to see this camera here
floating around in our viewport because it
kinda gets in the way we might accidentally
select it or move it. So we're just gonna
go up here to the top-right and then
click this little eyeball here to hide this camera
that you can see it didn't do anything to the
view cameras still there. It's just invisible right now, which means we can't select
it and move it by accident. Now let's create
our first element, which is going to be a floating
ring circling the body. We're going to work in
the right side here. We're going to hit shift
and a and then go to curve. Then choose circle. So when we choose this, we'll see a circle popup. However, don't click off of it yet because we want
to go down here to this option box,
twirl this open, and we're going to change
the radius of this right away from 1 m down to 0.8 m. So we're
just going to make it a little bit
smaller that way it fits our statue a bit better. With that done. Now we can go up here
to the top-right and we're going to
rename this from Bezier circle to
instead ring body. Then enter because
this is going to be the ring that circles
the body of our statue. With this Rings still selected. We can go down here
to this green symbol, which is the object
data properties for this Bezier circle. We're going to change
some settings here. We're going to start
by changing the resolution preview here of this. So from a distance it's hard to tell that this isn't
nice and smooth, but as we zoom in, we can see here that this circle has sort of jagged lines on it. It's made up of not
very many vertex, which means there's a
lot of flat spots in it. So to make this nice and smooth, we're going to change this
12-50 instead it enter. And we can see here that
made it a lot smoother here. So our ring will
be nice and round. Now we can scroll down here. We're going to go to
geometry, throw that open. Then we're going
go down to bevel. And then under bevel and
we're going to type in 0.01 and then hit Enter. That will give our ring here, which by default starts
out kind of invisible. A curve itself is not visible until it has geometry
applied to it. So by increasing the bevel, we've added geometry now
that is just a circle, your circular tube that
goes around this curve, which now makes it visible. Now I can see here that we
have an actual ring that is visible on our scene
with our ring created. Now we just need to position it around the body of our statue. It's, we're actually
going to try to do that here on the left side because we're actually seeing it from the camera's point of view. So let's start with
our Move tool on. We're just going to move
this up around here. Now this is gonna be
a little bit of trial and error to get this
to match exactly. So don't worry if yours isn't
perfectly matching mine, just try to get it
as closest you can. It's random. Move it
up to about the neck. We're going to switch into
our Rotate tool here. Just going to rotate this down. I'm going to rotate
it to the right now. And again, this is all
just by feel by I. So just try to get yours to match as close as
you can do mine. We're just going for a ring
that is at an angle here, sloping down to the right. And we wanted to frame
these, the shoulders here. We can see here that I'm leaving this kind of even gap here above the shoulder
where the Rings leaves a gap here and
goes behind the head. I think the ring overall
is a little bit too large, so I'm gonna scale it
down just by hitting S and then dragging
it down a little bit. Looks like I'm scaling
it down to about 0.91 and I can tell that up
at the top-left and Michael, top-left screen,
it says 0.9 175. And again, this is just me. I hang it up here. So about there. I think I want to rotate
it just a little bit more in the x-direction. Then we'll move that up. So as long as your ring
looks something similar to mine, you should be fine. I really wouldn't worry about
it being exactly perfect. It just needs to have a
general look to this. If you'd like to
follow along with me exactly the values
for this ring here. So if we add the Rings
selected and we hit N to bring up our
side menu here, run the item tab. I have Z location is 0.5
to E. X rotation is 16 Why is 18? Then if we go down to the scale, all three of these
are sets of 0.9. And the way you can
change all three of these is just to click
on the first one, hold down your mouse and
then drag to the bottom. I'm just control Z that click and drag is you have
to do a little bit faster if doughnut too slow
for the sake of the example, then you can change
all of these are the same time. I might have 0.9. I'm gonna hide this
menu now by hitting N. Now we're ready for
the second ring. To make the second ring, we're just going
to hit Shift and D with our current Rings selected. That will start the
duplicate process, which now we can just
hit the right-click to snap it back to where it was. We still have a duplicate here. It just snapped it back
to the exact position that we duplicated it from. Now we're just going
to move it up. We can start now
matching it to the head. So by default, this one is
gonna be much too large, so we're just going to
actually scale this down. I don't mind the fact
that it's getting thinner as it gets
smaller as well. I think that works
fine for the head. We're going to scale
it down to about here. Again, once I'm done
here, I'll give you my my exact measurements if you want to follow
along exactly. Otherwise, just watch what I'm doing and try to
match it visually. I'm gonna move this
up to about here, which is kinda like
in the center of the headband that she's wearing. We're going to rotate it
to the opposite side. So we have a little
bit of difference from the top and
the bottom ring. Then I'm just going
to rotate this down a little bit so that it's lower in the front of the
head than it is in the back. Just keep tweaking it here until you get something
similar to mine. I think my ring is a
little bit too big still. I'm pretty happy with this. We'll rotate it just a
little bit to the side. Flatten it out a little bit. Okay, I think I'm done
tweeking it here. Just like the last string, if you'd like to
follow along with the exact dimensions
that I have. The X location is
negative 0.02 m. Z location is 1.15 m. The
rotation for the X is 19.5. Y is negative 16.5, Z is negative 1.12. Then the scale for all
three of these is 0.59. And then before we forget and
let's rename this new ring. So we're just going to call
this one ring head instead. Now we have ring body
and we have Ring head. Will eventually be
Adding spheres to these Rings that
orbit the statue. However, that process
will be easier to explain it when
we start Animating. We'll hold on that for now. In the next lesson,
we'll be adding the last floating elements
to the background and learning a little bit about the lattice
deformation modifier. I'll see you there.
6. Adding the Grid and Eyes: This lesson, we'll be adding a warp grid behind our statue, as well as geometry
for the eyes, which we can easily
shade in the future. Let's begin. We'll start by adding our plane. So we're going to hit shift
and a recording go to Mesh. We're going to choose plane. So it's created the
plane here, however, we want to adjust the dimensions before we close this option box. So let's start out here by
typing in 2.7 m for the size. And then we're ready
to click off this. Now that we have our plane here, we need to rotate it. So we're going to
select the plane. We're going to hit R for rotate. The Breanna hit X so that
you bind it to the x-axis. And then we're going to
type in 90 on our keyboard. Then we can hit Enter
to confirm that. That's just a really
quick way to rotate it. 91 the x-axis. We're gonna go over
here to the top-right and double-click the word plane, and we're going to rename
this grid instead. Now let's get our
plane in position. It's actually going
to be using both of these viewports here to get
the plane in the right spot. So we're going to be moving
it on this right side here, but we're gonna be
paying attention to the left side
because this is when our cameras actually seeing. So let's start out by
just moving this back. We want to move this back until the plane is about,
about that size. However, right now it's offset. So we're going to slide
this up and we're trying to frame this
statue with the plane. So about there it looks okay. I think it's still too big, so I'm going to slide it
back a little bit further. I'm thinking you're
right about here. It looks okay. Now I don't want to move
it at all in the X, so I want to make sure
it stays perfectly centered in the
left and the right. But I can move it up and
down with the blue and then backwards to make it
smaller here with the green. So as long as you're
playing here, it looks about about
similar to mine. So it stops just shy
were the head is here, so there's a little
bit of a gap here. And a pretty similar in terms of its distance gap
here on the bottom, where it runs to the
bottom of the statue. If you'd like your
plane to be pretty close in position to
where mine is that we can hit the End key with the plane selected and
then go to your item tab. And then these are the
measurements reminds you don't have to do
the exact number here, but three-point
one for the Y and 0.59 for the Z should get you pretty
close to what I have. Now with your plane selected, we're going to hit Tab
to go into edit mode. We're going to hit to, to
switch into our edge mode. Now with all of our edges selected and we can
just drag select over them or you can just hit
a which will select all. Now we're going to
hit the right-click, and then we're going
to choose sub-divide. So when we click
this, it's going to bring up this option box. And sub-divide is going to
allow us to cut this plane up into a bunch of
different smaller pieces. Right now it's just
putting a single cut from here to here. I'm here to here. But as we raise this number, we can see we start adding
more and more cuts. This is how we're
actually going to get the look of our Grid. So this is determining the size of the Grid that we're
going to create. I think ten is probably
the best number for this, but this is a matter
of preference really, if you want to follow along
exactly, I'm using ten. But if you want your
grid to be a bit smaller or a bit larger, just use a smaller number for a larger grid or a larger
number for a smaller grid. We're going to
leave this at ten. Now we can hit tab to
exit our edit mode. We can see here that the, visually these lines
have disappeared, but they are still there. So we don't have to worry
about them going away. Now let's turn this
into an actual Grid. We're gonna go over here
to our Modifier tab, which is this little blue wrench icon with our plane selected. Then we're gonna go
through our modifier. And we're going to
choose the modifier here at the bottom
called wireframe. When we click this,
you can see right away it turns into
an actual Grid. And what this is doing is
it's essentially just drawing geometry over top of the
lines that we created. So you can see here as if
you sub-divide it at less, you would have a bigger Grid. Or if you subdivided it more, you'd have a much smaller
Grid because it's just using the number of lines
that that plane had. And creating geometry
on top of those lines. We're going to adjust just
a couple of things here. We're going to first
set your boundary. So we're going to check this on. We can see here as we
zoom in on the edge, when we check boundary, it just gives it a little bit
more geometry on the sides. That way it's the
same thickness in the middle as it is on the edge. Because without this checked, it only does a half
of the geometry on the edges will check that on. So we have all the
geometry around it. Then just double-check
that your thickness started at 0.02 m. Now mine defaulted to that. I'm not sure if yours will. It might inherit some number from a different parameter
that we've set up So just make sure
that yours is set to 0.02 m, then you should be good. Now that we have these
things set up here, we need to actually apply this
because we're going to be doing some further
adjustments after this. We can't have this modifier
working in the background. We need it to be baked
into the model that well, we can work with
its current results and then edit them further. So we're just going to click
this little drop-down here, this little down arrow next
to this little camera. And then we're going
to choose apply. Before you hit Apply though, just make sure you have all
your settings. Correct. Because as soon as you hit
apply, these settings go away. And now this model
is baked into this, this configuration where
it looks like a wireframe. The Grid selected, we can
now hit tab again to go into edit mode and make sure you're in
edge mode with two. Then we're going to hit a on
our keyboard to select all. So just hit a and it'll
select every single line. Then again, we're going
to be subdividing this. So the reason we're
subdividing this is because we plan on warping this. In the next step. Can in order to warp this
and get nice smooth lines. It's similar to the way we increase the number of vertices, the number of steps
on these circles. So when they have
very little steps, it's hard to get a smooth line. Right now, this Grid has very
little steps and you can see these areas between each of these grid lines
have nothing in them. There's no vertical
cuts in these. We're gonna be doing
here is just adding a whole bunch of
vertical cuts to this. It's going to be a
little bit messy, but since it's such a
far background element, it's not really going to matter. We're just looking for enough geometry that when
we start warping it, the warping and looks
nice and smooth. With all of these edges
selected using the a key. You can now right-click. And we're going to
choose subdivided. And then this one here,
instead of doing ten, we don't need the
nearly that much. We're just going to hit five. So we'll do about
half of we did. Now we can see here now it's added cuts in areas that
we don't need them. Given that this
scene is so small, we're not really
going to worry about trying to exclude all of these cuts that are potentially
useless in our case. Really all we need
are these cuts here. But the quickest
simplest way to do this, this is just to apply
it across everything. With the set reset to five. We can see all these cuts here. Now we're good doing.
Just click off of that. Going to once again leave
our edit mode using tab. So you can see we're just kind
of hopping back-and-forth, doing things and then
jumping back in to make some additions and
then jumping back out. Now we're back in
our object mode. We need to create an
object called a lattice. The lattice is how
we're actually going to be deforming this
Grid and the back. We're gonna hit Shift and a. Then we're gonna go down here. And instead of choosing
mash or anything like that, it's in the middle
here below armature. It's called lattice. Will create the lattice just makes this little
orange box here. It's not actually geometry. This lattice is invisible if we rendered right now we wouldn't
see this lattice at all. But we're just going
to slide this back. And our goal here with this lattice is to
make sure that it's the same size as this grid here, because this lattice is going to essentially become a
cage that we're going to use to deform and warp this Grid element
in the background. Let's start just by going
into our side view, making sure that it's
kind of wind up here. Okay? So it's about centered
with it vertically. And let us doesn't
need to be perfect. We're going to have
a little bit of breathing room on either side. So what I want to worry
about getting it perfect, I'm just going to
switch to my scale here, scale tool here. On the left. I'm just going to scale
it up so that it's about the right size vertically. It looks about right. Now I'm going to
scale it in so it's thinner because I don't need
it to be nearly that thick. You might have to scale
this one multiple times here because it gets a little finicky when you're scaling. It's so large down
to a smaller size. I think that looks about right. Might need to move
it up a little bit. So I'm just going to switch
back to my move tool quickly. I just tried to
make sure that I'm seeing about the same amount of space here on the bottom and the top as I am on
the left and right. It looks about right. I'm going to rotate my
camera than this one. I'm just going to switch
back to my scale tool. Then just scale it up
so that it's about the right size from
the front as well. I can do that just by going
into my front view here, by clicking this little, these little bubbles
here at the top, or like I said before, you can just hit the Tilde key and then choose Fred from
there as well. Both work. Then I'm just going
to scale this down. Now I have my lattice
about the correct size. Then like I said, this lattice
is going to be used to deform the Grid and
the background. So this is how we're
going to be warping it. In order to warp it
though, we need to have more cuts in the middle, just like we had for the,
the Grid here in the back. Now we won't need
nearly as much, but we do need to have some cuts here because right
now there's nothing to select on this lattice
once we link it to the Grid. So we're gonna go down here to the object data properties. This little green
lattice symbol, you're at the bottom with
the lattice selected. Then we want to change
these numbers here. So this determines how many cuts this lattice actually has. For this value here, we're going to type in seven. So this is the EU resolution
where the lattice, we can see here that
will be type seven We have a bunch of
cuts going down here. And then for the W, we're
also going to type in seven. Now we have a vertical
cuts going this way and horizontal
cuts going this way. The reason we didn't change the V is that's because that's the cuts that are determined
for the thickness here. So if we turn this up, these are going to
be cuts that are pretty much useless to us, so we don't really need those. So we can just
leave those at two. Now we select our grid. We can select it
from the list here, or you can just select it
right in the viewport. Then we're gonna go to
our modifier panel, the little blue wrench. Open up the modifiers. Then for this one we're going
to be choosing lattice. I'm going to choose
the lattice modifier, which is right here. Click that. And now it's going to ask
us for the object which is the lattice that we
want to use to deform it. We're going to click this
little eyedropper here. Now it'll just looked or we can select our lattice directly
from the viewport. So we're just going
to click right here, where over this
little black line is that we'll
choose the lattice. So now it's saying that
the lattice is response. This specific lattice is responsible for
deforming this Grid. It's now we can go
back to our lattice. So we're gonna just going
to select the lattice here. We're going to hit Tab
to go into Edit Mode. Then I'm gonna choose
my move tool here. It's a little hard
to see because it's black on a gray background. But this lattice actually has
little vertex points on it. It's at the intersections of all of these lines
that we put in it. So now if we select one
of these lattice points, so I'm just going to
drag select over it. And you do want to drag
select over these, because there are two. If you move just the front one, it's only going to
deform the front of the Grid and it'll leave
the back where it's at. Which gives you these kind
of weird like stretching. So we want to avoid that. So we'll just be drag
selecting over it. Now if we move this, we can see we get rid
of that stretching. But you also notice that we're
able to deform this Grid. Now, we're getting nice
smooth deformation because we added
all those cuts to the Grid after we
applied the wireframe. Now it's up to you. Maybe really this is entirely
personal preference here. It's gonna be difficult
for me to even give you the exact values
that I move these, but just kinda follow along
with what I'm doing here. And I would might actually
want to be deforming this from the camera because this really is the view that matters. You can just look at
this camera view here. Drag select over some vertex, and then just slide them. I would suggest you deform
a little bit on the edges. So it looks like this is
getting smeared inward. But I wouldn't go crazy
with the defamation. You still want it to look like
a Grid and the background. But you want it to be kind
of almost melted looking. So we want to have some areas
where they pinch together, some areas where they
kind of bow apart. Maybe pull this down. This is, like I said, just purely personal
preference here. So whenever you want them to do, I wouldn't go too crazy with it though because like I said, it still needs to look
like a grid to an extent. I think I think that's
probably fine for mine. To get a better idea of
what your grid looks like with all that
information done on it. You can just hide this lattice. After you're done
moving your points, just click this little
eyeball next to the lattice, and that'll just hide
it visually so you can see how deformed
your greatest behind it because it's a little hard to tell what it looks like with all this lines
laying over top of each other. I think for my purposes
this looks pretty good. I'm just going to
turn my lattice back wound so I
can see it again. Case I wanted to make
any further adjustments. Now that we're done with
deforming the lattice, we can just hit tab to
X at our edit mode. And now we're good. Then the last thing
we're going to do in this lesson is we're going to add some
geometry for these eyes that we either easy to
texture and shade once we get to the texturing shading
portion of this class. So let's go over here on our right side will
be working over here. We're going to hit shift and a, we're gonna go to Mesh. And we're going to
create an ecosphere. It's, we're going
to click this one. Now we can see here it makes this sort of geometric
sphere shape. And we're going to make this
a lot smoother by typing in five for the subdivisions. So to add a whole bunch more of these triangles making
the edges licensed moves. And then we're going to
make this a lot smaller, so it's a better
size to start with. We're going to type in 0.05 for the radius and
then hit Enter. We can see here
it's so small now that it's actually
inside the statue, but that's fine. We
can move it out. Now we're going to
go to our move tool. I'm going to move it up here. Then we'll right-click
and then shade smooth. Now way the eyeball
is nice and smooth. Then our next step
here is going to be intersecting it into the head and then
just having a poke out just where the areas
where the eyes are. So let's move this
into the head. Going to zoom in here. It's a little hard to tell
in this statue exactly where the eyes are. But in my mind, the
eyeball itself, like the actual eye
is right about here. This area here on the bottom, this is an eyelid, and this is eyelid as well. So you want to make sure that the sphere kind of pokes out in this area right about here where I'm tracing
with my mouse. We're just going to slide
this back into the head. It's just a matter of pushing
and pulling it in and out of the head until it
fills up the area you want. Now you'll notice
you're not going to be able to get it perfect. And we'll be adjusting
the shape of this sphere here in a second. But just try to get it
as close as you can. So I think right about
there is probably not a bad place to be before we
start actually warping this. Then before we do any
adjustments on the sidewall, let's just duplicate
it over that when we have a nice starting
point for the other eye, we're just going to
hit Shift and D. Then we're going to hit X to make sure it moves
just on the x-axis. We're just going to
set it over here. Don't really worry
about this one for now. We're not going to
need to line it up until we start deforming it. Let's go back to the left one. So going to zoom
in here. Now we're going to go into edit
mode, hitting tab. We're going to be
working in vertex mode, which is one when the keyboard. Then we're gonna be
using something called proportional editing. Now you'll notice up here, it's not actually on the menu here. That's because it's
slid off because we've made two smaller windows. So to see them menu over here, we're going to click in our middle mouse button on
this row up to the top. We can see as we do that, we can pay them this row over. So we can see the symbol we're looking for, which is this one. So when we click
this button here, this will allow us to
proportionally edit the vertex. So what that means is
when we move one vertex, we're going to tell Blender
a roughly how large of a radius around that vertex to also move other vertex with it. Because by default, if you
just move a single vertex, I'm going to just click
and click this off here. Go back to my move tool. If I move just this vertex, it moves literally
just that vertex. Now that makes it
really easy if you're working on just moving
a single vertex. But it's also very hard if
you're trying to sort of massage a shape into a
more of an organic shapes. So if we're trying to work
with this geometry here, almost like it's clay. You don't want to be
moving one vertex at a time and having to like wri round the areas and move them all individually. It
would take forever. I'm going to Control Z that. I'm going to go back up
to this symbol here. It looks kinda like a bullseye. And then it's next to this
little falloff curve, looks like a little hill. We're going to highlight
this bulls-eye, which is the
proportional editing. Now when we move this, you'll notice it starts moving a whole bunch of
vertices at once. And it's moving so
many of them right now because our proportional
editing ring, the falloff is
really, really large. While you're moving this, Use your mouse wheel and scroll up when your mouse wheel to
make your ear rings smaller. So you'll notice here on
the left side of my screen, you can actually see this ring
getting smaller or larger. It's hard to tell
on the right side because we're so zoomed in. But I'll just keep
scrolling up until I can see that this ring
gets much smaller. Now that the ring
has a lot smaller, you can see it's only moving
vertices with inside that, the radius of that ring. That allows us to move
this a lot easier. So I'm gonna
actually make this a little bit bigger
because we want to movies all of the
same time here, about half the eye ones. I'm going to slide this back. We can see here as we pull
this back and we stretch this, we're getting more of a normal
pointed shape to the eye. And that's what we're going for. So we're going to
slide this one back, stretch it out so that
we get that kind of pointed shape that we're
looking for on either side. Up here at the top, I think this actually probably
needs to come out a little bit. Pull this out. Don't worry about this
eyeball being perfectly round and smooth
because we're going to be putting a glowing
material on this. That's going to hide a lot of the maybe lumpiness that would be left behind from
doing these small edits. So only really worry about
what is exposed versus what is intersecting with
the model because this silhouette shape is the most important part
of what we're doing. The actual roundness and the shape of the eyeball,
the surface itself. That's less important. We're getting pretty close here. Again, this doesn't
need to be perfect. It's gonna be a pretty
small detail in the model. And it's going to be glowing, which means it'll have
this glow around it. So these edges here we will get fuzzed out because of that, that bloom in Glow we
add to it as well. So it doesn't need
to be perfect. Okay. So you have something pretty
similar to what I have here. I think you'll be fine. I'm gonna hit tab to exit
the edit mode on this. If I click off of it, I can
zoom in here on my left side and just kinda see what
this eyeball looks like from the
camera's perspective. I think this looks fine. We made sure we didn't
cover up any of the eyelid on the
top or the bottom. And we have a pretty
convincing I shape here, even if it is just a little bit wobbly here. Don't
worry about that. With this I'd done, Let's
go to the right eye. We're going to select
that. Now we're going to position this one back inside the head like
we did the first one. This eye shape is a
little bit different, so it'll take a little bit different edits to make
sure that it fits. Just do your best to match somewhat similar to what I have. I'm looking here at
the corner of the eye. So I think that that looks about right and it's probably
a little too high here because a little bit
too far down on the bottom. But I think that's probably as close as we're going to get it without having to edit
the shape of the eye. Now we have it positioned. You should look pretty
similar to mine. Little pinched on this side and it's a lot wider on this side. I'm going to hit Tab to
go into my edit mode. We can see up here, it remembered that the last
time I was in edit mode, I had proportional editing on. It still has it. It should still have
the same size as well. Let's grab the bottom here. We're going to pull
this up because it's going too far down into the eye. The eye lid rather
going to move up here. Just keep shaping. It feels
like you need to adjust the size of your
proportional editing while you're doing this. By all means, if
you need to make it bigger or smaller,
just remember, in order to make it
bigger or smaller, you need to be moving
a vertex as you do it. This ring will only
be editable while you're actually in the
process of moving something. Make sure you start moving something and you know
what the move very far. Just make sure you
start the process and then you can scroll
up and down when your mouse wheel
can also use page up and page down to
change the size of this. That works as well. If you don't have a mouse fuel
for some reason. We're going to scroll in,
make this bit smaller, and then we're going to
pull this into the head. I believe we need to make this a little
bit more pointy here. And by doing that, we can slide this back to kind of
accentuate that point. Going to pull this
out a little bit. We're getting pretty
close already. This one didn't take
too much editing. Pulled this out a little bit. So I'm pretty happy with that. Woman had tab texted
my edit mode. And I can click off of it. And then just zoom in here and we'll make sure that this eye, so we can see like
the edge here. This is, this looks pretty good. Now both of my eyes have
easily selectable geometry. Then once it comes to
the shading of them, just as an extra precaution, we're going to select this I again, we're going to hit Tab. Then we're going to turn off
this proportional editing. This is something that a lot of times you'll be
working on a model. You'll have proportional
editing on shaping this I. And then we go to
Edit at another model and we're wondering why
everything is moving so weird. And that's because we
have proportional editing on when you have it on, use it for what you need to. And then I would try to
remember to turn it off because it's something
that's really easy to forget that you have on. And also sometimes the influence
of that fall off is so huge that it's
really difficult to tell even what's
going on unless you notice this little
blue dot up here. So it's good practice
to turn it on, use it and then turn it back off when you're
not using it. Now we're going to
tab to get out of it. We have our eyeballs. So the last thing
we need to do is to attach these eyeballs to
the actual statue itself. Because right now this statue moves independently of its eyeballs and we
don't want that. So make sure you have
everything deselected first. So I have nothing
selected at the moment. I'm going to select
the left eyeball. I'm going to hold Shift, select the right eyeball. So now I have both
of these selected. Then I'm going to
select the statue. So the statue base, the big statue last. So it's important, the order
you do these N is important, not necessarily the left
versus the right eyeball. We have to have both
of these eyeballs selected and then select the V statue last
because we want the Statue be the
parents of all this. We want the statute or be
the reference objects. We're touching the
eyeballs to the statue, not the statue to the eyeballs. With these selected, I'm
gonna hit Control and J. Now we've attached all those together and we can see here, and we know we did it
right because one, our pivot stayed where it
used to be for the statue. And the objects we have
leftover is statue base. We don't see light goes
sphere leftover here. If you see I ecosphere
after you've attached them, that means you've attached
them in the wrong order and you selected the eyeballed last. In the next lesson,
we'll be doing some simple animation and
adding orbs to the Rings. I'll see you there.
7. Animating the Statue: In this lesson, we'll be adding simple looping animation to our statue and orbiting
spheres to the Rings. Let's begin. Let's start by dragging
this bottom window up a little bit so we can see
our timeline better. Then we're going to change
this end value from 250 frames to
instead one-twenty, one to zero and then hit Enter. Now we can zoom in
on this timeline and then use our middle
mouse-click to pan it over. We just want to
zoom in so that it fills up most of
this bottom area. Actually zoom out a little
bit right about there. Due to our frame rate of 30 FPS that we set up in
our output properties. Having a frame value of
one-twenty means that our entire animation
will be 4 s long. We'll be creating our
animation so that the beginning and the
end are identical. That way, they loop seamlessly. That way, if we
play our animation, we can just let it
play continuously and it will look like the
animation goes on forever. This will require us to
place our first keyframe on frame zero rather
than frame one. However, by doing this, we essentially cut off the
first frame of our animation. But it prevents the
duplicated start and end frame from
showing in the animation. If we didn't cut off
the very first frame, we would see Our
Animation freeze for a single frame as it rolls
from the beginning to the end. So it's important that we
started our animation on zero, thus cutting off that very
first duplicated frame, which would be identical
to frame one-twenty. Let's start by selecting
the statue base. So the large piece
of the statue, we're going to hit Control. And a, then we're going
to apply location. By doing this, we've now zeroed out all
these values here, at least for the location, making it easier
for us to enemy. It's easier for us
to animate from zero rather than some arbitrary
value that we picked before. Now it didn't move the statue at all. I left it where it's at. It just now acts as
if it's currently at 00 with your statue
still selected. Go down here to this little
orange box tab here. This is your object
properties tab. And this is where we're
going to be actually animating these values. Again, just double-check that your playhead here, you
can just click and drag. This number is set to
zero because we want to place our very first keyframe outside of the bounds
of the animation. That way it cuts it off. And we're gonna be keyframing the Z location in
the Z rotation. So to place a keyframe
while you have to do is just click this
little circle here, this little white dot here, it turns into a diamond now and it's made a yellow keyframe. We're also going to
be placing a keyframe on the Z rotation as well. Now we have a keyframe
here just basically telling it to start
at 0 m when we frame 0.0 degrees rotation when the Z own
frame zero as well. Now if we add
another keyframe to these values at a
different frame, it will animate
between these values. Let's start by going all
the way to the very end. We go to frame one-twenty. We can see here that these are green now instead of yellow, and they don't have this
little diamond filled in, Which means that they're
ready for a keyframe. They just don't have one yet. So to place a keyframe here, we can just click these
little diamonds here. Now we can see that it's made a keyframe between these two. Now since these are both
the exact same value, it's not going to do anything. So we need to go now to the very middle of this
animation, which is 60. We're going to place another
keyframe here which will actually anime
between these values. For our Z location, we're going to type in
0.01 and then hit Enter. We can see this is turned
to an orange color, letting us know that
we've changed the value. However, we haven't
set the keyframe yet. It's now we just need to click this little keyframe
button here. It turns yellow, letting
us know that we have changed the value we
have placed to keyframe. And then for the Z rotation, we're going to
change this as well. We're going to switch
this to three degrees. So we just type in
three, hit Enter. It turns orange to let
us know that we've changed the value have in
place to keyframe yet. Click the little
keyframe button. Now it's yellow,
letting us know that we have actually
placed the keyframe. Now if we just drag
between these values here, drag between your keyframes. We can see that it
actually moves up and down and it spins a little
bit left and right. So we just hit this
little Play button here and we can launch
this left side. You can see that it goes
up, spins a little bit, and it goes back down to
the beginning position. And we can see that there's no, there's no weird hold
here between them because we cut off
this, this first frame. Okay, so now we have 060 in one-twenty keyframe for
just the statue base. And we have a lot of
different pieces here. So we're gonna be doing
a similar process on each one of these pieces. Now let's select
the statue slice and do the animation
here as well. We're going to hit Control
and a to apply this location. That way. All these values here
are zeroed out again. Now we can begin animating this. So let's start by
being on frame zero, placing a keyframe
for the zero or the Z rather at 0 m
on their location And then same thing
for the rotation. We're going to have that
set to zero as well. We'll go all the
way over to 120. Place another zero
for each of these. Then this line showing
between these, this is just letting
us know that this is a consistent value
between these. And then the second replace any other keyframe in the middle. It gets rid of this line, letting us know that
now it's no longer a, an identical value
between these keyframes. Something has changed
between them. For this middle value here, we're going to do, again, we're on frame 60 because that's the halfway point. For the Z. We're gonna do 0.01 m. It
enter, place a keyframe. However, for the Z rotation, we're actually going
to have it rotate counter to the other one. So we're going to type
in negative three, it answer, and then
place a keyframe. So now our head spins one way, or the statue base, sorry, spins one way. And then the slice spins
the opposite direction. Just add a little
bit more interest. Now we can see as we
drag across this, the head spins to the
right and then the, the slice spins to the left. However, they both match
each other in terms of their movement up and down. So they don't separate
and that way, because we really couldn't
have them separate. They meet exactly where they need to and if they
separated at all, they would start intersecting
into each other. Let's now if we
play it, I can just see that we have
this kind of subtle, kind of really slow
moving serine, like up and down bobbing
almost like it's in water. And they just kind of
rotate slightly as well. Now let's apply
some animation to the warping of the Grid
and the background. Which might initially
seem like it's going to be something
that's pretty difficult. We're going to have to
animate these points moving around to make the
Grid move and everything. There's actually a much
simpler way to do this. We're going to start
on frame zero. As always. We're going to key the Y rotation
at zero degrees. We're gonna go again
to the last frame. Key that again at zero. So we have the same
beginning in the end, then in the center. So it's 60. We're going to type in
ten degrees for this. It enter and we can see here
it just rotates the lattice. By rotating the lattice, we're rotating what's
affecting the war on the Grid. So we can see here as we move our animation back-and-forth, as this lattice moves. So too does the Grid
and the background. So you can see here
this little line here. You can see that it actually
warps that as well. Now we can hide this to make this a little
bit more obvious. So I'm just hiding this lattice. But the animation
is still there. So now as I move my
animation across, you can see it pretty well
here on the left side of our, the right side
rather of the Grid. So we're just rotating
that lattice which moves the points that we've moved on the lattice across the
Grid and the background. It gives us a nice wobbly,
sort of distorted, almost like it's like it's
being seen through water or something like rippling
water in the background. I'm going to turn
my lattice back on just so I can see it again. Now let's animate these Rings to make them wobble back and forth across the statue is we're going to select the, the ring body. So the larger one at the bottom. We're going to set our keyframes here at the zero,
like we always do. We're going to keyframe
the X and the Y rotation. Then we're going to
go to one-twenty, place those same keyframes. Go to 60. Now, we're going to add two
degrees to each of these. We're going to type in
18 for the top one. So 18 for the X key that
we're going to click the Y, type in 20, hit Enter, and then keyframe that. Now if we play this animation, we can see our Rings
just kind of teeter back and forth here on the bottom. Now let's do the similar
process to the top. We're going to select this one. We're going to place
a keyframe here at zero when the X and Y go to one-twenty
least another keyframe. Now we're going to go to
60, just like we always do. Then this time we're going
to add two to the X value. We're going to have 21.5 here. It enter plays a keyframe. Then for the Y, we're going to add negative two to this one. So we're going to change
this from negative 16 to negative 18 instead. That hit Enter, then
place a keyframe. Now we can play
through our animation. We can watch our Rings here, just kind of teeter back and forth along with all
the other animation. This point we have
all of the pieces of our animation
currently animated, except for the orbs that I
mentioned in the beginning. It's now let's add our orbs
and we're going to have them enemy around the Rings, so they orbit the statue. Let's start by creating an
orb. We're going to hit Shift A, we're gonna go to Mesh and we're going to
create an ecosphere. Again. We're going to twirl open this little menu down here so we can see
the options for it. We're going to change this
radius instead of 0.05. We're going to make it smaller. We're going to make it
0.025 and then hit Enter. We can hide this menu, can right-click and then
just choose Shade Smooth. And because we have
this Warp selected, it will have Shade Smooth Depth. Now we're not going
to actually move this orbit all because
we're going to be using a different sort of
method to get it onto the orb Art rather the
orb onto the ring. So we're gonna be
using something called Path constraints. With our orb selected. We're gonna go to the object
constraints panel here. So it kinda looks like a, like a timing belt when
a, when a car. Then we're going to go over here to the object
Constraints menu here. Then from here we're
going to choose follow path with follow
path turned on now, now we can click the
little eyedropper. We're going to choose
the target path, the path that it's
actually following. Which in this case we're going
to choose the body ring. We're just going to click
the body ring here. And we can see right
away that the orb now has moved from the sensor
here inside the statue. And it's pops to the ring. So this is how we're
going to animate this orbit around this ring. The value we're going
to be Animating is the offset value, which we can find here. This offset value
works on a scale 0-100100 is a full
rotation around the path. We're going to be picking a more desirable place on the path for the spirit of start and
then add 100 to it. So it goes around the ring. The place that we're
going to start, our orb is actually at 88. So if we type in 88, hit Enter. We're going to have our orb
start here for the Animation and then continue
around the, the path. Let's move our play
head down here to zero because we're going to be placing our first keyframe. Then we're just going to
place a keyframe here on 88 with this little dot here. Then we have a keyframe 10. Then we're going to move all
the way to the very end. So we're not going to have any middle keyframe on this one. We're just going to
have a last keyframe. For this one, we're
going to type in 188. So we just had a one here. It enter. And then click the
little keyframe button. Then we can see nothing
happened because what we did is we added
100 to the value, which means it should just be exactly where it's
at because it made an entire rotation during
this amount of time. Now if we move our play
head back and forth, we can see it moves all
the way around the ring. But we'll notice that there
is a slight issue here. When we play this. We can see the Rings
starts out, moves around, and then it slows down
when it gets to the end, and then it picks
up speed again. And that's because of
the type of animation handles that this
animation is using. We're going to first animate the other orb around the ring. And then we'll go over how
to fix this weird slowdown that we get when it gets to
the beginning and the end. First, let's just
create another, we're going to be
creating another orb and then adding it to this ring. We're going to hit shift into a gonna go to Mesh by ecosphere. Going to twirl open this menu. We're going to make this
sphere just a little bit smaller because it's going
to be on a smaller ring. We're just going to
have this one be 0.02. It enter. Now we can right-click
Shade Smooth. And now we're ready to constrain this one to the smaller path. We're still in their
correct menu here. So we should be in the object constraints tab
here on the right. So add Object
Constraint, follow path. Click the little eyedropper, and then choose the smaller path at the top, the ring head. We've clicked this, the
smaller orbits popped to that. We're gonna go to frame zero, which we're currently on now. Then for the offset, we're going to have this one started at 30. So it starts sort of opposite
to where this one is. The first one was
at this first one here is that the front left? We're going to have this
one at the back right. We'll place a keyframe here. Go to one-twenty. Then we're going to have a
keyframe at 01:30. It enter and then
place our keyframe. Now if we play our animation, we're going to see the exact
same issue happens here. Once it gets to the
end, it comes to a stop and then picks up speed
again and continues moving. Before we fix the Animation, Let's just give these names. That way we know
which one is which. For this one we have
selected over the top. So the smaller one,
we're going to call this ring head ORB. For the larger one here on
the bottom. Larger ring. We're going to call this
ring body orb at Enter. Let's switch to our animation
tab up at the top so we can adjust these
handles for the Animation We're going to leave this
left viewport as it is. However, this right viewport, we don't really need
this right now. So we don't, we're not gonna
be making any further edits. Well, we need to see is
called the Graph Editor. We're gonna go up to the
top-left on this right viewport. Click this little symbol here. And then from this we're
going to choose Graph Editor. Now that we have
our graph editor, Let's start by selecting
both of these orders. So we're gonna go over here
to our scene collection. Then we're just going to first
select the ring head orb. That doesn't matter
what you were or whichever be select first. We're just going to
select one of them. Then we're going to hold Control and select the other order. So now both of these selected. So I should see two
different color lines here because each one corresponds
to each of the orbs. Then to make sure that this line graph editor here
it looks correct. Just hit home on your keyboard. Home is a button that
is directly above your arrow keys
on your keyboard. So if you look for your arrow
keys on the right side, look above them, you'll
see a button called home. You can also just use
your mouse wheel to zoom in and out or
hold down Control and middle mouse button to
squash and stretch this to get into view for some
reason if home isn't working. So I'm just going
to hit home again so that I can see both of them. The Graph Editor gives you a visual representation
of the animation speed. The more sloped and
steep a line is, the faster the object is moving. So we can see here it's
moving pretty fast. And then at the beginning
of both these lines, it's pretty flat,
It's pretty shallow. That means it's moving slow. This is why it looks
like it slows down at the beginning and
end of our animation. Because at the beginning of
the animation, it's flat. And at the end it's also flat, but in the middle, it's sped up. Let's get rid of these
slowdowns by changing the keyframe type from
Bezier a to linear. So we're just going to drag select across both
of these lines. So we want to make sure we
get these little black dots selected on both sides. So I could zoom out a little
bit to show you that I have all four of these selected
beginning and end. With them selected. I'm gonna hit V, then
I'm gonna choose vector. So right now they've
defaulted to align two, which is the Bezier handle type, which is our default. But we want to switch
them to vector. That way. When we click this, they're perfectly straight lines and
there's no S curve into it. So it gets rid of
these flat spots that we have and then just makes them a perfectly consistent speed from
beginning to end. Now we can add our
play button at the bottom to see the
improvement that we've made. So we can watch these orbs now. And right here this would
have slowed down before. Same thing over here, it
would have slowed down. But now we can see
that it moves just in a nice consistent
pace all the way around the orb
with no slowdowns. So let's hit pause, and then we can switch back
to our layout tab. Now if we just give our
animation to play here, you can see everything
all working in tandem. All of our pieces are kind
of bubbling around and wiggling and wobbling
and orbiting. So it just gives
a whole bunch of just small animations to this. That way when the man
animation continues to loop, it has a little bit
of interests to it. In the next lesson,
we'll be adding lights and Volumetrics
to our scene. I'll see you there.
8. Adding Lighting and Volumetrics: In this lesson, we'll be adding Lighting and Volumetrics
to our scene. Let's begin. We'll
start by clicking this little white box next to the render scene collection
here at the top right. That'll make sure that
any lights we create, we'll go into this
collection rather than our statue collection
to make sure everything here stays organized. Now we can go over to
our left viewport, which is currently
showing our camera view. We're going to click down
our middle mouse button to pan this menu all the
way over to the right. Then we're going to click
this far right button here, this little circle. When we click this, it'll change this viewport into our
rendered viewport, displaying something similar
to what our Cycles render, final render is going
to produce when we actually get to the rendering
portion of this lesson. Now we're going to go over
to the world Properties tab, which is this little
red globe icon. We're going to click this.
And then we're going to click the color rich right now
is kinda like a dark gray. And we're going to make
that completely black. So that's going to remove all of that ambient lighting that
we're getting in our scene. So the only lighting
that's left in the scene is the light from the
original default late. So it gets rid of that
kind of soft glow, that light gray glow that was filling in
all of our shadows. We want to have complete control over the lighting that
we're doing here. We're gonna get rid of
that ambient light. Now we can see here that we still have a light in our scene. However, if you
accidentally deleted this light that we
left in the scene, this one way up here. If you've deleted this by
accident, that's fine. We can just hit Shift a and
then go down here too light. Then you'll just
create a point light. And then that'll make
a brand new light in your scene. You can move around. Now I'm not going to make another late because
I already have one. So I'm just going to use
the one that was here. Like I said, if you've accidentally deleted
years already, It's pretty easy
to add a new one. Now we're going to be
going with a pretty common Vaporwave aesthetic
color scheme, which is like a bright pink and a bright blue
for the lighting. So we're going to start out
by making the pink light first and we're just going to use the one that we have here. So let's rename this light. So I'm just going to rename
this by double-clicking on it and type in pink late, and then hit Enter to adjust the properties
of this light, make sure you have it selected. And then go down here to this little green
light bulb icon. This will allow us to change
the properties of our late. So let's start by making this
light a good bit dimmer, because right now it's
really bright and we're going to be
moving this closer. The brightness we want
here is 88 watts. So we're just going to hit at
eight and then type Enter. Then we're going to change
the color of this to pink. So if you want to follow
along exactly the color pink that I'm using will be 0.78. For the hue. And saturation
will also be 0.78. And then hit Enter. We can see here we have this
kind of vibrant pink color. And right now it's
really **** and that's because our latest so far. Now we're going to move our
light closer to our statue. With my light selected. I'm just gonna go
to my move tool. And then we're just going
to move this down much closer to the statue. And we want it to be at the
front right side of it. We can see here as
we move this round, we're getting a nice
preview of what this is doing here on the left side. So it's nice having both of these viewports going
at the same time. So we can kinda see
what the light is doing even though we're
working over here. So let's have this light
above its head a little bit. Maybe about here. I'd say probably
about as high as your Grid is in the background. We're going to have it off to the front a little bit as well. Just be paying attention to what the shadows
look like over here. This is kind of sort of the
way we can tell roughly where our lightest position
and we want to get these shadows to be complimentary
to the shape of this. So we don't want all
the light coming from one side so that we can't
really see the shape of this. If you'd like to know about approximately where this
latest placed for me. Currently, I have it set
for the X location of 0.83. By is a negative 0.81. The Z is zero point
one-six-four. We type those values
and you'll have something really close to
what I have currently. I'm gonna hide that menu. Okay, so now we have
our pink late setup. Let's hit Shift and D to
duplicate this light. And we're just going
to duplicate it down here to the left. Don't worry about where it's
going exactly on the X and Y just kinda get a rough
position over here. We want this to be
below the statue, not directly below it. So about even with
the zero line here, so right at the
base of the statue. And we're gonna kinda
line it up here with this first grid point. So about there. Now we're going to adjust the parameters
here on the right side. Let's first start by
adjusting the brightness. So we're going to change
this 88-24 instead Because this, we went
this slide here to just kinda fill in the shadows. We're not making it
the main light source. The main light source is
always going to be the pink. Now let's adjust
the color as well. Just click on this pink here. And then to follow
along with me, you'll just make this 0.55 it enter and then just make the
saturation and the full one. If you've done
that, now you have a nice bright blue light. And we can see here on the
left side that it's filling in the shadows here
with kinda like a teal bluish light that's mixing now at this pink layer that we have is the main late. Before we go too far though, let's make sure we don't
forget to rename this. So we're just going
to double-click on this and call this blue light. Then hit Enter. Now let's make
another duplicate, and we're gonna be using the
blue light here is a base. We're going to hit shift
in D with this selected. Move it up to about the
height of behind the head. And then we're actually
going to position it behind the head as well. We're going to place it here. I can actually look on this side so I can move on
either one of these. So if I want to move it
from the camera this time, I can just start clicking over here and move it from there. I'm going to position this right behind the nose. Basically. It's right in the
center of the head. So I can see here that's
roughly where it's at now. Now to adjust the
parameters of this late, Let's make this late
significantly brighter. Now this isn't gonna be
something we're going to notice the true effect of yet until
we get the Volumetrics in. But we're going to
type in 350 here. So it's gonna be really bright. And then we're going
to adjust the color. We're just going to make this
a little less saturated. So we're going to type in
0.7 for the saturation. So it's a little bit
more closer to white, but it's still obviously blue. Now let's add Volumetrics to our scene to make our
lighting a bit more dynamic. Volumetrics, we'll add an effect or render and lighting that makes it look as
if there's a fog or mist surrounding our statue. This will make our
Lighting fill the volume of our scene with
lighting running. Go back to the world
Properties tab, this little red globe icon. We're going to
twirl down volume. Then here where it says none. We're going to click
the word None. And then we're going to look
forward principled volume. So once you've found
that GOT and click it, we'll see right away
that are render has changed significantly
on the left side. Letting now fills the
air around the statue. In air quotes. However, everything is much
darker and more obscured. So luckily, we can change these settings to make
the render look better. Let's scroll down here
to the volume settings. There were basically two things that we're going
to be adjusting. The first thing we can
adjust is the density. The density is basically
just how thick is this fog on the left side. So right now it's set to one, which is the default value. But we're going to
make it a lot thinner. So we're going to type in 0.05 for the density and
then hit Enter. We can see here now
we stopped the fog. We can still see it. But it's a lot more see-through, so it's not nearly as obscuring
and darkening on arsine. The other thing we can change
here is the anisotropy. So the Anisotropy is a
little hard to explain, but basically it boils down
to the higher this number is, the more intense the lighting of the fog is around the
light source itself, then it quickly falls
off so that you get brighter fog around
lights and you get much less illumination of the fog the further it gets
away from a light source. So it gets rid of that kind of overall haze that we have on the scene and
makes it a little bit more localized around
each of the lights, specifically the anisotropy. Let's just type in 0.6
and then hit Enter. We see here on our left
side that it looks like the fog overall has gotten
thinner in general. But really when
it's doing is it's focusing the fog around each of the light sources
so that it's not so pervasive across
the entire scene. As one final step here, let's not forget to
rename this late. So the light we have
behind the head, we're just going to call
that rim light because it's lighting up be a rim to the
outside here of our statue. It's now we should
have a blue light, a pink late in the rim light. We're done setting up the
three lights in our scene. However, we're not actually
done with the lighting. So the remainder of the lighting is going
to be handled with textures that emit
light themselves. So that's how we're going
to get light on the Rings, as well as in this gap here
where we've made this lace. So we're going to have
light cast down and up onto this slice of the face with
our main lighting completed. In the next lesson,
we'll be applying glowing shaders towards scene and finishing the
rest of our lighting. I'll see you there.
9. Shading the Statue: In this lesson, we'll be
applying glowing shaders to our scene and finishing
the rest of the leading. Let's begin. Shaders
other way that we make our models look like different colors other
than the default grade. They start as this
is how we'll make elements glow or look
like shiny metal. Will start with
the statue first. We're going to select
the statue base. Can zoom in here. Then we're gonna go down to the
little symbol here. It's like a little circle
with a checkerboard on it. This is our material properties. Now we're going to click
this little new button here, and that'll create
a new material. Let's start by renaming
this material. So we're just going
to click down here. We're going to type in statue. That way we know what
this material is for. Somebody can scroll down here and discuss the things
that we're going to be changing to make this
material look different. The first thing we're
going to want to change is change this base color. Sorry, now it looks
like it's white, but it's actually a gray color. So you can see here the
value is not one value, which means it's
only at 80% white. So we're just going to
make this 100% white. Just by turning up the value. We're going to leave the hue
and saturation both at zero. That way it stays white. Now we can scroll down here and we're gonna go to
this specular value. So this is essentially how
shiny is the material. How much is it reflecting
light? Right now it's at 0.5. We're going to make
this more shiny. So we're going to
turn this up to one. So we're just going to drag this slider all
the way up to one. Then down here, this is the roughness for
the, how shiny it is. So essentially
this is saying how blurry are the reflections
of this shiny object. So the lower the number, the more sharp and sort of
mirrored the reflections are, the higher the number, the more blurry and
more sand papery, almost you can think of
the reflections are, we're going to make it
just a little bit sharper, a little bit more Mirre
by typing endpoint for their just a
little bit more sharp. Then we can see down here
now we're actually getting some reflections here on this kind of the neck
piece of the dress. So we're gonna be keeping
all of our materials here pretty simple and
we're basically just going to be using Shiny,
solid color materials. We're also going to be
using some italics, and then we're going to have
some glowing materials. So let's make our first
glowing material, and that's gonna be on the eyes. It's now we can scroll up here. We're going to push this
little plus icon here. It's adding new material slot. Then we're going
to click new data, new material, that slot. Then we're just going
to name this Eyes. Then hit Enter. We're going to change
this color here just for the sake of example. Now you can change this with me, but we're going to
be changing and eventually back to white. I'm just going to make this red. That way it's easy to see. The first thing we wanna
do is actually apply this Eyes material
to just the eyes. We don't want this
material applied to the entire statue because we don't want our entire
statue to glow, just the eyes with your
statue still selected. So statue base, we're going to hit Tab to go into
our edit mode. Now we can zoom
in here and we're gonna be working with the eyes. So first, switch to your face mode using
three on the keyboard. That'll switch to face. Now just click off
the model to make sure you don't have
anything selected. Then we're going to hover over this eyeball here
that we placed. Just hover over anywhere on
the eye and then hit L on your keyboard to select
all linked faces. This will select every
single face that is linked to the face that
you are hovering over. And since this is
a separate object, it's only going to
select the eye. Now what that done?
Make sure you still have the Eyes
material selected. Then we're going to click
the assigned button. So that's going to assign just this Eyes material
to the selection. Now we can rotate
around our model. Click off to make sure
we don't have anything selected. Going to
hover over this. I then just hit L to select
all the linked faces. Make sure you still have
is selected over here on the material browser
and then hit Assign. Now we can leave our edit
mode by hitting tab. We can see here and we have
somewhat of a creepy statue, but we have clearly
defined areas where we have this red material which is the eyes that
we just applied. It hasn't applied it
to the entire statue because we selected faces first and then apply this
material just to those faces. We do actually have
two more faces. We want to apply this to its, we're gonna go back
into edit mode. We're back into edit
mode for the statue. We need to apply it to the top and bottom of the head here. Let's just select
this bottom face. Make sure you select eyes. So when we select it off here, it's changed it back
to the statue material because that's the
material that's currently applied to it. So select the face just
by clicking on it. Then go back over here, select Eyes, click Assign. Now we've assigned that red here Then we're gonna do the
same thing underneath the top of that, we're going to click
this little face here. Make sure we switch back
to the eyes material. And then we're going
to click Assign. Now we have this
glowing eyes material applied to all the
faces that we need. You can hit tab to exit again. Now we can see here that we're actually getting some sort of reflected red light from this
red face that we applied. Now let's get rid of
this creepy red color and we're gonna go over
here to change that. So click on this red box here, and let's switch
this back to white. So we're just going to
get rid of the entirely, get rid of this saturation. You can also center out the, or make the hue is zero as well. And that really doesn't
matter if it's not saturated. But we'll just set
both of these to zero. Then we're going to set the
value all the way up to one. That way it's pure white. Now we can scroll
down in this list. We're looking for something
called a mission. So here we can set the color of the emission and how
strong the emission is. An emission essentially
just means glow, so it's emitting light. So let's determine what
color this is emitting. So currently it's
emitting black, which is no light at all. We want it to emit white. So we're just going to make
this completely white. So 00.1, we can
see here now that this emissive property is now casting light
down onto this. So if I have to do this with me, I'd just to show you though, if you watch the left side, the lower I make this value, the less it glows. Now, if I wanted to, I
could change this into a different color and make
it glow red or yellow, or blue or green. But for now, we're just going
to leave this as white. Then we're gonna make
this glow a little bit stronger because I
want it to be pretty, a pretty strong glow. We're going to change the
submission strength to, to, to double the
brightness of this. So we're going to type
into that hit Enter. Now we have it twice
as strong here. Now we can see all
this extra late. Now we're getting now inside
this crevice that we made, this little cable on the
side is now filled up with all this white light
that's emitting from the bottom of the jaw here. And then down from
above as well. We're also glowing out
of the eyes as well. Now let's select the statue
slice here in the middle. Because even though
this is, these are both part of the Statue, this is a separate object and it didn't get
any materials yet. So instead of adding a
new material here in just recreating the material we
already applied to the statue. Instead, we're just going to click this little
drop-down here. And we're just going to
choose the statue material. Now these are both using the exact same material
and any changes I make 21 will affect the other because they're using
an identical material. Now we can zoom out here. We're going to make
these Rings glow. Now. Select the large ring on
the bottom, the ring body. We're going to click New
to add a new material. And we're just going
to call this Rings because we're going
to use this on both. So with that done, we can now go all the way
down here to the bottom. And we're just going to
change the emission color and then the emission strength. Let's start with the
color. We're just going to click this black box. And then here we're
going to type in 0.07. Then for the saturation 0.95. And then for the value, we're
going to make that one. Let me can see here that
that's made it a bright, warm, orange, kinda
yellowish color. And that's what colour of
these rings are going to be. Now, right now they're
only set to one. We're going to change
the submission strength to be much brighter. And because this will be
important for the future lesson, we're going to make this ten. We want these Rings
to really glow there, Adding a lot of lighting
to the scene as well. We can see here on the left
side if you watch watch mine. So that's set to one. We can see how much orange light is casting into the scene. Then if I type in ten, you can see how much more light it's filling
this scene with. Now we can go up here to
this head, ring, ring head. The same thing we
did for the slice. We're just going to
choose that ring material here from the drop-down rather than making
a brand new one. So we're just going to
click the drop-down, go to Rings, click that, and now we have the
same material on both. Next, let's add a material to these orbs going
around the Rings. So we're going to
select the bottom orb. Why add a new material? We're just going
to call this orb. Orb. It entered. Then we're gonna make
this one metallic. So first let's change the color. We're going to click
the color here. Let's set the hue to 0.1. Hit Enter. Let's set the saturation to 0.85 and then hit Enter and then will
lead the value at 0.8. Right? Now if we zoom in
over here on the left, we can see it's just kinda like, uh, just kinda looks
like a yellow ball. It doesn't really look
like metal is just kind of a yellow sphere here. We're going to make this
look more metallic is by actually increasing
the metallic value. Right now it's set to zero, which means it is not metallic. And then if we turn
this all the way up to one, it's now metallic. So you can see right away. It's got much deeper shadows and much brighter highlights. So it's giving it that
more metallic look. However, that's not the only
thing that we can effect. We're not going to
scroll down here to the anisotropic number. So this one here, it's
just below roughness. This value here is
essentially taking these circular
reflections and it's squeezing them into
more elliptical shapes. So it's going to make
them thinner slivers rather than these
big wide circles. And that's going
to happen when we make this value higher. We're just going to type in
here 0.77 and then hit Enter. We'll notice right
away that this starts looking a lot
more like metal. And that's because I'm one
of the properties of metal, is that a distorts reflections stretches of
them along the object. This is the value here
that will accomplish that. So the less you have in this, the more circular
your reflections are, the higher the value, the more kind of pulled into
this streak that they are. I'm going to keep mine at 0.77. And then the last
thing we're going to do is we're going to add some additional
reflections on top of this almost as if
it's like a car paint. Or we have the kind of
metallic color below. And then we're going
to have a clear coat paint on top of that. And we're gonna do
that with this value here called clear coat. So we're just going to turn
this all the way up to one. We can see here that it looks a little bit more reflective. So if I deselect this actually, so you can see these little
white dots that we're seeing. These are actually
reflections of the light that we
have in our scene. If I turn this all the way down, you see them less so you
still keep this one, but this one's not
there anymore. We're going to turn
this back up to one. So my clear coat is
set to 01:00 A.M. I, clear coat roughness. This works just like regular
roughness except it's only affecting the reflections
of the clear coat. I'm going to set this to 0.1 to make those reflections just
a little bit more blurry. But we can still
see that we have a reflection here and here. Now we have this kind
of golden orb that swings around in orbits
on this golden ring. And let's not forget to apply
it to the top one as well. So we're just going to
click this top orb. And again, just like
the last couple of duplicates we've done
set of making a new one. We're just going to
click this drop-down and then choose orb. Now we have that
same metallic gold when this orb as well. At this point, the
last thing we need to texture is this Grid
and the background. We're gonna make this
kind of a silvery metal. So let's select this. We're going to choose
be orb material. Then rather than using the 4D material and then
adjusting this to silver, which would then change the, the balls on the, the one, the Rings themselves also to silver because
they're all linked. We're going to make
a duplicate of this material and
use this as a base. So the way we're going
to make a duplicate of this orb material is
this little number here. So right now this
is saying three, which means it recognizes that this orb material is applied
to three different objects. So both of the orbs and then now the Grid that
we applied it to. However, if we click
this number here, it will make this 4D material
just on the Grid suggests the object that we
have selected into a duplicate of it that is no longer linked
to the other two. Now we can rename this
from orb to Grid. Now if we make any
adjustments here, it won't affect
the orb materials that we have on the other two. This we're gonna need to
make into a silver metal. So we're going to click on
this yellow base color box. I'm gonna get rid of the hue, get rid of the saturation. So that's back to that kind
of very slightly gray. Then because we made
this a duplicate, it's already set up for middle. So right now we have it set
to metallic 1.77 ash tropic. And then we have our
clear code set up. So there's really nothing
else for us to do. And that's the power of
taking a base material, duplicating it, using that little, that little
number button. Now it's going here because this is only applied to an object. But by clicking
that number button, we branched it, made it into
its own unique version. And then while we had to
do is adjust the color, we didn't have to rebuild
everything about this material. Now if we deselect our grid, we can see in the background
here that we're getting these kind of interesting
reflections that caused this Grid to almost look like it's disappearing
in certain spots. And that's because it's
reflecting different parts of the scene that are either
catching more or less light. So as this thing moves
during our animation, it will catch
different reflections as it moves around
in the background. With the materials
out of the way, we're ready to move on to
the Compositing Effects. I'll see you in the next lesson.
10. Compositing Effects: This lesson, we'll be working on compositing Effects
within Blender, tad bloom, and glitch
effects to our image. Let's begin. First. Let's do a
single frame render, so we can use that as
a base to composite. From. Now let's go up to our Rendering
tab. Here at the top. We click that. It'll switch us to our
rendering work-space. Now we can go over
here to the left. We're going to click render. Then we're going to
choose render image. We can also just hit F12 on our keyboard if
you prefer that. I'm going to click this button. Now we can see that our
image starts to render. It'll take just a moment. We can see the progress
down here at the bottom. Then once it's done rendering, it'll run the D noisier. So you can see all that kind
of graininess disappeared. And that's because of the D
noisier that we had enabled. While the image looks
pretty cool so far, There's some effects
that we can add that I'll really AMP up the Vaporwave aesthetic and
distorted look of the image. So let's switch from the
rendering work-space to the compositing workspace. Then we have this
dope sheet down here. So this is currently
the dope sheet. We're not going to
need that, so we can just drag this down. We just drag on
this middle line. We can see the arrows and
we'll just make this smaller. We don't need to see
that. We're not going to hit N on our keyboard
to hide the side menu. Then we're going to drag
out another viewport. It's, we're gonna go up
here to the top-left way into our mouse turns
into a little plus sign. And then just drag
it to the right. And we're going to make another view port here
on the right side. We'll have it a
little bit smaller on the right and then a little
bit bigger on the left. Now on the right viewport, we're gonna go up to
this little symbol here. Click this, and then
we're going to choose Image Editor three
near the top left. Then in the center here. So the center drop-down next to the new button, we're
going to click that. Then we're going to
choose viewer node. Now, back on the left side, we're going to check
this little box here that says Use nodes. Now we can see our little
render pop up here. However, we're not seeing
it on the right side. So we're gonna be using
this as sort of like our representation
of the final result. Then, then we'll be working
over here on the left. So the way we get to show up on the left or the right side here, where it's currently empty. So we need to make something
called a viewer node, which is what this is
currently displaying, which is nothing because
we don't have one. We're just going to hit
Shift a on the left side. I'm going to click on Search. Then we're going
to type in viewer. We'll just pick viewer here, the top place that now we can click and drag
this down to the viewer node. Now we'll notice that
the image is showing up on both the left
and the right side. That's because this is
set to backdrop here. Right now it's showing the
image behind the work area. However, we've already set up
an area on the right side. We can just zoom in
and out one that has an unobstructed
view of our render. We can just click
this backdrop button here to hide that on the left. This is the first time
that you're seeing the node system within Blender. Basically these nodes
worked from left to right. So this is the render result that we had on the
Rendering tab. This tab. And then over here,
these are the outputs. So now we can add different
nodes between these two to add effects
to the output. So in this case, the
image on the right. So we can just click and
drag over top of these to select multiple nodes and
then just space them out. So we have some room
to work in the middle. We're going to start with
that node called glare, which will add a blue Meet Glow, a fog around the brightest
elements of our render. Let's hit Shift and a. On the left side, we're going
to search the word glare, GLA, re, pick this node and then
we can just drop it here. So when it highlights
one of these and white, that means it's going to
automatically link it to that. We're going to have to
link it to both of these. So once we drop it, now we need to run this viewer. So the output, so the
top here of the glare, we're going to run
that back down into the viewer as well. That way the glare is outputting
to both the composite, the viewer node. I
can drag this over. Now we can kinda see what
this glare node is doing. Now right away,
it's kinda crazy. It's doing this star-shaped
plus sign all over the place. But that's because of the
mode that it's set to. We can zoom in here. We have a few different modes
that we can choose from. So right now it
defaults to streaks. There's also Ghosts,
which does this kind of sort of multiple scales, sizes of these
brightest elements. Then there's fog glow, which is the one we'll
actually be using, which we can see here just adds a nice soft glow around
these practice elements, like they're made of neon. Then there's simple
star which adds, it's kinda similar to streaks, but it has some
minor differences. For our Rendering.
We're gonna go up here, we're going to
choose simple star, and then we're going to switch
it back to follow glow. Fall. Glow is just that default, sort of nice soft glow
that we're getting around this to make these
look like neon tubes. We can switch the quality
here from medium to high, which really won't make
a huge difference. It's just kinda giving it
a little bit more samples, making it a little bit smoother. So the values we want to change here are the threshold
and the size. The size is pretty obvious. That's just the bigger the
number, the bigger the glow. If we type it in nine, we can see it's a
little bit brighter and it also goes out a
little bit further. Then threshold here. This one's a little
bit more complicated. So essentially this is saying, the higher the number, the less bright objects that will fit within threshold,
the lower the number. So if we make this zero, it'll make every single thing in here received this bloom. And then as we make
the number higher, it'll be a little
bit more picky. It will start looking for only the brightest areas
to apply the balloon to. So if you want to really
glowing, really bright, super bloomed out render, then you want to lower value. In our case, we're going
to have our set to 0.9. We'll let it put a
little bit more bloom on areas that it wouldn't
have normally done it. But we don't want
it to go crazy. Now that we have some
nice glow added, let's create an effect
called chromatic aberration. Chromatic aberration
is an optical defect, or light is separated
an offset into its red, green, and blue channels. This creates a
rainbow effect and slight blurring around
the edges of an object. Its first, let's zoom out
here on the left side. I'm going to drag these over to make a little bit more room. Now we're going to
be making a few different nodes to start with. First hit Shift a, and then search type in. Combine. We're looking
for combine RGBA. We're going to place that
here on the right side. Now we're going to
hit Shift a again. Search. We're going
to type in separate. So we can just type in Sep. We're going to look
for separate RGBA. Replace that here. Now we drag the, the node here from glare
so that the top output of the glare node going to
drag that down into image. And then we're going
to drag the output of the combined RGBA into both
the composite and the viewer. May can see here
nothing has happened because we haven't actually
link these together. This node is going to separate
this image into its red, green, blue, and Alpha channel. Then this node will
combine red, green, blue, and Alpha into
a solid image. Again. This is the first
step in order to separate the
channels out for us. So we're just going to drag
these across to match. We can see there soon as I connected the B,
which is the blue. Now it's only displaying
the blue channel. Now if I attach the green, it's going to display the
blue and the green channel. And then we can drag the red to display all three of them. Which means our
images back to normal because now we've separated it, but then immediately recombined. It. Might have seemed like
an odd thing to do, but that's because
we want to affect only two of these channels, which are the red and the green. It's now let's hit
Shift and a again. Then the search bar we're
going to type in transform. So T RAN will get transformed
and place that up here. Then we're going
to hold Shift and D. Just start duplicating it. And we're going to make
another one because we're going to
need two of these. So now we can zoom in here. Now we want to run this
red into the top one. We're going to drag this
red node here into image. And then we're going
to drag the output for the image back into red. We can see your head hasn't
done anything because we haven't really changed
any of these values yet. Then we're gonna do the
same thing for green. Going to drag this into image, then drag the image output
back into the green. So essentially we're
adding another node in-between the green on both sides and then
same with the red. Now we can affect the values on these transform nodes to shift these red and
green channels. To see what this effect
is really doing, Let's zoom in and our image
here on the top rate. We want to see a little
bit of this ring, some of the Grid
and the background. And then some of our statue. Let's start with the
top transform node, which is currently
affecting the red channel. Here, we're going
to type in 2.5. It entered. Then we can see here that it's shifted this red channel
over to the right. So now the red channel
is a little bit offset. It's missing a little bit of the red channel
and the left side. And it's overlapping a little bit over here on the right side. We can also shift
this up a little bit. So it's going at a diagonal by typing in one for
the y-direction. Now it's moving
over to the right 2.5 and then up a
little bit one. Now we can do the opposite
effect when the green, so we're going to
actually just type in the negative versions of these. So for the X, we're going
to type any negative 2.5. It entered. Then for the Y, we're going
to type any negative one. Now if we look around our image, we can see here we're
getting this kind of shifted, almost, kind of almost reminds me of a kind of like an old 3D movie where you had the red
and the blue channel and they were kind of offset
to make a 3D effect. So that's kinda what
we're going for here. Now we've done it pretty
simple or a subtly. So we're, we're
getting some areas where it's pretty obvious
that we're getting some red over all the green
side is a lot more subtle. So here we can see a little
bit of the green for the red side is kinda like
the leading edge here. Now if you wanted to
make this effect even more impactful, and now the more
impactful you make it, the more blurrier image
is going to appear. But you could
change these values here so you don't have to
follow along with this. This is just an example. But if I make these much higher, so if I type in like ten
for this and maybe five, we can see how much
more this shifts that. It's, I'll do the
same on the green. Negative ten, negative five. Now, it's making a pretty
interesting effect here. But you'll notice it'll
also make the edges of your frame also noticeably
have a shift on them as well. And we still have that with the smaller values that we had. But it's a lot less
noticeable because the lines are just
so much smaller. They're only like one pixel
by two-and-a-half pixels. These values here will also depend on the size
of your render. So if you make a
much larger render, so if you say you double the
size of your render output, which right now ours is ten at. If you make it 2048, then you'll have to
double these values as well because this is using pixels instead of an
arbitrary number. So you'll have to double your effect or
else you'll end up having your effect by making
your render twice as large. So if you're looking for are
render That's a little bit more chaotic and distorted, then you want to have
higher values here. You can also mess with
things like the angle. If we adjust the angle of that channel and we'll
actually rotate the channel. We can see there that it's
rotated a few degrees. This will be more obvious. So here we're getting a really chaotic and really
distorted image, which might be what
you're looking for. If that's the case, then you can really play with
some of these values. And then the scale,
we'll just scale up or down the size of
that channel as well. You can see here
it's really crazy. Now, I set mine back to the
values that I originally had, which was two point 5.1
for the red channel. All zero these out. Then I'll just fix
these as well. With this last effect added, our final look is complete. In the next lesson, we'll be Rendering Our final animation. I'll see you there.
11. Rendering Our Animation: In this lesson, we'll be
Rendering Our final animation into a video that you can share with your friends and family. Let's begin. Luckily, we've
already set up most of our settings and
a previous lesson. So this should be a
pretty easy process. Just to be safe. Let's give the
settings a quick run through just to make sure
everything is correct. Can first go up to
Edit Preferences. Then we're gonna go over
here, it's a system. Then at the top, make sure
you have either optics, cuda selected, whichever
one it allows you to use. If you can use optics, use that. If you're not able
to use optics, then choose cuda and
then make sure you have all of the devices
listed below checked. Now they won't
match mine exactly. But whatever your computer has, just make sure you have
every one of them checked. Now we can close this. We're gonna go over to our
render properties tab, which is this little
backside of the camera. Then just make sure you have your render engine
sets his cycles. Your device is set
to GPU, compute. Let me can scroll down. We don't have to worry about
the viewport settings, although they should be
set to what we had before, which was 0.1 for the
noise, 100 max samples. De-noise checked on, and then
de-noise are set to optics. Now we can go down
here to the render. You want your noise
threshold set to 0.03, which is what I have here. Your Mac samples set to
100, de-noise checked on. And then your D noisier should
be open image de-noise. Make sure you have that
setting. Now scroll down and then twirl
open light paths. Then every single one of
these should be set to one. So your total should be one. And then every one of
these different categories should also be set to one. We won't need anything
higher than that. Then lastly, scroll all the
way down to the very bottom. Twirl open color management. Then make sure you
have your view transform sets of filmic. Then you're look set
to high contrast. Now go back up here to
our output properties, which is this little printer and printing out a little photo. Scroll up to the top. Make sure your
resolution is set to 1080 pixels by 1080 pixels
for both the X and Y. The percentage here
should be at 100%, so that renders the
full value here. Then our frame rate
should be set to 30 FPS. Lastly, just double-check that your frame range here is set to start on one and then end when one-twenty with a step of one. With those settings
out of the way, let's get our output setup. This will tell it where to save it and what file type to use. The first thing
we're going to do is click on this little folder here and then navigate
to the folder that you want to
save this animation. So simply just click on
this little white folder and then navigate
to that location. Now that we've
found the location, we want to save it in, we can
give it a name down here. So I'm going to call mine
Vaporwave animation. Underscore v0, v1, which
stands for version one. And then an underscore
at the end. So the underscore at the end just gives it a space before it adds the frame numbers for
the animation at the backend. That way it doesn't put
the number directly against the V1 that I had here. Because either way
it's going to add frame numbers at the
end of the animation. The point of adding
the V1 is just in case we render this out, find out we want to
make some changes, but we don't want to
delete the old one, then we can just call
the next one V2 or V3, V4, whatever you end
up getting up to. The name changed. Now
we can just hit Accept. And that'll commit the change. Now let's switch
the file format. So right now it's
defaulted to PNG, which is an image-based format. We're going to render Ares
directly into a video. So we're going to choose
click on P&G here. We're actually going to
be choosing FFmpeg video, which sounds like a
really weird one. And it's probably one
you've never heard of. But it's just the umbrella term for one that you probably
have heard of, which is Mp4. We're going to click
in FFmpeg video. Now we can scroll down and
we're going to open up encoding in the container. We're going to switch it
from Metro SCA to MPEG4, which is one that you've
probably heard of if you're familiar with video formats. We also just want
to double-check that our color management. So this little twirl down here, just set to follow scene, which means it's just going
to use what we set up before. If you wanted to
override the render to use something
different than the scene, you could choose override
and then change that here. But we're just gonna
leave it on follow seen. Now let's continue
to scroll down. For the video codec. We wanna make sure
that it sets uh.264 Which I believe is the default. But if it isn't, for
some reason just makes you choose in the
list, It's right here. Then for our output quality, we're going to switch
it from medium quality to perceptually lossless. Lossless means that it has
no compression at all. It's 100% full quality, except that makes the
video really, really huge. So we're going to choose
perceptually lossless, which has compression, which
will keep Our File smaller. But it's as far as you're concerned, it's
essentially lossless. It has so little compression on it that you
really can't sell. We're going to choose
perceptually lossless. And then we can leave our
encoding speed at good. Now let's go up to
our Rendering tab. And now we're ready to
render our animation. Now let's go up to render. Then we can choose
render animation. So this will actually start rendering each frame
of our animation. And then when it's done, they'll compile that into a
video that we can share. We're just going to
click Render Animation. Now. We're going to see a progress down
here at the bottom, which shows us the progress
for the current frame. And we want to know which
framework on out of one-twenty. We just go up here that top-left and that'll show us what
frame number we're own. So that finished
the first frame. Now we're on frame two. It also show us roughly how
long that last frame took. The remaining over here. This is all over the place. It's I wouldn't really
go too much by this remaining it's mostly
remaining time for the frame. It's not for the
entire animation. You'll notice as you
render each frame that only some of them show that bloom and
chromatic aberration that we added with Compositing. Don't worry, it does still
apply them to each frame. It just doesn't show it
while it's rendering. As a warning, this animation does take some time to finish. I can't tell you
exactly how long, but after rendering
your first frame, look at the top-left and see how long that last frame took. Multiply that time
by one-twenty, then divide it by 60 to get an idea of a rough estimate
for the entire Animation. You can expect this
to take probably at least 15 min to render, or possibly as much as an hour depending on how good
your computer is. My computer isn't particularly powerful and is using hardware
that is a few years old. It took me about 35
min during my testing. I'll be back in a moment after
my render has completed. Now is a good time to go make a cup of coffee or tea as you wait for your awesome Vaporwave animation loop to complete, we're back in, the
animation is finished. You can find the video
file in the location he told it to save in
and our output settings. If we're using the built-in
Windows Media Player in, click the dots at
the bottom and check the repeat options so
you can see what they animation looks
like when it loops. Now with that option checked, you can hit play and watch our
animation loop seamlessly. Now all that's left is to upload your hard work decisional
media to share with your friends and family
just this morning, I have noticed that even though our video loop seamlessly, some social media
platforms such as Facebook or freeze for a moment
at the end of each loop. Unfortunately, that's
just the limitation of the platform
we're uploading to, not a problem with our video. The next and final lesson, we'll be discussing
our class project. I'll see you there.
12. Our Class Project: Congratulations, You've made
it to the end of the class. Now that you've learned
how to make a Vaporwave animation loop with me. I'd like you to create
a new one of your own and share it with the class. I recommend you look
through the 3D scans website again and pick
out your favorite statue. Utilize the same techniques
we learned during this class to turn that statue into a
Vaporwave version of itself. This would include Adding
geometric elements, Breaking up the statue
in interesting ways, Applying unique glowing
or metallic materials, Creating vibrant lighting setups are Animating interesting
subtle movements. If you would rather not
attempt a brand new statue, try giving the current
statue different materials, lighting, and animation to
make your own unique version. For my class project, I utilized this broken
bust statue from 150 BCE. I went with a pink
and yellow scheme for the neon elements, with pink and blue
for the background. This was created
utilizing all of the same techniques we
learned during this class. After you've finished
your Vaporwave animation, post the render to the
project gallery to share it with me and all
of the other students. I'll personally
review each project posted and let you know what
I love about your project, as well as anything that
could use some adjustment. I can't wait to see what
you all come up with. Thank you all so much
for taking my class. I really appreciate it. If you enjoyed the
class and want to know when I release new ones, please click the Follow
button here on Skillshare. Please consider
leaving an honest review for this class so you can let other students know if it's worth their
valuable time. If you liked this course, please check out my teacher profile. You might just
find another class of mine that interests you. Thanks again, and I hope to see you in another class soon.