Transcripts
1. Introduction: Her. Hello, and welcome to
this blender mini class. I'm Harry, a season
three D artist with over a decade of
professional experience, and the privilege
of being recognized as a top teacher on skill share, specializing in
blender tutorials. In this mini class,
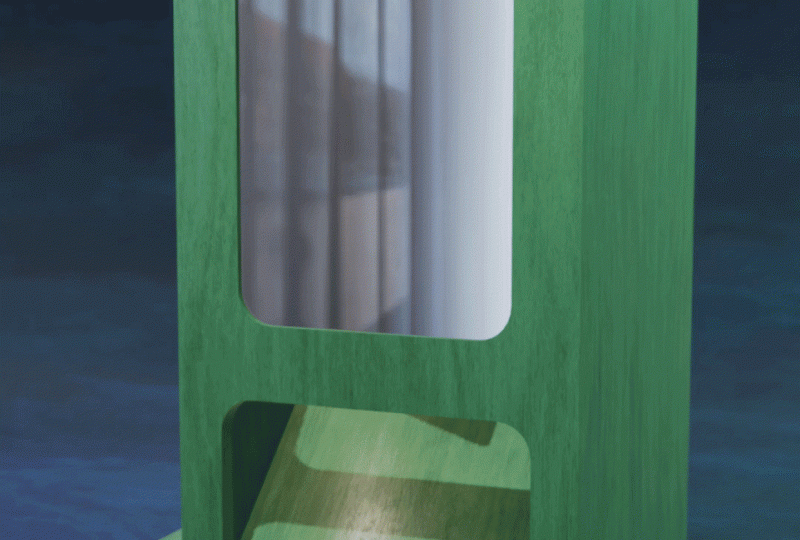
we'll be creating this dice rolling animation with the use of rigid body dynamics. You might recognize this
wooden rolling device already. But if not, this is
called a Dice tower. While it's an integral part of rolling dice for many games, it also gives us the perfect
opportunity to learn how to use physics and blender to
create realistic animations. I'll be teaching
you how to create your own Dice tower animation using a pre made starter file provided in the
project resources. We'll end the class with
rendering a video of our newly created
Dice Tower animation. And I'll even provide
tips on how you can customize it to your
own unique style. By the end of this short class, you'll be amazed at how
easy it is to create realistic animations with the
use of physics and blunder. So if you're ready for a
fun dice rolling adventure, I invite you to join me in
class. Let's get started.
2. Animating the Dice: I this lesson, we'll
set up and run our dice Tower animation
using the help of rigid body dynamics.
Let's begin. If this is your first time
taking a blender class, I'd highly recommend
you start with my complete beginners
guide to Blender first. This class was designed for the absolute beginner to Blender and three
D art in general. We cover every single
necessary topic in order to get you up to
speed and running and blender. We'll accomplish this with
short and focused lessons that cover each topic from
a beginner's perspective, utilizing a well
organized starter file. We end the class with an
easy project where you set up and customize your
very own cozy campsite. With that out of the way, let's
continue with the lesson. Due to this being a mini class, we'll be approaching
this a bit differently than some of my other
full length classes. In this class, I'll be narrating
the animation process, which you'll watch me
create here on screen. This means this lesson
will be a bit faster than you might be used to if you've
watched my other classes, but it should still be
a comfortable pace to watch and pause if you
need a moment to catch up. As always, I won't be
skipping any steps, but I will be going from step to step without much
break in between. So if you're ready,
let's jump right in. First, make sure that you
have the starter file, Underscore Dice Tower animation 01 file downloaded from
the project resources, and open and blender
version 4.1. If you're working in
Blender 4.2 or later, you instead need to
download the Blender 4.2 version of the starter
file from the class resources. The EV render engine received a pretty big
update in this version. I needed to update the file in order for it to
work correctly. If however, you're still
working in Blender 4.1, you should continue using the original starter
file without the word Blender
4.2 in the title. Now that your file is
open, you might notice that some of your
materials appear broken. This is because Blender
isn't sure where to look for these texture
images that I've provided. Luckily, this is a
pretty easy fix. First, make sure that you
have the textures dot zip file downloaded from
the project resources. Save this zip file in the same location as you have the starter file saved in now. Now that the textures folder and the starter file are in the same location on your computer. You can right click on this textures folder and
then choose extract all. This is the process on
a Windows computer. However, a mac computer
would be somewhat similar. Now that our textures
folder is extracted, you should have a
textures folder here without any sort of
zipper icon on it, and this will include
these images. Now let's head back to Blender, and then we can tell it where
to look for these images. We'll go to file, down
to external data, and then choose
find missing files. Now go to this textures
folder that we just unzipped, double click on it
to enter the file, and then click Find
Missing Files. You should now see all
of your textures are updated and the pink error
textures have been removed. With the file setup
out of the way, let's get these dice animated. Our first step is to add the rigid body
world to our scene. This is a requirement for
the rigid body dynamics we're planning to
use on our dice. You can think of this as turning on the
gravity in our scene. To do this, go over
here to the right side. Click on this symbol here to
enter our scene properties. Now go down here in this list to where it says
Rigid Body World, and then we'll click
this button here that says Add Rigid Body World. Nothing will happen when
we click this button, but it will set up our scene
for the rest of the steps. We'll return to these settings
later on in this lesson. Now let's begin the process
of enabling physics on our dice and our dice tower that we're rolling
the dice through. We'll start with the Dice tower. First, make sure you
have the Dice tower selected here in the viewport. Then over here on
the right side, we're going to click
this little circle icon to enter our Physics tab. Now we can click the
Rigid Body button found here, second
from the bottom. Let's go through here and
change some of these settings. So we'll scroll down so
we can see most of them, and we're going to set the
type from active to passive. We'll go down here to
the shape and switch it from convex hull
to mesh instead. We'll set our bounciness
value here to 0.5, and then we'll change
our margin to 0.0, zero, zero, one,
and then it enter. Adjusting these
settings, we've let Blender know that this
object should be rigid, meaning that it should interact with other rigid
objects in the scene. If you don't make
an object rigid, other rigid objects will simply pass right through it as
if it wasn't there at all. By setting this dice
tower to passive, we've told this object
to just provide a solid surface for other
objects to bounce off of. The mesh and margin settings
make sure that Blender sees the collision for this object accurate to how it
actually looks. The bounciness setting just makes the surface
a little bit more bouncy so that the dice bounce off of it with
a bit more force. With these changes done, let's move on to
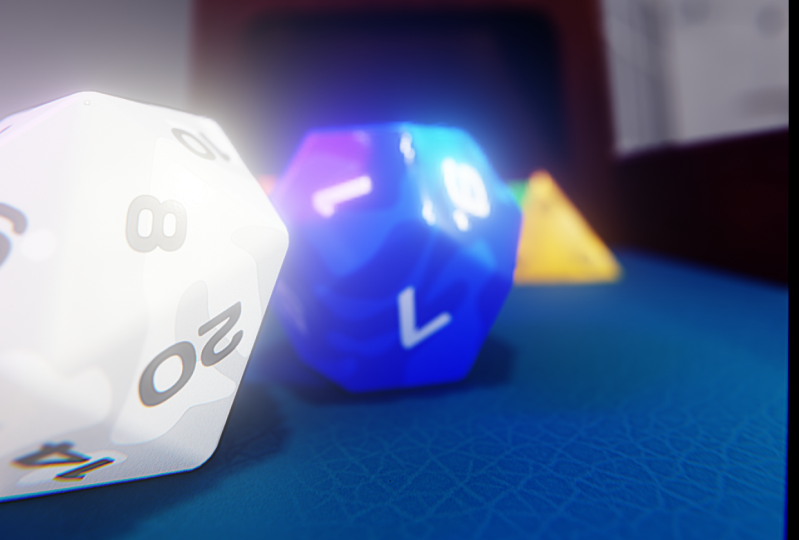
the dice settings. Let's select the D 20
from the viewport. Or from the list over
here on the right side. The D 20, in this case, is
the one here in the middle. We can also see it
here on the left, it's the white die, or simply just select it
here from the list. On the right side here, we're still inside the physics tab. So all we need to do is
click Rigid body again here. Our settings for
this dice object will be a bit different
than the Dice tower, as we actually
want these dice to animate and reactive gravity. We'll leave the type
here set to active. We'll change the mass to 0.0, zero, five, then hit enter. Then we'll set our
bounciness here to 0.75. By adjusting these settings, we've lowered the
weight of this tiny, 20 sided die to something
a bit more realistic. We've also made it
a lot more bouncy, so it bounces and
rolls a lot more. Before we can begin
the animation process, we'll need to copy these same
settings to the other dice. Luckily, Blender has a
tool that allows us to copy all of these settings
to other objects easily. We'll first start
out by selecting any one of these other die here except for the
one that we just adjusted, which is the
one in the middle. Just going to start by
clicking on this D four here. It looks like a little triangle. Now I'm going to hold shift, and then just go around
the circle here. Holding shift and clicking on these to select the other die, then I'll select one here
in the middle very last. By selecting the D 20
last in the middle, we've made it the active object. We can tell that
here because it has a different color
highlight around it. Now at the top of
this right viewport, we can click this object
button found here, then we'll go down
to rigid body and then choose copy from active. This tool will
automatically transfer all the same rigid body
settings from the D 20 to the other dices so that we don't have
to do it one by one. Now, all of these
dice that we have selected have the exact same
settings applied to them. With these rigid
body settings added, we're ready to start
the animation process. We can get a really simple
example of how this all works by selecting all of
our dice as they are now. Then move them up slightly
about an inch off the surface, and then down here
at the bottom, we'll hit this play button. You'll notice after hitting the play button that
all of your dice fall from the air and bounce around inside this tray
just like real dice. There's one pretty
noticeable issue, though. They fall and animate
really, really fast. So if we pull this playhead
here by clicking and dragging it back to zero
and then hit play again, we can see that they fall around and bounce relatively
realistically, but it's a really
quick animation. Isn't super realistic, and it also doesn't
look great either. Luckily, for us, there's
a really easy way to slow all of this
movement down. Let's head back to
the scene properties, by clicking this icon here. Then we can scroll down here to our rigid body
world settings, and then we'll click
on speed and set this to 0.5 and then hit enter. Now, on our timeline
here at the bottom, we can drag this
back to frame zero, and then hit the play button. And we'll see here
our animation is a lot slower and a lot
more realistic now. That's because we basically just have the speed of the animation. For now, we can leave our
speed here set to 0.5. Now that we have
the speed settled, let's get our dice falling
down through the dice tower. This is actually much
easier than it sounds, thanks to us enabling all
of these physic settings. We'll again set our
playhead here by dragging it all the
way back down to zero. And now in our right viewport, we're going to rotate our view slightly and then
use our move tool found here to drag this
above the dice tower. That's placed basically
above this hole here. You'll find it much
easier to place these dice if you orbit
your view around, so you can get a better
view from different angles. Now we can switch to
the rotation tool found just below the move tool. Then I'm going to rotate
around here to the front, and then I'm going to be
spinning these dice using this red circle and moving
them mostly vertically, just a little bit off vertical
so that as they fall, they bounce around on
top of each other before they hit this first shelf
that we can see here. After rotating your dice, you might want to switch
back to your move tool and then slide them over to
the right side a little bit. That way they hit this
first shelf entirely before they move
down to the next one and they don't bypass it. Also want to make sure that
your dice aren't so far to the right that they totally miss the dice tower in general. They should all fall comfortably here on this first shelf. And then our last step is to move them higher
into the air. So on our right viewport here, we're going to click and drag on this blue handle
using the move tool, and then we're going
to look at the left viewport where we can
see our camera view. So we can see here
as I move them up, where they're starting to
come out of the frame. So as soon as they get into
this shaded portion here, we want to move them a
little bit further until that shadow disappears
on the dice tower. So I'll move them up
to just about here, just past where that
shadow is touching. And now we notice over here, it looks like there's
no dice in the frame. Don't want them super high into the air because
that'll make the dice explode once they hit the bottom here because they're falling such a far distance. They only need to be
just high enough that they're no longer visible
inside the camera. After your dice are placed, you can go over here to the
right side and then click on this little camera
button here to jump back into the camera
view for both sides. Now we're ready to hit
our play button here to see what our dices do as
they fall through the tower. So we can see after
hitting play, our dice have fallen through, hit this first shelf, bounce
down to the second shelf, and then roll down
here into the tray. You can get an
example of what this looks like in a little
bit slower speed. If you just click and drag your playhead and move it backwards. You'll see your animation
here, play in reverse. And then you can
drag it forward here to see what the animation
actually looks like, albeit at a slower speed. Another thing that you'll notice is that your dice have
rolled completely differently than
minded and ended up in different positions
here in the dice tray. This is because
even the smallest difference in the placement or the angle of the
dice can completely change how the dice roll. It's very likely that
every single person taking this class will see
a different result down here in their dice tray, which is actually pretty cool. If for some reason,
you're not happy with how your dice rolled
down here in your tray, say maybe they all
bunched up in one corner, or they only made
it a little bit into the tray and
stopped really short. All you need to do is
go back to frame zero, and then in this right
viewport here again, Going to zoom in, and
then I'm going to hit R to start rotating
with our quick tool, and then just rotate them just like one degree
would be enough. So like a single degree
in any direction, and then play our
animation again, and you'll see it'll makes a
completely different result. So these dice don't fall
in the exact same place. Again, for some reason, if you're not happy
with how it looks, just rotate them one degree in any direction, it the
play button again, as long as it's a frame zero, and then we'll see here, it makes a completely
different animation. Another change that you
can make is to go back to your scene
properties found here, and we can adjust the speed. For some reason, you
wanted your speed to be a little bit slower or
a little bit faster, you can change that number here. Maybe in my case, I would want mine just to be a
little bit slower, so I'll change it to
just 0.4 instead of 0.5. Now you'll notice next time
you play your animation, however, it looks different. Because of that slower speed, it actually changes where
these dice fall because it's just another change that changes the randomness of how
these dice bounce around. So if you want to
change your speed, make sure you change it first, and then start rotating your dice to find
where they land. Because if you find the dice
position that you like, and then you change your speed, it's going to change what
it looks like anyway. Once you're happy
with both the speed and the animation of your dice, we're ready to move on
to the final steps. So again, here, you
might want to be in your camera view if you're
not in it on the right side, so we can just click this little camera button found here. And now let's determine how long our total
animation should be. This might be different for your animation based on the speed of your animation and how long it takes for your dice
to stop moving. To figure this out, I'm
just going to go down here, go back to frame zero, hit play. And then take note of when my
dice basically stop moving. So after I hit stop here, I can drag back through and then see once these
dices stop moving. So in my case, my
dice stop moving right around this kind
of 80 frame mark. Yours might be a bit different. It might be a bit sooner or
it might be a bit later. Once you've found where
your animation ends, we're going to add about 30 frames extra space
at the end of it. This lets your dice
settle for a moment, and it lets you get
a quick view of what your dice rolled before the
animation starts over again. Me, I'm going to
set mine here to basically about 1:20 just
because it's a nice number. 120 frames at 30 frames per second is a nice
four second animation. To cap my animation
here at 1:20, I'm going to go down
here to the bottom right where it says end, and I'm going to type in 120. But again, your value here might be a
little bit different. Let's go back to frame zero. Play our animation just to make sure everything
works correctly. Now with our timeline shorten, let's head over to
the scene properties again and then scroll down
to the cache options. So we're here in the
scene properties, and then we'll scroll down
here to where it says cache. Now we'll set this
end number here to the exact same number that we set down here at
the bottom right. So in my case, 120. And then before we move
on to the last step, we're going to save our file. This next step has a small
chance of crashing our file, so it's best to save it now, so we don't lose
any of our work. So we'll just go here to file, and then choose Save. With our file saved, our
last step is going to be baking the simulated
animation that we've created. The baking process will cache, which is kind of like saving
your simulated animation. So it doesn't need
to be calculated every single frame when you
play or render the animation. On more complicated simulations, this is typically
the first step after you've got the animation
exactly as you like it. For more simple
animation like ours, it's more or less
just good practice to get in the habit of doing. Be sure you're happy
with your animation before you bake it, however. As you won't be
able to go back and make changes to it
after you bake it, you would need to
delete the bake, then make your changes, and then bake it again. To bake the animation,
make sure you have all of the dice
still selected. You likely still do from
when we placed them earlier. If you need to reselect them, the easiest way to do this
would be go over here to the outliner list on the right and then select the first die. Old shift, and then
select the last die, and it'll select everything
here in between. And now that we have
our dice selected, we can go down here into
the cache settings, and we'll simply click
the word bake here. Your blender file might
become unresponsive for just a moment as it works
on baking the simulation. Give it just a few moments, and your bake
should be finished. You'll know it's finished
when the bake button that we had down here before, has now turned into a
delete bake button instead. And that's it. Your Dice tower animation
is officially complete. You can now hit the
play button down here to watch your animation
loop over and over. In our next lesson, we'll render our Dis Tower
animation and explain some simple methods
for customizing this animation to your own
style. I'll see you there.
3. Rendering and Customization: In this lesson, we'll render our dice tower
animation and explain some simple methods
for customizing this animation to your
own style. Let's begin. We've made it to the final
lesson of this class, but we're not quite done yet. We're going to
start by rendering a test frame of our animation, so we can add a cool
motion blur effect, and then we'll
proceed to rendering the full animation as a video. Let's start by switching to the rendering workspace
found here at the top. Now that we're here,
the first step is to render a still frame
of our animation. We want to switch it to a frame that has some action
going on in it. So down here on our timeline, we can make it a
little bit bigger by dragging this bar
here to the top. And then if you can't see
your entire timeline here, just click on this little
dot here on the right, on the scroll bar,
and we'll drag it out so that we can see more
and more of the timeline. Now, let's drag
our playhead here to one of the frames
near the beginning. Ideally, we want
a frame that has the animation about halfway
through the dice tower. I M case, somewhere around Frame 40 should be a
good place to start. Now what we need to do
is render our image. To do this, we can simply
hit F 12 on our keyboard, or we can go over
here and then choose render and then
pick render image. Your render should only
take a few moments to render thanks to the EV render
engine that we're using. With our steel image rendered, we're ready to enable a
cool motion blur effect to really make our dice
animation look realistic. This is a pretty easy
effect to enable luckily. First, we're going to go over
here to the right side and go to the render
properties tab found here. Now we'll go down
our list until we see here the motion
blurr settings. First, let's check on this box next to it to turn
the motion blur on. And then we're going to change our sutter speed from
0.5 down to 0.35, and then we'll set
the steps value here from one all the way
up to ten instead. In simple terms,
the sutter value changes how much
moving objects blur, and the steps value changes how visually smooth
this blur is. Now, let's render our
image again to see the results of these
motion blur settings. And again, we can hit F 12 or go to render and then
choose render image. Now we can see if we move in on our dice here by zooming
in with our scroll wheel, that our dice have this really
cool motion blur effect here to make them look like they're really moving quickly. This gives the
impression that they're moving so fast through the dice tower that they're
blurring inside the camera. With our motion blur set up, all that's left is to
render this animation as a video that we can share
with our friends and family. We'll start by heading over to the output properties found
here on the right side, just below the tab that
we're currently in. I'll scroll down
here to the bottom, and then click on this
white folder icon. This will allow us to
set up where we want this animation to save
when it's finished. Now navigate to
wherever you'd like this file to save
on your computer. And then down here at the
bottom, we can give it a name. In my case, I'll call it
Dice, Tower, animation, underscore, final,
underscore, zero, one, and then hit Accept. Next up, we need to
change the file format, so our animation outputs as a video rather than
a series of images. So over here on the right,
where it says file format, we're going to switch it
from PNG to FF peg video. Now we can twirl open
the encoding options found here just below, and we're going to switch
the container from Mitroska to M peg four
found here at the top. Then lastly, we'll switch
our output quality from medium quality to perceptually lossless found here at the top. With that last setting changed, we're ready to render
our full animation. This will take a few minutes depending on how powerful
your computer is. However, based on
our render settings, it really shouldn't
take too terribly long. To render your animation, go up here to where
it says, render. And then choose
Render Animation. The button just below the
one we work clicking. I'll see you in just a moment
when my render is finished. But I recommend that you
pause the video and let your animation finish before
you continue watching. I'll see you in just a
moment. And that's it. Our final animation is
rendered as a video and saved in the location that we chose in the output settings. Now you can share it with all
of your friends and family on social media to show
off your hard work. Before we end the
class, however, I'd like to give you a few simple tips
that you can use to customize this animation
for your own class project. Before we begin making
any changes to our file, let's save this version
of file as it is now. Then we'll make a new version
that we can play around in without messing up any
of the original animation. So we'll just go
over here to file, and then choose Save. I'll save this file
as it exists now. Now let's make a new version of this file that we
can customize a bit. So we're going to go
over here to file, and then this time
we'll choose Save as. This allows us to give
the file a new name and then save it as an entirely
new version of the file. This make sure
that we can always go back to the
original version of the animation if we don't like any of the
changes that we made. At the bottom, we can
give it a new name. So in our case, I suggest
that all you do is add the word class project, underscore at the beginning
of the file name. And then once we have
our name changed, we can go over here and
then click Save As. Now that we have
our new version, we can begin making changes. The first and most obvious
change that we can make is to change the
colors of our objects. So first, we'll start out by
moving our playhead here to the very last frame
of our animation that we we're sure that all
of our dice are visible. Now we can go to the shading
tab found here at the top, and this is where we'll
be changing our colors. Won't be explaining exactly
how shading works in blender. However, I will be giving you some quick tips on how to adjust the colors if you'd like. If you're interested in how the shading tab works
in more detail, I'd highly recommend either my previous mini class called create a vibrant
plastic material, where we create a material
for another 20 sided die, or if you want something
a bit more comprehensive, I'd recommend my magic
of materials class, where we learn
everything there is to know about materials
and blender. So now in our top viewport, we're going to select this D 20, so we can zoom in here
to get a better view, and we'll select
this white die here. And then here in the
bottom viewpoort, we'll see the Shader editor, which shows us the node system responsible for this
white material. We won't focus on
all the nodes here, but if we zoom in
with our scroll wheel to this very top node
here called color ramp, we can get a look at
this node better. This node in particular is responsible for the
color of our die. If you need to reposition
this view at all, you can also click in
your middle mouse button, so click in the
scroll wheel to pan it back and forth or
slide it up and down. The easiest way to change
the color of this die is to adjust the colors on either
side of this color ramp node. We'll first start by selecting
this far right slider, by clicking the little triangle
here at the top of it. Now that it's
selected, we can click this color bar here
at the bottom, and that will bring
up a color picker. If you notice that this
color picker is really large or it's in the way of
you seeing the die behind it, simply pan your view
off to the side or zoom out slightly to make sure that it's not so
large when you click it. So now that I've panned it off to the side and click this bar, we'll notice that
it's a lot smaller. To adjust the color here that
we see in the color picker, all we need to do is click on this little dot
here in the middle. And then we can drag it
anywhere on this circle, and the color on our dye
will adjust to match. After finding a color you like, you might also want
to make it darker or lighter by adjusting
this right slider here, which makes your color
either brighter at the top or darker
here at the bottom. When you're satisfied with
the color that you've chosen, you can just mouse
over here to the side, and this color picker
will disappear. And then on the left side here, we're going to click
on the other slider by clicking the little
triangle at the top, and then click this
color bar at the bottom, and now we can change this
color to whatever we like. So in my case, maybe
I'll pick a nice blue, maybe a dark blue to
match this kind of dark reddish purple
that I had before. With these two colors changed, we have a nice new
look for our D 20. The last color on
your die that you might want to change
is the number color. Depending on the die
color that you chose, your numbers might not be as
visible as they were before. In my case, these black numbers don't show up very well
on this dark color. Luckily, this is
pretty easy to change by simply adding
a brand new node. So down here on
our shader editor, we're going to zoom out. And then move down to
the bottom until we find this block of nodes here
called face numbers. Now we can zoom in slightly, so we can see them a bit better. Depending on whether or not
you started with the D 20 or maybe you chose the
D four or the D 12, you may or may not see this node here called invert color. It doesn't matter if
you don't see it. This process is the same. To start with, we're
going to hit shift and A at the same time to
bring up our ad menu. And then here at the top, we're going to go to the search bar, and we'll type in mix, M x and choose mix color. We'll now notice that
this mixed color node is sort of attached
to our mouse. And when we hover over any
one of these lines here, it highlights that line. You want to place this new
node on top of whatever line connects into the B socket
on this mix node here. In my case, it's
the one that has the invert color attached to it, but yours might
just be going from color here over to the B. Either way, I'll place it after the invert color if you have
it, or if you don't have it, just hover over top of this
line until it turns white, and then click, and it'll automatically
connect it up for you. Now let's sum out a little bit. And then down here,
we can see the color, as well as a factor slider. We're going to set
this factor slider, all the weight to the right. That way, this color is
as vibrant as possible, and we can already
see a change here, so it's using
whatever this color is here to make our
numbers that color. So if we wanted something
other than white, maybe I want a bright
yellow for this. We can set it to yellow, and then increase the value, increase the saturation, and really just make it
whatever color we want. So in my case, I think
yellow looks pretty cool. And that's the last
change I have for you for changing the
color on your dice. So now let's zoom out a bit. And then before we
move to our next step, I'll show you how
to change the color of your dice tower as well. So to do this, we're
going to need to select our dice tower just by clicking
it here in the viewpoard. Now on the bottom,
Shader Editor. We can zoom out using
our mouse wheel. Click in to pan the view, click in the mouse wheel, and then zoom in
here to the hue, saturation and value
node at the very top. With this node, we can adjust the different properties of the image texture
creating this material. The main slider that we'll be adjusting if you want to adjust the color is the hue
slider here at the top. You'll notice that if you click and drag on this hue slider, you can see the color
of your wood changes. However, you also notice that
it moves really quickly. So to make sure it
doesn't move so fast, you can hold down
shift while you drag this And you'll notice
it moves a lot slower, so you have a lot more control. So maybe in my case, I want
some bright green wood. So we can just drag it to about here to about 0.77 in my case. You also have the
option to change the saturation to make it
either more or less colorful. Maybe I'll make mine
really colorful. And then we can change the value here to make it either
darker or lighter. So I'll make mine a bit
brighter or maybe a bit darker. In my case, I think
darker looks better. Once you're happy with
the color of the wood, you might also want to
change the color of the leather here in
the rolling dray. To do this, go over here
to where it says slot one, and then choose the
leather material, which is in slot two. Again, down here in the bottom, you'll notice that the hue saturation and value node should be basically in the same
spot. So I'll zoom in here. And then again, just slide these around until you find
a color that you like. Maybe I'll choose something
really bright like purple. We can adjust the saturation
and the value as well. There are plenty of
other objects in your scene that you can
change the colors of, but I'll leave that
up to you to explore. Our next quick change revolves
around color as well, but this time of our lights
and not our objects. For this change, we can
actually switch back to the layout workspace
found here at the top. You'll recognize this
view from before. You have a few different ways to select your lights
inside the scene. You can either select
them over here in the list by just selecting
on the name of the light. In this case, we have spotlight, pink light, and blue light. I'll select spot
for this example. Or alternatively, you can go over here until
your right viewport, orbit your view around, and then you'll notice
these lights floating around here around
the Tice tower. Again, in this case,
I'm going to be selecting the spot
light for this example, which is here pointing
towards the front. Now, let's switch to the
object data properties tab found here on the right. It's also the same symbol here as this little green light bulb. The main settings that
we'll be adjusting on this light are found
here at the very top. We have the color and the power. The color is obviously
the color of the light, and then the power is how
bright this light is. Let's switch the color first by clicking on this color bar, and I'll make mine something equally crazy to match all the other crazy
colors I have in here. So maybe I'll make it
a really bright blue. And then once I'm
happy with my color, I can adjust the power here. So if I make this number larger, it'll make the light brighter. So if I really increase
this power higher, we can see here this light is
much brighter in my scene. Each one of these
lights here can have their power and
their color changed, as well as their position
within the scene. So if you wanted to move a
light closer or further away, you could do that here as well. And now let's learn our
last tip for this lesson, changing the camera angle. We'll be making the change to our camera angle here
in the left viewport. The easiest way to change our camera angle
is to simply click this little tiny lock
button here found below this camera symbol.
So we'll click this. And now we can orbit around in this view without jumping
out of our camera. We'll notice that as
we're moving around, instead, it's moving our
camera with our view. So this allows us to easily and intuitively place our
camera wherever we'd like. In my case, maybe I want a
closer view of the sic tray. So I'll zoom in to
right about here. When you're done finding a
new position for your camera, don't forget to uncheck
this little lock icon. This will make sure
that once you've found the location that you
like for your camera, you don't accidentally move
the camera position by trying to zoom in and out or
pan your view left or right. This will allow us to
just move back and forth without actually
moving the camera. You might notice now that your render appears to be pretty blurry if you've moved it a lot closer or a
lot further away. This is because the depth of
field settings were tailored specifically for the original
view that we had before. Luckily, this is a
pretty easy fix. In the outliner list found
here on the top right, we're going to select
our camera found at the very top inside
this collection. Your camera is going to appear
grad out inside this list. That's because it's currently
hidden inside the viewport. That won't really
change anything about us changing the
settings, though. And now that we have
our camera selected, we can go down
here and make sure that we're in the
object properties tab, which is this little
green camera icon. It's likely that you're
already inside this tab. You shouldn't need
to change anything. The first and easiest option to fix this blur is to
simply turn it off. If you don't really want
any blur inside your view, you can just uncheck this option here called depth of field, and we'll notice now everything is nice and sharp in focus, but there's also no blur
on anything either. If you did want to
keep some of the blur, but just fix what's in focus, we'll need to adjust this
focus distance and the F stop. To do this, first,
let's turn it back on, so we'll make our
image blurry again. Then this focus distance that I mentioned before found
here at the top, effects at which distance
objects are viewed in focus. Idally, you want this to be near the center
of the dice tray. To change this, you're
just going to move this back and forth
using the slider. Now you'll notice this
is a really fast slider, so it's pretty hard to get it right exactly
where we want it. This is a situation again, where you want to hold down shift while you move
this back and forth. And that'll give you
a lot more control. And to get a better idea of
what's actually in focus, you might also want to
zoom in here and find the die that's the closest to the center of your die tray. In my case, it's probably the front side of
this die in the back. So I'm just going to zoom in here, so it's mostly in view. And now I can hold
shift and move this back and forth until this
die becomes nice in focus. So somewhere right around here, it doesn't need to
be exactly perfect. I just wanted it to
be mostly in focus. For this specific
camerang I had, if you match something similar, was about 0.23 meters. Now that we found the correct
distance for our focus, we can adjust how blurry the objects outside of
this focus distance are by adjusting
this f stop value found here at the bottom. If you increase this
number, generally, your image will be less blurry, and if you lower it,
it'll be more blurry. If you wanted a
more severe blur, you could lower this down
to something like eight or six to make objects not in the center of this
tray really blurry, or we could raise
it above the 12 that we had it in
before up to something like 16 if we wanted only a little bit of
blur here in the foreground. And that's it. With
that last change made, you're officially
ready to customize your animation for
your class project. I obviously haven't
shown you every single way you could
customize this animation. But hopefully this gives you a good idea of where
you could start. When you're done with
your unique animation, don't forget to
render your new video and post it to the project
gallery for this class. I'll personally comment
on every single project uploaded and give you
feedback on your render. As a quick disclaimer, you won't be able
to post your video directly on too Skill share
as your class project. However, you are
able to upload it to YouTube and then add a
link into your project, or you can convert it into an animated gift and upload that directly
into your project. If you'd like to know
how to easily turn this video file be created
into an animated gif, I recommend you
watch Lesson 16 from my create a Cartoon
Bumblebee animation class. This lesson will explain
the entire method of using a free online
video to gift converter. You can find a link
to that class in the class project
section for this class. It's a pretty easy process, so I hope you'll give it a try. In the last lesson,
we'll end the class with some conclusions and
farewells. I'll see you there.
4. Conclusion: Congratulations on reaching
the end of our class. I wanted to take a
moment to express my heartfelt gratitude
to each and every one of you for taking
this fun mini class. Your participation
and excitement for learning is incredibly
rewarding for me as a teacher, and I can't thank you enough. I hope you've had a good
time learning how to make seemingly complex
animations easy with physics and blender. It's been a pleasure guideing
you through the basics, and I hope you found the experience both
fun and valuable. Now that you've got these
new skills under your belt, I can't wait to see where
your creativity takes you. I wish you the best of
luck in your adventures crafting your own unique
Dis tower animations. As a quick example of what you could do
with your project, I created this spooky Cracken dice Tower animation
for my class project. The possibilities
are endless when it comes to customizing
your animation, so have fun with it and don't stress out about the details. When you're done with
your unique animation, don't forget to post it to the project gallery with all
of your fellow students. I'll personally comment
on each project uploaded. If you like this class, let other students know
by leaving a review. Your feedback really helps me understand what you found
most valuable in the class. You can leave a review easily
by going to the Reviews tab just below this video and clicking the leave
of Review button. I appreciate the support. After leaving a
review, you might want to follow me here on
skill share as well. You can follow me at
any time by clicking the Follow button
above this video, or by going to my
teacher profile and clicking the
Follow button there. Following me is the best
way to get notified when I release a new class or make
important announcements. Don't forget to check
out my teacher profile for more classes just like this. You might find something
else that interests you. Lastly, I want to thank you
all again so much for taking my class and supporting me by participating in
the class project. I can't wait to see what
you all come up with. Farewell for now, and I hope to see you in
another class soon.
 Harry Helps, Professional 3d Artist