Transcripts
1. Blender 3D Crash Course - Intro!: I finally did it. Today's the day
that you're gonna learn Blender, blender,
blender, blender. Down here, it's our time. It's our time down here. A in A in I'm Drug Pre Dave, a Toti artist, and a three
D artist who loves frogs. I don't know if I just learn
differently or something, but I just couldn't find blender tutorials that didn't make my brain literally dissolve
and come out of my ears. But that's why I finally did it. I made a full crash course for Blender for absolute beginners. This isn't a 32nd
clip with the memes. This isn't a donut.
Those are great. Learn all the tutorials you can, but I'm gonna put some of that
drug pre Dave dust on it. I think there's so
many different people that learn in so
many different ways, and it just seems that I
have a way of explaining things that seems to resonate
with a lot of artists. He's good. But that's the thing
about blender is it's not Blender is not
really an artist's tool. It's more of an engineer's tool. It's border line
physicists tool. So you have to have
a PhD in physics. Do you get a PhD in
physics? I don't know. But I have an artist's brain, so I'm going to teach it with my full artsy fartsy mindset. So what will we learn
in class? The basics. Opening up blender and
putting with a few settings, general navigation and
useful shortcut keys, Blender is all about shortcuts. Camera setup, simple
backdrop setup, cycles versus EV and how to get that photo
realistic look, hard surface basics,
vertices, edges, faces, simple lighting and materials, a few practice shapes, and, of course,
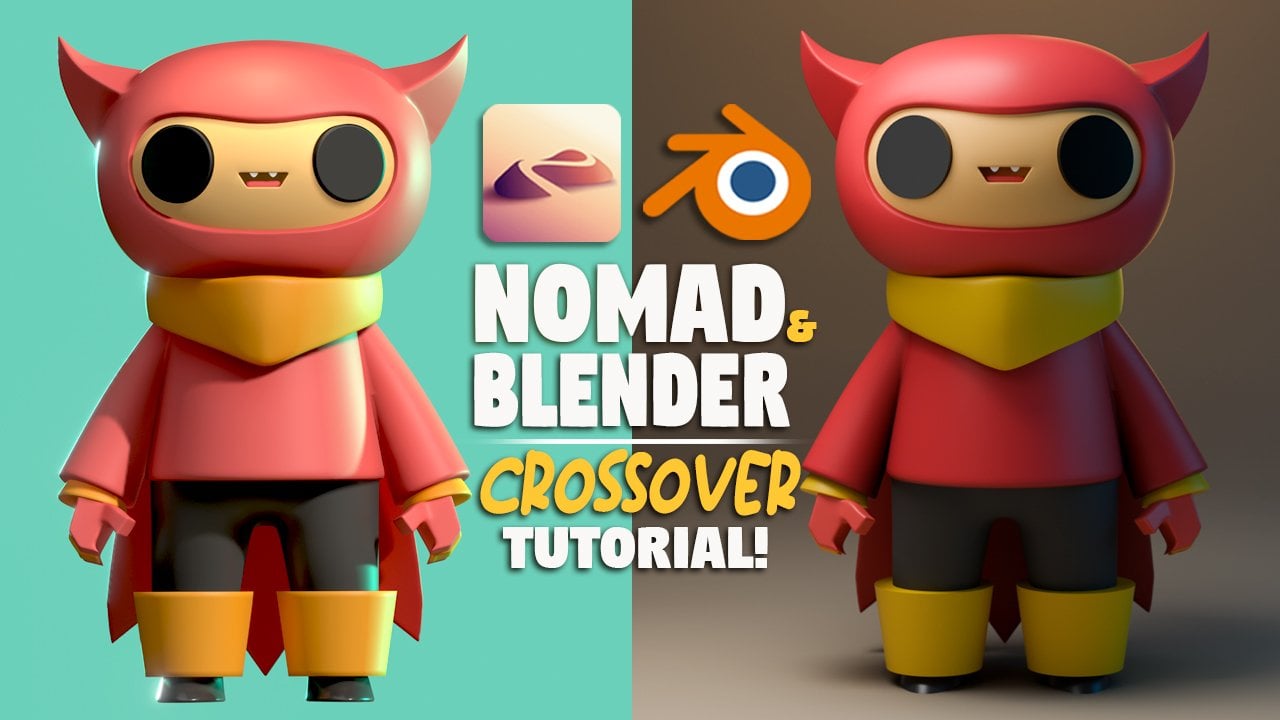
cycles rendering. Yay. Yay. R. I always bring my nomad sculpts into blender for
the great renders, the great looking turntables. That was my initial motivation. And honestly, it's
just night and day. If you're ready to
jump in a deep end, then let's jump in together. Keep drawing, keep sculpting, and I know I'll be seeing
you on Skillshare.
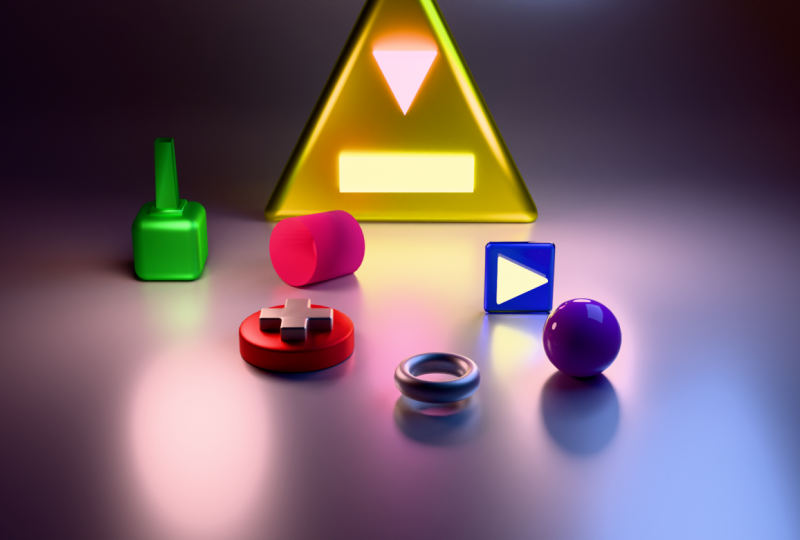
2. Class Project: Alright, so welcome
to the class project. It's going to be simple. We're just going to do some
shapes. We're going to do some simple shapes in blender. And trust me, that's
going to be complex enough for this class,
doing some shapes. So firstly, you want
to make sure that you download Blender. It's free. It's for Mac, Windows and Linux, whoever is using Linux. Just make sure that
you can open it, make sure it's ready to go, and then you'll be ready to go,
and we'll be ready to go. So, of course, there's
going to be a lot of differences between my
computer and your computer. So obviously, Macs have different a slightly
different keyboard. So some of the keys
are different, like the shift and option. Those keys are a
little different so you just have to figure
out if you're using a Mac. You just have to figure out
those little differences so you can follow along easier. I actually learned on a Mac, so I know that
everything can be done. It's just a little bit
different than using a mouse and a keyboard on APC. We'll be talking a little
bit about computers and about some of the hardware on computers and
things like that. So if you're not
familiar with that or if you're not really
well versed in, like, computer hardware and graphics
card and all that thing, if you're not quite there yet, then don't worry
about that part. Just kind of, you know, you can try to follow along. But later on, once you get a little more used
to it and once you understand how things are moving in blender, then you're
going to be like, Okay, I need to figure out what chip I have or what graphics
card I have and if I want to upgrade
or things like that because blender is really
dependent on your computer, how powerful it is,
your graphics card. That will determine
whether something takes 60 seconds to render, which is rendering is
just creating an image, whether it takes 60
seconds or 60 minutes. So there's a big
difference, but for now, we're not going to get
anything too heavy, so you should be okay. And also, there'll be some
points where I'll explain that you can put the
settings a little bit lower or a
little bit faster, depending on the power of your system. Power
of your system. Once we get going, I'm
just going to show you how to duplicate and
move things around. So you'll be able to make
a scene kind of like mine, but you'll really be able to be creative with
shapes and light them. It'll be fun. But I
think that's it for the class project.
Let's jump right to it. The first video is
gonna be more about setting up blender and
just making sure that you kind of understand where the system settings are because you might want to
change a few things around, but nothing too crazy. We're gonna keep it
simple and relaxed, and we're gonna get
through this. Woah.
3. Blender System Preferences: Okay, so first off, let's
open up Blender 4.4. You can see we have the
splash screen here. So this is you can open up a new file or you have
some recent files here. So I'm using 4.4 0.3. It should work fine for this
or anything above this. So first, I'm going to go
into Edit and preferences. And I'm just going to turn
off the splash screen. I just turned it on so
you guys could see it. But again, edit preferences will have a lot of the
things having to do with, like, the system and setup. And these things can make
your life a lot easier, just like opening up the screen and getting rid of
that splash screen. Again, we're going to go
into edit and preferences. Now, I'm using a PC with
an RTX with a G foce RTX, a 40 90, I believe it is. So it's a fairly newer computer. Whatever computer you have, you want to utilize the GPUs. Those are always going to
be faster than the CPUs. If you're using a Mac, if
you're using one of the M one, M two, I believe it's metal. I think that might work faster, but a lot of it's going
to be trial and error. What I do is go to system and here we have
Nun Cuda, optics. So here under optics, I found Invidia Gfce RTX 40 90. So I know that's the
GPU for my computer. So that's what I have checked. Whatever system,
whatever GPU you have in your computer,
makes you check that. And again, it might take
some trial and error. So now that we know
I'm using the GPU, there's a few other places that I want to use
the GPU as well. So if we go over here
to the Render tab, the render engine is EV. So there's EV and
there's cycles. I'm not going to go too
deep into it right now, but let's switch it to cycles
because I prefer cycles. And we'll get a little bit more into why I like cycles
a little bit later. So as you can see, as
I change to cycles, the device CPU here, that means that the
device is using the CPU and not the GPU. I don't actually know why
that would be the default. It doesn't really make sense since I changed it
in the settings, but that's just
something with blender. So now I'm going to select
this and do GPU compute. So next, I'm going to scroll
down to the sampling. So the sampling is
whatever you're doing, whatever's showing
in the viewport. So what you're seeing now
on screen is your viewport. It's not necessarily what's
going to be rendered. So it's not necessarily what's going to be the final image. So right now, it's
rendering the viewport. So what we see at 1024,
which is pretty high. So let's just tap on that
and change it to 300. And also, if we go down
to the render tab, so this controls what's
actually going to be rendered. So when we render it, the
MAX samples would be 4,096. That's a lot. So let's
change this to 300 as well. We'll keep everything
else the same. And see this denoise, let's just tab that down, and then Snap use GPU. I don't know why I said Snap. That way, this is using GPUs, and this denoise is using GPU. And those are just
things that we're going to be using regularly. So it's good to
switch those over to whatever's the most
efficient for your computer. So next, let's go back up to Edit and back to preferences. Now, if you're doing a lot
of tutorials on YouTube, which I'm sure you are, there's tons and
tons of tutorials. There's things called add ons. So here, there's lots
of different add ons. One that you might see a
lot is the node wrangler. So just start typing node, and you'll see node Wrangler,
and you can check that. There's also another one that's used a lot, which is loop tools. You might not see it here. I didn't when I
try to install it. So you may have to go to get extensions and
then find it here. So loop tools. So you
may have to install it. And then once you do
that, you go to add ons and then you make sure it's checked, and then
you can use it. I'm just adding that
in because a lot of tutorials talk about node wrangler and loop
tools and things like that. So at least you'll be
ahead of the curve when you try to do those tutorials. So, there is one more thing
that I want to mention. Let's go down to input, and there's Emulate Numpad. So this is something that I
used when I was using a MAC. I had Emulate Numpad. But if you're using a laptop, this might be useful to check
because there's a lot of number shortcuts like one and
zero and things like that. So if you're having an issue
or if you're using a laptop, then just remember the
input and emulate Numpad. I think that's it
for the preferences. Of course, you can go
through and, you know, check out all these
other options, see if there's
anything that might be relevant to you
or your computer. And then just hit X. I don't actually think you
don't have to save anything. You can just hit X, and
your options are saved. So next, I'm going
to talk a little bit about why I prefer cycles to EV and what some
of the differences are.
4. Cycles vs Eevee: I'm not going to be able to summarize it better than Google, so Cycles and Nv are the two main rendering
engines in Blender, each with distinct
strengths and weaknesses. Cycles, Cycles is a physically
based ray tracing engine designed for
photorealistic rendering. EV. IV is a real time
rasterization engine that prioritizes speed
and interactivity. Choose Cycles if you need
photo realistic results. Accuracy is paramount, and rendering time is
not a major constraint. Choose EV if you prioritize
speed and interactivity, need quick previews or animations or are going
for a stylized look. So I'm going to save what we
are currently working on. So let's just save as
Skillshare, Blender, X. So here we see this scene
which looks fairly realistic. You can see all the
realistic elements. You can see the lights. Now, as I play through
this animation, you'll see that it's
very slow right now. And as you can see,
as I pause this, it's pretty realistic looking. All of the lights and everything are hitting all the reflections, the light passing through. So it's very realistic. So this is Cycles, and that's one of the things
that I like about Cycles. So we can go to
EV and this might take a minute or two
to fully convert into Evie. Okay? So here we go. This is Evie. You can see
it's a lot more cartoony, and it just doesn't
feel as realistic. But if I play this animation, it will probably
run a lot faster. Okay, so here we are in Cycles. He's very realistic looking, it looks like a little toy. And even as I rotate, this is the interactivity part. Even as I rotate, you can see that it's getting
grainy because it's actually processing
all the lights and all of the reflections
and everything else. So we switched to Evie. So as you can see, Evie
is just more cartoony. I can move this around a
lot better, a lot easier. And there's no lag because EV is just way less
resource intensive. So that's the benefit of EV. However, I really like
the way cycles look, so I always work in Cycles. And of course, if you
have a slower system, feel free to use EV
if that's easier. But just note that
some things, lights, some materials, some things are not exactly the same as cycles. And if you run into some issues, switch to Cycles and see what's going on,
see if it works. I could just be an
EV cycle difference. And there is one more thing
I want to tie into this. If you're working on a project in Blender and Blender crashes, just open Blender backup. A file, recover, autosave. And then just find what you were working on in the autosave. The AutoSave, I believe you can set how many minutes it does it. I think I have it
set every 2 minutes. It does an auto save, but it's great because you
won't lose everything. You can just open
up an autosave, and it should be maybe a minute or two back
from where you were. So if you ever crash, just
remember to go to AutoSave. So next, let's just talk
about general navigation and Blender and also some keyboard shortcuts that I
use all the time, and they're just a normal
part of working in Blender.
5. Navigating Blender & Common Shortcut Keys: Okay, so basic
navigation of blender. So I'm just going to start
out by saying that a PC and a Mac are very different
experiences with blender. Also a laptop. So if
you're using a laptop, you're gonna have
probably a touchpad. So some of these things are going to be a little
bit different. If you're on your
touchpad, obviously, you can just experiment with rotating and pinching just like you would your phone,
that sort of thing. If you're using a PC or if you're using a
Mac with a mouse, then obviously it's going
to be very different. You have a right mouse click, a left mouse click,
and a scroll wheel. So if you hold the scroll wheel, then you can sort of
maneuver around your object. If you roll the scroll wheel, then you can roll in and out. Just practice pressing on the scroll wheel and then just spinning
your object around. And then you can practice
zooming in and out. So you can also hold shift, and you can move it this way. So this is without shift, and then this is holding shift. So these are going
to take some time to get used to, so just
practice those. If you want to select your cube, the default cube, then
you just click on it, and you'll see that's
what's selected. Okay, so the other things that we'll just touch
on really quick, tab goes into Edit mode. So we'll talk a little
bit about that later, but that's just
something that is a very important
piece of blender. So just remember tab
goes into Edit mode. So there's also pressing one. So if you press one, you see
that it kind of clicks to the middle but if
you see over here, there's this little tab. So if I touch that, now it's
in, like, orthographic mode. So orthographic is without
perspective distortion. So if you were trying
to model something, you just wanted to
look at it straight, this is what you want. So just remember this
little graph here. The lines are just in a
perfect perpendicular lineup. Okay? Of course, you can still spin and all that kind of thing, but just hit one and it
goes right back to it. You can press two, and
you can just check out what it does. It
just kind of spins it. Let's go back to one. Three
will turn it to the left. The other one I
use a lot is zero. So zero is actually
the camera view. And this is the
default camera view. I don't like that
it's where it is. So if I just scroll
out and then rotate, you'll see where the camera is. So if I hit one, we
know that we're looking at the exact front of
whatever our scene is. So you see where our camera is. I don't really
like it there. So we're going to
move the camera soon. But for now, just remember
one is the front, three is the side. Uh oh. Let's press Shift.
And kind of bring it in the middle and
view. We'll click on it. So one is the front,
three is the side. Zero is the camera view. The only other thing I
might do is right click. I might tap on this and right
click, something like that. Another useful
shortcut is Shift A. So let's just go to one again, and I'll hit Shift,
hold Shift and hit A. And this brings up
the search menu. So let's say I wanted
to add another cube, I would just go to mesh, and
then I would just add cube, and now we have another cube. Now, let's say I wanted
to make it bigger, you can hit S for resize. Then you can resize it
as big as you want. So we're just going to
stick with S for now. S is for a scale. Just think of resizing, think of scaling the
object up or down. And you should have these
controls over here. This is kind of
all the controls. This is just like directional. But this is all the controls, and this is just like
a regular gizmo, so this just helps you
control whatever it is. Okay, so we'll hit S,
resize, S, resize. And we want to go to the
front by pressing one. So that's pretty much the mouse and some shortcuts
that we'll be using. But every time I use a shortcut, I'll make sure to remind you
of what that shortcut is. It's kind of designed to
be all about shortcuts. You'll get a handle in
them really quickly because you have to
use them with blender, so you'll be using
them all the time. So next, let's talk about
the screens in Blender, closing them and opening them. You'll see that on the right
here, there's a panel. I have one big screen here, but then I have this
kind of underneath. So we're going to
get into all that. Closing and opening screens was very difficult
for me to begin with. So something I want to just
go over quickly so that you'll understand how to open new windows and
close new windows, and it won't be a
complete nightmare.
6. Closing & Opening Windows: So maneuvering windows in
blender is truly a puzzle. Okay, so let's get into it. So right now we are
in the layout tab, so you see the layout tab here. And there's a bunch
of these other tabs. For now, we're just going
to stick in layout. Okay, so you see see any of
these lines, these breaks. So these are two
separate windows, so you can, you know, just click on them and you can stroll these separate windows. Now, if you go to the edge, you see that little cross hair. So this happens. So then now you have two windows
of the same thing. So we have two windows, and then we have another
window here. And we scroll up. So just practice doing that
on your screen. So go to the corners and
just make other windows. So I'm going to do another one
here, I'll bring it there. Now, if you've
never used blender, you will probably never figure out how to close these windows. And if you want to pause
and try it, you can try it. No. So in order to
close these windows is to merge the windows
that are the same length. So let's say I go in this corner here for this very small window. So I'm on the corner. It
doesn't matter if you're at the top corner or at
the bottom corner. The window next to it
is the same length. So you can easily merge these
two by just dragging over. So now you've made one
window out of those two. So next, we want to get
rid of this window. So you can go on this
corner or this corner. We'll go on this corner
and we'll just drag up because they're
the same length. So we drag up. Now these two are the same length, so
we can drag it over. And now these two
are the same length. So now we can drag it down. Somehow I lost my side panel. Okay, so you want to always make sure you have this
side panel here. It looks like I also lost my
I don't want collections. I want this to be properties. We want this window
to be the outliner. The outliner is always
going to stay here. This is the properties. The properties is also
going to stay here. So now I can close the
rest of these windows out. So next up, we'll just
customize our screens. That way, the layout of blender can be exactly how we want it. Of course, this is just
going to be how I like it, but I'll tell you why. And then at least you'll
know how to create a screen setup that
works best for you. No.
7. Customizing Windows: So let's customize our windows. Like I said before, we're in the layout now, so that's
what we're seeing. But I also like to use
the animation tab. I like to use the animation
tab is because this was the first place that I
saw the two windows. One side is the camera
view on the left. So this is the camera view, and then this is the just a different view that
you can move around. I liked it because when I
was first starting out, I could move the camera around you can pull
out the control. See this little
pointer right here. If you tap on that and
you tap on Transform, could be the move tool
or the Transform tool. But when you move the camera, see, you can see what
you're looking at. And that just always felt
very comfortable to me. Now, later on, I
realized that, you know, I could do the same thing
here and I could create that. But baby steps. There's a lot going on here. So, again, this is that same
little pull out toggle. So if you close
it, there's always going to be this
little pull out here. So these are where
your controls are. So if you need to
move something, you can use these little
controls over here. There's also some controls
over here as well. And you can slide these back in. Now, I mentioned that
these always stay here. And any window I go
to, I keep these here. So these always stay we're
always going to need them. We're always going to
be in these menus, so it's easier to just
keep them on the side. And this is the
three D Viewport. So this always controls whatever your scene is,
whatever your window is. It's always going to
give you these options. So this is the
three D view port. So if anything happens,
if you need to open a window and you want to just
go back to the viewport, just tap here and go
to three D Viewport. Another thing I like
about this setup is that this side is clean. I don't have these
little controls out. I don't have any of this stuff. This side is just the camera
view, so I like that. And I like to do my
editing on this side, and I can keep an eye on it, how it actually looks in camera over here. So I
think that's useful. This is the dope sheet. I usually use the timeline. This is for doing animations
and things like that, which we're not going
to get into now. If I wanted to do a turn table, I would set a keyframe
here and then set a keyframe here
for like 360 degrees, so then it would play
and it would turn. But I'm just going to make
it a little bit smaller because we're not
going to do that. Okay, so again, let's go to
this window. Let's hit one. Remember, if it looks like this, then just hit this little grid, and then we have everything
going right here. So the last thing
about customizing the screens for the camera view, hit Z and then go to rendered. So this is a rendered
view of the camera. This view, if we hit Z, this is the solid view. So this is the rendered
and this is the solid. And this is the same. If you look up on this
little bar up here, these four different options. If I press Z, we have those
four different options. So this is mostly
just to keep in mind, just to show some of the
relationships between the shortcuts and things that are actually
happening on screen, like these physical buttons. So this is the wire frame. I believe this is solid view. Yeah, this is solid view. This is material preview, which we're not
going to get into. It's something else, and
this is the rendered view. So if you go to Z, this
would be the rendered view. And, of course, you can
get to them either way. So we'll stick to the
solid view for this side. And, of course, if these
things happen to go away, you can see this is like the
floor grid and the lines. So that's what that is. You
can turn it on and off. This turns off this
little thing you here, so that turns that on and off. And I think that's
pretty much it. The one thing that I want
to mention because I had this issue a lot when I first
started working in Blender. If your screen goes away, or if all of a sudden,
you're just like, looking at something like this and you can't find anything, and it happened a lot
when I was on my Mac. What you can do is just
go to view up here. So just go to view. And you
can go down to frame A. So that should frame all of
the objects in your scene. If that doesn't work,
then go to view. Go to Local View and
try Toggle Local View. So if I go on this mesh, and I do Toggle Local View, now I'm only seeing this one. So sometimes this might happen. Sometimes you might touch
something on the keyboard, and that might happen
and you're like, Where did everything else go? So if this happens, you
can just go to View Local, and then toggle Local View, and it should bring
everything else into frame. There's also a
shortcut. You can press the Backslash, I believe it is. If you press the Black slash, if you press the backslash, then it just will
it's like solo. I'll just show you whatever
you have selected. So that's really easy if you want to just isolate something. So, as we've seen, there's multiple ways to do everything, which can make it
more confusing. You can always just
come back to this class if any of those things happen. But now you know
layout and animation, and now you know how to change the windows and how
to get this back to rendered P Z to get this
to solid, things like that. Okay, so I think that's
pretty good for now. So in the next video,
let's work on moving the camera from that kind of upper side view
to the front view. And then let's also just
make a simple backdrop. So if you bring characters
in or something like that, you'll have a nice floor and
a backdrop to work with. Great job so far. I
know that it's a lot, and I know that it
might be overwhelming, but just remember that's
normal, it's perfectly normal. But once you keep
repeating these steps, you'll learn them faster
than you realize.
8. Camera Position Backdrop: Alright, so let's bring
the camera to the front. So if you scroll out
on your scroll wheel, so just tap on the camera. And as you see, the
camera is over here, so this is our camera. If you wanted to rename it, you can just go like
this and rename it. If you go up to the top right, you should see this
little new collection. So just tap that,
and let's bring this camera into
this collection. And then tap on the collection, and let's just name it cameras. We can make another
one and we can Oops, it looks like we
put it in camera, so we just need to drag it out. Like, so, let's
call this Lights. So you just double click
and call it lights, and we can bring our light in. Like so. And we can
take this collection, and then we can name it objects. So back to the camera. So if I want to bring
the camera to the front, the easiest way to do that is to bring it to World Center. So World Center is
this spot right here. Let's take this cube and
just hit X and delete. This cube is at World Center. World Center is the exact
center of the project. Let's just tap
this little arrow. And you see item. So right now, this is all
the location of the camera. So to make it simple,
let's just go here, tap on all these numbers
and just put in zero. If you put zero for
all these numbers, then it's gonna go
to World Center. So right now, it's in the
center. Let's hit one. Okay? So now we know
that this is the front. So the camera is still selected, so we can take this green arrow and just move it this way. So that's all. So
now if you hit one, you can see the
camera is in front. It's just pointing down. So I'm going to move it back
a little bit more. Okay? So if we look
at my location, so right now you can see the Y, that's what
we've changed. So that's what we've changed. So now we want to rotate it. So let's rotate it
up until we can see that square
on the left side. So now we can see the
front of that square. So that's around 90 degrees,
as you can see here. You can even tap this in and
do a clean 90, if you want. Go to the camera. I'm gonna
move it back a little bit. Okay, I'm going to move it
up a little bit. Why not? We can see the top,
and then we'll take this little red ring and
then just tilt it forward. Maybe we'll bring it up a
little bit more. There we go. So now our box is, like,
floating in space. Perfect. And while we're
here, this is a light. So let's tap on this light here. We can move this around.
We can move it up and down, left and right. Let's move it up kind of in front of the cube a little
bit, maybe around there. And let's add another light. So let's hit Shift A. And then just go down to light. And let's add an area light. Now, the light, like
I was saying before, everything starts
at World Center. Let's take this light
and move it up. And we can move it over here, and then we'll rotate
it towards our square. So you can make it
bigger by going to this little yellow line around the light,
that'll make it bigger. But more importantly,
if you go over on the right and we go
down all the way down, you see this little light bulb. Since we're on the light,
this is now a light bulb. Camera, it turns into a camera. Let's go back to the area light. Okay, we can change the
power 10-1 thousand. Now, let's change the
size a little bit. Okay, so now let's just move
it around. There we go. Now we can see it on our box. And maybe we'll move this
light back a little bit. And maybe we'll
turn the radius up. So this is on the point light. So now we have two lights. We have an area light, and
we have a point light, and we have our cube. Our cameras in a good place. So last but not
least, let's just add a quick floor Shift A. Up to mesh, and let's
just do a plane. Okay? So now we have a flat plane. You can kind of see it,
but it's inside the box. So let's just tap S, and then just
scroll out until it covers our whole camera,
the width of the camera. There we go. Perfect. So
now you see our box here, our box is actually
going through. So let's take the
box. Let's tap one. And now we can
move the box Okay, so now we have our plane here. Let's just name this backdrop, and everything is looking good. I'm going to slide this
over because it's just in the way. So I think
that's pretty good. Let's go ahead and save. Okay, so in the next video, we're going to talk
about the three elements that really make up the core of any three D model vertices,
edges, and faces.
9. Vertices, Edges, & Faces: Alright, vertices,
edges and faces. That's one of the
main differences between nomad sculpt and blender is you can
manipulate the vertices, the edges, and the
faces. So what are they? So here's our box.
Here's our backdrop. Let's go over here, and let's just hide the backdrop for now. This is hiding it
from the viewport. This is hiding it
from the render. So we have our cube here. Let's hit tab to
go into Edit mode. So tabs tab to edit mode. And you'll see Edit mode here. Okay, so see these three Okay, so these three options
here, this is vertices. This is edges, and
this is faces. So if we go to vertices, we can select each
verticee if we want to. So that's a vertice.
Maybe we go to layout because the
screen is bigger. I'll go back to Edit mode. Each of these points
are vertices. So I can select two of them. If I hold down shift, I can select multiple
ones like this. And then I can hit size and I can make them
bigger or smaller. Okay, so I'm gonna hit Control Z just to go back to normal. So let's say I take one
and I just grab this. So I can edit just this vertice. So that's vertices. The
vertices are the points. And let's say that you want to select all of the vertices,
but some are not visible. Let's say you wanted to
select this verticee here. You can hit Alt Z, and
then you can see through. So that's Alt Z. So if I wanted to select
all these and maybe one in the background,
I can select them all. You can hit AltZ to go back
to regular solid view. So next edges, the
edges are the edges. So you can adjust the edge. Any edge like this. Okay, so that's the edge. And faces are the faces. So this selects each side, of course, then you
can move it as needed. Okay, so let's just
do a simple recap. So let's hit Alt Z, Alt Z. If we want to see through our box so you can see points
or edges on the far side. So that's Alt Z.
These are vertices. Vertices are the points. Edges are the edges. And then faces are these faces. Okay, so let's go ahead and
bring back our backdrop. Okay, so we have
the camera is here. Let's hit tab to go
back into object mode. Okay, so those are the vertices, the edges, and the faces. So in the next video, let's talk about how we can use some of these things to really construct something that
we want to construct. Let's start with the background. So we'll use a few of the tools that are specifically
for the vertices, the edges, and the faces. So we'll do that in
the next video. No.
10. Hard Surface Basics: Extrude, Inset, & Bevel : Okay, so let's start
out with our backdrop, which really is just a floor. So let's say we want
to make it a backdrop. So our cameras here, so it's pointing this way. So this would be the back wall. So if you were to imagine that
this was a back wall here, but we'd also want it to
be like a nice backdrop. So we need a nice slope. Okay, so let's make sure that we have our backdrop highlighted, and we can actually
hide the cube. Okay, so we're on the backdrop. Let's hit tab to
go into Edit mode. And then let's hit edge. So we'll click on the back edge. And if we just try to move it up now, it's gonna go like this. So that's not what we want.
I'm gonna hit Control Z. So what we need
to do is extrude. So we need to extrude the edge. So let's just tap E. And C, then we can extrude the edge, but it kind of goes anywhere. So if we want to lock it, so let's lock it to the Z axis. So just hit Z, and it will lock to the Z axis. So now we can just put
it up here, click. So now we have a back wall. So if you forget the E, the shortcut, you can just
come over here to extrude. So now we want to get that
nice slope in the wall. So we need to bevel this edge. So first, let's select this edge so we can go
over here to Bevel. And there's also,
if we select it, we can do Control B.
That's the same thing. So both of those are Bevel. So now you can pull and we'll
make something like this. So this is going to wind
up being our curve. So if you're using a mouse, you can just scroll
on the scroll bar. If you scroll forward, it's
going to add these sections. So the sections is what's actually going to
create the curve. You can still make
it a little bit bigger, a little bit smaller. So I think that looks pretty
good. So we'll just tap. And now we have a
nice curve there, and we've just created these sections that's
going to be our curve. So I'm going to really
quickly show you another way to do the
same exact thing. So if I had shift A and add a cube, Oh, I know what I did. I made a mistake. So what I did was I added the shape
while I was in Edit mode, and when you do
that, it permanently connects it to the other shape. So I'm just going to
control Z and undo. I'm going to hit tab to
go back into object mode. So shift A, and I'll add a cube. I'll scale it up,
I'll move it up. Okay? Now I'm gonna go back into Edit mode by hitting tab. And I want to take
these two vertices. I'll hit X and delete
those two vertices. Okay? And I'm gonna
hit backslash. So I can just isolate this box. So now we have the
same thing. So now you know you can hit the edge. You can tap this edge, Control B, or you can
go over here to bevel. So Control B, and
you can pull this. And it looks like it
already has the sections. But let's say you
do this and you forget to add the sections
and you just click, and you're like, Oh,
I need the sections. So right after you
do the Bevel tool, this little option comes up and you can add
the segments here. Once it's gone, it's gone, but at least you can add the
segments here if you need. Let's go back into object mode, and we'll just move this over. We need to hit Backslash, and then it brings
back the other one. So essentially, these are two
perfectly fine backgrounds. We just got to them
two different ways. So if we want to bevel
the whole square, what we can do is just hit A. So if we have our
square selected, let me just go back
into object mode. Whatever you have selected, if you then go into
Edit mode and hit A for all, it'll select
the whole thing. So now let's go into bevel and we can pull this
little yellow tab, and it's going to bevel. Control B, and now
we can bevel this, and we can scroll up to
give it some sections. Now our square is bevelled. Okay, so that looks
great. We're in edit mode. We're in face. So let's tap this face here. So, of course, we
could just drag it up. But you see these corners, it's not really that clean. I'm going to hit Control Z. Let's say we just want
to go straight up. We can hit E for extrude
and extrude it straight up. So let's try something else. Let's say we want to inset so we want to make this
a little bit smaller. See this inset faces, I just hit I and then just move your mouse and you
can adjust the size. Okay? So we've inset
the face here, so now we have
another smaller face. So now this face, let's
say we can pull this up. Or we could extrude E, we could extrude it as well. So let's say we want to
extrude it a little bit, and then we hit I, and then we bring
it in a little bit. Now, let's say we
want to move it down. Now, we could use the Gizmo, let's be smooth
about it and hit G. G is like freestyle move. So let's hit G, and then
you can move it around. But remember, we can always
control it by the axis, the axis, the axis, axis. So if I hit Z, then I can
control it like this. I can just bring it down, maybe just a little bit or
maybe up a little bit. Okay? I click let's hit I. Let's make it a little smaller. Okay, let's hit G and Z. And now we can move
it down a little bit. We can hit I to go
in a little bit. And then maybe we want
it to go straight down, maybe a little bit deeper. You can hit G and Z, so we can hit G, which
is the free move. And then Z to snap
it to the Z axis, we can bring it all the
way down like that. So let's say we want
to inset it again. You can't even
really see in there. But now let's just move this up. So I'm gonna inset it again, make it a little smaller. G, and I'll snap it to the
Z. Inset a little bit more. G, snap it to the Z,
and then bring it down. So that's why you
call it hard surface modeling because you can really get some
interesting things. Just with these tools, you have a lot of control. Now, of course, you also
can bevel some of these. What do we want to bevel here? Let's try to bevel these edges. Let's see if we can
bevel these edges. Control B. There we go. See? Now, they're beveled.
So now they have, a different look to them
cause they're beveled. Let's say we want to
bevel these edges. Now, you notice I'm
selecting all of the edges. If I tap Alt and then I tap, it's going to go all the way around these connecting edges. So again, you can select them all by hitting Shift
and selecting them all, or you can be super cool
and you can select Alt. So just hold down Alt, and then you tap the line, and any line that's connected, it's going to select. Control B, bevel. So let's maybe we want
to bevel that out a little bit and just
make it smoother. Okay, so as you can see, there's a lot you can do, a
lot of fun things. So I would just mess
around with that, play around with
that for a while, and get used to these tools. You make some
interesting shapes. Extrude, inset, and bevel. Great job so far. Make
sure to save your project.
11. Practice Shape A: Triangle: My face. Okay, so we're in Edit mode. I'm gonna hit one. And I'm going to go ahead and hide
the cube and the backdrop. And we don't need
these lights either. So I'm just gonna tap all
of these little eyeballs, even the camera because
we don't need it. So we just have a fresh
screen to work from. So let's just do some
practice shapes. Tab to object mode. Shift A, mesh, and let's
make Let's do a plane. Okay, so we see the plane
is facing downwards. So let's press one again. Let's go to item
over here, item. I am. Feeling? Okay, so I guess it
usually it pops out, but I guess it didn't
want to pop out. We want to rotate it towards us. Okay? So I'm using X. Let's tilt so we can see.
So that's actually right. Sometimes I'm wrong, I forget. Okay? So we want to
rotate it towards us. We know that it's X, and we
can just put 90 degrees. 90 degrees. Boom. So
now when we hit one, we're looking straight at it. So let's say we wanted to
make a simple triangle. So let's tab into Edit mode. The perfect way to make a
triangle is if we could take this vertice and this verticee and join
them in the middle. So first, let's go
to the vertices so we can see our points. We can select these
two vertices. And you might be thinking, Okay, maybe we can use
this little option, which is kind of
like to squeeze. We can squeeze it together
to kind of get there, which, you know, you can do. But Okay, let's right click and let's see if we can connect
these vertices. Okay, there's merge vertices. So that sounds promising. So let's say we want to
merge them at the center. Boom, so we merge
them at the center. Okay, so we made a triangle, but we want to make it
three D. So remember, we can use Extrude.
So we can go to face. We can select this face. We can hit E, and
then we can extrude. And now we have a
three D triangle. But it's too sharp.
Maybe we want it a little softer around these edges so we can hit A
for A and then Control B. And then I'll just
move my mouse, and we'll kind of
bevel these edges. I think that looks pretty good. So now it's a little
softer around the edges. But you can tell that
you can see the ridges in it. So let's tap on it. Let's right click and
let's hit Shade Smooth. Okay, so now it's
a lot smoother. Let's say you were making some sort of icon. You
could hit Shift A. You could add a cube. Maybe we'll just smush it
a little bit like this. Maybe we'll move it back a
little bit. Let's hit one. Maybe we'll hit S and resize it. It's a little small. So let's just move it back. But of course, we don't
want it to just be a box. So we'll control B. Whoop we'll tab into Edit mode. Control B. We'll bevel it. That looks good. We'll tab back into object mode. Right click, Shade
Smooth. Beautiful.
12. Practice Shape B: Directional Pad: Okay, so let's hide
those two pieces, and let's try something else. So we can shift A. We'll add Let's add a plane. Let's take the rotation
and let's put in 90 to the X rotation because we know that
brings it like this. Let's tab into Edit mode. You want to go to the edge. We're going to tab this edge. So we're going to hit E to Extrude Z to lock
it to the Z axis, and then we're going
to hold control. If you hold control, then it moves in increments. So it's easier to match because you're moving
in increments. So now I'm going to
tap on the mouse. I said, Left click. Yeah,
left click on the mouse. Beautiful. So now
I'm going to tap this edge, and I'm going
to do the same thing. I'm going to tap E Z to
lock it, and then control. And then I'm just going
to go down to here. Okay, so now let's
tap the side edge, and we're going to
do the same thing. We'll tap E, control,
we'll just bring it out. We'll do we skipped locking it to the
axis, but that's fine. So again, E, control, and we'll just bring
this out here. Okay, so we have pretty
much our plus sign, but we have extra geometry. So we have, like,
these lines here. So let's just get rid of them. So let's hold shift. Whoops. Let's hold Shift. And then X. And we want
to delete the edges. So we delete those edges, and now see we have the
outline of the plus sign. So let's hit A for A
and then F for fill. So F fills with a face. So now we know we can hit E, and we can do control, and we can move it
back like this. So we just extruded it. So now we can hit A, Control B, and we
can bevel this. But I don't really like
the way these look. So in these options, see where it says sharp here. Let's go to Arc.
That's way better. So miter outer, we're
gonna change that to Rc. That looks much better. Okay, so we'll go back
into object mode, so we'll tab, right
click, Shade Smooth. Now we have a nice
smooth plus sign. Let's hit Shift A and mesh. Let's add a Hmm. Let's add a cylinder. We want
to rotate it towards us. So remember, we go over
here to X. Let's do 90. Now we can hit S for scale, and then just move our mouse,
so we'll scale that up. We can squish it with this.
Maybe we'll move it back. Okay, so I can't
really explain why. Go over to this little wrench. Go up to add modifier
and hit Plus, then go down to generate. Edge split. Okay, so the cylinder
looks pretty good. Let's see what
happens if we right click and Shade Smooth. It looks okay. Let's
tab into Edit mode. Okay? I'm just going
to tap off of it. So see these front facing edges. Hold down alt and click on one. So remember, you have
to be an edge here. So just click on
one of these edges, and all of them
should go like that. So now let's hit Control B. So we hit Control B to bevel. The shape isn't
really what I want, so sometimes I might
have to hit P, and that might help
give it more shape. So what P allowed us
to do is it allowed us to change the arch of the bevel. So if I hit Control Z, I'll just do it
again to show you. If I just hit regular Control B, and I'm trying to bevel,
that actually looks pretty good. Actually, never mind. But I can hit P. I can control the edges to make it
exactly how I want it. Okay, I think that looks good. So now we'll tab back into object mode, and I
think that looks great. Let's bring back
all of our stuff. So we have our cube
that we made before, and let's just kind of
move these things around. We have our plus sign here. So let's select the plus
sign and the cylinder, and I'm going to scale them
both down by hitting S. Okay? So now we have these here. Let's just move them
out of the way. And let's select the
triangle and the cube. We can bring those up.
We can scale it down. And you can hit one, and let's try to line this
up to the floor. Okay, let's take these two. So I just tap one and then shift to tap the other
one to select both. And we'll just move
that down to the floor. Now, what you can do is
feel free to rotate these. There we go. So we'll rotate Let's see if I can
just make this zero. We'll make this zero. Okay, there we go.
So now they're both to zero if you want
to lay things down. So I'll just hit
one again and just try to line it up
with the floor. So you can just arrange
these how you want. You can add some other shapes. So just to Shift A, maybe you want to
add a UV sphere. So now we can add a sphere here. We'll do shift. I mean, we'll do right click
and Shade Smooth. You can even try this. You can see how it looks if
you shade smooth. That looks weird. If
it ever looks weird, try shade auto smooth.
That looks better. Okay, so we have some shapes
to make up our scene. I think in the next
video, we're just going to do materials. So that's like,
changing the color of things and just changing
how things look. Great job so far. This is one of the hardest things in
blender, so great job. Great job, great job. Great job.
13. Light Bright: We did add a few lights
earlier in the project, but I just want to go over a few things having to do with lights, which ties into
materials materials will only look so good
with the right lighting. So let's quickly go
over lighting first, and then after that, we'll
jump to the materials. Okay, so one thing
that I forgot, let's tap on our
background here, right click and Shade Smooth, and now it's nice and smooth. So remember what I was saying. I like to edit in a
window like this, but then have the
rendered version as well. So let's go over to
the animation tab, remember that gives us
that split window here. Okay, so now we have
these two windows. You can adjust it by just sliding in the
middle if you need. And this is the camera
review. So let's hit Z. And let's go to Rendered. Okay, so this is
our camera view. If it's somehow not
the camera view, just hit zero, and it should
go to the camera view. So over here, this
is the camera, so you can adjust
it if you'd like. So let's say we want to I think I want to
bring it up higher, maybe, rotate it, maybe a little higher
and rotate it down. So there's one thing
that goes hand in hand with materials
and that's lighting. Lighting is how you
see everything. So let's just start
from scratch, just so it makes more sense. So let's go up to
our lights here or we have two lights.
There's the area light. Let's drag that into the lights. What is it called collection. So we'll drag that
into the collection, so we have both of our lights, and let's just turn
both of them off. So you can see in
the render tab, it's much darker, but it's actually you can
still see everything. And that's because of ambient lighting, the world lighting. If you look over here on
this little tab here, so you'll see this little world. So this controls
the ambient light. In order to properly see the
lights that we're setting, let's take this strength
and put it down to zero. So now everything is black. So that's a good
base to start from because now you can see
what your lights are doing. So let's go back to the
lights and turn them on. And let's turn off one. Let's turn off both,
and then let's just bring them on one by one. So this is the area light, okay? And you can move it
around and really see how it's affecting
our little pieces here. You can also go to
these little corners, this little yellow
box around it. You can make it bigger and
see how it affects the scene. See how it kind of
got a little softer. The smaller it gets.
It's very harsh, so the shadows
become very harsh. The bigger it is, the
softer the shadows. Also, you can see
that it's a box. You can come over here. So
we're in this light tab here. So you can go over here, and right now, the power is 1,000. So, of course, you
can adjust this. You can put 500, and, you know, it makes it softer. But let's say you want
to change the shape, you can do that. Let's make it a rectangle. But let's make it wide. I like so. Okay,
something like that. Maybe we want to
make it a little higher and then move it back. Okay? That's a little nicer. So we moved it back further, so now I'm going to make
it a little stronger. So I'm gonna put
this back to 1,000. So now we have the other light, which we can bring back here. Pretty cool. You can
move this around, too, and you can really
get some interesting just some interesting
light setups. So another thing I like
to do is set one light to a little bit of a
warmer color and one light to a cooler color. So let's take this light, the area light, and you
can go over to color. Again, we're on this
little light bulb, and you can change
this to a little bit of a cooler color. So
it's a little bluer. You can take this and set this
to maybe a little warmer. Okay, I think that's
kind of nice. So you see these. Obviously,
you have the cast shadow. If you turn that off, it takes away the shadows,
the natural shadows. But there's also
multiple importance. Let's say we take this sphere, so tap on the sphere and
go here to the materials. So tap on that. Tap on the plus. So we've added a white material. This is just the
default material. So let's say we want to change the base color to
we'll do a purple. Okay? So that's the
base color is purple. Let's turn the roughness down. Okay, so now we turn
the roughness down. You can see over here
that it's really shiny. So this shine is
from this light. This shadow is obviously
from this piece. So when we go back to the light and you see
multiple importance, if I turn that off, then you
don't see the reflection. So that's just another
important thing that I wanted to show
you about lights. But you would only see that if you have a material
that's glossy. Oh, so also, and, of course, you have spread. Well, if I put 20
instead of 180, you can see it's very harsh
and it's very narrow. The light is more
concentrated on a narrow rather than 180, it's much wider and much softer. And, of course, you can play around with these other lights, and, you know, they're
very, very different. Fool around with them
and have some fun. But that's pretty
much it. But that's pretty much a quick and dirty
when it comes to lights. So in the next video, let's
just add some more colors and play with some
more materials with these shapes that
we have in the scene.
14. Materials & Glows: Okay, so I kind of touched
on it before the materials. So let's say we want
to color this red. Okay, so once you
select something, you'll see this little I
actually looks like a world, but this is the materials here. So then you just go up
and add a new material. You can highlight it, and we'll just
name this Y T red. Okay, so the reason why I do this is because
you can assign the same material or
the same color to other things as long as
you know the name of it. Okay, so base color, we can go in here and just change it to
any color we want. So let's do a nice red ish. And of course, you
have metallic, you have roughness,
which we went over. There's a bunch of
other settings. There's subsurface
that you can kind of play around with specular. So if I didn't want
the light to kind of shine on it or wanted
to shine less on it, I would turn down the specular. So it's not catching so much of the light, as I understand it. Transmission, if I turn it up, it's completely see through. It's like a little like
almost like jelly. So if I do something like that, then usually I also make
it a little bit shinier. So it almost looks like a fruit snack or
something like that. Okay, so let's say we
wanted to take this. Let's add a new material. And let's put warm glow. Okay, so we have warm glow. And now let's take
the base color. Maybe we'll make it
a little bit warmer, so a little bit more
yellowish orange. Maybe we'll make it
a little more rough. And let's go down to emission. So emission is like glowing. It means emitting light. Okay, so the color of the
emission, you can set here. So we'll do it a
little bit warmer. And then we can do the strength. So let's just do
up one at a time. And slowly, you'll see
that it that it will glow. Okay? You don't want to
turn it up too crazy. Let's put it to let's
just put it to one. You can't really see
it unless you do this. If you go to the lights and turn them off, then
you can see it. So ambient lighting and the
lighting of your scene plays a major role in things that are glowing are
supposed to be glowing. And another quick little
tip. So you can add a light. Maybe I'll put the
radius up a bit. I'll move it out a
little bit more. Maybe I'll match the color
of this point light, and then I can turn
this up to maybe 50 or even like 500 if I want
it to be really bright. Whoops. So you can get
creative with that. If you need more lights, then you can add
in regular lights. And that's the beautiful
thing about blenders. You can add in as many
lights as you want. So that's just another thing
that sometimes I have to do if a light isn't working as brightly as I
want it to work. Okay, let's take the backdrop and let's add a new material. Let's name it BG and maybe
we want it to be white, but maybe we want it a
little bit more metallic. It should eventually be a
little bit more glossy. So you can just play
around with these. I'm just kind of
running through these. Maybe we'll make it
a little grayer. We'll turn the metallic up. Maybe we'll turn the
roughness down a bit, so it's a little more shiny. That's kind of cool.
Okay, of course, you can make yours
as shiny or as not shiny as you want.
It is your world. I'm gonna take this
metalness out, I think. And that's pretty much how you set materials and set colors. So there's a lot of
things to play with. Go ahead and color these other
things, different colors. You can just go in
here, add a material. You don't have to rename
it, but I like to rename it just to keep it simple. Like, if I wanted this to be the same red as the YouTube red, then I would go
here, YT red, boom. And it's the same.
Same thing here, you can add it, then
you can change it or not change it. Okay. So, so just play around
with these things, and that's pretty
much materials. I mean, there's a lot more
that we can get into. But I think for now, that's a pretty good preview of just how many things
are available. You can also go here and you
can change to, like, glass. You can make things into glass. You can change the
color. You know, there's lots of fun
things that you can do. So yeah, I think this
is a good place for you to experiment, make shapes. You can make cubes,
spheres, cylinders, place them in your scene, make a little interesting scene. I think in the next video, we're just going to
render the scene, and we might play around
with a few other things, but I think we can just render. Great job so far. Make sure
you save your progress. And yeah, let's jump
to the next video. Mm.
15. Blender Render!: Alright, so here are my shapes. I just duplicated
them and placed them around and changed the
colors, and had a little fun. So right here, these are
the render settings. So we're at cycles. And then down here
where it says render, we're at 300 Max samples. If you have, like,
a crazy, like, a really good computer, you can make this number
a little bit higher. If your computer is
a little bit slower, you can make this number less. So it's all gonna depend on how long things take to render. Oh, the other thing
that I want to mention, and this is just extra credit, if you want to go down
to color management, so there's some extra
things here view transform. Sometimes I'll put it to Kronos, which is, like, a
lot more poppy. All the colors pop a lot more. They're standard.
Think I like standard. You can also adjust the look. So maybe sometimes I do medium high contrast,
which is kind of nice. So you can also
adjust that as well. So I'll just leave the view
transform at standard. I'll leave the look to none. Okay, so next down here
is the output setting. So right now this is
at 19:20 by 1080. I'm going to make mine bigger. So I'm going to tap here. Then I'm gonna go up
to four K UHD TV, 21 60 P. Here, the resolution is a lot higher. Render image. So should be This should take
a little bit longer because the image
is much bigger. Beautiful. I like this render. I'm happy with this render. But sometimes I like to put that nice photographic
swag on it, so I'm gonna hit X here. Mm. So let's go to our camera. So we go to the camera. Let's go down to the camera
settings here. And let's go down
to depth of field. So we'll tap depth of field. Okay, so we're on this screen, hit Shift A, and
we'll add and empty. So go to empty and add a circle. It doesn't matter what shape, but we're going to do a circle. So let's say we want
to focus kind of on this green sphere. So just move the circle to, like, so it's kind of
near this green sphere. So now we'll go back to camera. We'll go down to depth of field and see where it says,
focus on object. Tap that little thing and then
find your oh, there it is. So find the empty. Okay, so we found the empty, so it says empty here. So now we go down to the F stop, and we can put that down to, like, we put it down to 0.1. You can see that
this is in focus, but all these other
things behind it are not. So it just gives a very cinematic
look to certain things. And you can move this around to change where it's
going to focus. And also, let's see
which light I like more. That's kind of pretty,
but I think I like this. So I'm going to turn
both of these off, and then I'll render it
with just this light. So let's render this
and see how it looks. I think it looks amazing. Well,
I'm very happy with this. I hope you have a lot
of room to play around. I really enjoyed making these. I'm gonna save it. So I'm
just gonna go to Image. Save SK final shapes. And I'm gonna save.
I'm gonna shave it. I'm gonna save it to my MAC, actually. And I love it. So you have infinite ways that you can add lights, add shapes. I'm going to probably
play around with this a little bit more,
see what else I can get. But great job. Well done. I will see you in the
next and last video. No.
16. Outro: Thank You! : Alright, welcome back.
This was a big one. This was a doozy. Congratulations on getting
through it, number one. Blender is notoriously
difficult and confusing, but I hope that you were able to comprehend some of what
I'm talking about. The great thing
about it is you can always come back to
each individual part. I tried to break
it up so that if you needed to come back
to something specific, it wouldn't be that
difficult to kind of find it and then kind of jump back into it. It is gonna take time. I would say, as with anything, but Blender is a little more
difficult than just anything because there's
just so many levels to I'm still learning it myself. I have a long way to go,
but I hope that you feel more confident jumping in
a blender and figuring out what you need to get your art looking the best that it can be. So depending on how this video does and how the response is, I'm looking forward to
going into, you know, making a turn table, setting up lights this way or that way. And there's so many
nuances to blender. I'm excited to teach. It still annoys me, and it still literally
makes my blood boil. But I understand the advantages. I know enough that I
sort of can wrap my mind around blender thinks and how to get to what
I need to get to. But it is difficult, and
I'm really glad that you hung in there and got
through to this point. You can only go up from here. So please upload
your class projects. I can't wait to see them
if you do multiple types, if you change the lights,
if you change shapes, if you change the colors,
post those as well. I can't wait to see what you do. Make sure you rate and review. That's how I stay alive. So make sure you rate and review.
I really appreciate it. Even if it's something
quick, that's fine. Of course, I'm on YouTube,
Instagram, TikTok. Everything is drug free Dave. If you post on Instagram, I will share it to my stories. I love sharing my students
work to my stories. And, of course, I
mentioned YouTube. I have tons of
free resources and tutorials on YouTube, so make
sure you check that out. So thank you all again for
spending your time with me. We did it with No Man sculpt, and I know we can do it
with blender, as well. Keep drawing, keep sculpting, and I look forward to seeing
you in the next video. Thanks. And like
that, he's gone.