Transcripts
1. Introduction to Beyond Beginner Sewing: Ready to embark on
a sewing journey that's both fun and stylish. You're in the right
place. Before we begin the sewing adventure, let me introduce myself. I'm Jessica Rose. Your guide on creating
an easy quilted vest. I specialize in modern and
stylish quilt patterns. I'm also a fabric designer
for Moti fabrics. Over the years, I've had the
incredible opportunity to collaborate with some
of the biggest names in the sewing and
quilting industry. Every experience
and collaboration has enriched my craft and fueled my love for creating stylish and functional pieces. I'm thrilled to share
all of the knowledge that I've gained from sewing
over the past 20 years, which makes me sound really old. I just learned how to
sew a really young age. In this class, you'll
not only learn how to craft a
stylish quilted vest, but also gain insights into the techniques and tips that I've gathered
throughout my journey. We'll explore the art of
quilting fabric together, discovering the joy of cutting out and
assembling patterns. And we'll turn simple
materials into a masterpiece that
you can proudly wear. Learning how to make
clothing from patterns can be so much easier
than you think. And it's the perfect way
to get started in crafting a wardrobe that's both
sustainable and unique. Sewing is a valuable skill
for anyone looking to expand their creativity or even
start a fun side household, whether you're a seasoned
sewer or quilter, or you're even
just starting out, join me in this adventure. This class is perfect for those who have been
introduced to sewing, but would like to expand
their skills into quilting or making simple
clothing patterns. I cannot wait to see the unique pieces that you
will craft along the way. So let's get started.
2. Class Overview: Let's jump into what we'll be
covering during this class. Making a quilted best is the perfect way to get
started on making clothing from patterns and bonus you get to learn how to
quilt fabric together. You will need to have
a basic understanding of how your sewing
machine works, how to sew, and how to
pin for true beginners, it would be a good idea to
start with my earlier class. I chose this specific
project for a few reasons. One, I saw the cutest
quilted clothing being sold at my favorite clothing brands like Anthral and Made Well. And I've been wanting to make my own quilted linen
Invest ever since. Really, this class was a great
excuse to make one reason. Number two, making
clothes can be really scary if you've never
been shown how to make them, but they are so much
easier than you think once you get past all of
the weird vocabulary. It's really simple.
It's a process that anyone can
learn and replicate. Lastly, I also snuck in some quilting because
I'm a quilt at heart. It's a technique that I
love for so many reasons, but it definitely adds a
timeless element to any project. This is the perfect
introduction to it. Quilting is a technique that
can be applied anywhere. Bags, pillows, clothing,
and obviously quilts. If at any point you start
to feel overwhelmed, just remember to
hit pause and go back over any steps that
you may have missed. Sewing is a lot like cooking. In some ways you have a list of ingredients and you
simply need to follow a set of steps to get the final result that you're
looking for together. We'll go through how to print out and assemble
a clothing pattern. We'll go through how to pick out the right fabric
for this project. How to baste and quilt
panels of fabric together. How to cut out pattern pieces
from the quilted fabric. How to assemble the vest using the easiest
methods, I promise. And lastly, how to finish
the edges of the vest and add finishing touches to help you gather all of
the right supplies. I included a PDF list to help you see
everything in one place. Don't forget to download
it so that you have everything you need
before we get started. Included in this class is also
a free pattern for a vest, and I will put links for that. I'm so excited to get started. Now that we know exactly what
project we're working on, let's go over all of the
necessary supplies that you'll need to make
this cute linen vest. I'll see you there.
3. Necessary Supplies: Let's get started and gathering everything that you'll
need to be successful. You'll have a much
better outcome if everything that you need
is already in one place. Before you begin to start, you'll need a way to sew. Usually that means
using a sewing machine. Any sewing machine that can do a straight stitch will work. Nothing fancy is needed
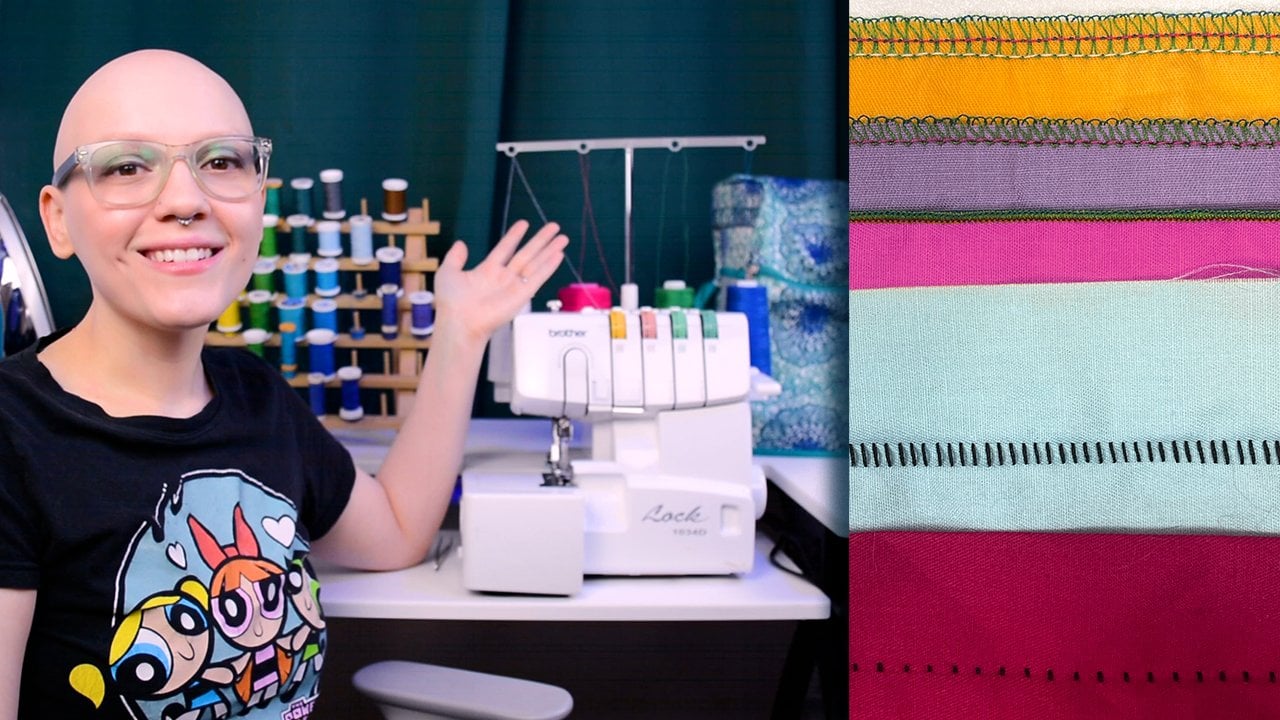
when making clothing. Usually a surgery is used. However, in this project, the seams are actually covered. Therefore, a surgery
is unnecessary. You will also need fabric. I chose 100% linen because it
crinkles when it's washed, which gives the project a
really great end result. If you'd prefer to use
another type of fabric, I would just say to avoid any fabric that
has stretch to it. Stretchy fabrics are
notoriously hard to sew with. Believe me, I've learned
that the hard way, the amount of fabric will depend on the size of your vest. But it will be anywhere
from 1.2 yards to 3 yards. This includes the
lining of the vest, which will also be in linen. While you're picking up fabric, make sure to pick up a
matching color thread. You can find the thread types on the PDF download supply list. To cut out the fabric pieces, you will need either
a rotary cutter or fabric scissors,
or any scissors. Sometimes I just use the
nearest scissors I can find because my little girls
abscond my fabric scissors. You will need to print out
the pattern pieces and have some tape nearby
to assemble the pieces. To make this vest quilted, you'll need thin
batting to go in between the outside fabric and the lining
fabric of the vest. This batting can be cotton,
pre, shrunk or not. And any other type of
batting will work. Really to mark the
quilting lines, you'll need a clear
acrylic ruler and a Hara marker or a table
knife will work just as fine. Lastly, you'll need
safety pins and normal sewing pins or clips to hold everything together
while we're sewing. That concludes the necessary
supplies that you'll need to make our
quilted linen vest. I can't wait to get
started on cutting out pattern pieces and quilting. So join me in the
next lesson where we will be covering
everything else.
4. Assembling the Pattern: Now that we've
covered what you'll need for necessary supplies, next we're going to
learn how to print out and assemble a paper
clothing pattern. By the end of this lesson, you should be able
to print out and put together mostly any clothing
pattern for a Qilted vest. You can find the free pattern at the link provided in
the resources section. Print out the first
page of this pattern. It will have a square
on it that you can measure to ensure that your
prints are accurately sized. Measure the square and it
should match your ruler. If it does, if it's
too big or too small, you may need to adjust your printer settings to
get a more accurate print. You should do this before
you print out any pattern. This will help you maintain
accuracy with your sizing. Patterns usually
have different sizes indicated by line
type and by color. Lay your pages out in the order indicated by the overview page. The overview page just gives
you a bird's eye view of the entire pattern before
taping pieces together. Make sure that they
overlap correctly. They don't have to be perfect, but they should lay flat. Most patterns will have small
indicators like circles, diamonds, squares,
lines, anything. But it should match
up when overlapped. It can be hard to see
through the paper, but getting really close
is all we really need, especially for a
looser fitting garment like the quilted vest
that we're making. Let's take these pages
together Like this. I usually tape just
where the pattern overlaps and the other paper doesn't matter on the pattern. You'll see notations
like on the fold or marks where you can make notches to later help
you match pieces up. Notches can be done
outward, like triangles, or inward, depending on how wide your seam allowance is and
what the pattern indicates. Remember that the
seam allowance is how much fabric will be on the other side of
your sewing line. In clothing, a seam allowance is generally larger
than in quilting. For this project,
our seam allowance will be around three
eighth of an inch. Honestly, if it's a little bit smaller and or a
little bit bigger, it's not going to make
that much of a difference. As long as your seam
allowance is consistent, it can mostly be anywhere from a four to a half inch wide. Now that we've printed and
assembled our paper pattern, let's get our fabric ready for filting in the next lesson. I'm excited to see you there.
5. Preparing Your Fabric: We're going to get started
by preparing our fabric. So make sure it's ironed,
nice and flat so that there's no wrinkles when we get
started with our cutting. Once you've done that, gather
up all of your supplies. So we're going to need your
fabric which has been ironed. The pattern piece which you've loosely cut out, your batting, which can be,
again, cotton wool, anything like that. Just
make sure it's thin. Lay your fabric out so
it's nice and flat. What we need to do is to
create a rectangle of fabric that will fit two of
these template pieces. I like to flip mine over to make sure that my rectangle is
going to be big enough. Once I've done that, then
I can start cutting out this rectangle and make
sure that you cut two. We're going to need
one for the outside of our vest and we're
going to need one that will end up being the
lining side of our vest. If you have a different fabric that's not linen or
is a different color, then the second rectangle
will be the same size, but it will be in
your lining fabric. One rectangle that should fit, two pattern pieces of
outer and one of lining. We're going to repeat this
with our second pattern piece. This is the back piece
which will actually be folded and will be cut on the fold later on when we're
cutting our template pieces. Once we've completed that, we should have four
rectangles in total. Two that match and
another two that match. Next we need to cut out
the batting pieces. We will need two
pieces of batting, one for each set of rectangles, for our front
pieces of our vest, and for the back
piece of our vest. Again, I chose batting that was pretty thin because
when I washed it, I didn't want it
to be super thick. But if you want,
you could totally pick a thicker batting and
have it be really puffy. And I would love to see that. You can see instead
of even by ruler, I'm just using the same
rectangle as a guide. And I'm just going to
cut that so that way it's a nice perfect
rectangle that matches. Once we've done this, we are ready to get started
with our basing, and I'm excited
to show you more.
6. Fabric Basting: Now that we've gone through
how to prepare a fabric, it's iron and cut
and ready to go, we're going to base
our layers together. The first method is by
using quilt basting spray, which you can pick up at
most craft stores also. The second method is
using safety pins. I like both methods
for different reasons, but my preferred method
and the one I usually use, is quilt basing spray just because it's a
little bit faster. First, lay down
your lining fabric and it should be faced down. And then we're going
to take our rectangle of batting and put
that right on top, smooth it down, and make sure that it's really
nice and smooth. There's nothing
worse than quilting lines or wrinkles
into your fabric, although it's happened
to all of us. Don't feel bad if
it happens to you. What we're going to do
now is we're going to carefully roll up the batting. This is just how I do it. I'm not sure how
other cultures do it, but I find by rolling it up very gently and
rolling it back down as I spray it gives me this nice methodical
way to apply the spray. Now, when you are
spraying, be gentle. You do not want to
saturate the fabric. It is just a fine mist of stickiness that keeps it all together, the
layers altogether. If you do saturate it, it might cause stains and hard spots that are hard to get out. When you wash it later. Roll out the roll part, unroll it is what
I meant to say. Unroll the batting very gently, and you can see here,
and I push down as I go. Then I'm actually going to
repeat this on the top half. I first start with the
bottom half and spray, then I'm going to
repeat on the top here, you can see
me just trimming the edges to make sure that I get my fabric lined
up perfectly, but you don't have to do
that. That's optional. Again, we're going to
do the same thing. Roll up your fabric. I won't show you the rest of the steps. You get the idea
firmly pressed down. Now I'm going to show you how
to base with safety pins. Same thing. Put your lining
fabric down, then batting. And then all you have to do is push that safety pin
through all of the layers. And you'll do that
every two or 3 " along the entire expanse
of the panels. And that is it. As far
as been basin goes, it's very simple and very cheap. And I still use that method
quite a bit as well. Now that we've done this, we're ready to get started
with the next step. I can't wait to see you there.
7. Marking Quilt Lines + Quilting Fabric Panels: We have both of our panels, which I've spray based. Now we have two options for
making lines in our fabric. You could also use
some marking device, pencils or pens
that are washable, but I had problems with these sometimes in the
past washing out. Actually, I like to use
what's called a hair marker. All hair markers do is just make an indent in the fabric so
that you have your lines. Now if you don't
have a hair marker, you could also use the back, the dull edge of a butter knife. Don't push too hard
into your fabric. You don't want to catch
anything for slow. Let's decide what pattern
we want for our quilting. You can do squares, you can do just
lines, match, stick. Quilting is what that's called. You can actually do
really anything. But if you are a beginner, I would suggest doing something that's very simple and has a very simple
geometric design. Now remember we have
two panels right here. It's not a huge deal. But if you would like to have
these matched up, you do need to be aware of
where your quilting is. If your quilting is too big, it's going to be
harder to match up. If it's a little bit smaller, I think it's going to be easier
to match up those panels. The back panel will
look like this. Really? We just want to
make sure that it's somewhat centered in the back. Also, we can choose the color of the
quilting that we want. You can do something that, that would be like
the opposite color. It would be able to be seen. You could do something that's
like a very similar color. Gold, which is really pretty, or I'm basic, I'm
going to end up doing exactly the same
color as my best. The most important part
is to make one line up. I'm going to start
with 60 degrees because I like these diamonds that I'm going to use this just so you can see what that's
going to look like.
8. Cutting Your Pattern Pieces: I finished quilting both panels. This is the panel for the back, and this will be folded
in half when we cut. This is the panel for
the two front pieces. Here is our standard vest
pattern. It's full length. You can see here, it does
include seam allowance, cut off about a half inch around all the sides and that will be the final
size of your vest. What you should do is cut out a general version near the size that you
want and then lay it on your body to see
how long you want your vest and how wide
you want your vest. My test version
was way too small. What I'm doing is I'm going
up two sizes to medium. Right here you can see the also, because I have a larger chest, this was also way too narrow
for me, like so narrow. I actually I liked it cropped because
I'm also very short. In some ways, I
basically changed the bottom length to be something that's
more cropped for me. I follow the same
line basically. And I might round that out even more then
because like I said, I need my best to
go out further. I'm going to go out to
this line right here, which was about perfect for me. Then straight back
up, right here, you can see that now I am not messing with the
shoulder lengths, I'm not messing with the
arm holes, and I'm not me. I guess I am shortening this, but I'm not doing
anything else to that. What's really nice about that is then we don't mess
with this top. That's the neck line. We don't mess with this right here, We don't mess with this. The only part on the
back that we're going to mess with is the
height of the vest. Because I am cropping it, it's going to end up being here. We can match up the
tops right there. There's the armholes, you can see where it lands
right about here. To be safe, I'm going to put
mine probably right here. Then I can see what
that's going to look like as always start off too long rather than
too short because you can never add fabric back on. Believe me, I've tried,
never works out. We always start with at least an inch longer
than we need, even though I'm
pretty sure I'm going to end up cropping
it even further. But cropping it is a lot easier than adding
fabric back on, which you can't do
nearly impossible. That is the size
that I'm going with. We're going to, with
this panel of fabric, this panel of Qilted fabric. And I kind of want my diamonds to be straight up and down, like this part of it. Not like, well, actually,
yeah, I'll do this. Makes sense. Okay. Now I find
something to weight down. You can use whatever you want.
Some people use pennies, some people use actual
pattern weights. Other people like me just use
whatever they have nearby. So let me find some heavy
things that looks good. Okay, so I'm going to take my scissors and we are going
to cut along this line. Now if you're making a
standard, quit, quit. If you're making
a standard best, just follow the lines that
we have exactly right here.
9. Sewing the Vest: Okay, so here are the
pieces to our quilted best, we have the front panels. The inside should
be outside fabric. Outside fabric, outside fabric. And then the lining
should all be facing out because what we're going to do is clip the edges
together In either one, what we're going to
do is bring this back down to a normal stitch. We're not quilting anymore. Quilt stitches are going
to be a lot longer, normal stitching, but
because this is thicker, I'm not going to
have it super small. I'll probably end up with 25
or 210 somewhere in there. I've got 33 eighth inch
from the side of my fabric, that's actually the
side of my foot, which is really nice. All I have to do is basically
using my foot as a guide.
10. Making Double Fold Tape: Now that we've sent
our vest together, we are going to cut strips that are called
double fold tape. I know that sounds weird.
It's not actually tape. They're just strips of fabric
that have been folded over twice to seal in
edges of things. They're used for all sorts of
different things in sewing, but I wanted to show you
what these look like. We're going to use them to
cover the inside seams of our T. It's really easy
just cut some one, a two inch strips of fabric. You can use the pattern
pieces that I gave you, or you can even just cut some strips like what I'm
doing right here. Then I measure out, just depending on how the
sizing of your vest is. Just measure out how
long you'll need. And then I just to be safe, add an inch onto the both
ends of each little strip. I have two strips for the sides of the inside and then I have two strips for the
shoulder section, which you can see there. We're going to pin those
on right sides facing towards the fabric because
these are going to end up being folded over two times. So make sure that the raw edges are lined up and that
the right side is down to cover the outside
edges of our vest. And this is the
edge that we'll be showing, it's not the inside. We're using what's called
double fold bias tape. Again, not actually tape, it's just strips of
fabric that have been folded over towards the inside. It's bias because it's
been cut on the bias, which means that
it's not straight of grain, it's diagonal. When a cut is made
diagonal in fabric, it becomes extra stretchy. It loses some of its
structure because the threads have been cut diagonal instead
of straight cut. All we have to do this is so much easier than
you think it is, is just make 1.5 inch strips but make them diagonal
from the salvage. You can see I have the salvage edge on
the right side there. That salvage edge
lets me know that any cuts that I
make perpendicular to that are straight grain, any cuts that I make diagonal to that are going to
be what's called bias. Then what we'll do is we will sew those edges together to make one long bias strip or
double fold bias tape. I do have a long pattern piece
for you which you can use. However I feel like this is just an easier method and
this is the one that I use. Just start by grabbing a rectangle and you can see
my rectangle is not that big. It's probably 19 "
by let's say 25 ". All I do is I make sure
that my salvage is on the edge that it is facing up. My salvage is straight up and
down and that I am cutting diagonal strips that
are 1.5 " wide. You'll see that the edges are going to be
diagonal as well. And that's okay. We'll end up sewing these all together
to make one long strip. This strip is going
to be folded over. It's going to be sewn on to the entirety outside
of the vest, and then it's going to
be folded and sewn on to lock in those edges,
those raw edges. Lastly, we're going
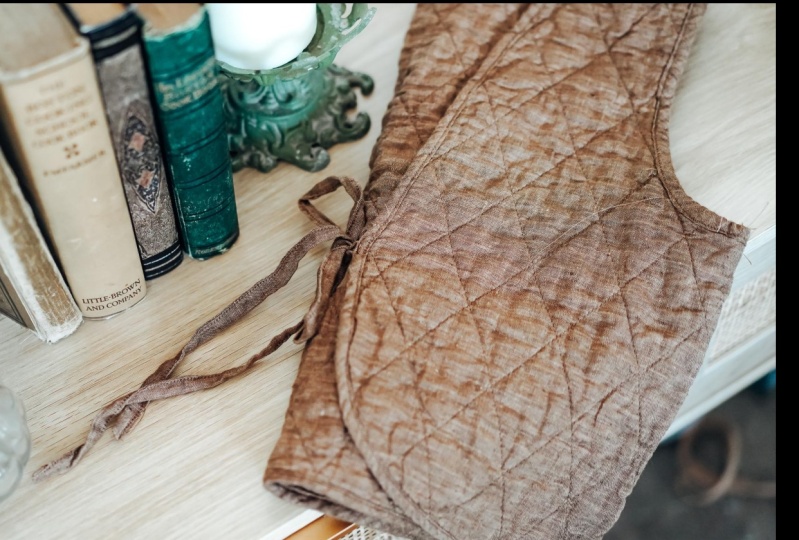
to cut the ties. We have two ties that go in the front of
our quilted vest. And these ones can be
straight of grain. And you can notice I'm
not cutting diagonal. I am cut, well actually this
is parallel to the salvage.
11. Making Double Fold Tape pt. 2: Okay, here are all by strips. They're beautiful and they're. So you can see the difference how stretchy this bias strip is versus this on the grain strip which really
doesn't stretch at all. These ones are our ties which
we will sell at the end. What we're going to do is
that we need to attach these to be one big long strip. We're going to, this is facing up if you
have a print fabric, this is down if you
have a print fabric. So a diagonal line from
this point right here, like this going from
corner to corner though, I just hold me into place. You can pin if you want. It should stay at 90 degrees. That's all, that's
really important. Okay, Now the trick
is to not get lost to open up your
strip like this. We'll go back and
iron and trim these. Pull your strip so
that it's still open. Keep going, keep
going, keep going. And then lay your next strip. This another sewing diagonally
from corner to corner, creating a 90 degree angle. Right here in the
90 degree angle. Where else? This is the
same with quote, lightning. Okay. Again, fold
it open gently, make sure that it's
going the right way. Follow it down, take
your next strip, create a 90 degree angle. And I really don't want
any of this to show, so I'm just going to pull it in on the strip and
then trim that later. Okay. You should have a very
long strip of bias tape diagonal and two strips for our ties or four if you want
to do two ties in the front. Okay. First we're going to take our bit tape and you have to be gentle
with it, it's stretchy. Go through and make sure that the seams are all
on the same side. You can see seam
is on this side, seam is on this side. I've made this mistake before. Where I go through
and I start trimming and then I realize that some of these were on the wrong side. They shouldn't be,
but if they are, you can go back and
unpick them and fix that. What we're going to do is make this into a nice
small seem like this. We are going to iron it open. Now we iron it open to
reduce bulk because we want this to be a natural
looking connection point. We don't want it to be this big bulky point that you can really tell was joined together
like earthworm. How earthworms have those
big little sections. That's what it would look
like, what we're trying to avoid in reality. We want something that's
very smooth and that sits very smoothly
and flat, perfect. That is done and
ready to be sewn on. Now what we're going to
do is we're going to fold our ties in half
and iron them down. Perfect, open that back up. You're going to fold one edge in and the edge is
going to meet the, the fold that we just made. The same on the other side fold. We fold this in half. Ooh, that's hot iron. One more time.
Beautiful. This is going to be our tie
repeat with this.
12. Attaching the Bias Tape + Sewing Inside Double Fold Tape: What we're going to do
next is we're going to actually sew on the
double fold tape. We haven't ironed our tape yet. We start by sewing it on first, and this is just
another way to make it, and you'll see in a little bit. So just make sure that
those edges are still lined up and using your standard
seam allowance, 38 inch. Mine's always a little bit
less than that though. All of these together. Once that's been completed, take it over to
your iron and iron it open or just iron it flat. Make sure that
you're keeping the strip nice and straight. We don't want it
to get all wonky or curved or anything like that. It is hard because it's linen, but make sure that it's
iron nice and flat. Once it's been ironed and
fat, fold it in half. So you can see
there, I'm showing you what it will
eventually look like. Fold it in half so that the other raw edge meets the
edge of the seam allowance. Iron it in half and then
fold again and iron again. Once that's been done, you can pin it or clip it in place because we're
going to sew this down to complete the
inside edges of our vest. You're going to repeat
that process for every single strip around
the inside of the vest.
13. Sewing Outside Double Fold Tape: Okay, we have finished covering the edges of our vest
and it looks amazing. I'm going to trim off
these little guys here. Open up your vest so
that the wrong side is on the inside and the right side is on the outside like this. And we're going to take
our bias, go to the end. One of the ends get lost here. We're going to leave maybe 2 ". You can start it in the back, very center back of your vest. I'd like to start
mine where there's already a natural edge. Just means it will
match, which is nice. I'm going to start
clipping on the inside. You can see because it's, it stretches and it will actually go around these
curves beautifully. I got a clip. I've clipped all of my binding
to the inside of my vest, so you can see this
is the inside here. Now, before we finish
clipping the very end, what we're going to do is
sew the binding together. I can't clip off, will need to make
more for our armholes because I did not have
enough. But it's okay. What I do is where it ends, I actually fold one side and the other side
back like that. And then I'm going to unpin
and unclip right here. And then we're going to go
over to the sewing machine. We're actually going
to pull this together, these two together,
where the lines meet up. Okay, let's go take that over to the sewing machine and
we're going to sew down this line and then term
off our seam allowance. First we're going to binding, and we're going to sew down
that line that we had made, the crease that we've made. Okay, so now we can see
how that worked and it should lay flat that, so that way we can
either join together, we can turn that off, and pin this down. What we're going to
do is start stitching around the exterior with a four inch steam allowance
or something similar to that. And then we're almost now that we have
sewn on the binding to the inside of the vest, we're going to do the same
thing for the armholes. I have folded these, then I'm going to
undo these like that, push down so I have room. Then I'm going to sew where these two lines
meet up right there. Push those down, make sure
that they are lined up. That sew down the line, the crease that we
just made and then pull back out and sew
around the perimeter. I'm going to do both sleeves, both armholes right now.
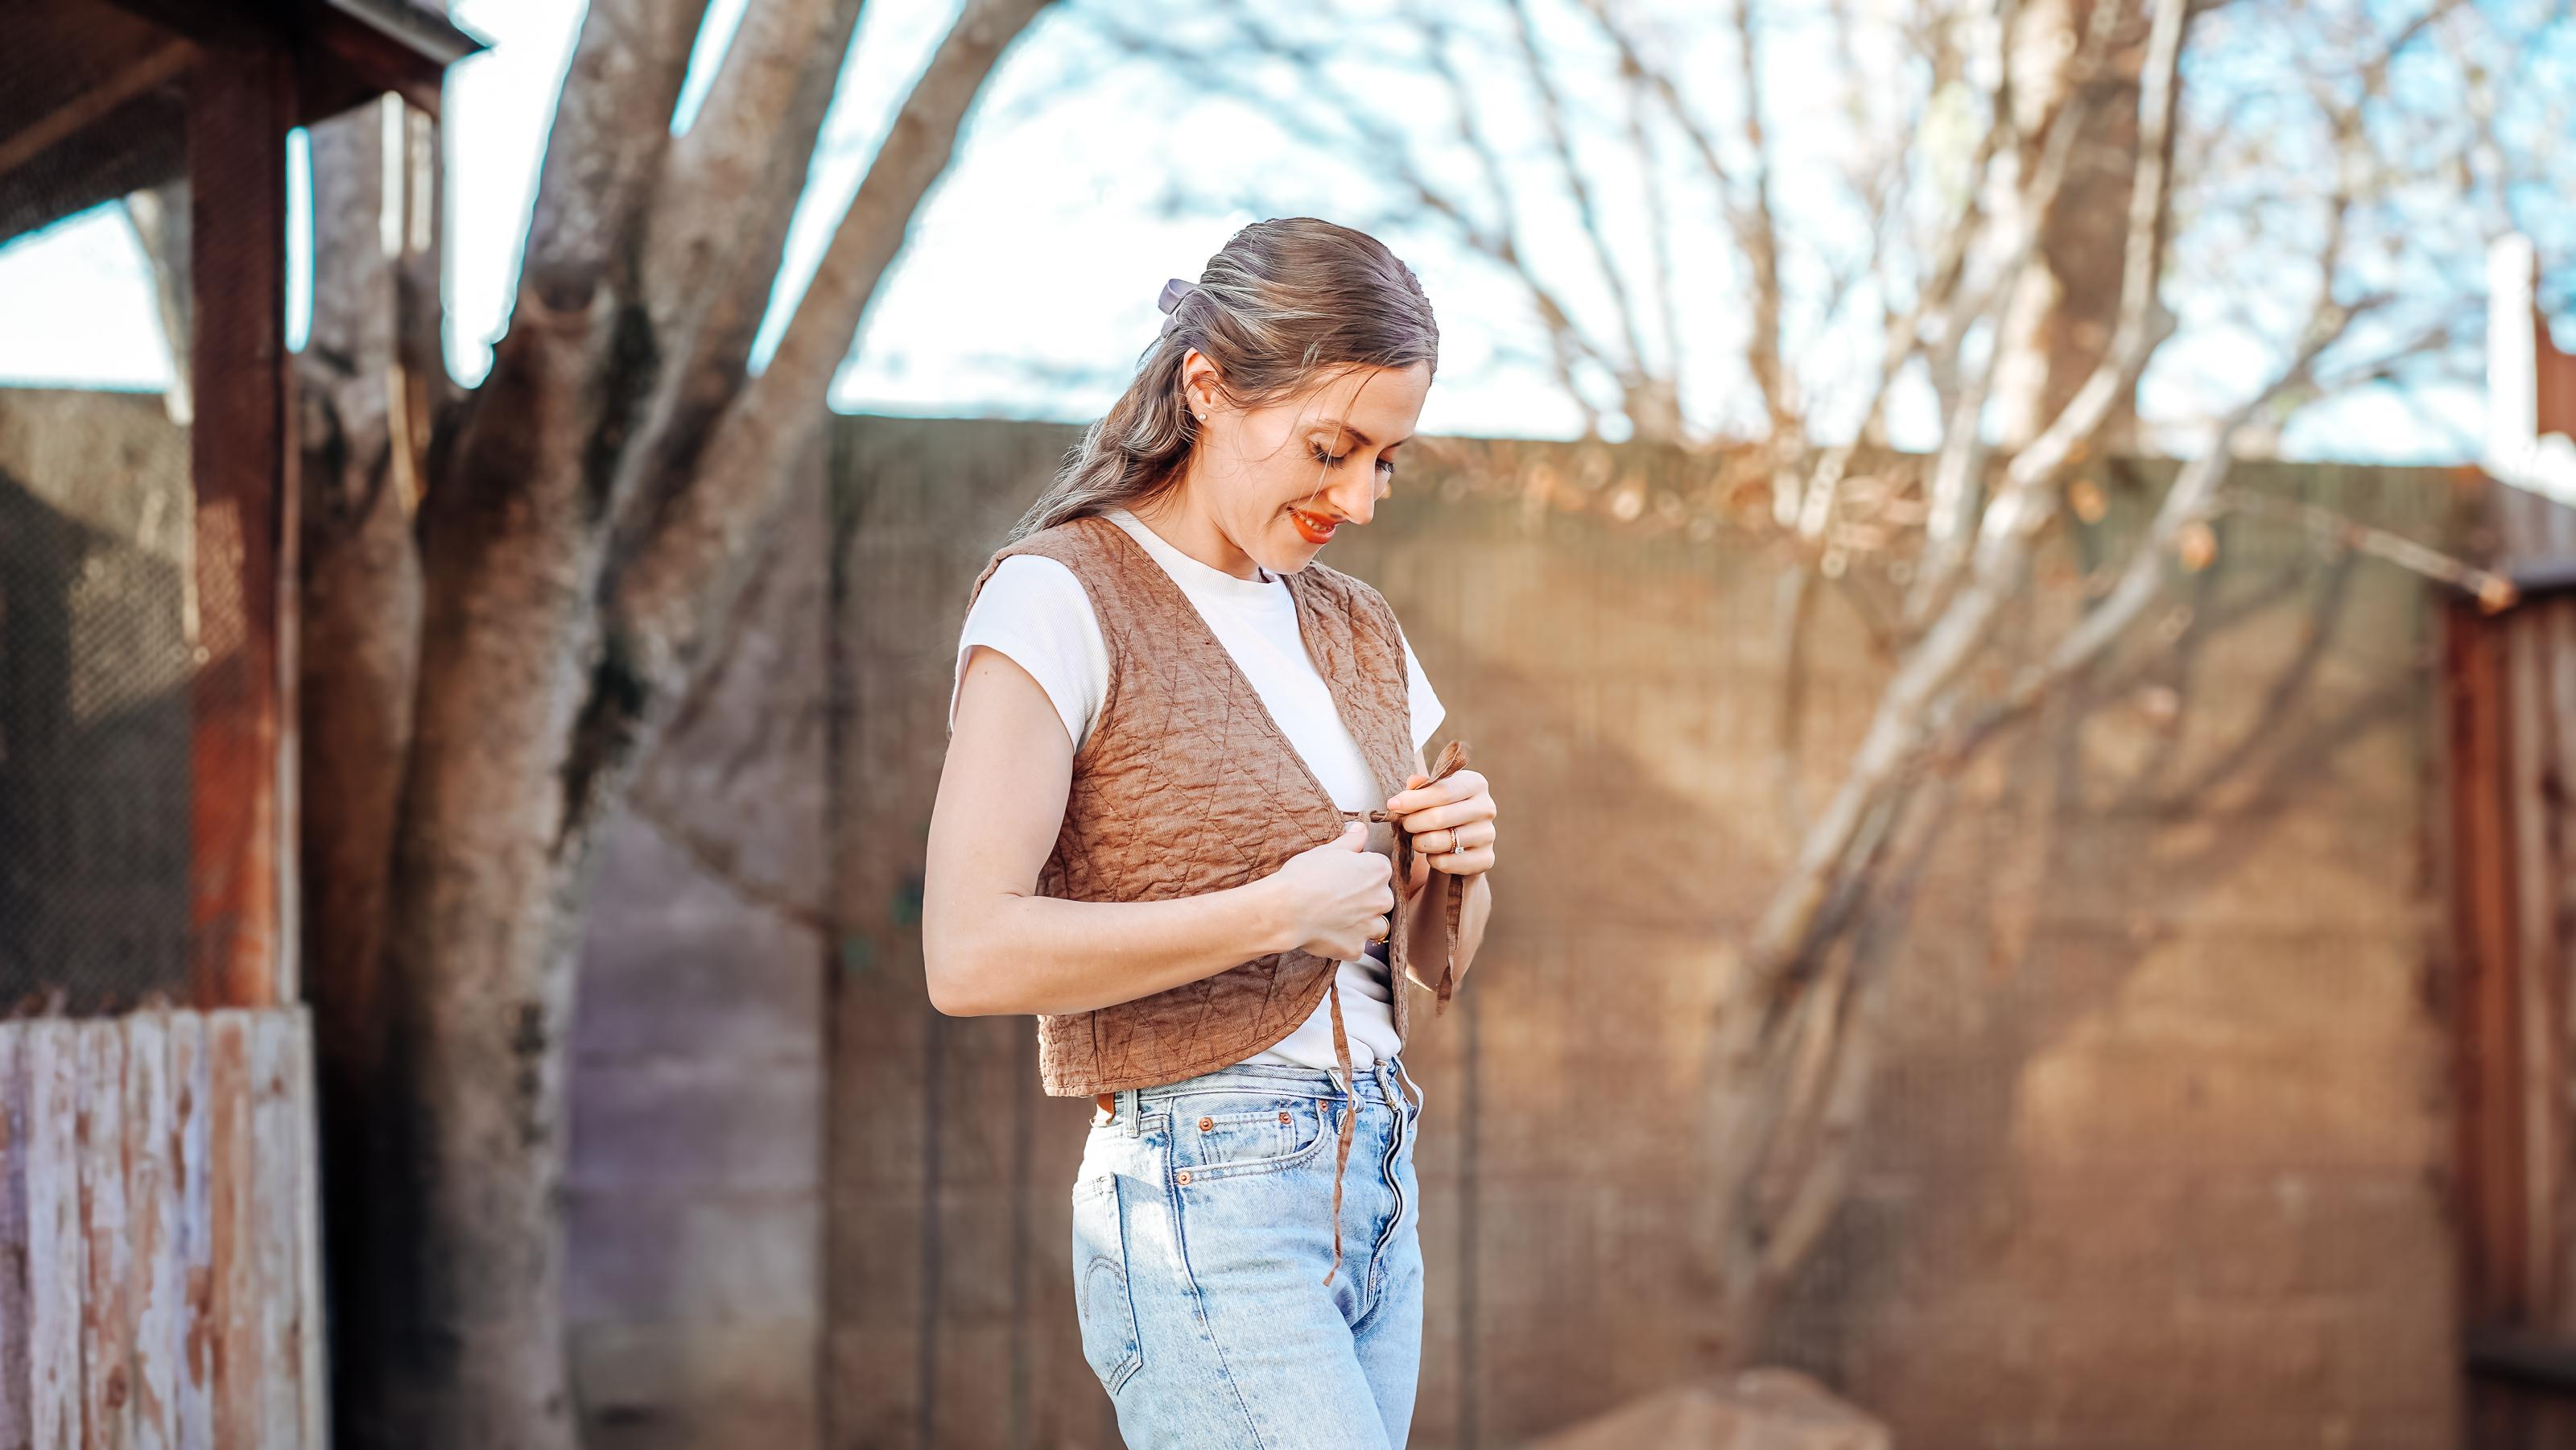
14. Finishing Touches: This is so exciting, we're
almost done with our vest. You can see here all
the finished seams. And now all we have to do are
our ties. We have two ties. It's just that double
fold tape that we've done before, fold it up. And now we're going to
sew down this strip at a really narrow seam
allowance right on the very edge to secure
the strip together. Once that's done, to make sure
that one end is finished, all you have to do
is open it back up, fold it in, and I usually
leave about 3 " unsewn. Then I fold it down
and then fold it back together and then
continue stitching down. That will just secure
it on one end. The other end you can leave
raw because that one will be stitched into the vest measure. Where you want these,
I have mine set about midway right around my bus line because everybody's
body is different, you can decide where
you want these. As long as they're
equal on both sides, it doesn't end up looking
a little bit wonky. I would measure, try on your vest and then see where
you want the bow to land. Once you've figured out where
you would like it to land, put the raw edge of
the unfinished side of your strip aligned with the edge of the
inside of your vest. You can see there,
we're just going to do another stitch right
over our same stitch, line stitch that once. And then what we're going to do, and I back stitch it,
just to be careful, is flip it over, Stitch it one more time, just right on the edge
to secure it down, and then stitch it
for a third time right on the very, very edge. Once that's complete,
you're going to do, you're gonna repeat
the same process for the opposite side. So you'll see there you've got some mixture threads that
will clip really fast. And then you'll repeat the
same process so that you have two beautiful ties to make a
bow on your gorgeous vest, which is now complete. I'm so excited for you. Hopefully you love your vest
as much as I love mine.
15. Conclusion + Next Steps: Congrats. You made it. I'm so glad that you joined
me for the sewing class. I know that sewing garments
can be an intimidating skill, but it really is so
easy and really useful. I hope you enjoyed making your quilted vest as much
as I enjoyed making mine. In this class, we covered how to print out and assemble a
clothing pattern from a PDF. We covered how to pick out the right fabric
for your project. How to baste and quilt
panels of fabric together. How to cut out pattern pieces
from the quilted fabric. How to assemble the best
using the easiest methods. And lastly, how to
finish the edges of the vest and add some
finishing touches. That is a ton. That's a lot. If there's anything
I've learned, it's that you learn by doing. A lot of times that means making mistakes and trying again. Just never give up
even if something didn't turn out exactly
how you envisioned. I hope that by following
along with me, you've gleaned some
tips and tricks to take with you to
your next project. Some of the next things that
I might recommend sewing could include making a simple
quilt or a quilt block, more simple clothing patterns
like an apron or a skirt. On my website,
you'll see lots of simple quilt patterns as well as a membership for those who enjoy making quilt
blocks and sewing. Don't forget to post
your project pictures to the project section
of the class so I can provide
feedback and support. Post your projects
on social media, of course, and tag me. I love seeing your
unique creations. Also, if you like this class, please leave a review and
follow me on Skillshare. So you know when my next
class has come out. Thank you again for joining
me on this journey. And I can't wait to see
you in the next class.
 Jessica Rose, Quiltd Studios | Designer | Educator