Transcripts
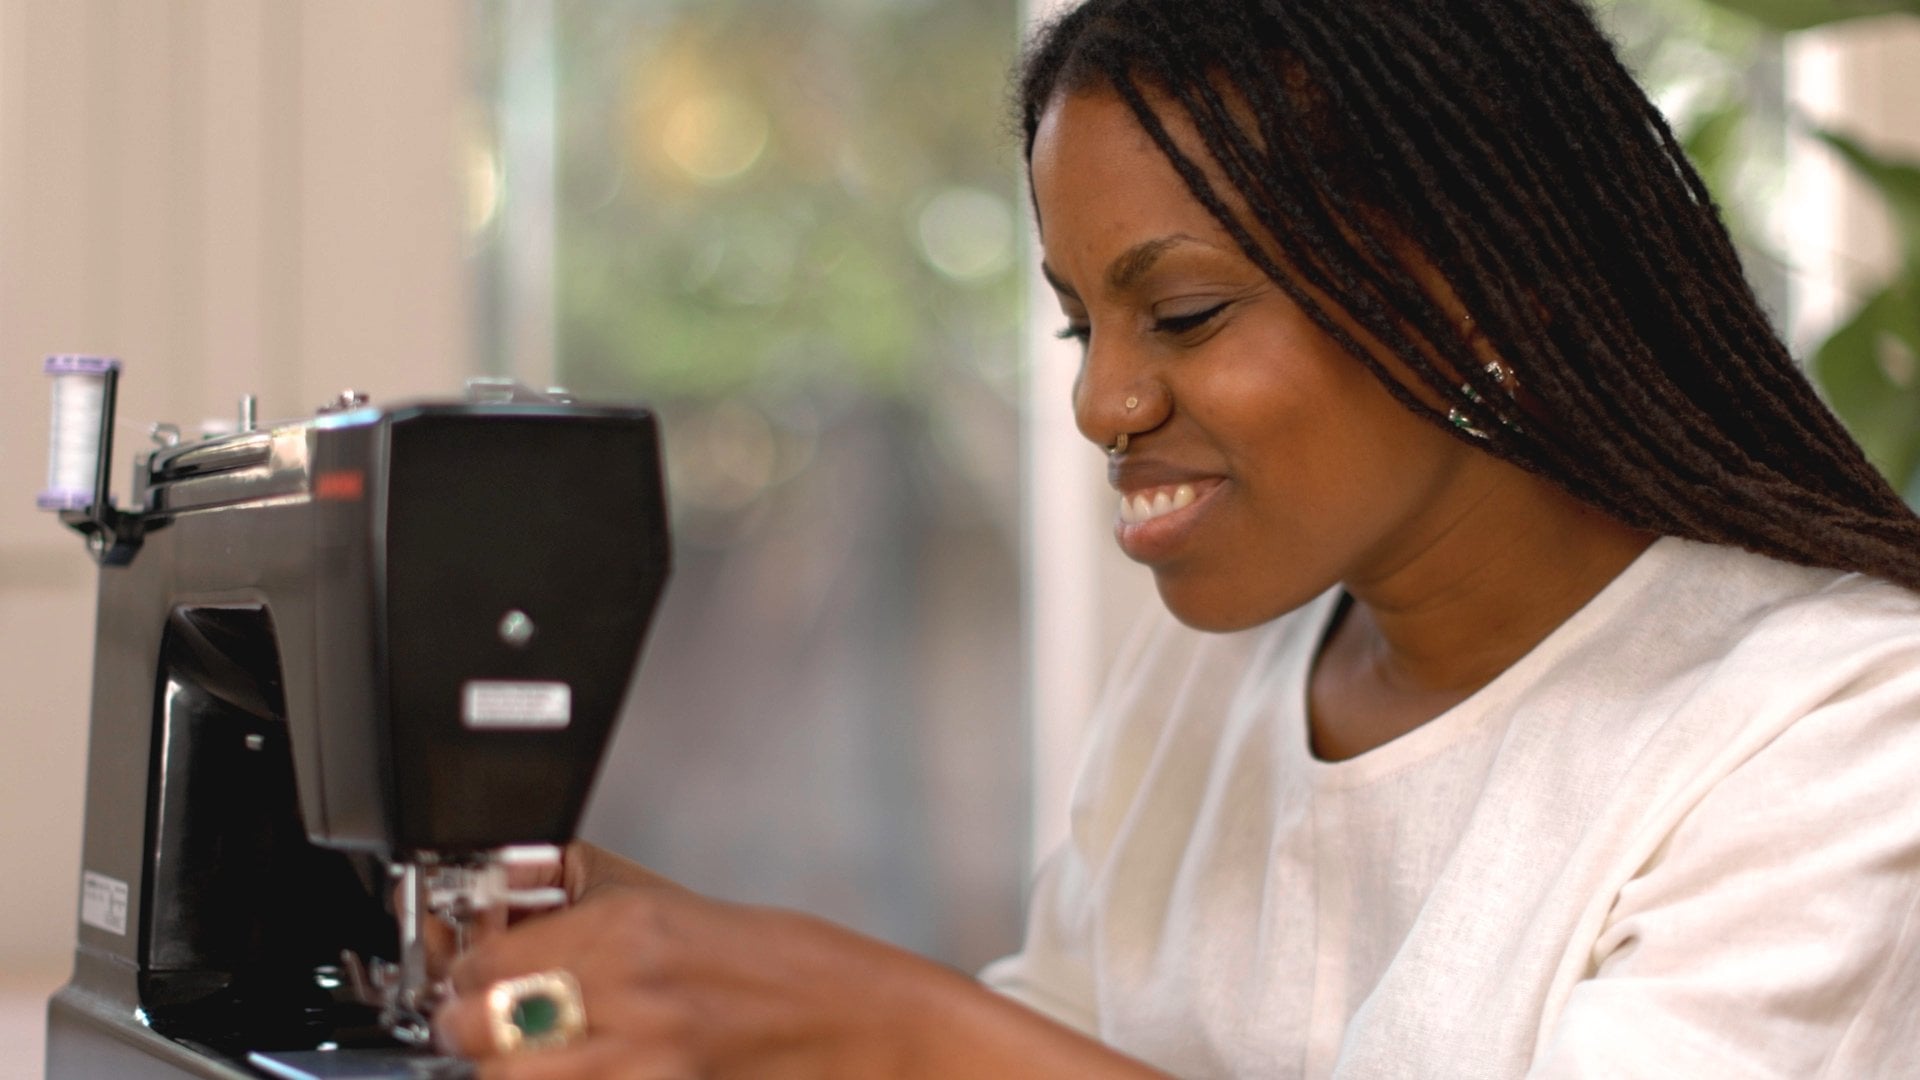
1. Introduction: Grandma didn't teach
you how to sew. That's okay. Luckily, I
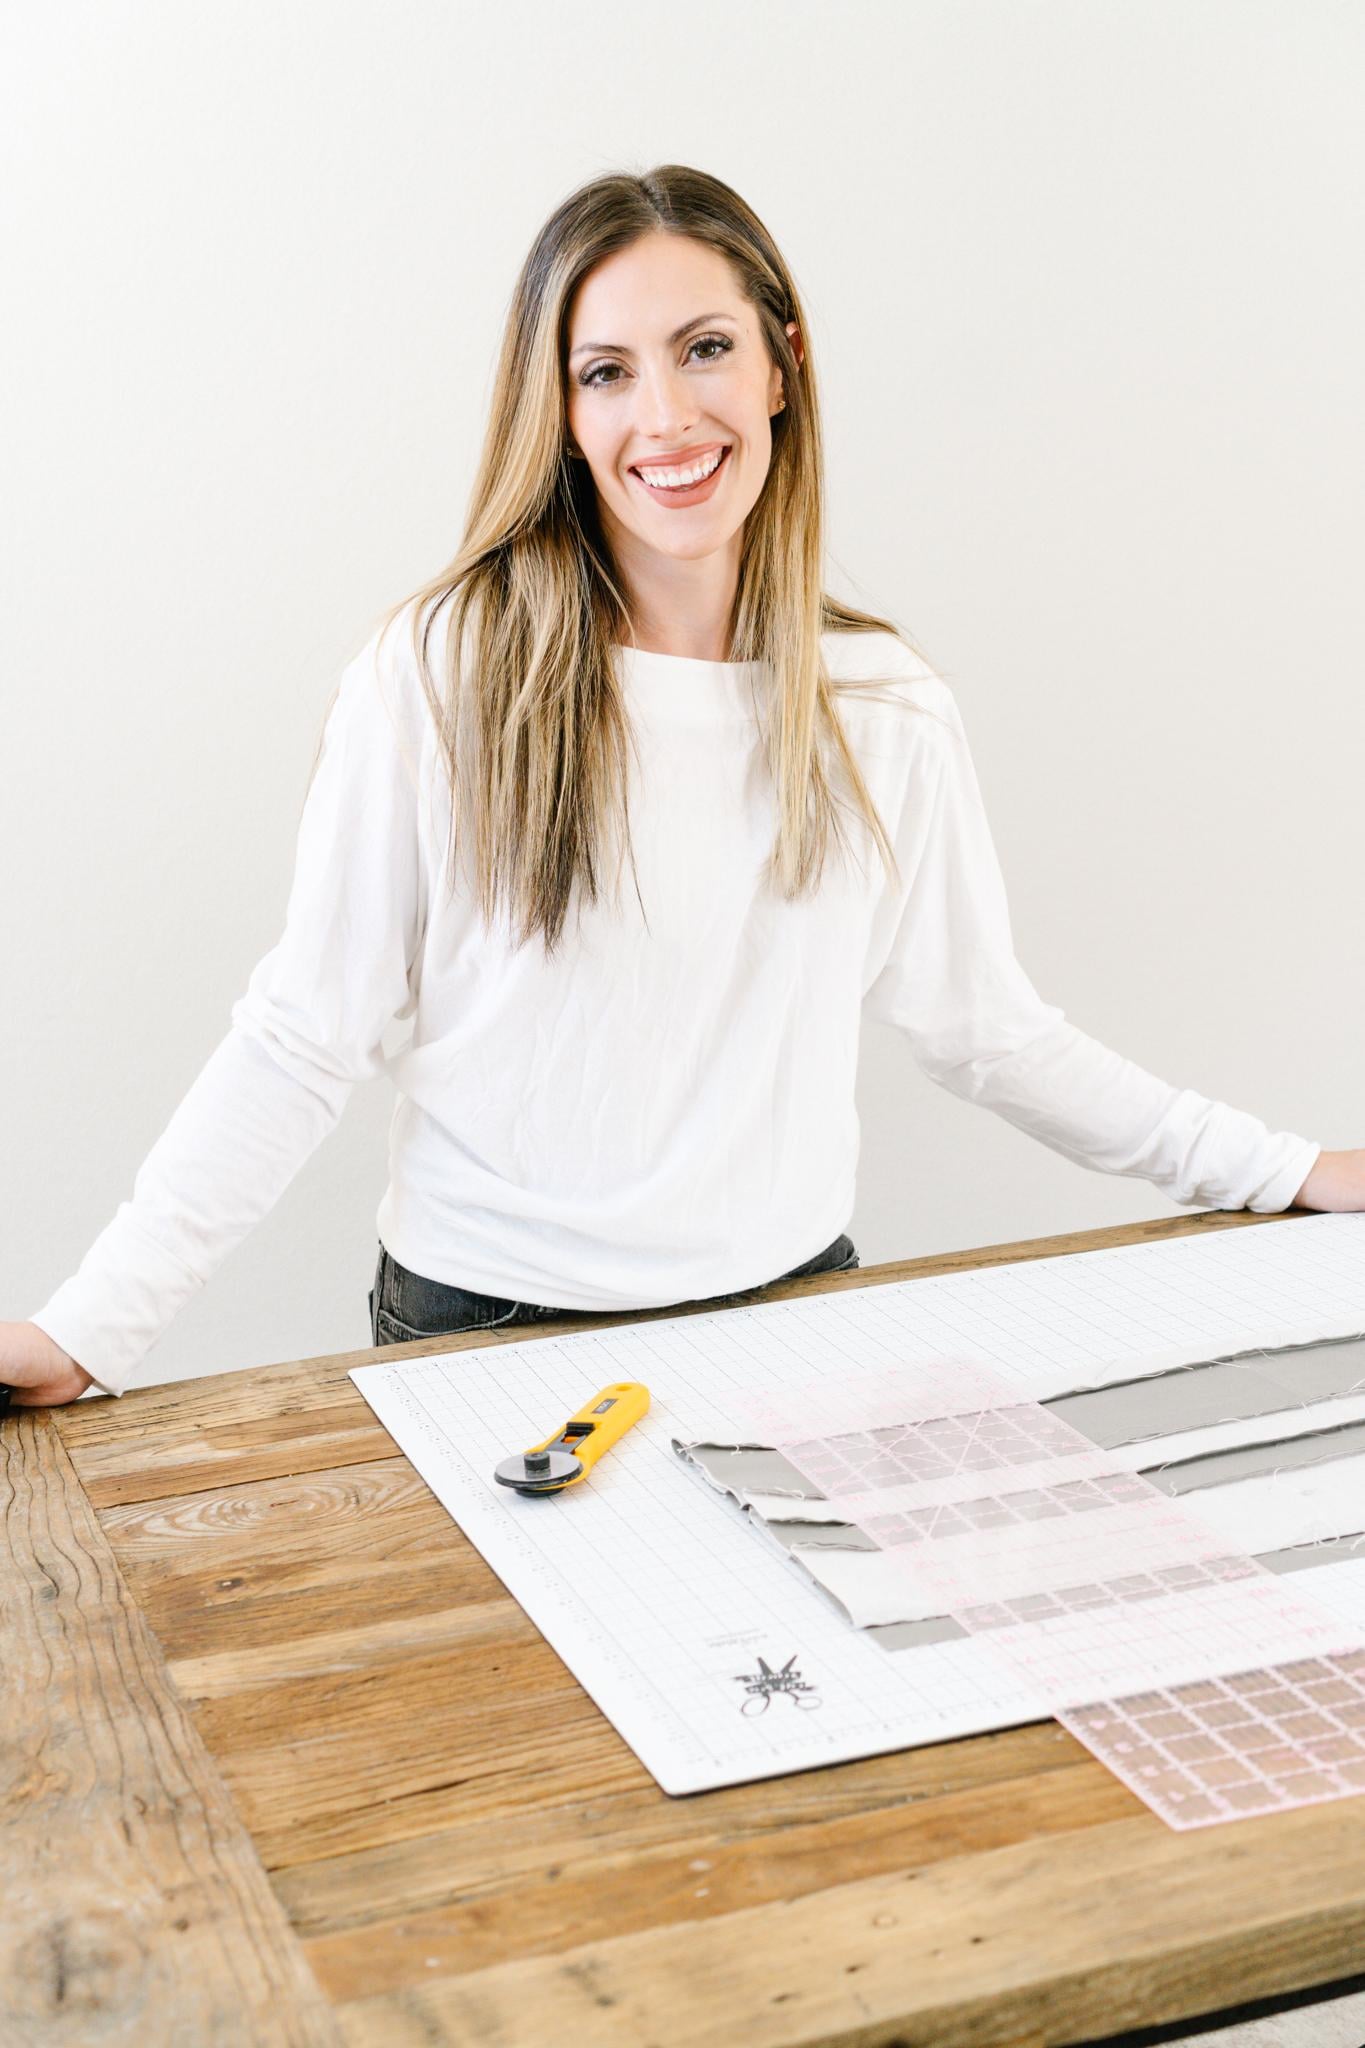
made a class just so. Hi, I'm Jessica Rose, a quilt designer and educator. As a quilt designer, I published multiple patterns through my design company,
Quilted Studios. I'm also currently a
contributing blogger for Bernina sewing machines. And I've had the privilege
to collaborate with brands like our gallery Fabrics, Con Cuts, Aliso Shannon fabrics. List goes on. I love sewing
for so many reasons, but one of my favorites is how versatile
sewing skills are. If you master the
topics in this class, you'll be on your way
to sewing pillows, full sized quilts,
having your pants, and quickly repairing
your favorite dress. In this class, we will cover how to choose your
ideal sewing machine, and of course the supplies
that you'll need to get started with all
sewing projects. Lastly, we'll go over how
to cut and piece fabric together using the easiest
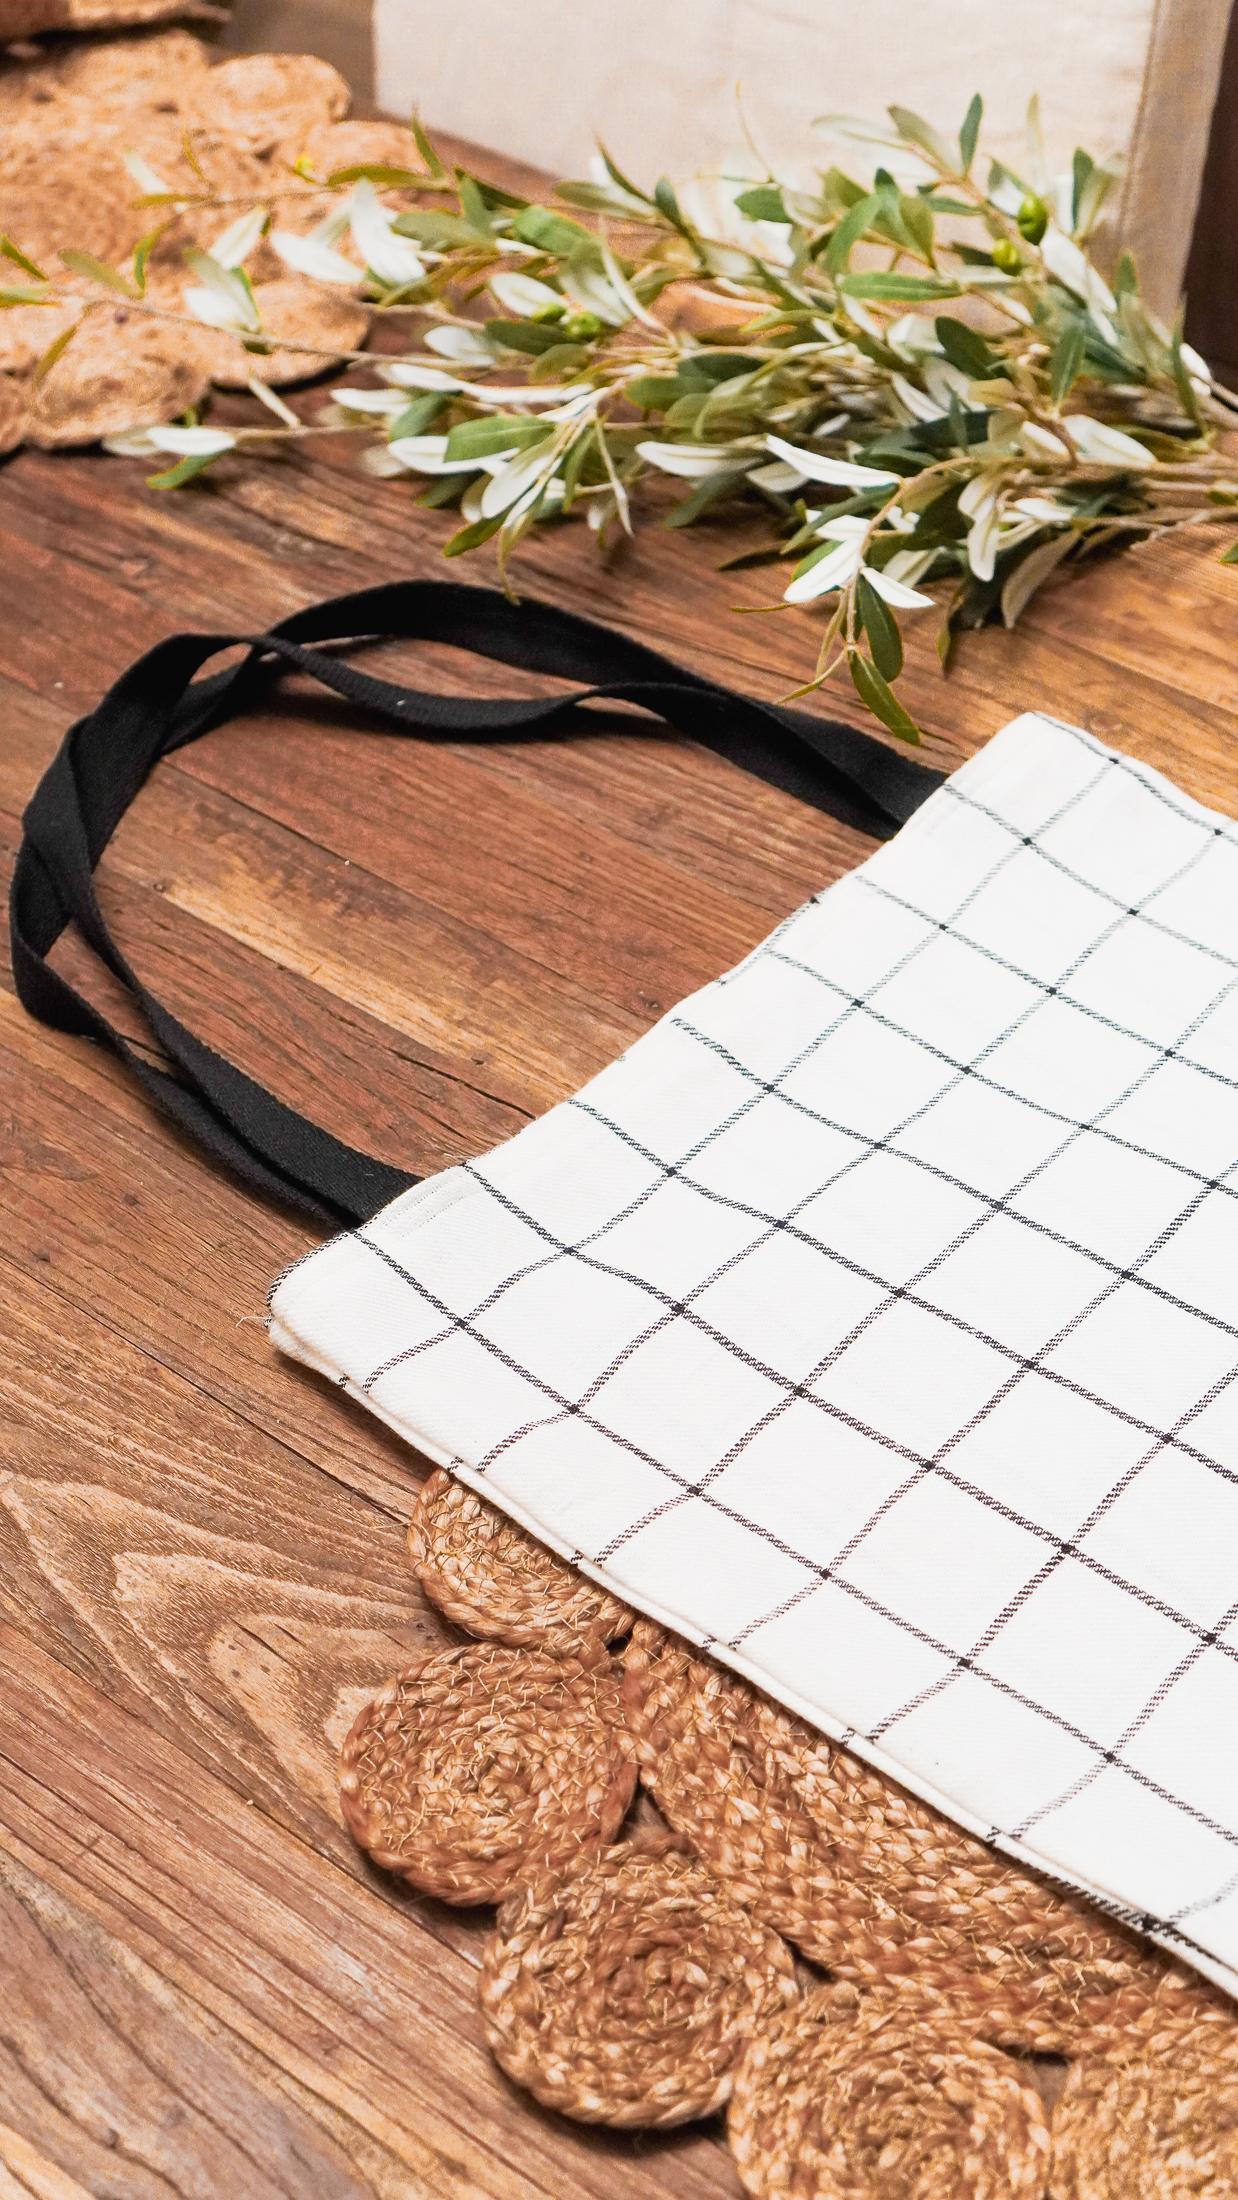
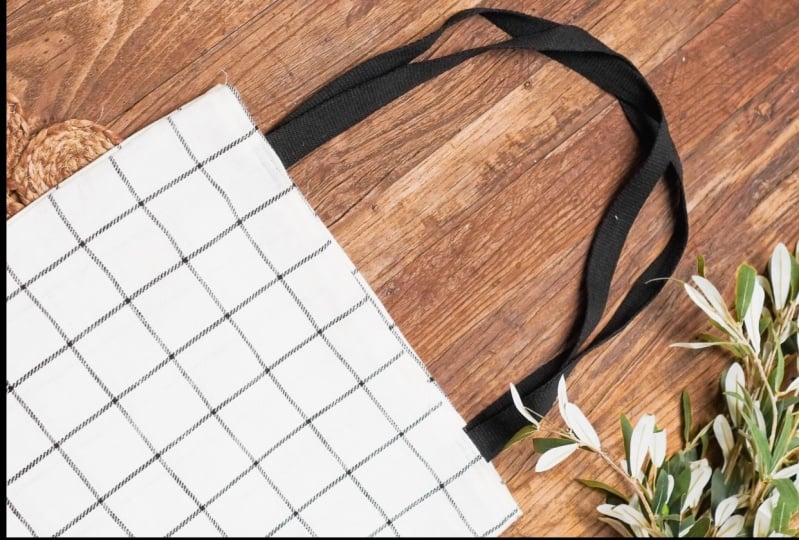
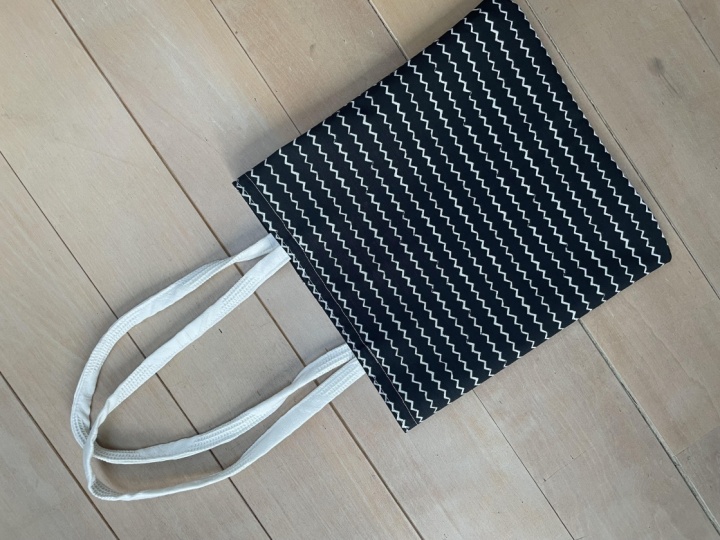
and simplest methods. I promise together we will sew this super cute tote bag that you can use for groceries or
whatever else that you need. I specifically chose this
project because it's simple. It effectively
covers the basics. And it will save you
time in the future when you're trying to tackle
more complex projects. I think you'll be pleasantly surprised at how fun
this project can be, especially for anyone
who hasn't sewn before. This cost is also great
for people who want to get started more in sewing, have a little bit of experience and they
want to sew something, maybe more intense like clothes
or something like that. Learning you to sew
is a super fun hobby, but it's also great for starting a side hustle or
a small business. Skills really are so useful and you'll see why
by the end of this class, I'm so excited to
share everything that I know to help you learn
the fundamentals of sewing. So even if grandma didn't teach you how to sew, that's okay. This class will
get you started in the right direction.
So let's go.
2. Class Overview: Welcome. As a beginner, there's no need to get overwhelmed with
super large projects. Sometimes I see people
jump head first into really long and
difficult sewing patterns. This is 100% not
necessary to learning. You don't have to make it
harder than it needs to be. I was totally guilty
of doing this. When I was learning to quilt, I unknowingly picked a super difficult
pattern to start with, and it took me three
years to finish it. Looking back, I can't believe
I finished it at all. I wish I could go back
and tell a little. Jess, please just start with something small and fun
and so much easier. So that's why I
chose this for you. It's a great place to start and it's going to save
you so much time. In the end, let me be
the one to tell you, let's start with
something you can actually finish in
under three years. Even today, my favorite
projects like zipper bags and pillow covers are
actually really small and they only take
a few hours to complete. It might take you a little bit longer as you learn the ins and outs of your sewing machine and you practice the
techniques as we go, But I promise it
will be worth it. Together, we'll go
through how to pick a sewing machine and of
course how to use it. We'll start by going over the necessary and maybe
unnecessary supplies. Then together we will
actually sew our bag. I'm so excited to help you
gather the right supplies. I actually made a PDF list so that you have
everything in one place, you can check it off as you
gather everything together. To be successful in this class, I highly suggest gathering all of your supplies
prior to starting. This is to avoid the
classic Da DIY effects. We don't want, you have
to make 50 trips to the fabric store because you needed a different
size whatever. I want the sewing project
to be fun, relaxing, and more importantly, get you on your way to sewing
anything that you want. Now that you know what
this class is all about, let's talk more specifically
in the next lesson about the absolutely
necessary supplies versus the nice supplies.
I'll see you there.
3. The Necessary Supplies You'll Need: This, Wilson will help
you gather all of the necessary supplies
for a sewing. It can be really overwhelming
in the beginning when you may not have yet invested
in a lot of sewing stuff. For a long time,
my husband and I, we actually lived in a
super small apartment where there wasn't
really a lot of space, and I really had to learn what mattered and what I
could do without. I'm here to tell you you
don't need all the things. You will, however, need to
procure a sewing machine. We'll go through how to
pick a sewing machine and the basics of using one
in the next lesson. If you're not looking to buy, you don't need to see if you can borrow one
from a friend, your mom, your uncle, a cousin, a neighbor. There's no need to invest in something until you
feel like you're ready. If you prefer not to
use a sewing machine, you need to hand
stitch, which is a lot, especially for a bag, it's going to take
you a lot longer. But if you don't have
one, that's okay too. Go for it. It can be difficult
to know which fabrics to choose from for
various sewing projects. For this project, we will be using really any fabric
that's not stretchy. The fabric I chose, it is like a toweling material. I went to a Joanne Fabrics
and I just picked out, actually I think I got this
at a quilt shop nearby, but which is good, you should support
those local colt shops. But it's just like a thick, thinner than gene material. But it's similar to like a
really thick towel so you could use any fabric
you want for this bag. It could be a thicker cotton. It could be something
like toweling material, it can be a thick
linen, whatever it is. Just make sure that
it's not stretchy. Feel free to use old fabric from blankets or clothing,
anything like that. It just can't be stretchy. You can tell that by
just like pulling on the fabric and making sure
that it doesn't stretch a lot. Also, you are going to need
some kind of way to cut. You can use a rotary
cutter or scissors. We are also going
to need a ruler. This is a clear acrylic ruler and this is my favorite size. It's a 624 inch. For a long time. Actually. This is the only
ruler that I had. Now, obviously I have some more, but if you're a beginner sewer, this is a great
one to start with. Usually it's long enough to cut anything
that you need to. And it's not huge, so it's easy to
store when you're not using it. So
this is a great one. Rotary cutters and cutting mats are easy to find on Amazon
or any other online shop. Joan local quilt shop,
pick up some of those. And if you don't have room for a cutting mat
and a rotary cutter, you can also just use scissors. That's fine too. When
I was in college and I made baby quilts
for my friends, I would just use
scissors all the time. Feel free to do that. The last thing you
are going to need is something for the handles
of our bag. This is webbing. Webbing is like, I don't even
know how to describe it, like a thick material. I bought mine in a giant
roll off of Amazon. Like a massive role. I've
made a bunch of bags. So you can see that I
don't have a lot left. But you don't need to invest in a giant role of webbing
if you don't want to. I think you're going to be addicted to making
bags after this. But feel free to actually go maybe to goodwill or
savers or something like that and just clip
off the handles for another bag if you like those handles, you can
do whatever you want. You can also use ribbons, but the ribbons do
need to be thick. The handles just need to be able to support the
weight of the bag. That's really it for
absolutely necessary supplies. Actually, I forgot. Hold on. Oh wow. Pins, I forgot. You are
going to need pins. Now, pins are super
easy to find. You could actually find these
at like a grocery store. Usually have a little sewing
section or a sewing kit. Grab some of those if you don't want to go
to a sewing store. You can also use office clips. Office clips will work fine, especially because we're
using a thicker material. Now that we've discussed
all of the needed supplies, join me in the next lesson where we will be
covering probably the biggest investment
that you'll make your sewing machine.
I can't wait to see there.
4. How to Pick a Sewing Machine Perfect For You: In this lesson, you're going to learn how to pick the right
sewing machine for you. And by the end, you
should have a good idea of what you're looking
for in a sewing machine. There are so many
different kinds, it's really hard to
know where to start. There are lots of
different types of sewing machines that do all
sorts of different things. Embroidery machines,
straight stitch machines, surgeries, and basic
sewing machines. Embroidery machines
have longer throw space and can create
intricate designs on fabric. Usually uses computerized
software to make these designs. Straight stitch
machines do just that, one stitch and it's straight. These machines are usually
more industrial and they can handle thicker fabrics like
denim or vegan leather. These are commonly used in
upholstery or bag making. You've seen them on
Netflix on fashion shows. They also use straight
stitch machines. Surger, if you lift up
the bottom of your shirt, I'm going to lift up mine. They finish the edge and
you see those little lines. That's the surgery.
Basic sewing machines, they do a little
bit of everything. Zigzag, straight stitch. Some of them do computerized
embroidery as well. When you're looking at machines, there's a few basics that can help you pick the one
that's right for you. Those three are price,
size, and function. First, let's talk about the
price of a sewing machine. Sewing machines vary
greatly in price. I actually have two machines, and I will show you some of the differences between
these price points. First, this is my
20 year old Kenmore was manufactured by Genome. And it's an entry level machine. Maybe actually a little
bit above entry level. And you'll see by, here's some of the features of this machine. It has a touch screen. Kind of stitches
are available and it's easy to get precise
changes because it's digital. My second machine
is a Bernina, 570. Lots of stitches
available, a touch screen, a larger babin, it converts
into an embroidery machine. My Bernina has customizable
actions for the foot. You can do all sorts
of interesting things. How much do you
think each machine costs? I'll give you a second. The price of the 20 years
ago was about 02:50 $250 The price of my bring was about just under 6,000 I know
that's a super wide range, but this one actually converts into an embroidery machine, and as someone who
sells constantly, the burning is perfect for me. For a beginner, you
do not need to Berna. Although Bernina does have some amazing entry
level machines, I would go to your local
sewing machine store, get a recommendation on a basic machine that
fits your budget. The next consideration is size. When you're choosing
machine, it's important to consider what
you plan on making. Each machine is unique and some are a little bit
larger than others. If you have a small space, maybe consider buying
one that's a little bit smaller that can be
moved around easily. This can help you store it when you don't need it anymore. For bigger projects like
quilts and costumes, having a sewing machine with a longer throat space is definitely going to give
you more room for quilting. This project that
we're making today does not require a
large sewing machine. Actually, you could
easily make this on like a little mini machine. To the last consideration
is function. Sewing machines are different functions like we
went through earlier. More expensive machines
may include nice to have features like
automatic thread cutting, needle threading, you know
an embroidery module, but that's not
necessary to sewing. They do make your
life a little bit easier to decide what
machine is right for you. Look around online or at local stores and look for a machine that has
what you need. And think about what you
plan on using it for. Straight stitching, a
white enough throw. All these things
will go into what you want from your
sewing machine. I actually learned
to sew on my mom's old sewing machine
from the '80s, actually think the '70s before using miss Ma for 20 years. And then this year
I got my brine. And it's been so fun to
learn all these new things now that we've
covered the basics of how to choose
a sewing machine, what things to look for and
what you plan on sewing, use, price, size, and function. You can find a machine
that's perfect for you. And in the next lesson, we'll cover something super important, that's how to cut fabric
without losing a finger, like I almost did. I can't wait to see you there.
5. How to Cut Fabric Without Losing a Finger: We've covered how
to pick a machine and hopefully you've
had a chance to procure one because we're going to start sewing in
the next few lessons. For now, let's go
through how to cut fabric using your
rotary cutter in a map. This is a rotary cutter and
this is an acrylic ruler. It's really easy to get
precise cuts in fabric, but you have to
follow a few rules. Make sure that if your fabric is lumpy or wrinkled that
you iron and starch. Starch is not necessary, but I love starting my fabric and clean and then
they cut really well. That's really important, so that your fabric lies flat when
you're working with it. The second rule is to go slow. Seriously, take your
time to get a good cut. You are going to lay
your fabric flat. Oh, wow. I don't even
have any fabric. You are going to lay
your fabric flat. Then we will put our ruler down. Usually you use a tinted hand. I don't know if that's the
right word but you, Heather, you sheath your blade and
then you are going to cut right along the edge
of your acrylic ruler, pressing firmly
with both your hand and not not too firmly. I actually had an accident. I had an accident a while
ago and a few months ago and I actually was cutting and
I wasn't paying attention. And I won't go into details now. Actually what I used to be safe, a section cup, what it does is it sections
onto your ruler. That way your hand is protected so that when you are cutting, your hand isn't anywhere
near the blade of the ruler. Now, I did this as a precaution because I got into an accident. I cut for 25 years before
getting into an accident. If you can't find one
of these, that's okay. They also have cut gloves like these which are rated up to a certain amount usually What's funny is that
I think they're used for cutting in the kitchen like butchers and
stuff like that. But I do use this as well hard because it
doesn't grip as easily. And I find myself almost always using this
section cup instead. But these are really,
really good as well. When you are cutting,
make sure that you hold very firmly so
that it doesn't move. When the ruler shifts, that's when you're going
to get weird walkie cuts, which is not what we want. This project, it does
not matter, honestly. You could have the walkies cut ever and you'll still
end up with a cool back. Just make sure that
you line up the edge. Mine has a little pole button and you go right along here. Now the other thing
is that when you do set this down,
just a safety rule, always put the cover back up, for example, this
one cover cover up. And that's because
other accidents could happen. You could drop it. A small child could come nearby and grab it
and cut themselves. Any number of weird
things can happen. So make sure that this blade is always put away when
it is not in use, and that you store it away from small children or
places that it could fall. Those are the big things.
If you're cutting, you are still going
to need a ruler. And that is just
so that you can, it's just going to be
so much easier for you. You are going to
need a ruler and you can use a pen instead. Not a marker, but just
a pen, like a big pen. Make a markdown and then cut along and making sure not to
shift the fabric as much. Another reason why
a rotary cutter is a good idea because it will make that cut
really quickly for you. That is how you cut. Those
are the basics of cutting. Just make sure you're
nowhere near your fingers. You have a rubber mat to protect any surface below
your fabric is flat. And iron, if it's not ironed, just make sure it's, if
you are using scissors, you will still need
an acrylic ruler. So that way you can at least
make nice lawn of marks. You shouldn't be afraid, but I hope this is helpful. Now that we've
covered how to cut, let's go through the
basics of how to use your sewing machine and
the basics of how to sew, and then we're going to get started with our actual project. I can't wait to see you there.
6. The Anatomy of a Sewing Machine: We've gone through how
to cut fabrics safely. We have all risk wise, and
we have everything do. But before we get
started with sewing, let's go through the anatomy
of a sewing machine. I had to put a caveat in here, I am not a sewing
machine expert. I don't professionally
repair them or take them apart
and rebuild them. Sewing machines are usually
very consistent and easy to use if you treat them with respect and
you maintain them. That being said, my Kenmore, I had for 30 years, I never once had a service, and obviously now it makes
some weird squeaky noise. That's definitely the result of my lack of regular maintenance. My Bernina obviously requires more care and I'm going to make sure that it's very
well maintained. Let's go through
all the parts of the sewing machine that
you're going to need to know. If there's something that
we don't go through, it probably isn't necessary
for a beginner sewer. I know on some machines
there's lots of buttons, but really you don't
need to know a lot. Just a few things. We'll go through how to
thread your machine. I will say this though.
Threading each machine is unique to the sewing
machine that you have, but the basics are all the same. Next we'll go through how
to thread the bobbin. The key terms that we go
through are bobbin, thread, foot length with
petal and needle. This is my sewing machine. We're going to take this off. So you can see this right here is our
sewing machine foot. The foot is what holds
the fabric down. It sandwiches the fabric
beneath the feed dogs, which are those little ridges. And those ridges pull the
fabric forward in an even gait. It moves forward evenly and that's what creates
your stitch en, you have your foot here. And there's different
kinds of feet for different kinds of sewing. I actually have all sorts of different feet for my Bernina, I have one that's non stick for maybe when I'm
sewing with leather. I have one that's clear so I can see when I'm piecing
quilts together, this one is actually
a walking foot that's meant for quilting lots
of layers together. And the top actually
walks with the bottom. If you have a new sewing machine or even your borrowing one, if it's just a metal foot that came with yours, that's fine. Just use whatever one is default that came
with your machine. That's the only one that
we're going to need today. You don't need a special foot, You don't need anything weird. Not that the other
feet are weird. The main area right here. And then you have your, it's
just a Universal Needle. If you go to any selling
store or anything like that, just ask them what the Universal Needle
is for your machine. Just make sure that
it's new sharp. Up here, we have
our thread spool. This is what this looks like. I actually have one over
here to hold it up there. So you can see basically
what's going to happen is that your
thread starts up here. It will go around down, loop under, back
up to the needle. The whole point is to try to
get the thread, the needle. And you can see that
it's just a series of hooks to get the thread down. I will show you what
this looks like for my, now there's a loop here in the back that usually
grabs that and then you go like this
and then I go back up. This is actually really
similar to what happened with my Kenmore. Really
the same process. This one I just
clip back and then over and it clips into
this with my Kenmore. I had a hook and I brought
it all the way to the top. And then I would loop
around that hook back, make sure that it goes under
this thing right here. Again, the whole
point is just to guide that thread to
the eye of the needle. At this point, it will go
through the needle sticker. Wow my kids, I always snip off my thread and
I get a little bit wet. Then I stick it. Now I stick mine going
from front to back. The only thing to really
remember is that you do not want that thread to be wrapped
around the needle in any way. You want it to go straight down, straight back or some machines, they might go straight
back and straightforward, but I don't think so. I think they always
go straight back. There's any sewing machine really truly sewing
machine experts out there. You should love me now, email me or I'm always on
Instagram, DM B. Okay. That is the
most important thing. Do not let that thread
wrap around the needle. If you do, you're going
to have attention issues. Pull it and then I
always just pull very slowly and hold the
thread at the same time to make sure it doesn't get wrapped around the needle because then you're going
to have to redo it. Then you pull out a good length, maybe, I don't
know, three or 4 ". That is how your
machine is threaded. This is your bobbin,
your bobbins down below. Wow, I need to claim
that this is my Bob. Mine actually comes
out as a little. The Bob and holder actually
comes out on my chem, that here is the Bob in itself. This is
what that looks like. Now the Bob is what
creates the bottom thread. You've got the top thread, and you've got the
bottom thread. And how you load the bobbin is usually by putting it up here. Usually it will
be empty. I never load a bobbin when
it has thread on it. You're going to
take this, wrap it around here, wrap
it around here, and then goes like that, That will wrap the bobbin
for you on my Kenmore. All I had to do was
like push a button and it would start wrapping
for you again. Look that up for your
specific machine. They're all different. Great, I've lost my thread. Okay, with my bobbin, all I need to do is
make sure it's clean. And I pull my in like
this over like that. Shove it in there. Clicks in, actually cuts automatically. Okay. And then it will
automatically pull my thread up with my Kenmore. I actually had to what I
would do is I would pull, using the Sky, I would pull it down and
then loop it around the bottom and I had
to fang a little bit. If you have an older
machine, just Google that. This is how a machine
should look when you're getting ready to start this. Right here is your
sewing machine stitch width and
your stitch length. That is how long the stitches
and how wide the stitch is. Basically what's going
to happen is that you will leave your
stitch with at zero. A straight stitch
is all we need. Your stitch length, I
usually have mine at around 1.9 or two
depending on your machine. Some of them are
different. This is how fast your machine goes. Mike Moore had a little
rabbit and a little turtle. If you're a true beginner, keep it really slow. You
don't have to go fast. I usually keep mine somewhere in the middle prevents me
from going too fast. Going crazy over here is where your needle is.
Your needle position. I keep mine dead center. Occasionally, you'll need
to move this if you're maybe installing zippers
or something like that. Don't worry about that,
just keep it dead center. This is a needle
and a needle up. This pulls your needle down. That pulls your needle up. Oftentimes there's
also a function to end with your needle down or end with your needle up when you're selling.
Don't worry about that. Doesn't matter when
we're rounding curves, it is helpful to have
your needle end down. That way you can
pivot your foot up. Now this foot actually
automatically goes up and down based off
of when I press the pedal. But my Kenmore has a
little lever in the back, and you will just
pull that lever up whenever you
want your foot up. Whenever you are sewing, just make sure that your
foot is squashed all the way down on the fabric
and it keeps the fabric down. When you're sewing
nice and flat, you will notice if
you start sewing up, things are going to get crazy. Your stitches are
all over the place. Like it's hard to
manage this right here, The hand crank or the
hand wheel over here will help you understand what
happens when you do stitch. Sometimes when I'm going
through really thick seams, I will actually use
the hand crank to just slowly stitch through
these thicker seeds. That is that needles, how you install a needle is usually you have this
little black thing right here and you just stick your needle up there
with the flat piece, usually in the back
or on the side. And then tighten it.
Make sure that's tight. Before you get
started with sewing, make sure that your
foot is tight. Before you get started
with sewing, I'm going to remove my walking
foot and put on a different foot
just for this project. Last thing last, when
you do have this on the side here and you have this little guy I
remember as the beginner, I didn't know this,
but I usually had this all the way
up to my thread. It would prevent that tension, it would prevent the machine from pulling the thread
the way that it should. My tension was all
wonky and weird. Now obviously know better. But as a beginner, I
didn't make sure that this isn't trapping your thread in any way or
touching your thread. It prevents it from
coming off as it unspool. Just make sure that that's
not right up against there. I'm trying to think if
there's anything else, but I think that's it. So now that we've gone
through how to cut fabric, how to use and get your
sewing machine ready, I think we're starting to
get ready with sewing and I can't wait. So I
will see you there.
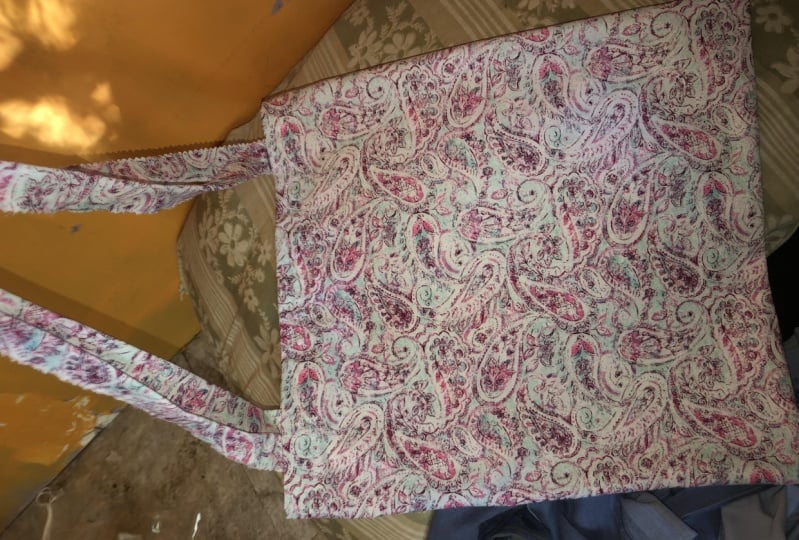
7. Use Your Skills: Cutting the Tote Fabric: Let's get started
with cutting fabric. I actually thought I had enough of this
material, but I don't. I actually grabbed this other material
that's very similar. What we're going to
need to do is to cut either one length
of 32 " by 18 ", like a long rectangle. Two lengths, two panels, 16 " by 18. ". Now, because I have
such a long length here, I'm going to actually
just fold it in half. You can see here, this
is the fold right here. So what I'm going to
do is actually just cut one length with a fold. I'm going to take this
fold and I'm going to line it up on the edge of my cutting mat here, make sure it's
nice and straight. I probably should have ironed this fabric. Let's
not look at that. This is my section cup thing. Okay, now we're going to
cut that 16 inch length. So I've got my ruler
lined up here. I have my fold 16 " by 16 " rotary cutter. It's weird. Okay, now
I'm going to hold down firmly and this blade will go
along the edge of my ruler. Now, before I
looked at my ruler, I always check to make sure that none of these
threads got caught. That happens all the time. Just make sure that nothing remaining before
you lift up your ruler. Okay, now that we have the side, nice and squared off, we're
going to cut the edges. So this is 18. " here, press firmly. It's very satisfying. Okay, there we go. And then we're going to
finish off the bottom. Now, you really are not supposed to cut towards yourself
for good reason, right? They don't want any
accidents to happen. Lots of times people will
just move around so that way they can cut not
towards themselves. Or sometimes they'll shift the ruler so that it's
on the other side. It's easy to cut, and that's probably what I
will end up doing, slow and steady when
you are cutting. Here is our panel now, again, if you don't have one
long piece, that's fine. Just cut two of
these single panels. This one and you'd
have this one. But because I have a
fold at the bottom, I have one long piece. This will end up
becoming our bag. Now we are missing our webbing. I have two different
colors of webbing. I have this color and
I have this color. And I decided to go with
black. But this one. So we're going to send
you two lengths, 920, 9 " let's fold this guy up here and we're going
to measure out. 29 ". If you don't have
a long enough mat, that's okay, just
double it over. What's half of 291,014.5
Something like that. You guys, I wasn't a math
major. I'm not great a math. Okay. 29 " Here we go. These will be my handles again. This is wedding that
I got off of Amazon. Surprisingly, I've used a lot
of it for various things. You know, if you wanted
to get a lot of webbing, I think it would be useful. Okay. This is all we need for
our bag to get started. I will see you at the sewing machine
where we are going to pin this and get
started sewing our bag. I'm excited to see you there.
8. Pinning the Tote Bag Pieces: Okay, let's get started now. But we have our
pieces cut again. I have one long rectangle. This is going to be the
inside of my rectangle, I know it's mine's
the same actually. Is the same. What we're going to do is
we're actually going to fold over the edge a half inch. Okay. Mine is a little bit
more than a half inch. You do a half inch, maybe even three
quarters of an inch. And I am going to click mine. You fold it over, just
make sure it's somewhat even feel free to iron it if you'd like
beforehand. That's okay too. We will be repeating this same process on
the opposite side, 3.5 " from the edge clip or pin. And then we're going to do the same thing on
the opposite side. I will show what that looks
like, this over again. This is on the same
side, it's not tangled. 3.5 " in. Hey, I will see you at
the sewing machine. Oh, I forgot the cheek, my foot. Okay. We are ready to
get started with sewing. We should have our bobbin,
we should have our thread. Everything should
be ready to go. What we're going to
do is we're going to sew with our foot lined up. The edge of the foot will be
lined up next to the edge of this piece of
fabric right here. Not the fold, the other set, this loose piece right here. All I will do is I
will lower my foot. I lower it about a quarter
inch from the edge. Quarter inch from the edge
of this fabric right here. Because I don't want to
start right on the edge. Oftentimes when you do
that, your fabric will get sucked in down below. That causes issues. I usually start about a quarter
inch from the edge, then I will forward
stitch a little bit, then I will back
stitch a reverse, I don't want to
say every but most machines have a reverse button. Reversing usually just
like locks in your stitch. You can see that slowly, so with the edge of my foot lined up against the edge
of this piece of fabric, right here at the edge
of our folded fabric. As I go, I remove the clips, but only until I approach them. I don't remove them prematurely because then I lose
the benefit of having it secured very slowly. And you'll notice I'm
not pushing or pulling. I'm not doing anything
with the fabric except keeping it flat and making sure that it is getting guided through the
machine at an even pace. I will hold this here
and make sure that as now when you approach
your webbing or your handle, it is going to be a little bit thicker than the other fabric. Sometimes you will need to make sure that it is getting
pushed through. Sometimes I will stop and I
will make sure my needle is that you can lift up your foot and just
straighten that out, flatten it out, and then lower your foot again and
keep sewing that, just ensures that
this didn't get pulled back or
anything like that. Now, I am going to
take out my needle, my pin around my
husband too much, and then I will continue to sew. Some people sew
over their needles. That's fine, but the
accidents have happened. So you will notice, I will just keep
sewing straight. It's harder than
you think it is to sew straight, but this
is a good practice. Sure, that's straight. Now I just so right off the
edge of my fabric. And then I cut mine. See here. This is what
this will look like. Beautiful. We're going to repeat that on the
opposite side. And then what we're
going to do is we're actually going to fold
it over when more time like this and sew it again. This is turning out so cute. Again, we will lower our
foot about a quarter of an inch from the edge that was a little bit more
than a quarter inch. I'm going to reverse keep sewing with the edge of my foot aligned with the edge
of my cut fabric. It's hard not to
get walking lines, but just try and make sure that you practice
sewing straight. That is important, really learning how to sew,
where you need to sew. Make sure this handle
is nice and straight. It should be exactly
perpendicular to the rest of your back again, so right off the edge. Okay, this looks fantastic. This was the first
step of our bag. Now what we're going to do
is actually we are going to fold this again. Here is outside of the bag. That's what the
outside looks like. Here's the inside which we
just folded over and sewed. We're going to fold
it over again. I'm folding it over at exactly like naturally it
folds that a half inch. I fold it over again,
another half inch like this. Then what we're going to do
is actually pull the handle back like that and clip or pin. We are going to sew
again down this line, the seam allowance get back. Okay? So now that we
have clipped this down, we are going to
sew down the edge. Now this time you are
not going to line up the edge of your foot with the edge of
the seam allowance. But we're going to do is,
we're actually going to go in a little bit here, See how I started you off easy. Now we're going to make
it a little bit harder. What I'm going to do is I'm
actually going to follow the same that I made last time. I'm going to lower my needle and make sure that's
right about there. You can see that's a little less than the length of my foot. I will be about there now. This is going to be thicker. Your machine might
struggle going over this. One, we're going to go slow. And two, I will show you a
cold trick to go over that. I'm going to start
sewing with my needle right over the last
stitch that we made. You see that I have a
stitch going down here. That's where I am sewing again. But this time it's folded over, reversing just to secure it. Okay. Now it's going to struggle a little bit going over that, make sure your needle is down. Lift up your foot, You can straighten it out and
push it under a little bit, lower your foot and keep going. Now, if it's really hard and your machine
can't go over that, you can also just use your hand crank and you can
crank over just that edge. If you crank over
just that edge, sometimes it's a little bit
easier for your machine, you can help that. And then again,
lift up your foot, make sure that's nice and under there a feed docs can catch it. Then you're going to keep
slowing very slowly. Oh, my throat broke. I'm going to keep sewing using
that last same as a guide. Again, sew right off the edge. Pretty. I love it. Well, that's great. So I'm going to sew
it one more time down the opposite side
just to secure this. You are welcome to do the same, so it will create two
seams going down. Awesome. Okay. That looks fantastic. So that is done. This is the inside of, look
like this is the outside. So okay, we're going to flip
over to the other side. We're going to do
exactly the same thing. You should be a pro by now. Over about a half inch. I'm just folding it over the
same length clip or pin. Make sure that this folds back. These bags are so great too. I use them all the time,
especially in California. We have to pay for grocery bags. I end up just like carrying bags around with me
everywhere I go. This is actually funny, these bags have been like my lifesaver because I
have them in my purse, I have them in back of my car. I have them pretty
much everywhere. We are going to, again,
sew using the last seam. I'm going to pull that up so
it's not pulling as a guide. And then I will sew another
seam on the very edge here. Okay, we're almost done. Honestly, this bag comes together so quickly.
Really excited. Let's go this one last time.
9. Quick and Easy: Sewing the Tote Bag: What we're going to do is, now that we have
sewn on our handles, what we can do is sew on the
edges to complete our bag. My front sides are
facing each other. I fold it in half using
that fold that we used to cut lotus here. This is the fold, these are
the seams that we just made. You can see this is the outside of the bag and
the outside of the back. I am folding those together and lining up my
edges on both sides. What we're going to do
is we are going to fold the edges first a line them
starting at the top here. We're going to fold it over by about a quarter of an inch. This maybe more
than that. And then fold it over again like that. Once we do that, we will
clip it in place and then keep moving down
the edge of our bag. Folding it over about
a quarter of an inch and then folding it over again a quarter of an inch. Folding it over again,
you'll do sides of your bag, starting at the top where
the handles are on the top. Here we go. Once
you've done one side, we're going to repeat the
same on the other side. Fold over one edge, hold it over again, clip and then repeat on the
opposite side. Now we're going to
move on to sewing down this edge right
here to lock this in. And then we will be
done with our bag. What we're going to
do is just sew along the edge catching both folds. Okay, Now I just
reversed a few inches just to reinforce it. Reinforce that
scene. And then I, so right off the edge, that is what the finished
inside will look like. Then we will move over
to the opposite side. Now you'll notice that I am starting at the bottom
instead of the top. And that's just
to keep the seam. This fold on the top, I could start on the other side, but then it would be this fold would be on the bottom
and be harder to control. I am starting over here
again, about a half inch, quarter inch from the edge going forward and
then reversing. I'm sewing about an
eighth of an inch away. About a quarter of
an inch actually. Maybe even a little bit
less than a quarter of an inch from that fold. From the inside fold.
Not the outside fold. Just make sure you're
sewing somewhere that will catch both folds
and secure it down. It can be smacked in the middle, it could be red
on the very edge. Although if you're getting
caught on this fold, it's going to make your
life a Just stay safely. About a quarter of
an inch away. Okay. Now this part is so thick. What I'm going to do is raise my foot and then just hand can just so I
don't break my needle again. I broke my needle
on the other side. Just ticket over that
big part right there. Okay. And I saw right off
the edge and we're done. That's it. That's your back. This is what it
should look like. You're going to go around
and trim some seams, make sure everything's
nice and clean. Oh my gosh. It's so
cute. I love it. Wow. Great job, everyone. You all did amazing. I can't wait to see your bags. I can't wait to see
what colors you chose, what fabrics you
chose, the handles that you chose, and
what you use with them. So make sure that you
share pictures with me and there's a place on
skill share to do that. I would love to
see what you make.
10. Conclusion and Next Steps: Grads, you made this. I'm so glad that you joined
me for the sewing class. I know that sewing can be
an intimidating skill, but it is so useful. And if you practice, it gets easier and easier. In this class, we covered how to pick out your ideal
sewing machine, how to cut fabric safely, how to sew straight lines using a four inch and a half
inch seam allowance. And of course, you
made the super bag. You're amazing. Look at
everything that you've learned. And I hope that you love your
bag as much as I love mine. All ten of mine, because
I've made like ten of them. If I could give you
one piece of advice, it would be to keep choosing small sewing projects
that gradually skills. I know it's tempting
to jump into the deep end and it's really
easy to get burnt out. Believe me, I know I've done it. Some of the next
projects that I would recommend might include
a drawstring bag, scrunchies, bells, hot
pad, anything like that. Something that's
small and reasonable and manageable and you can
get done in the weekend. Don't forget to post
your pictures to the project section
of the class so I can provide feedback
and support. I love seeing your work. It's my favorite
thing about teaching. Post your projects
on social media and tag me one so
I can share it. And two, so I can
see your projects. I love seeing your
unique creations. For anyone who makes
more than one bag, you'll be entered
into a giveaway. If you like this
class, please leave a review and follow
me on skill share. Thank you again for joining
me on this journey. I'm so excited to see what
else you make that I would recommend might include a
straw string bag scrunchies about a four inch from the edge. Then I will breed is
like, that's not right. I don't want to say every but most machines have your
time to get a good cut. You are going to lay your
fabric flat. Oh, wow. I didn't even have any
fabrics not working. Oh, I broke my needle. Both the front and the back
of the bag. You're fine.
 Jessica Rose, Quiltd Studios | Designer | Educator