Transcripts
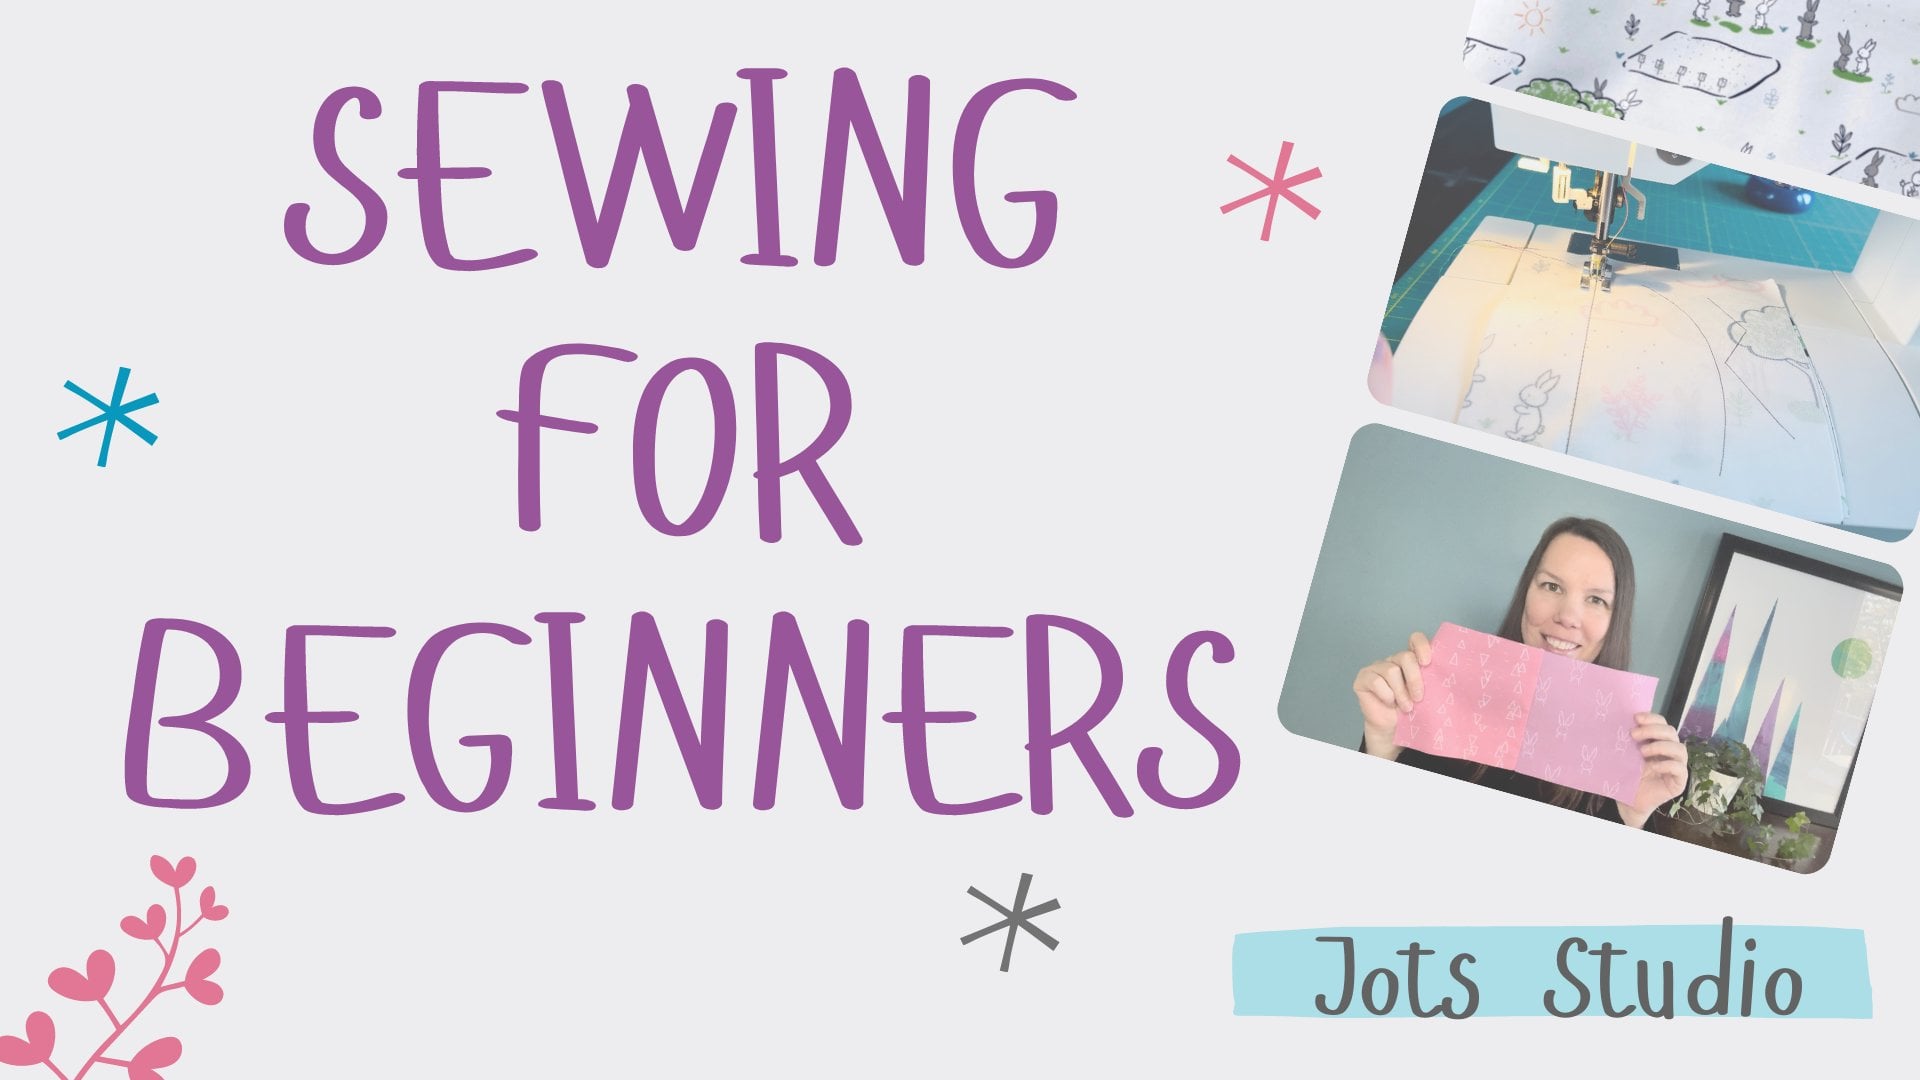
1. Intro for the Ultimate Beginners Sewing Class: Hey everyone, I'm Emily from MEP designs and this class
is for the beginner solar. This course is perfect
for you if you've never touched a sewing
machine before, but you really would
like to start. Maybe it's been a long
time since you started. Again, this class
is perfect for you. We're going to start by showing you the basics of
a sewing machine, what each button means, and how to really get
to grips with it. We're then going to
be practicing our stitching on the machine. And then we're going
to start making some easy beginner
style projects. In this course, you'll learn
how to make three projects. The first project that you'll
make as a cushion cover, an envelope back cushion cover. We'll then move on to making a makeup bag so you can
learn all about zips. And then finally it will be
making aligned tool back. Each of these three
projects will kind of progress you're on at a rate where you'll be able
to stop the video and maybe have a go a few
times if each project, I'll just follow along
with the costs naturally, it is completely up to you. This is the beauty of an online course that
you have for life. You can pause, rewind, and keep going back to the
bits that you're not sure on. This class is designed
for a beginner. No jargon used here.
Let's get started.
2. Threading your machine: Okay, So this is the
machine that we're gonna be working on
throughout this course. Although my own personal machine has a lot more stitches on it, I wanted to show you that
you don't have to have a machine that does a 100 different stitches
to start your journey. This particular machine here as around six or
seven stitches on it. And it is a perfectly
functioning machine for what we need it to do. This particular model
is a genomic E17 S. I'm not sure whether this
model is still in circulation, but what I will do is find
the closest one and leave it linked for you if you would like to buy yourself
a similar machine. So our first job here is to get the machine ready and
set up for stitching. So that's what we're
gonna do first. In every single
machine that you find, no matter what make our model, you will always need
two types of thread. So you'll need your
thread that lives on the top and then you spread
that lives in the bottom, also known as your bobbin. First job that we need to do is transfer some thread off of this cone here onto our bobbin. So that's what I'm gonna do now. So most machines work in
a very similar manner. There will alter
from time to time. But generally, this is how you're going to
fill up your bobbing. Someone to put my thread on the little
thread holder here. And most machines than half a tension desk
like the one here. We're going to wrap the thread
around the tension disk. And what you need to make
sure is that that thread is caught in properly on
your tension disk. If it's not in the tension disk properly, like for example, if he's literally
just rams like that. And obviously you can
see when I pull it, it wasn't caught in. That will cause is your thread
to wind onto your bobbin. Far too little sleep, then obviously
you're not going to have much luck when
it comes to sewing. Make sure that this is
sort of pulled on poplar. You'll be able to lift
this tension disk up and the thread sixths
in-between there. And then take your
Babu on your bobbin. Show you close up. You have some little holes
on the top of your bobbing. So this one here,
I'm going to put the thread through that hole. Like so. Then I'm going to place the carbon onto this
little holder here. My machine on the
bobbin to the right. And what this does is initiate the bobbin winding procedure. Now on some machines, what will happen is when I start winding this on this
down here might still work. And I'm going to show
you a little trick how to stop that from happening. So if I just stop, the machine operates with
the foot pedal which is plugged into the machine
and he's on the floor for me. And I'm going to press
that obesogenic lift. And as you can see,
this is moving. I'm machines where this happens. What you need to do is pull your wheel side outwards
until it clicks like that. That stops that from happening. If your machine automatically
doesn't do that, then you don't need to do
anything with the wheel. Once it's bound a little
bit of thread on, I'm going to trim this off. I'm going to wind this
until this is full. So you will know this is
for when the machine, basically it will slow down. Some machines will
completely stop that. I'm going to keep my foot on the foot pedal on the floor so you'll be able to
see on my machine. So as you can see mine
still making a noise, but this is no longer moving
because this is full. So now I'm going to push
that back to the left, lift this off and
trimmed to separate. And that is your
bobbing, nice and full. Now we're going to thread
the rest of the machine. So what I'm gonna
do is I'm going to keep my thread on here, but I've taken it off
the tension desk. Again. Machines are different
to one another, but most will thread
in the very same way. Most machines have numbers and arrows as well
so that you can follow those in order to make threading your
machine up a lot easier. Okay, so I'm gonna
keep the thread wherever it is for the moment, but I've taken it off
the tension desk. I'm also going to
switch the machine off at this point as well. Just saw no accidents happen. So as I was saying, most
machines have numbers, are arrows are both
in order to help you, but they will follow the
very, very similar path. So the thread is
going to go around this first hook here and
down this first channel. Then the thread is going to go underneath the
channel to the left. You then should have a hook
roundabout at the top here. If for whatever reason
you can't see a hook, that's probably caution needle
is inside your machine. So what you need
to do in that case is get your wheel up the side, turn it towards you until you
find that you hope appears. And then you're going to go
to the right-hand side of your hook around the back
and then to the left a bit. And then what that should
do is catch on that hawk. You're going to come back
down that same channel. The most machines have a big hook right at the
bottom of these channels. So I'm going to put the
thread behind the big hawk. And then the normally
happen as well, a little hawk just
above the needle. So I always remind them that
is B Corp bend little hook. And then we're gonna
go through the needle, which always seems to
be the trickiest part. So most machines will
thread front to back. You will only find that industrial or semi
industrial machines will thread left to right. And that is the top portion
of your machine threaded up. Now to thread it, the bobbing. My machine here is a
bottom loading bobbing. What that means is to first
look at this machine. I can't see where
this is going to go. You might have a top
loading machine, which the machine behind that is a top loading machine
cost right there. I'm able to see my bobbin at all times behind a clear case. That would be a top
load in bobbing. This is a Button Mode in
Bobby to get into here, I'm going to push
this to the left. Then this should flap down. So this is normally a
bottom loading Bobby, and we'll have a
metal spore care. So after the red is going
to sit inside here, this should be like
little latch on your metal case that you should be able to lift
up and pull this out. I already had some
thread in here, but obviously I'm going
to take that out. I'm going to drop my
thread inside there. Now on your spool case, you should have like
little slit here. And sort of like another
piece that kind of brings you out too wide
called like a little window. So I'm going to get
the end of the thread and I'm going to work it round to that little slipped there. And then I'm going to bring it around to lease space
in that little window. And then I'm gonna put this
back inside the machine. And I will show you exactly how it should look
inside your machine. Okay, so I've zoomed into the bobbin case that you
can see properly what you should be able to
notice that in your bobbing your bobbing case, that is like a little
notch just there. And that is exactly
where this will say it. So you want to
push that end line up and then give you two good push back until
you hear it click, and then that is
in there properly. If that didn't click, Take it back out and try again. The click is what ensures that it is in all
nice and popular. Okay, so once we've done that, then we need to bring the bottom thread so your
bobbin thread up to the top, so that instead of the one
strand of thread at the top, you're going to get
the tool as opposed to one bean on the top, one
being on the bottom. To achieve this with
your left hand, I want you to grab
the thread that you thread it through the
needle and hold on to that. Don't hold it too tight. But make sure obviously that
you've got a grip of it with your right hand and the wheel
at the side of the machine. You're going to turn that wheel
towards me this up-close. So with my right hand, I'm turning the
wheel towards me. You should be able to see that top thread go
down into the bottom. I'm doing it quite
slowly and it's going to retrieve that bottom thread, the loop that you can
just sort of see here. Once that disappeared
and moved up here, you can just see the threads
coming back through there. If you talk on this top thread to pull
the loop further up. And then you can grab that
then with your fingers. So now instead of one
thread at the top, one at the bottom, you've
got both at the top. Then what I always do is push the threads between the gap on your presser foot and put it off to the back of the
machine, off to the side. You can pop that case back on. And then you'll be ready to sew.
3. How to use your machine and practice : Okay, so now you've threaded everything up and
you're ready to go. Now just to point
out a few things on the machine that
you need to know before you get started. If already use the foot pedal, which is on the floor, which is obviously how the
machine is controlled. Then you want to locate
your reverse stitch button. I'll leave it on your machine. So on this particular model, this here is the
reverse stitch lever. You might have a button which
you have to press and hold, which I can show you on
another machine here. So on this particular
machine here, this would be my
reverse stitch button. So if you look for
a symbol like this, That's how you'll know that that shot reverse
stitch button. So now I know where that is. I'm ready to start. I just need to make
sure that I'm on the right stage for what
I'm gonna be using. For this course will be mainly
using a straight stitch, but we will be using as
exact stitch here and there. But obviously I will show
you that when we need it. But to start off with, we're just going to get to
grips with the machine with a straight stitch
on my machine here, I can see all the different
stitches I have available. And I can see that stitch
air is a straight stitch. I am on the stitch selector here on mine again is
a dial and I'm on a. And then this is where we control the length
of our structures. So some machines
have the ability to control the length and
the width of a stitch. These particular
machine, with it being a basic model on the controls, the length of the stage, which is perfectly
fine for this, I'm wondering would
be between a 23. So if you need to change the
settings on your machine, then you can if you're
having any trouble with located in any of the
settings on your machine, please reach out on the contact me page of the website and there will always
be happy to help. The reason I am between 23. So I read a 2.5. This is normally a standard
stitch length. If your machine is a
computerized machine, this will always be the
setting that you're straight stitches on when you
first turn on your machine. It's not too big, not too small. It's just the right stitch
for general sewing. On the course page, you will be able to access in this section
where this video is the practice sheets that I've created to help you with getting to grips
with your machine. If you want to print these out, you can print them off as
many times as you like, as much practice as
you feel you need. Obviously, I'm just going to
show you on both sheets of paper because we're gonna be using a couple of different
techniques in this course. And these bits of paper just going to help
you get to grips with those techniques
before we move onto fabric. Might seem a little bit silly. So in on paper, but the reason that I deal with this is more than anything, it just gives you
confidence that you're using your machine
in the right way. Don't worry if your paper starts ripping, that's
completely normal. The machine obviously isn't
built for stitching on paper, but it won't, it won't break your machine or
anything like that. People do sometimes on paper
as well to make cards. So it's something you can do if you do end up liking this, we're going to start off with the practicing on
the straight lines. So what I want you to remember
for this is not to get too hung up on sewing right
on the black lines perfectly. I'll tell you why later, but I want us to
just get used to using the reverse stitch
leave at more than anything. And so aligning
stitch up to start. So I'm going to start on
this black line here. I'm going to turn my machine on. I can see that my sewing needle is in line with the gap
in the presser foot. So obviously this here
is the presser foot, these normal
interchangeable, but that is something that we can
worry about another day. So my needle is in line with
the gap in the presser foot. So if I lower my presser
foot onto the black line, with that gap on the black line, I know that my sewing
will be on that line. So to lower the presser foot, normally there is a lever
the back of your machine, sometimes it's a bit
off to the side, so minds off to the side here. And it is a lever that
lowest this up and down. This has got to be down in
order for the machine to work. So I imagine it as a sandwich. Bread wasn't on your
sandwich poplar than the filling would
probably spill out. A little bit similar in
terms of if that wasn't up, your stitches aren't going
to be nice and accurate. They're going to be very loopy because the tension isn't there. So I'm going to
lower my, my lever, do that very gently
onto that black line. Now if you want as well, you can use the wheel at the right-hand side
of your machine, turn it towards you or to lower the needle down to your machine. That way then you can see where the needle is going to hit. When you start and end a scene where the norm the no matter what
you're working on, unless otherwise
stated in a pattern, you will always reverse stitch. And at the start and
at the end of a scene. Just a bit like when
you're hand sewing and you're not the
end of the thread. This is exactly
the same process, but this lever here are the
button on your machine. It's gonna do that for you. You can reverse stitch a
little bit too much as well. I always try and
say it's people, remember the rule of three. So this is what I mean by that. I'm going to lightly press the foot pedal on the
floor and count to about three like that. So roughly three seconds, three stitches, something
along those lines. Once I've come forward
roughly those three stitches, I'm going to press and hold
this lever down and put my foot back on the foot pedal again to go back three stitches. So pressing this down basically makes our stitches go backwards. And I'm gonna go back
the same amount. Once you've gone
back the same mount, you can let go of this and
continue coming forward. So again, be nice and steady when you
first start talking. A bit like, obviously, if you have learnt
to drive before, you wouldn't put your
foot on the accelerator flat to the floor when you
first saw it, I get a new car. You're just going
to ever-so-slightly until you get to grips. And I'm going to sort all the way to the end of this line. So when I get to the
end of the line, I'm going to press and
hold my lever down and go back for the
three stitches. And then let go and then
come forward again. Those three stitches. So always remember
the rule of three. So when I've finished like here, obviously my needles finished
In this down position. It could finish up. It just depends on how you stop. But obviously if your needle
is in the down position, then use the wheel at the
side to bring that back up. Lift up the lever that controls your presser foot
and pull this out. If this is causing you a bit
of problems pulling out, we're going to get for
the side just to close enough attention and cook
it all threads to separate. The best thing is, like I said, I'm not quite on the
black line there, but if you look from the
back of the sheet of paper, you will be able to see is that that one looks
perfectly straight. Normally you wouldn't be
following black lines like this. You would always be falling mainly the edge of your fabric. And you can sort of
see where the threads darker is where I've
reverse stitched. And like I said, if you
were to reverse stitch tool much you would probably
get too much bulk there. But we will go through
that one more time. And then obviously you can
continue practicing on all the lines and even print more sheets out if
you would like. So placing my presser
foot on the black line, lowering my needle,
three stitches. Leave a down three stitches. And then forward all
the way to the end. In terms of hands and where
you need to get your hands. Always, usually hands
in this position here. So you're not press down
completely on the fabric so that if you look that's
not now able to move, but just ever so slightly
controlling the paper, which would be the same
then with the fabric. Just saw that then if you weren't holding it, for example, you could go a little bit off, off the track there. So I'm just ever so slightly with the Hammond's whitespace. This three with three, needle up, lever up. If he's getting a bit wary
of your mat, pull out. There we go. You want to continue
practicing on your other black lines
as I've mentioned, or even print off if
you feel you need to. Okay. So I'm moving on to
this next sheet of paper. The reason we're
going to practice on here is because this is going to get us to grips
with turning corners. So when we come to, so in our Cushing, particularly the other
projects in this class, we will be turning corners. Now, lots of people
seem to think when the very new to say when is that you would just
like you would turn a corner in a car
again, for example. So just using your hands
like assured you're sort of hold the
paper and sort of steel yourself around a corner. And I'll show you
what I mean on this. To begin with that,
then I will show you the correct way to do it. So we're going to start
at the bottom here, exactly how we started on
the other sheet of paper. Lowering my presser foot
onto the black line, pop in my needle in. To start. We're going to do
forward three pictures and back three stitches. And then come to
kneel to go forward. So a lot of people would
sort of automatically think, as I've just mentioned, sort of putting your
hands on your hands. Turn the corner and
I'm going to show you now why that wouldn't be the
correct way of doing it. If I show you up close there, we've got a curve on the corner, whereas what we want
is a 90-degree angle. So sometimes you might be around curves and that is exactly
how you would go about that. But again, that's
something for another day. But when we're sewing as
cushion, for example, we're going to be
so in a big square, we want nice corners
on our cushion. And just like mosque questions
that you will have on yourself or at home will
have nice pointy corners. And then I'm going to show
you exactly how we do that. If I just get myself
back on here as I was, and start again, what I'm gonna do is I'm
going to try and stop or as near to the
corner as possible. So I know if I saw a
carry on a bit more, I'm probably going to
go up past the corner. So I've just stopped myself
just before the corner. I'm going to use my wheel at the right hand side
of the machine. And we want to turn it
towards myself one full turn. And that's got me
on the corner them. So what I'm gonna do is I'm
gonna make sure the needle is down inside the
machine in the paper. That way, when I pull the
lever for the presser foot, what I'm able to
do is twist myself around and the needle is unclean the paper that it's only
going to sort of go around as opposed to be going
every which way possible. I'm going to turn
myself 90 degrees and then lower my presser
foot and come to some. I'll show you that again
at the next problem. Stopping on a forest near
to the corner as possible. So I'm banging on
the corner there. I'm making sure that my needle
is in the down position, anchor in the paper
in, onto the machine. Lifting the lever, twisting
around, lower in the lever. And you want to follow
this process all the way around your piece of paper. I'll show you this again. If you're not quite
near the corner, use your wheel at the side, turn it towards you or
to get yourself there. Leaving your needle
lowered into the machine, lifts the lever,
turn 90 degrees, lower the lever and continue. I also want to show you is
what will happen if you do forget to lower
the presser foot? Not just in this
situation, but any. So some machines don't have
a safety mechanism on them. So my normal machine
that I normally use day-to-day won't let me
saw on less, this is down. So it basically triggers
a bit of a beep. And the machine just want go on. On computerized machines like this one, you won't have that. So this is what will happen. As you can see, it's
got nothing to grip on. I am able to move it forward. You will see what things look
like when I get to the end. So just to finish
this we did before. I'm going to sort all the
way to the end of the line. I'm going to call
my reverse lever, go back three stitches. And then come forward again. Making sure the needles up, lift up the lever. So there we have it. I've done on some as well. Well, I've not been
exactly on the line. So first off, this was the line where I didn't lower
the presser foot. And as you can see, it's a lot less straight. These stitches here
will be a lot more likely to come on stage from threaded just because there's no tension there
within the thread. But as you can see
again, this line here, I'm not exactly on
the black line, but when I flip it over, it's still looks
perfectly straight. So always look at your work
from the, from the back. Because when you're not
comparing it to a black line, it always looks a lot
straighter. Again. If you need more
practice with this, then please do
print it off again. But you do have a little step-by-step guide
here that I've written to go through all the steps for
turning the corner.
4. How to cut your cushion: Hi everyone. Now it's time to start
cutting out those projects. So the very first
project we're going to work on is the cushion cover. It's gonna be an envelope
back cushion cover. This segment of the video is gonna be all about
cutting it out. I'm going to let you know
what size do you need to cut out and give you some tips
and tricks along the way. So what you're going
to need some fabric, I recommend at least three-quarters
of a meter of fabric. So he saw go to the shops and
maybe by a meter of fabric, then that would be perfect. But roughly three-quarters
of a meter will be enough. You also need a cutting mat. So I've got a
cutting mat here on my table that I'm using. And then I'm also going
to be using to cut out a ruler and a rotary cutter. This is going to make sure and ensure that I'm gonna
get some accurate cuts. Want to be put in three
different pieces out. And by using these, I'm gonna get some
nice straight edges. So I'm gonna give you
some tips and tricks along the way of
how to use these. So let's get started. Okay, So in terms of
cutting out the cushion, as mentioned, we need
three different pieces. One piece is going
to be the back, which will be one big square. And then the two
pieces we've got leftover will be to back pieces. And those pieces are going
to basically overlap one another to create the envelope
style of the cushion. So first thing you
want to do is get your material already
and laid out. What I would do is
give you material a good Press so that it makes
cutting out a lot easier. That's everything
pressed and ready to go. In terms of types of fabric that you want to use
for this project. You need to make sure
you're using fabric, but it hasn't really
got any stretch in it. So for example,
the best thing to use is some kind
of cotton by hand. You could use a 100%
cotton, poly cottons. This that I'm using here
is a brushed cotton, which basically means it's
just a softer touch cotton. Normally, this can be used on things like bedding and quilts. But I thought this would make a lovely Cushing that you could have as in
a child's bedroom. With the form printing
I've got here, it's completely up to you. So instead of
obviously giving you a pattern to download and
then pick pin on and cut out. I want you to be
able to give you measurements as we go along. Just so that you can
then see that you can scale things up and down
should you wish to, or depending on
what you're sewing. For example, today, we're
going to look at making a standard cushion cover for a standard 42 centimeter
square caution. So I'm going to be working in inches as opposed
to centimeters. So 42 centimeters equates to
roughly around 16.5 inches. 16.5 inch square Cushing is
what I would like to do. Now. Top tip for
sewing cushions. So normally when
you're sewing things, you have your seam
allowances added on. And obviously you
would make the cushy normally bigger so that
when it's finished, the finished size
is 16.5 inches. Now, have you ever had
a Cushing where you've put the Cushing pad
inside the cushion cover. And it just doesn't
look quite full enough. Top tip to get rid of that is to actually caught
you Cushing to the exact size that
you would like it to be finished it that
once you've sown, you didn't see my answers, you end up with a
cushion that's ever so slightly smaller than
the cushioning pad. But then the cushion pads fills the cushion out perfectly. So that's exactly what
we're going to do. For the front piece,
I'm going to cut myself a 16.5 inch square. At this bottom edge here. I can see that this is
not quite straight. So my first job is to make sure we're working
off a straight edge. The edge along the
right-hand side here. My right hand side is the
salvage of the fabric. And I know that this is
always going to be straight. The salvage is always
going to be straight, whereas this was the
cut edge in the shop. So what I'm going to do is
I'm going to put the edge of my ruler along the
edge of the salvage. Line that up straight
and then cooked down the side of the ruler to get
this edge nice and straight. So the trick to working
with a rotary cutter, and I'm going to
move this on now. A lie, not now I know this part is nice
and straight. I can. Line my ruler up with it. You can use the grid
on your board as well. Make sure you are using method two maps so that your
tables protected. So the thing with a rotary cutter is you want
to make sure you're adding enough pressure that you are getting the
cut straight away, but don't worry if not, so for example, I didn't add a lot of pressure
there and that's not, that's not caught it all is
caught some cosmetic threads, nice and sharp,
but not all of it. The thing most common that people want to do once
that doesn't happen, It's just come
back on the south. And so I do this
until it is caught. That's going to blunt
your blade very easily. So instead, I know that
that's not cooked properly. So instead of coming back, always cut away from yourself. So if you lift the rock, record shut up and just
do the same crops again, but with more pressure. Then you get a lot
more accurate results. Using it like it does
look like a pizza cutter, but don't use it like you
would a pizza cutter. That's going to blunt
this blade a lot quicker. So now what I'm
going to do as well, the salvage of this fabric, I'm going to trim off
because obviously it's got writing on it and
I don't want that to be within my Cushing. I'm just going to align
the edge of the ruler up with the edge of the salvage. And again, enough pressure. You want to be stood up ideally
when you're doing this, if you're able to just be
cost of weight behind you, then is what's going
to help you get nice pressure onto
the rotary cutter. And if you are sat down, if you need to be sat down to eat, that's completely fine. Again, just make sure
that maybe you've got one hand that you
can have on the ruler, which you want to have as well. Just so that then
you've got that weight behind you to get you going. So keep moving your
material if you need to, depending on how big
your cutting mat is. I'm just going to cut all this salvage off just
to make life easier. Like I said, I know that that's a straight a straight edge. I'm going to move the
material back to the bottom. So in terms of cutting
now a 16.5 inch square, there's lots of different
ways you could do this. And what you could
do is you will get a heat erasable pen,
awesome Taylor's shock. And you could use the mat or your ruler to draw
out 16.5 inch square. That is perfectly fine. You can use if you've got a
long ruler and you can use the rule that account
and then do it that way. I'm going to use the board and count the
squares on my board. I'm going to count
from the corners. I've lined everything
up in the corner and I'm going to count
6.5 inches across. And then once I'm there, I'm going to line my
ruler up on the 16.5 inch line with the ruler
on the bottom of my mat. So I know that it's
nice and square. Again. I'm going to put the ruler and then lift you
up and then try not to move your fabric too much. You can move this
piece out of the way. But then align this
ruler back up with that 16.5 inch mark and
with the lines on the mat so that you know that your square again and again. So that little, sort of like a little thread that,
that's not quite caught. You can just use some little
scissors to trim away. So before I cooked up anymore, because I know
that I've probably exceeded the 16th and
a half inches there. I'm going to count 16.5 inches. This way. Depended not mine. Where this is still
the way around, which is why I'm
having to count if you match the right way with your one to however many that way I'm one to
however many inches that way. Then obviously just pop
your fabric in the corner. And obviously you'll be able
to see your 16.5 inch mark. So I can see my 16.5
inch mark there. So again, I'm going to align
the edge of the ruler up. Like so. Once I've caught as far
as I can with my ruler, match it with the same. On the other side. Always making sure
everything is square and cutting it down if anything's not caught and
it's on a little bit, you can use some scissors. Whenever you're not using
your blade and make sure you pop the safety cap. Now, I've got the
front of the cushion, which is a 16.5 inch square. And I'm going to pop
back to one side. Okay, so all that's left to cut out now
is the back pieces. And I'm going to show
you exactly how I work out what size to cut
the back pieces. With R-square, it's
16.5 inches square. So no matter what, the width of the caution
must measure 16.5 inches for the back pieces in order for the other pieces to fit
together when we saw in them, it has to be 16.5 inches. We know that for a fact. Now obviously, as I mentioned, the two pieces for the back will start to
overlap each other. We'll hand the raw
edges so that there's a gap for the cushion
in it to go in. But the need to
overlap enough that there's no gate once
the cushions in. What I tend to do is do at least two thirds of
the width of the cushion. So like I said, we're
definitely 16.5 inch. This way. 16.5 divided by three is
around 5.5 if we double that. So we're looking at 11 inches. If I caught 11 inches in depth, that way I know
I'm going to cover a round two thirds
of the caution. If I do that for both
pieces at 11 inches, we're going to get a nice
overlap in the middle. So I'll follow that same sort of guide for any
signs of caution. If you are doing, for example, if it was a twit 20 in
your square Cushing, you would definitely
do 20 inches. And then I will go for about 15 inch in
depth so that you've got more than halfway more
around two-thirds of the way. So that's why I'm gonna do now. I'm going to put out a
piece that measures 16.5. And I've already got this. I'll go in here. I'm going to continue on the 16.5 inch line
that I've got going here. Just get baseline dope. I want to put all the way
just to make it easier. Okay, so now this
measurement here, I want to have 11 inches. So I'm going to do it this
way to make life easier. I'm going to measure
the 11 inches, which I can do on
my ruler this time. I need to just literally
cut an inch, inch off here. So again, I'm using the rule of making sure that this edge
is on a straight line. Popping the ruler at the
edge of my board up, not moving the fabric. Matching it up to the
measurement at the other side. So that is my first back piece, which is measuring
16.5 by 11 inches. So again, I'm going
to pop back to one side and I'm going to repeat that same process for
the second back piece. That's everything cut out. Now, I've got the front piece. And just to show you with the back pieces and how
they're going to overlap. They overlap very nicely
on the back there. So the next stage now is
to get this on together.
5. Sewing your Cushion: Hi everyone. So now we're ready to solve
the question together. You're going to need the back
pieces to start off with. I'm just gonna give them a press so that we're ready to go. So your tool back pieces are what we're going
to start off with. For this, you want
to use a ruler or a tape measure to help
you measure your hands. So doing the two thirds
method for the back pieces. So it's two-thirds at
the size of the front. I'm gonna do a half inch and an inch all together but
in half inch increments. So by that, what I
mean is I'm going to press half an inch to the
wrong side of the fabric. And I'm going to use
my ruler to make sure that I measuring correctly. Then one of them
press the wrong side. Then I'm going to press
the exact same amount. Again. You have something
that looks like that. We're going to do the exact same thing on the other piece. But remember, I've hemmed
the bottom of this piece, so I need to make sure I'm doing the top of the next piece. So now I've got
the sewing machine all set up and ready to go. I've set it up in
exactly the same way as I did in the first video. And nothing has changed
in terms of Stitch, set him on a straight stitch
to stitch length of 2.5. Everything to fit threaded up correctly and I'm ready to go. So the first thing I'm
actually going to stitch is we're going to stitch
these hands down. So obviously we've
pressed half an inch and half an inch again. We're going to be doing a stitch all the way along
this long edge, close to this edge here. To stitch this in place. We're going to reverse
stitch at the start here. And then we'll
reverse stitch when we get to the other end. The only difference here
from when we were doing the pieces of paper is obviously we're not
following an exact line. My needle is lined up with
the gap in the presser foot. So I'm going to put
the gap juice next, do this folded edge here
on the left-hand side. So I know then I'm as
close as I can get. Obviously, I'm using a
bright called thread here just so that you aren't gonna be able to see
my stitches properly. But that's completely up to you. What core thread that you use. We're going to use
the rule of three for the stitching. Forward three. And then you reverse stitch. And then you're going
to keep coming forward until you get to the end of this same principle, keeping the hand on the material
and guide and it nicely. So when you get to the end here, you're going to have
Cook, reverse three. And then four with three again. The needle up. Lift your
presser foot up. Again. If it comes a bit. We call this a little bit
to release some tension. You've also got most
machines as well, a thread cutter that you can
use to trim your thread off. Mine is not the most
perfect stitching, but I am sewing at a bit of
an angle for the camera here. So I'm gonna do the
exact same thing on the other cushion, on the other back piece. So now I've got the exact
same on both pieces. Now, you could leave
this stage here, but what I always
like to do here is another row of top stitching. So I like to do another
row of stitching. But close to this top edge here. What that does is it helps
flatten this a lot more. From the front, the
tool rows of stitching. It looks a lot nicer
than just the one there. So I'm going to follow
the exact same steps. Forward three, reverse,
continue going forward. Then when you get to the
end, reverse Three, Three. So as you can see, two rows of stitches just
adds another added feature. And it's made it a lot
flatter and nicer. Like I said, you're
probably would use a cotton thread that
matches a bit better. This is just so you can see. You know exactly what I'm doing. I'm gonna do the
exact same thing now. The second realistic
gene on here. So now we've got the hems
and I'm ready to go. We can now start to look at
putting the cushion together. To do this, we're
gonna get the front of the cushion and lay
that in front of us with the right sides
facing upwards like this. Then I'm going to take one
of your back pieces that you've hemmed and
place that right side facing down at the top of the cushion. Like so. Then I'm going to place
the second back piece also right side facing down. But this time I'm going to match that up with the bottom edge. And then you want to pin all
the way around the edge. Or my case, I like
to use solar eclipse because I find them a
lot better than pins. Just make sure you put
in some pins where it overlaps to keep
that nice and secure. A coupon along each edge. So we'll be ready to sell. Now, this is where the practice on turning the corners
comes into effect. So it doesn't matter which
corner that we're starting. But essentially what we're gonna do is we're going to soar in a big square all the
way around more. So from one edge, from one corner to the other, we'll do the turning technique it each corner until we get
back to where we start. That's what we're gonna do now. So in terms of seam allowance, I'm going to sell with a
quarter inch seam allowance. So in most cases this age, the edge of the foot here running along the
edge of the fabric, which I will show
you in a second. Edge of the foot. Right along the edge
of the fabric there. We're going to start off, has, as we have done with the
previous strictures, forward three, back three, and continue until you
get to the first one. Make sure you take your pins. Are you clipped out as you go? He's also checking that your materials
matched up perfectly. So this time we want to stop roughly around
a quarter inch away from the edge so that when we do turn within so in water and you seemed
down the other side. How I can gauge that is I'll so roughly in a lot of sense, You have got to eyeball this. But this can be
rectified when we turn our making sure the needle
is in the down position, lifting up the lever, turning myself 90 degrees. You can see them
a little bit out, but we can bring ourselves back to the quarter-inch
quite easily. So I'll show you this again when we get to the other corner. So when you saw in over
the overlapped bits, you might find that
your machine does sound a bit different. It starts just purely
because E is going over more layers of fabric and
it's nothing to worry about. Just take it steady
at these paths. Again, stop roughly around
quarter of an inch away. Make sure all the needles in. Lift up the lever and turn. And again, if you if
you quite a way off, you can turn yourself back around and come forward
a little bit more. So we're going to repeat this on the next corner and that
we've got coming up here. So I'll put a needle in, lever up 90 degrees
lower back down. And now we're on the last side. And what we need
to do is obviously finished exactly
where we started. When every man and
we're going to try and finish exactly
where we started. Then we're going to reverse
34 with three. Again. Need a lot for me. That's off. So at this stage, essentially, you could finish
here as you would have a fully working pushing. But what we're gonna do
is we're going to need an off the raw edges on the inside. These are going to make
sure that it looks a lot nicer on the inside at
the moment than it does. And it's just going to stop. As you can see here, this
is phrased a little bit. It's just going to eliminate that frame on the
inside as well. So to do that, I want
a zigzag stitch. So I can see on my machine here that stitch see
is my zigzag stitch. That's what I'm gonna
do now is I'm going to turn this to stitch, see, and we're good to go. I'm not changing
anything on here. I'm just going to
stick to the stitch. See the exact stitch. Now what I'm gonna do
now is I'm going to sort all the way
around to the cushion. Again. Exactly the same
manner for turning, as opposed to being a
quarter of an inch away. I'm going to aim to get
my zigzag stitch between the straight stitch and
the edge of the fabric. I'm also going to
reverse stitch when I start and when I get
to the end as normal. The same method on the corner. And then as you can see, this is what we're looking
like and I'm gonna do this all the way
around the cushion. I'm going to finish
off in the same way. So all that's left
to do now is trim any loose threads
off and turn it out. Turn it the right side out so
I can see what we've made. So what I'm gonna do first is turn this the right side out. Use your finger to get
right into your corners. Pluck them out. I've got my costume ready here. And as you can see, the cushion is ever so slightly bigger than the cushioning pad. You do have to squeeze
these in a little bit, but the end result, Cushing a good fluff. But there you have it. One finished envelope
back cushion cover. And that is the pathway for you. If you want it overlapping more, then obviously make
these pieces deeper. And you can also move on to looking at different
fastenings for this as well. If you wanted, you could put
buttons on their choice. Is yours really? Once you're ready, you can
progress on to the next stage of this course and start
making the next thing.
6. Cutting out your Tote Bag: Hi everyone, welcome back. In this segment of the course, we're going to have
a look at cutting out your tote bag pattern. On this section, you
should be able to print off your
took back pattern. You should have the
main pattern piece that looks something like this. Then your handle pattern. I've actually laminated mind. So here I've got a
laminator at home. It just makes the pattern
a lot more durable. And so you can keep using
it over and over again. But obviously, if not,
printing it out on paper is also fine. For this. You're going to need
to lots of fabric, half a meter of each will be plenty to be able to
make aligned tool bag. I'm also going to be using
a rotary cutter roller, as well as some pattern weights. So the pattern weights
that I use are just metal washes that you
can get from DIY shops. But you can also buy specific fabric pattern weights as well. Alternatively, you can use pins and pin your pattern
onto the fabric. So to start off with, I'm gonna take my
material that I'm gonna be using for my lining. So I've chosen a plain fabric, then the outer of the bag is going to be at
patterned fabric. But obviously you
could use tool patents or Bricks tool plain fabrics. This is where you can get really creative with your choices. So I'm going to fold
the fabric in half. And you want to fold it
realistically, salvage, to salvage now mine because it's a small cut
of fabric, scrap a hat. It's not actually folded
salvage to salvage, but because this is a
tote bag and it doesn't specifically matter
which way you fold it as long as when you
add fold in it, you're taking note
of if you are using the pattern and the pieces
are gonna be the right way. So for example, the
writing on the pattern here indicates the way that
you should look at it. It's obviously the
writings facing this way. So this is the way
that it will face. So this long edge here
does surplus on the fall. So we're going to place
this side of the pattern on the folds of the fabric
and we'll be cutting round than the outer edge. What this then creates is a piece that's twice the
size of this pattern. And it will create like
a mirror image effect, meaning that there'll
be another cutout corner in that side. So make sure that
you are putting the right edge on the
folds of the fabric. I'm going to pop my
lights on. Like so. If I could anything out
because we need two of these, always make sure that you've got enough material in order
to be able to cook to out. So what I'm gonna do is
just fold it over like that just to make
sure that I'll be able to cut a second one out. And I can just squeeze
that on there. Obviously, if you
can't see if there's another way that you can
fold your materials. So for example, can you fold each long
edge into the middle? And can you pop it on that way or have you got
enough room to do it that way? Just have a play around with the best possible way
to use your material. So you're not wasting any. I'm going to fold my Buckingham. Again. We're caught in
this situation as well. Just fold it as much
as we need it again. So we're not wasting we're
not wasting any fabric, them smooth out any lumps
or bumps in your fabric. I'm not going to
place these back on. I'm then going to take my rotary cutter just like we used in the first
part of this course. And the rule that up against
the edge of the pattern. To help me quickly out. Again, you can use
pins and scissors. If you're not comfortable
with using a rotary cutter. I'm moving my pattern weights
around when I need to. Again, anything that
doesn't look proper like little bits and pieces. Just get your little
scissors in there just to help trim away. And that is what you
should be left with. So I'm going to repeat this. Again, placing that long edge
on the fold of the fabric. You can also use a rotary cutter and go
around it freehand. If you feel confident. But with these being
lots of straight edges, I'm using the ruler
to my advantage. But like this, for example, I've just run that along
the edge of the piece. That is the second one. So now I've got both
lining pieces on it to do. Now is do the same again in the altarpiece and also think about quitting
out my handle. So I want to see if I can get my handle pieces
out of this PCR. Again, you need two of these, and you need this sharp
edge here on the fold, just so we get a piece
that's twice the size. I'm going to fold
my fabric in half. And I'm going to have a see
if I can fit these on here. So I'm just about a
fraction shot on this, but I'm still going
to use this anyway. Just to show you that you can do smaller handles
should you want to. And like I said, because this
is only about a centimeter, I'm quite happy to use this just so I'm
using up this fabric. When I unfold this, I've got a nice long piece that will be one of the handles. Do the same again. Not all that's left to do is cut this out twice out of here. I've got quite a lot
of this material here. There's a meter. So just like we did before, it runs folded in half. But when I fold this in half, if I were to put this pattern
right on the edge here, I'm going to be wasting
quite a lot of material. So what I'm gonna do instead
is I'm just going to fold it just as much as I need. Again, smooth out
any lumps or bumps. Again, if we eat you, if you
are using this freehand, you would just do it like so. Then just using the small
Susan's lab on the top. Then one more time. Note taking advantage. They already have
straight edges. Again, it's up to you
whether you use or not. Of course again, you
can use your scissors. That's the one. That's everything cut out. We've got two pieces to lining
pieces and two handles. Watch the next video to find out how we're going
to solve it together.
7. Sewing your Tote Bag Part 1: Once everything's cut
out with the tote bag, we're ready to start sewing. I've read threaded the machine
with a color that's a bit more suitable for the
projects I'm working on. Obviously I'm using quite a
bright contrasting color. So again, you can see the
stitches clearly on the video, but obviously you
can do the same. You could do something nice,
bright and contrasting. I can do something that
blends in more as well, which is always a
good option as well. If you're a bit worried
about your stitches still being a bit wobbly. But honestly it don't worry. Even sometimes my
stitching still wobbly. It happens but yeah, nice, bright phone call
or does look really nice. If you're struggling
with your machine, then refer back to the
introduction video. And you can always go
back through that again. The first thing we're
going to work on is the straps to the back. So this requires
some pressing to start off with which I
have done off-camera, but I'm going to talk you
through the steps on how to do it on your long strip of fabric. The first thing you
want to do is press the fabric strip in
half lengthwise. Like so. We're doing
that so that we then, when we open it back up, we've got ourselves
a nice center crease down the middle here. You then want to press each outer edge to that
center crease like so. So all your Rogers and running down the
middle of the strip. Finally, you want to press it
in half together like that. And then all raw
edges of concealed. And you're going to do
this all along the strip. So if I just show
you that again, pressing 1.5th, open backup, press each outer
edge to the middle, and finally in half again. So the first thing
we need to do is so this opening clause. So to do that, we're going
to start all the way down this long edge of the
fabric to closet together. Imagine this being that part of the cushion that
we did where it was pressing the hem
down and we start close to the long edge. That's what I'm gonna do. First. Don't forget to reverse
stitch when you start and at the end as
well just as before. Remember that rule of three. Once you've finished, lift
the needle and the precedent for trim off any loose
threads that you may have. Just should have something
that looks like. Now, just like the
cushion again, we're going to go along down
the other lung edge. Again. At this stage it's clause, you could just do it like that. But by doing another row of stitching at
the opposite edge, it's going to flatten this down. And again, the two rows of stitches looks a lot
nicer than just the one. My needles common thread there. If you do get anything like
that which does happen. Just read thread, you've
talked thread and I can see I've still
got my bottom thread. So there's no need to do
anything there with them. This is what you
should be left with. Once you've trimmed all
the excess thread away. Repeat this step with the
second of your handles, press it in the same way and
stitch it in the same way. So that's the straps
all done with. So I've just popped
them to one side for the moment and I've also
just place my machine out of the way so I just can
probably show you the construction of the
main part of the bag. So I've got the two
pieces here that is going to be the front
and back of the bag. And I'm working on
what it's going to be the outer sections. This bag can be reversible, but just for the purpose of making things a lot
easier to explain. Make sure you label
one is Altair Angela. And just so you know which I'm referring to when I'm sewing. So I've got both of these here. I'm going to take
one of them and I'm going to place it
right side facing up. So in terms of a which
is the correct way, I'm going to show you
that close up now. Okay, So on your pattern, you've got to cutout corners. This is gonna be the
bottom of your bag. Just so you can sort of imagine this in
your head because I feel like this makes it a lot easier when coming to construct. These are your side
seams here and here. This is the top
edge of your bag. This is the bottom of your bag. And these cutouts here we're
going to form the base. So hopefully that kind of
makes things a lot easier. Because I always
think it's a lot better to know how things are going to be constructed before you jump into constructing them. So I've got that one piece there lid right side facing up. Then what I'm gonna
do is I'm going to take the second
piece and I want to place it right side facing down. What that then does is
puts right sides together. And if you remember
from the cushy when we put in the front
and back together, we worked right sides together so that
when everything was stitched seems we're on the inside and obviously
all nice and neat. So I'm gonna use
my Eclipse here to help me clip
everything together. Or alternatively,
you can use pins. So first off, I'm going to
pin my side seams together. I'm going to do the
same on this side. Make sure everything's
matched up nicely. Pot myself some clips in. And now I'm going to clip
this bottom edge here. Again, making sure that
everything is matched up nice. Like so. I've clipped, opened
this together, is where we're going. So we're going to solve
from the top edge here down to here, reverse stitching at
the top and the bottom. We're going to repeat
this on this side, reverse stitch to here
and reverse stitch again. And then we're gonna do
the same along the bottom. So we're going to start here. And the so along to here. Again, it doesn't matter
which way around you do it. Um, but we're gonna source side, same, side seam, bottom, same. The only thing we're
not showing at this stage is the top edge. And we're not so in these
cutout corners here. So that's what we're
gonna do next. Just like we did
with the cushion. We're going to start a
quarter inch seam allowance, which are most machines, is the edge of your foot running alongside the
edge of your fabric. Don't forget to take pins
and clips out as you do. So again reversed it can. As you can see, the edge of my port is running against
the edge of my fabric. If you feel like that's too much like I said in most machines. I've never come across a machine where the edge of the foot
run along the edge of the fabric is too
big or too little of a seam allowance is normally
roughly around the clot. Or alternatively, what you
could do is on your machine, on these parts here, you normally have lots of
different measurements. There should be a measurement
that is three-eighths. So three slash eight. If you have the edge of your
fabric moving on that line, then that would be, again, perfect amount to
seam allowance to you. That's one side seam down. I'm now going to move on
to the other side scene. Finally, I'm going to
show that bottom edge. In the same way, quarter
inch seam allowance. You should have
something that looks like this so that both sides
seams and the bottom edge, for the time being, we're
going to pop this to one side. I'm not going to
work on outlining. So I've now got the line in pieces and we're
gonna work on that. Again. I've got grabbed one of my
line in place pieces and I've placed it right
side facing up. So again, just for reference, you've got your side
seems the top of the bag. The bottom of the bag. What's going to make the base? So exactly the same. We're also going to do exactly
the same thing as before. Placing the second
line in peace, right side facing down
the right sides together. And I'm going to clip my
side seams in the same way. I'm not going to solve these
in exactly the same way. The only difference
with the lining is going to be the
base of the bug. When we come to put both the outer and the lining together, will be sewing it
right sides together. But again, we need a way
in order to turn the bag from the wrong side
to the right side. So we'll be turning
it right side out. Everything will look
inside out when we, when we start
sewing it together. So I need to leave a gap. In order to deal with that, I'm going to leave the
gap on the bottom of the bag, specifically
the lining. Again, I say aligning. You can actually make
this reversible. So just choose one side. I always refer to the lining as the side that I'm
gonna do the cap in. For this, I am
going to use pins. The reason I'm using pins for this bit and I haven't
used them just yet is because I find that
when you go into your soul, your side seams as
normal if you put clips and it's quite hard
to get carried away. And so all the way across, even though you told yourself
you needed to leave a gap. So what I do is I take two pins. I placed them horizontally and then place them about three inches apart
from one another. Like so that wear them
when I'm sewing the base, I'm gonna saw this
side of the pin. This side of the pin. But I'm not going to
solve between the pins. This is the gap that
I need to leave. So you'll reverse
stitch here and here, treat that as one seam. And you'll reverse
stitch here and here and again treat
that as another scene. So that's what we're
gonna do. Now. Cmc mile runs portrait
of an inch edge of your thoughts along
the edge of your fabric. Okay, So again, the
only difference now is instead of showing
all the way across the base, we're going to solve this
part here and this part here, and avoid sowing
in-between the pins. So a reverse
direction as normal. Then when I get to this cluster, to this pin here,
I'm just going to start to move it out of the way. Reversed it when I get to it. Same, same rule of three
that I taught you. Trim the excess thread away. Then for this next one, I'm going to jump
to the next peak. So on then move that
out of the way. And then reverse
at the end again. This is what you
should be left with. Now we're going to work
on the base of the bag, which is the cut-out
corners on the bottom. This is going to be
the same for both the outer and the lining. So whatever I do
on one corner is gonna be the same for
all four corners. So we'll start with
the outer first. So this is the easiest way to do this and for
me to explain. But in order to create the base, we need to match the side seam
up with the bottom. Seem. To do that. I'm going to put my hand
in the top of the bag, which will be the bugs Altman. And I'm going to
gently lift the top away from the back of the bag. What you can see is what
that's done is brought the side seam and the
bottom seam together. I'm going to grab that. We've got side
seam, bottom seam. Then I'm going to open up the seams so that the
net lay nice and flat. Alternatively, placed
them to one side. I personally like them open. Make sure that they're
matched together. I'm going to clip it
in place. Like so. So to attach these together, I'm simply going to
soar along here, reverse stitching at each edge. And obviously it
will be placing it onto the machine this way. So that will be so in down here. Once I've done that,
obviously I will show you again how to match
them together. So here we are. You selling through two layers
of fabric here? That's why it looks
like from that side. Any for sure. Yeah. Holding the bag at the top. That's the side we haven't done. That's the side we have done. I'm going to show you
again how to do it. Again, the easiest way to do it is pop your hand inside the bag and you're going
to start to lift this top layer away
from the bottom layer. What that does is
bring those together, grab both layers of material, open out the seams, make sure they match together. Then I'm going to
clip it in place. And I'm going to show
right across there. So not in the exact same way. I put my hands inside
the bag so you can see a little bit better. So it's created a little bit
more of a depth to the bag. So that was the side
there that you can see moving round to
the base of the bag. And then decide, you want to repeat that step
with your lining fabric.
8. Sewing your Tote Bag Part 2: So we're almost there, It's time to start putting
the back together. You want to get back the out of the bag and the two handles
that you made earlier. I'm going to turn the bag. So he's now facing
the right side out. And I'm going to place
it down like so again, so that I've got the opening
of the bag along the top. Now, taking one of the straps, you want to loop it around, like so, so that
nothing's twisted. And the both ends are
facing the same way. And we're going to place
that on top of the bag. So realistically, it's up to you whereabouts you
want your straps, you might want them
further apart, for example, you might
want them closer together. I tend to do three inches
in from each side. So because I've got a board
here with inch markings on, all I've simply
done is countered 123 inches and then
put the strap, they're the same
at the other side, 123 inches and put the shrub They're going to take
one of the clips. I'm going to click this
just to one side of the back. Like so. So only clipped to the one side. I'm then going to flip it over. And I'm going to do with
the exact same thing with the other strap, bringing it around like so. So nothing's twisted. And I'm going to
place the straps in the exact same place
as the front ones. Using the front ones
to help me line up. And I'm going to click this
to this side of the bag. So make sure you are
putting them downwards. A lot of people tend to want to click them upwards
like that because obviously that is what
you're going to see in terms of that's how
you're going to hold them. But by doing it this way, obviously when everything
is sewn together, again, Rogers will be on the
inside of the bag. So all I'm gonna do now is I'm gonna go over
to the machine. Simply just going
to stitch across the handles fairly close to the top edge just
to hold in place. It doesn't matter whether
you reverse stitch or not. It's completely up to you. I tend to reverse stitch just to make them extra step you are. But May 1 come to a
place aligning in onto this that will
obviously secure it. Again. Here we are. Again, making sure you're only signed
through one side of the bag. Don't want to accidentally
close close the bag. Then again, like I said,
it's up to you to be fair. You could do it
as just attacking stitch because like I said, this isn't going to be the final stitch that
stitches the hamming ball is just the cost obviously depending on what
to put it in your bag, just doing this extra
bit of stitching. It's just going to make
them a lot stronger. Which is why I do the reverse stitch because if we didn't do the reverse stitch, then obviously it would unravel one and do a less than your quarter
inch seam allowance, which is why I've done
it close to the edge. Because then when you
do come to stitch the line into the
ultra of the bag, this stitch won't be visible. Time to put the line in together with the
outer of the bag. I've got the outer of the
bag with the handles now attached right side facing out. I'm going to grab my lining and I'm going to leave that with
the wrong side spacing out. Now this next part sometimes
feels a little bit wrong, but just trust the process. So what I'm gonna do
is I'm gonna take the outer bag and I'm going
to pop it inside the lining. Like so. I'm going to
match my side seams up. Why I tend to do is
grab both sides seams. Did this a little
bit of a shake. So everything falls into place. Obviously, what's happened
then is now right sides are facing on both sides. Now I'm going to
clip all the way around the top edge of the bag, going with the side seams first. With that being the
most important. And again, it's up to you
whether you open the side seams up or whether you place
them to one side, I'm going to open mine up again. So we're only going
to be clipping again two layers of
fabric together here. We're not clipping all for
literally doing two lessons. I want to put a clip probably
where the straps are. Then probably one in
the center of that. You should have something
that looks like this. We're now going to
sort all the way around the top edge of the bag using a quarter
inch seam allowance, again, only so in the two
layers together at a time, essentially you're going
to be going in a circle. So wherever you,
wherever you start, That's where we're
going to finish soluble reverse stitch. When we start, we'll come
all the way about round. When we get to a stitches
where we started, we'll reverse stitch again. So a little tip to make
things a lot easier for you in this part is if you take off the little sort of detachable part away
from your machine. If your machine can't do
that, then don't worry. I will show you how you
can do it without that. But what this allows us
to do is completely hide away the part that we're not so selling because
we don't want it again, accidentally stitch all
four layers together. What would come do is
pop this on the machine. Then it doesn't matter
where you start. But as you can see, we've got the two layers
here and then we've got the two layers below. And as we start stitching, this will maneuver
around as you'll see. Don't forget to
take your pins out. As you can see,
everything's now maneuver and if you haven't got a detachable your machine, you can sell it in
the exact same way. It just make sure the bottom portion of the bag is out of the
way of the machine. Will feed round the exact same. So again, quarter
inch seam allowance, edge of the foot along
the edge of your fabric. Obviously your handles are in-between the two
layers as well. And you don't want the handles
to be sticking up or else the handles will
actually end up on the inside of the back
incident. The outside. We're almost back
to where the scar. Once we get there, we're
going to reverse stitch. Remember the gap that
we left earlier, which is in a line inside? Well now I'm going
to turn everything through to the right
side, through that gap. Just persevere with this bit. If you feel like you haven't
left a big enough gap, you can always unpick
some stitches. Just persevere with this stage. Everything that good shake. So as you can see, our
handles are on the outside. Now. We've got a gap here
that we need to close up. Now if you did want to make
it properly reversible, what you can do is you
can handle this gap, which I'm going to show
you how to do now. Alternatively, you can just do a top stitch on your machine. But I will show you how
to do the hand sewing. I've got my needle
and some thread, and I'm going to
thread my needle tends to be the trickiest bit. And I'm going to
double my thread over. So I've got that double thread and I'm gonna not the bottom. I've zoomed in here so that
you can see a bit better. So to start off, I'm
simply just going to put my needle through
one of the layers, took the ends of the threading. And then I'm also
going to do that a second time of the
fabric is sorry, I just realized you
couldn't see that. Well then we'll put
the thread days. I'm going to pop
my needle through that loop to tie it off. So now we're gonna do something
called a bladder stitch. So essentially what that means is each time will be
grabbing piece of fabric from either
side and we'll alternate going
up like a ladder. What this will do is
close the gap as we go. We'll also make it
an invisible stitch. Because instead of putting our thread through
the layer like this, the lip of the fabric
that's created, that's kind of going onto the inside of the material
is what we're going to grab. So I'm going to grab
a piece of thread from that side, pull
the thread through. And then I'm going to
pull a piece of thread, the thread through
the other side. If you watch closely, that will start to
bring it together. And we're going to alternate. So back to this side. And each time we go up, we'll move a little
bit further up. Going a bit too far
up on this bit. But they'll get
the general idea. So back to that side. Then obviously, from the
outside as you can see, you can't see,
obviously you can see some little ends of the
thread at the moment. Even if you did this
on the machine, there's nothing to say
that you couldn't do this.
9. Cutting out your Makeup Bag : Welcome back. So on the final project, which is really exciting, and we're gonna be showing
you how to make a makeup bag. This project is going to use some of the skills
that you've already previously learned in
the past tool projects and the introduction
part of this course. And it's going to
put it altogether. And we're gonna
make a makeup bag, which is obviously also
tackling the zips as well. So this is what you
need for this project. Print out your
makeup bag pattern, which is on the
downloadable section and this section of the course. Again, I've laminated mine
just to make it more durable, but you don't have to do what? You also want to lots of fabric. A fat quarter of each
would be plenty. Obviously, if you've
got more fabric than that, that's fine. But you will need at
least two fat quarters. If not three, depending on how
you want to go about this, which you'll soon see
why I say line a second. This particular design
of a makeup bag has got a different band of
fabric around the bottom. The reason I've chosen
to do all this, it's just that again, She's going to keep building on skills or add a different
element to the makeup bag. So let's put it out. I've got these two
different types of fabric here that were
from the same range. And it's a lovely sort of like
15 for lack of makeup bag. Basically. This
gray one here has got like little
illustrations of lipsticks, hand creams, that
sort of thing on it. And this one's got a
shop windows I'm like coffee shop window party
series, flower shop. And it was from the same range. So I'm going to use one
of them for the lining, and then I'm also then going
to use both of them for the ultra of the bag and
the bag pattern itself. What you'll see is again, this, this will look very
similar to your torque, which is why I say uses some of the same elements
that you've already learned. It's just a smaller size obviously with it
being a medical bag. But we've also got
this extra line here, which is basically
gonna be the line that separates two different
types of fabric. Basically there'll
be a seam there. I'm going to use basically one, the top, one for the bottom. We've got to cut this out in
a different way. Basically. You first need to decide
which is going to be the top, which is going to be the bottom. I think what I'm gonna do is I'm going to use this as the top. This is the bottom, but also the line as well. So we'll use this 1 first. So very much like the top bag, I'm going to fold my fabric
as much as I need it. But at this point, I don't need to
fully cut this out. So obviously this edge here goes on the folds of the fabric. I still love to fold my fabric, so I'm quitting out a piece
that's the right size. But what I'm doing
is cutting out a rectangle fabric that is deeper than this
measurement here, so deeper than from
that to that line. So I'm going to basically place the placement
pattern on there. And then I'm literally gonna get my ruler and Moreau to
recruiter and caught myself. A piece. Wouldn't be plenty big enough. So obviously I've
caught it on the fold. So I know that that's plenty
big enough for that piece. And I need two of those. So again, just
basically cut this out here is the top portion of it. And we don't need
this fabric now. Then I'm gonna get this
portion of the material. And I want to do the same again. But obviously this time, I only need enough for
the bottom portion. So same again, making sure I'm folding it enough so it
wasn't quite good enough. They're going to make sure you want it to be
at least an inch bigger, I'd say, than what it needs to be because
obviously we need to create the scene. We need to make sure all
the seam allowance on math. Show you about an
inch bigger there. I'm going to do all
the same again. Now we need to put the lines. The lining is caught in the exact same
way as the tote bag. We're going to just
ignore this line, but going to pop
this on the fold and cut around the outer edge. And we want two of those. I want to quote round this. You can even use your ruler. O freehand. Again, use your little scissors. Why you need so that hopefully it will
just be enough. Don't know about you, but I
always get a little bit sad when I'm using the
last bit of a fabric, especially when it's
one that I really, really want climb this one. Suppose it's a good enough
excuse to buy marble. So where almost all cutout
but when it's due a bit more so in first before we can fully caught the
front pieces out, I want to give all these
pieces of press and I'm gonna go hop on
the sewing machine. Okay, so I've changed
my thread again to something that
matches a bit better. But again, I've gone for quite a contrast so that
you can see the stitches. So what we need to do is
stitched together the strips of fabric that we've cooked
for the outer of the bag. I'm gonna get one
of each fabric. And obviously pay no attention to which you want
it to be the top, on which you want it
to be the button. So for example, I knew I wanted the shop
front to be the top, this to be the bottom. And obviously take note too, if you've got a print
that's going a certain way, make sure that obviously for me all the shops are
in the right way. I've placed them
how I want them to look one, everything's
sewn together. And then I'm basically
going to flip one over so that they're
right sides together. Doesn't matter that one's longer than the
other at this stage. And I'm simply just going
to sort this together from one side to the other
quadrant to see my hands. And I'm going to
reverse the chip side. It's not like so much just going to pop that to
one side for the time being. And then I'm going to grab
the other tool pieces and do the exact same thing, making sure I'm taking note to which is the top and which is the bottom quarter
inch seam allowance all the way across. There we go. So I'm also going to do now
is go over to the iron and I'm going to press
both the seams open, ready for the final
stage of coating. So I've pressed
everything open just to make this next
part a lot easier. And this seam looks a lot nicer and how it
is being pressed. So I'm going to fold it in half. Cos don't forget when we're
cutting out this pattern. The long edge needs
to be on the fold. So I folded it in half, making sure that the seams, the axon and matching
up underneath. And I'm going to place
this pattern on top that I want to make sure that this line is placed
on the scene. Like so. Again, I'm going
to take my router equal to, I'm going to call this out. I'll show you what
that looks like. So she can see by just
kinda using both materials. He's added another look to the makeup bag
for when it's done. It's kinda added lack that bordered print
effect when you're using fabric as well from the same collection
looks really lovely. Also, what you could
do as well is use a patent and a plain
fabric that works just as, as nice as well. So I'm gonna do the exact
same thing with this piece. Fold it in half, making sure all the
seams are matching up underneath place in this scene on that line. And cutting out just
as we've done before. Everything put out, ready to move on to the sewing
portion of the video, even though we have done
some salt and already, you're probably wondering why
haven't mentioned zips yet. And the reason why is because I always caught my Zips to size. Well, caught them after
I've cooked my project out. I always uses it that is a
lot longer than what I need. So looking at the front of
the makeup bag and again, just like the tilt Bible, we've got the sides
here, bottom of the bag. What creates the base?
And then the top. So this here is where
the zip is going to go, as opposed to using a zip
that's exactly the same length. I always use one that
took quite a bit longer, sort of at least an inch
or so longer on each side. This way I can so
there's it onto the makeup bag without getting
the zip pulling the way. Most of the time I like to use what he calls
zips on a roll. These can be found lots
of different places. These particular ones come from crafters companion for
their brand called thread has the dual come with
ten zip pulls on the role, it's a five meter role. And you do get ten zip
pulls on a five meter rule. As you can see, I've actually
used all this, it pulls. But what you can
do hobbies, again, various places as you can
buy, spare sit pools. So that's what I've
got in this box here. I've got a variety of
different zip pulls. And I'm going to
pop one of these, it pulls on to the zip tip. So what you need to do to help
you get yours it pull on, is caught yourself about
a centimeter down each side of the zipper
tape and then cut diagonally away from that. So you're cutting out
those pieces there. This helps the zip
code get on better. So I'm going to take
the zipper pull. And I'm going to
feed one side him. But not all way through like so we don't want
it all the way in. We want to take just enough that we've got something to grip onto the other side in
as far as it will go. And then use that little tick there to try and
feed both sides. And it does take a
little bit of doing. But once you've
got that grip tin, so you might get something
that looks like this, but then all you do
to rectify that, let's open it all
up. Then raise it. Is it people get
this at the end. Obviously, don't worry
because like I've done is I've made it a lot
longer than our console, the zip on, without the
zip pub eating the way. Once you're at that stage, you want to watch
the next part of the video to see how you're
going to stop it altogether.
10. Sewing 101 end: Well guys, that's it. That's the end of this course. I hope you've enjoyed it
and I really hope you've learned something new
from this course. And most importantly, I
hope it's helped you gain some confidence in order to
move on to other things. So it is such a massive space. There's endless
possibilities and hopefully this is just
the beginning for you. I've had students that have
done this exact costs and mainly in person as
obviously this is the first time I've done
this course online. And I've always shown these
three specific projects. And from there, the Fanon to create absolutely
wonderful things. They've gone on to
dressmaking, making ties, and set it, even setting up their own businesses and selling
the things they've made. Anything's possible. Should you need help with
any of the projects that you've seen or there's
any difficulties, please don't hesitate to contact me on the contact me page of the website and look out for future videos of costs is going to be lots more coming soon, including dressmaking videos and introductions on a plea care. Just, just so much to be able
to sink your teeth into. Don't forget as well. We've got the summon stitches, membership head to the Jaya, they're called page if
you want to be constantly inspired with new projects
and ways of learning. Thank you very much again, and I'll speak to you soon. Bye guys.
11. Sewing your Makeup Bag : Okay, now we're ready to start putting the
makeup back together. And this is how
we're gonna do it. We've just top stitch
everything together and we're going to keep everything like this for the time being. So with one outcome, one line on either
side of the Z, it's now important at this
stage to unzip your zip. So it's at least
halfway on zipped. This is going to ensure
that when it comes to turn everything in the
right side out at the end, because obviously
we're going to start sewing things right
sides together. Although we're going
to leave a gap in the lining by leaving
a gap in the zip. Also, we can turn it through to the line and then
through to the right side. So make sure you unzip this, like I said, at least halfway. And you can do it
a little bit more. If you want minds a little bit more than halfway, I'd say. Then what you're gonna
do is you're going to grab your top two pieces. If you lift these up and bring
them right sides together, what that also does is bring the lines right
sides together. So the difference here
from the top bag is on the top bag we saw the outers separate to the line and then put the outer lining together
around the top edge. Whereas we've already got the outer lining attached
together by the zip. It's, it's kinda like doing
things in reverse really. So as opposed to with y. So on the top edge,
which is the zip. And now we've got to
deal with the side seams and the bottom seems, the big difference
is that for one, side seams of the outer
inside Teams as aligning, joined together by the CYP. Which means we need to
sort that as one big city. But obviously we've got
the zipping the way. If you've used a
plastic zip like me, and you shouldn't run
into many problems. But obviously I'm going to
show you a few tips and tricks to help you. So over the Zip, if you're using a metal Zip, then you do not
want your needle to hit the teeth of your zip code, your needle will break. Obviously, you can change
your needle, that's fine. But you have got to
take a lot more care. So my advice to you would be that when you first
saw him with zips, try and always use a
plastic nylon teeth. Basically because
you're just going to eliminate that issue. Not to say that you can't break your needle
with plastic teeth. It's all in the speed, which is obviously something I'm going to speak to you about. Obviously one side of the hip is open and one side is closed. So we're going to start off
with the side that's closest. So what I tend to do is look
at my SIP and the I always saw fold the tip downwards that way then it's
like facing into the lining. And that's going to
take all of my clips. And I'm going to start clipping
together the side seams. Again, making sure that
the side seams matching up nicely and that the tip of
the zip is facing downwards. Then I'm also going to make
sure that those seams that we saw on the front and matched up. And I'm going to hold that
together with the clip. Then what I'm gonna
do is I'm going to go on my machine and I'm going to start from the top here
all the way to the bottom. And I'll reverse
stitch each side is normal and I'm gonna do a
quarter inch seam allowance, which remember is the edge of the foot along the
edge of the fabric. Again, take eclipse
out as you go. Most important thing I would
say is making sure that the dots when you get to it. Then when we get
close to the zip, I'll talk you through my talk. Okay. So what I've got up to
the teeth of the zip, what I'm gonna do is
I'm actually going to use my wheel at the side. Just manually move myself
over that initial teeth. Once you're over that, just go just slow until you know that you've got the ball of the foot
over that point. So as you can see, she's
still on the teeth of the zip without any issues. So the main takeaway really is that if you make
sure you're going at a slower speed and you can use your wheel at the side to manually move yourself over. You just don't want to do
all that for too much of it because it's not going to be as strong as if you
were in it properly. So I literally did it
for the centimeter. If that probably one. You'd be able to see literally
just this little bit here. Over the teeth is where
I went over manually. Now I'm going to repeat this
process with the other side seem different CRB and
obviously as it is open. I want to do the
exact same thing, making sure that my
teeth is facing up into the outer part of
the makeup bag and the tip is facing down into the lion's den clip
everything in place. Making sure that this
is mugshot poplar. And I'm going to show in
the exact same manner. So again, I'm going slow
when I'm approaching it. When I get there
using my wheel to get myself all over it and
then slowly coming down. So we're going to the bottom of the outer in the
exact same manner, like the tote bag. We're going to sort
from here to here. So we're ignoring the
cutout parts at this stage. And we're going to
solve that with a quarter inch seam allowance. So hopefully you remember the process of sorry,
not the top by pus. If you remember, on the
lining of the tool bag, we left a gap along
the bottom edge of about three or four inches or so in order to turn
it the right way out, I'm gonna do the exact
same thing here. So if you remember
the little trick I showed you there was to get two pins placing them. This way. The I know not to sell between those pins and want to
solve from here to here, reversed each unit, each side, the same on this side. Okay, so that's the side seams
and bottom seems all done. The thing we need
to tackle now is the box corners of
the makeup bag. So all these are going to
be sewn together again in the exact same
way as our tote bag. The only difference
being is if you remember the way I showed you how
to do all the box corners, wants to put your hand
inside the bag and leave the two with the top piece away
from the bottom piece. And that brought the
scenes together. Very, very similar. But this time obviously
I can't get my hand in. The way to do it is to separate both pieces
away from each other. And that gets the
exact same outcome. And we're going to
open the seams, are again, place
them to one side, depending on your preference. Much the seams up. And then we're going to saw down here reverse
stitch and at each end, exactly the same thing. Pull them apart, match the
side seam and the bottom seam. Open out the same. Pin it in place. I'll clip it in place
should you want to. Sometimes I find, Wow, I've got a grasp
on them together. It's just as easy for me to put it just straight
onto the machine. But we're gonna do
the exact same thing with the other two corners. So we're almost there now. We need to trim the zip off. Any access it just trim away. Now everything is shown in yours if a pole
want to come off. And now we're going
to turn everything the right-side out
through the SIP, well through the gap
in our line in first. And this is the stage
where a lot of people tend to think that I've put
there z upon upside down, but that's exactly why
we opened the zip. Because then we're going
to turn it in that way. You can often then
use it all the way. Get in there and poke
all the corners out. Make sure everything
is stitched correctly. Before we now close the gap. Just not the tote bag. Push the Rogers in words. And then on your machine, just do a top stitch close to the top edge there
to conceal it all. Or alternatively,
you could happen. So it we're left to do is
pop back in, back inside. One last-minute touch up. Let's take a look
at what we've made. There you go. One
line makeup bag, complete with a zip. And even this lovely little
design feature here. Just to give it a bit of
extra something special. Star, forget, just
like you could with the tote bag and the cushion. Make it bigger, make it smaller. You could even have a mess
around with the base, making the base bigger. To make your base bigger. This square here
needs to be bigger. So sort of thing that this
here is half of the top edge. This here is half of
this bottom edge. And how tall it is. Take your pattern and have a
look at how it's constructed together with the
pattern in order to have a mess around with
adjusting sizes. Yeah, fascia, makeup
bag, all complete. Don't forget that you can obviously watch it back
if there's anything, you still don't
hesitate to contact me.
 Emily Gillott, Making Sewing Simple