Transcripts
1. Introduction to Painting Foil Balloons : Hi everybody. This is the second part of my series of painting aluminum foil. The first class which has been released last week, is about being eating chocolate foil. Candy wrappers in foil. I'm just in love with the effect of foil, the highlights and the contrasts. Actually, I have always been very fond of painting subject matter, which is a rare and unique. It all started when I got my first 1000 followers on Instagram and I decided to paint the one key foil balloons. And that's when it started. And I decided that I needed to do more of this because it was so exciting and the results was so stunning and it was relatively easy. The reaction I got from that host told me I needed to spread this out. And when I went on the Internet and didn't find too many tutorials on painting aluminum foil, I sit, Let's do this. So today is my class on painting aluminum foil balloons. And I have been painting foil for the last 23 months and perfecting the art. It is relatively simple, but when I start loving something, I just want to do a lot of it. And that was the case when I started painting watercolors. I started with florals and then moved onto still life. I have a group on social media that beans food. We do food from other countries. I love painting different subject matters, still life as in the mundane, everyday objects. So here I am with foil balloons. It's a relatively simple class which even beginners can take. And it's a fun class. So those who had been building for some time, I hope you will enjoy it and put up your projects so that I can see them and comment and suggest to you. The next class is on the materials you would need. So as See you there and we get a quick start on how to start painting these wonderfully simple and so effective aluminum foil balloons.
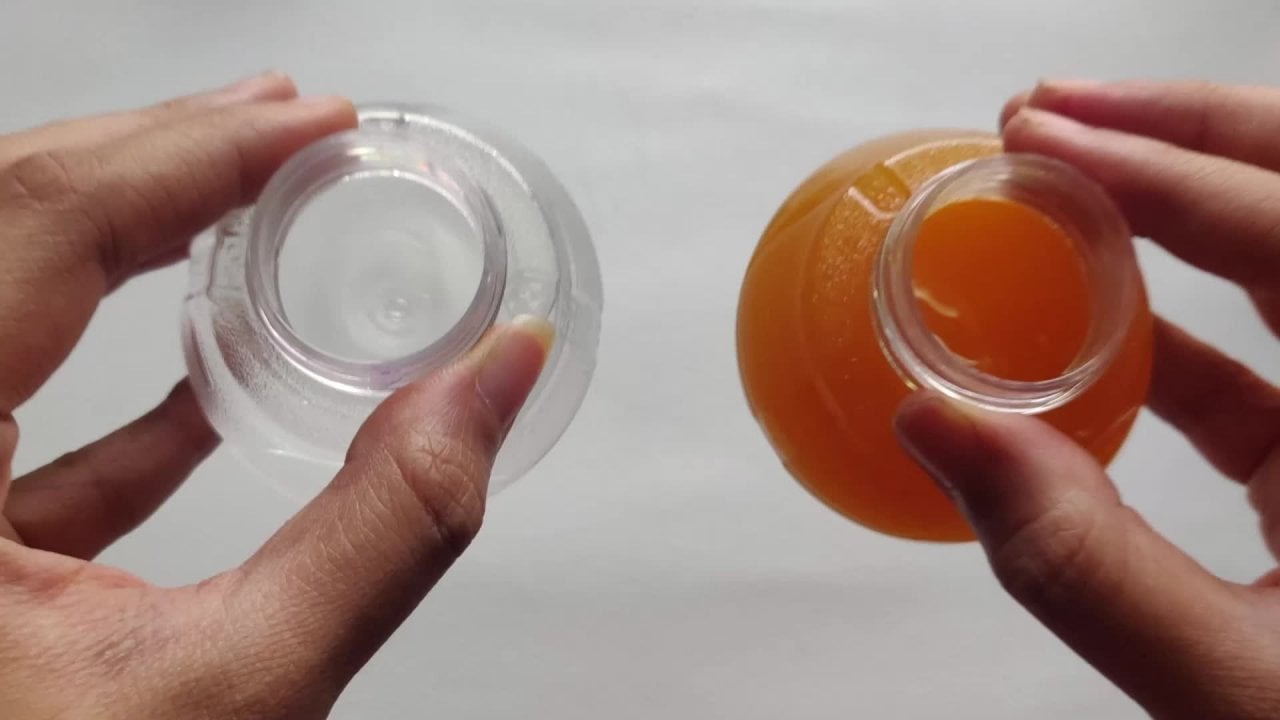
2. Materials Required : Hi, welcome back. Let's have a look at the materials we need besides beans and your regular brushes. We will need the silicone tips to apply the masking fluid. I use the one from Daniel Smith and the brushes I use my regulars, my Princeton, my silver brush and a fine brush. These are my 45 favorite brushes. My silicon tips have a jar of clear water with your tissue and your rags. So for people you will need about 300 GSM thickness. That's the best. These are my Payne's shimming key. It's the wooden box, so 24 colors. I love them. I use them for all my projects. You will need the following pain colors. This is my opera pink from Daniel Smith and the crimson alizarin red from Daniel Smith again. So this scholar can be water down are painted with a thickness. This is again the opera pink and I'm going to just mix a bit of alizarin in that to give it that perfect shade. For some of the tones in the balloon switches these two tones, you get a wide variety of colors. And that's my shadow, violet in the end again. This is again my opera pink from Daniel Smith for my unicorn. Moving in a bit of lilac there. That's my orange, cadmium orange shrinking cadmium orange. For some of the flowers. The alizarin crimson is again used for the darker, deeper tones and the contrasts. And more or less desire important colors. The shadow violet, which comes into almost everything, is the basic tone for the face and the body of the unicorn. So these are the other two colors have used black and in a few places like the eyes. So basically, this is my deal from Daniel Smith. Again, use for some of the flowers. And that's about it for the colors. So see you in the next lesson where we start painting our gorgeous foil balloons.
3. Unicorn: Laying Down The First Layer: Hi, welcome back. So I decided to start painting foil balloons of different shapes. After I finished painting with my first one, k, golden foil balloon, which was a huge success on Instagram and other social medias. So here I pick up this unicorn for my granddaughter and look at it and say, Where do I start with this? So here I go. Please take this sketch and put it in your masking fluid. I have done that before so we can get right down to painting it. So we start with opera pink from Daniel Smith. Make a very watery B is, and it just basically, I'm going to be putting in our first layer. It's almost flat, clear, but I'm just going to be leaving a few areas with a light wash and the others with a darker wash. Some of you might say why foil balloons. This is quite a unique subject matter. And that is what gets me painting subject matter which nobody else's thought or for Israeli painted. So I love the way the highlights stand out and when you rub off the masking fluid, the depths that contrasts so stark in foil. I hope you're enjoying yourself. Let's just carry on painting this water rebase. Just going to give the whole thing out. Flat, almost flat base. The main colors in this Alizarin crimson, opera, pink by Daniel Smith. And then the body of the unicorn is going to be CRE, which I'm just picking up some of the excessive beamed to give it a highlight in the middle. So the body, as I said, is going to be shadow violet again as the most gorgeous, gorgeous green shadow violet by Daniel Smith. Just perfecting the edges. Sam, good and mix a very watery base of the shadow where I lived and just lay down because already masked out my eyes, the nose, the highlights. I'm using one of my favorite brushes, which is the silver number 6. This pressure is actually one of my most favorite brushes. And I started painting my florals and getting those unique shapes after I bought these brushes. So it really matters what are your tools of the trade? I'm just finishing up with the first layer. And probably gonna put in the first layer of the horn of the unicorn. Let's make that light orange. It's a cadmium orange by shrinking. And just putting down a very VO2 relate this, trying to get a few highlights out there and a few depths. And I think we're done. See you in the next lesson where we can work on the contrasts.
4. Unicorn: Get to the Darker Mid Tones : Welcome back, a quick recap of the colors we need. We basically have opera pink, we have heredity, Schumann case, magenta, and we have shadow violet, Daniel Smith. And we're good to go. I have a couple of different thicknesses of brush. My favorite, for instance, brush number 4 the same. And I'm going to be just starting out by wetting my vase with clear brush and with my Chinese brushes, which are quite amazing, I am going to be attempting to give this a definite shape around. So keep an eye on the sample image and try to put in your darker dawns for the depths in as strategic spots as you can. So at this stage is really important to keep looking at your sample image or to follow my directions exactly. So you can put in the dark tones and giving the horn quite definite lining. We're going to be darkening the area which lies between the green and the pink. Keep working on your doctors. And then with a clear brush, go back in and wash it on one side so it doesn't look very stark and very definite. Carry on making the dark lines all the time, keeping an eye on my sample image. So the darker tones are actually Alizarin crimson by Daniel Smith. And that's, that's the darker tone which I'm applying on top of my opera pink. So Alizarin crimson is quite amazing. I'm darkening it. In the next lesson, I will be using a bit of shadow Wilder to make it even darker. At this stage, I'm using a little bit of permanent red too. Create brighter highlight. The center of the main where the peaks of the balloon really be drawn later. And that will show how the foil balloon crumpled around fleets. So just keep working on the debt. I'm quite happy with the way this is coming out. Just making a bold Alizarin crimson line to create the day. And this is the flower is beautiful cadmium orange. By going down to this now with my shadow when mixed with a little bit of blue and creating the outline of the snout. I'll see you in the next class where we're going to finish this amazing unicorn. Well Bye.
5. Unicorn: Let's Pop it : Hi, I'm glad you could join me for this final lesson where we're going to create the dock is stuff tones in the unicorn. Let's get down by creating those shadows under the eyes, giving you declare water. Swish. So there are no dark lines. I'm just completing a few flies at the base and going to be taking care of a few details as the layer of face dries. Small flies. Using a dark lilac to make shapes which are asked hills us to what I see in the sample image. So just follow me by creating the same shapes. A few flaws, a bit of decoration around. This is the wonderful me. The pink collar main off your Nikola. That some Alizarin crimson mixed it with some things. And I'm just creating these strokes. Taking. So what does tropes in between? To prevent it from the line? This is my soul, which is what I'm going to be giving the unit colon all through. I'm going to paint the eyes black actually am just defining the edges. Those pretty, pretty eyelashes, which gives so much to our unit gone. She is coming out very pretty. I've taken off my masking fluid so that beautiful highlights. The highlights show you how important it is to have those white stack white highlights in a watercolor painting. There you go. All my beautiful paintings where I have left white or with masking fluid. The one k was my first foil balloon attempt. And that was the one painting which got me hooked on to painting foil. And I think I'm not going to stop off to this class. I'm going to find more and more inspiration to keep painting foil. And I hope you can join me on that journey. So just taking my shadow violet and creating the wrinkles and lines and folds of the unicorn. The face of the balloon has these deep set lines. Softening it with a clear water brush is very important. Just giving an outline of the head and softening it. Creating the eye. And the darker stones. This is my doc of stone. All right, I'm going to create a broken line around the head. Just go in and create your deepest depths at this point and watched all come to life. Just taking care of a few details with my colored watercolor ink pens leaves the print. This is basically the print on the foil, which is going to be giving the unicorns such an amazing, amazing and very complete these details. And then I think more or less burden. This is quite done. And I hope you'll join me in my next class where we paint magenta color foil balloons. This is a rat. See you, buh-bye.
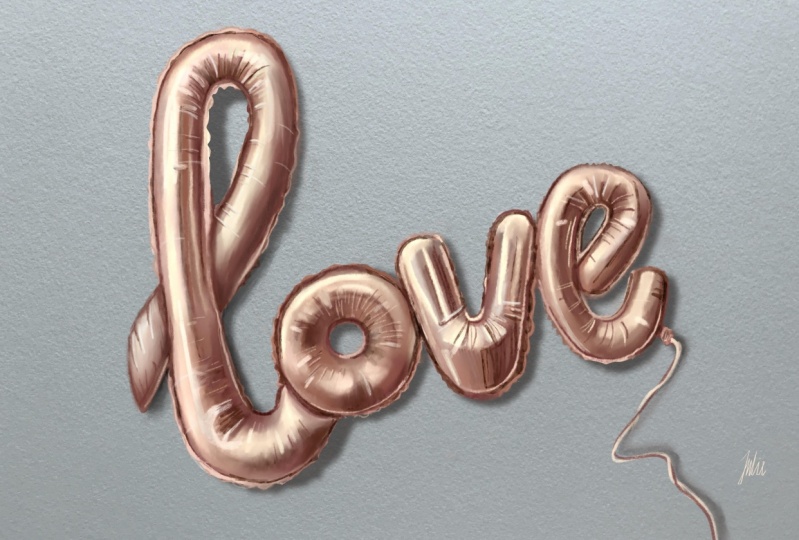
6. Get Started With The Pink Foil Balloons: Hi, Just listen to that. Cracking. Painting for it is such a fun project. Let's get down to laying down our masking fluid. I'm using the Daniel Smith masking fluid. You just need to put a small daughter in a small container and start laying it down. Way you see the highlights in your sample enrich. So this masking fluid gets dry very fast. You can use it with your silicone nips. And I choose, I'm going to demonstrate how I have taken no because it gets dry and Kylo in the nozzle lay down a very small drop. And then go in with your brush. And very quickly lay down on your artwork to be sure to close it properly so that there's no air getting in to the nozzle. So I've started with the Turkish brush, which helps me lay down the masking fluid at the fastest speed in areas as you can see in this image, I'm going to be laying down the masking fluid and the lightest portions of the balloons. I usually keep the silicone nibs for the finer areas and the pleats on the side required, but a fine works. I'm putting in my masking fluid very carefully. The center portions where you have the brightest and the lightest highlights is covered by the thick, fresh and with a lot of masking fluid. Once the masking fluid is totally dry, you can go in with your paints and let's paint the first layer, which is a watery opera, pink by Daniel Smith. You can see the bunch of my shimming cave paintings. These are 24 beans which government a wooden box. And I use them for everything. Besides these, I have Daniel Smith, a few colors, which are my favorite. And opera, pink is one of my happy gallows. So this forms a beautiful, luminous be a first layer. So I'm just going to go in and give a light wash. The first layers of the honest way you don't have to think much because you have your highlights covered with the masking fluid and the darker tones come in the next layer. But I'm still going to go in with a few darker tones because the paint is still wet. I'm going to be governing all the balloons in the same manner. Hello. Trying to give the darker shades a little more definition. So that in my next layer, all I need to do is go in with a very, very dark tones and bidded on my contrast. Balloons are happy subject. And painting them has really given me a light feeling. I hope you are enjoying this project to as much as I am. Duke put up your work so that I can comment. Any questions you have, please feel free to ask. And I'm going to be taking this over into the next lesson. Maybe going to be putting our Dakpo tones.
7. Layering the Foil Effect: Welcome back. In this lesson, we're going to be shoes probably going over our dark tones, which he completed in the last lesson. And just make them a dad. Keeping in mind to let the undertone, the lighter undertones be seen in certain spaces. I have making the fleets of the balloon probably the most important effect. You can get this to create the pleats Loom, which shows how they are stretched at the lining where the stitching is. Paint along with me. And let's try to get these balloons look like they are really made of foil and not plastic. So the edging, this is very important that you give it tiny pleats. I'm just putting in this in the middle, color tone. And we will come back with a darker stones. To make this fluff up through life. We've got a dead leaves which are coming in from the side. Again. A mixture of opera pink and alizarin crimson by Daniel. I like to dab my work with the tissue just very briefly. So it gives the right kind of voiceless to the paper. And their goal, sharpening my edges and creating the roundness of the balloon. This is alizarin crimson, little bit of shadow right in it. I'm going to be creating the darker tones. Now. This is actually the most stressful part. You need to create your contrast. That yet it's the most fun because your painting just staffs flopping tonight. So I slowly go with each balloon, creating the fleets with adapters store. Hello. Keep your subject in mind. Keep looking at it as often as you can. This is the fourth balloon. Red. I'm going to be giving the pleats on the side first. Create the splits. Broadly soften them up with a very watery fresh. I'm creating the roundness of the balloon here. I hope you're getting the same effect. Do fed me a line out, suddenly operations if there's anything you need to ask. There a goal with my darkest Alizarin, crimson and shadow violet mix, creating the darker stones are feeding. Join me in the next lesson where we make these beauties fought to live. But by CEO.
8. Final Lights and Shadows : Let's put it in the darkest tones and get this to pop. So we take our darker stone, which is alizarin crimson mixed with other shadow violet to get the stone. And I am going to repainting exactly what I see in my image and trying to get those in this layer is really, really important. To keep those dark strokes very, very minimum after a lot of thought and weighing of what goes where. I'm creating a contrast between each balloon. This is the pleats in the side with the stitching is. And these are the form and go right down to the center of the balloon. Hello. So drawing the strings down gives me a feeling of completion. So just cheap tech, very light. One is Shane. Threads sort of feel. I hope you've enjoyed this project as much as I have. I would love to see your work to put it up so I can comment on it.
 PAVAN KAPOOR, ArtBased Therapist.Watercolorist